Man, I havn’t been around lately… Long, too long. And I believe this is my first post in the helis forum… anyway, I’ve been getting back into modeling full-bore now that my summer vacation has become… more like a vacation. High school, playing (and umpiring) baseball has left me precious little time to build models, I rarely get more than 20 minutes a day. I friend of mine gave me the Academy MH-60L DAP, “Southern Comfort” and I wanted to"backdate" it to a Gothic Serpent DAP. Specifically, super 68. Thanks to a lot of time reading Heavy Arty’s posts on the subject, I have a very good idea on what I want to do with it. I even know what mods to perform, serial numbers to apply, etc. My problem is I don’t have a decent shot of the fuselage, specifially in the tail area. I found a couple of pics on other sites that showed the front half of super 68, but I have nothing on the back half. Helis are not my area of specialization, so any help anyone can give me would be MUCH appreciated! And also, are the yellow decals correct for Gothic Serpent? Or do they need to be toned down?
Graham
Good subject. I haven’t been able to find any full shots of Super 68, but it was a standard MH-60L, so nothing special back there. The yellow decals are wrong for any era MH-60L; Academy screwed them up. Cobra Company has a set of 160th SOAR decals in the correct OD Green color. I’m glad my posts have helped out. A couple of points though, none of the 160th SOAR helos in Somalia were fitted out as DAPs (short ESSS wings and weapons hung on them). All were standard MH-60Ls with M134 miniguns on the doorgunners’ window positions.
Here is a consolidated post that should help out: Op Gothic Serpent MH-60Ls.
Good luck on it and keep us posted.
Thanks. But from the shot I have (I’ll upload it sometime) the “Razor’s Edge” logo appears to be in a shade of yellow. Is that the only thing that should be yellow? Or are all markings just a darker shade of yellow/green? And yes, your posts are extremely helpful. I’m planning on detailing mine using your pics as a guide. Even though you did that like 6 years ago, (or was it 4?) that is some serious stuff. I bow to you! [:D[ I’ll check out cobra company.
Nope, in the pic you are talking about (two soldiers standing next to the helo with about half of Razor’s Edge showing on the engine cowling) it is just the lighting or something. All the markings were OD Green.
Yup, its been about 6 years since I did my DAP, it represents a post-Somalia MH-60L DAP though.
Let me know if you need any help on it.
found the pics. go to post #440 excuse me, #490
http://www.militaryphotos.net/forums/showthread.php?40746-160th-Special-Operations-Aviation-Regiment/page33
more lighting issues?
And I will probably need some help in the future, just not yet. It looks to be a nice kit, a little work can make it. 1 question, on rotors, I thought of taping (or tying) the rotors to a curved piece of metal. Then soak it in boiling water to establish the droop. Good idea? And as far as color goes for those, Basicially a really, really dark green? Is there a decent match out there for that color or is it “mix yer own?” Ah, forums… Gotta love 'em! Without posting here, I would be blindly and happily sticking the parts together, full Operation Desert Storm kit with yellow decals. Then realizing to my horror… at an IPMS show as some dude next to me did it the right way… lol.
I have those pics too. On my monitor it looks OD. I’m telling you, the yellow is just wrong. Stay away from it. For rotor droop, that will work. I find the big blades of the Academy kit droop pretty well on theri own though, so not an issue. I painted mine black and drybrushed the hub with steel and left them like that. The blades are almost black in actuality.
ok then, must be my monitor color settings. That clears that up…
Been a while since I have been around the helo forums! It is good to see another 60 getting built! I just thought I would share a a couple of general items about Army hawks, they may or may not apply to the SOAR airframes, Gino may be able to clarify.
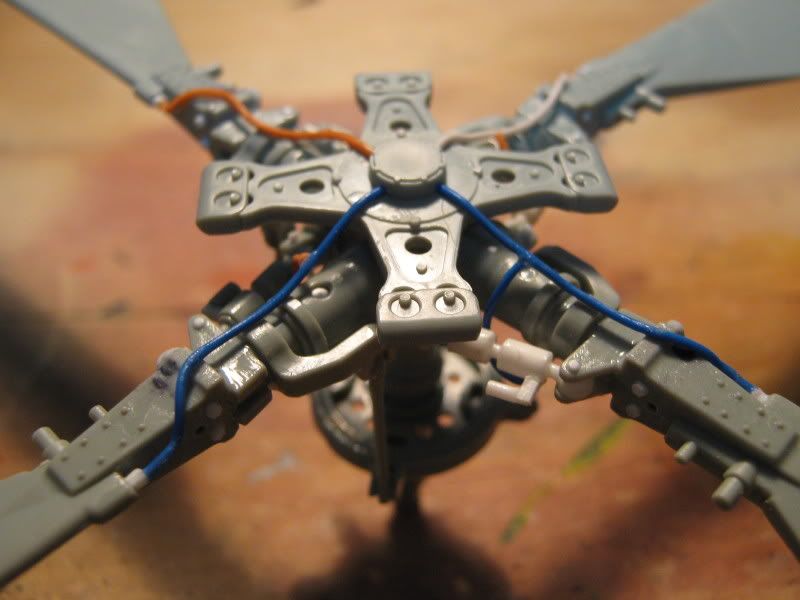
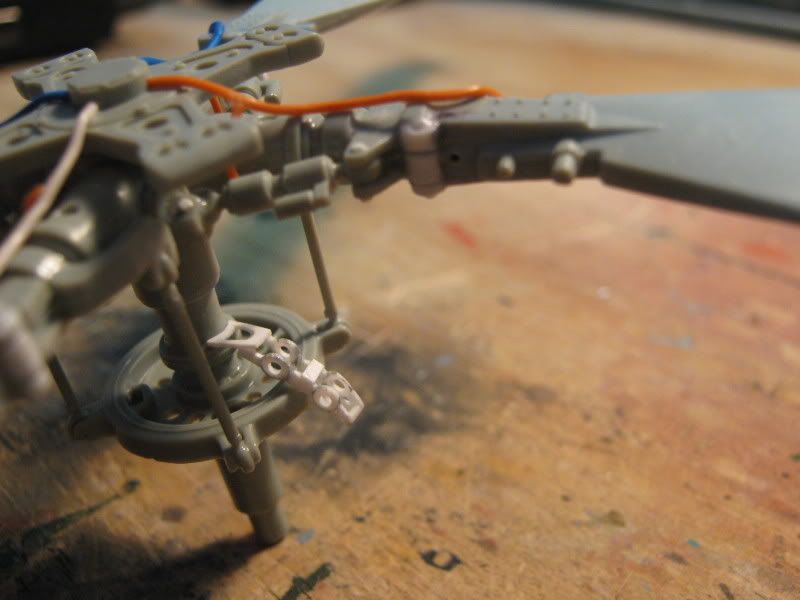
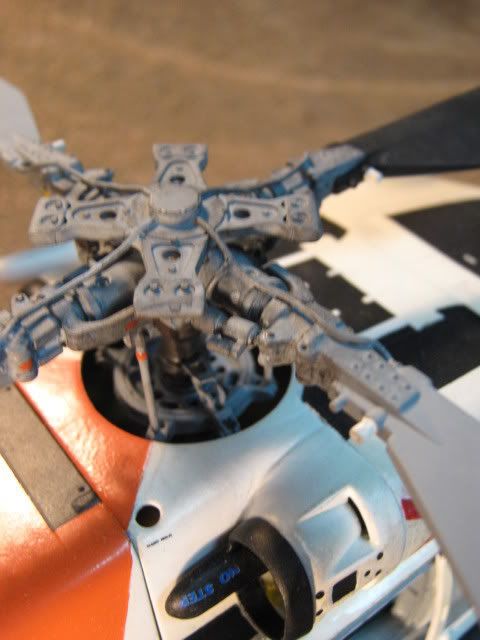
The rotor head on Army 60s is most commonly green, I have seen a couple of black ones and the mast extension below it is usually bare titanium but it is not at all unusual to see them in black or the occasional green. The blade dampeners (attached to the trailing edge of the blade near the root ) is black. There are a few places to add some bare metal details but almost all of the head is painted.
Gino is quite right about the blades, the ones in the kit have a decent droop to them. If you want to split hairs, put a little negative twist in them so that the tip has a shallower angle of attack than the root but this may not really be worth the effort.
The above info comes from experience with a lift unit so take the color information with a grain of salt.
Thank you very much! ANY info I can get is much appreciated. I was also looking at clips of “Black Hawk Down” on youtube for other references, but I’m very skeptical of anything I see. Whenever Hollywood is involved… We can never forget the T-6 Japanese Zeros of Tora Tora Tora or the M-24 Chaffees of The battle of the Bulge. But is the movie any good for reference?Because I might go to the library and pick up a copy to watch. I would assume they are using Standard blackhawks in that though, since whenever Special ops is involved… It’s amazing how sparse the references are for SOAR birds are. Anyway, I’ll be turning this into a WIP thread. At the moment, I’m working on a Pavla Bell H-13 so that is occupying my building urge while I gather reference. I swear, 75% of that kit is PE. But the thing’s actually fun to build, the tail section went together nicely. I’ll post pics of my work on the hawk, and what the heck, the H-13 while I’m at it.
As to the color of the rotor heads, I have seen some with a green annodized look to them as well. Most have a flat metalic color to them though. There are many variations though. You can see a few in the below pics.


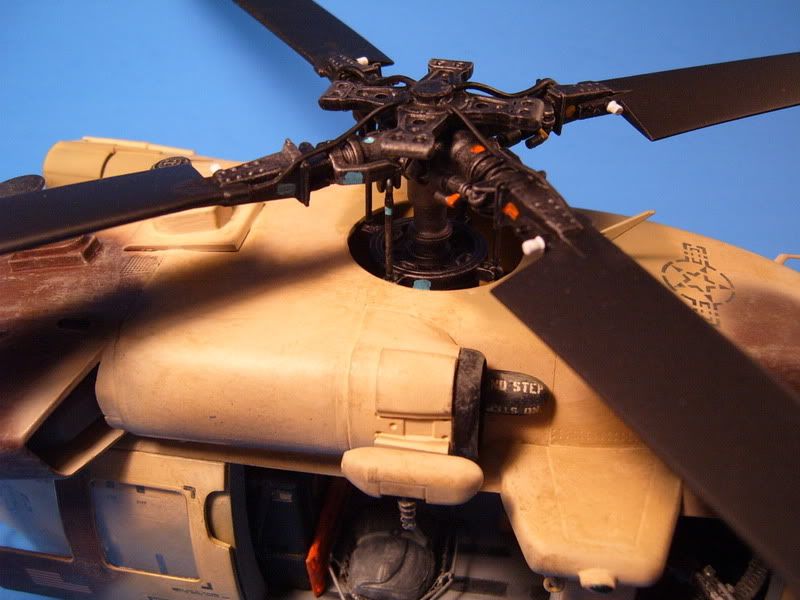
This one looks greenish for the hub and steel for the shaft.


Mostly black w/black mast.


Blackhawk down is actually one Hollywood got right. The US Army supported the movie and the helos are actual MH-60Ls from the 160th SOAR. They did have features that were not on them in '93 though since they were current helos when the movie was made in 2001. Actual active Rangers were used as the extras as well, many of them were present on the Op Gothic Serpent raid of OCT 23, '93. I say go get it and watch it a few times. It is a great movie.
Nice shots Gino! The paint on the hub and the mast extension is standard CARC. Over time it does wear to a much smoother surface and seems to have a sheen to it but it is flat paint. This can actually be a good way to add a little interest to the head. The four weights that you can see on the top (biflar weights) smooth out very quickly ( they sometimes come with a satin finish too) because they make convenient hand holds. The biflar its self also gains a smooth finish over time as well. The dampeners take on a smooth finsh for the same reason and they can be green or black. The actual hub tends to keep its flat finish much longer. The de-ice cables are all covered with black corrugated plastic, so they would have a gloss finish. Finally, each hub arm is color coded (red, yellow, blue and black) and the blades, dampers and rods are usually marked to match the arm that they are attatched to.
If you look closely at the pics that Gino posted you can pick out these details and more. You can really spend alot of time on the head if you want to and add an incredible amount of interest. You can also drive yourself nuts doing the same but it is pretty easy to do more than just paint it all the same color. It really wouldn’t take much to make it look the part.
I look foreward to your WIP. I love these birds, I just can’t finish the kit that I have because I can’t stop trying to ‘fix’ it.
Yup, you can go nuts on the rotor heads if you want.


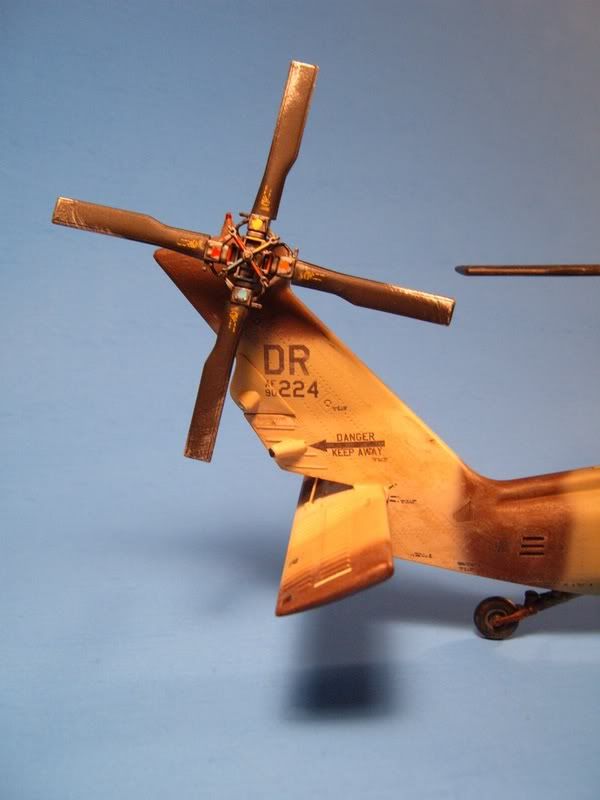
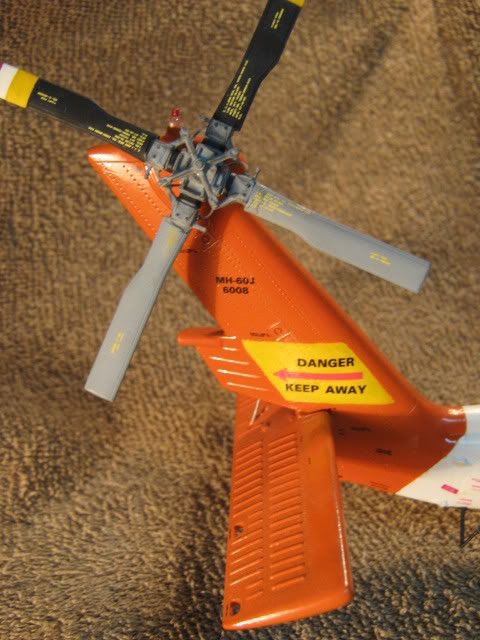
Hey Gino, I finally got to get on at home and see your work. Nice! Looking at your work, I could do no more than nit pick. I really like the tail rotor mismatched like it is. I have seen both blades on one paddle be a different color than the other paddle, that is different…I like it! It looks like you either have hangar access or have a buddy in aviation by the pictures that you have but I will still offer custom shot detail pics if you do another one.
PS. We now have 6 HH-60Ms if that gives you any ideas
Thanks Mac. No, no one in the hanger that I know. I have just studied lots of pics and helos that I have had access to. I’ll let you know if I do another (I do have 5 more Academy H-60s in the stash).
On the different blades. The aircraft I was using as an example had them. I thought it looked cool and I went with it. It adds some color variation too. I like it.
Where in GA are you at?
I’m up at Dobbins. I just noticed that you were at Stewart, I’ll be there in about a week. Three weeks of fun in IBA!
I figured that about the blades, it just sticks out because it is unusual, opposing tail rotor paddles are on a common spar. I guess that they wanted to get those two out of the shop ASAP!
The DAP kit or the PAVE Hawk would be a good starting point for the -60M. The HH interrior would have to be completely scratch built though.
Ok, finally some updates!!! Here is the roof of the cabin. I’m not trying to make this 100% accurate, but keep it real about 75% of the time. The boxes and cables are somewhat random, more for looks. It’s not done yet, needs a fast-rope bar. enjoy!


now, I’m trying to figure out how the seat attaches to the backrest, and how that attaches to the floor. any hints here? Academy does not make this easy.

Comments, suggestions, please post them! I’m trying to build this within 1 month, want it ready for MMSI in October. Thanks!
The roof look really good. It’s coming along nicely. The seats just sort of sit on the rails. On the back of the seat you will see 4 pins (sort of), 2 short at the top and 2 long at the bottom. These pins sit on the rails. The top horizontal piece of the frame cuts just below the headrest on the back of the chair. There should be 2 pins on the bottom of the frame as well. These go into the 2 holes in the floor. The side frames go down and touch the floor at the front and attach to a cross bar that you have to make. You can see it in the below pic.

Thaks arty. More updates. small, bad pics, but updates.


Thoughts? The textures on the seat were made from bondo and spackle.
Nice work!
Creative realism is the way to go if you are going to expose the cabin ceiling. There is so much behind the soundproofing that it would not look good if it was all there. It looks like you have the major components represented with enough “stuff” to make it look the part.
I like what you did with the pilot’s seats. The cockpit is probably the area that could use the most work on this kit.
BTW, which kit are you using?
Hey Gino, have you ever fired on small arms E? The range is oriented north/south and the 200m and beyond targets are in shadow all day. Lane choice makes a difference there!
It is coming along nicely. The seat texture looks good. Keep up the good work.
Screaminhelo: I have been out to SA E. It can be a real PITA if you get on the wrong lanes.