Where do the clowns come out?
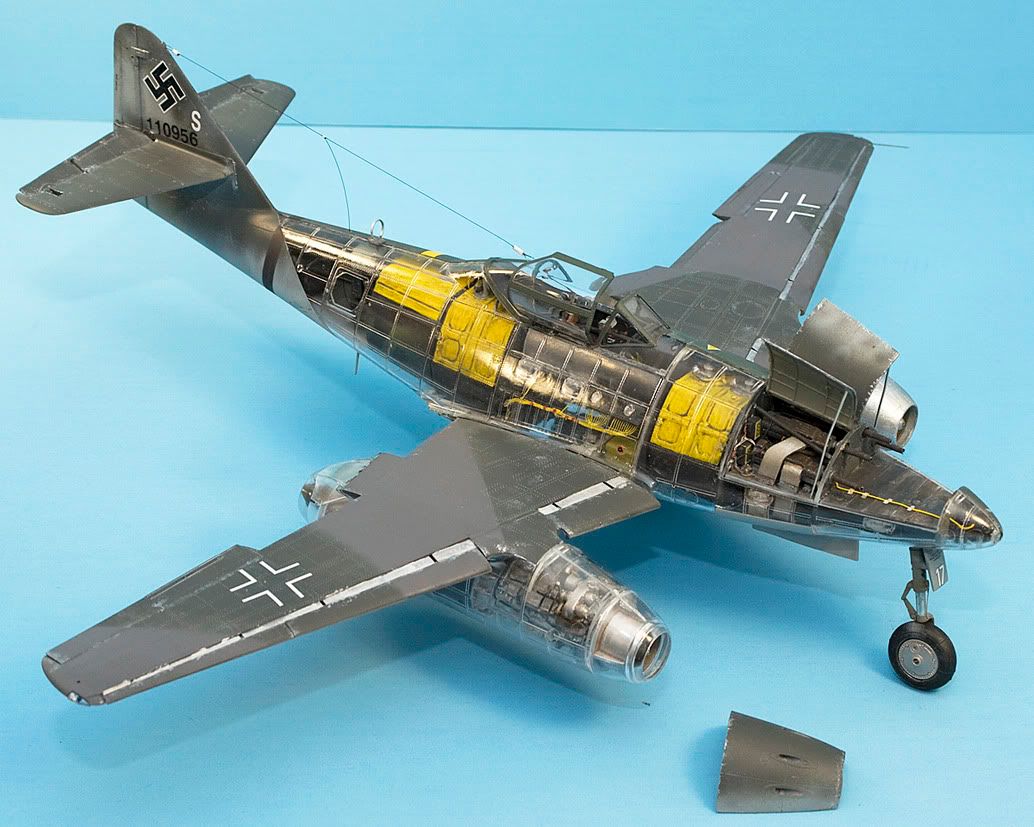
I built the visible version of this kit. I just loaded the fuel cells with BBs and CA.
You can see where the fuel cells sit, in this picture
The weight doesn’t have to be extremely forward of the center of gravity. In all actuality, in a model, it only has to be slightly forward of, or directly over, the CoG. If the fuel cells aren’t included in the regular kit, I would build a small styrene box and just fill it with weight. Or, if you don’t want to go that far, if you have two, dead AA batteries (or AAA, or even a 9 volt), you can glue that in the space of the fuel cells. I did that with a 1/32 Bell X-1. There was no space in the nose for weight, so I built a box behind the cockpit and put 2 batteries in there.
-Fred
I’d be a bit worried about using batteries…dont those leak after a while?
Now Hans, play nice. Of course, as soon as you asked where the clowns come out I immediately thought of the perfect smart alec reply but I’m not sure I can post it here. I don’t know, can you say “butt” on the FSM website? [whstl]
Fred, that’s a great looking 262 you’ve got there. I always shied away from the visible kits because I always thought they looked kind of toy-like, but yours doesn’t look that way at all.
I share Owl’s concerns about batteries, so I’ll just stick with lead sinkers or shot.
Gary
I finished this kit a couple of months ago. Great kit, very fun build. I used the metal landing gear… recommendations from various sites indicated the plastic gear would fold up eventually, especially with a weighted nose.
To keep it balanced forward I superglued 4 pennies together and put the stack in the empty ‘gun barrel’ bay just forward of the exposed machine gun bays. They fit just fine under the top two barrels. If you plan to expose this bay that won’t work, but it would (IMHO) be an odd decision given the fact there’s really nothing in there, and the far more interesting gun action bay right behind it already set up to be displayed.
The model sits perfectly, and has no propensity to sit back on its tail. The ideal of filling the forward fuel tank with weight is also intriguing, but I didn’t install the tanks or rear radio equipment. The tanks aren’t visible at all and I didn’t want to leave the radio hatch open.
I did use a razor saw to open up the starboard engine nacelle along the top maintenance hatch on the real thing to show off the Jumo, and that works very well and is easy to do. This was only my third model since coming back to the hobby (and first Trumpeter), but it turned out perfectly. There are already internal panel grooves that make it easy to cut, almost like they thought about molding the panel separately. Add some various sized soldering wire to simulate plumbing and it really pops. That’s my only complaint about the Jumo in the kit… they put the manifold on there, but if you look at any of the pictures of the engine the part that’s visible if you cut that panel out is almost completely covered in plumbing. It’s easily corrected, and the color of silver solder wire is virtually perfect for all the metal tubing, but I’ve seen engine moldings that much more closely simulated the ‘busy’ aspect than the fairly bare Jumo offering in the kit.
I would love to post photos of my ME262, but it went to the great recycle tip in the sky just this morning.
I actually used it as a test bed for my paint colour matching tests, just to see what the original shade matched colours looked like, so it didn’t have a proper scheme on it. In actual fact, at the stage of the war that these came into service and due to allied bombing, Luftwaffe ground crews were slapping on and mixing anything they had in stores, was delivered or what they could… aquire! This gives the late war luftwaffe builder a very broad scope for a paint jobs so long as the original shade matched paints are used you can mix and match to your hearts content. I would reckon that some birds flew with more than 3 colours on in a scheme!
It is a nice kit (and so is the ME 262-2a and the 262 night fighter.)
I would like to build another - the 262 2a with the MDC nose retrofit thingy
Just as an unusual version on the 262 would look good in my cabinet, but I have no experience about doing that kind of conversion stuff as I usuallly build OOB and maybe add some eduard stuff.
Why do people insist in using real money to weight models?? this defies all normal logic to me!
Eh, old, dead batteries aren’t as prone to leakage, as they have mostly gassed out, by then. Plus, they’re sunk in with CA, so that pretty much keeps them sealed up.
For smaller kits, my first choice is BBs or spare change. But when I have a lot of space to fill and a good deal of tail-weight to overcome, a dead battery will do just fine. No need to go out and buy specialty sinkers or bird shot - it’s the “let’s see what we can re-use from around the house” in me.
-Fred
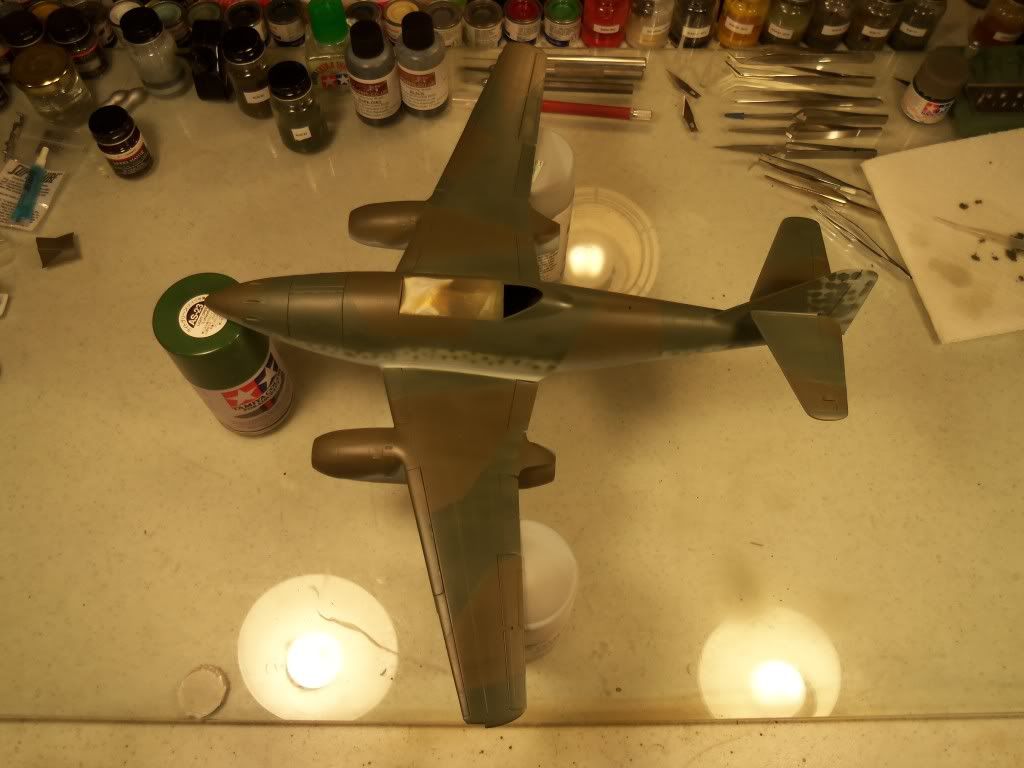
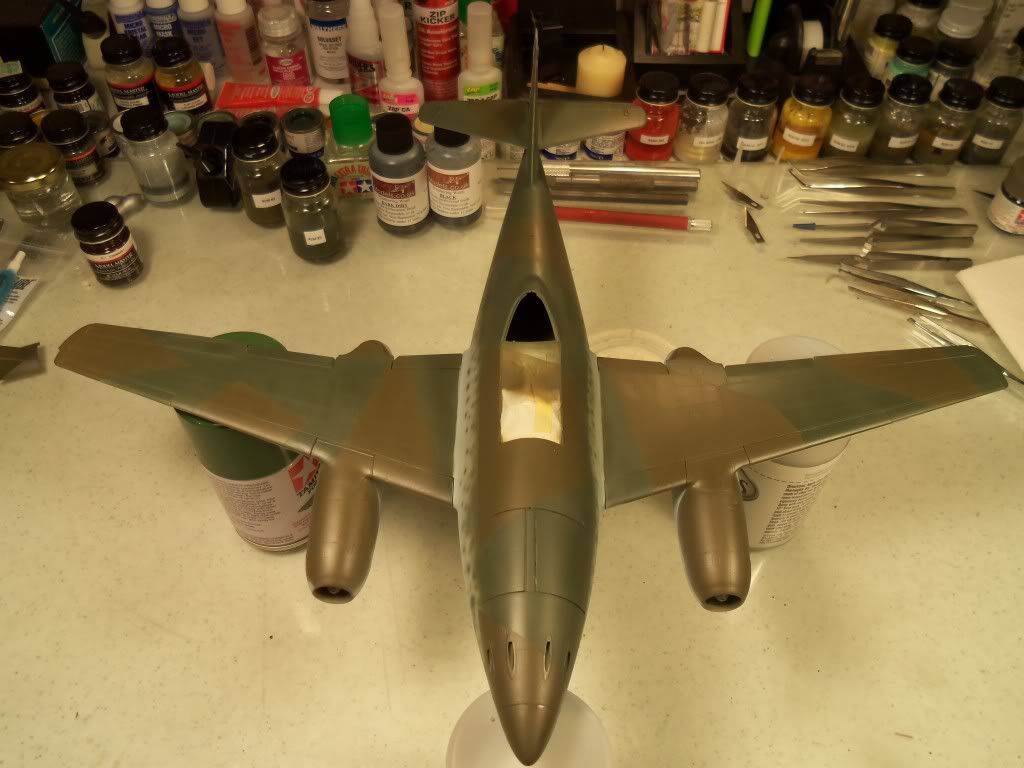
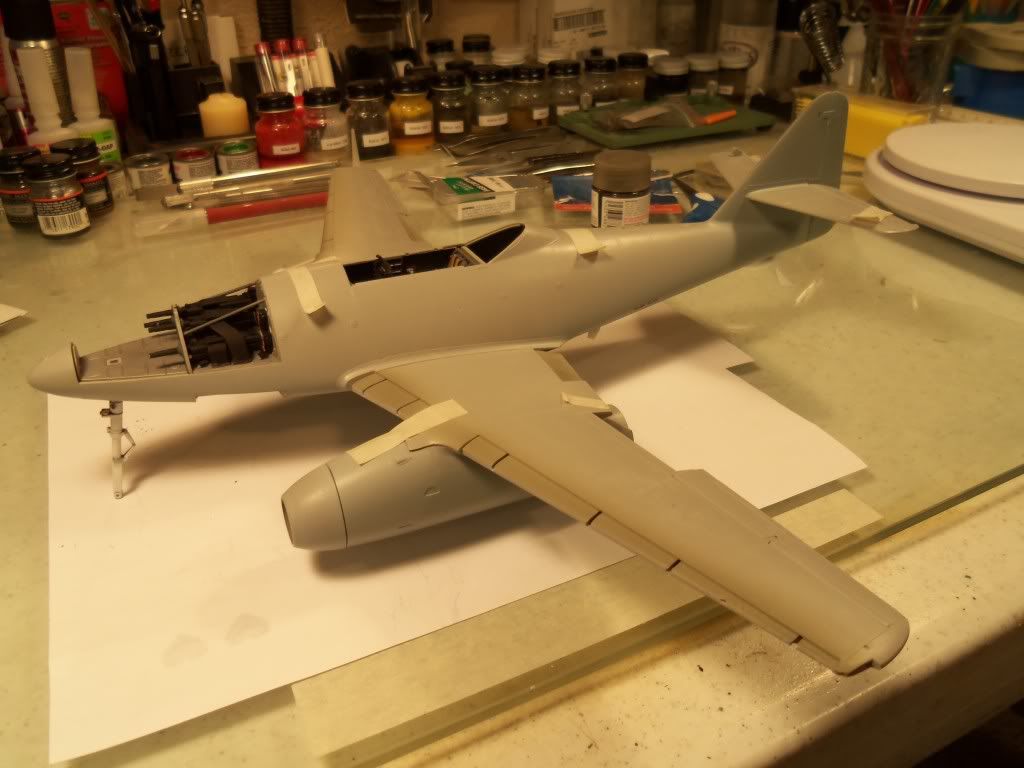
OK, Fellas, here’s what I’ve come up with so far: first I did a dry assembly without any of the stuff that attaches rear of the main gear legs (flaps, ailerons, stabs, rudder). As you can see, she sits pretty good, but when I added the aforementioned pieces she sat right back on her tail.
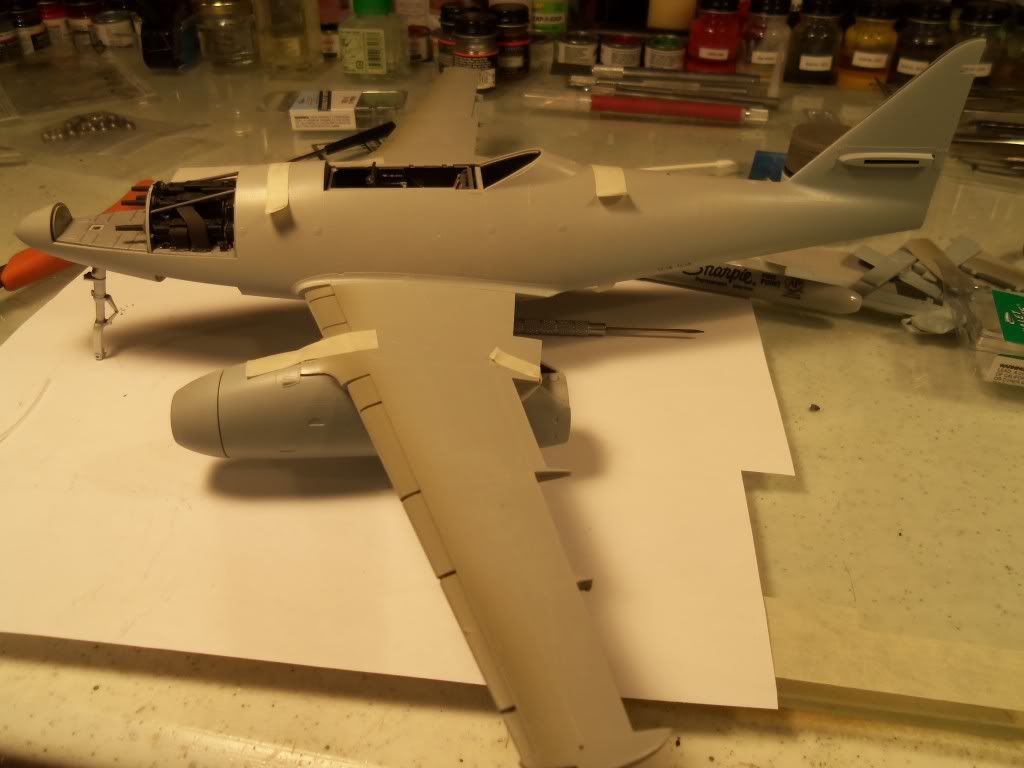
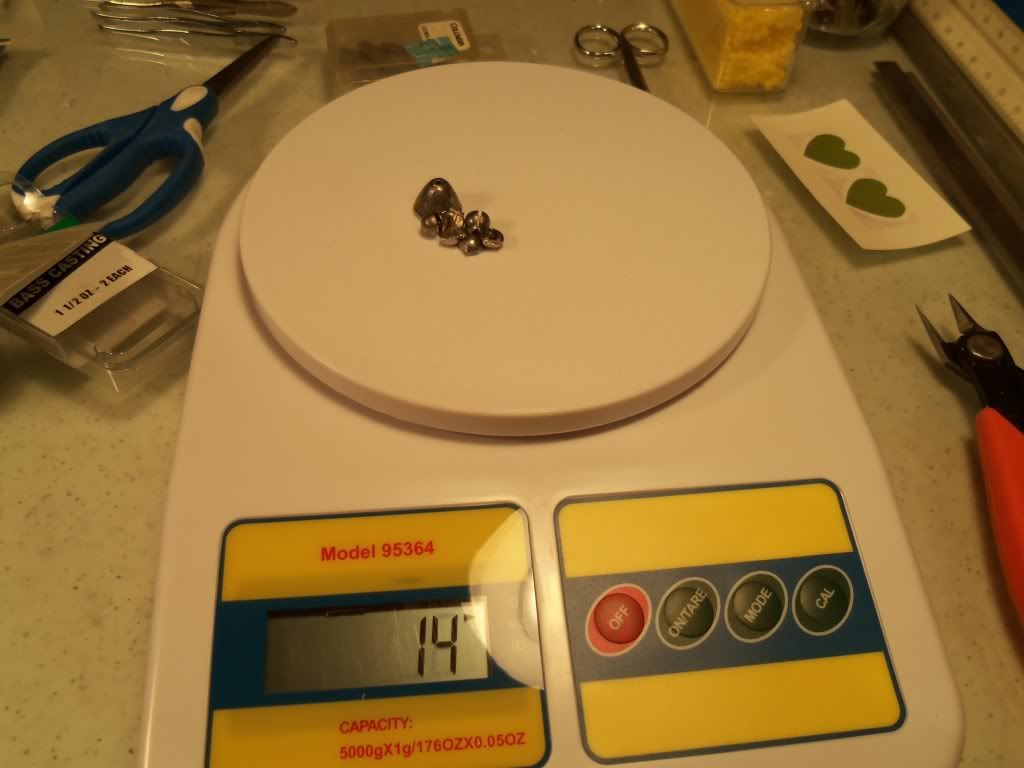
So, I weighed all the stuff that I added and it came to 15 grams.

Then I weighed the covers that go on the nose, which came to 5 grams
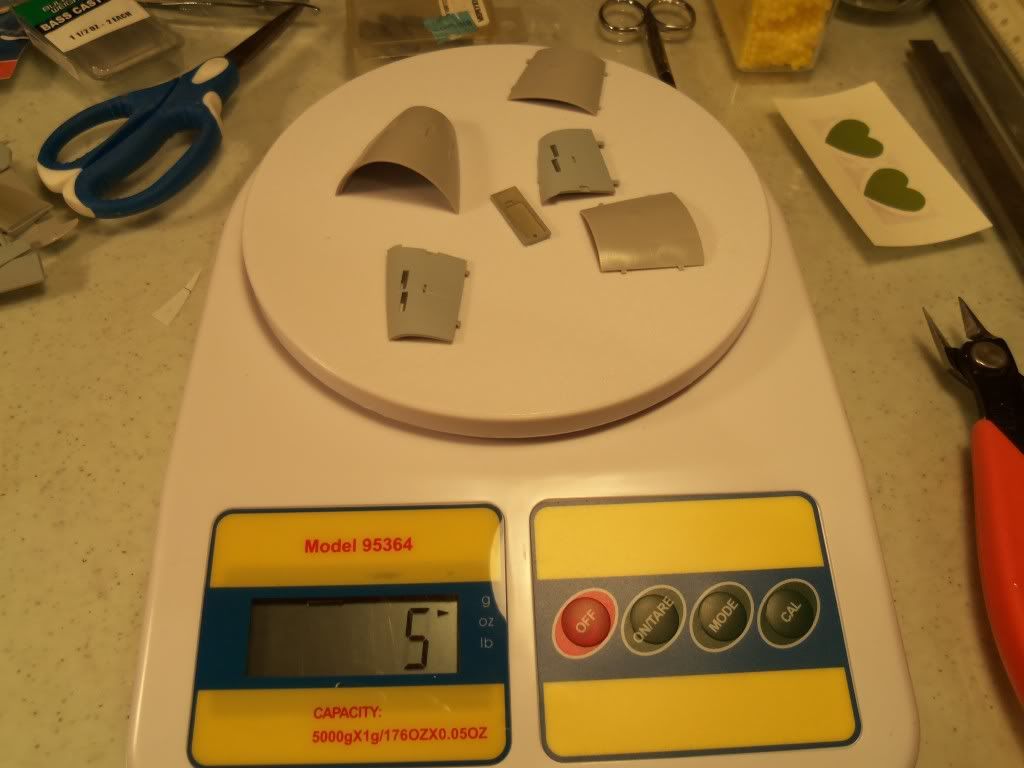
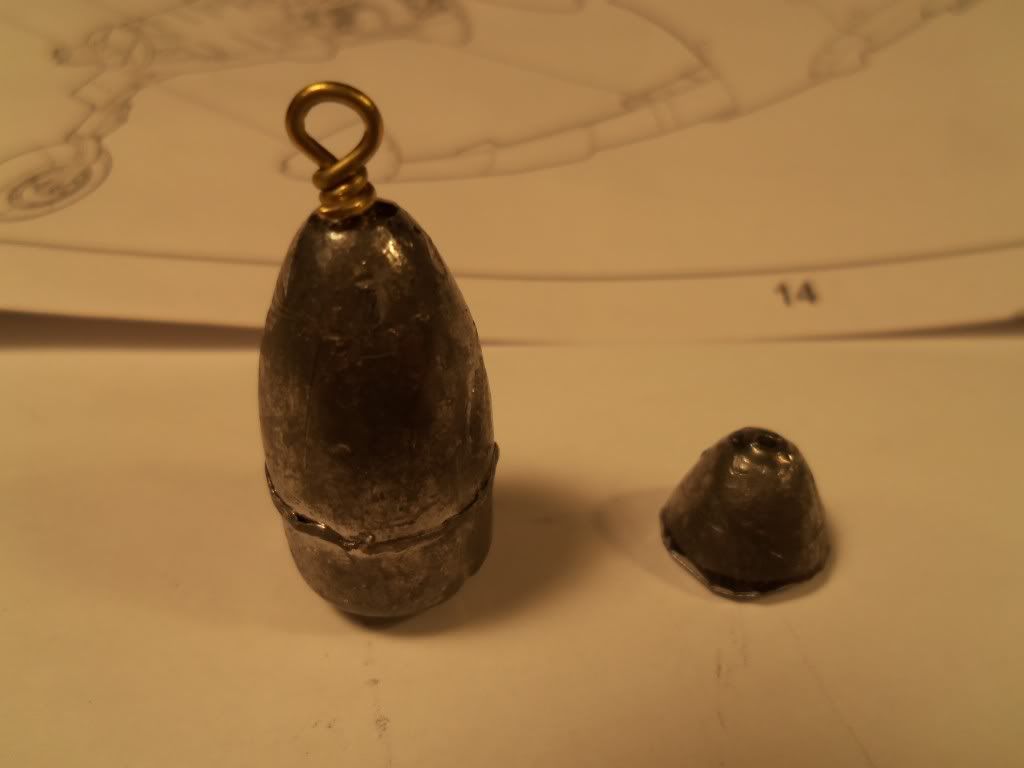
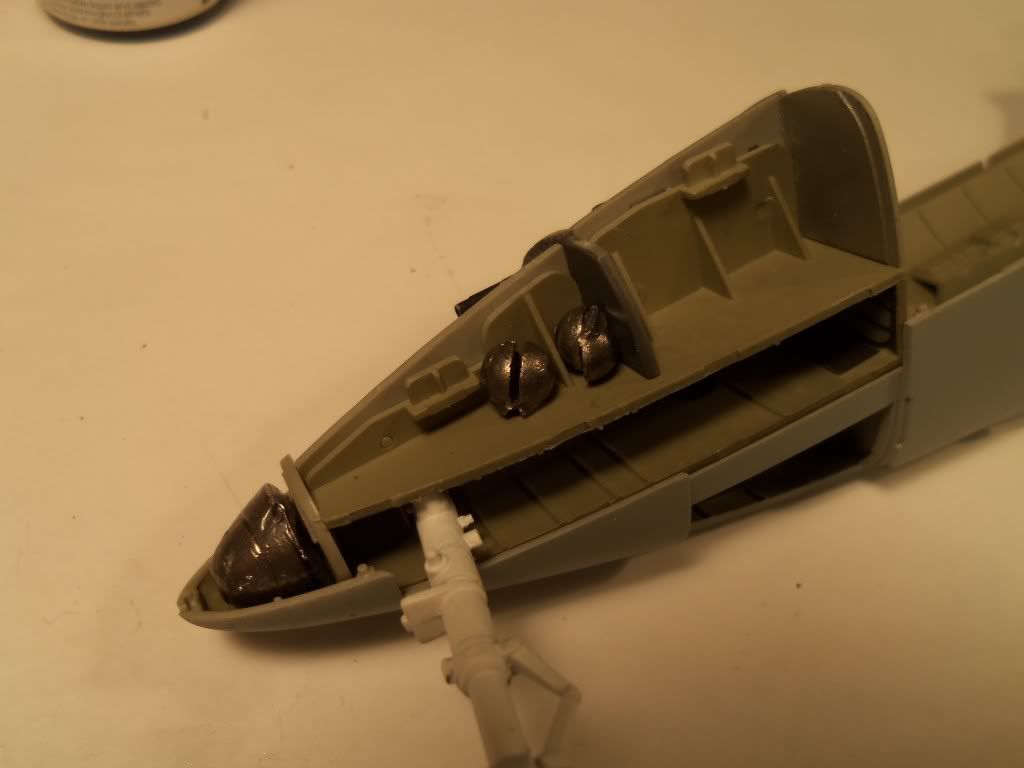
With a difference of 10 grams I started fitting weights. I used the front half of one of these larger sinkers to make a piece to fit in the nose but that wasn’t enough so I added two splitshot sinkers on either side of the nose gear bay
The added weight equals 14 grams, almost 50% more than what I think I’ll need. I then did another dry assembly with the added weight in place and she seems to sit pretty well.
I’ll gain a bit more weight when I add the epoxy to hold everything in place and there’s still five grams in covers for the nose so I’m hoping all will be well. That’s the question, eh? So, what do you guys think? Am I forgetting anything? Do you think the weight I’ve added, in the locations I added it, will be sufficient? I’d hate to get all done and find I don’t have enough, but I don’t want to add any more than I absolultely have to for fear of over-stressing the landing gear. So I’m open to tips, suggestions and CONSTRUCTIVE criticisms.
I heard some guys with older computers have trouble with posts that contain multiple photos but I don’t know how many is too many so if anyone had problems, my apologies. I’m also open to suggestions to make my posts better, so any ideas there are also welcome. And thanks again, Guys. You’ve been a big help. I’m not sure which is more fun - building the kit or getting together with you guys to solve the problems that inevitably appear. Both are pretty cool in my book.
Gary
Hey Fred, I’ve been studying the photo you posted of your 262. That’s a great looking model, Fred. I have a couple questuions, though. The attachments for the antenna look great. I’d like to replicate that, so how about a quick block of instruction? What did you use to get those great loops at the ends?
Also, what color did you use under the leading edge slats? My instructions call for RLM02 but yours looks lighter than that. Do you know something I don’t? Did you find a reference that called for a color other than 02?
And just out of curiosity, since the clear version seems a little more detailed, is that very first compartment in the nose the gun camera compartment?
Gary
Hey Guys,
For those of you that were following, here’s a little progress. Still miles to go, but we’re a little closer than we were before. [H]

Gary
That is one cool bird Gary
Here’s progress.