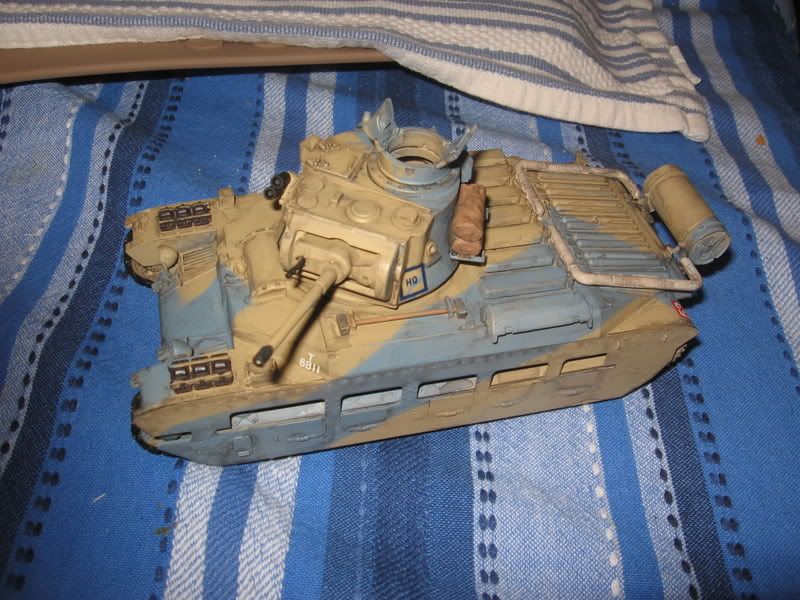
As stated in the title this is my 1/35 Tamiya Matilda Mk. II. I started this probably 2 or 3 years ago for the North African Group Build , some of you may remember it, well I finally finished it lastnight 2 hours after the New Years, (I guess my resolution to finish a model has been upheld).
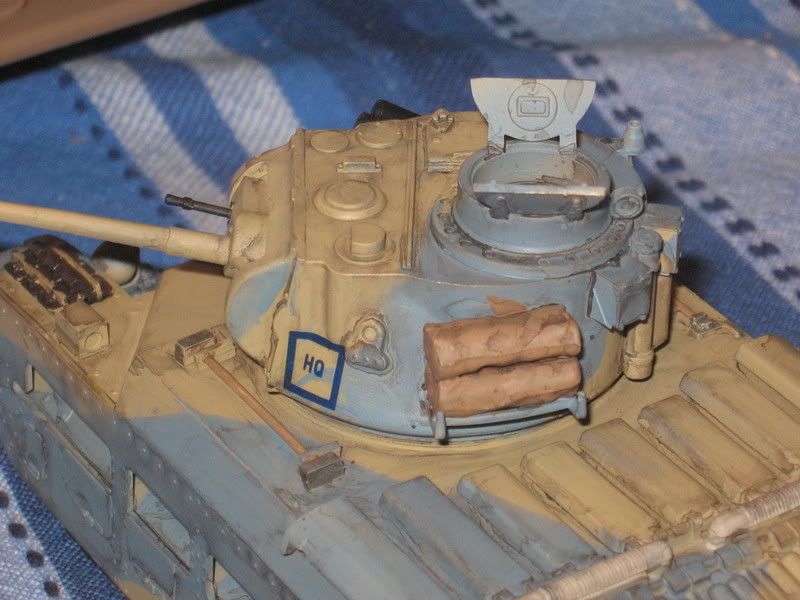
There are several things wrong with this model, the cupola is sideways, the decals are most likely wrong, also it should probably be a 3-tone camo scheme. However this model was a first in many categories for me, it was the first time I have done camo with my airbrush, it is also the first time I have done a wash. I’m happy with the results of both, although I will do several things different the next go around, live and learn I guess.
So other than the decals, cupola, and the lack of correct camo scheme please feel free to critique or comment.
Thanks for looking guys!
You could have got a correct color scheme off the internet, but otherwise you did a good job for your first camo airbrushing, because practice makes perfect.
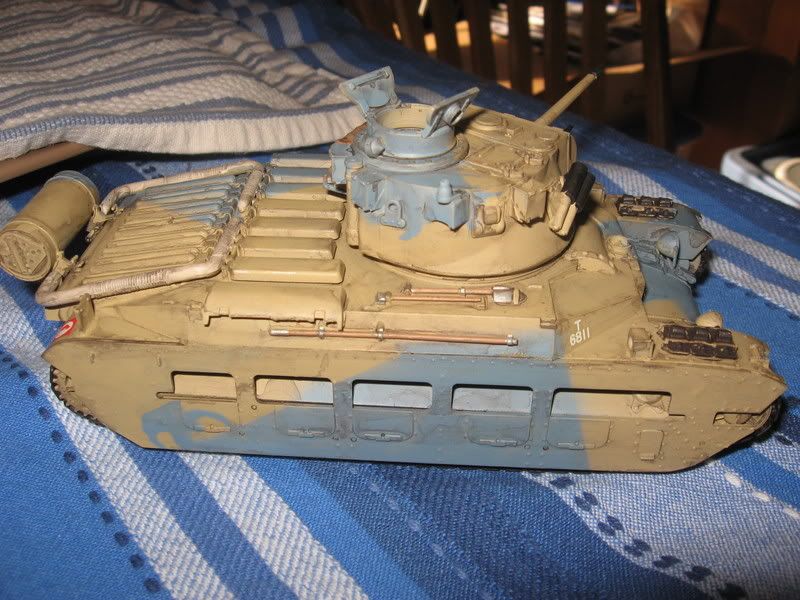
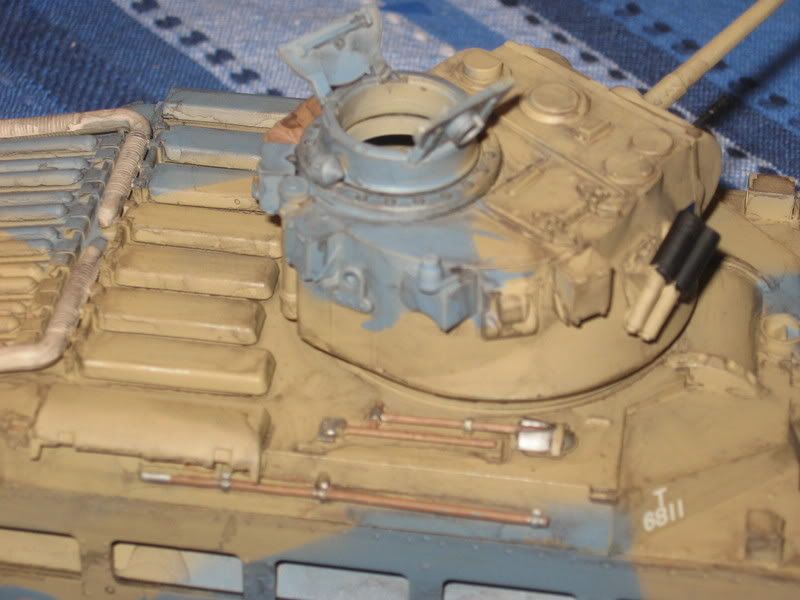
Just keep up the airbrush work! That Caunter scheme is a bear on the Matilda-hard edged and so many angles needed to be masked off. I don’t think the smoke grenade launchers or gun tube muzzle should be a different color than the rest of the vehicle. If you do build anymore Brit tanks, early WWII Brit armor had a silver painted interior if you model the hatches open. You might want to put a tank commander in there. Also beware of mold seams like on the rear deck piping. But overall, a nice first time effort airbrush finish.
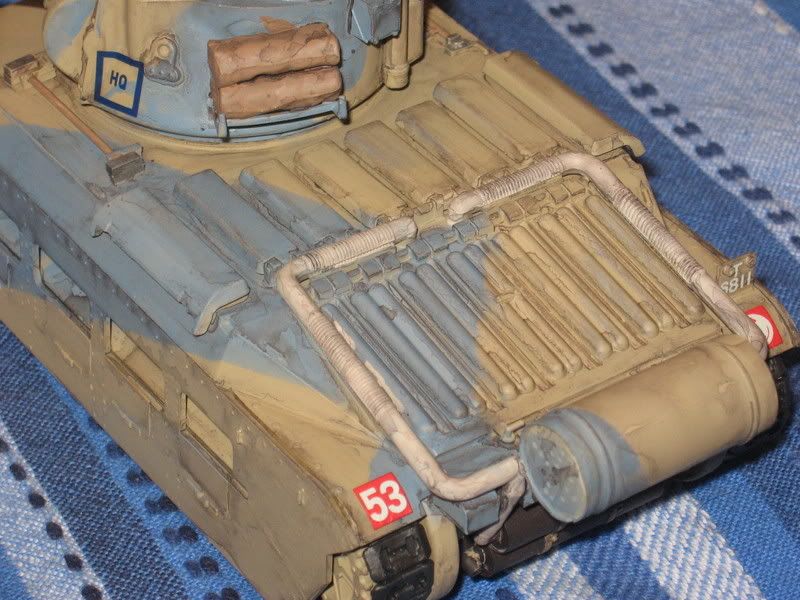
Looks great to me. One hing that jumps out at me quite a bit ever since I built this, is the stowage rack on the turret side. The bed rolls or rolled tarps just looked odd balanced there, so I added a quick tie down.
Other quick fxes to add detail to Tamiyas fairly soft molding:
Add an antenna
Add some wires to the smoke launchers on the turret
And last, rusting up the exhaust/ muffler IMO would be a good idea.
Hy yg, I really like the job you did on this; for a model of many “firsts”, you really pulled it off very nicely!
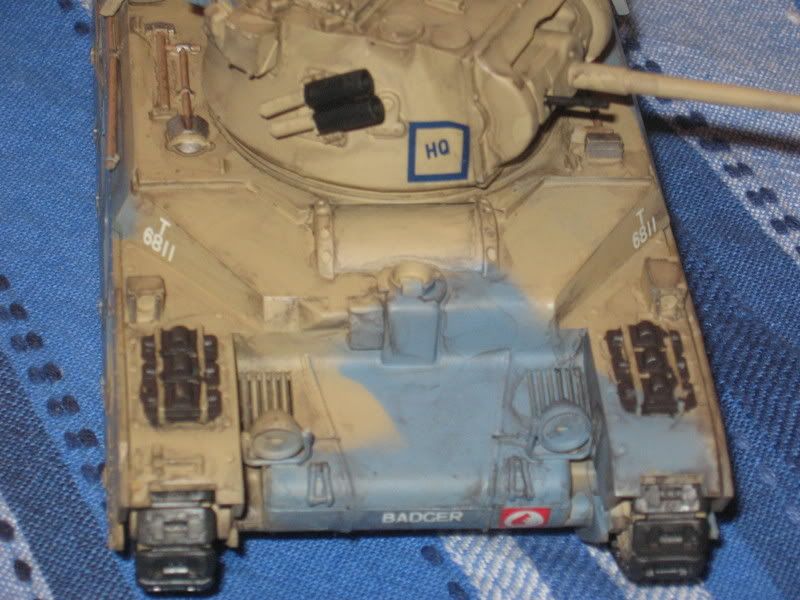
The only thng I would add is to look at the ways that some of the more experienced guys here do their tools–that bright, bright silver overall is not the best way to depict tools. A better way to go is to paint a base of metallic black/gray and then add some silver chips, followed by maybe a little wash of raw umber or even some light sof a dirt color. Makes 'em looked more realistic and used.
I know I speak for all of us in saying that we all look forward to your next build!
I admire your elan for trying to tackle this camo job. I always wondered how to do it. Keep up the good work and always search for refs to better assist you. I know it’s hampered me in the past too. Practice makes perfect with the AB too. You did a fine job.
Glad you liked it, though I hope you didn’t lean to heavily on it as a reference-- I wasn’t 100% interested on accuracy with that build, so I’m not sure how accurate mine is to say the least. Nice work with the wash, but recently I’ve decided I like the look of a brown wash more than black, although that’s entirely a personal opinion. Doog’s got some good advice on the tools too. Great work overall.
Hey, that’s a nice Matilida! I like the camo scheme even if it isn’t accurate (?). Some good points have already been made and, not having built any Brit armor, I can’t add anything else but keep up the good work!! BTW, any problems with the assembly of the kit?
I remember back when you started this one and its nice to see it finally finished, despite its flaws i think it is a very nice looking model and one to be proud of plus im sure you learned a few things along the way, extra points for sticking with it and finishing it. Well done.
Doog-Looking at it now it does look quite silver, I used burnt aluminum to paint it, and it had a wash of burnt umber (along with the whole tank). I think it’s the flash though, in person it doesn’t have that brand spanking new silver look to it, but I’ll keep this in mind for future projects.
Ian-I wasn’t too focused on accuracy either, but I was searching the forums and yours came up and I just sat there drooling over it, lol. Then I noticed the cupola [#oops]. lol. Again I used burnt umber for wash, but the flash made it look black for some reason, [%-)] Oh well live and learn.
Bufflehead-As far as I can remember there wasn’t anything to complicated, the thing went together beautifully, but as always the stupid vinyl tracks, haha. I still haven’t really found a way to get them on without breaking something. Other than that the only thing is take car when putting all the gear and boxes on the turret as they don’t really have any marking places. Also come up with a plan of painting, as the sideskirts add a little twist, or at least they did to me.
Biffa-Yeah that was a loooong time ago, haha. I’m glad it’s finished too, now I have like 3 more, haha.
Again thankyou for all the compliments and critiques guys, it’s real encouraging.