After my last build, I wanted to work on something smaller, easier and simple. This rest was with an M8 Greyhound. Over the past few months there have been a few of you who have built this kit, notable Biffa and Disastermaster.
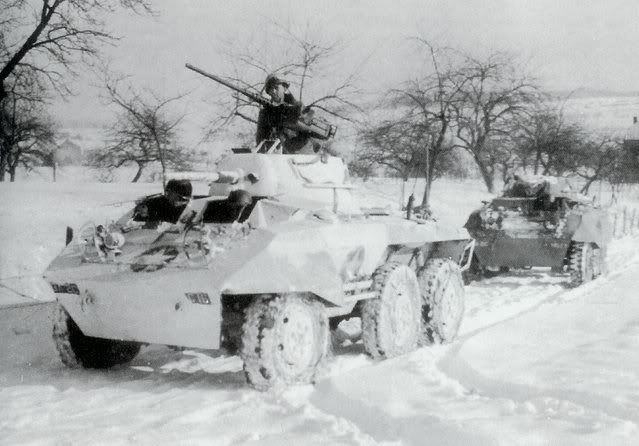
I will build the Tamiya version but as a twist from my esteemed colleagues, I decided to use a little of Doog (snow) and a touch of Manny (figures to come). After doing research here is what I am shooting for.
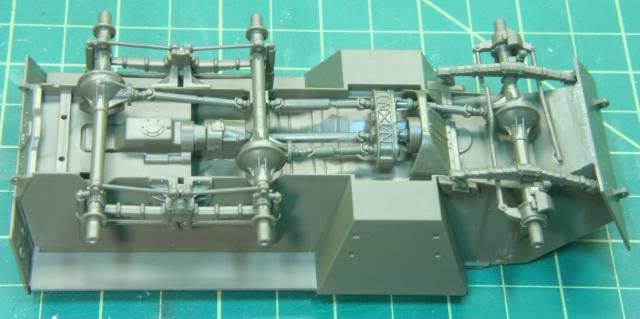
We started out going through the first 3 assembly steps to get the under carriage built.
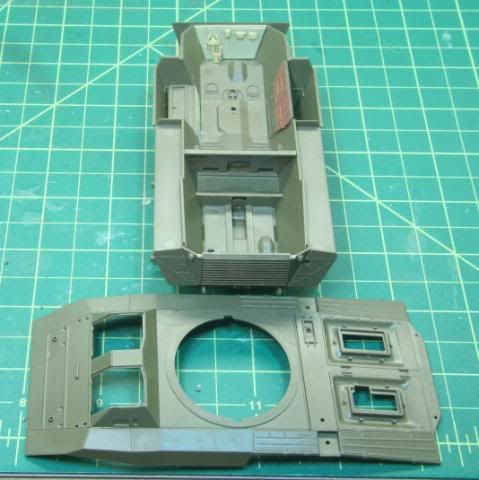
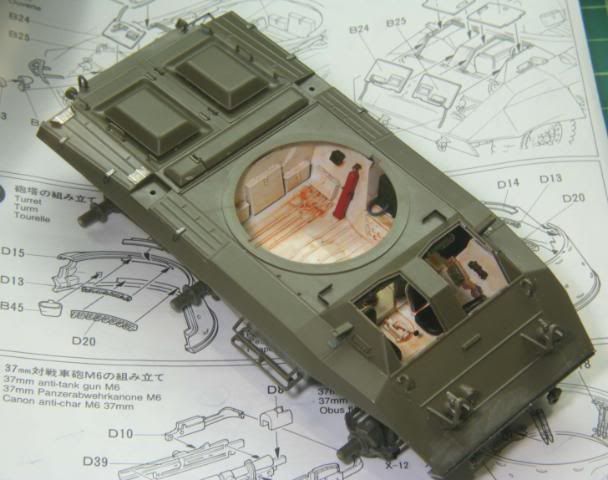
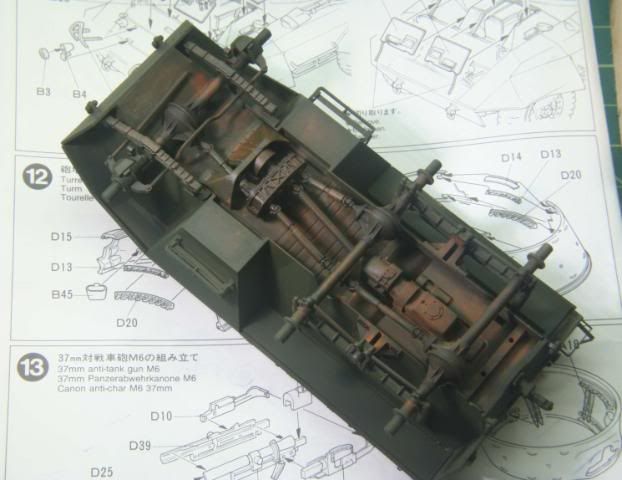
Next we assembled the upper hull main parts and began some internal assembly.
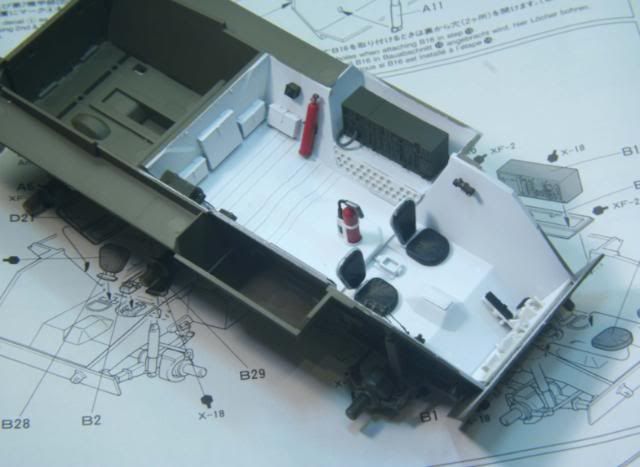
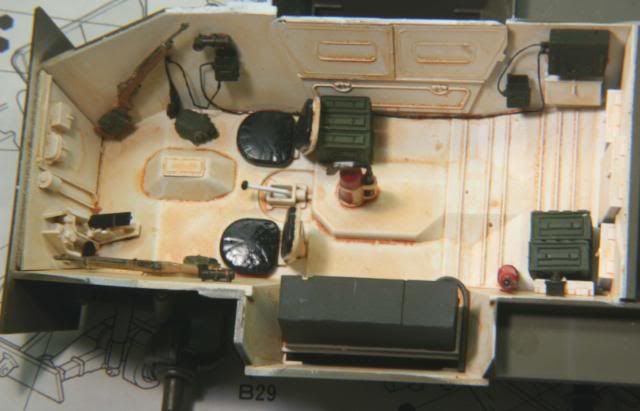
Now…did you think I would not scratch and AM an easy kit…well I could not resist so we will add the Verlinden M8 interior, some PH sprinkeled throughout and tires with chains later.
Stated to get most of the interior in place for a wash
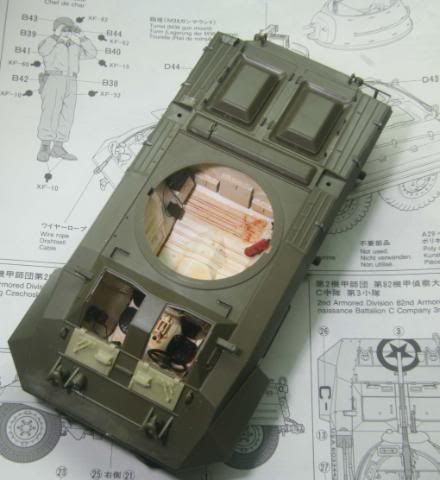
Interior completed and washed.
Thanks for looking in. On to mating the upper hull and beginning the turret. All comments welcome
Wow, I’m impressed…good interior…that Tamiya kit is a dream to build…gonna really keep my eyes on this one…your ref shows a VERY complete and neat application of whitewash…I built the Tamiya one as well a while back and set it in an Ardennes dio:
Manny, I love that dio, and I certainly dont want to hijack or sidetrack this thread, but I couldnt work out the storyline. Abandoned US vehicles with no battle damage, no signs of their crew (alive or dead) Obviously the German troops have moved into the sector ? or are they lost ?
PS: Redleg, that M8 is looking great- luv that interior !
Nice start Mike very tidy work on the interior i love this vehicle i did the italeri one and the tamiya m20 it is also a beauty, i have another in the stash heh you have my attention [:)]
If you need some insight as to how I did my chains, look on the last page of Panzerbait. I added a mini-toot on how I did it.
I’m interested in how this is gonna go as I’m notorious for loving 'em ragged.
Great start…
Helpful suggestion on my part… (you know… my two cents worth) With all that snow there’ll be mud and with all that mud and dampness from the GI’s boots, it’d be pretty nasty inside.
Not that much of a stretch if you think about it. Some U.S. units were caught completely unaware by the German push, like the 106th Infantry Division. Over the summer of 1944 the 106th Division, then at Camp Atterbury, Indiana, was filled with replacements from other training units, the Army Air Corps, Army Specialized Training Program (ASTP), Coast Artillery, Anti-Aircraft Artillery units and others, with no combat experience.
In October 1944 the Division shipped overseas to England for a brief period of training, then shipped across the channel to the LeHavre, France area. On 11 December 1944 the men of the 106th replaced the U.S. 2nd Division on line. The 2nd Division, in the Schnee Eifel area of the German/Belgium border east of St.Vith, Belgium, was replaced man for man and gun for gun and the entire division was greener than Kermit the Frog, especially the Officers and NCOs. Add to THAT Charlie Foxtrot, at the time the 106th Infantry Division caught the brunt of the German Offensive on 16 December 1944 they:
Had been on the Continent only 15 days.
Had been in place in a “quiet” sector for orientation.
Had the youngest troops (average age - 22) of any American Division on line.
Had been in their new positions only five days.
Had no prior warning that the Germans were going to attack.
Occupied a front line that covered over three times the normal distance. The normal coverage for a division on the front line was approximately five miles. The 106th’s positions extended for 21 miles and jutted out, like a thumb, into Germany in a salient extending approximately 7 miles.
Manny = Thanks for the comments. I remember that dio and loved it. Yes the M8 is rather clean, no real chipping which is why I like this one. Plus nice deep snow…fun with tires and making snow fenderburgs!!
Wirraway - Thanks for looking in
MG Mike - Thanks for your comments
Biffa - It’s always a pleasue to have you comment. Went through your thread prior to this build. Still peaking back as I go.
Mobious - True, but at least the Tamiya kit is a good fit and not a lot of putty work…
As an engineer the old saying of cup half empty or full is answered with you cup was twice as big as you needed…now thats smaller!!
Bill - Thanks for your comments and for looking
Disastermaster = OK…I’m gonna level with you…I was a BAD BOY and cheated…I took the easy way out…the dark side force of buying something was too strong…I have Tank Workshop tires with chains…
I know, I should be beaten…BUT…I love your toot and will use the chain in the future.
Hopefully you still respect me in the morning!!
As far as the wet inside and boots, I agree…stuck with dirty…when finished the interior view is limited…I did not want to go too nuts on the interior with puddles and snow…but I agree with your comment
And Thanks for you comment and looking.
Hans-von-Hammer - Thanks for looking and you comments
Marc - Yep…white…with all the snow on the ground in the photo…there was no chance for dirt. I will need to paint lightly so the OD shows through and not PURE WHITE. You know…there is always a point when a vehicle is white washed, when it is clean and not full of scratches. I have the photo!!! Oh yes…we will have the rusty blacked exhaust and dirty air intake in the rear. We will allso have some outside stowage in the rear. But, I thought to do something different…all white snow…all white vehicle. How much purer can you get???
Although it is a very thorough and neat application of whitewash there is a lot of room to give her some color and variation…the stars and serials appear to be neatly masked off prior to the white being applied and the borders are very crisp, which almost suggests that this vehicle was spray painted instead of brush painted…this promises to be a very unique finish!
Manny - Exactly… the star could be weathered. yes…a nice circle around the star. The vehicle #s look like the were quickly masked. The area in the wheel wells also appears to be masked with OD in the upper area. Also the variation in coverage of the white wash.
Thanks for the cocurrance and observation. As I said…I wanted different, I think I found it.
Moving along on my M8, here is my current progress.
Mounted the upper hull and added kit details
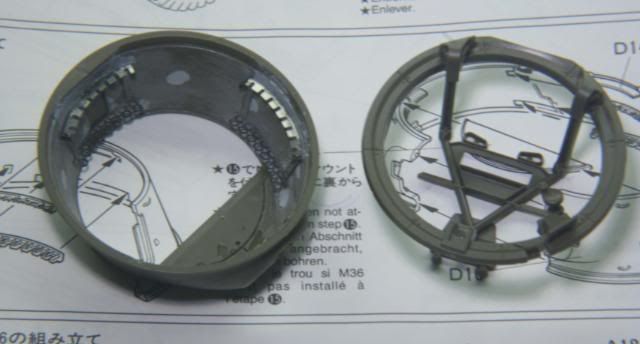
Now it was time for some PE
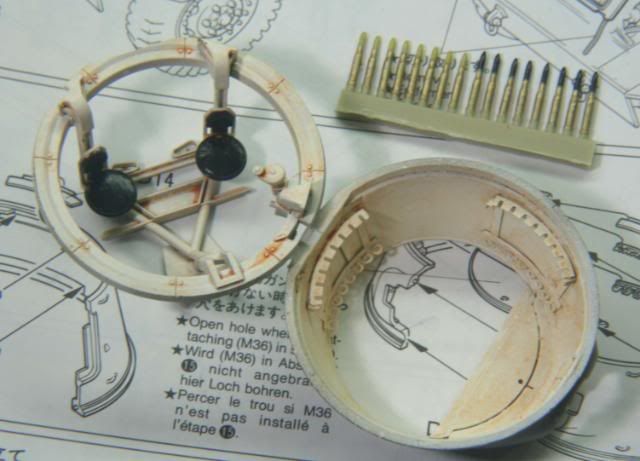
Assembled the turret, cleaned up some pin marks and added PE ammo racks
With the main body finished, it was time to paint the underside. Since this this will stay green a prime coat and a coat of Tamiya OD. Then weathered with an oil wash and then some MIG pigments.
Painted the inside of the turret with Tamiya Flat White, detailed the turret gears with Alclad Steel, and seats with Tamiya Black. Then gave an oil wash for weathering.
I finished assembly of the main body by adding the front fenders and lower hatches. We are now ready to prime and base coat with OD
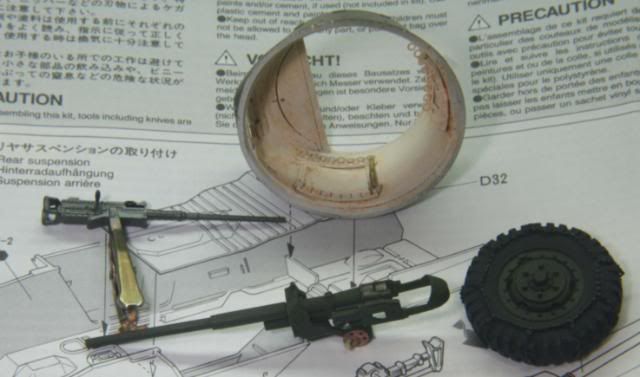
Other details coming together such as the 37mm gun, the M2 50 cal, ammo into the racks on the turret and tires cleaned, primed, painted black, rims in OD, and chains in Alclad Steel.
As a note on the reference photo, the rear fender covers are removed. Also the 50 cal mount is not standard but appears to be welded brackets to hold the 50 on the turret front (ahhh…some scratch building to come).
This version also does not have the middle fenders but has the mine cages.
Well that where we are today. Thanks for looking in. All comments welcome
Mike you are doing some outstanding work on that. I just checked with our club president and I was right… we are not allowing any M8 amored cars at MCon next year[:-^]
Marc - I’ll be there…if you don’t want my M8 I’ll shoot my Pershing missile at them [:O] Thanks
Disaster - Well you are right and you are wrong. I checked Osprey M8/M20. Some photos, like page 8, show white turret interior and white ring. Others show, like page 9, show green turret and white ring. And yet some others look all green.
I think the only incorrect combo is white turret and green ring!


 If you need some insight as to how I did my chains, look on the last page of Panzerbait. I added a mini-toot on how I did it.
 I’m notorious for loving 'em ragged.
 (you know… my two cents worth) With all that snow there’ll be mud and with all that mud and dampness from the GI’s boots, it’d be pretty nasty inside.
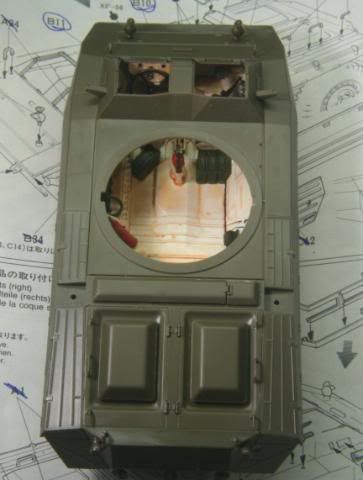
 I can’t be sure.