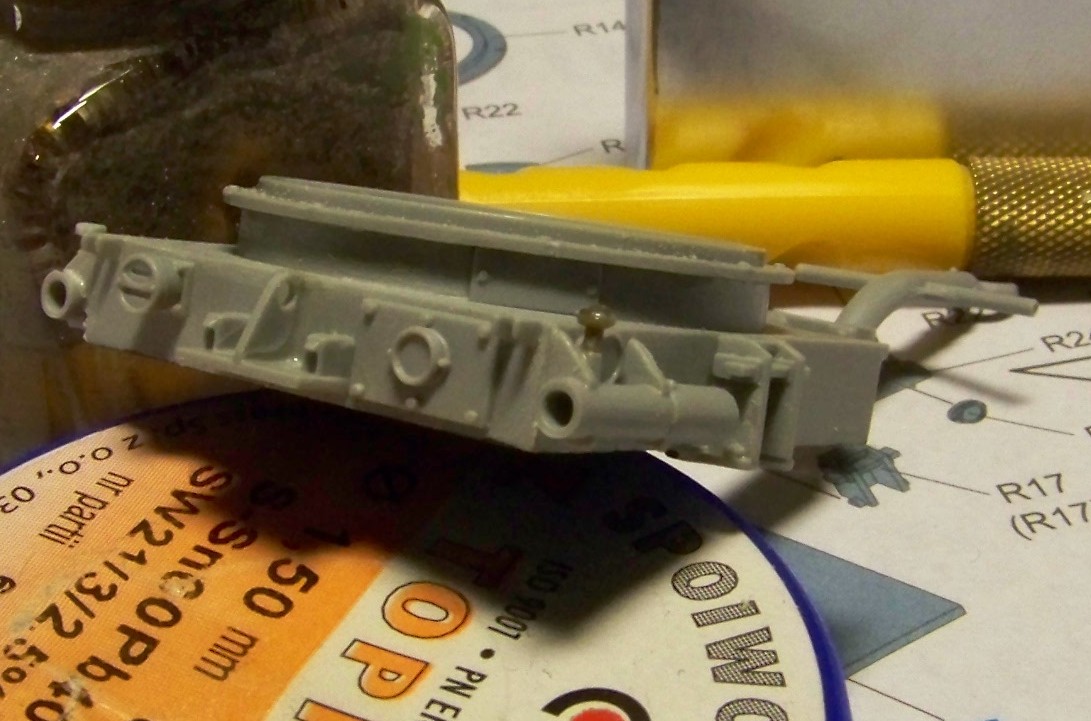
I just started building the M55 Quad 50 from the recent Dragon kit and would like to share my work with You. The kit itself looks very pretty with lots of delicate detail and even one photoetched part. The fit is good, although the trailer will need some sanding and filling to hide the mould partition lines and part joints (although on the underside). No ejection pin marks on the parts - all ejection pins use additional “eyelets” so that’s great.
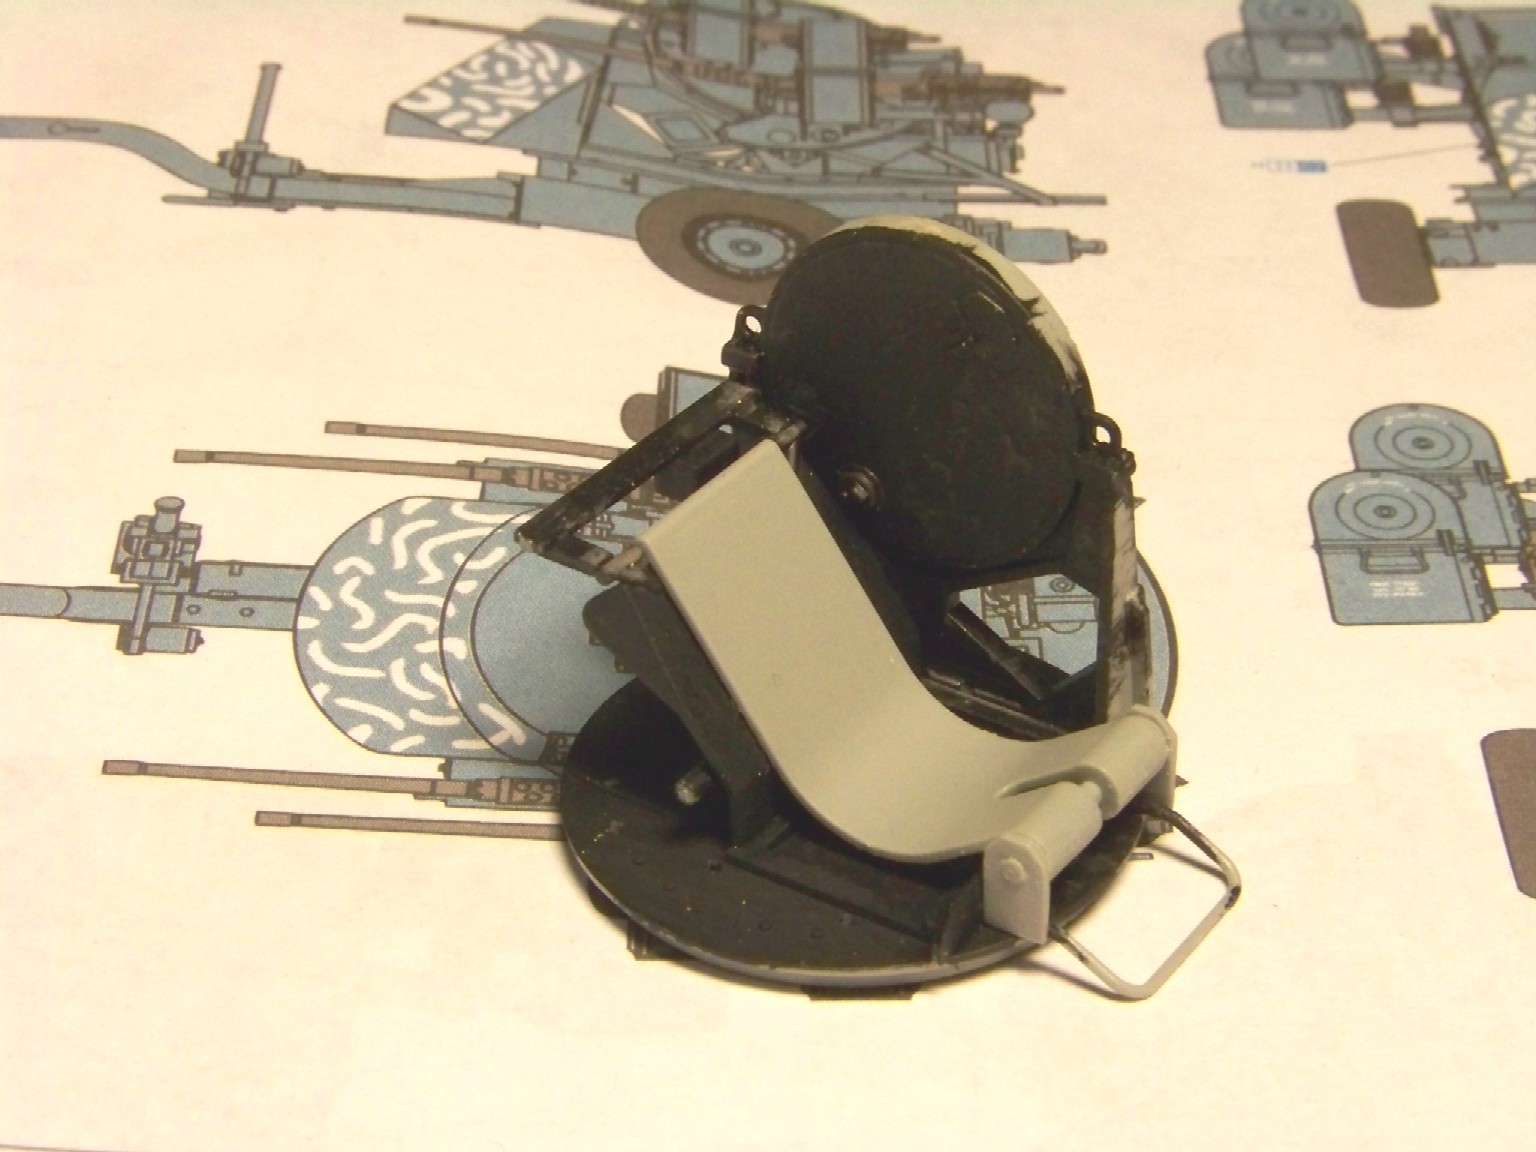
The mount is pretty complicated with lots of nooks and crannies and the parts “interweave” some, so I went to try something new - I’m painting the parts with black Gunzepaint and then glue them together with my favourite liquid glue. The paint melts away at the joints and I end up with parts glued together painted dark colour, even in the unreachable spots. With enough parts together I’ll airbrush olive drab on them. So far I have this:
It doesn’t look to clean, but that will change. Looking forward to Your comments, have a nice day
Thanks for the comment, redleg! Yeah, the little parts - I really fought the carpet monster yesterday. Here are the fotos, first the trailer:
The trailer is a nice assembly. It will be shown in the emplaced mode, whichmeans wheels off and jacked down. I drilled out the handles perpendicular to the tow bar. I also had to cut off the locator pin of the taillight, or else it would have to be installed upside down. The underside needs filling and sanding if you are picky, you can see the mentioned area primed inblack on the foto. You can also see the olive-green replacement to the part lost to the carpet monster. Fit is good, there are only ejector pin marks on the wheel attachment points and detail is also good.
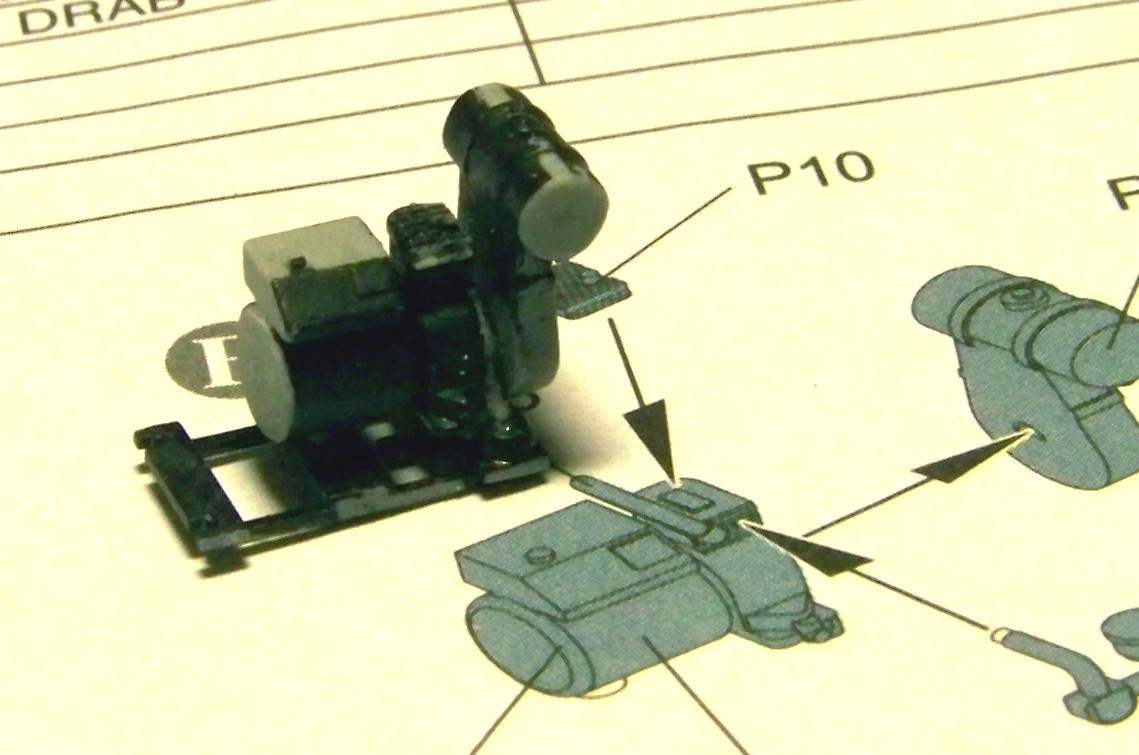
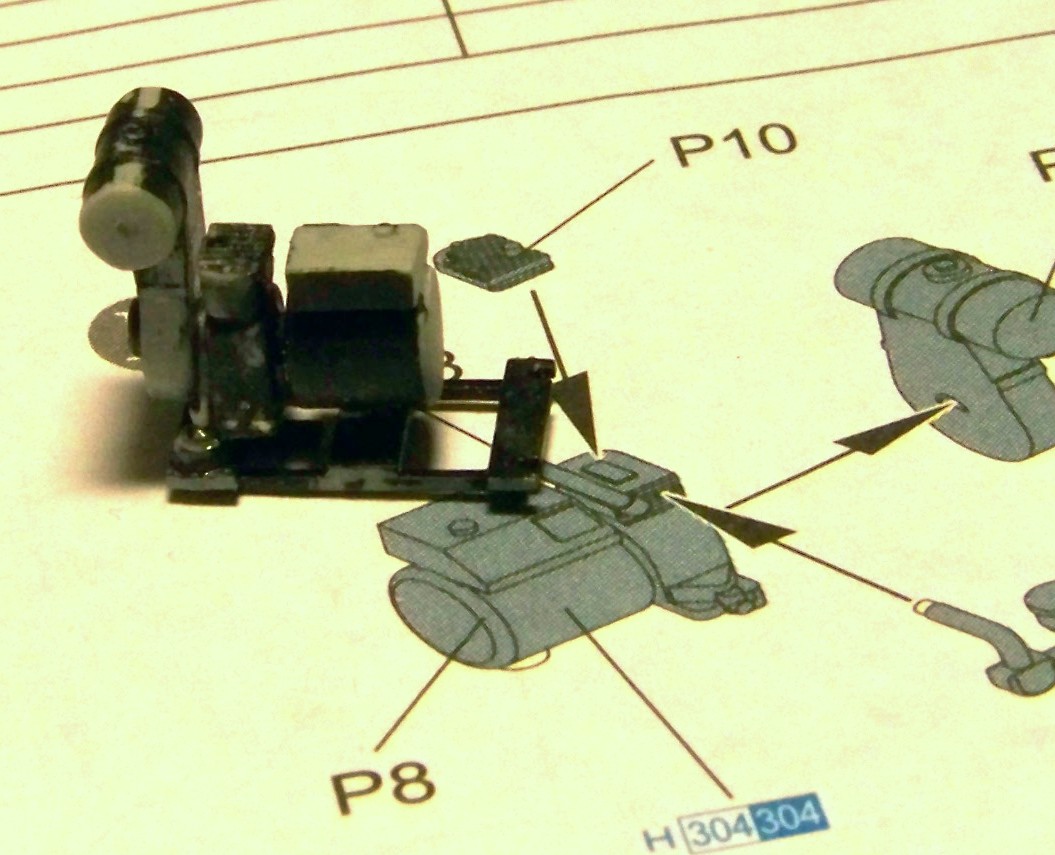
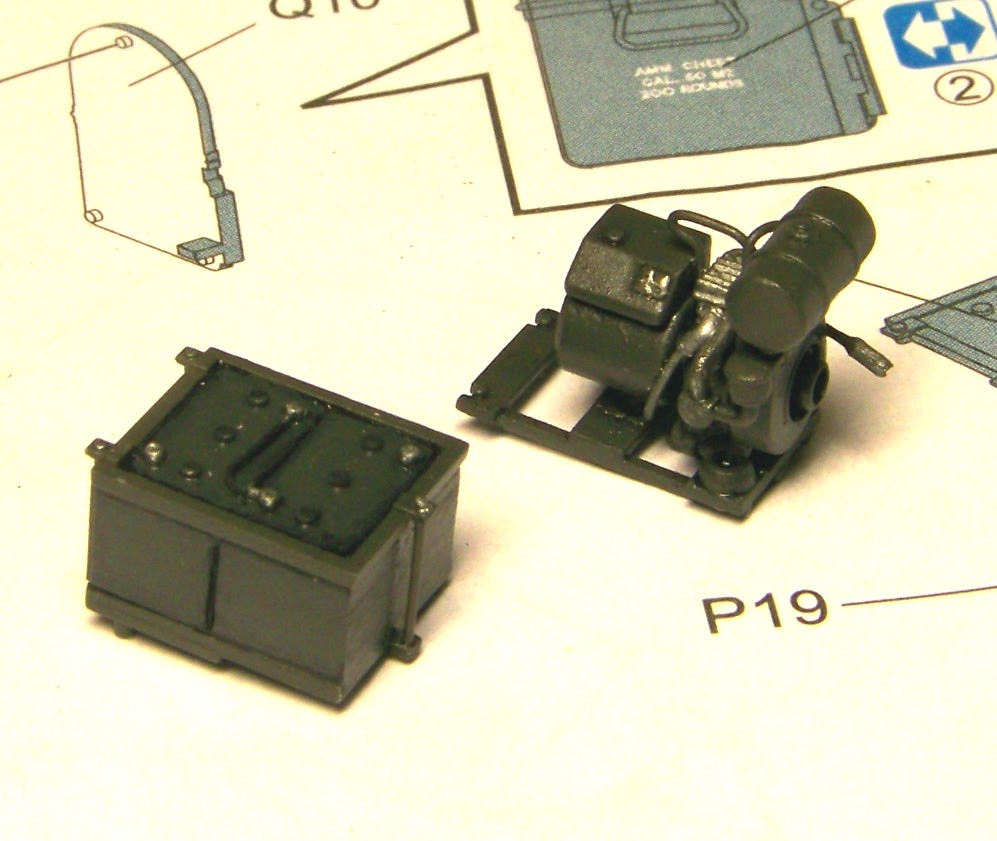
Next, the power charger:
That assembly has a minor problem, according to my TM fotos - the whole machine is a bit too far back on its sled. I tried to remedy this by instaling an additional part between the piston and the part with the fuel tank, and also by relocating the generator’s attachment point. Still left to do are the carburetor, exhaust and the ignition line and carrying handle (last two missing in the kit).
As always looking forward to Your comments, have a nice day
Aren’t that two of the top ten modelling problems - the carpet monster and the kit inaccuracies?
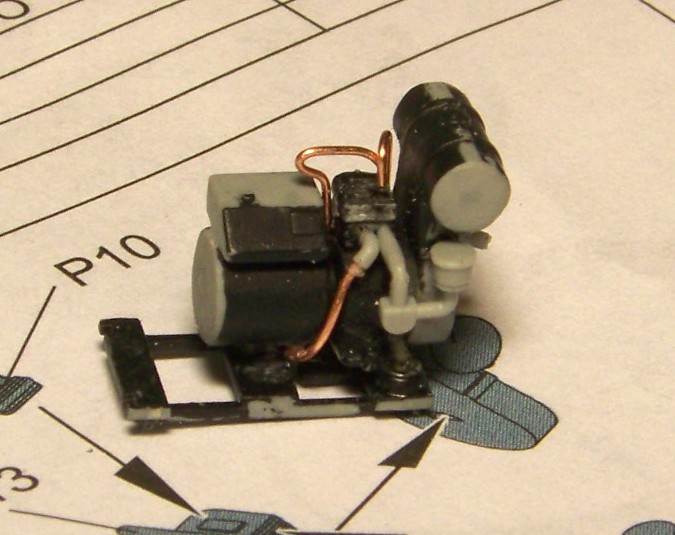
Anyhow, goin’ on with the build. Recently I finished the power charger. I added the carburetor, and also replaced the kit exhaust (partially) with copper wire. I also used the same wire for the ignition cable and the carrying handle. That’s what it looks like:
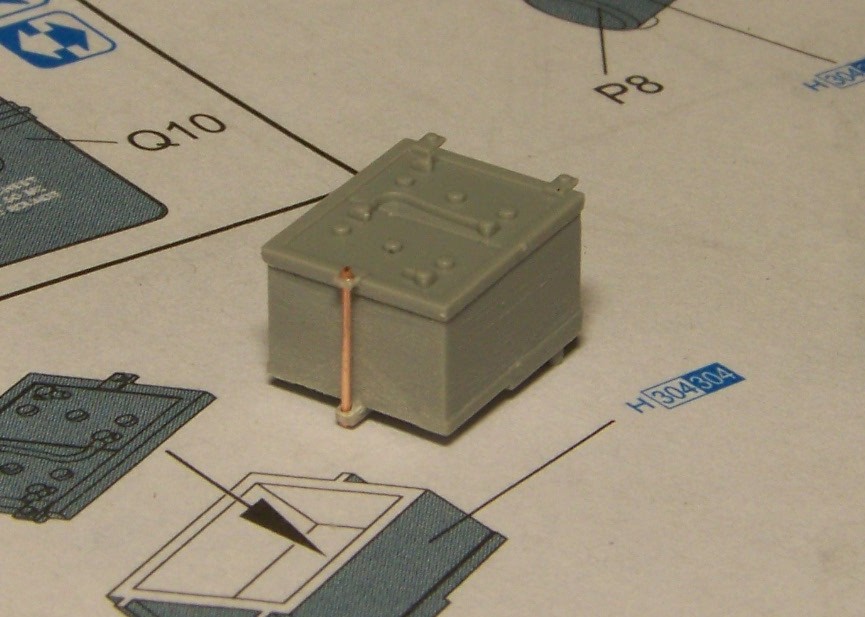
I also assembled the battery. I added the hold-down pin, also from the same copper wire. By the way, I pulled my wire from an auto battery cable, I recommend this source. The battery, yet unpainted looks like this:
Just after pasting the picture I noticed I still have to scribe the joint where the batteries meet at the sides. Just another example how this forum helps make better models[8)]
And the big question for all: What color would such battery be? Would it really be olive-drab? Could some more civilian color be realistically used for variation? Thanks a lot in advance, looking forward to Your comments, and have a nice day
mikeym: I didn’t add the other hold down pins, because after the battery gets installed, they will be completely out of view. But thanks for watching the fotos so carefully!
redleg: Yeah, we all like to see that plastic-metal combination and why pay for expensive PE? [:D]. What color would you paint the batteries redleg? That question really bothers me. OD doesn’t sound 100% right. The batteries shown in the TM even have manufacturers logo on them.
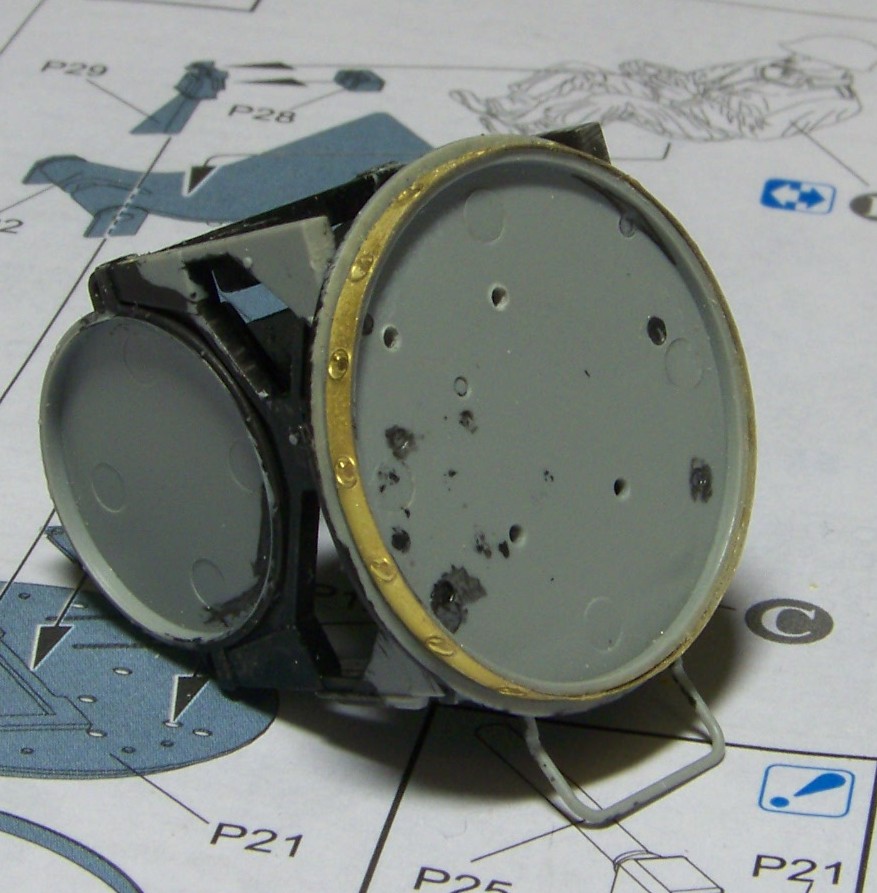
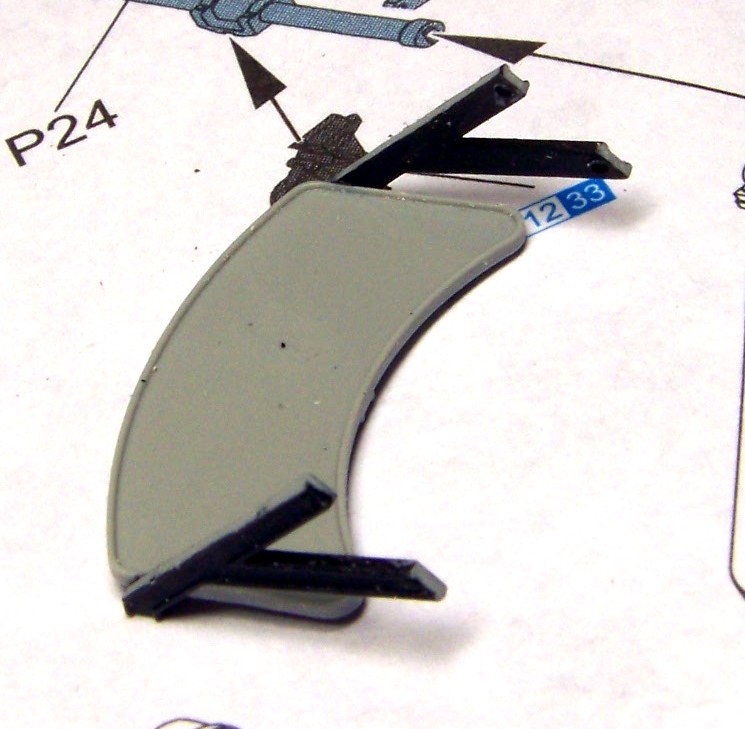
I still don’t know what the batteries will look like. Anyhow, there’s some progress I’d like to report. First thing, I installed the one and only kit-supplied PE part. Here’s what it looks like:
It was by no means a drop-in - the part had to be narrowed almost 50% - talk about cutting off two strips about 0.5 mm wide - and then bent to shape and finally adjusted in length - some 0.5 mm. At least the detail is nice.
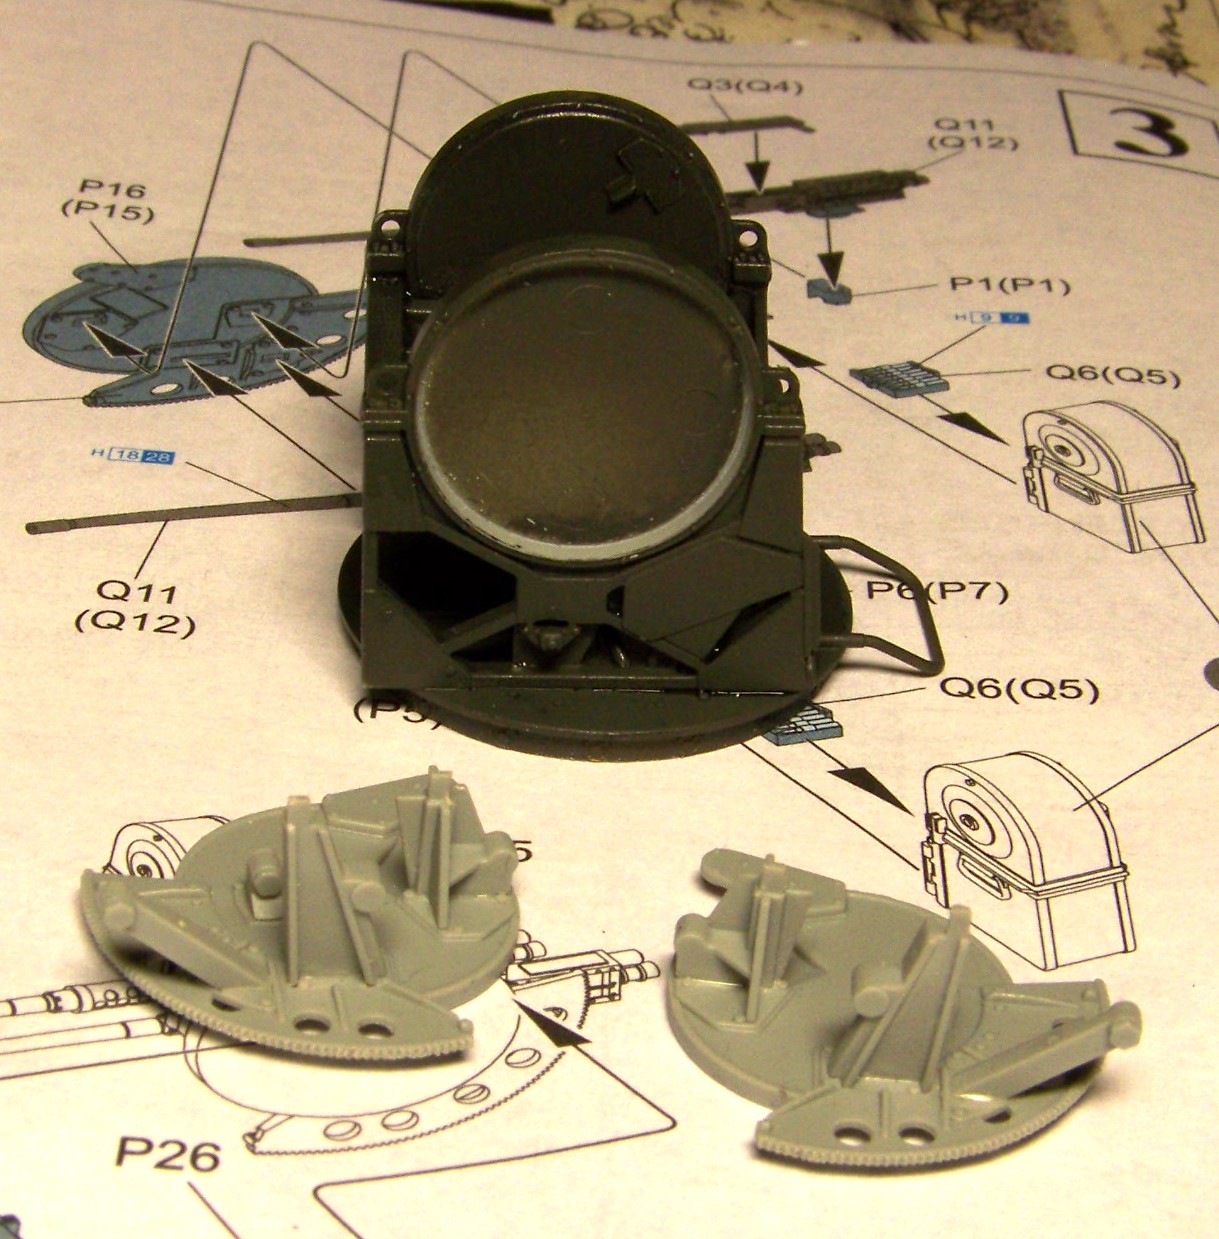
Then I went for first coat of Olive Drab. I airbrushed Humbrol 66 which was, after drying throughly, coated with a mixture of floor finish (read more here:http://www.swannysmodels.com/TheCompleteFuture.html - nice job Swanny!) with slight addition of black acrylic paint. Here’s what the parts look like:
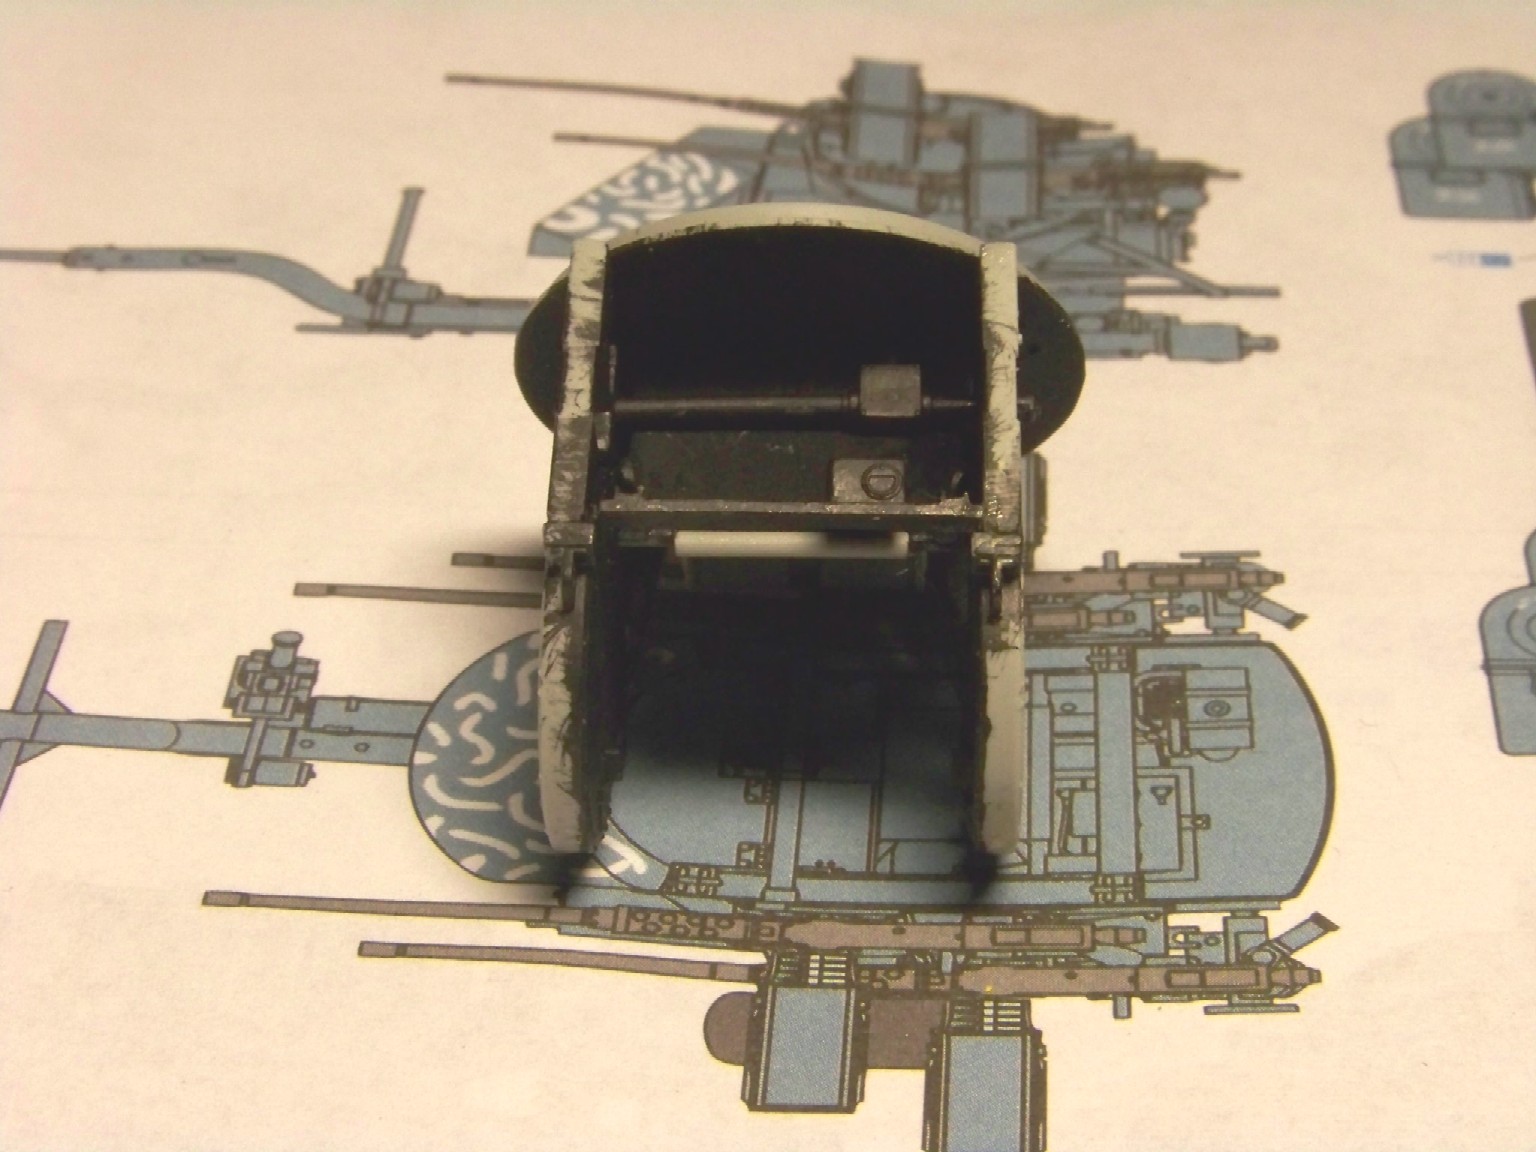
In the drying time I started assemblying the gun elevation assemblies. I noticed that the mentioned assemblies fit extremely tight into the mount, so I scraped some plastic from the inside of the mount, so the assemblies can be rotated after installation. The result can be seen on the foto below:
I hope you all enjoyed, as always I look forward to your comments and wish you all a nice day
Pawel, I would paint the battery flat black and also the filler caps. This is the same quad I’m putting on the Jimmy I’m getting ready to build. Keep the photos coming, you’ll same me some headaches.[:-^]
Hi Pawel, this is looking great, nice scratched details.
Re the flat black, I agree the battery should be dark,
but from my figure modeling and study of color, I no longer use “black” and “white” in my painting, because the colors are so stark that you really don’t see them very often. Stuff we routinely think of as black isn’t, like tires, hoses, etc.
I think if you use a grey-black, a floquil weathered black, or similar non “black” black, it will look more authentic.
pawel , do not go straight black. go with the floquill weathered black. it looks very good because its a very dark grey. and BTW, im lovin your build.[tup]
thanks a lot for Your comments. Now I know what the battery pack will look like.
Mike: - glad to help. It’s good to know my WIP is of use to somebody. The wire I’m using is about 0.45 mm in diameter, or AWG 25 for you Americans. Got it from an auto battery cable.
Bill, Some - I agree wholeheartedly on the black. My favourite color for this is Humbrol 32, and I intend to use it on the battery and on the tires. And thanks for the compliments[:I]
Now, back to work - please stay tuned and have a nice day
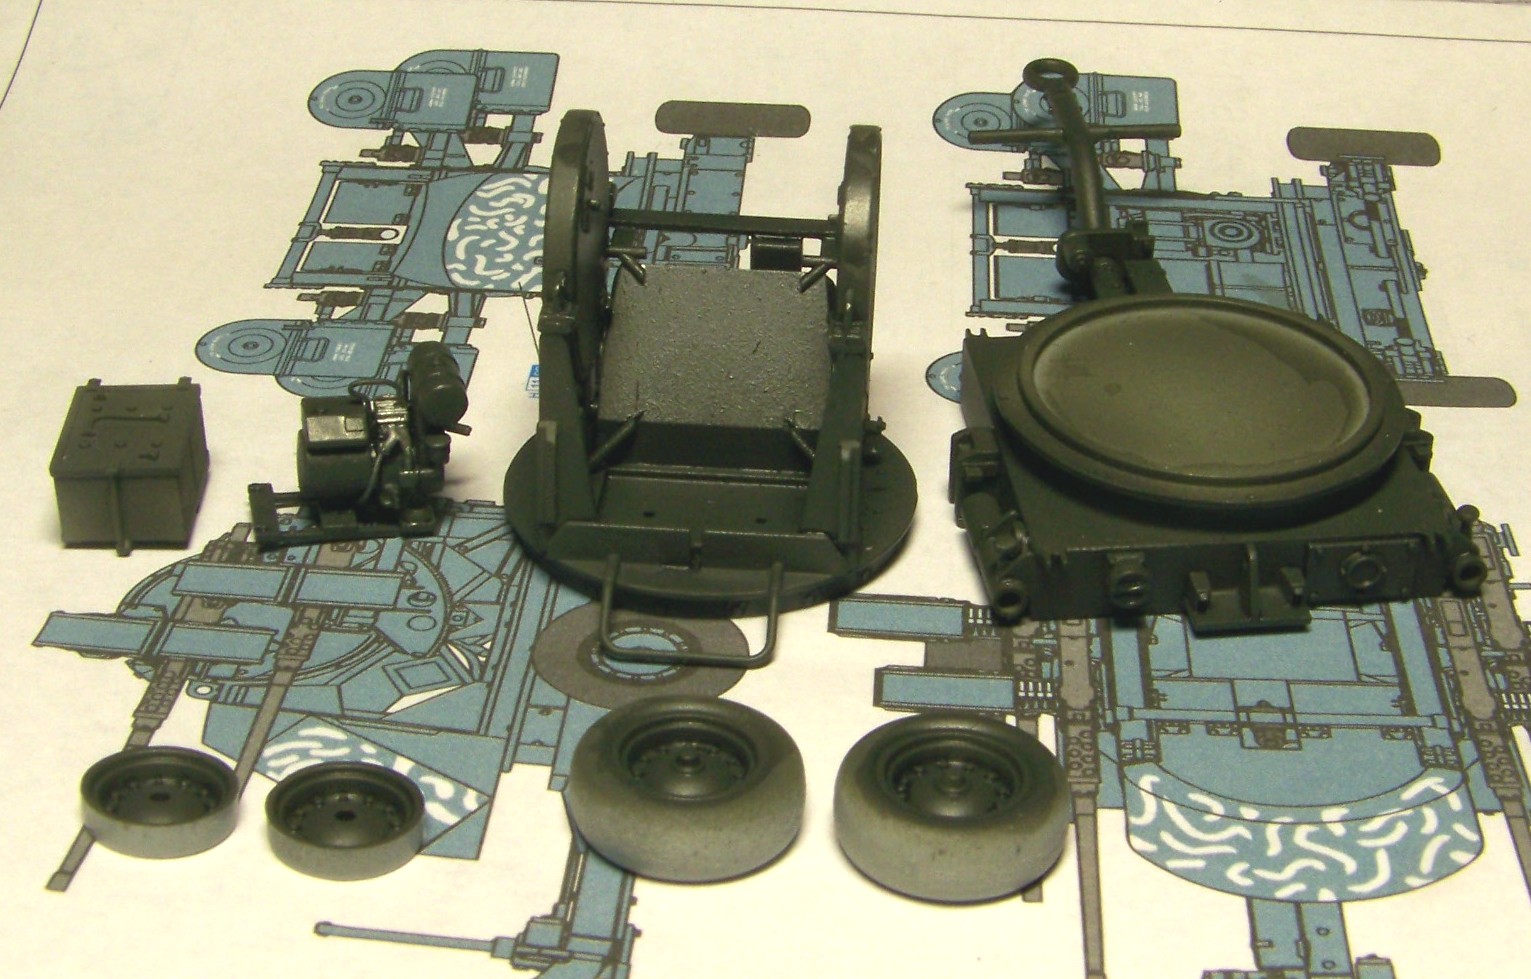
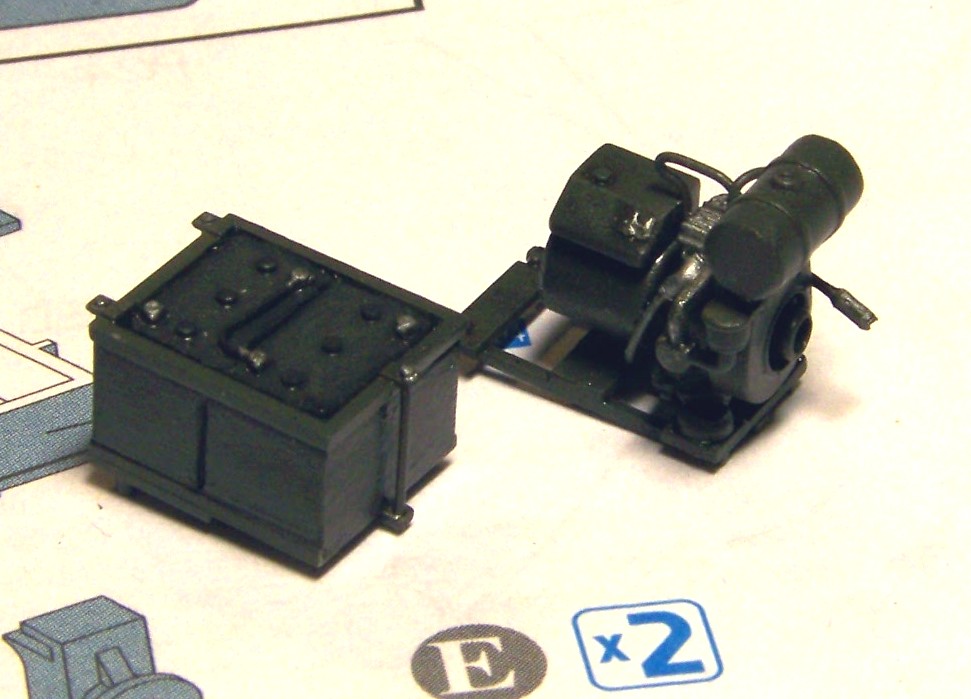
Thanks to your comments I was able to finish the battery pack and I also finished the power charger. Here’s what they look like, I still have to decide how much to weather them before installation. Unfortunately the fotos are not so good, but anyhow:
I also put together the lifting jacks, couldn’t help to use some more wire[:D]
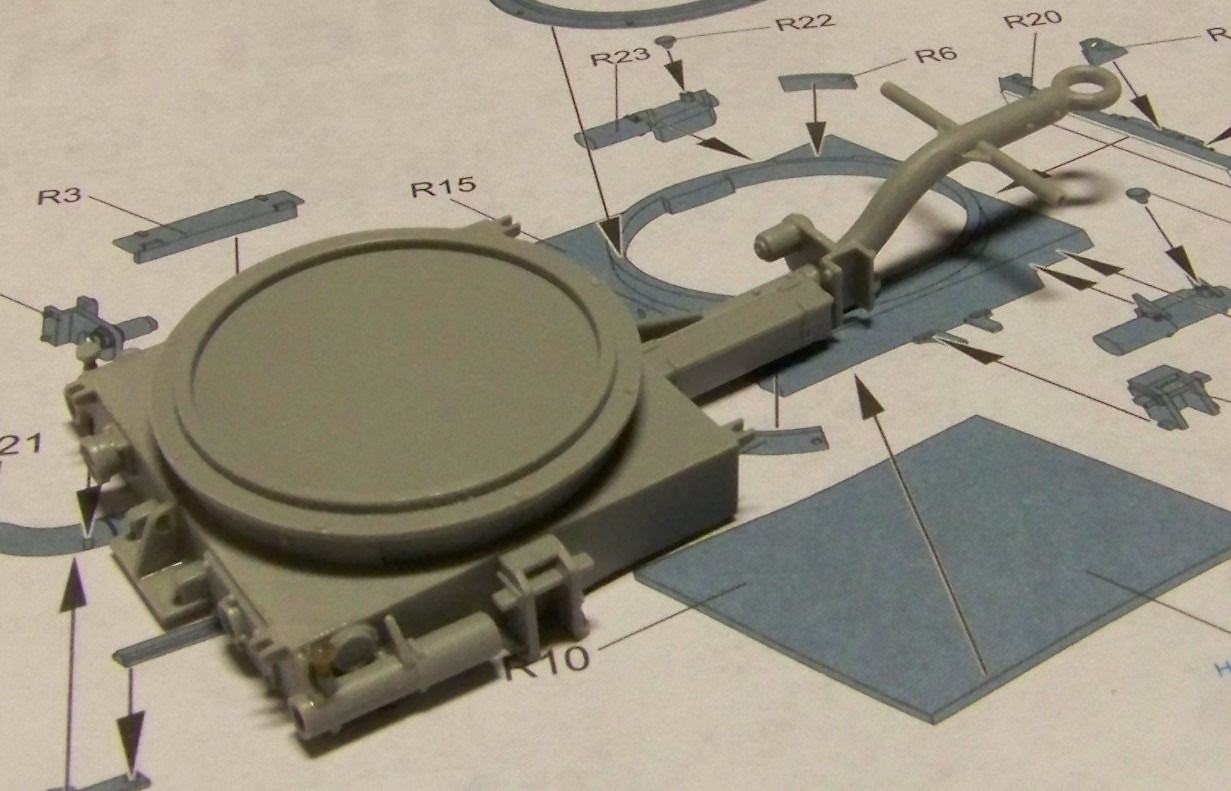
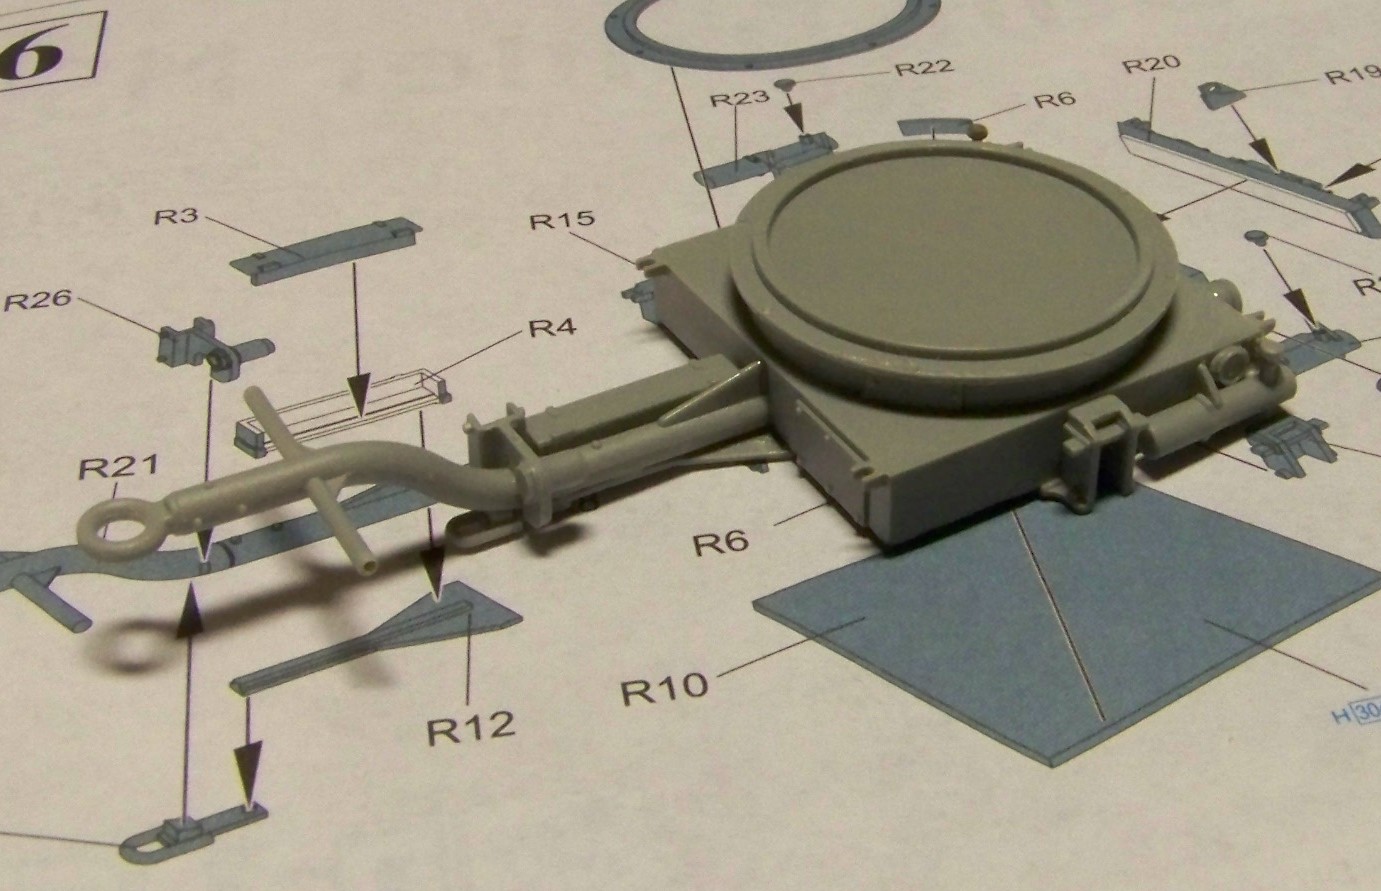
Another simple thing to do was the platform
And now the hard part - in the fotos it’s clear the “tombstone” magazines weren’t used at all. All the Quads either use standard ammo box tray, or this cool modification - cut down jerry can for ammo feed. That’s what I’d like to do in my model. Got some jerry cans from the old Academy M151 with trailer kit - they have good side detail byt crappy caps, so it’s no problem cutting them down. How exactly they fit the gun itself - this I have yet to work out. If anybody has any info on this one - please write me. Looking forward to other comments too, have a nice day
I have no experience with the quad .50, however I have spent a lot of time on a single mother deuce (M2).
If the tombstone ammo cans were not used then I see no benefit to cut down jerry cans unless the standard .50 cal ammo can would not fit/feed in this system. If this is the case, anybody with experience in this system please chime in, the cans would have been cut in such a way as to have a feed ramp. What I’m thinkin’ is they cut one of the narrow sides taller and bent it in such a way as to provide support for the ammo belt as it fed into the weapon. IIRC aircrew had at one time brazed beer cans to M60’s to facilitate the belt feeding when the weapon was used in the door of a heliciopter. This was prior to a dedicated mount.