I have started another project. This one will be a US Army convoy escort guntruck in Vietnam. It will be one of the quad .50 armed guntrucks known as “Easy Rider”.
Slide11280×720 116 KB
Slide2939×720 104 KB
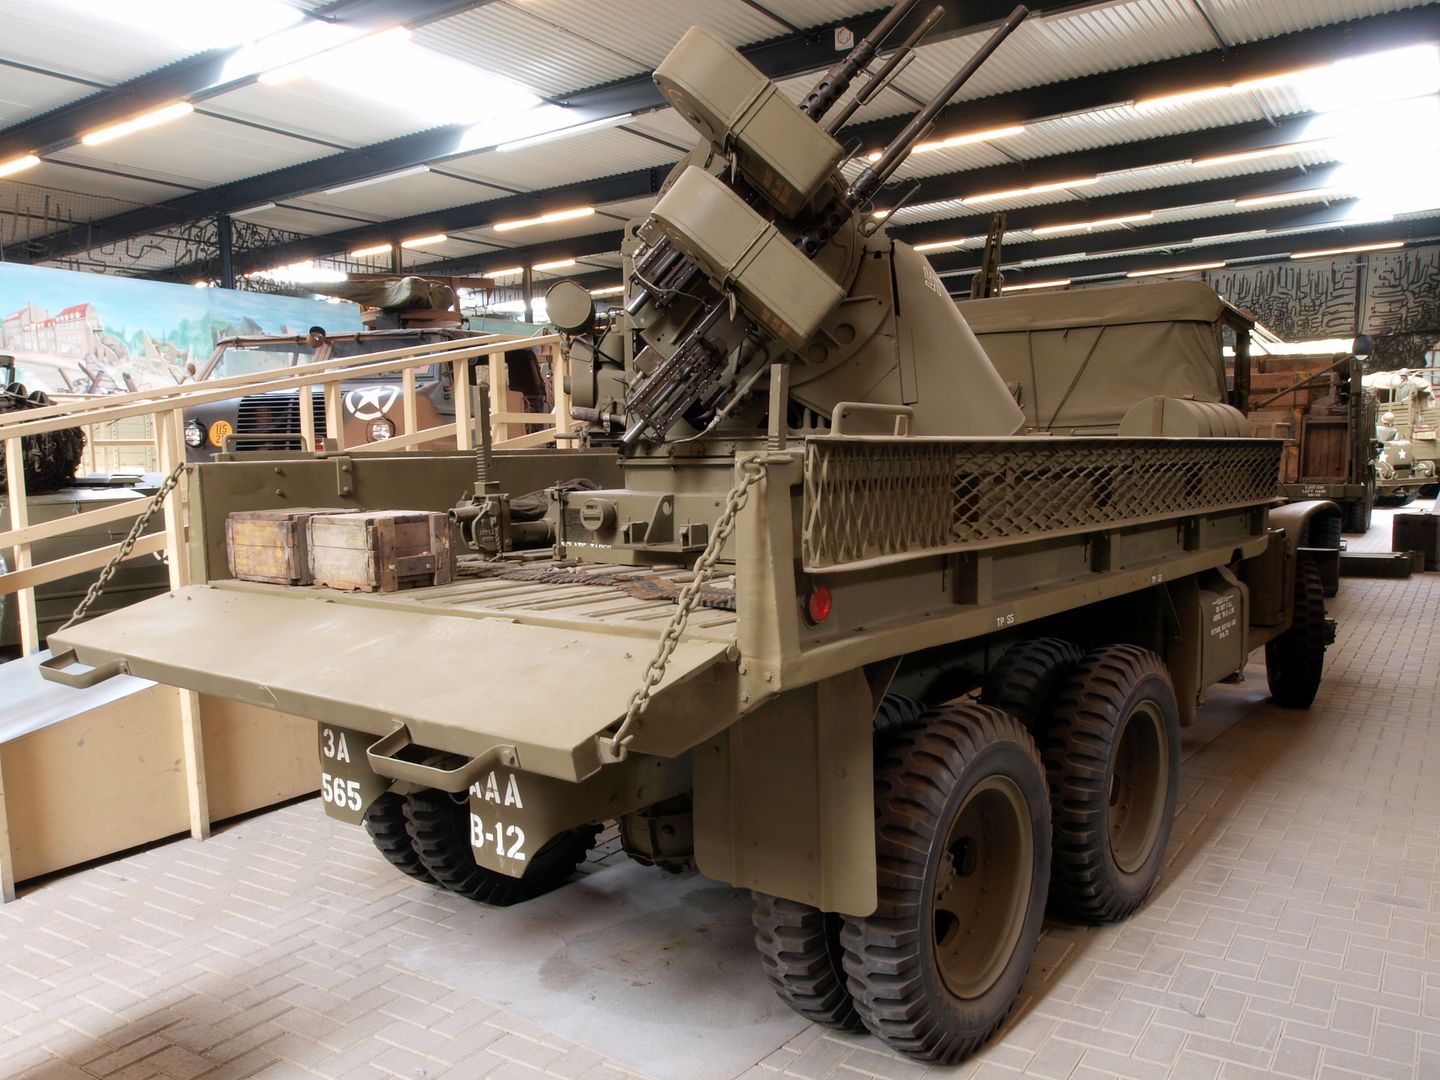
These guntrucks were modified M54A2 trucks with an M55 Quad .50 cal ADA trailer mounted in the bed. They were used to escort and defend convoys against ground attack.
“Easy Rider” decals are available from Star Decals.
Easy Rider Star Decals 1514×727 43 KB
I have started on the trucks using the AFV Club M54A2 truck.
image704×447 69.3 KB
I will also be using the Dynamo Models M55 Quad .50 cal kit which has 3-D printed parts to bring it up to Vietnam-era specs.
Dynamo Models’ first 1/35 scale injection-molded kit features this American heavy machine gun setup used as an AA platform. It may be built either as the Vietnam M55 version with multiple decal options, or the WW2 M45 version. Available for release this March. [image] This is partial text from the full article (usually with photos) at https://armorama.com/news/dynamo-models-us-quadmount-machine-gun
So far I have the frame and cab in the works. The AFV Club kit is very detailed and complete. I also had no issues assembling it so far.
Looks cool Gino! I love your choice of subjects, they’re a nice change of pace from the usual M4s, T-34s, and panzers. (not that I don’t love those too)
I have to agree with Cliff about your subject choices! And I would add that about half of the projects you build are things that I would like to build too, like in this case, where I have even the materials stashed appropriately.
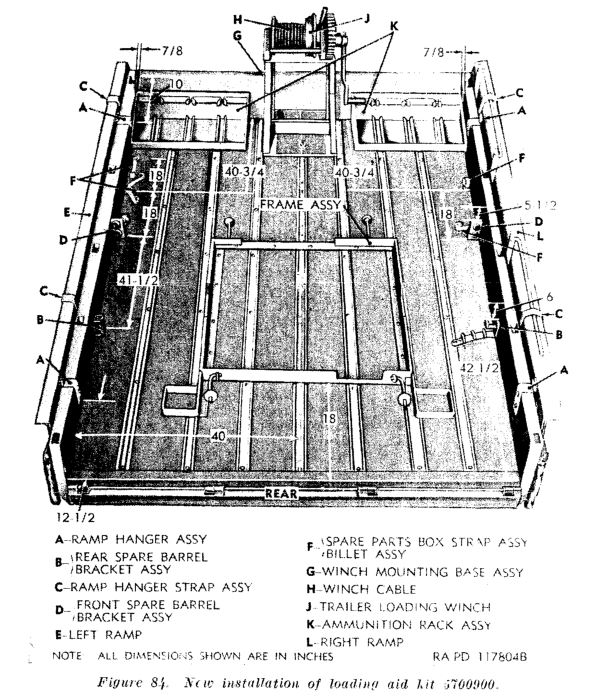
One more thing that might help you. I don’t know if you know this, but there was a special frame that was being used to fix the trailer to the cargo bed. Here’s an excerpt of the old TM for the quad that even has some dimensions:
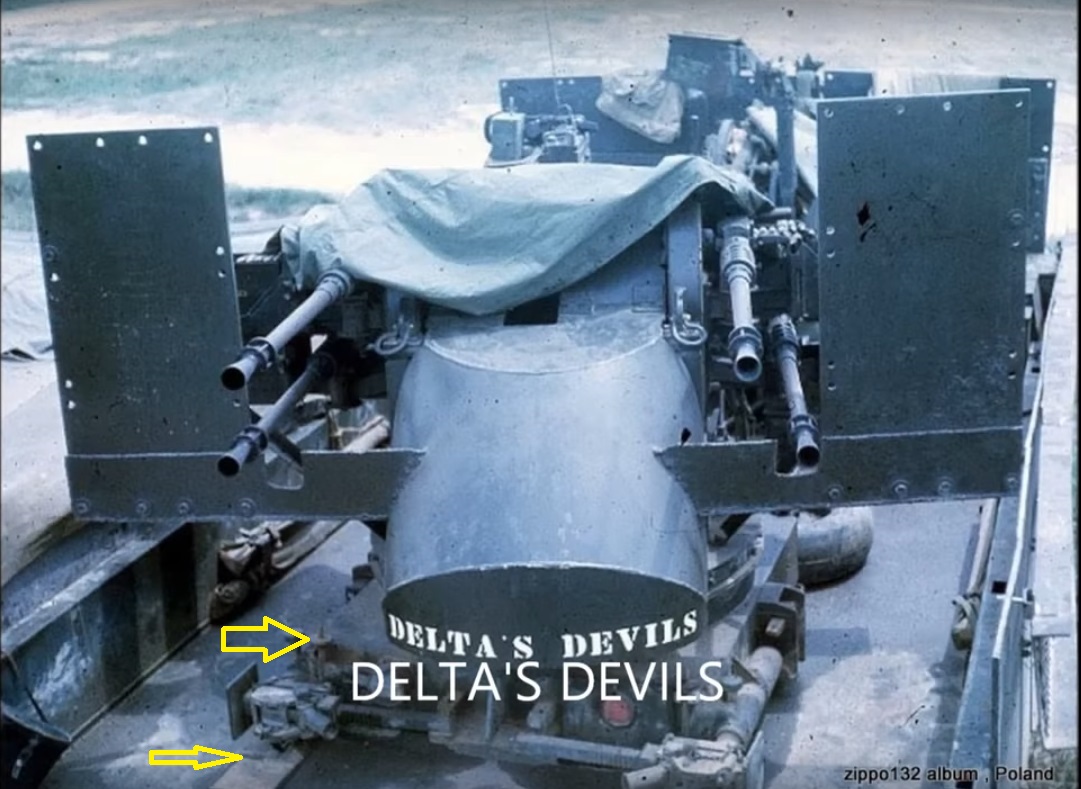
And here’s the evidence it was indeed used in Vietnam. The upper arrow shows how the frame grabs by the little prongs present in all four corners of the trailer:
In this photo also it’s shown how they carry the trailer wheels with them. One Vietnam vet told me some rews preferred to leave the wheels at the base, together with the trailers tow hitch, which was often removed to make more room in the truck bed. This would be the configuration of the trailer for truck mounting:
I hope this helps you - good luck with your build and have a nice day
That looks very interesting. I like that idea. I am not an armor guy but will be watching this. The engineering that went on in the field always surprises me. Some of it is fantastic .
Thank you gents. I have wanted to do this one for a while.
Thanks Pawel, great pics. I had heard there was a special mount, but not seen any pics of it. I am not sure these were used on M54s in Vietnam though. I think the mounts were for CCKWs post WWII. From pics I can see, the M54s had an added armored(?) box inside the bed that the M55 sits in. It doesn’t look to have any extra parts on it. Maybe they added some bolt plates or something to the added box, hard to tell. Knew about the tires and tow bar already. These will be very helpful though.
Gino, if you look on the second picture I posted, the lower arrow points to a kind of “pad” that belongs to the part described as “frame assembly” in the TM picture. This frame was bolted to the cargo bed and had four threaded rods with nuts (upper arrow) that angaged the “prongs” on the trailer to keep the quad from moving araound in the cargo bed. If you look closely, you can also see the spare barrel holders along the cargo bed sides. They probably didn’t use the winch, just took a wrecker or a fork lift to put the quad up in the bed.
Looking forward to your next updates, have a nice day
If you look at the below pic, you will see that the TM pic above of the mount pieces etc., are from the CCKW version, same ribbed bed. Maybe the M35 quad guntrucks used these as well.
I am assuming that the M54 quads in Vietnam simply welded a few angle iron pieces to the added box in the bed in a similar fashion as the mount and bolted them down. None of the other pieces seem to be there.
I have continued work on the guntruck. I have completed construction on the truck itself.
I added chains on the fold down bedsides and the tailgate.
IMG_20240213_2044420931920×1440 148 KB
IMG_20240213_2044558581920×1440 160 KB
IMG_20240213_2045065281920×1440 141 KB
I also made the armored box that goes into the bed. I used the templates on the Star Decals sheet for the angled side pieces. I also added a radio on the rear wall, bars to hold the spares, and a pintle for an M60 MG.
IMG_20240213_2046107471920×1440 149 KB
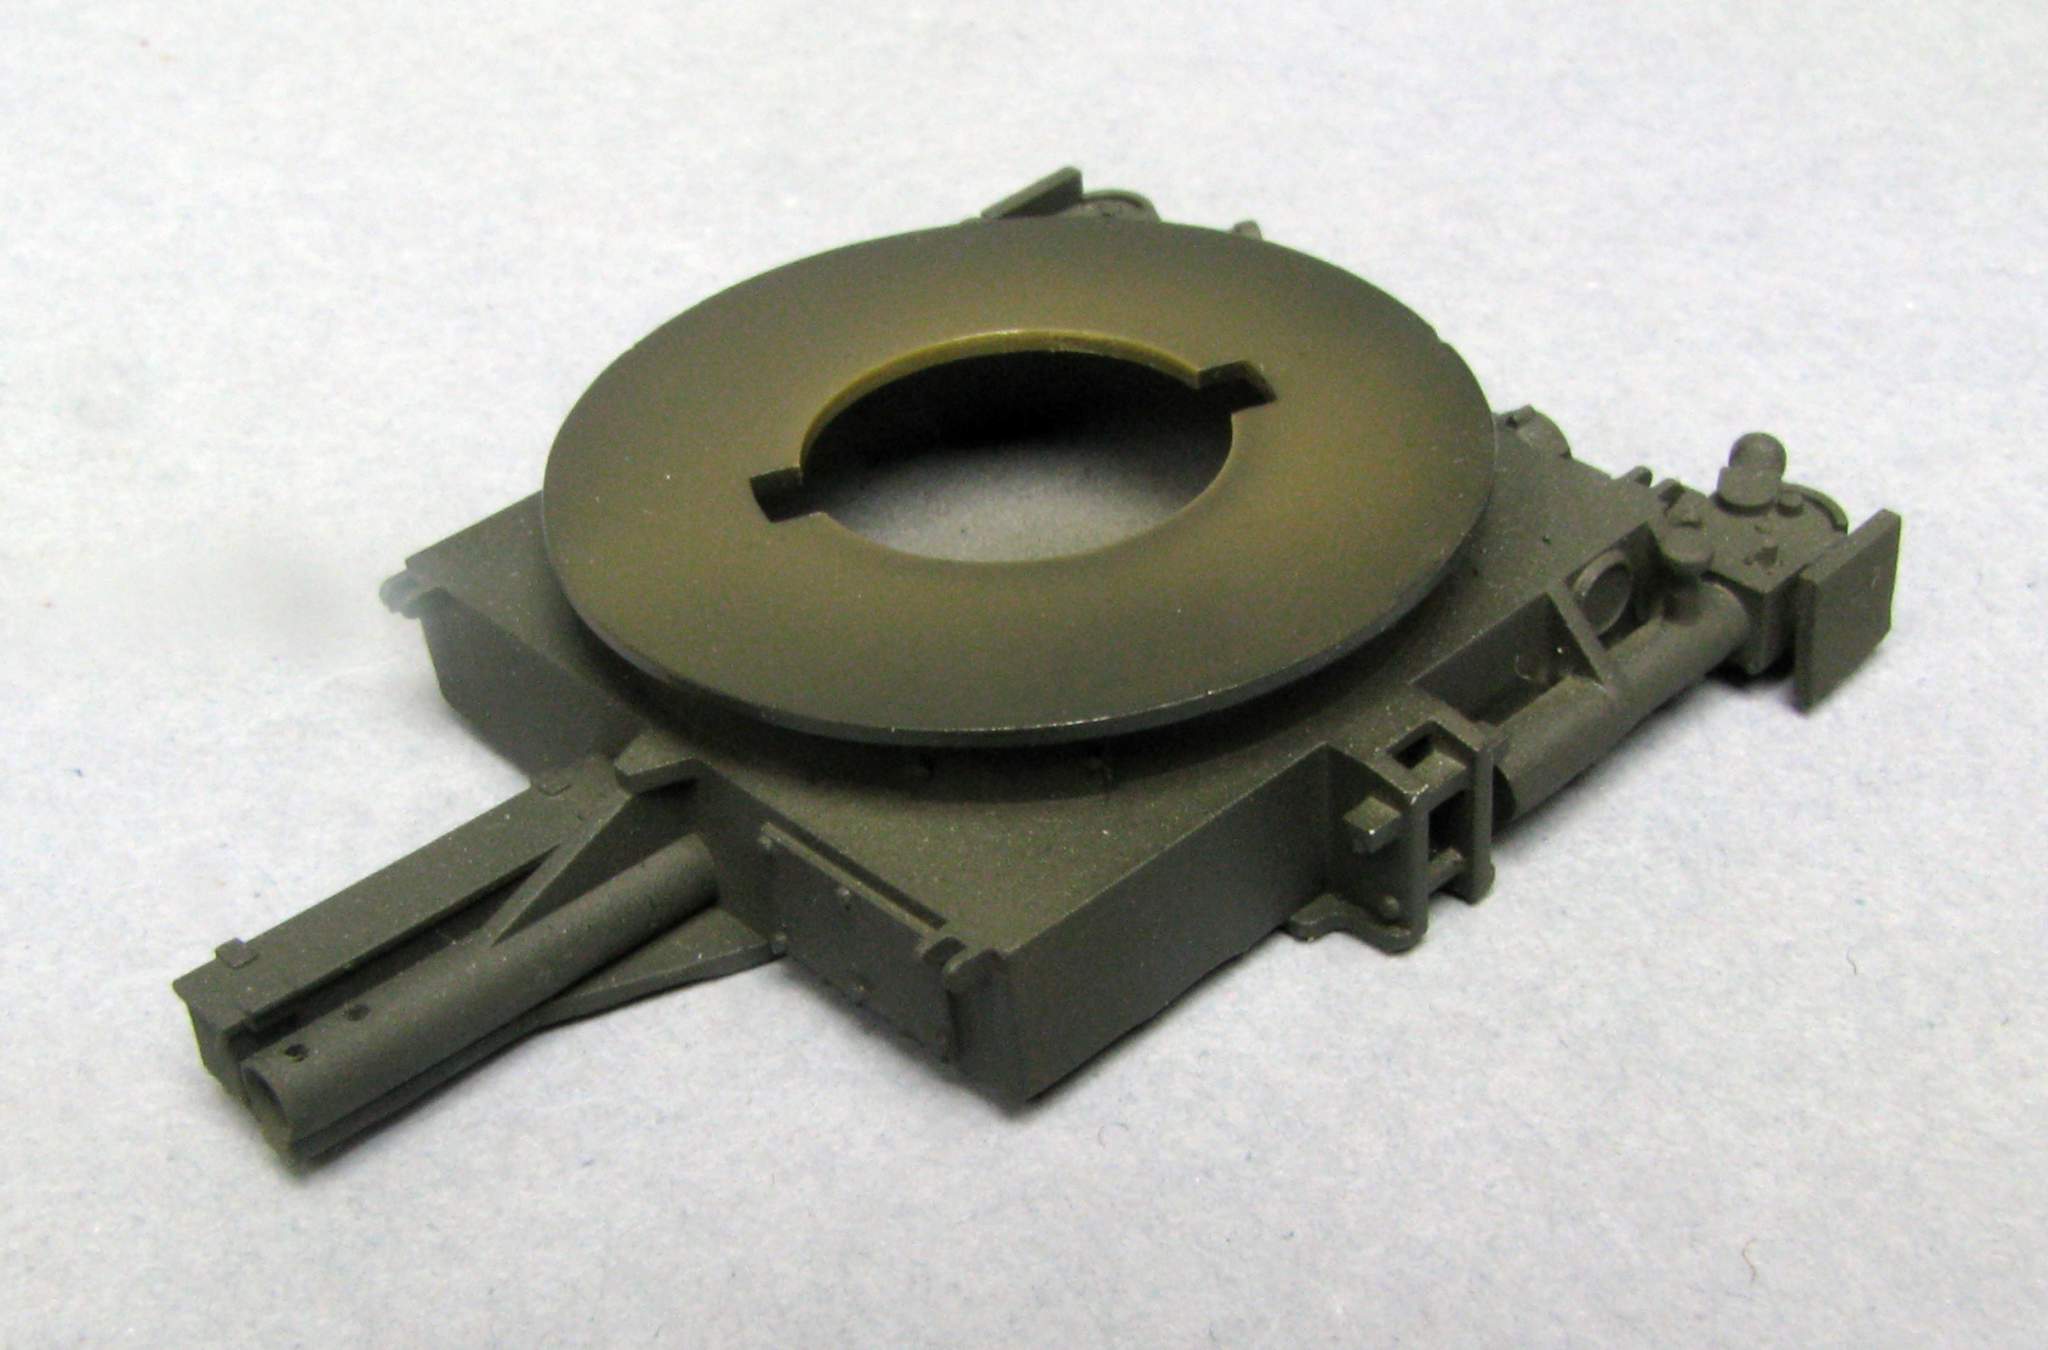
I have completed the M55 quad gunmount as well. It is the Dynamo kit, using the 3D printed Vietnam-specific parts (dark grey). I also used the templates on the Star Decals sheet for the armor for the gun turret.
IMG_20240213_2046366021920×1440 89.3 KB
IMG_20240213_204653234_HDR1920×1440 125 KB
Here it is all mounted in th truck to see how it will look.
IMG_20240213_204557745_HDR1920×1440 153 KB
IMG_20240213_204543435_HDR1920×1440 151 KB
I still have to add some mounts for the gun turret and then a bunch of ammo cans. Then on to painting.
Lookin’ good. Please note, that most gun truck photos show the trailer facing with the tow bar stub towards the front of the truck. This might be important, because the quad has an interrupter circut that prevents it from shooting into the truck cab…
And please excuse me that I come back to my previous posts about the mounting hardware. I mainly mean that funny rectangular frame fixed to the truck bed. Looking at the bolts holding said frame to the quad I believe those frames were still issued during the Vietnam War and looks like it was more convenient to use something readily available than welding something on your own (but I’m sure that was being done, too).
I have pretty much completed construction on the Guntruck. I added styrene angle iron mounts in the armored box to secure the quad mount. I also added bolt heads to show how it is attached. I took some thin sheet styrene and made circular holders for the quad mount tires as well.
IMG_20240218_1117242061920×1440 64.5 KB
IMG_20240218_111745148_HDR1920×1440 147 KB
I also used the AFV Club ammo box set (AF35035) to line the bed w/ammo cans.
The crews filled them with dirt to act as additional armor.
IMG_20240218_1119194151920×1440 143 KB
IMG_20240218_1119376501920×1440 220 KB
Next up is to start painting everything. I may add a few more ammo boxes on top of the armor layer to be additional ammo for the guns as well.
There was some point in the Second World War, I don’t remember where it happened but nervious Japanese AA gunners on some warship were shooting at the moon, stars, etc. And the POed captain chewed them out ‘We don’t have enough ammo to shoot down the moon!!!’
Thanks gents. Gotta have lots of ammo as the quad .50 could spit them out quickly.
I was able to get some paint down this week. The truck is overall Tamiya TS-5 OD Green, which replicates the darker, post-WWII OD Green well. The ammo cans and some of the other smaller items are NATO Green (Tamiya TS-61) for a little variety. The armored box for the bed is flat black from a rattle can. The blue and white on the quad mount are hand painted.
IMG_20240222_102442469_HDR1920×2560 227 KB
IMG_20240222_102537675_HDR1920×1440 165 KB
I was also able to get it up on it’s wheels. I used the Def Model M54 wheels. They are excellent and fit the AFV Club hubs w/no issues. The two spares are from the kit. The multi-direction mud tires usually look very rounded at the edges, while the kit tires look too squared off in the shoulders to me. They work as spares, but don’t look right as in-use tires, hence why I replaced them with the Def Model resin ones.
I used the Def Model Military multi-direction mud tires on the rear.
image700×934 66.2 KB
Many of the gun trucks used civilian truck tires on the front, not sure why, but Def makes them too, which I also used.
image1280×1280 127 KB
The truck all ready to go.
IMG_20240222_1023590241920×1440 143 KB
IMG_20240222_1023444041920×1440 158 KB
Next up is decals. The Star decal sheet provides all the decals for the gun truck. The quad kit decals have a bunch of extra ammo can decals, so I will be adding some to those in the bed too. I will probably add a few various placards here and there as well, we shall see.
I won’t have an update for a while. I am off to VA this weekend for my youngest granddaughter’s 2nd birthday. So cake and fun for a few days and no work on the model.