Overall, it’s a nice kit. Unfortunately, I didn’t use much of the additional parts in the kit.
The PE parts were very very flimsy. I’m too used the Eduard’s stuff I guess.
The dust cover didn’t really fit or look right when on the turret.
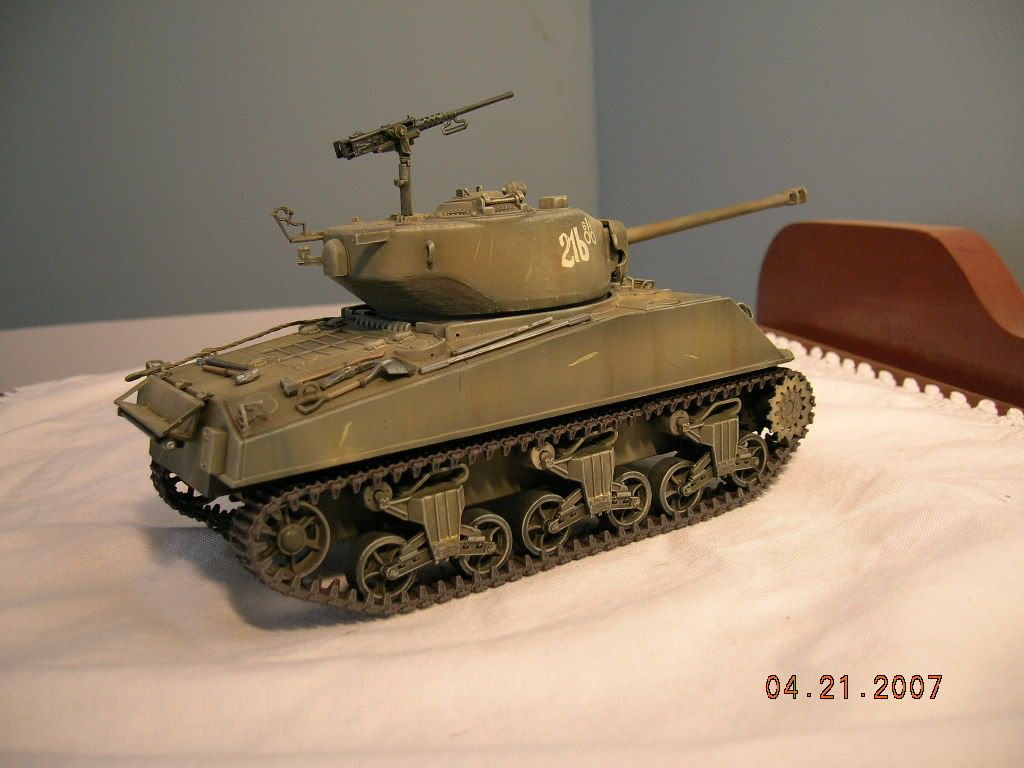
The turned aluminum barrel was longer than the plastic one (1/4"), and sort of didn’t look right on the kit.
I don’t know which barrel is the correct size.
Aside from the extra parts, my only complaint(s) were with the tracks. Per the Finescale review, the tracks were too long. The review said that they were 2 links too long. I cut 2 off per side and found them too too tight. I had to add one back on to each side. [:)] They are still a little tight. The funny thing is that I dry fit the original sized tracks and they seemed way too big. The other problem I encountered with the tracks was that they didn’t like being in contact with enamels.
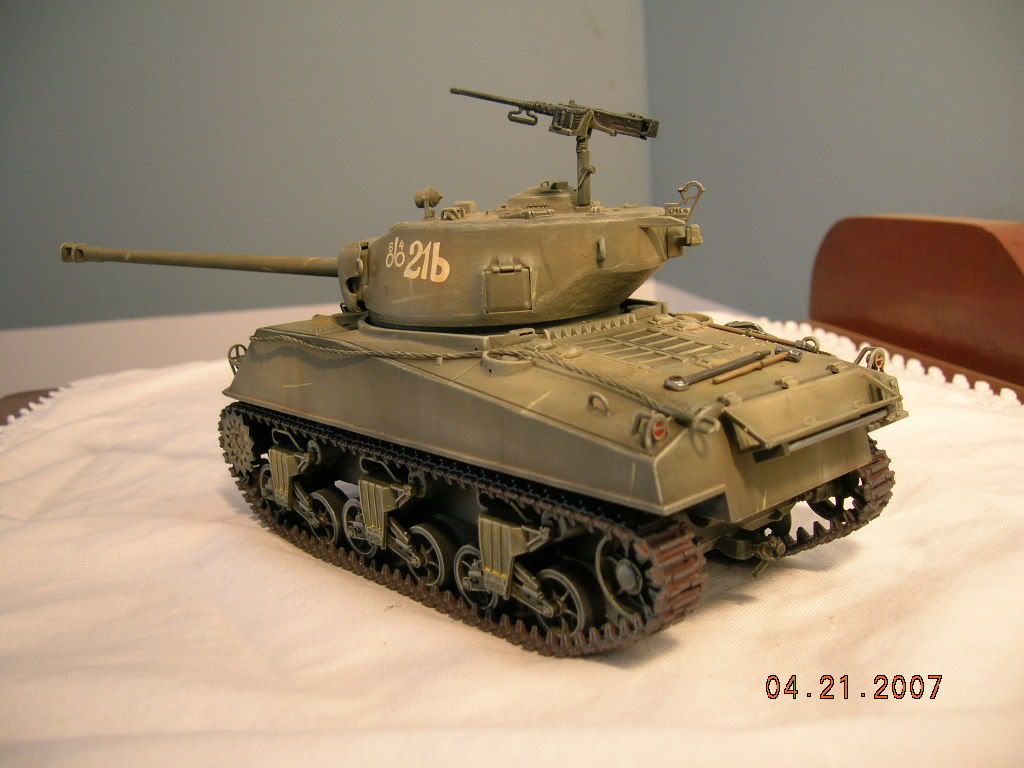
Hey Roo, quite a nice, clean build there!! Good paint, and very nice weathering! The only thing I’d change is the little streaks of dirt; they kinda stand out like "shooting stars " a bit too much for me.[:-^] Can I suggest a different technique?
Try loading up a big, fat brush–like your wife’s “blush” brush in her makeup kit!–with dirt color and empty most of it, just like you were gonna drybrush with it; then stab at the hull,etc, with the brush–you’ll get a nice “splashing” of dirt that really looks more realistic.
Other than that, it’s great, and the tracks look fine.The weathering on the tracks is a big improvement over the last one I remember that you posted!
I know what you mean about “mucking it up” Grant. I think it looks really well done. That’s about how I’d do mine too, just enough weathering to bring out details without hiding them up.
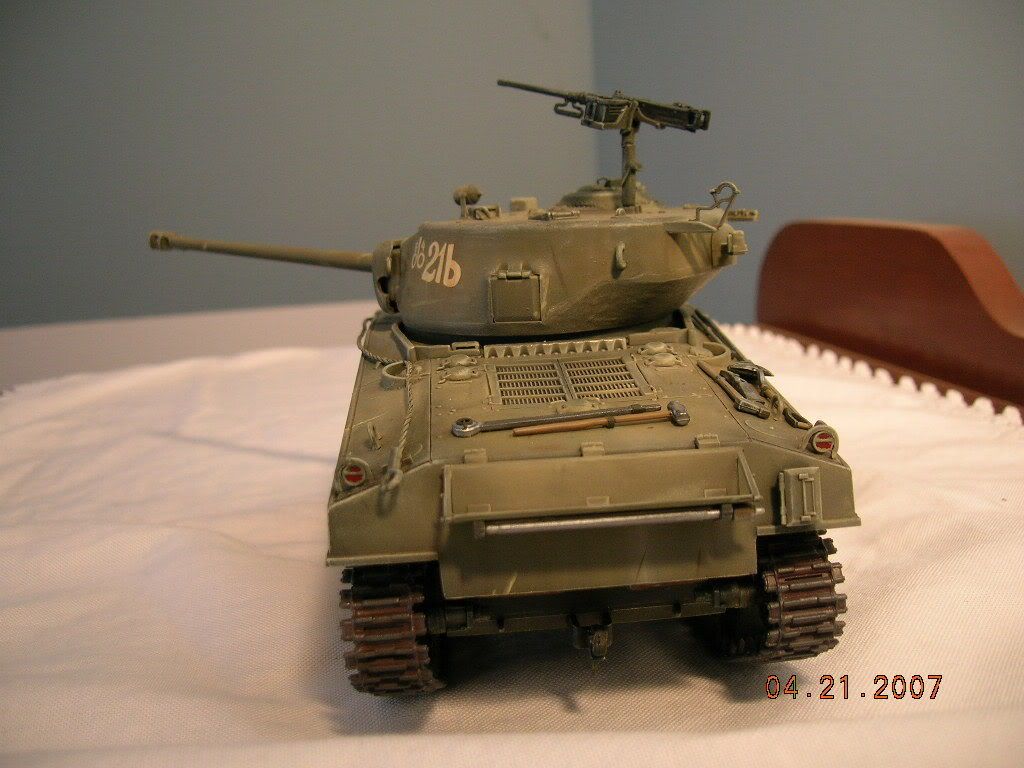
Great looking Sherman there mate, I am building this exact kit as my first foray into armour. I have one question what colour did you use as your main finish, the Dragon instructions I have seem a ittle vague on this and your colour choice looks spot on to me.
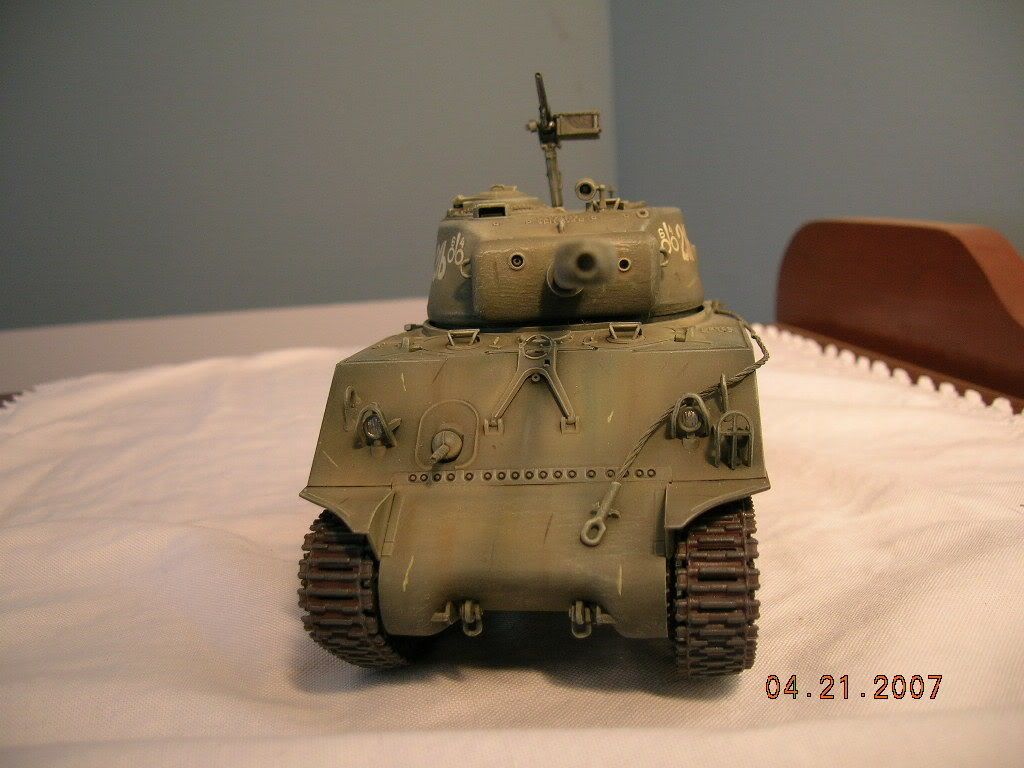
Grant: that’s one nice looking Sherman. That Soviet 76mm one is nice! A couple of items that you migh want to correct:
taillights: only the top rear left oval lens was red. All the others were black
lifting lugs on engine deck corners: they were perpendicular with horizontal and not to the angle of the engine deck itself
Final item is return roller arms should be the upswept type and not the horizontal type – this one would be difficult to correct however.
It is a nice kit. One thing…use the upswept trucks. I used the flat ones to be different, and I don’t like how they turned out. I think the upswept ones are of better quality and fit.
My paint color is average of Tamiya XF-62 Olive Drab since it came from the states and I didn’t know if “Russian Green” was applied to “USA Drab” Shermans. My coats of paint went like this:
2/3 OD and 1/3 a mixture of black and brown
Pure OD but diluted 50/50 with alcohol
2/3 OD 1/3 White diluted 50/50 with alcohol
20% Tamiya Buff and 80% alcohol
Coats 2, 3, and 4 were highlight coats only placed on the center of each panel. This was done to keep the dark color in the recesses.
Hi Grant: The upper left light lens was oval and red. Beneath it was actually only a rectangular opening. Inside of it were the distance indicator blackout reflectors. I forget what the right side lights upper lenses were for. Again, it was an upper oval lens and the lower lens was rectangular.
Some postwar restorations have a red lens on the right side due to civilian roadway requirements. But it’s strictly non-military and were only on restorers’ vehicles.
Very well done. I’m loving the subtle effects. You can see the effort through which you went to keep the weathering subtle. The fading and hints of streaking really add to this piece.