Hi guys,
Remember me?!? [&] Yeah, it’s been a busy year, for sure, and I haven’t had much time at the bench. Been traveling a lot, got engaged to Jenn, and I’m back out the door to Spain on Tuesday–but I managed to find some time to sit down and start a new WIP. I thought I’d throw you all for a bit of a loop by doing something in Olive Drab! lol!
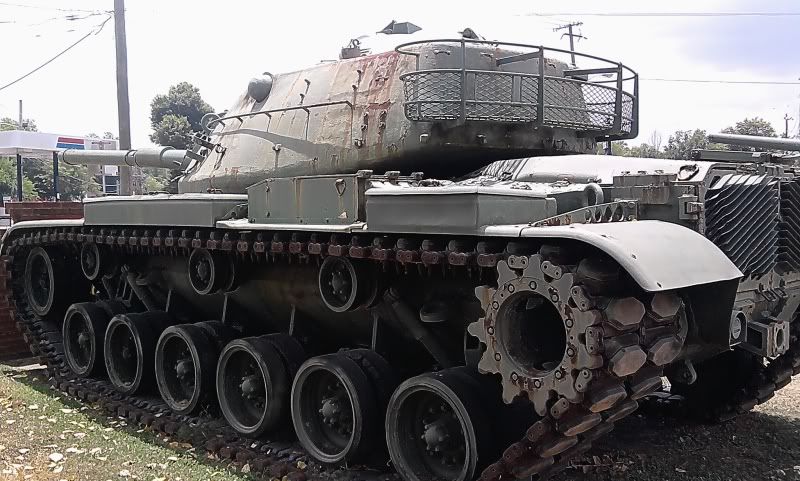
I’m sure you’re all familiar with the Tamiya M48 Patton. The Monogram “Patton tank” was actually the first tank I ever built, so this one has a bit of nostalgia for me. I got some goodies to dress it up, and hope I still have what it takes to make a decent model these days!
Here’s what I got;
!(http://i170.photobucket.com/albums/u244/heydoog/M48 Patton/faf36c8e.jpg)
The tracks are pretty much a necessity; the Legend kit there has a nice mantlet and accurate jerry cans and stowage; I’m going to put a dozer blade on it (unless someone tells me that it’s not accurate for some reason–but I do have quite a few photos with it) and of course, I have some Verlinden figures to go in the hatches.
The first thing I did was to drill out the lightening holes in the sprockets. It’s a tricky thing to get these even, but I’m happy with the results–thank God for Dremel tools, lol.
!(http://i170.photobucket.com/albums/u244/heydoog/M48 Patton/1.jpg)
So now comes that suspension mod, because the model is based on one that had no engine in it, so it sits high. (Thanks to HeavyArty for providing the nice list of corrections and mods that are recommended!)
The way I did this was to glue ONLY the mounts for the suspension arms to the hull; the actual arms to which the wheels attach were left UN-glued. I decided that the easiest way to lower the suspension was to saw the little shock posts there–as I saw through them, the wheels fall away, as they aren’t glued. They will be cleaned up and then glued at once, so that I can then position them all at the same height together.
!(http://i170.photobucket.com/albums/u244/heydoog/M48 Patton/2.jpg)
And when they were all snipped and cleaned up, I put the wheels on and glued to posts to the ends of the shocks now. I’m not sure if this was the best, or most accurate way to do this, but in my modeling book, it says “If it looks right, it’s fine”. [whstl]…[;)] It DID lower the sit of the beast…
!(http://i170.photobucket.com/albums/u244/heydoog/M48 Patton/3.jpg)
Next, you have to fill in the motorization holes;
!(http://i170.photobucket.com/albums/u244/heydoog/M48 Patton/4.jpg)
…and the weird open area above the rear idlers, and there are also little slots by the front sprocket…
!(http://i170.photobucket.com/albums/u244/heydoog/M48 Patton/5.jpg)
Next, you have to shim the turret to increase the turret height. Here’s how I did it. First, with my MicroMark mini-chisels, I scrape away the line-up moldings inside the turret floor…
!(http://i170.photobucket.com/albums/u244/heydoog/M48 Patton/6.jpg)
And then I trace the outline from a piece of plastic that is just shy of 1.5 mm thick–no, I don’t know exactly the dimensions; this was a piece of scrap. I literally cut it out with these gnarly scissors.
!(http://i170.photobucket.com/albums/u244/heydoog/M48 Patton/7.jpg)
And then sandwhiched another thinner piece of reddish styrene in order to bring it up to 1.5 mm. I clamped these and let them sit.
!(http://i170.photobucket.com/albums/u244/heydoog/M48 Patton/8.jpg)
I needed to put some Squadron putty to smooth out the joint, which was eventually sanded and polished to shape.
!(http://i170.photobucket.com/albums/u244/heydoog/M48 Patton/9.jpg)
The “Tweaks list” says that the kit is known for the fender supports being overscale and rec’s replacing them with either PE or scratched ones–I just spent some time thinning the kit parts with a good ol’ #11 and some emery boards. I think they look fine.
!(http://i170.photobucket.com/albums/u244/heydoog/M48 Patton/10.jpg)
Another fix–roughening up the casting. Using my Most Valuable Modeling Tool–the Dremel–I bounce and swirtl a metal-gouging tip around.
!(http://i170.photobucket.com/albums/u244/heydoog/M48 Patton/11.jpg)
Then coat it with some Testor’s Liquid glue…
!(http://i170.photobucket.com/albums/u244/heydoog/M48 Patton/12.jpg)
And this is what I got.
!(http://i170.photobucket.com/albums/u244/heydoog/M48 Patton/13.jpg)
And the hull…
!(http://i170.photobucket.com/albums/u244/heydoog/M48 Patton/14.jpg)
I dunno if I screwed this up, or if this is how the kit joins in front? Either way, it’s not doog-worthy. The real tank had a sharp hull front, but not THAT sharp with the overhanging lip, lol.
!(http://i170.photobucket.com/albums/u244/heydoog/M48 Patton/15.jpg)
I put a .060 rod in that gap, and then sealed it in with White Putty. After it had dried a good 8 hours or so, I filed it into shape with a combination of sanding sticks, sandpaper, and my Dremel with a grinding stone head.
!(http://i170.photobucket.com/albums/u244/heydoog/M48 Patton/16.jpg)
I threw a quick coat of paint on it to see how it’ll look. Not bad; I’ll take it…
!(http://i170.photobucket.com/albums/u244/heydoog/M48 Patton/17.jpg)
To mount the gun, you have to cut here on the kit part to mate it to the LEGEND mantlet.
!(http://i170.photobucket.com/albums/u244/heydoog/M48 Patton/18.jpg)
The loader’s hatch–MOST un-doog-worthy–and not even accurate. You can see the part “opened” on the left, I decided to just make a new one. IN the middle the hatch is shown "closed; I cut out a blank from .040 plastic, and then checked the fit…
!(http://i170.photobucket.com/albums/u244/heydoog/M48 Patton/19.jpg)
Using my ol’ Dremel, I hollowed out some of the recesses in the hatch—you can see the real one there from a Verlinden M60-M48 update with PE that I remembered I had. I only am using a very few pieces from this. (The fender stays were inaccurate for an M48, by the way). I also put a .020 x .020 strip around the edges to simulate the sealing rim.
!(http://i170.photobucket.com/albums/u244/heydoog/M48 Patton/21.jpg)
Add the PE periscope cover-thing, and a latch, and the rest was made from strip. The springs on the back were made by wrapping a piece of wire around a needle. The handle’s a piece of wire.
!(http://i170.photobucket.com/albums/u244/heydoog/M48 Patton/22.jpg)
And that’s where I am so far. Like I said, I’m outta here for another three weeks or so on Tuesday, so I wanted to get this up before I leave.
ONE THING!!-– anyone who sees anything inaccurate, or any of you older guys who were in the 'Nam, PLEASE do not hesitate AT ALL to send your ideas, comments, and critiques my way. You guys who know me know that I SINCERELY appreciate critique and criticism–you guys made me the modeler I am, and I"m not going to start thinking I’m too good to learn. SO don’t hold back because of the regrettable episode here just recently–LET’S HAVE IT! [:D]
It’s good to be back! [^][B]


