So the basecoat is Tamiya Nato Black flat. Air brushed on top of badger primer. I then airbrushed Pledge floor care for a sheen and decal application. I used Micro Set & Micro Sol according to directions, but right away i noticed that the decals were not laying completely flat w/o air bubbles(i guess)… See pictures marked “last night”, after application:
What caused this? Surface not completely smooth? Should have used another coat of PFC before decal application? What can i do now to make them look better? I applied extra MicroSol and tried to work them down last night but no luck. Heres today:
so the “today” shot was after I tried to fix it but just left it to see what it would look like today . Guessing I didn’t apply enough gloss before the application. Just got finished brushing on some more on the other spots that will get decals. And popping some of the bubbles to lay in some micro sol.
so i just noticed a big noobie mistake i made. Aghhh… When i put the tail decals on, i mistakingly placed them parallel to the tail rudder, i guess so they looked even to me as the plane was sitting… Another lesson learned.
In looking at your yesterday pics it looks like either the primer, color, or pledge coats went on too dry and gave you a “pebbled” surface.
Try getting the coats a touch wetter on the next build. Practice on scrap, spoons or a plastic for sale sign. Be sure to do some practice on a vertical surface. You want wet, just short of runs and sags.
Where you’re headed is good on decal fixes, but I don’t think you will get rid of all of it.
I was looking at your wing pictures and saw a lot of dust and lint on them. You might try covering your model after you coat it with Future/Pledge to keep the dust off it. I agree with the others, you definitely need more gloss on there. It looks to me like you were holding your airbrush too far away and it was drying just before it hit the surface. Try misting the first couple of coats on then move in closer to build up your wet coats. The early mist coats will give the latter coats some teeth and help prevent runs. Like the others say, practice, practice, practice.
Tks. The “today” shots were the day after and i tried a little clean up and wiping with paper towel but before i attempted a 3rd go 'round - hence the lint… Yes, i suspected not having enough laid down, but need confrimation. Thanks much for the tip and for looking! Appreciate it as feedback is critical in addition to the mistakes. Ugh… Gonna post a pic of the contraption i used to help keep some dust off - I swiped a net dome the wife uses to cover cheeses when laid out!!
Tks for looking and for the feedback. Thats what i suspected. Practice, practice… One time i laid on too much and made a mess. I guess i went too far in the other direction this time. Need to build more!! to get the hang of it. This is where i stand on the corrections. Think im gonna leave 'em alone now… Im in the process of brushing onmore PFC to the remaing areas - dropped the airbrush and bent the tip.
ok, so i decided to do just about all of the rest of the decals by setting them w/ pledge. I would dap a little PFC, then lay the decal, press then a little more to cover… I think it worked out ok. All is drying now. Have to decide if im gonna seal it gloss(PFC) or acryl semi gloss - for maybe more a sheen and a little less bling…
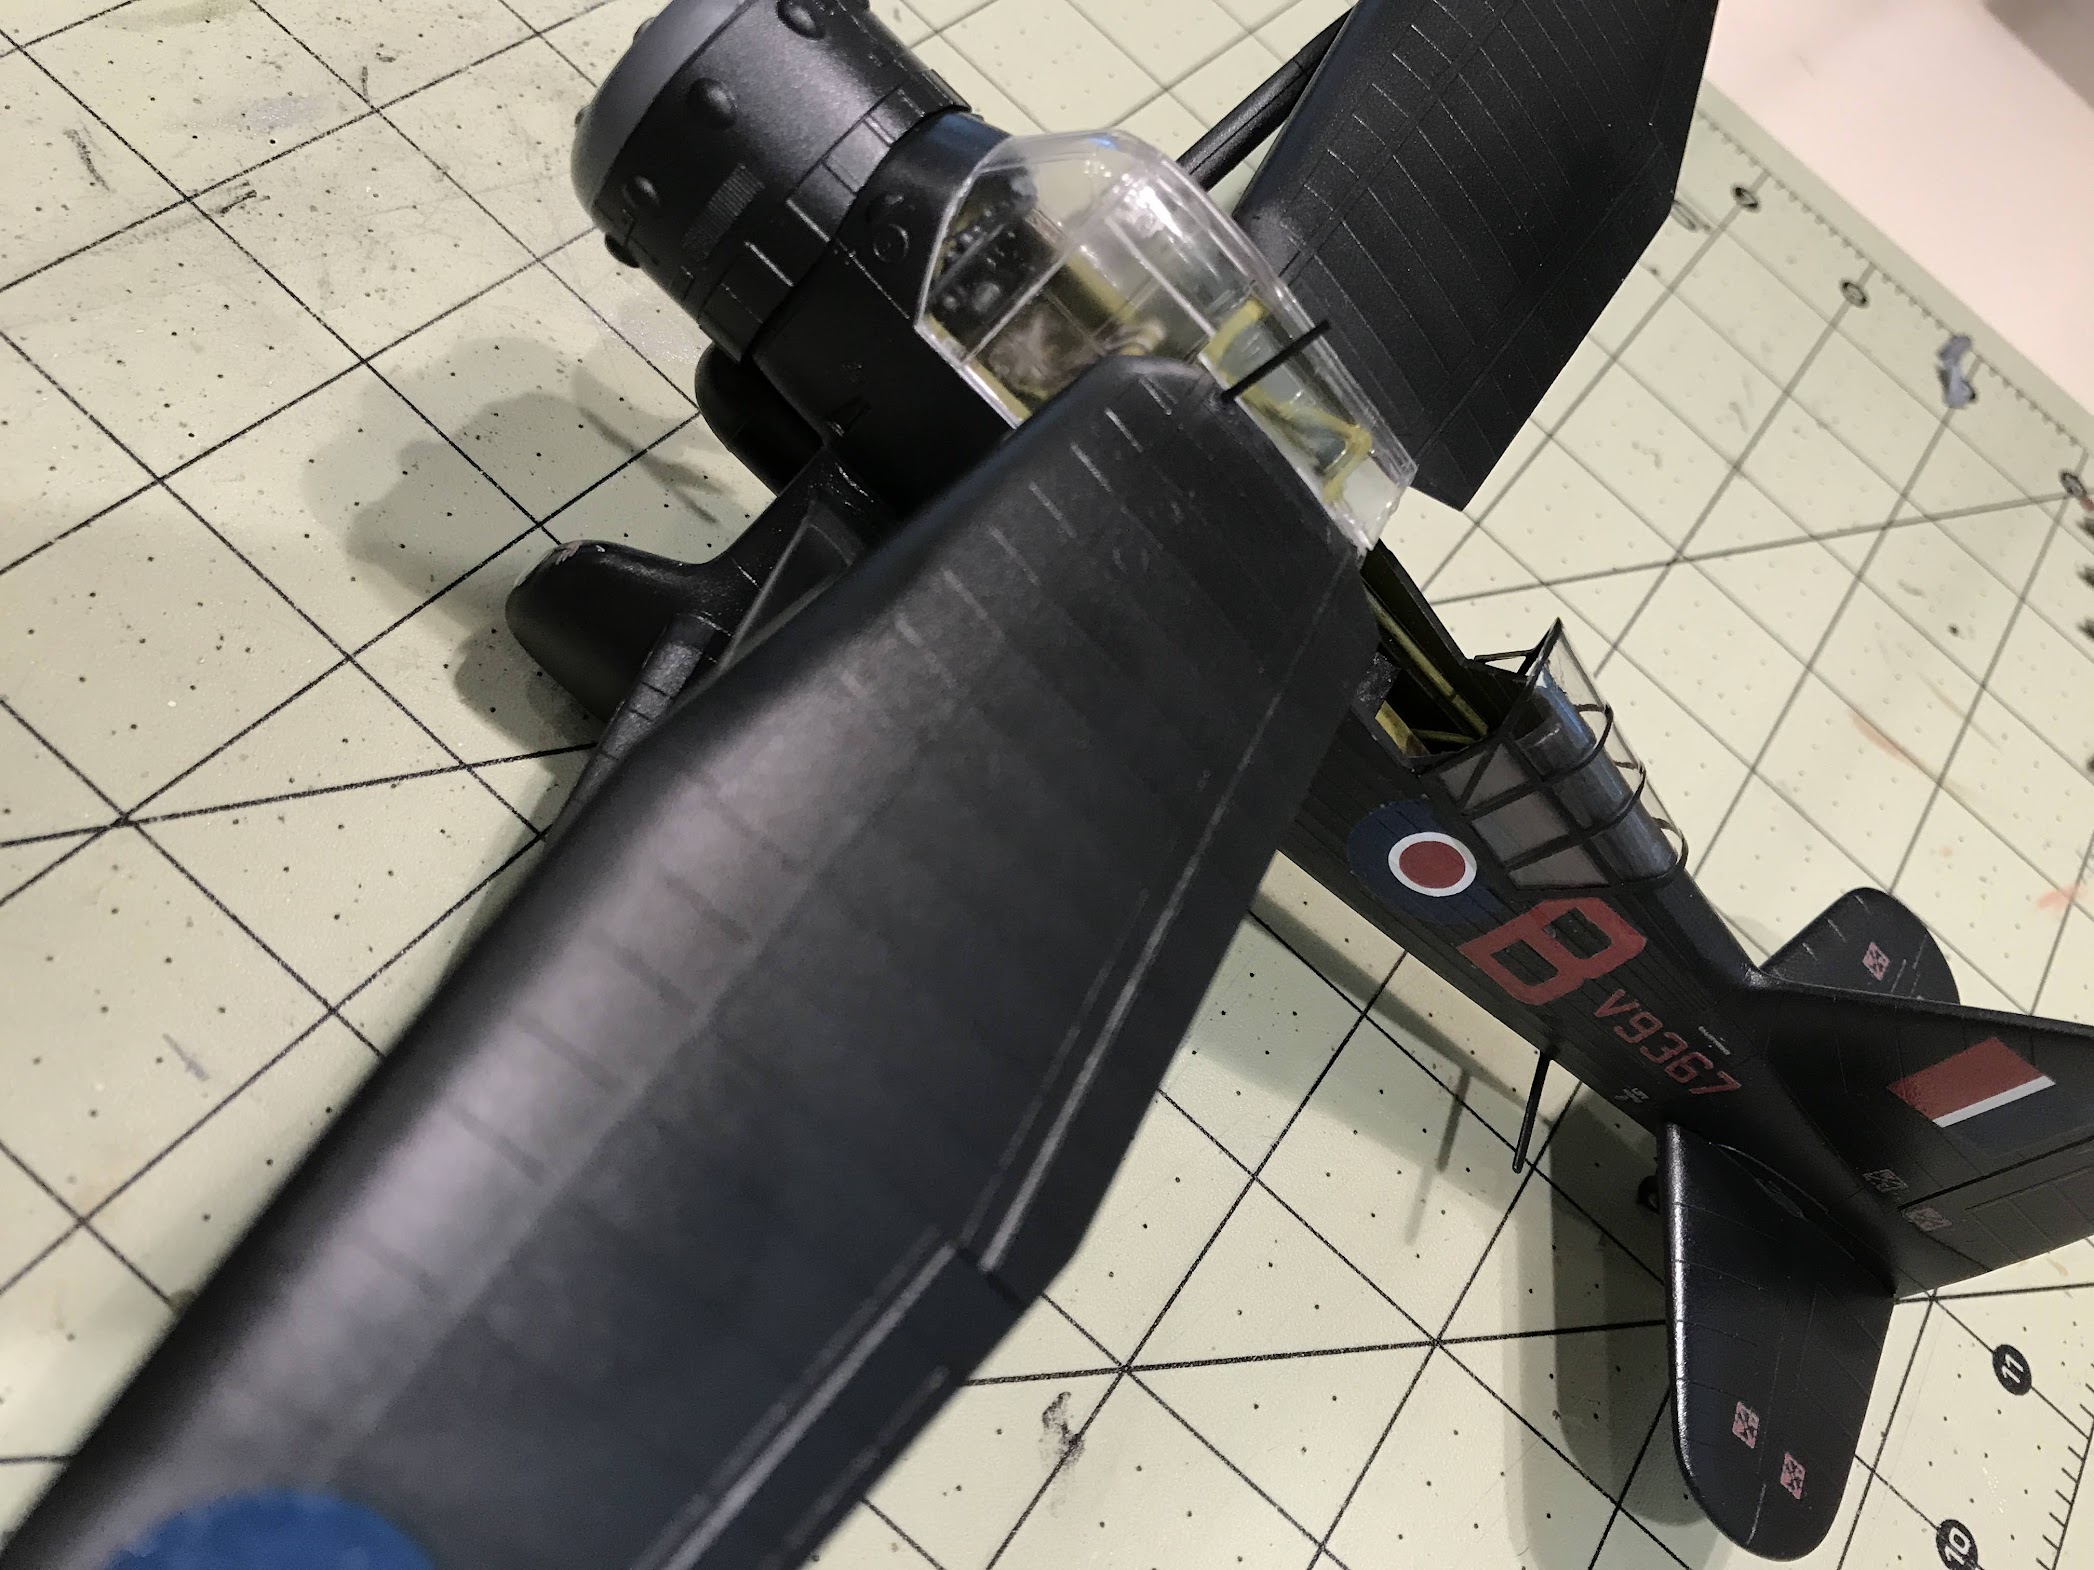
Tks Bill. Once again learned a lot. That darn 4 piece forward canopy gave me fits. Attaching wings too as i have no real aircraft stand and the interior cockpit framing was a tad skew causing the wings not to be entirely straight across. That said, when i set them i was a little off too due to poor gluing. Then the struts were a little off also - the domino effect!
Question - there is a small gap between the rear (Wing? stabalizer? (not sure of proper terminology) and fusulage. I have attempted to fill w/ elmers but it sank in a little when it dried. Would you attempt to fill(for experience) and if so, what to use and can it be painted w/ tamiya acrylic? Or should i just try to paint over what elemers i can see - once again - do i have to priime it or can i just paint w/ tamiya?
For filling narrow gaps like you have between the fuselage and wings or horizontal stabilizers, I like to use perfect plastic putty (PPP). Can clean excess off with a damp q-tip. When dry brush touch with your Tamiya.
tks for the tip on the filler. I had some acrylic vallejo plastic putty and tried the smallest dab. When I wiped a little excess with a damp cloth, it pulled some of the pledge - I’m guessing or the smear left a smudge type mark. Anyhow, I don’t feel like messing the finish I have so another lesson learned - fix all boo boos before finishing! Who make the PPP you mentioned?