White decals, especially large one can be a bit of a pain as the darker colours often show through, another good reason to paint.
Might be a good idea to just use the decals as a masking guide since they should be designed to fit the kit.
Ed, that’s a good idea. I believe I will do that.
I was considering trying to free-hand them…to try and achieve an authentic look. But the more I think about it, the more it sounds like a bad idea. ha-ha
Probably only really good for spacing the stripes. It would at least give you an idea if you are way off.
From looking at a boatload of D-Day photos to does appear that everybody’s stripes were a little untidy. It was all “hush hush” (like everything before D-Day) so everything was done on the fly by groundcrew. When working at model scale, doing it all freehand would be almost impossible. I did find, however, that if you masked the plane and then hand painted the masked stripes that some of the irregular quality showed through:

I don’t know how long it took, but it’s pretty clear that at least some planes were repainted in following weeks and appear tidier. I doubt there was any hard rule on the transition, so you’re fine regardless. I too would mask it. Actually I don’t like any big decals - only the very best look okay. I’ve never worked with either dry transfer or stencils (except those I’ve made myself) and it would be a good idea to try.
Eric
Eric, do you know the scale of the kit in your picture? I’m debating weather to spray of hand paint in 1/72.
68, that’s a 48th kit, its the one on the front page Eric did for the GB.
In my previous post on the Sherman I noticed that the TC’s aiming vane was broken, so I had to procure a replacement turret. This was done last weekend.
the interior is painted in MM primer white (the first turret was in PS dirty white and looked too yellowy. (is that a word?) 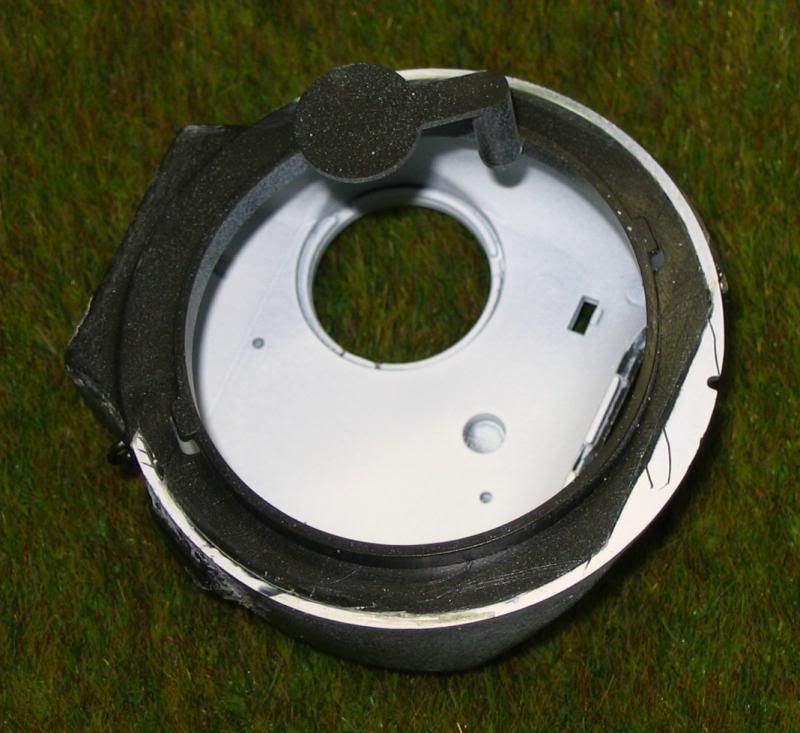
the rear part of the M3 main gun, again in primer white with the breach block painted Humbrol (Metal cote) gun metal 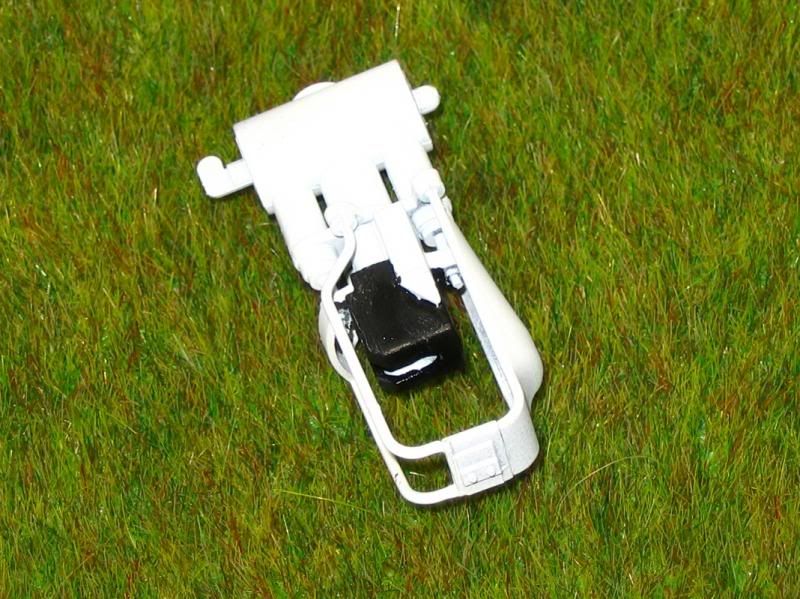
the turret pistol port puttied (as previously stated, the port was cast in 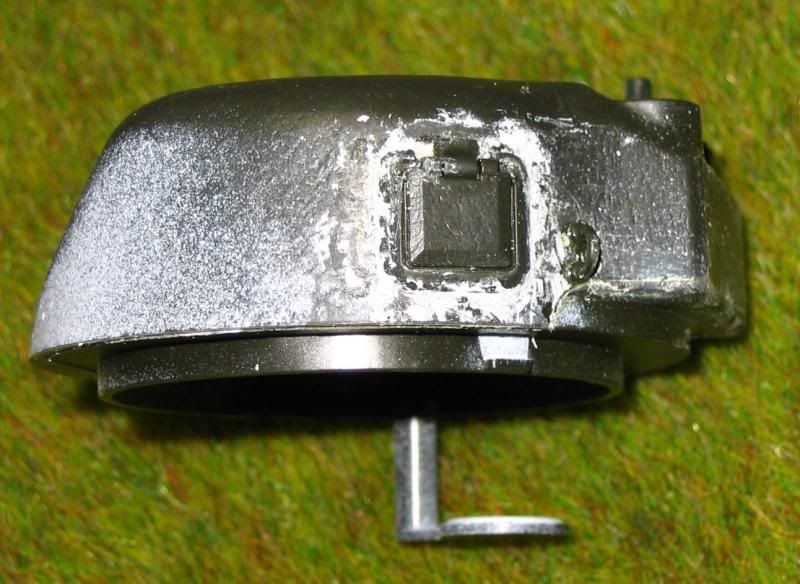
if I can find some casting numbers I might add them also, but I’m not sure I want to get all anal on this build.
Got the painting done on the Panther today. I was originally going to do it al with Vallejo Model Air. I got the 4 main Panzer Colours last year but was yet to use them. The DY went on ok, a bit thinner than what I am use to. But I wasn’t to keen on the green, it seemed way to thin and didn’t cover the zimm on the turret very well. So after a few minutes I switched to my usual Xtracolour enamels and finished the green and then did the brown. This was all done free hand and I’m really pleased with it. I have been getting some practice at airbrush control doing mottling on German aircraft and I think its paid off.


Next up is the decals, there is only the unit and national insignia, no turret numbers. So I am going to give the wet future trick a try. After that, some oil dry brushing. That will mean lots of time leaving it to dry, so this week I will be concentrating on the base and figures. I don’t want to add this to the queue of armour waiting for dio’s. I haven’t finished an armour dio in years so I need to brush up and I have been reading up on painting SS uniform camo, so will see how that works out.
Nice work Greg, was there no way of fixing the aiming vain.
I decided not to go all anal on the Sherman and am just building it with a few add-ons.
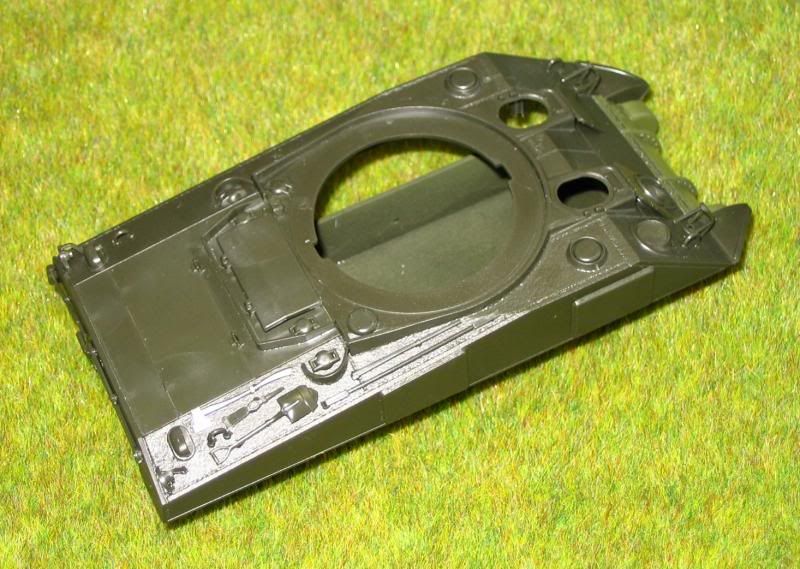
This week I managed to mate the upper and lower hull together and add the bits & bobs, as they say. 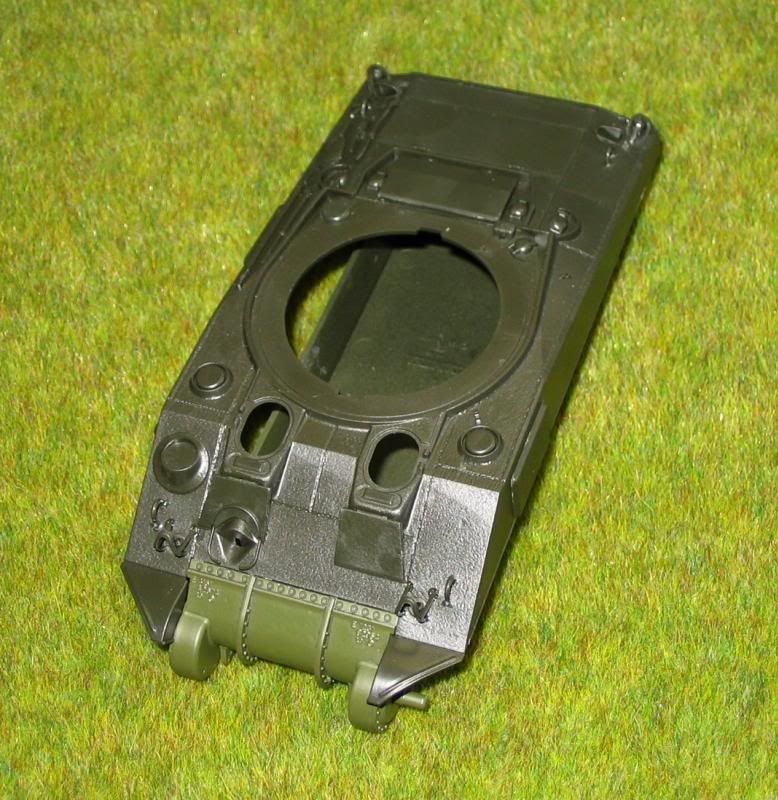
Here’s a few ammo cases that’ll be added to the engine deck 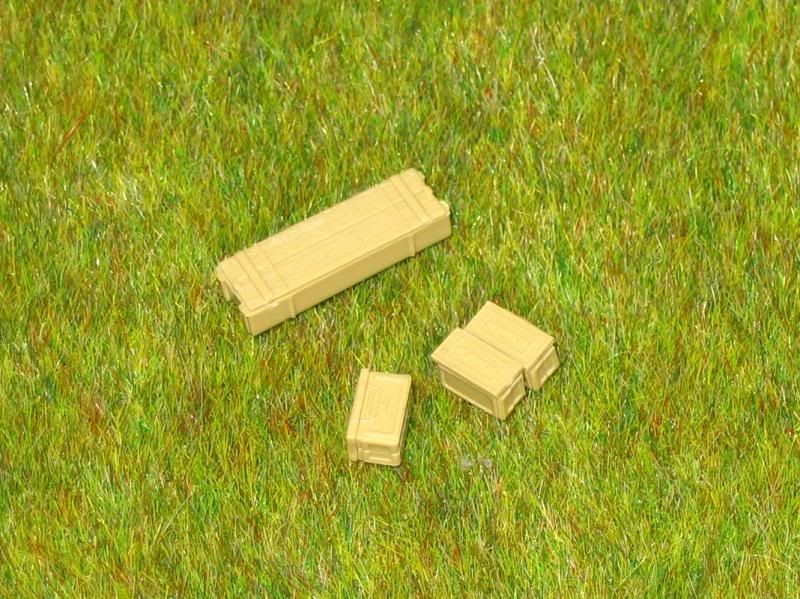
Eric: nice prison…ermmmm…invasion stripes on that RAF Mustang!
Bish: Holy cow…that’s an impressive camo scheme! Uhmm…the aiming vane is fixible, but it was easier to just scavenge a turret for now.
68GT: The P-51 is coming along great! I tend to mask and paint the invasion stripes, I used decals when I was younger but it never seemed to work very well. I’ve always painted the stripes, masked them and then done the rest of the plane though.
Greg: Looks great, really like the work you did to fair the pistol port in the side of the turret there.
Bish: Super work there on that crazy camo scheme. Some serious free-handing talent there!
It’s 1/48, although I’d think a 1/72 would work about the same. I did use Golden Fluid titanium white and carbon black which are the most opaque paints on earth and a small brush. Vallejo Model Color would also work. I’ve never really worked much with MM. I wouldn’t want to do much hand painting with Tamiya. You’d want to use masking with either technique I’d think.
You could mask it and spray it and then on the underside try a little overpainting with a brush - no need to get close to the edges: might give a little brushed-on look. If you don’t like it, leave it alone or give it a couple of passes with fine sandpaper. Doubt anyone would notice. I do small medical experiments on out of the way parts of my kits all the time. Gives you a better idea of whether a wash/filter or whatever will work on the kit better than trying something on spare plastic.
Eric
Seems like putting the stripes on top of the olive drab would be best…most like real life. And I like the idea of brushing it on. If you’re going to airbrush on a very opaque, very even coat of paint you might as well use decals, right?
So I was thinking that the stripes were painted around the insignias and possibly the code letters. Am I over thinking this or should I just apply the decals over the hand painted stripes? If I was spraying the stripes I wouldn’t even give it a thought.
Going to put some clear on tonight and contemplate the stripes.
Was going to hand paint with Reefer White.
(http://s67.photobucket.com/user/Scode68/media/Models/P-51/P3300003_zps0b1decef.jpg.html)]

Seeing as I’m on spring break I thought I’d take some time and preshade my LCVP. I saw an interesting technique here that I thought I’d try. I’m not nearly as good at airbrushing as he is, and for some reason I can’t get a very fine line with my airbrush so I’m not sure how well it turned out. We’ll have to see how it looks after I paint the grey on.
Preshade 1

Preshade 2 (for some reason the camera didn’t pick up the brown very well)

Also, my Academy machine guns came in today [:D]. Here they are compared to the kit guns, I’m really glad I bought them.

Bob: nice choice on the Academy MGs.
The Academy .30 cals are a huge improvement. Try dialing down the pressure a tad on your air source and see about getting a finer sprayed line.
Most of my bench time today was spent here- tail gunners compartment. I added strip and channel detail to the rear bulkheads that I made up recently


then a floor board using some sheet and half round strips as well as the tail gunner’s seat- apologies for the neon green card background, but the white plastic on white paper does not contrast well, teh green card was handy

rubber banded fuselage for a test fit with the gunner’s armor in place

then a test fit of the stabilizers

All I need to do in the rear is scratch up the ammo cans for the waist guns, added the flex ammo chutes, and build the top turret… more coming soon…