LIS Chariot 1:35

Hey Greg, nice to hear from you.

It amazes me how much we see things the same way. I was thinking the same thing about warm white, that it fits the era of the show. I was hoping someone would see it that way because that is why I wanted to go with warm to begin with. That settles it then. Warm it is.

Thanks for sharing your thoughts on it. It is not not an easy thing to do sometimes. I appreciate your input.

Steve

Interesting side note from those ā€œsnoā€ tractors, they use inflated tires rather than solid ones (this is said to improve the ride).

An obsessed person might consider adding valve stems to the wheels. But would realize that’s jsut the sort of fever dream Dr Zaius and the Carrot People would inflict on a person.

Might be cool to find other 1/35 kits to pose with this one. Whether that would be sublime or ridiculous becomes an issue, of course.

Some of the Soviet ā€œObjektā€ tanks might make an interesting counterpart.

And, of course, neither dinosaurs nor a giant squid would be entirely out of place in a LIS setting [:)]

Good points, Capn. And interesting nugget about the tires.

A snippet of work tonight. LEDs are wired and mounted. Lenses are still not mounted for this image.

Btw. I find UV resin a nice tool for things like this. I used UV resin to position and hold the LEDs in place until I could bring the big gun out… JB Weld.

Lastly. With the LEDs mounted it was easier to I retest the lenses. By cutting the mounting nubs as far as I can go… they are fine as is. There is no depreciable reduction in light. Long story short… no need to make new lenses.

From the start I planned to not use the plastic curtains. I am not a fan of what they designed here. Tonight, I put them in place to get a feel for the landscape and wow, they look worse than I imagined. I will fabricate something more realistic and fitting.

Here is an image of the replica and how the curtains look.

I looked at the other light housings with this kit and I figure might be able to light them too. It won’t be easy, but I have done similar before. So maybe.

Those curtains certainly seem to want being made out of extra heavy-duty foil or lead foil or the like.

Something tells me that was a hot glass box to ride around inside of.

Hmm, might be a notion to show the Chariot in a Proving Ground situation, which would offer opportunites for people with clipboards, lab coats and the like. Which would also allow having a contrast between a ā€˜mundane’ vehicle and the "space tech’ new.

And not having to do ā€œspace terrain,ā€ too. (Although the opportunity to render purple grass and orange dirt and lavender trees is not to be scoffed at.)

Again, looks good Bakster! I am impressed how the lighting is going.

And as usual the captain has some good advice! I like the idea of foil curtains.

Maybe you can find a ā€˜Baby on Board’ sticker for the rear window- though I guess ā€˜Robot on Board’ might make more sense.

It’s looking great.

Life is keeping me busy and limiting my time at the bench. Still, I do get time at it. A little rusty after a long hiatus. Taking my time working on a Bipedal Mecha Missile Launcher. That’s a mouthful of a description. [:P]

Thanks for the info on the temp for working with the FO! Filing that in my for future use folder.

FWIW, I think your lighting choice of warm white for the headlights was a good one. Incadescent lighting was king at the time!

I second Gamera’s idea for a ā€œRobot on Board signā€! [:D]

Third! [:D]

Looks like you decided to go with the warm white lights. I, personally, would have gone with the cool white lights. But so far, your work and this kit is coming along spectacularly.

Hey Capn, good thoughts. Foil for sure.

Thanks, Gam.

Funny idea about the bumper sticker. I can think of a few more:

I brake for Robots!

Proud parent of an honor school robot.

If you can read this, you are too close and my robot is about to zap you.

PG: I hear you about life keeping you busy. Same here.

I will watch for your missile launcher. (I wish the subscribe feature worked for me because I miss updates).

Thanks for your input about the lights.

Hey Tiger II, thanks for the input and the encouragement. The lights issue was a tough one for me. The camera makes them look yellower than they are, but, in my opinion, maybe still too yellow. It is a compromise. Hopefully, in the end, it pulls together.

Thanks for your thoughts on that.

Really like that one! [:D]

Back to the curtains, the shot of the finished model (back on page 1 somewhere, I think), do you know if those are painted versions of the kit-supplied curtains? They actually look pretty good in the picture.

I’m sure cap’s lead foil idea is better, I’m just curious, no big deal.

Laughing.

Hey Greg, happy Sunday to you. Guess what I did today? Hint: My Sunday ritual. Yup…grocery shop. Ugh.

I think the small image in the second capture just left of the right side, (that is a mouthful), may be an actual photo of a finished model. From what I see in testing, the curtains are grossly thick, and they don’t align with the canopy frame correctly. The latter makes them appear to stand in air with no connection points. It probably looks ok from a distance, but I think we can do much better. It’s gonna be tedious and I am not much looking forward to it. Kind of like in life, I am not a curtain guy. [:P] I’d make a terrible interior designer.

Long story short. If I can push through with the foil, I think it will make a world of difference to the model.

I got roughly two hours at the bench today. Time has been limited.

Disclaimer: Sorry to post the mundane but it’s all I got. Also, I feel I am accomplishing something by posting. For me, it’s about keeping velocity alive. Hopefully, you see some value in it too.

Below: I began work on the lower lights. By comparing the two lights you can see what before and after looks like. Using a drill bit, I routered holes for the LED chips. If you look really close… you can see the chip in the lower left under the word spot. The LED is an 0805 and that is as big as I can fit. There are two smaller sizes I could have gone with but the bigger they are, the more light.
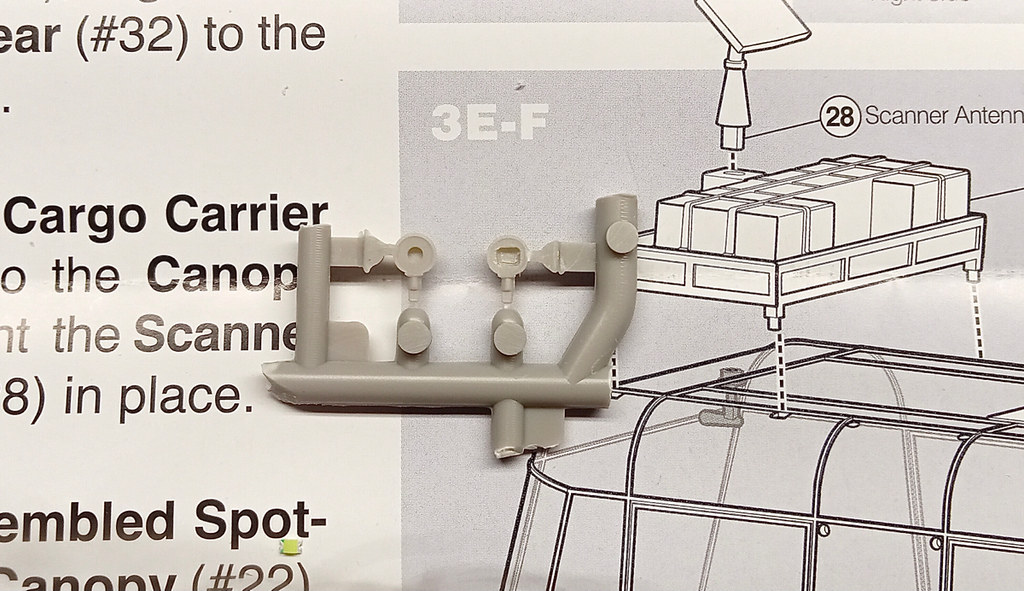
Below: Test fitting the LED chips.

Breakthrough

Below: Not shown below, there are half round mounting nubs I lopped off. The nubs would interfere with keeping the bit straight.

I square the end and then by using a needle, I make a starting hole. Afterwards, in comes the drill, being careful to check my angle as I go. I am happy to report both holes are done without blowing the sides out.

Below, I test if the wires go through. They fit fine, with room to spare.
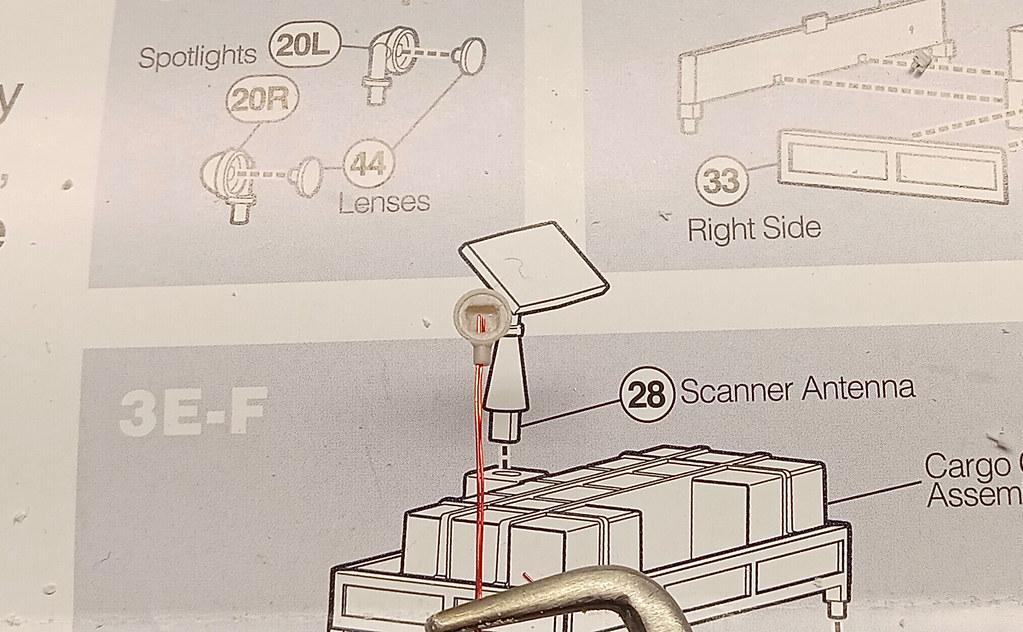
And this is the easy part in all this. Fitting soldered chips is the hard part. I must put minimal solder in all this because any sort of high spot will make it hard for the lens to fit. The cavity is extremely tight.

Speaking of soldering, I am on hold. I had to order warm white chips because I don’t have that color in stock. I kind of lucked out on this. The 0805 I am using for these do come in warm white, but several of the other sizes do not appear to. Or, maybe, just through this vendor they do not. Of that I am not sure because I didn’t need look further. They stock everything under the sun, so, I assumed the former. The point is this. If I want to match the main lights, that could have been an issue if it was not available. Then, I might have had to do mixed lighting.

Lastly, there are two searchlights that mount to the top of the canopy. I must do more research before I settle on lighting them. Mainly, can I hide the wires? With all that glass it might be tough to do.

There’s probably a legitimate case that the color on spot or search lights can be different than with ā€œheadlightsā€ on the vehicle. It certainly is in real life.

I’m drawing a blank on the actual Chariot used in the series, but, I’ll wager the curtains were on rings over rods mounted to the canopy structure. So, very much like a shower curtain if a person wanted a 1:1 example to emulate.

I’m not imagining the prop guys went to the trouble of getting, say, sail tracks or the like when 39Ā¢ shower rings would suffice.

Which probably suggests wrapping brass or annealed steel wire around a suitable mandrel, then cutting rings from that. Whic hcould then slide on a rod affixed to the structure.

Found this, clean by accident, and might be worth searchign for in the wrapping/paper section of the local Jo-Ann/Michaels/Hobby Lobby: Embossed foil paper.

https://www.amazon.com/ForPro-Dispenser-Application-Highlighting-500-Count/dp/B09YTCN9B1/ref=sr_1_2?keywords=embossed+foil&qid=1682963355&sr=8-2

Which might be a cool way to render the aluminized curtains on the Chariot.

Just a thought.

Hey Capn, good thoughts. And I agree, there may be a legitimate reason for the search lights being a different color. That crossed my mind as well, and I even pondered on intentionally changing it up. I probably won’t, but it is something to think about.

Here is a snapshot of how the replica was done. Supposedly, they went to great length to make the replica accurate to the TV version. I don’t know, but I will probably go with something similar.

Here is what I am thinking. Since I already have it on hand, I might try using Bare Metal Foil. I will cut curtain sized sheets and apply same sized sheets back to back, sticky side to sticky side. Then, I will add folds by bunching them. If I get super ambitious, maybe leave an exposed sticky edge for attaching purposes. Sort of, wrap the edge around a frame. And yes. I will probably make a frame for the curtains to attach to. Those frames can then be mounted to the canopy. If all would go well, I could make the frames and curtains off model as subassemblies. They could be installed just before I close up the canopy. It looks fantastic in my minds eye, but you all know how that can go.

Thanks for your input, Capn. If the Bare Metal Foil flops on me, I will consider what you found!