Your WIP’s are so much fun to follow. Thank you for taking the time to post.
Most of the time I’m just shaking my head and mumbling " Wow, he’s good." I need to take the time to tell you that more often.
knox.
Hey Knox… you are welcome!
You are too kind. I like to call it blind determination and a good amount of luck!
Thanks for following the build and for posting!
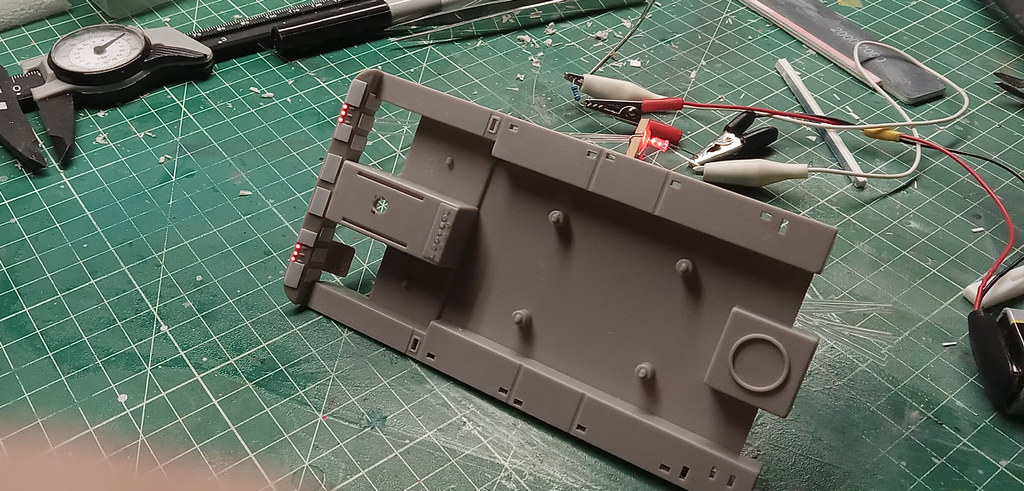
I drilled out the lights on the panel behind where the terrain scanner sits. Then shaped and installed FO for testing. Btw. I used the soldering iron method to dome the ends. It works much better than a flame. I can get much more consistent results this way.
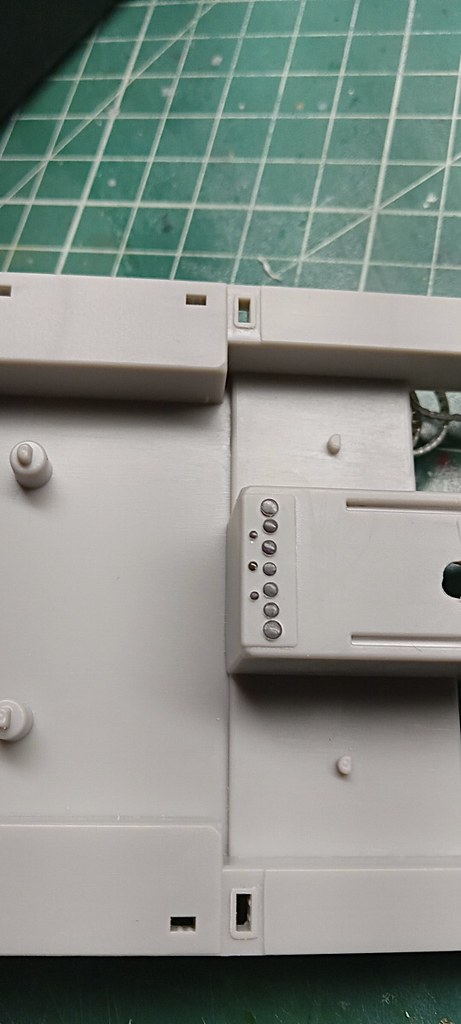

Holding the assembly up to the light with one hand, and trying to image it using my floppy phone with my other hand. Not a great example of how it will look but it will give you a sence without my fighting to image it using a colored led. They will be driven by colored leds when I get there. Oh… and the ends need to be polished yet. As is, they are ragged from my clipping them. In that condition it distorts and reduces the light output. Not to mention the ends are not all properly aligned to the light source.
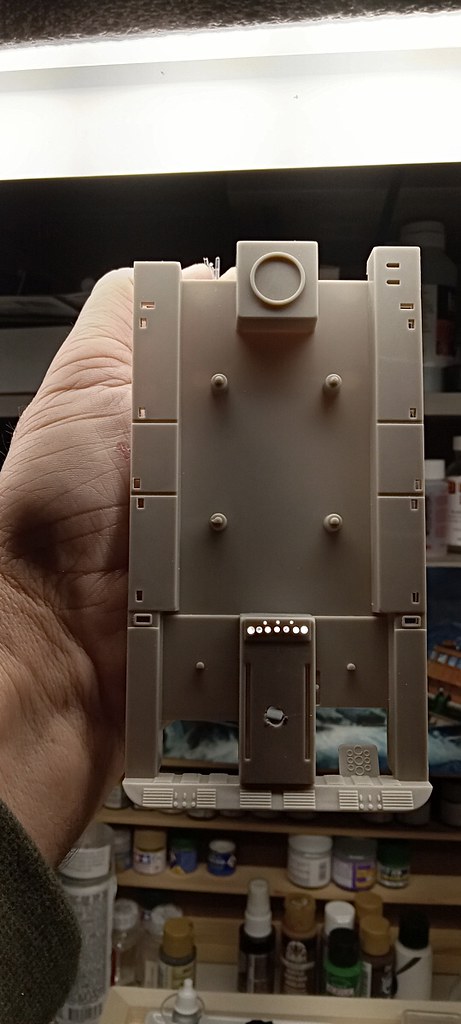
Lastly. I sure wish there was a PE set for this. I could make the dash look much better. I am sure one is coming but not just yet.
PS: I broke 4 drill bits tonight. The cobalt set I have are sharp, but they are rediculously brittle. Just a slight side pressure make them snap like a twig. If anyone has a recommendation, I would like to hear it.
Wasn’t my favorite show but I liked it. It was all about the robot. Speaking of the robot…
Yeah. I have seen that has become a big thing. I think there is company out there building 1:1 robots too.
Addressing decals I began by removing the raised relief. To the right is removed, to the left is yet to do.
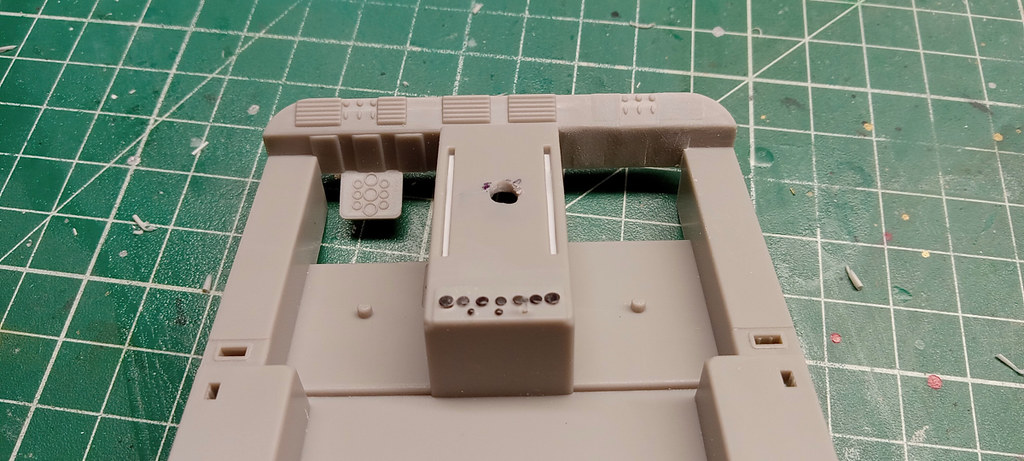
The 1:24 decal sheet scanned. Also, you can see the replacment panels I made. Both are scanned and decals will be scaled to the panels using photo editing software. This model is not quite the same as the 1:24 scale so… I will surely need to modify the graphics as well.

Replacement panels applied and I have opened more lights at the top edge of the dash. As well, FOs made, and for this image installed.
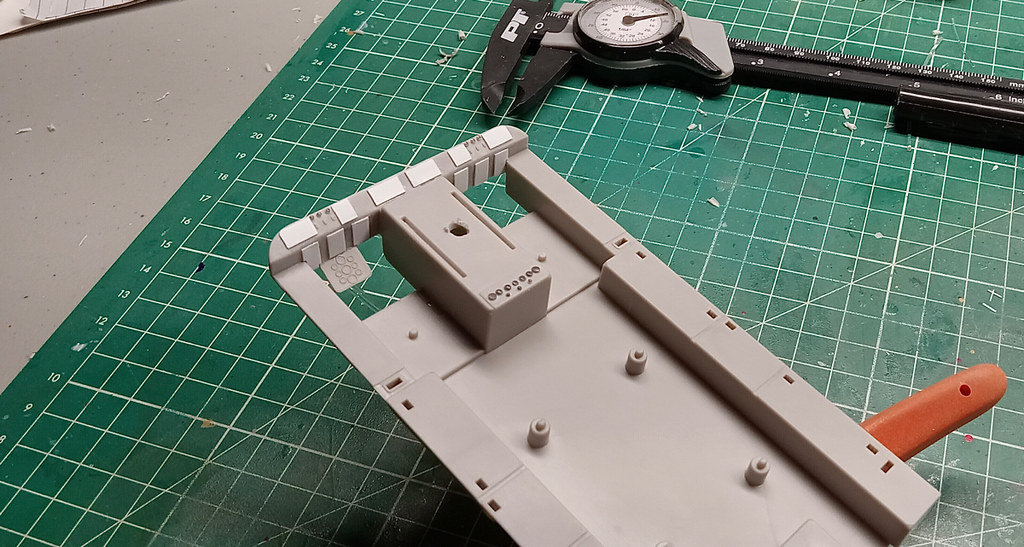
I made the panels using Evergreen Plastic flat stock. Amazingly, I had a size in stock that has the perfect width. All I had to do was cut them to length. Oh, that, and reduce their thickness some. Kind of a funny story. I sanded each piece by pressing my index finger against the piece as I moved it across a sanding stick. Long story short, my finger is sore. What’s worse is that I sanded off my dermal ridges. Now… when I open my phone the reader can’t ID my fingerprint. I must manually enter the security code.
And that is that for now.
Always fun to follow your builds and this one is no exception.
Great tip on using the soldering iron to shape the FO as well as round the end. What temp do you have your iron at when shaping or rounding the FO?
Hey PG, how are you doing? Are your working on any projects?
The station is set to 250C or 482F. Actually, that is what I have been soldering at as well. To be honest… it might not matter all that much. Depending on the setting you choose… you might go shorter, or longer, depending. The main plus is the regulated heat. With an open flame the temp fluctuates wildly, and it’s hard to get consistency. Using the iron, they came out perfect almost every time.
Thanks for following and chiming in!
Btw… I think my career in crime is over. My finger print is back and I can use the scanner again. Thank goodness too. Punching the code was getting to be a pain.
I think next up is fabricating the main headlights. After that, I need to get serious about buying paint.
Beware the carrot man.

Never fear… robot is here!
Robot! Stand down! Forget about Smith. You are firing too close to the Chariot!
Smith can run! You know how he runs from work!
INDEED…

Back at it.
I started work on the headlights. The first thing I did was to see how much light came through the hole that they provide. Trying this and trying that, I decided to open them up more. I countersunk the openings some as well. It might help with the viewing angle.
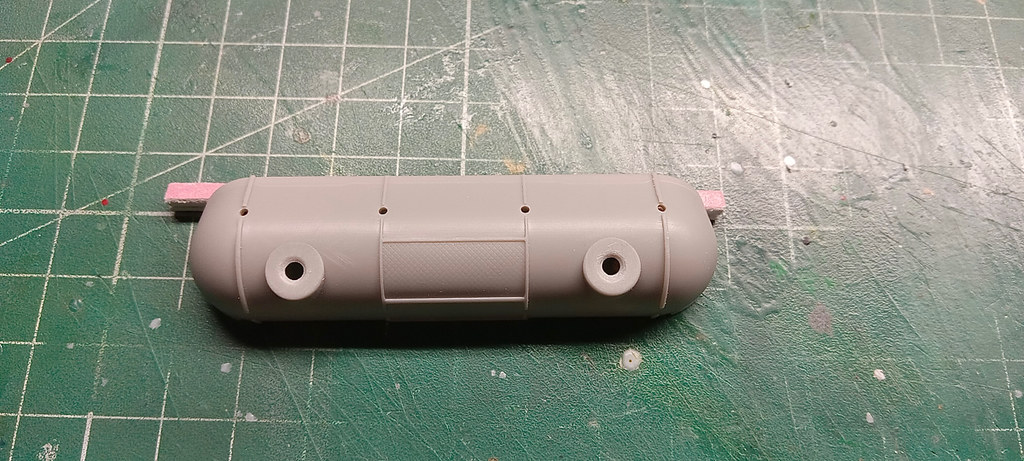
I did the same to the backside. The collars are cut from Evergreen tube stock. You will see that they are used to help secure the LEDs.

Collars are installed. The LEDs are not secured.

You can see how the led rests. This was another reason for countersinking the back. I wanted the led to rest as far forward as possible without going too far.

I tested warm white and cool white. The jury is still out but I am leaning to cool. I’d like to go warm but they are just a bit too yellow for my taste. But maybe. Thoughts anyone?


The kit provided lenses are not installed in the above photos. If there is a weakness in all this, it might be the lens. They have mounting pins on the back side. The end result is that they defuse the light. I clipped them shorter and that helped some. I just wish they didn’t put those there. The pieces are too small to remove entirely and with them being concave, I have no way to get sanding tools in there, let alone some sort of polishing stick. I am probably being picky but if there was a way to remove them, I probably would. I suppose I could try casting new ones. I will have to test this further and just maybe, I will do that, make new ones.
Below: For grins… I tried test fitting things. I needed to see how much clearance I have for the LEDs and for the optics. And by Jove, it all fits.
The fit of this kit is so far, awesome. I am really pleased and I must say, this project is coming together nicely. The FOs should look very cool once done. They really pop when driven by LEDs.

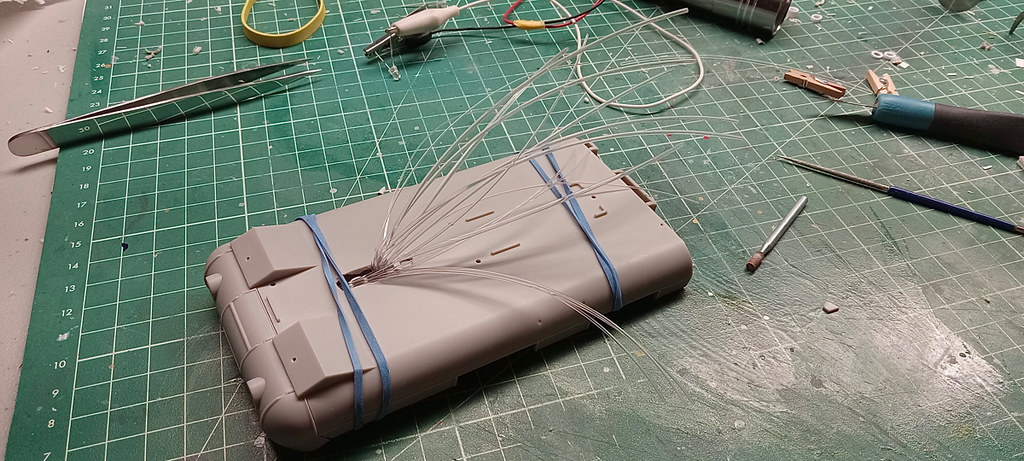
Below: A view of the rats nest. I still have to fit several light-engines and associated wiring for their LEDs. This is gonna be quite the fun. I feel confident all of it will fit in the transmission box. It will be tight though. The only thing to route out of the model and into the base are the power wires. I should be able to conceal that, for the most part.
That’s that.
I forgot one thing about the rats nest and that is the terrain scanner. When the scanner is installed it adds another 7 strands of FO. Egads.
How do you eat an elephant?
One piece/bite at a time.
Good to see, by several measures.
A good kit well done can be its own reward.
Hey Capn, seeing your post made me smile on this dreary and cold Sunday. Yes, it remains cold in our area. It snowed a bit yesterday and I had seen flurries today. Just 260 miles north, where my cousins live, they were hit with 27 inches of snow just a few days back. No… I am not living in Alaska. [:)] Its been a wild ride.
And that is so true. Most of the kits I build are oldies. They are worn out, and filled with pitfalls that require a lot of work bringing them up to snuff. The Nautilis was a good fitting kit, no complaints there. So that was an exception. And this kit, thus far, looking good. Of course, it is not perfect, but few are. To your point. It makes the build so much more enjoyable when I don’t have to fight ill fitting parts.
She’s lookin’ good Bakster! I hear you, the show did have some really cool props and gear.
Glad to see her moving better than the gold digger. Hope the weather gets better, temputure is great down here but the pollen has been giving me a headache…
The orange bomb. Too bad I lost the will for it; it could have been cool.
Thanks Gamera!
I guess Nemo is entitled to a dub every once and awhile…
As Dr Smith would say, Indeed. [:|]
Good to see you back at it, Steve! [Y]
The color chariot footage was fun to watch. Project is coming along great. Someday maybe you can give me fibre optic lessons.
You asked a few posts up about warm white (too yellowish for you) or the cool white. I like the idea of warm white because even though the show is scifi set in the future, it still feels old to me, and that aims to warm white in my mind. Hard to tell how yellow the warm white actually is from pics, I suspect you’ll end up with the very cool white.
Kind of makes me think of LED headlights on current steam locomotive operating models. They are nice and bright, but they still don’t look right to me in that cold white.