Liquid dispensers

Perhaps I am bored. Perhaps I need a diversion from the model I am working on. In either case, here is another post from yours truly. Maybe it will be of interest to someone.

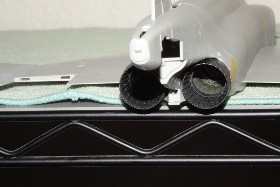
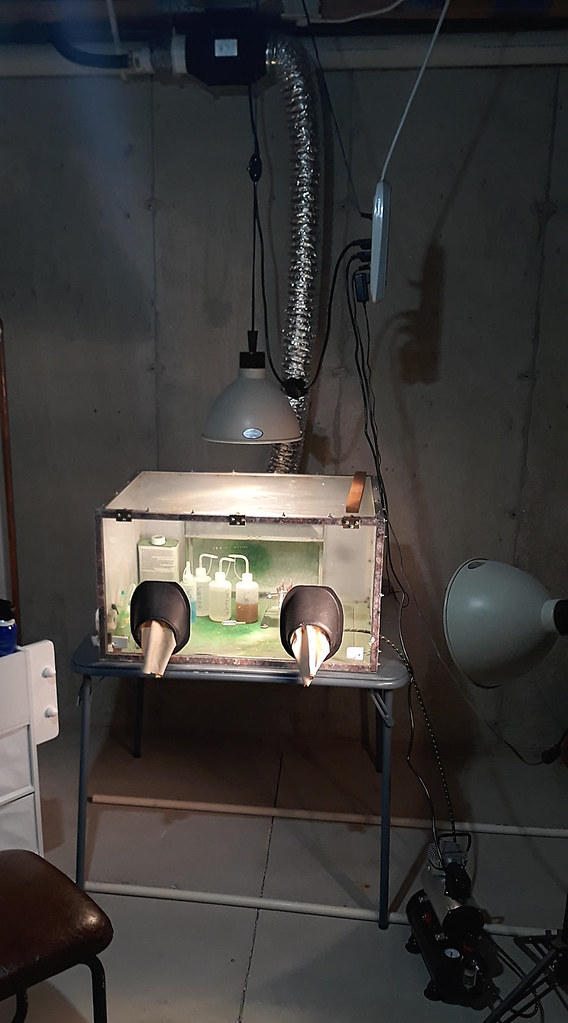
I did some major revamps regarding my spaybooth and the tools that I use with it. I first started by calking some of the air leaks. The blower I am using is one of those portable paint booth jobbers that fold up. I retrofitted it to the back of my booth and what I recently discovered is that the fan housing had some major air leaks. Why is that a problem? Because it is blowing paint particulates and fumes through those leaks and into my working environment. You could litterally feel air blowing out when you put your hand over them. There were three major areas that had leaks.

  1. Around the powerswitch housing.

  2. Around the flange for the exhaust hose.

  3. Around the powercord compartment.

  4. Lastly, I shored up the opening into my booth.

Since doing this it has drastically reduced fuming, and I dare say, it improved the air draw out of the booth and through the exhaust hose.

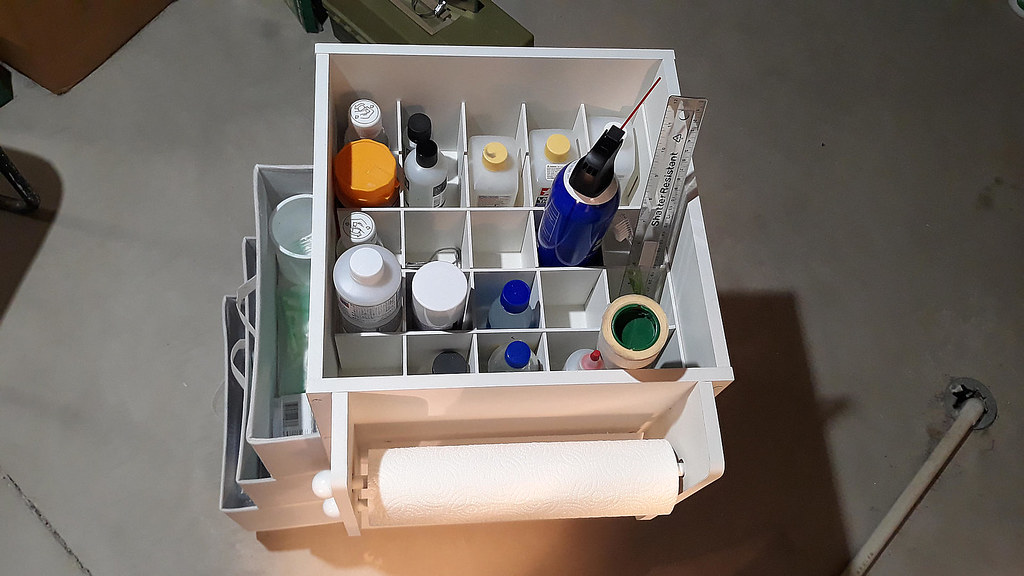
But that is all side commentary of what I wanted to mention. And that is, I have new liquid dispenser bottles, aka, safety wash bottles.
And I have to say, they are proving to be very handy.

I use them primarily for dispensing lacquer thinner during my AB cleaning process. One bottle is for used lacquer, the other is for clean lacquer. So when it’s time to clean the AB, I first squirt thinner from the used thinner bottle and into the color cup. For the most part, particulates settle and what comes out is fairly clean lacquer. (Why waste clean lacquer for this messy stage.) I take a foam swab, dip it into the cup, and wipe the paint from the wall and bottom of the cup. Then I spray the thinner through the brush. I refill the cup but this time leaving the nozzle in the cup, I depress the container, and this causes the thinner to back flush into the bottle. I repeat this process in a quick motion and this forces thinner back and forth helping to loosen remaining paint in the cup. I then spray the thinner into a paper towel and remove the color cup. Using the nozzle I port it up into the neck of the cup, and do the same process of flushing /back flushing. It clears the paint in the neck and bottom of the color cup. And at any stage I can draw the dirty solution back into the bottle. No need to dump it. I reattach the color cup, and now using the fresh thinner bottle I fill the cup and spray out any remaing color. It sounds complicated but it’s easy and fast. Then I follow my regular process of cleaning of the needle and nozzle. Btw. Reusing the dirty lacquer keeps it from having to be dumped. I can use that refuse for probably years.

And if none of that grabs ya, I will just say this. These make for great dispensors. The liquid comes out in a fine and controlled stream. The angle of the nozzles works well with streaming fluid into your cup. I love that the nozzels have caps and that helps with fuming, and with evaporation into your living/working environment.

Also new, are the mini pippets that I ordered. I ordered a box of 200 off Amazon for $9. The waste footprint of these is smaller than the typical pippets, so not as much plastic going into a landfill. And the size is I think perfect for extracting paint from paint jars. I succumbed to using pippets because I was tired of trying to clean the threads off paint jars after pouring. There is less waste of paint too because of this. You can get exact amounts of paint that you need straight from the jar and into your color cup. If you draw too much, squirt it back into the paint jar. No muss, no fuss.

So from all that malarkey, maybe you can garner something. If not, well, I had a good time posting it.

PS: Here are some links.

https://www.amazon.com/dp/B097GYJ4B8?psc=1&ref=ppx_yo2_dt_b_product_details

https://www.amazon.com/dp/B0853DDH7C?psc=1&ref=ppx_yo2_dt_b_product_details

If you have the marking on them rubbing off, relabel and cover with a wrap of clear package tape.

Good tip, GH. I will probably have to because I think it’s rubbing off already.

You can also use cheap masking tape to make your labels. The cheap tape isn’t much good for masking things because the adhesive is too strong, which makes it great to use as labels.

Just in case you don’t already know this, since you’re rightly concerned about the waste footprint of your pippettes, I found that they’re usually surprisingly solvent-proof. So, you can clean and reuse them. I just stick the tips in my relish jar of dirty MEK and squeeze the bulb a few times to flush them clean after each use.

My airbrush cleaning is a bit different since I have an external mix Paasche H. Between each color, I just drop the color cup, needle, and air cap into another relish jar of MEK, close the jar, and run it in my little ultrasonic cleaner for about 30 minutes. In the mean time, I have 2 more full sets of color cups, needles, and air caps, so I can keep going with subsequent colors if I want to. Those parts are cheap for the Paasche H, and easy to get.

No paint booth here. My airbrushing technique doesn’t require one because nearly every drop of paint goes on the model and not into the air. I use an extremely bright headlamp during my model building, and its great for detecting when my paint volume is too high and dispersing into the air. Dust and paint particles light up like a Christmas tree if they’re present. The super fine coats also minimize fuming because the paint is mostly dry within a few seconds of being applied. My old testors enamels are the worst in the stink department…not much I can do about their slow cure time, but MRP lacquers are great. Very little fuming from those with my airbrushing technique.

Nice system you’ve got there Bakster. Always cool to see the ingenuity of fellow modelers.

I also use similar wash bottles. Brother P-touch labels hold up pretty well and only need to be changed occasionally.

Good to know! Thank!

Yup, I didn’t mention that but I do that from time to time. Sometimes, I let the paint set too long and cleaning them gets too difficult. Maybe I should have a small jar of thinner that it soaks in. Or maybe just toss them! Lol.

That is a nice system as well. I am really interested in hearing more about this brush since it’s an external mix. I have never tried an external mix brush. Do you care to share how it performs for you? Obviously you really like it or you wouldn’t be using it. Tell me what you like about it and what you might not like about it. And what I am most interested is in how the paint behaves when it hits the model. Can it go on heavy? Does it go on smooth? Orange peel? Tip dry issues? I am really tired of the dance I have to do to avoid orange peel and or occasional clumps. It is making me want to try rattle cans, particularly with larger sections of models.

There was a video I watched years back where a guy demonstrated using a cheapo external mix brush. It might have been a testers brush. I was amazed at the volume of paint he could lay down, and in so doing, he got a nice smooth finish. It was like watching him using a mini rattle can. The guy basically admonished people to stop using internal mix brushes that take too long a time to lay paint.

If I show you the lengths I go through you will think I am nuts. I built a booth that has holes in the front that I put my arms through. It is almost a closed system but not entirely because I have to allow for air movement. I built it for back in the day when I lived in an apartment building. I had to minimize fuming for myself and for my girlfriend that had health issues. It works really well for that. With my latest mods, I don’t smell anything until I open the front door of the booth. I will post pictures later.

It performs flawlessly, and I haven’t found anything I can’t do with it. Its all just a matter of getting the paint/thinner ratio and the pressure right for what I’m trying to accomplish. The only time that orange peel is a problem is when I’m spraying into tubes or semi-enclosed areas that have sharp angles. But, that’s only a problem when I forget to dial my air pressure down. I airbrush the insides of intake tunnels and exhaust tubes at about 10 PSI, and I get a nice, smooth finish. There’s absolutely nothing I don’t like about it. Its like the AK-47 of airbrushes, just keeps on shooting no matter what.

You can go as heavy as you want to with it, but I never do because its just not how I airbrush. Even a nice, glossy finish on a car body or chassis goes on with thin, light passes…I just gradually increase the volume of paint and get progressively closer to get the wet look at the end. I find that I like the results better than a heavy coat. It preserves fine details, and gradually builds thin layers of paint that become increasingly more able to hold onto their own kind so the final pass goes on wet, without worrying about runs of sags. Just have to keep moving and not hover over anything. You can get needle and aircap combinations from the #1 which is the finest, to the #5 which is the largest, highest-volume. I almost never use anything bigger than the #1, except for doing a gloss finish on a car, where I may step up to a #3.

I live in an apartment myself and the thin, light, low-volume technique pretty much eliminates paint odors or stray paint particles floating in the air. Something that has helped tremendously with getting the volume, pattern width, and air pressure right is that I always start by spraying onto a Post-It Note pad. That also helps me make sure any lingering moisture in the lines is purged before it goes to the model.

Did all of the primering, 2K black base coating, Alclad plating, painting, and Alclad heat effects and metal color variations and shading on this F-4B stabilator with this one, simple airbrush.

Also did all of the same stuff, with heating effects and soot deposits on the exhausts of the same aircraft with it. Its a very versatile airbrush that has been trouble-free and low maintenance.

I use the standard squrt bottles as shown on the left in your pic for everything, except lacquer which I keep in a sealed glass pickle jar-type thing, and I STILL sometimes find it evaporates.

I put lacquer into something plastic once I shouldn’t have, and I’ve been afraid to store it in anything but glass since. It looks like those containers you are using work just fine, so thanks for that. (would save me the extra step of using a pipette for cleanup. So thanks for that. No evaporation, right?

Also, I read the above a few times to try to find and answer to this; I obtained one of those 90 degree angle dispenser tip bottles with an airbrush cleaning kit years ago and have yet to use it. Can you explain more why the bend is helpful? (You probably hit on it in your post above, but it is evading me)

BTW, I like the idea of saving used lacquer for initial cup cleaning!

I’ve been using empty dishwashing liquid bottles for years with no issues. That includes lacquer thinner which doesn’t evaporate (assuming I remember to close the cap) and doesn’t destroy the plastic bottle either. I last replaced one because the flip open top broke off and I’m too lazy to want to take it off and put in down on the bench. I have 4 bottles each with different things in them.

I just watched a video (Paul Budzik) and he says the H does not atomize as well as an internal mix. Though, he says it’s a good brush. I found the video a bit confusing. I am still very intrigued by your testimony. You make the point that you have to adust accordingly, and that could explain the difference with his view, and what your experience is. Thanks for the in-depth analysis. I truly appreciate it and I am considering this brush.

I am very critical with my paint finishes and generally, I can get an almost glass smooth finish but, I have to flood the piece with paint to draw it out. I hate graininess in what is supposed to be a gloss. Even with a flat, I want it completely smooth. In the case of gloss, by flooding it on you are opening things up to splatter, catching dust, and runs. And I question whether the internal mix brushes I use are suited for this. Hence, my interest in the external mix.

Just musin…

I think yes, it always will. It will find a way to gas out no matter what.

Greg, I think it will be the same as above. The caps slow it down but it always finds a way. Having said that though, if it is, I think it is very minimal. And yes, this plastic is not melting on me so it should be good to go.

That is a good question and I had to think it through. I think it’s helpful because it gives you extreme control. The bottle remains in an almost vertical position and yet you can steam fluid at a right angle with almost no drippage. Like when before I was using a pipette to draw thinner from a bottle, I immediately had to flip the pipette upwards or the thinner would drain out onto your work surface. Then I had to be careful as I position it over the color cup because, again, it drains, and makes a mess. In fact, this is what made me search out these bottles because I was sick to death of the drippage from pipettes, or even from an eye dropper. They leak too. These bottles are extremely precise. No muss no fuss. I love them.

Yeah Buddy, recycling. Less waste, less cost.

Whatever works right Jeff? [Y]

Thanks for opining further on the bent nozzle stems, Steve. That all makes sense. I’ll have to try mine.

No problem, Greg. You know that l like to Opine! Lol

As promised, here is my spraybooth. I made this over 30 years ago, though she has seen some revision changes, mostly with the extraction system. I made it out of items readily available at a hardware store, including the aluminum angle stock that I cut, mitred, and drilled. I have one fan directly behind the booth, and an inline fan further up the food chain. The exhaust is sent to my attached garage. And let me tell you, when I enter the garage after the spray session, it smells to high heaven. And that speaks to the fuming if I didn’t vent it. My basement would wreak for hours and the heating system would suck and blow it throughout the house. But not the case with my system. Part of my regiment is to collect the soaked papertowels, gloves, foam swabs, whatever, and take it straight to the dumpster. Opening the main garage door for those few minutes is enough to clear the stink.

So, I do my setup, close the front door, and spray with my arms working through the front openings. The system works so well, I don’t have to wear a resporator. On the left front side I made an opening that is filtered allowing some outside air to draw in. Additional air would come through the sleeves I made.

Close up view.

Fan assembly behind the booth.

The only negative in this design is that the plexiglass has a charge to it and that attracts dust. I need to figure that out. Maybe wipe it down with a fabric sheet or something. So when I spray, the overspray changes the charge in the booth and anything clinging to the ceiling will drop.

And as long as I am in talkative mood, here is another thing I repurposed. This caddy was designed for giftwrapping. I turned it into a AB cart. It has wheels and I role it over when needed, usually when I am ready to clean the brush. I store swabs, and much more. The rod at the side of the rack was to hold ribbon spools, I use it as a paper towel dispense. The thing works very well for my purposes. I think I got this about 4 years ago. (Assembly required)

And that completes my tour for the day.

https://www.amazon.com/gp/product/B01HI6SLD6/ref=ppx_yo_dt_b_asin_title_o07_s00?ie=UTF8&psc=1

Possible alternate…

https://www.afrugalchick.com/michaels-mobile-craft-storage-center-45-reg-90/

Hey Eaglecash, I ordered an H. I have to try it. FYI.

Cool beans, Bakster! I think with airbrush review type videos, the reviewer is always going to be a little biased just from the fact that they have a model of airbrush they like and have a lot of experience with. Its totally understandable that trying something different may or may not be like what they’re used to. Its all about setting things up right with the right amount of thinning and air pressure and it atomizes beautifully. Its not complicated at all though, I’m definitely not one to be into using a virtual chemistry set to make paint flow through it properly. One of the first things I painted with it was a 1984 Corvette model I had built in high school to give to my step-father as a birthday present. Still remember being scared to touch it a week after I painted it, because the paint was so smooth and glossy, it looked perpetually wet. I also have a Paasche VL and an Iwata Eclipse HP-CS, but I have been using the same Paasche H since I was 15 and just keep coming back to it because its what I’m used to. I’m sure you’ll love its simplicity and reliability.

I agree wholeheartedly.

That is what I am hoping for, simple but effective. I can’t wait to try it. Maybe get some modeling joy back. Seems like everything I try of late has been a struggle.

I will let you know how it works out. It will be a few weeks at least because it sound’s like a few weeks for arrival.

Looking forward to that. Heh…you know…airbrushing is actually my favorite part of model building these days. Finding those MRP paints made it even more enjoyable than it already was. I can paint a whole group of parts, or just paint one part, the setup and cleanup are that easy…don’t even have to plan airbrushing sessions to minimize messing around…there is none. I just decide to paint something, and 5 minutes later, I’m done and everything is cleaned up. Can’t get much enjoyment out of something that is a PITA, and this is as slick and painless as it gets. [H]