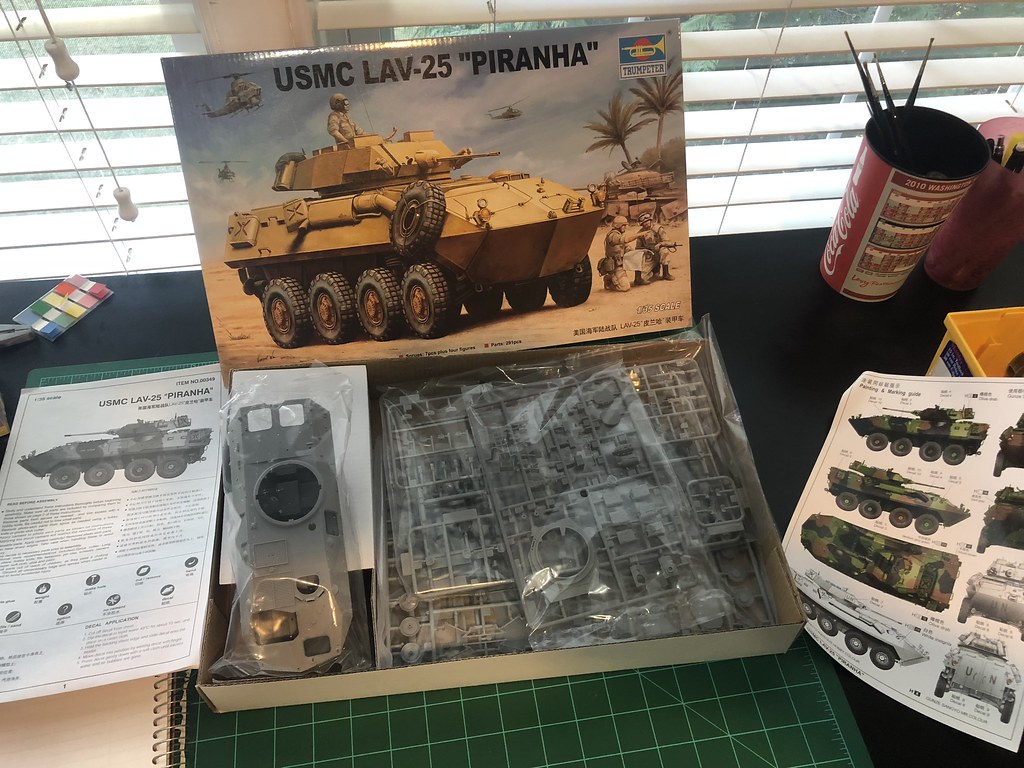
The wood ship model I bought on the honeymoon has been kicking my butt so I needed some plastic in my life to take a break. I’ll be working on Trumpeter’s 1/35 LAV-25 kit.
I’m aware of three problems with the model:
1)Turret top MG/mount is missing
2)Coax MG barrel missing
3)Wire cutters missing
I was going to post beginning pics this morning but had to run so cut the first post short.
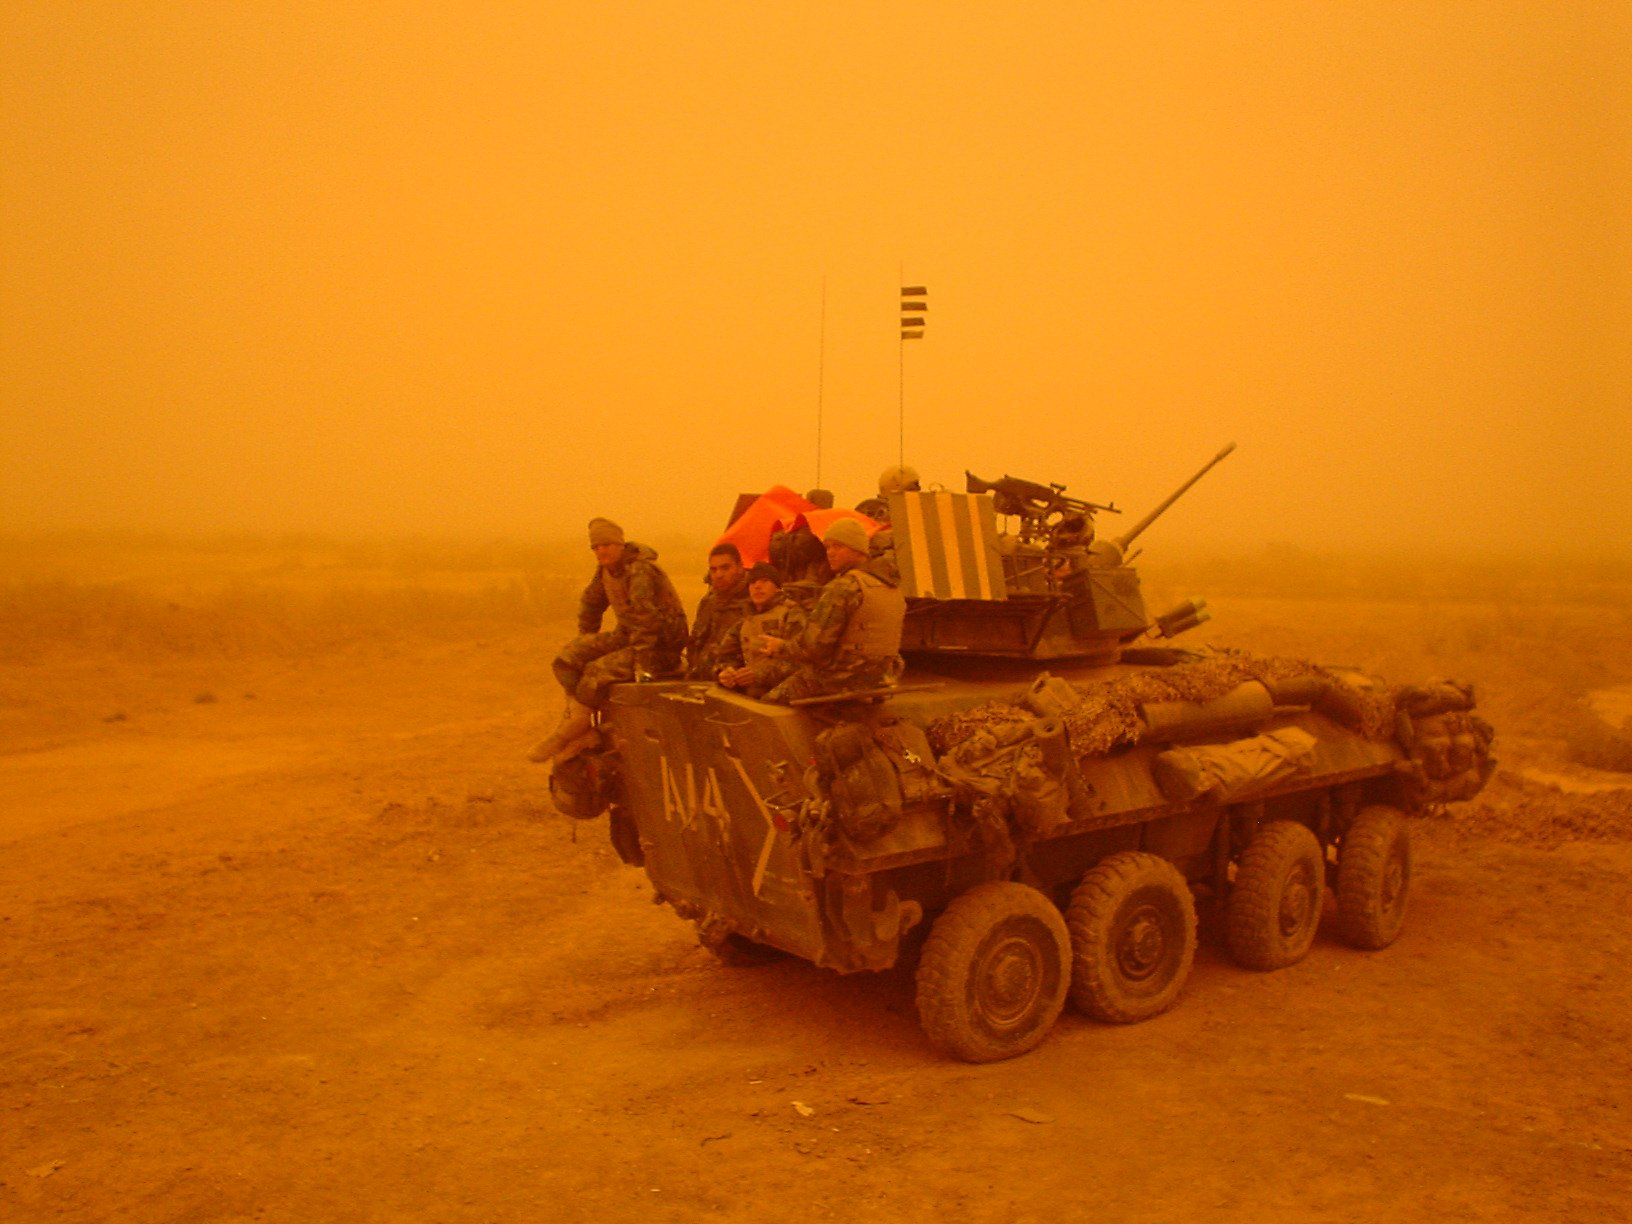
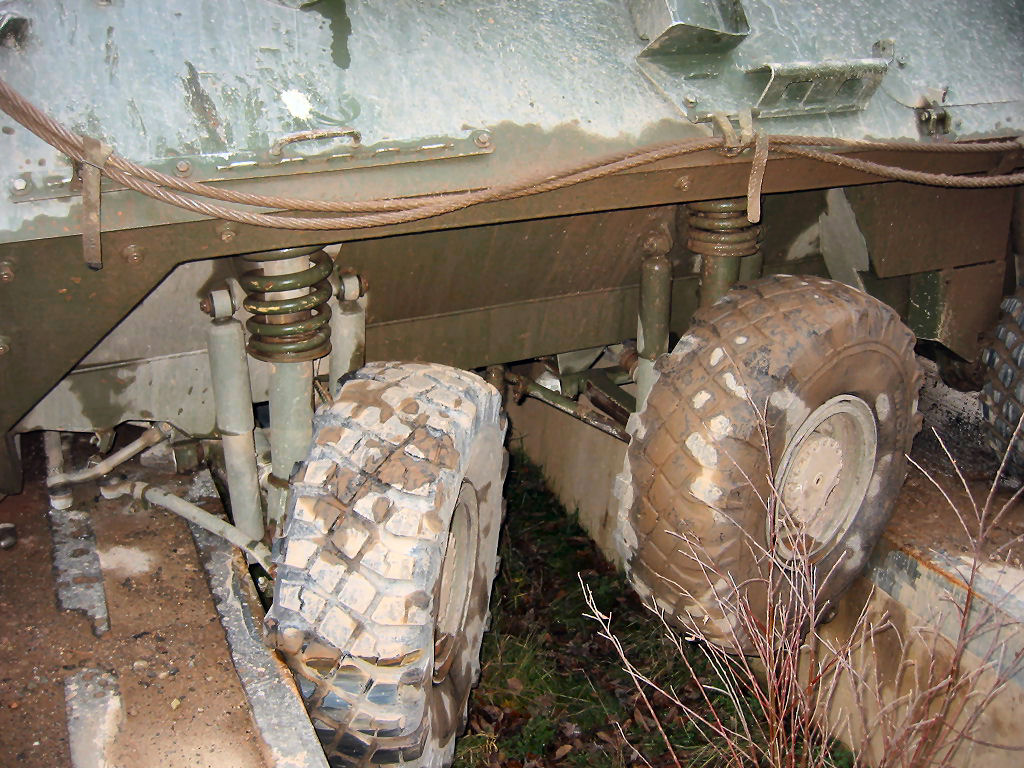
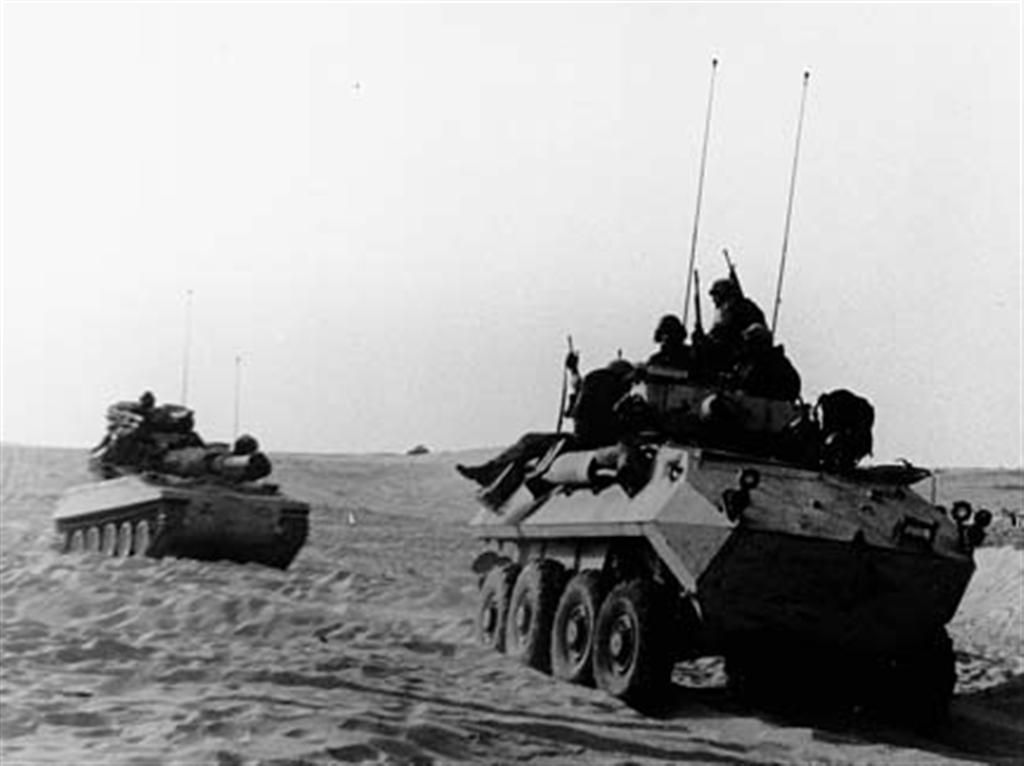
I wanted to make the model more interesting so I’m going to have the wheels turned. From looking at various pictures and the suspension, it looks like the front two (or rather four) turn. Surprisingly, there’s not a lot of pictures of LAV-25’s with the wheels turned but I did find this one on Prime Portal:
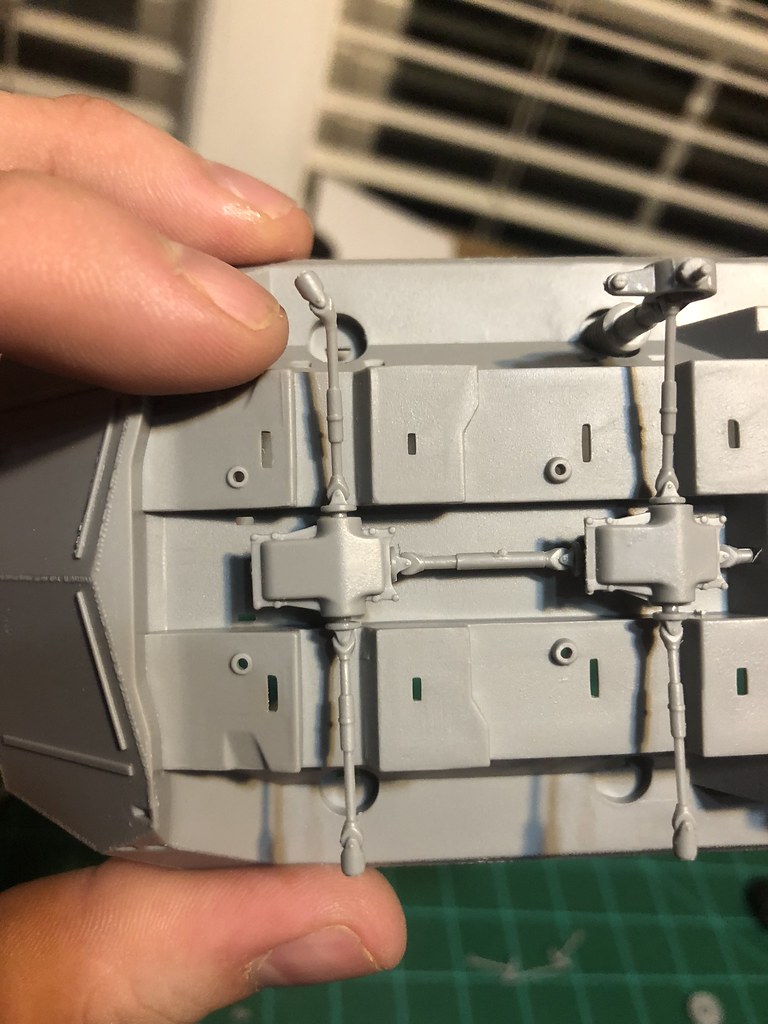
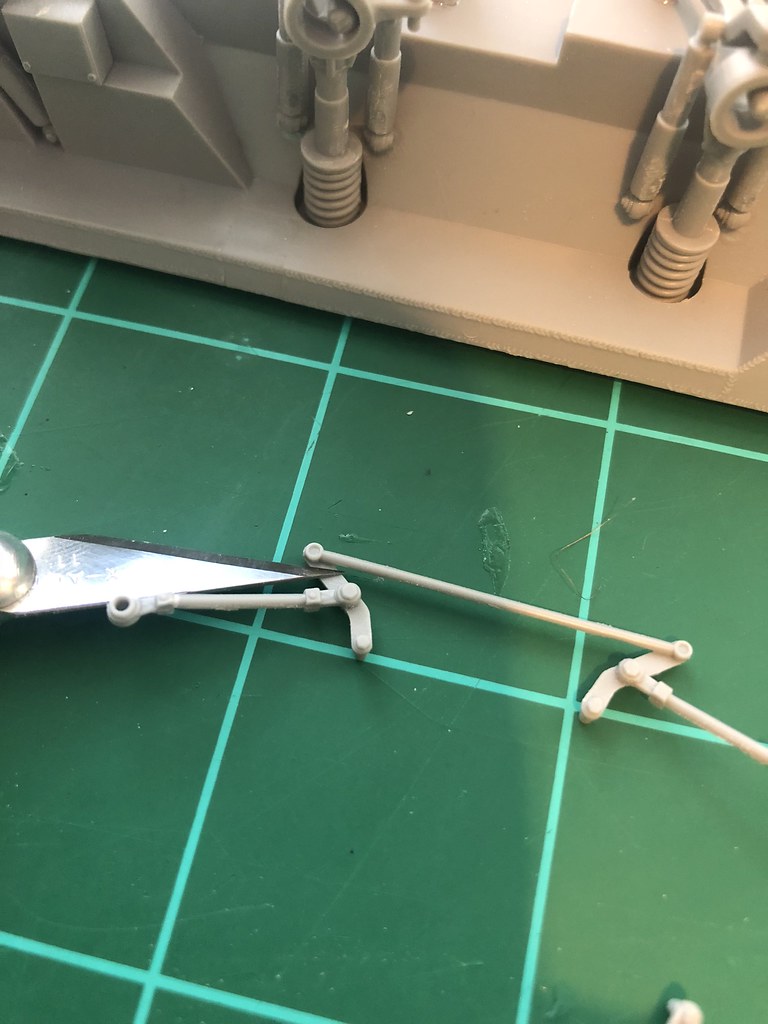
So after deciding on a plan of attack I set out to achieve this. Left is the front of the vehicle. Bottom of picture is what the rod looks like before, top is after.
I cut the shocks at a good spot so that I could turn them, as well as the end of the rod that connects to the tire where it looks like would be turned with the wheel. I am not a mechanic and know very little about how suspensions work/turn This was my best guess and was working off of another Prime Portal photo
It’s looking good! My unit met up with a Light Armored Reconnaissance Battalion in 2003. They were good guys. They let us Air-Wingers fire off some AK’s they had captured/found near Kut. I did this kit many years ago. In fact, I built it in the barracks. I learned from some of the great people on this forum that the exhaust has been updated since this kit was produced. I found a decent picture of the new exhaust on this Wikipedia article. It’s about 1/2 way down the page.
Thanks! I’m thinking about doing a vehicle during OIF, so it’d be March-May 2003. It’s my understanding that SLEP upgrades didn’t start until May 2003.
According to 1st Marine Div’s website, 1st LAR Battalion was the first unit of Regimental Combat Team 5 to cross the Iraq-Kuwait border. They redeployed back stateside by the end of May '03.
From what I read 2nd, 3rd, and 4th (reservists) LAR Battalions (though without some companies) were also apart of OIF and were there from anywhere between February to summer 2003. If the May 2003 timeline is correct for the start of SLEP upgrades, I’m assuming they started upgrades when the first units rotated back home.
Turning the wheels is a great way to add interest to the vehicle. I dug my kit out to see what else the suspension involved; are you planning to modify the steering linkage (kit parts A-22)?
Rob, I’ve seen pictures of Desert Storm LAV’s with my mounts but with the M60 variant of the day rather than the M240. I thought the SLEP (LAV-25A1) was the first upgrades the LAV received since coming out in the 1980s, and read that those started in May 2003. I’ll see if I can find other sources confirming or denying that. If so I can switch to an ODS vehicle. I appreciate your input on the subject as I consider you one of the multiple SME’s on modern vehicles on this forum.
Real G, thanks for the comment on the mirrors, I’ll add that to my notebook of things to add. I’ll try and post as many WIPs as I can. I’m by know means an expert though, so if you can take even inspiration to build yours I’ll be happy.
I do not remember which LAR unit we met. They were likely from the 2nd Marine Expeditionary Brigade. 2 MEB was temporarily attached to the 1st Marine Expeditionary Force at the time. They were camped around a castle, east of Kut, overlooking the Iranian border. Somewhere, they had discovered a cache of Iraqi small arms, and they let everybody come by to fire off a few rounds. The rifles were old and dusty. The ammunition was old, dusty, and multi-national. They had rounds stamped with Russian lettering, Chinese lettering, and Arabic lettering. The rifles didn’t work very well. We had all kinds of jams, mis-feeds, and even an audible pop. We stopped with the audible pop. There was a round stopped in the barrel.
This was just around the beginning of May 2003. They were bored. I wasn’t bored. I always had something to fix. But, I thank those guys for letting us have a little fun.
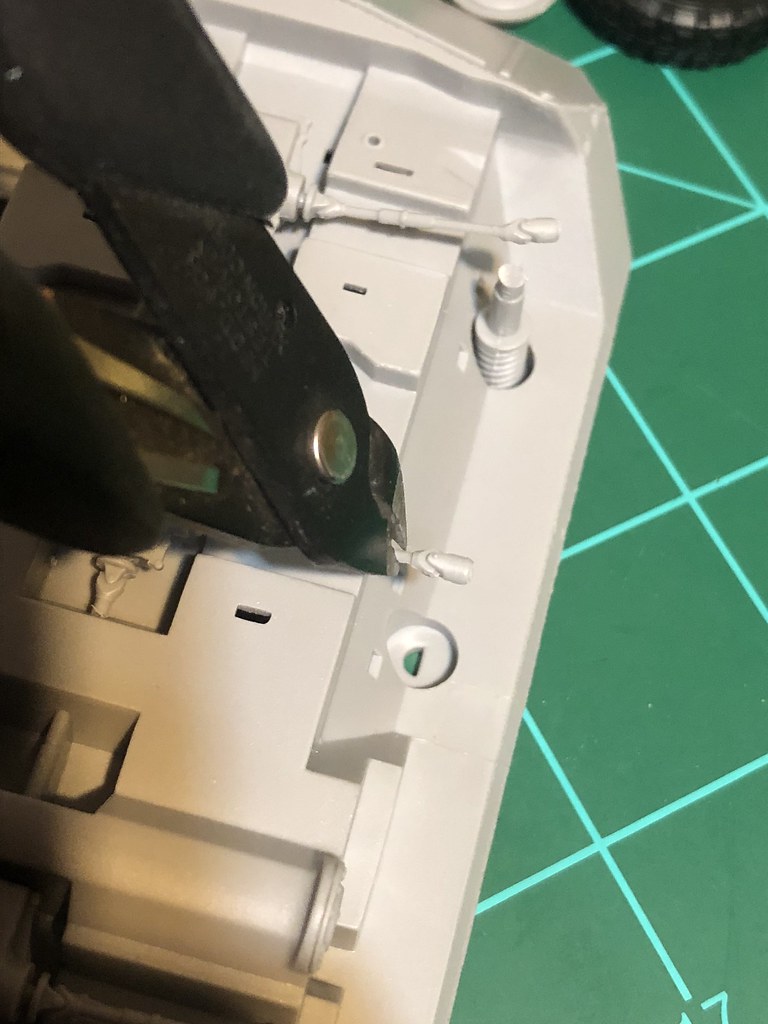
Mike, From dry fitting just now, the A-22 part is very thin and looks like it it’ll fit without modeification (I.e. will just bend in place). I was unaware what it’s actual use was for. If I can glue it in place without chopping it up and it’ll look the part, I may forgo accuracy’s sake and do that. I’ll hopefully get around to that tomorrow or Monday depending on the wife’s plans.
Sorry, coming into this one a bit late, but the Voyager PE set (35078) for this kit would solve a couple of problems (wire cutters & mirrors) and help with the turned steering. The PE set supplies the curved steering arms and tells you where to drill and pin the linkages. It doesn’t tell you how or where to bend the CV joints though. An adventurous modeller could possibly articulate the steering, but the bits supplied will make it somewhat easier to model the front wheels in a turned position.
I agree it should have an M60 on top, even the old Italeri LAV-25 came with one, and it was issued in the 90s. The 82nd Airborne’s 3/73 Armor Battalion borrowed a tank company’s worth of LAVs (14 LAV-25 & 1 LAV-R) during Desert Storm. That’s all I know about the LAV-25.
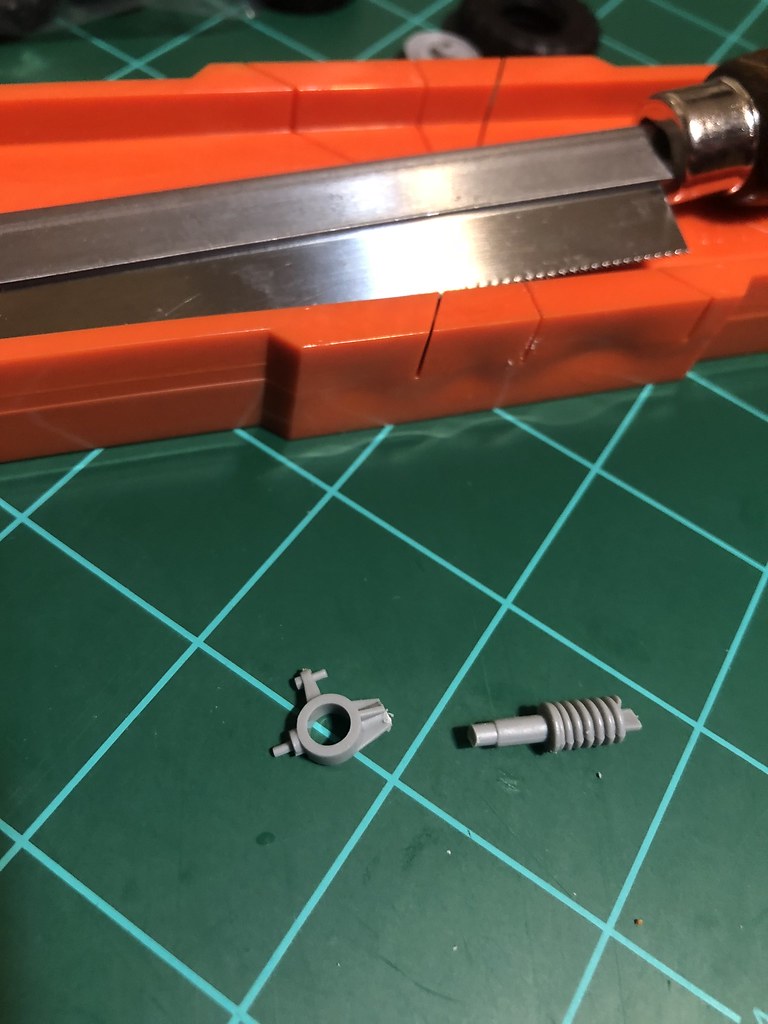
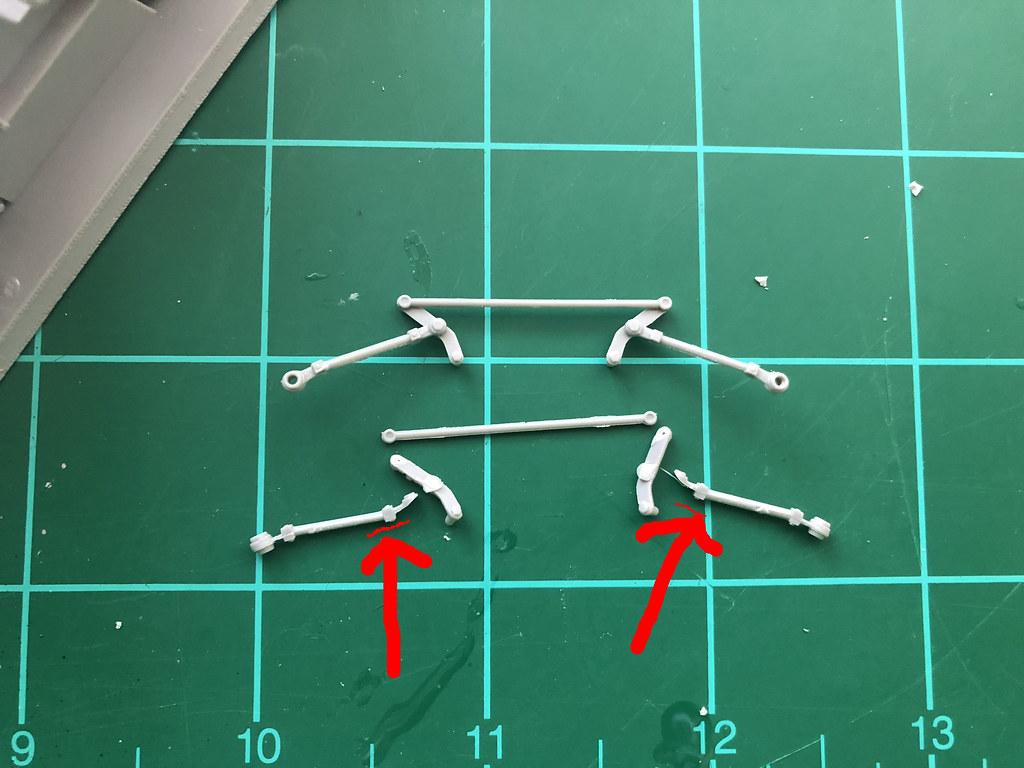
Mike, the steering linkage did in fact need to be modified. Here is the regular fit before modification. As you can see, one side is too short to reach and the other is too long.
I decided to slice the part into the obvious separate parts that made sense to me. but instead of “cutting” I went for more of a “slicing” to keep the lengths the same and not have to add details back such as the bolts and what not.
Here I have the part broken down and compared to the original. Luckily, A-22 is used for both axles so it’s doing the same thing twice. I did the 2nd axle first since it is less visible and wanted any mistakes to be more concealed. One thing I learned doing the first one, is that on the underside of the arm that attaches to the tire, file off the tab that is closest to the underside of the vehicle, if you don’t do this, the arm that attaches to the vehicle won’t swing far enough so the connect rod will be too long. On the first axle I had to cut a couple millimeters off of this connect rod to get it to fit right, I still think it looks fine but definitely gave me a ‘scare’.
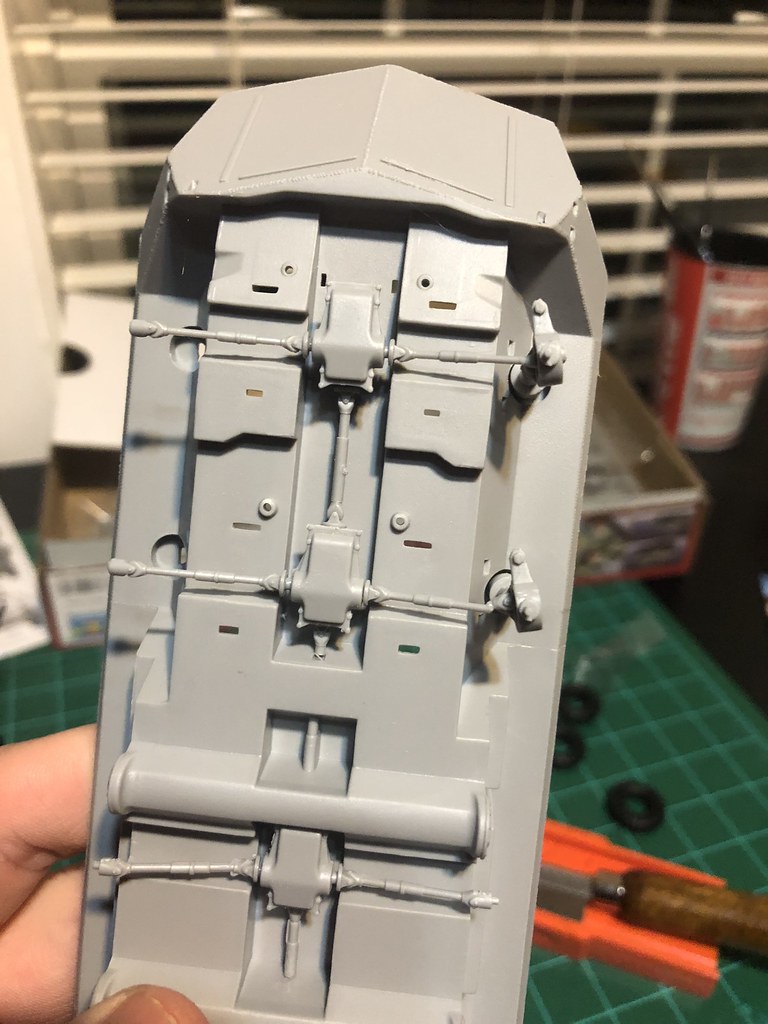
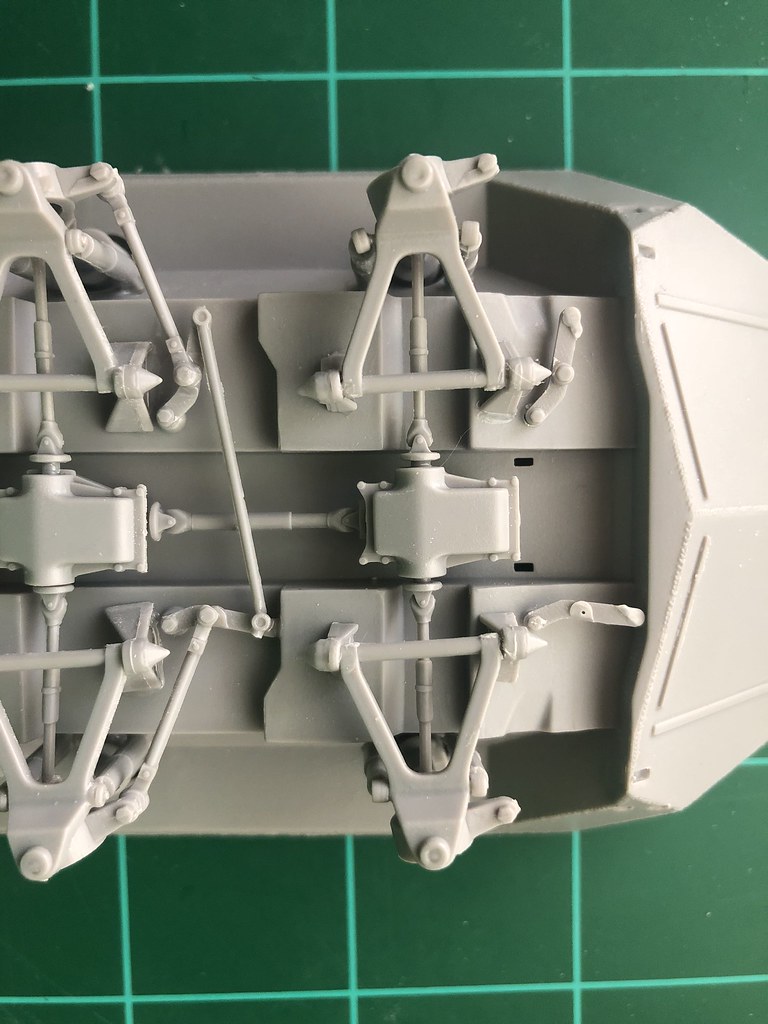
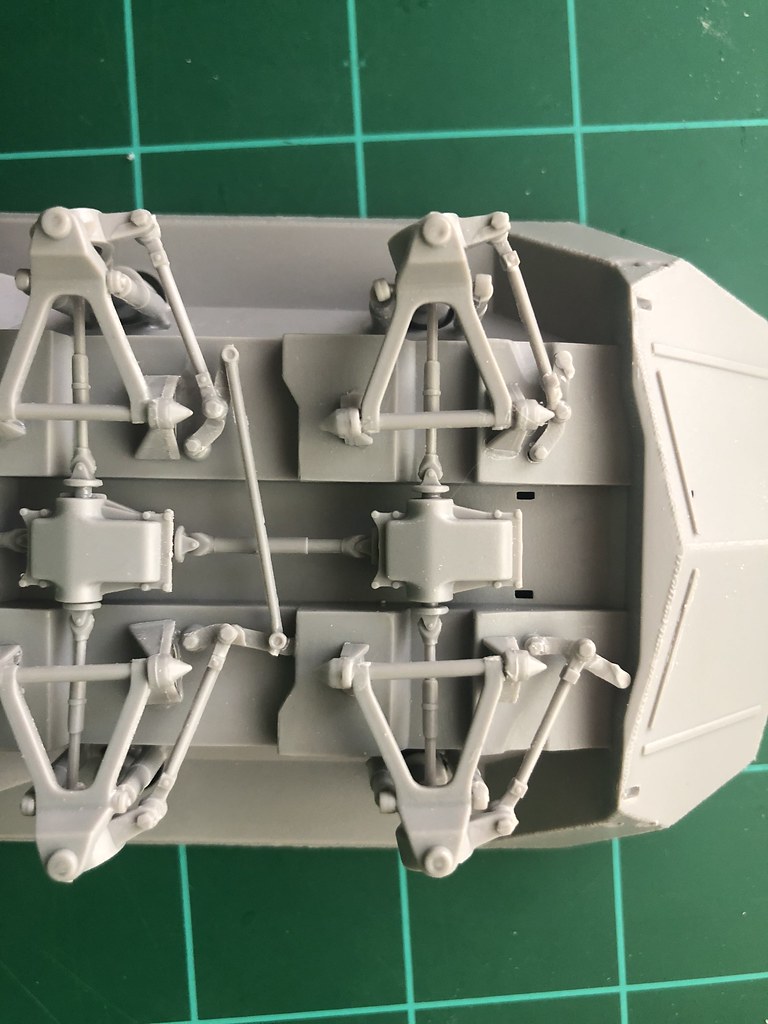
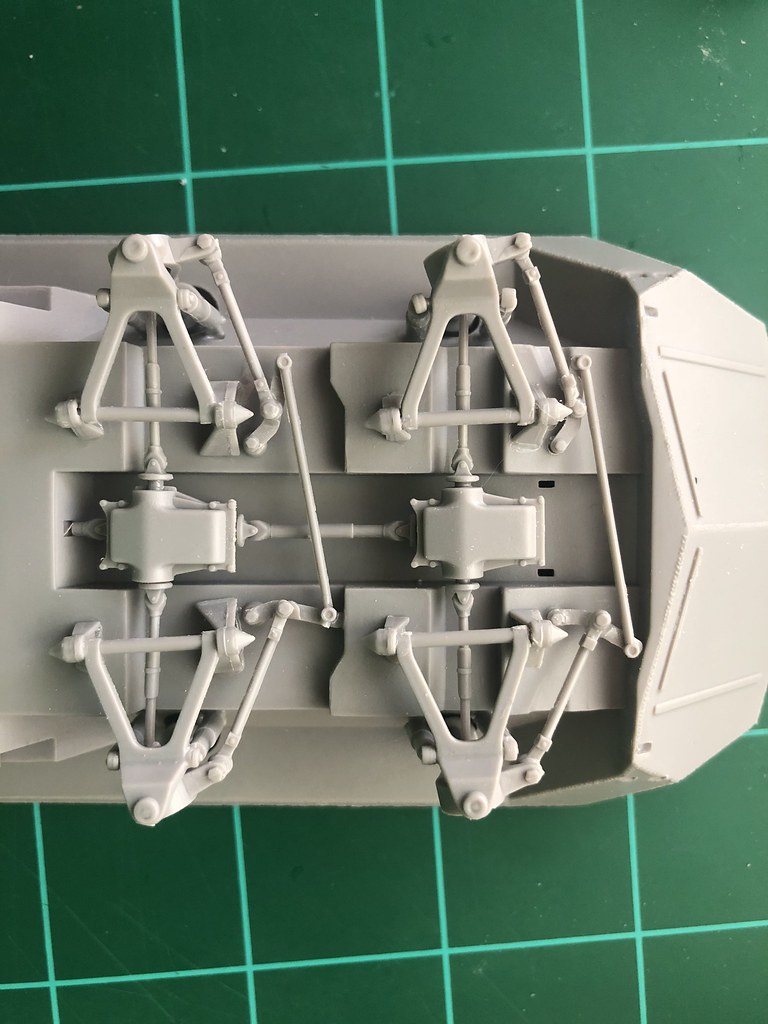
The steps which I put it back together went by relativey quick. You can see the first go around completed already to see where the steps are leading too. Thankfully all the ‘pins’ of the arms that go into various holes are tight fitting so you can snap them in and turn them slowly, getting every fitted together without having to use glue until the end.
I started the arms that attach to the underside of the LAV first. I placed them in the rough position I thought would work.
Next I placed the arms first on the rod that the tire attaches to, at this point the part is upside down so may need some glue, but mine was snapped pretty good to the attachment it goes into so that wasn’t need while I was getting everything together. once everything was in place and set I glued everything together.
Last step was to place the connecting rod. The front axle I did not need to make modifications to the length of the connecting rod because I filed off those tabs I previously mentioned.
I really admire your ability to do that detail Josiah. What you did is mechanically correct, and adds to the realism of your modification. I confess that when I looked at the kit parts and thought about slicing them up, I also thought about how few times (if ever) anyone but me would turn the model over.
Thanks for the compliments guys. Rob: I got info from a source who worked with the LAVs, this kit is fine for an early OIF vehicle. Most if not all didn’t have the thermal updates for the exhausts or the add in armor plates. It just needs the M240’s, mirrors, and a fully fluted 25mm barrel.
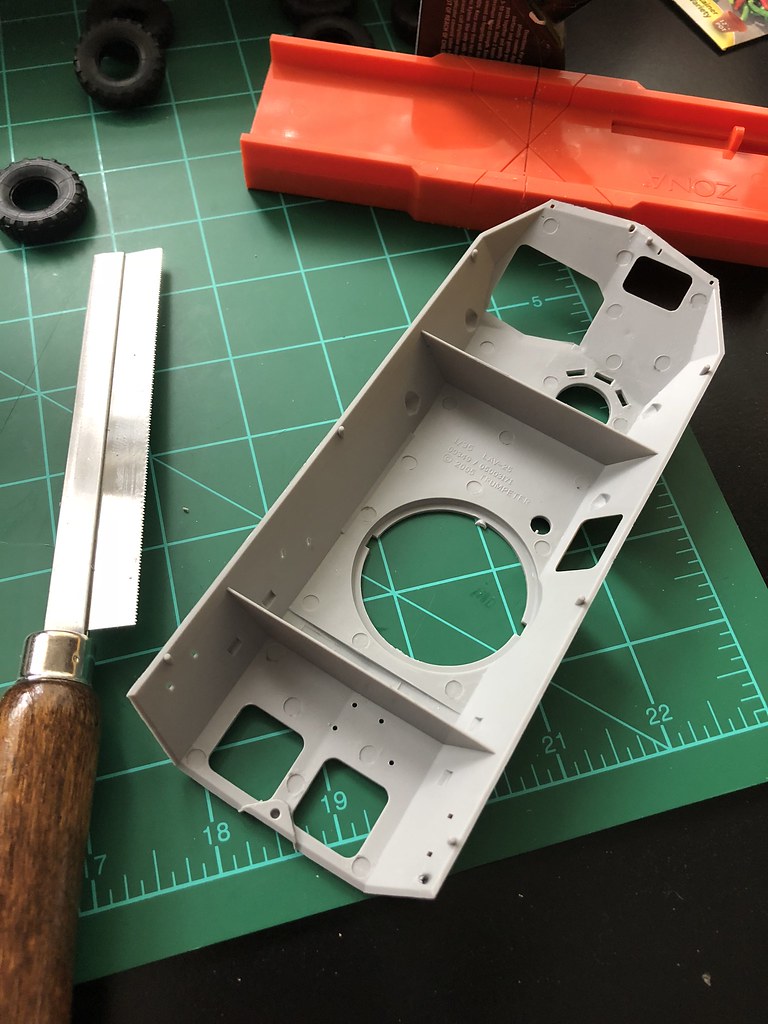
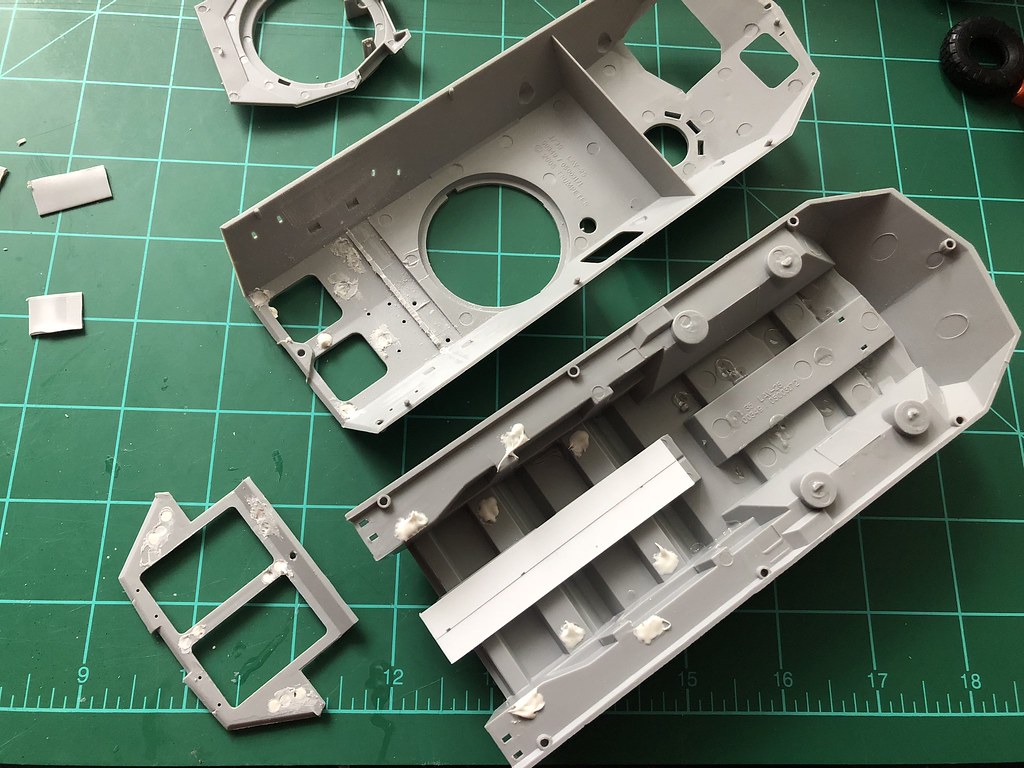
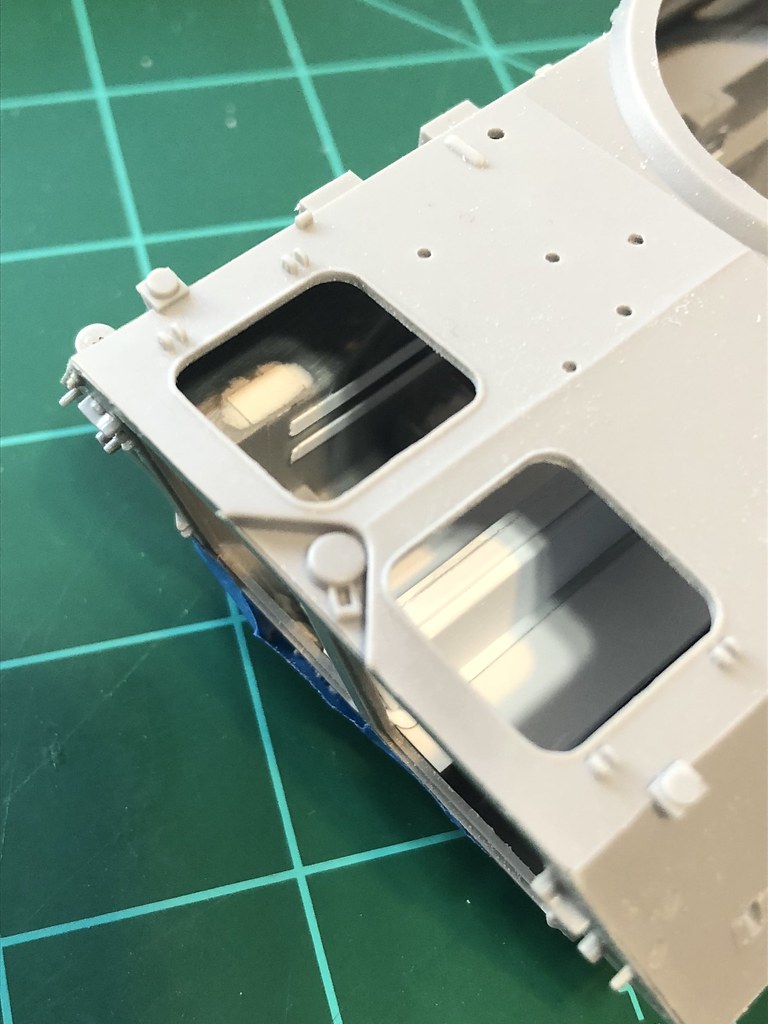
The rear top hatches will be opened so I’m scratching a partial interior. I started by sawing/cutting most of the plastic brace off. Then filling the injector pin marks and put a piece of sheet styrene down the middle to represent the bench.
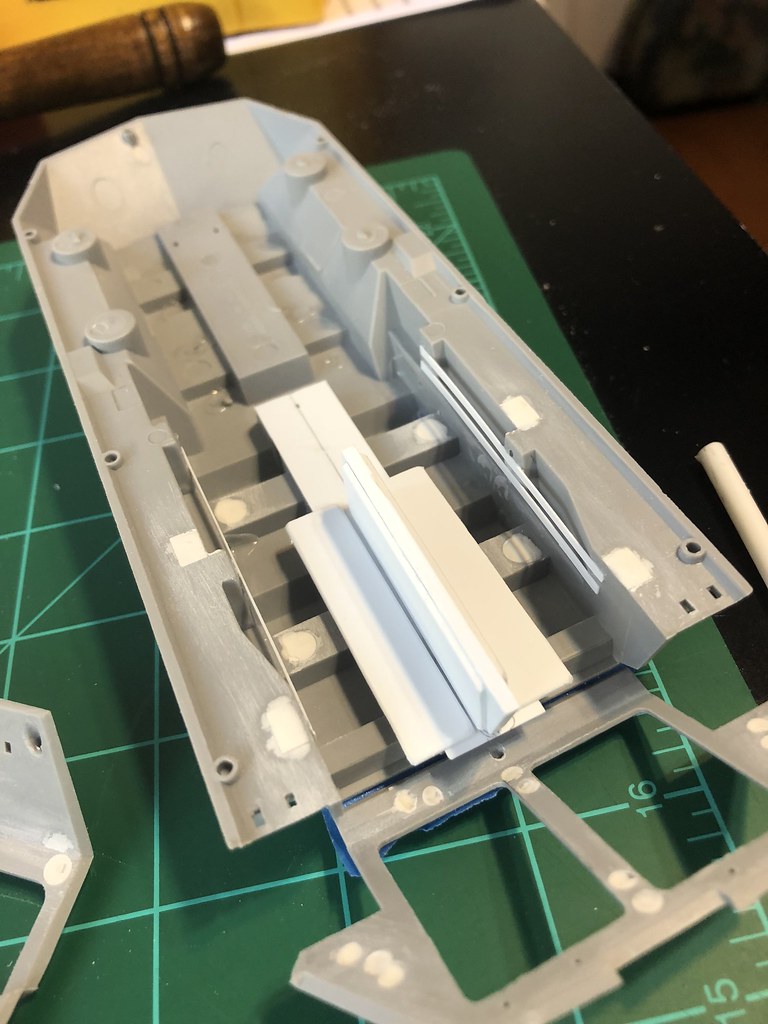
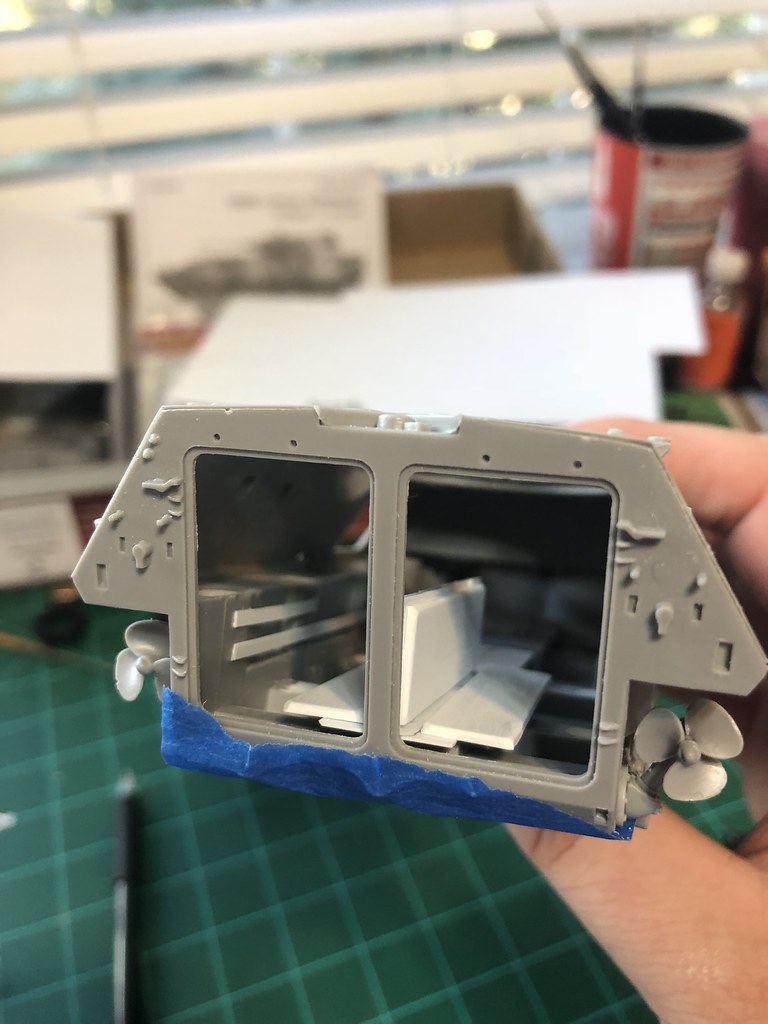
Next I added the divider to the bench, as well as the “cusions” for the bums and backs of a Marine riding in the back. Also added rails to the sides as seen in reference pics. Here’s where I’m at for now: have some more details to add that may be seen. Next up is adding more detail to the sides.
 Untitled by Josiah McDonald, on Flickr