Bish, thanks! Well, I’m putting my best foot forward and have a progress report today. I realise I didn’t post any shots of my cockpit and wing work from earlier, so here’s the first pics (box top shot coming tomorrow).
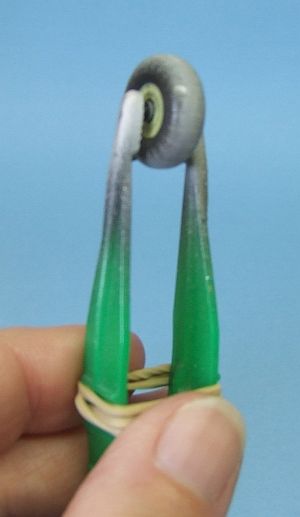
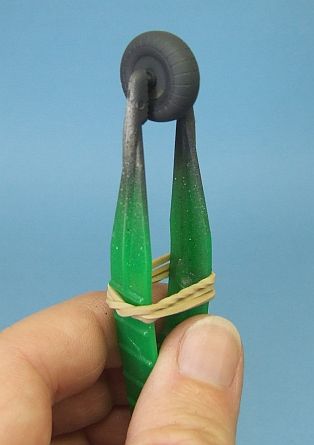
I assembled the wheels and sprayed the hubs way back, and today applied the masks and worked out how to hold them to be sprayed, thus:
Instead of straight NATO black, this time I mixed a paler shade by going 1:1 with Panzer Grey, as I’ve seen plenty of examples of German rubber being a pronounced grey rather than black – here’s hoping it works out okay:
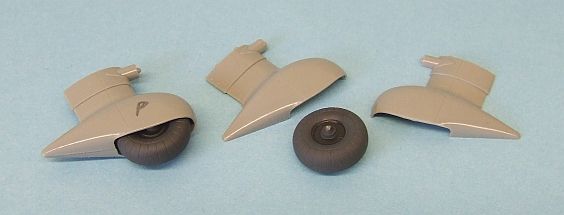
As today’s main job, I assembled the landing gear around the wheels, dressed the joints and installed fairing caps over the siren mounts. They may have been removed completely by May '41 but I didn’t feel like doing plastic surgery at this point. The spats are marked up for port and starboard as there is a fractional difference in the inner and outer faces of the wheel hubs, not that they are really visible. The handed adaptors to the wing are already installed on the wing subassembly that I built in the first half of the year:
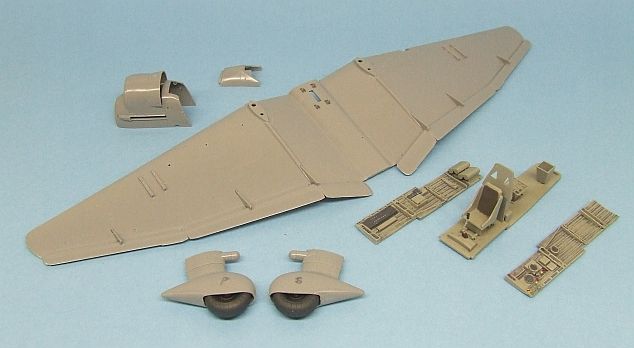
The wheels will be masked and the spats airbrushed off the model, then added in final assembly, assuming the various small parts on the underside of the wing clear the resting surface and won’t be damaged by handling minus the gear. Overall progress to date:
As you can see, I made a start on the engine cowling, which is fiddly, though parts fit seems appreciably good. Regarding this last part, I have a question for die experten here: the wide open view into the cowling from the back is troublesome, I have no plans to build anything in there but would like to get the colour right – was the interior 02 or 65 to match the underside?
Target for tomorrow, complete the cowling and continue with drybrush detailing in the cockpit, plus possibly broach the etched harness.
Tom, I think you have been backed into a corner now buddy.
Mike, looking good. Interesting idea on the tires, I have found NATO black to have more of a grey tone to it, I normally use the Tamiya Rubber black for none German builds, but I do like the look you have there.
Good question about the rear of the cowling. I always go for blue as the area is exposed, the colour pics I have seen of a museum He 111 (same engine as the 87 and similar cowlings) they are blue. I would be interested to see what others think.
Last night I assembled the pit and sealed it up in the fuselage. I was going to put it aside at this point but decided to forge ahead with the wing assembly (sorry, forgot to take pics). One thing I’ve noticed about this kit is that the glue (Model Master) seems to set very quickly - I only have to hold the parts together for about 30 seconds or so. I guess it’s a different type of styrene than the Revell kits I’m used to? So I had the fuselage and wing assemblies set aside, then I literally woke up in the middle of the night realizing I hadn’t dry-fit them before the glue set (not that I would have had enough time to make adjustments anyway). Luckily I had spent quite a bit of time adjusting the wing tops with the bottom, so I didn’t have any major fit problems - just a very small step that I may choose to leave as is rather than taking a chance on sanding away any of the lovely recessed detail.
Those little steps can be a real pain. I have an Excel sanding stick that a good friend gave me and I first used it a few months back and it was perfect for sanding those parts with damaging the wing detail. Nice to see it coming together Steve.
Yes, It seems my fate is sealed! Lest I be cast into the FSM dungeon of doom, I feel I must pursue this wild winter scheme. The die is cast. Besides, I woke up yesterday morning with Stuka on the brain. Apparently, I had been dreaming of a solution.
How to get the lines, with texture, to replicate a white washed field mod? White, with a tad of grey…Oil paint!..brushed on. Fairly forgiving, but if…I touch…it, all bets are off. How long does it take oil paint dry? Is it 5, or 10 years? I can’t recall.
I did look into white sharpies, but dont think it would be adequate over a dark undercoat. Still, that is a viable idea. Thanks, Archangel.Oh, and stop posting pics of real engines, would ya? Great work!
Tom… Just a wild thought… Paint marker! I have several that I use to mark replacement parts when installed on equipment for warranty purpose. They come in a variety of colors and I just so happen to have a white paint one that is like a ball point pen, that is it has a roller ball in the end. These can be found at most any welding supply store, and I think at most tool stores. The one I have came from the near-by Harbor Freight tool store. It would leave a line similar to a 1.0 to 1.2 mm pen. Just a thought my friend. They also dry super fast!
Good point, Bish. If things do go amiss, I can just blame. I was forced into this! They made me do it!
Thanks, Doug. I’ll give those a shot. I’m willing to try anything. But, first this…Day one…[^o)][:D]
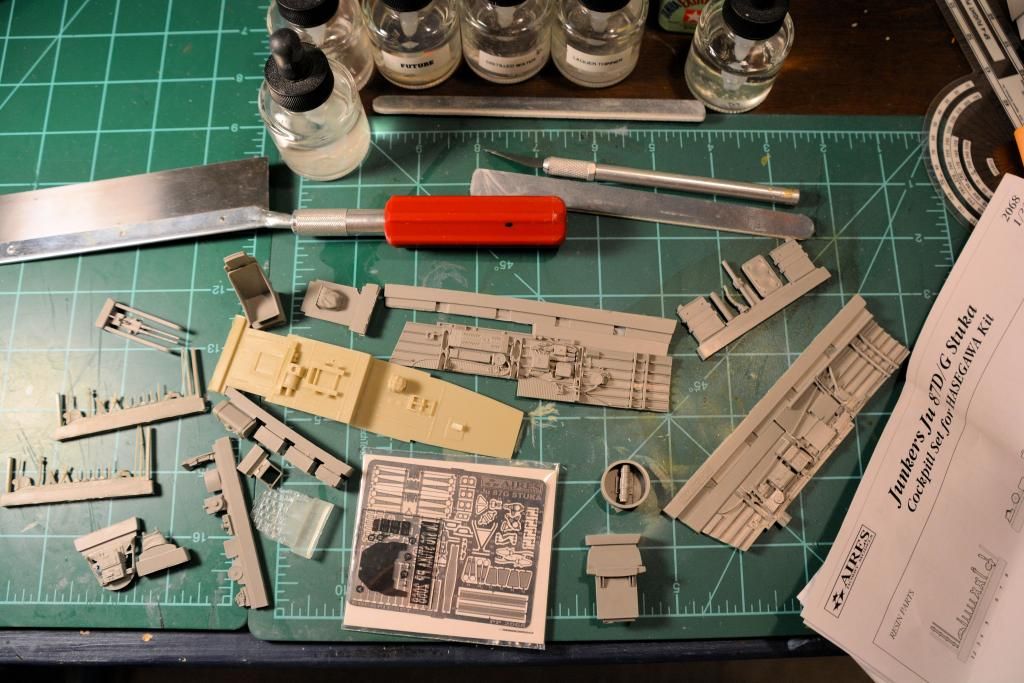
(Hey, SS. I read your set is coming in soon. Maybe we can battle this out together, or bounce ideas back and forth.) Oh, and Those two identical sprue, far left, are the replacement for the included sprue that had missing parts. Aires sent me not one replacement sprue…but two! [B]
PP – Doug is onto something with the paint markers! Tamiya make them too, though I’ve no idea if they’re enamel or acrylic. Given the way the original was not spray-applied, a marker might be the best way to replicate it.
Bish – glad to be back with this schwarm and looking forward to making progress. I think I’ll go the 65 route on the cowling interior.
Here’s another question – the coolant radiator under the nose. The kit instructions make no mention of final colours and for some reason it’s hard to see clearly in photos, the best are B & W which kinda defeats the object. Was the rad in natural metal or did it carry RLM 65 on its primary vanes?
I must say I am drooling over the Stuka photos from all the builds in here.
Shooter the engine just needs a drop of gasoline and it will start roaring to life.
Tom the scheme is a great challenge.
Adj, this badge seems like a (not so good) replication of I/JG52, in the original the boar was smaller and the blue color lighter.
Apart from drooling, I managed to make some progress with my B’ Stuka.
Canopy was masked with much care, using Eduard masks. The mask are not perfect and need some reinforcement with thin tape strips + adjustment in several cases.
Interior color was sprayed onthe canopy area.
Then the upper surfaces were rather heavily pre-shaded with two tones, since the upper colors are quite dark.
Under surface was pre-shaded with a lighter color (red brown), as well as the yellow cowlings.
Okay, progress today – I added some oil wash to the cockpit for dirt on the floor and walls, rust where paint us chipped on the seats, drybrushed silver for bare metal in the cockpit, white to pick out the radio boxes, and built up the engine cowling:
The interior of the cowling was brush painted RLM 65. I added some styrene shims to help align the lower section with the upper, which is without positive alignment features. The prop backplate is required to be added before the cowling mates to the fuselage, secured with a fitting from the inside, and dryfitting revealed a deliberate gap between the backplate and the cowling. I checked photos and it does not appear to be there all the time on the real thing or other models, although there could be a gap, just not so pronounced… I’m thinking of filing down the spacer ring on the backplate which creates this gap, to reduce the separation and, hopefully, make the prop fit a bit less ‘wobbly.’
The intake in the upper part of the cowling was prepainted in dark metallic, and then masked with rubber solution before the part was added. Hopefully I can just peel away the rubber cleanly after spraying.
There are sink marks on the prop blades and these are now filled for smoothing out.
Target for tomorrow – get to the etched harness, finish off the instrument panel, add the rudder pedals and bombsight, and just maybe mount the cockpit walls to the fuselage halves.
Today’s progress: I mounted the cockpit walls to the fuselage halves, repainted the seat cushion as brown leather, painted and fitted the bombsight and rudder pedals to the instrument panel, the crash pas to the coaming, and added the intake to the right side of the engine cowling. Not a lot, all told, but I’m painting a T-72 at the same time, and alternating between projects.
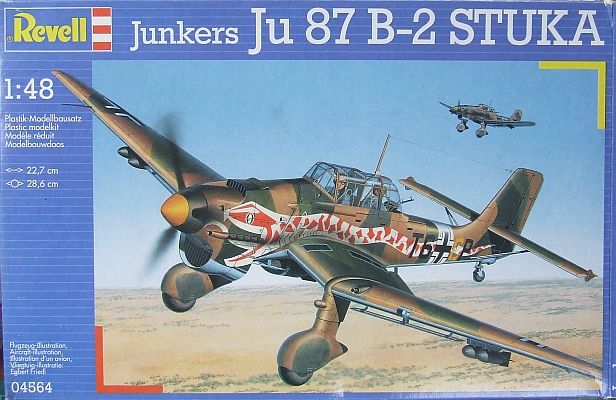
Here’s the edition I’m building:
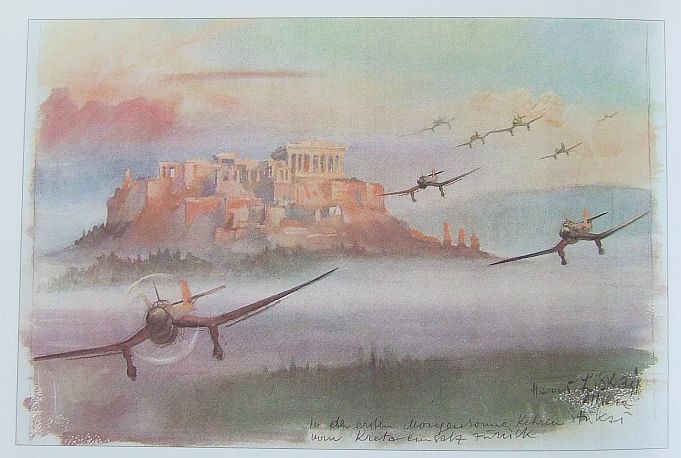
I’m doing the markings for the Greek campaign, dated May 1941, so I was interested to come across an original WWII watercolour painting, published in the excellent Black Cross book on the Stuka, which shows a flight of Ju 87s on a dawn patrol over Athens:
That’s a real piece of history, eh?
My target for tomorrow is to have the etched harnesses installed, fuselage closed up, and to start work on the scratchbuilding to fix up the landing light. I might get that out of the way before mating the prefabricated wing, for ease of handling, then run through to final assembly.
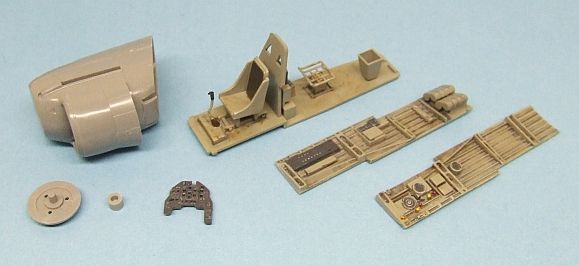
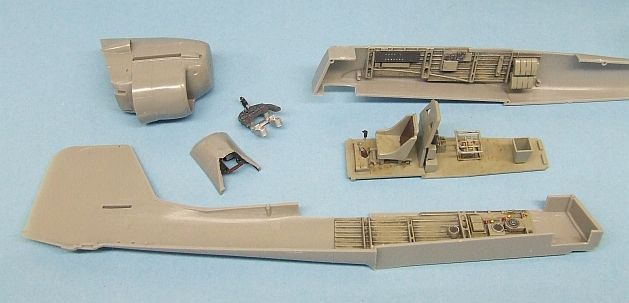
**panzerpilot:**Those are awesome interior detail sets from Aires but test fit the floor in the fuselage before you do anything. Mine was too short and not wide enough so I ended up fixing that by transferring all of the Aires detail to the Hasegawa flooring. Also the pilots seat platform ( you know that part that looks like a capital letter “H” has a problem in the fact that the outer edge of the legs contacts the detail on the cockpit side walls. I had to trim these back to get the cockpit flooring to fit properly without the platform contacting the side wall detail. I have photos of what I did if that’ll help you avoid stuff like this. Looking forward to you build man.
**Zvezda:**Serious preshading!
**Mike:**Cool painting and good progress on your 87.
Hmmm, I hope the pre shading didn’t come along too serious…[^o)]
Bish marking will be of III / St.G 77 as operated during the battle of Crete from either Argos, Molaoi or Karpathos airfields (I cannot accurately trace the Gruppen’s exact position at that space and time).
Nice, I really like the yellow nosed Stuka’s. I see what you men about pinning down the location. I have just found one online source and a book that says Argos and another book that say’s Molaoi. I think we are safe in saying Greece.