That’s looking good greg. I need to try joe’s method for cockpits, well done for giving it a try. And ye, those are the drum magazines. You can see the colour in the pic I posted above.
Bish, you da man!!!
Thanks very much, and I have a bit of repainting to do.
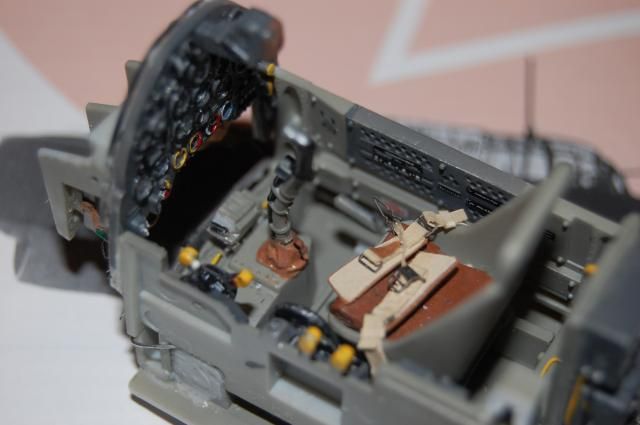
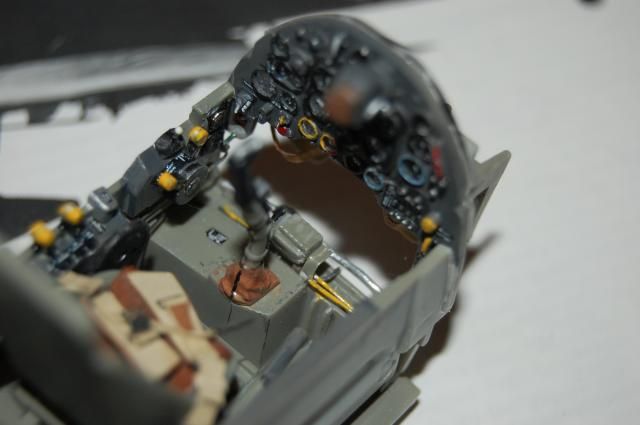
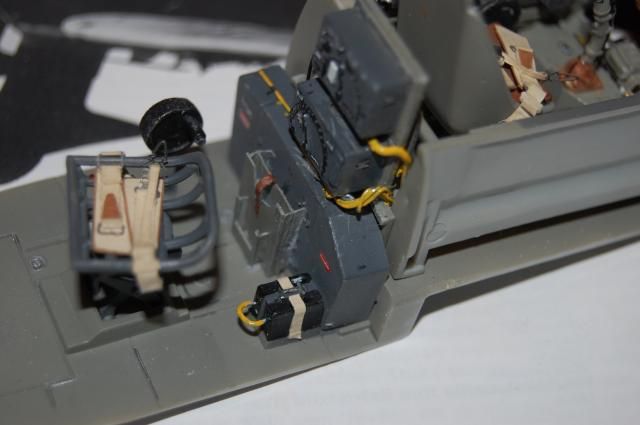
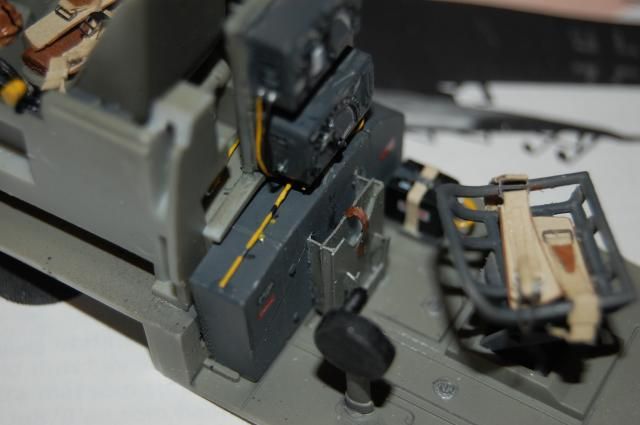
A few update pics here, I’m still adding things before I close her up. Thanks to Bish for posting that pic of the MG and the ammo drums. I thought they had a strap on them so I will get to those too.
The pilot seat is not glued in yet, still need to work on the seat back.
When I first built one of these Airfix kits back around 1978, I just slapped it together and was done withing a few days. But detailing this one is more fun now. Be easier if there were AM sets for it.
Scott
WOW!!! Nice !
Thanks,I just said the heck with it and now glued the cockpit to the R/H fuselage. Don’t think the engine assembly will take too long once I get going on that. The block is together and just needs painting then once the fuselage is together, start detailing that portion. After that’s done the rest is all downhill.
That cockpit looks awesome Shooter!
Sweet looking pit there Shooter. Love it.
Well figured all I could do with the radiator with the skills I have was trim a piece of sheet plastic to slide down into the cockpit floor up against the back side of the radiator. Nothing fancy at all, but at least it will close it up and you won’t be seeing daylight through the cockpit out of the back of the radiator. 

Shooter, that cockpit is awesome!!! Thanks for the pics! I’d love to see your ammo magazines once you have them finished.
ajd, that oughta work. Way to plan ahead.
The detail in this cockpit is pretty sparse, but I tried my best with what I was delt.  Now the instrument panel actually had some pretty good detail to it. This is the first time I used a toothpick for very fine detail painting.
 Everything is going pretty smoothly so far. Might try to get the wings on her before I hit the hay tonight.
You look like you are doing the ol Monogram some justice there adj! I know what youre talking about concerning the empty space in the fuselage with the lack of a radiator at the back. Hasegawa tried to put something in there but you can still see into the fuselage if you get the angle just right. Keep pluggin’ away bubba!!!
Lookin’ good ajd.
Looks like you caught on quickly to using toothpick for paint. IP instrument faces look perfectly round. I’ll have to try that sometime myself.
Your doing a good job with that ajd.
Greg, you mentioned earlier you are using joe’s method for the cockpit. Do you have a link for his tut, I remember seeing it but didn’t save it and now can’t find it.
Sure do, Bish. Have a couple, an older one and a newer one…
http://cs.finescale.com/fsm/modeling_subjects/f/2/t/156030.aspx
http://cs.finescale.com/fsm/modeling_subjects/f/2/t/160714.aspx?sort=ASC&pi240=1
This first is a straight tutorial from July last year. The second is Joe’s Dauntless WIP thread, currently in progress.
Thanks Greg, I will get them saved and have a god read before my next cockpit. I can get some practice in before getting to the big 109.
My pleasure, Bish.
If I mess stuff up, I plan on blaming Joe. [:P]
Good call.
lawdog, its your fault (just getting in early) [:D]
Well I’m sure this has been touched upon at least once here, but now that I have the wings installed, I have to say that I had NO idea just how large these were. I put it up to compare against my T-6 (which is nowhere near being a small plane) and the Stuka pretty much dwarfs it!
I know what you mean ajd. I have been studying Stuka’s for years and looked at lots of photo’s. But it wasn’t until I put some figures next to one that I got a full idea of how big it is. I think the fact that’s its a single engine gives the impression that its smaller than it is.
I bet you guys thought I had forgotten about this. [:D] I got back to the 144 G-2 the other day, after adding the decals, I sprayed on some exhaust staining, it was tricky trying not to add to much, and then a matt coat. The spinner spiral is not perfect, its a decal and the first time I have added one in any scale. I have also filled in the seam down the middle of the pit, so I need to sand and paint that and then ad the canopy.


