Ahoy Ranger. Very very nice. I always thought the Concorde was a beautiful airplane and your distinct JAL livery makes it even better. Small scale can be magic if you do it right and YOU did it right! Good job.
Very nice! And I dont even build airliners. Been inside a few concordes, surprisingly tight space.
I’m struggling as well, thought for sure I’d be working on my F-4 Kai by now but alas. It’s not likely to happen.
Dragon 1/35 Type 95 “Ha Go” Light Tank (Early Production)
 musleft by Eric Bergerud, on Flickr
 leftregular by Eric Bergerud, on Flickr
The Type 95 in World War II.
You don’t really think of tanks serving the Japanese Army. Actually in the mid-30s their armor doctrine was quite advanced and the tanks developed - like the prototype 95 - would have matched any in the world. It weighed in at 7.5 tons, was armed with a 37mm gun and two 7.7 mgs. It was a small tank and carried a crew of three - that meant that only the commander was in the turret. But if you compare it with the Panzer I (or even Panzer II), the Matilda I or the Soviet T-26 models it looks pretty good. By war’s end some 2500 were produced.
That said, Japanese industry was not strong enough to produce a larger model. The Japanese government knew this and one of the reasons Japan went to war was to conquer the resource rich territory that would allow Japanese industry to compete with that of Europe or the US. That proved, obviously, a vain hope, and the Type 95 was yet another proof that Japan should never have made war with the USA.
The Type 95 (“Ha Go” simply means “third edition”) had a rough start being roughly handled by the Soviets in the two battles in Manchuria in 1938-39. The problem for the Type 95 was more numbers than quality - the Soviets also had a lot more artillery and artillery does a good job at damaging or killing tanks. And the light armor proved vulnerable to anti-tank rifles used by Soviets and later the British. The tank was, however, fast for the time (figure 28mph) and reliable due to its simplicity.
The Type 95 earned its supper during Japan’s most spectacular victory of WWII - the blitz down the Maylay Peninsula leading to the capture of Singapore. (The camo and marking of from a tank that participant in the campaign.)The British and Australian forces didn’t have tanks, although did have some “Bren Carriers.” Most of the British forces were part of the Indian Army and their heart wasn’t really in the fight - indeed thousands were captured in the campaign and served as the nucleas of the National Army under Chandra Bose. In any case, the Type 95’s gun and mgs came in very handy on many occasions and helped keep the Japanese advance moving very quickly. If you’ve read accounts of that campaign, it almost sounds like the German conquest of France in May-July 1940: allied HQ contacting advance units to find out they’d been overrun. The Type 95 did pretty well in the PI. There they faced the American Stuart tanks. The Stuarts were newer and better tanks, but they arrived late in the day and American tankers had zero experience. So tank vs tank duels were very rare and US vehicles had trouble with breakdowns and failing to cross bridgets in time. Nobody’s tanks did well in the Bataan fighting.
After 1942 it was downhill for the Type 99. The Japanese had a few on Saipan and more on the PI when MacArthur returned in late 1944. You can image how well the Type 95 matched up against American Shermans on Saipan or Luzon. They didn’t do any better facing British M3 “General Lee” tanks in Burma in late 1944-early 45.
The Kit
As noted in an earlier post, this is a terrific kit. The fit is excellent - Dragon resisted making the kit overly complex, so the part count was low - I’d guess around 200. There was no interior for the kit, nor were their figures (I don’t do figures anyway) so I modeled the kit “buttoned up” which simplified things further.
The paint scheme was interesting. As near as I can figure, it was very similar to that used by the Germans. I’m not sure what color the primer was, but I think the tank was painted a kind of tan at the factory that looks a bit like German “Dunkelgelb.” In the field I would guess the crew applied blotches from a dark green and red-brown. For reasons known only to the Japanese, they applied yellow stripes. The pic below gives you the general idea:
 rightftregular by Eric Bergerud, on Flickr
In my humble opinion some modelers put too much rust on armor - unless they’re trying to reproduce a “knocked out” vehicle. (Some Japanese modelers do nothing but - the results are very impressive.) The exhaust would certainly have shown rust - and I used real live rust effects on the exhaust and it looks … like rust.
I did quite a big of weathering. If I modeled for the camera you could see quite a bit of chipping. But most of the chipping is obscured by dust and mud. Of one thing I’m sure - tanks got dirty. If you watch a short video of “Tank Fest” at Bovington you can see tanks getting dusty in about 90 seconds. Now figure that tanks would usually be moving in a column - that means there will be dust and mud dispersed from the tank or other vehicle in front. Add to this climate in Southeast Asia. Malaya would have been temperate compared to New Guinea but you’re still looking at a lot of rain, a lot of sun, followed by more rain. So a tank in action would be dirty, dusty and would show some mud.
I went on Google Earth to see what a jungle road in Malaysia would look like. It’s a kind of reddish brown. Because there is some much rain I don’t think you’d get mud the way you might in Russia (or Italy for that matter) in the fall and spring.
I decided to make a base for the model that would emulate a jungle road during the Singapore campaign. There was a boat load of foliage. To emulate the plant life I used “Super Trees” from Scenic Express. This is a great product. The Super Tree is made up of a dried lichen found in rural Norway. Depending upon how to you want to configure it, you can make a proper tree or a row of shrubs as I made. Get the stuff nice and damp with watered matte varnish and the flock sticks right on. In used two different colors on the shrubs and a third for the ground. I didn’t put foliage on both sides of the base because that would have hidden the model. But you can get the idea.
 rearnew by Eric Bergerud, on Flickr
 rreardio by Eric Bergerud, on Flickr
More pics below:
 rtrearnew2 by Eric Bergerud, on Flickr
 rtftnew2 by Eric Bergerud, on Flickr
 rtregular2 by Eric Bergerud, on Flickr
rreardio by Eric Bergerud, on Flickr
 leftftregular by Eric Bergerud, on Flickr
 frontdio by Eric Bergerud, on Flickr
Eric
8 Likes
Excellent job ![]() . Your type 95 looks great the camo is cool and the weathering looks spot on. A nice write up of this vehicle and its significance in the history of WWII. Thanks for sharing.
. Your type 95 looks great the camo is cool and the weathering looks spot on. A nice write up of this vehicle and its significance in the history of WWII. Thanks for sharing.
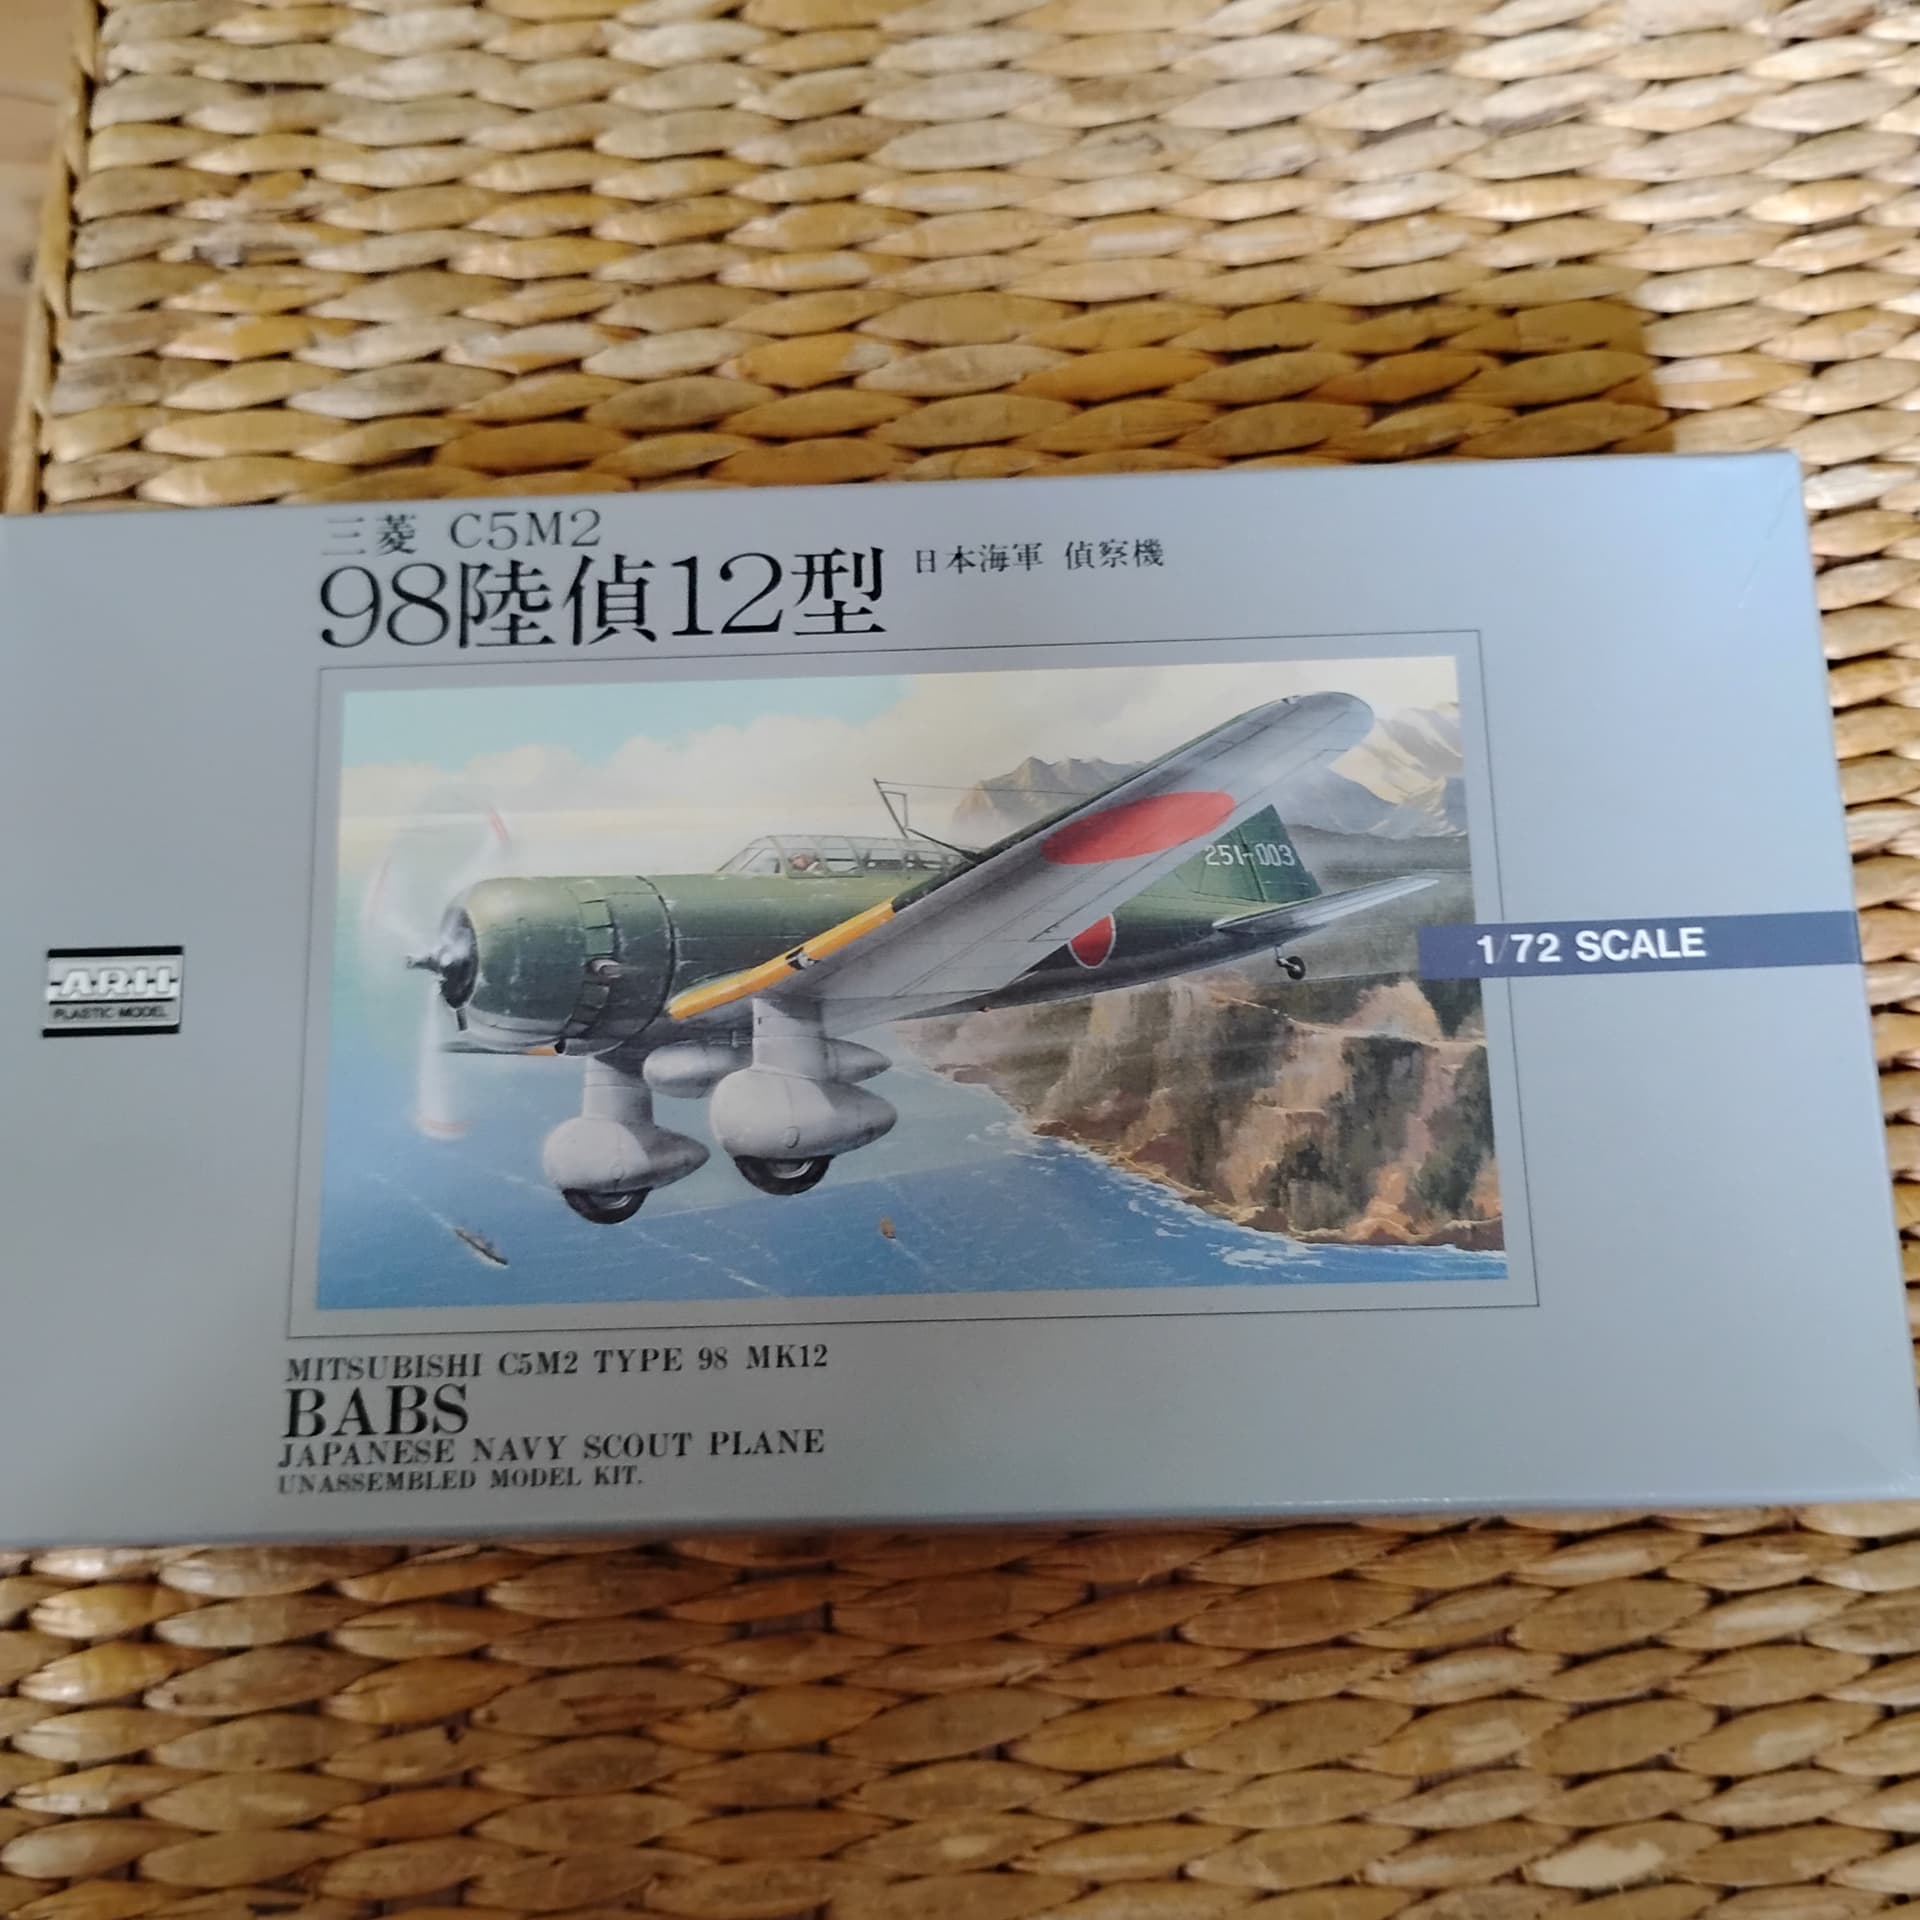
I would like to join in with the only Japanese kit in my stash the ARII Mitsubishi C5M2 Babs. The little kit looks good in the box with nice engraved details.

4 Likes
That’s a cute little kit! Looks to be a quick build too! Looking forward to seeing it finished.
Wonderful model and excellent history lesson. Thank you!
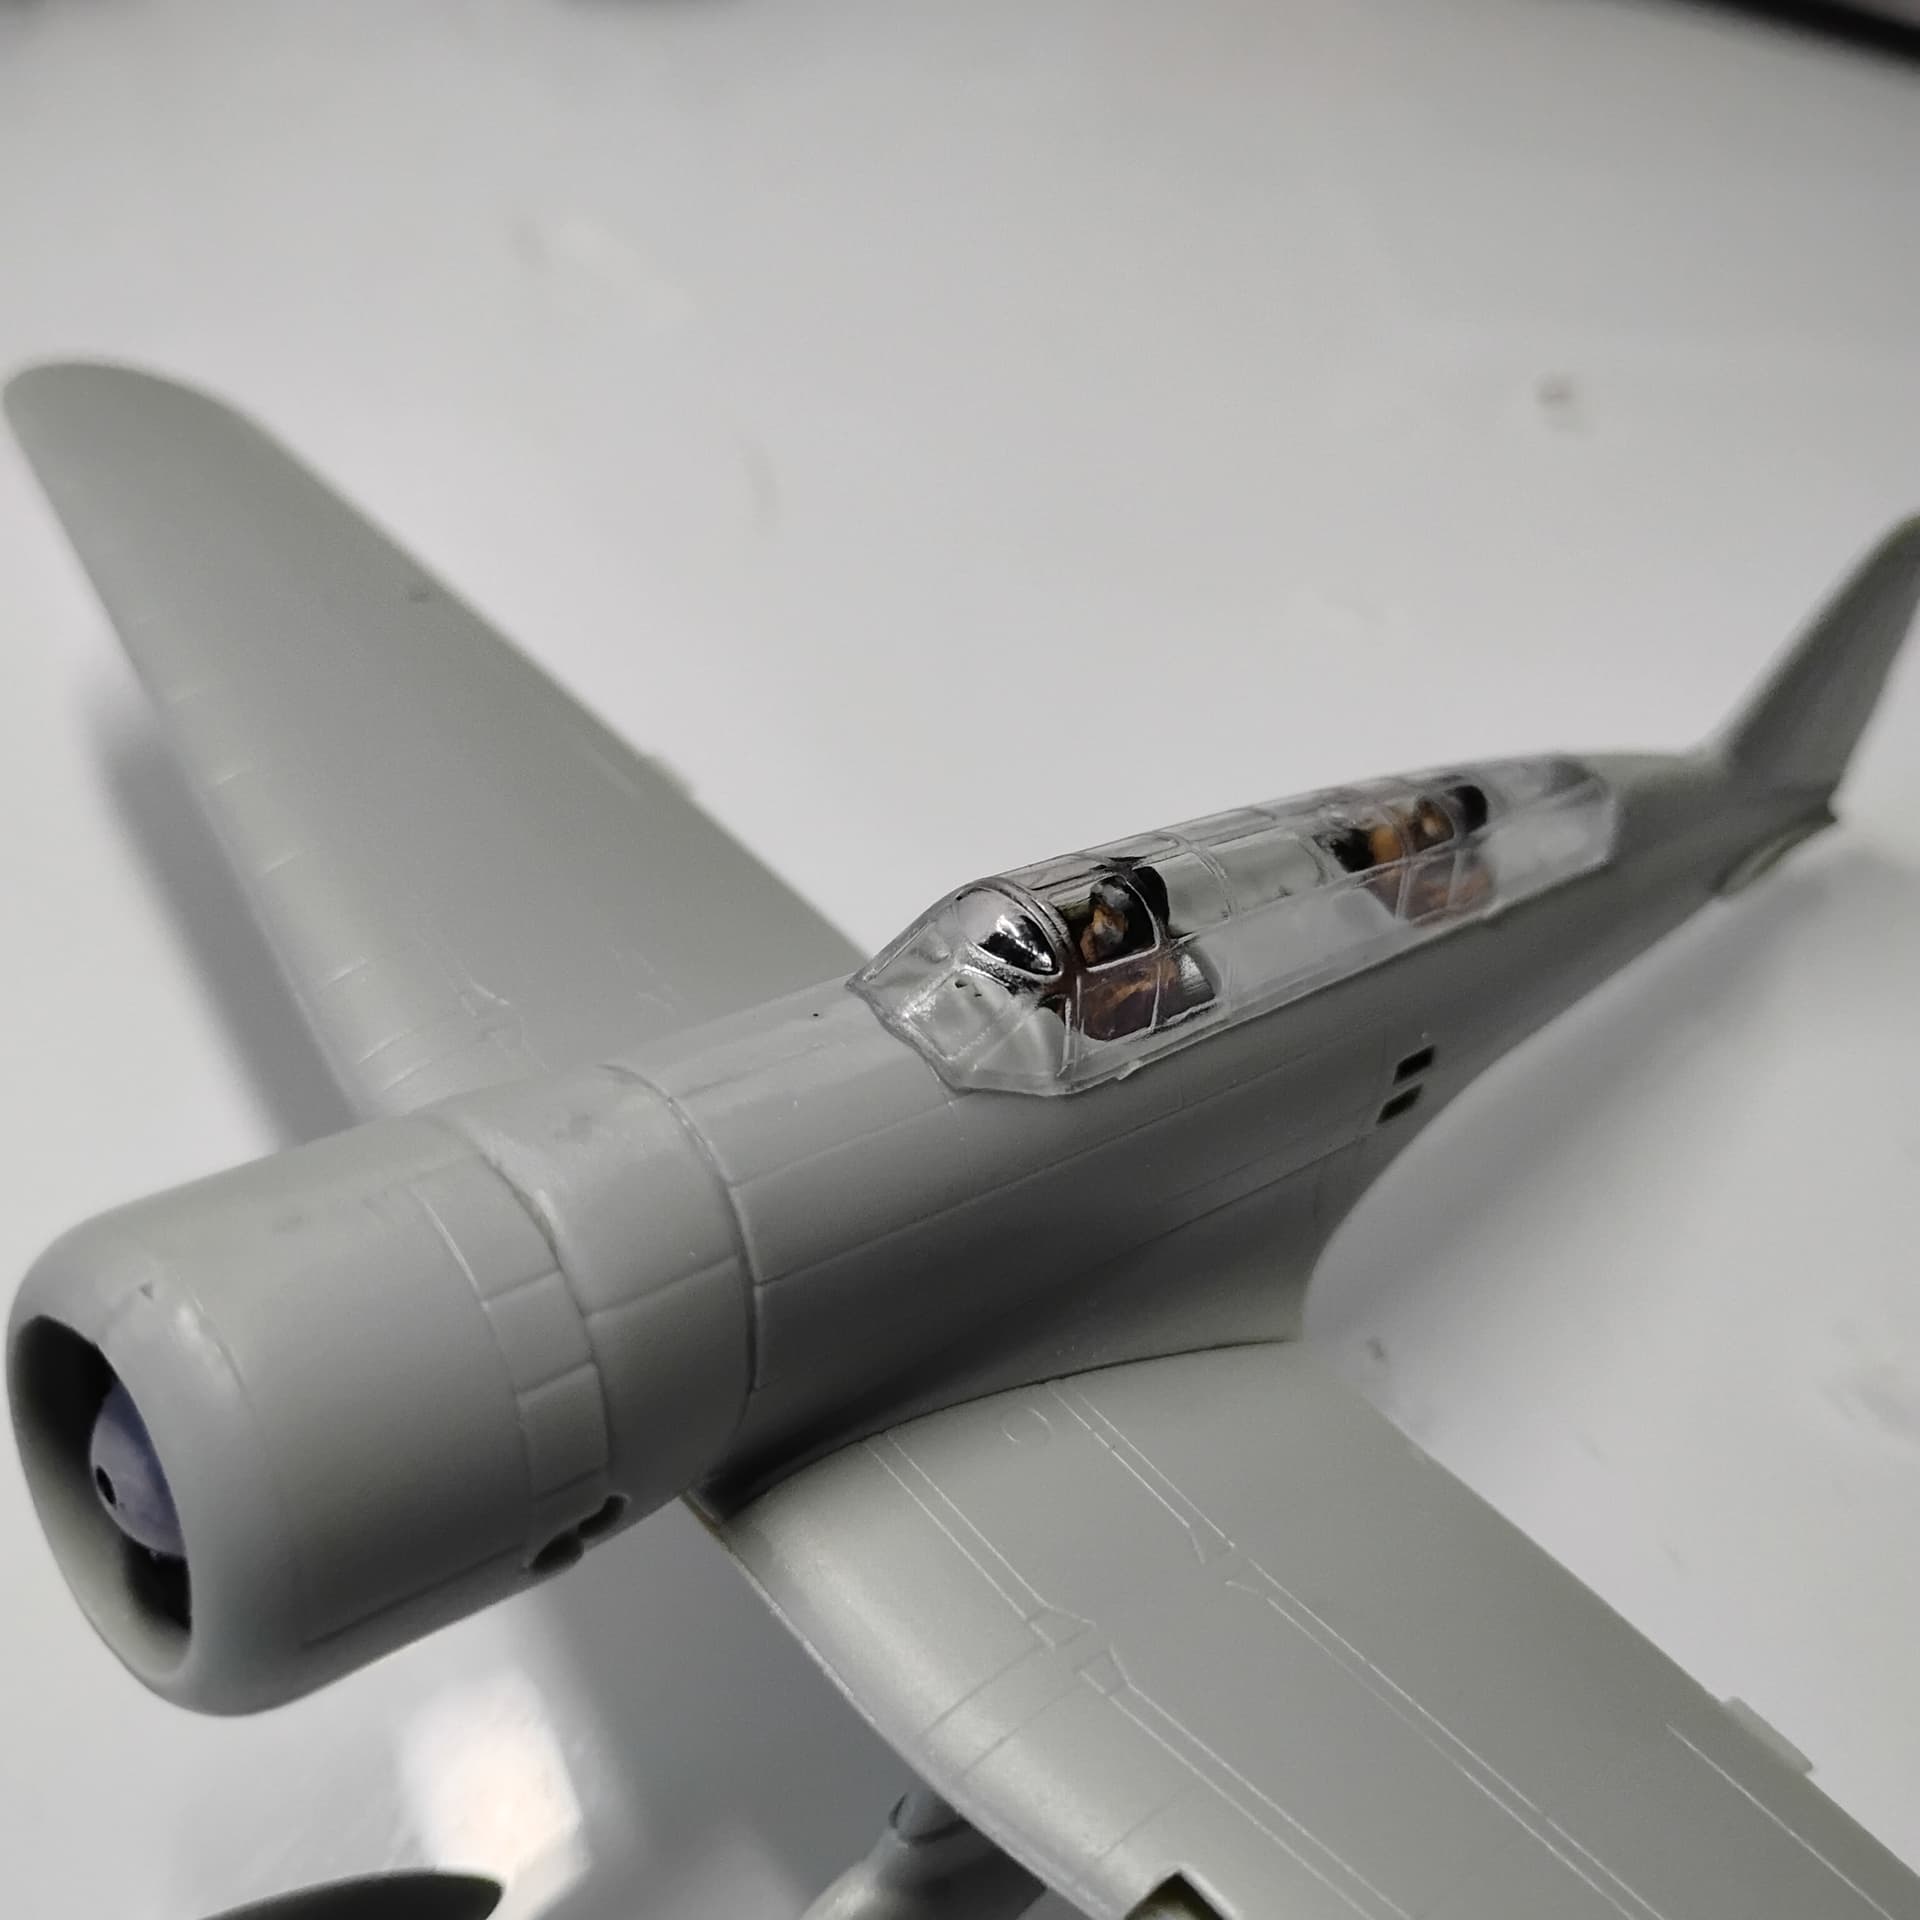
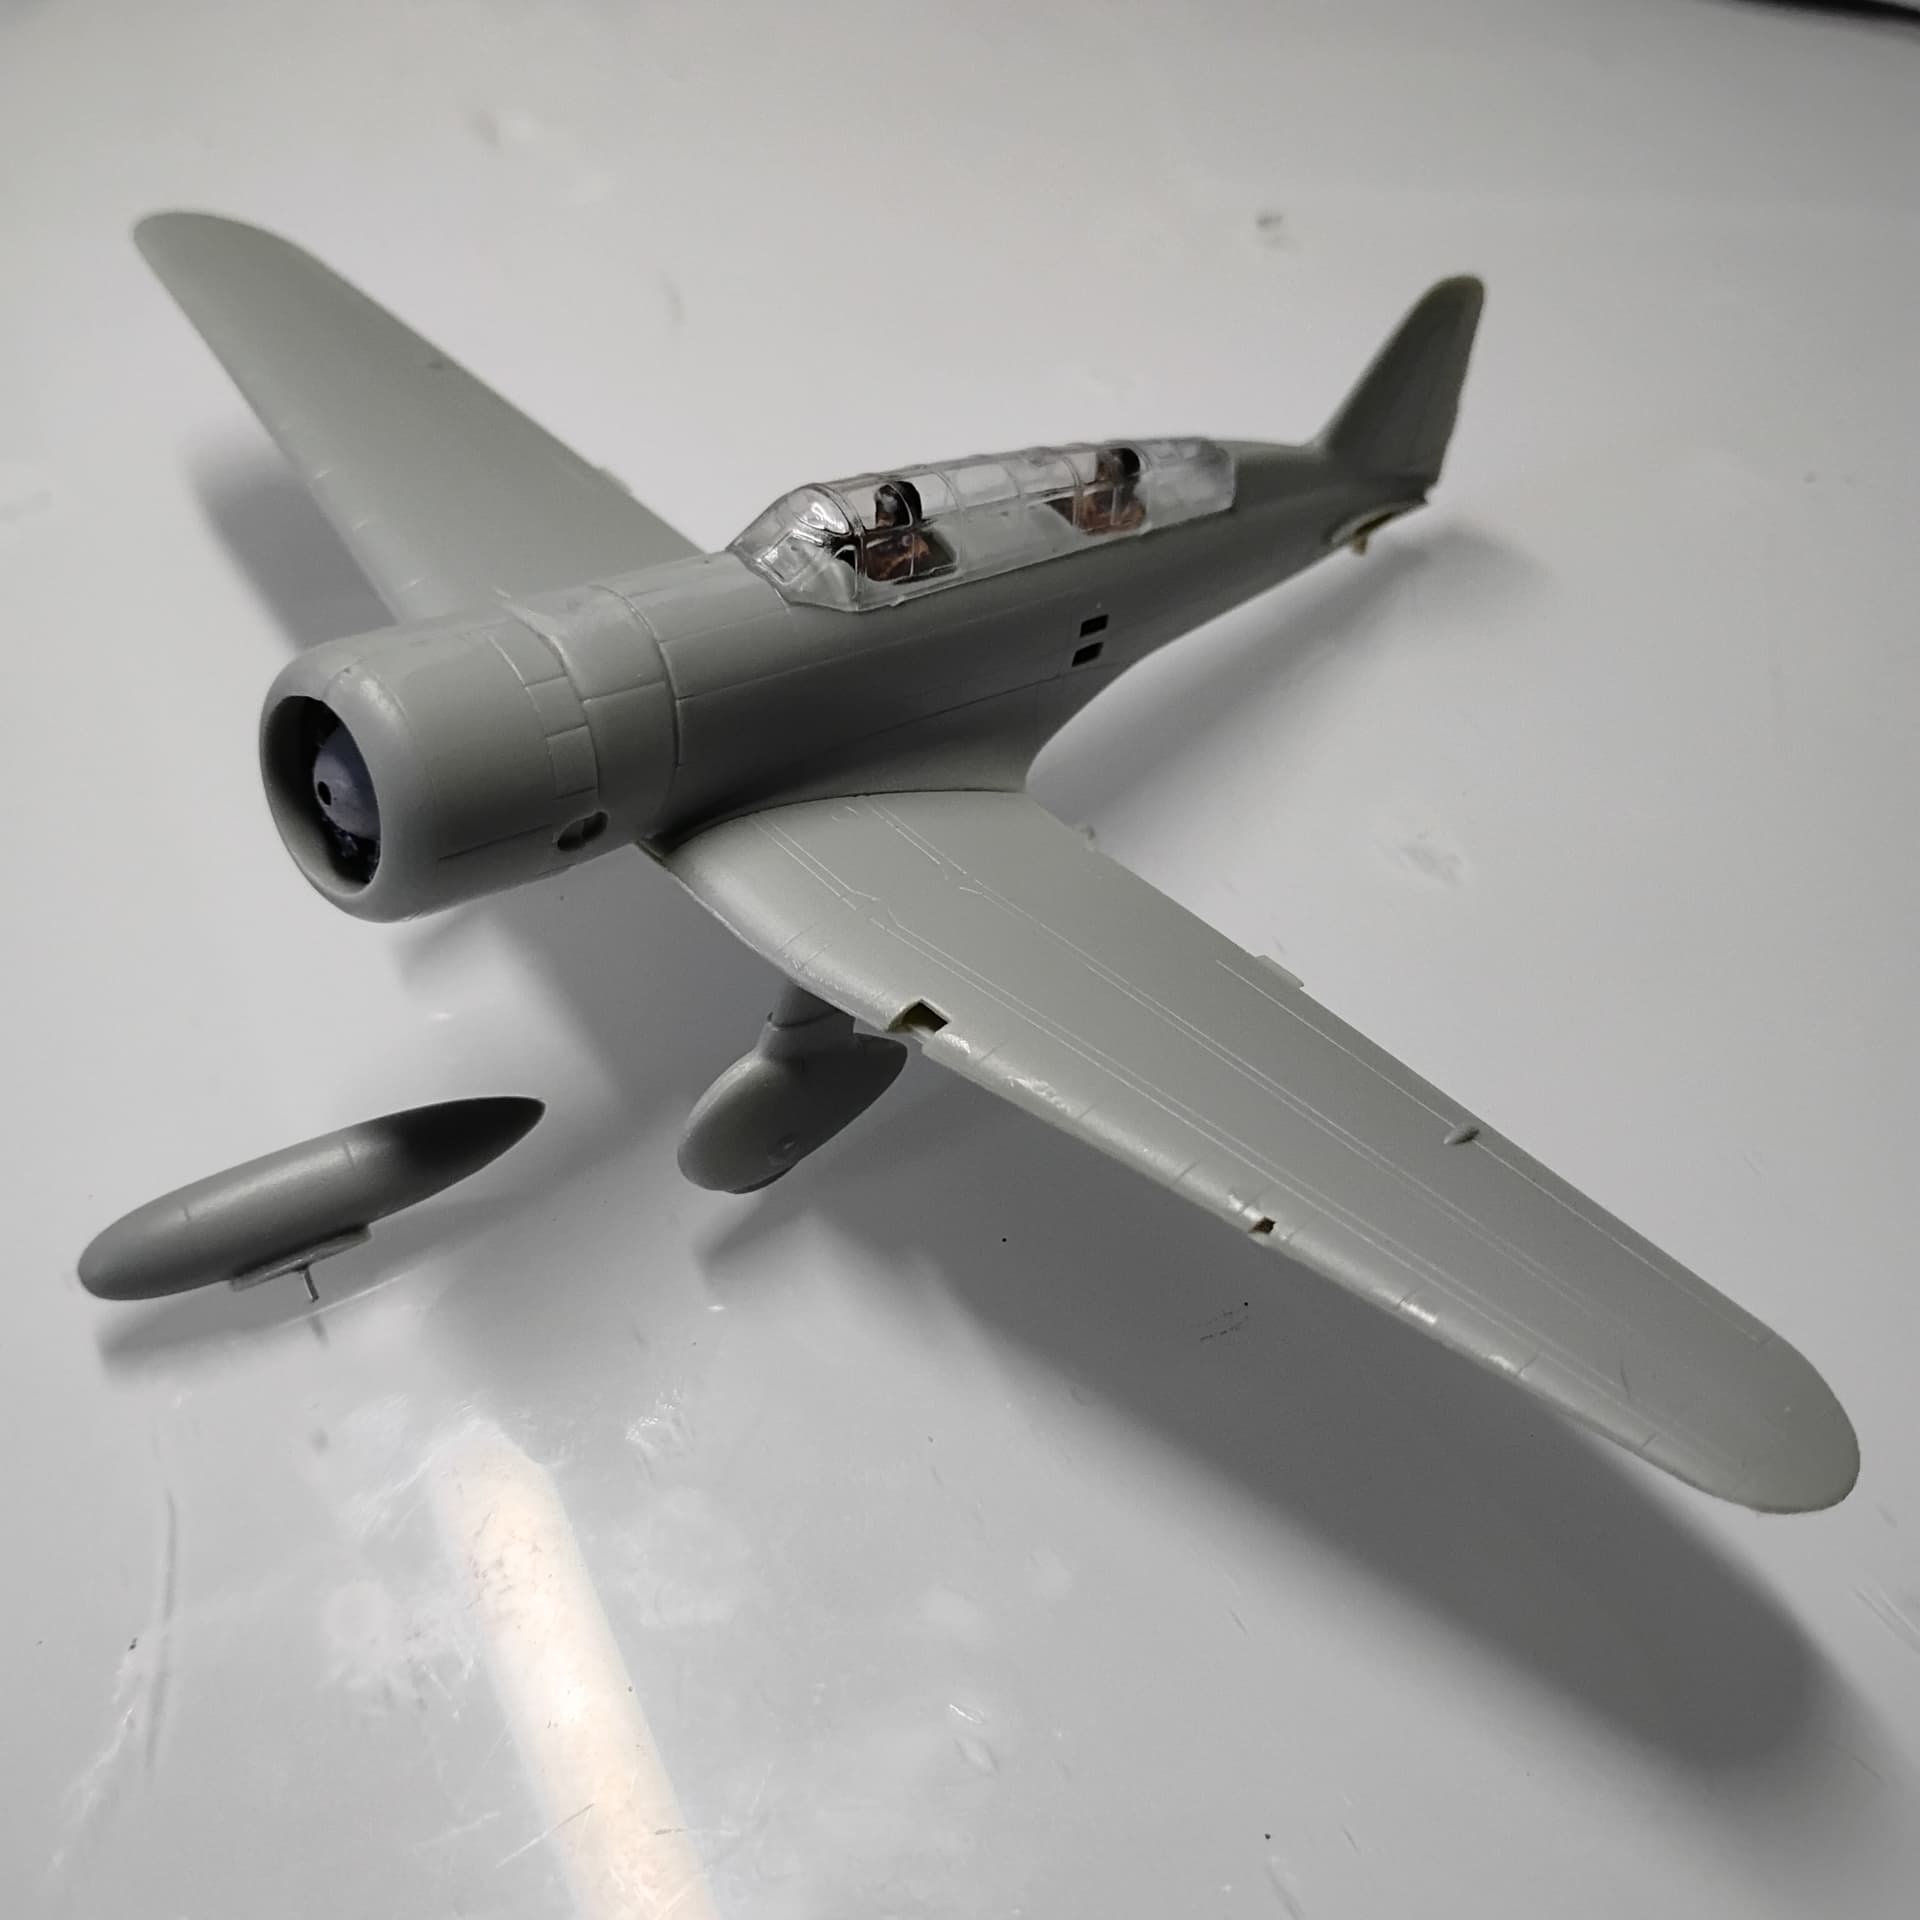
Progress for the day the pilots are a first for me to fill the empty cockpits. The fit of this kit is first rate and looks like no filler will be needed, a real joy to build.
3 Likes
Welcome to the Group Build @Fisherman_Dave. Glad to have you on board! Will get you added to the roster.
Your tank looks awesome Eric. Nice work. I’ll get it added to the wall at some point this week! Thanks.
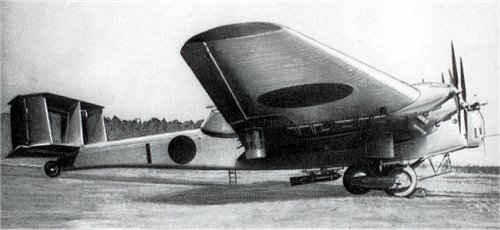
Finally found the motivation to get the E8N1 Dave build underway. There is little information on this aircraft. It saw combat early in the second Sino-Japanese war as a coastal raider being employed as a dive bomber, but was soon relegated to rear area duties as newer aircraft designs were coming on line. The E8N1 was the only Japanese float plane utilized by the Kriegsmarine aboard the Orion.
The “Up Detailed” version of this kit includes rigging but I’m not sure about it being flat.
Added some plumbing/electrical connections and lightened the crew bulkhead. The seat belts are included in the kit. There are 2 sets of instructions, the base kit which calls out the PE instructions. Painting calls out Mitsubishi green for the interior but I chose to stay with the Nakajima green as this is referenced online. Chipping was applied and a light weathering was also added.
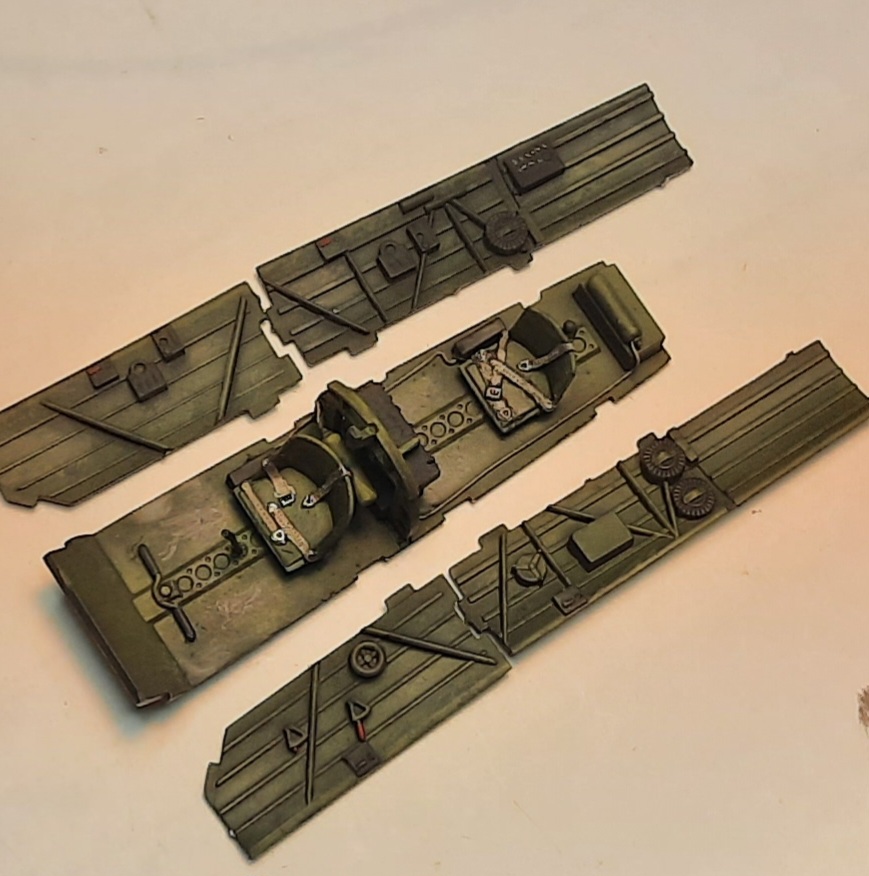
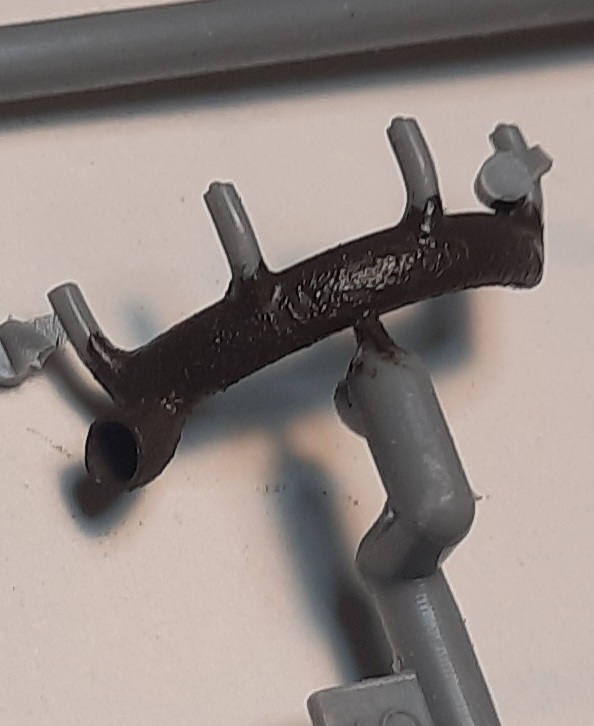
Cleaned up the exhaust with a drill and a bit of reaming to get the sidewall as thin as possible. Weathering was started by texturing with Mr. Surfacer mahogany applied by stippling with a stiff brush.

For comparison…
Happy modeling,
Mobious
2 Likes
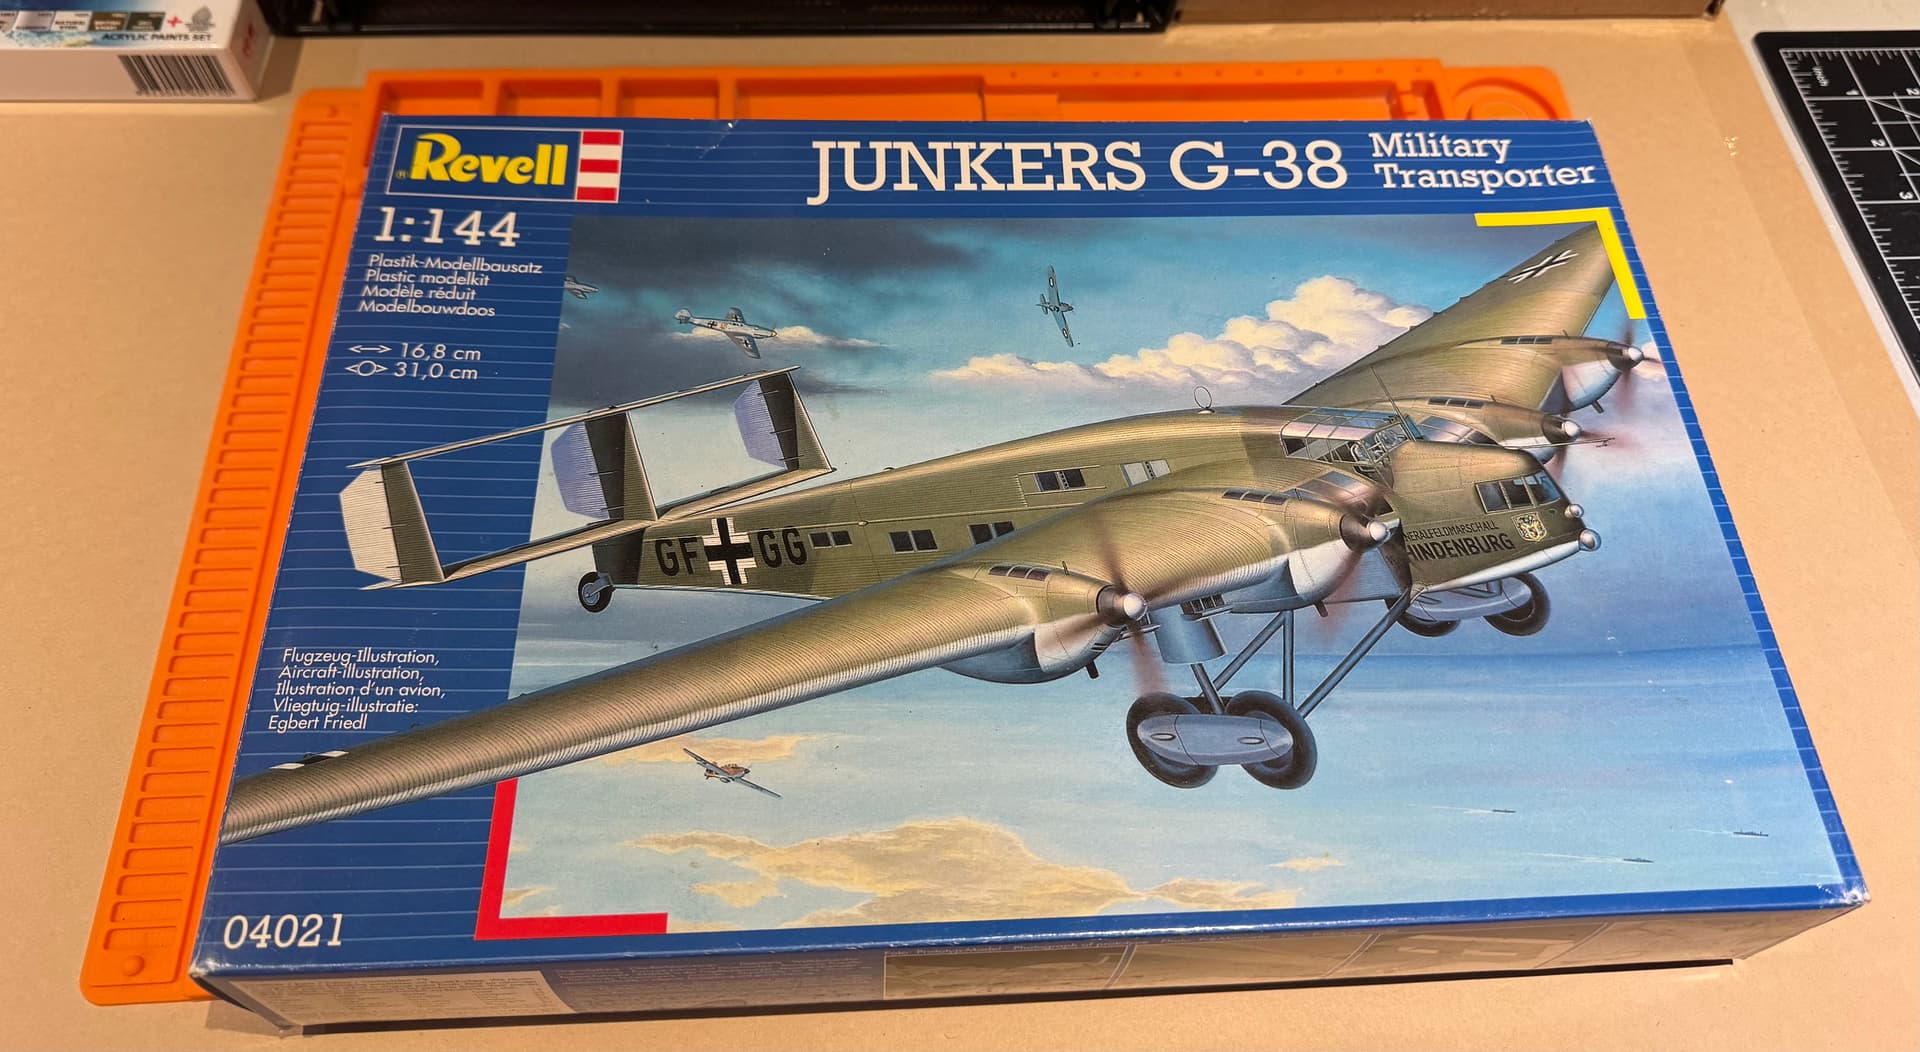
Due to a difficult Summer, I’m just now getting to throw my hat into the ring. My Revell 1/144 G-38, to be built as a IJA Ki-20 example.
5 Likes
Great report and build, I learned a lot.
And, I agree about rust and weathering. You found just the right balance.
Fitting the three part fuselage together to get a preview of seams and any trouble spots that may need attention. Everything looks good. No glue yet…a bit more sanding is a possibility…
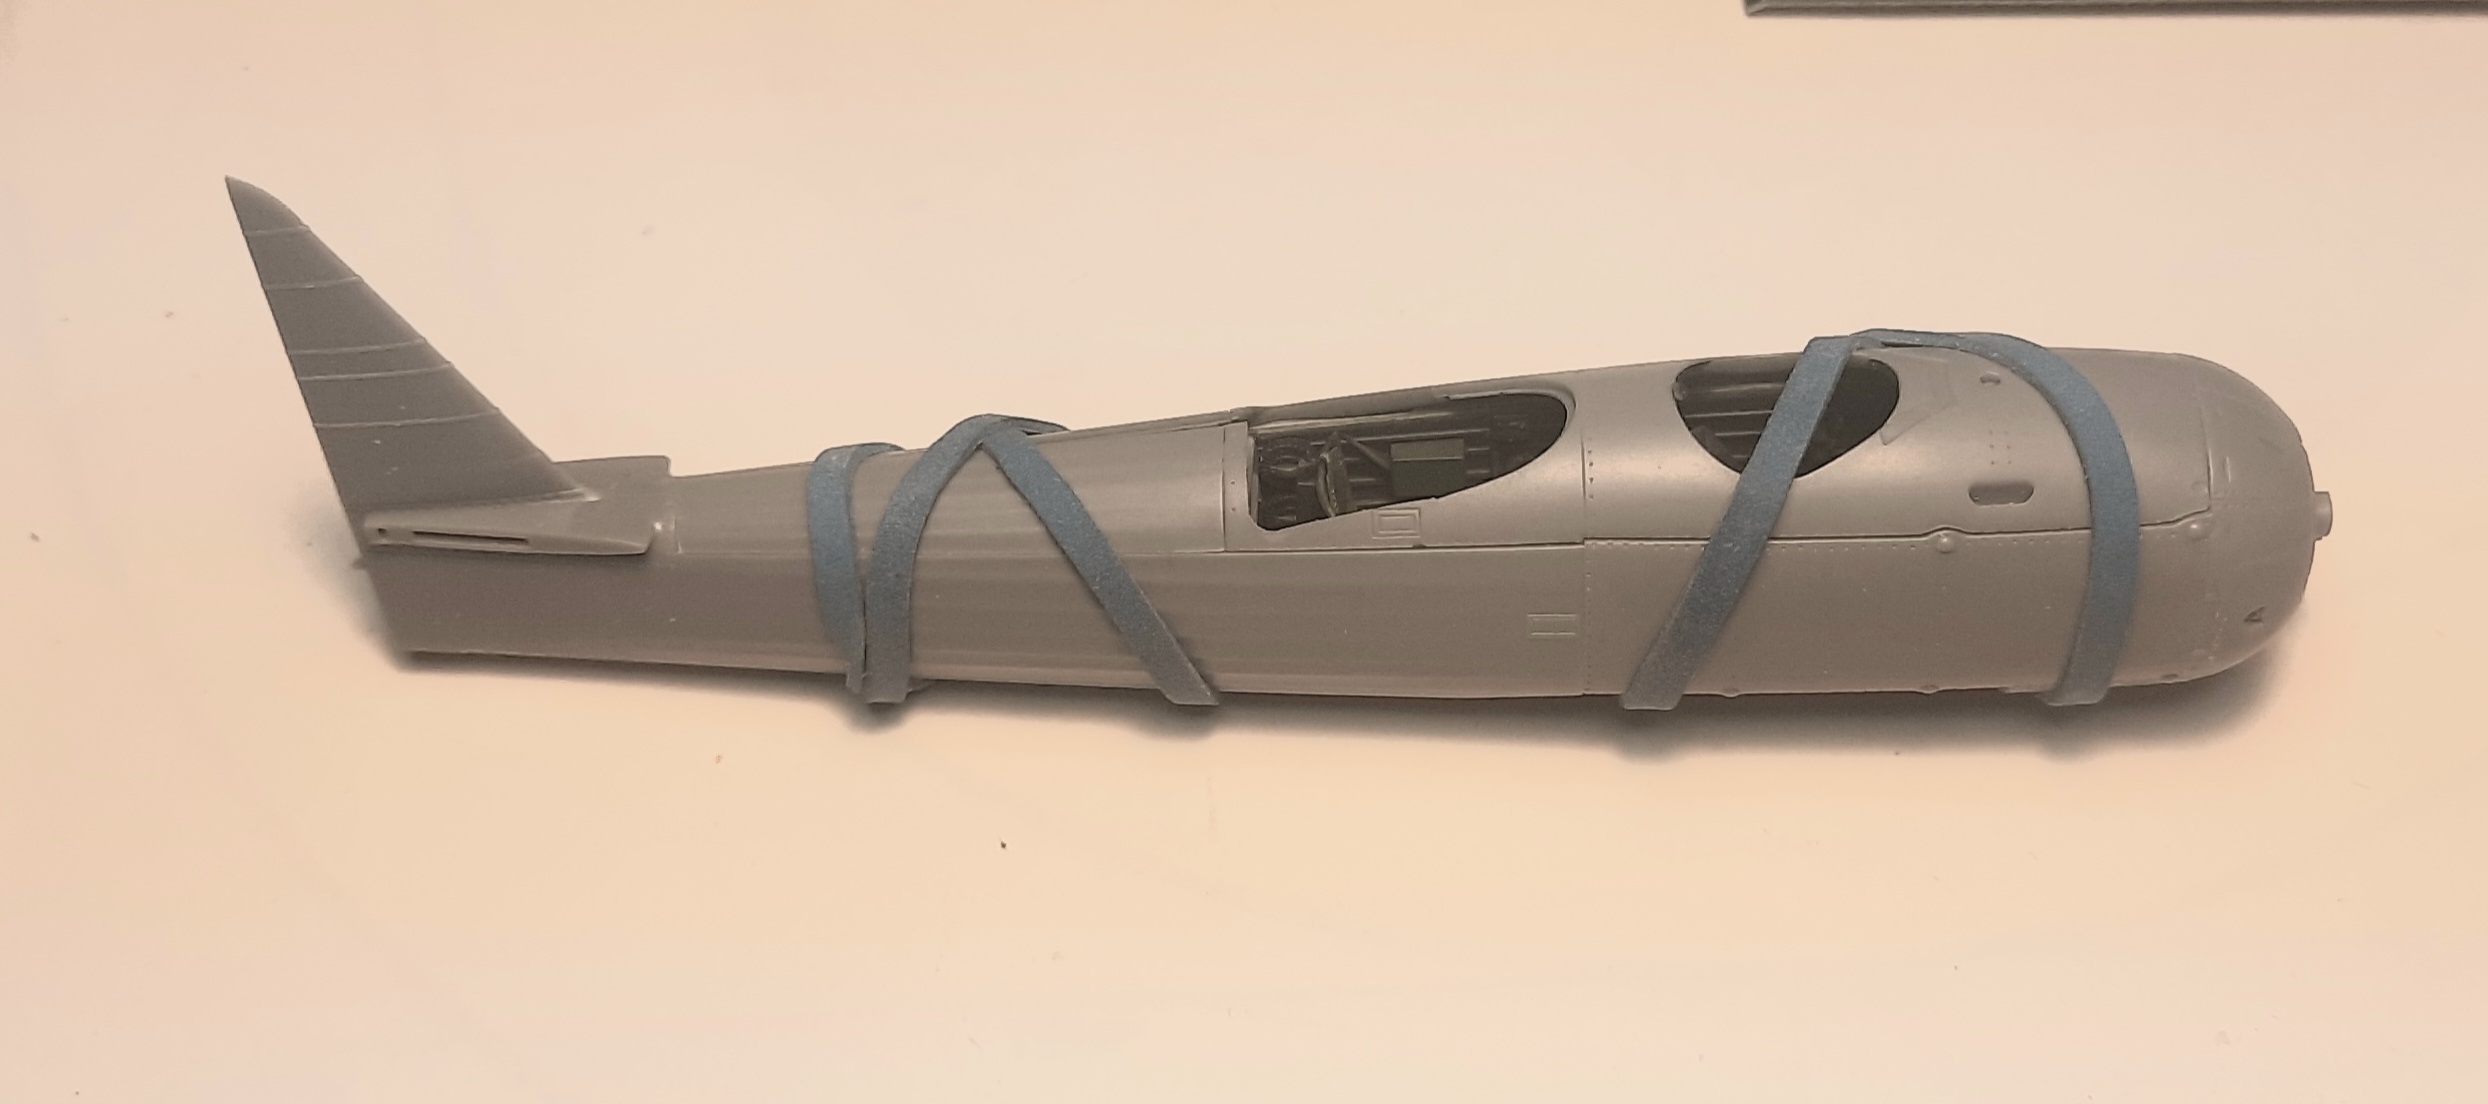
There are 2 halves that capture the cockpit which needs just a bit of sanding to get a good fit. The third section is the top with the seam lines being blended in with panel lines which to my surprise fit pretty good.
The detail is very good on this kit. The forward area is of aluminum construction and the Hasegawa kit delivers with nicely recessed panel lines and rivets of differing sizes.
The rear section is of stick and canvas construction and it too is nicely molded with well defined ribs.
I will need to get the instrument clusters assembled and installed befor sealing this up. Both pilot and RO sets are PE.
3 Likes
Good Start. Great looking interior work!
Very interesting project! Grabbing the popcorn!
1 Like
Wow! That’s an oldie, looks cool. I just started my F-86 so we can race!
1 Like
The Junkers, I know nothing about this plane. What a interesting pick.
1 Like
8 Likes