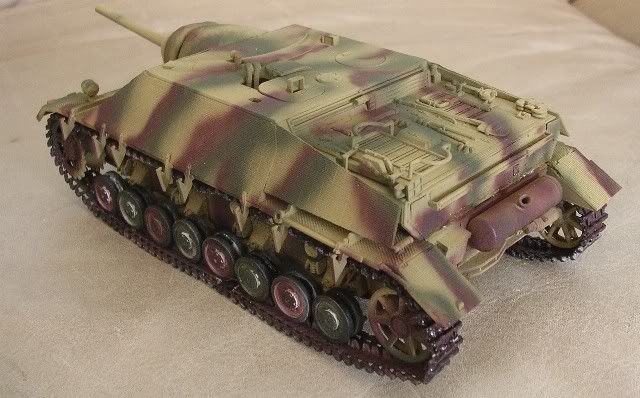
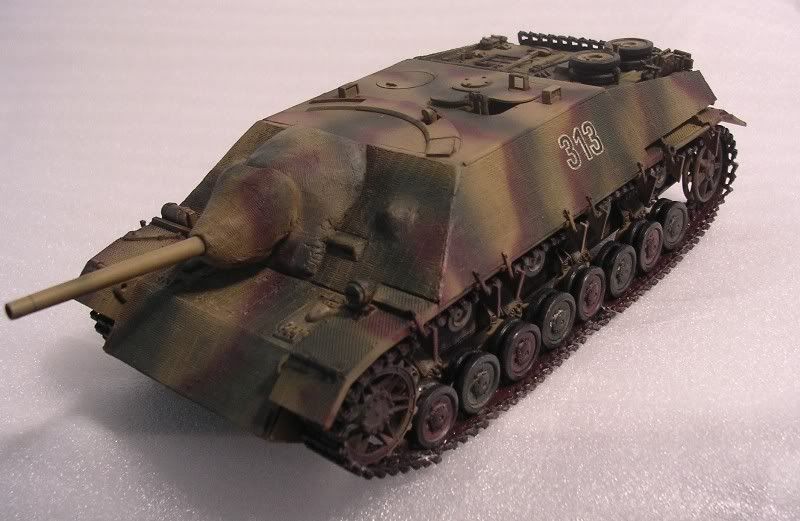
Working on the DML Jagdpanzer IV L/48. Long, long way to go still, but here’s the progress so far.
This is my first shot at applying zimmerit. Eduard PE zimmerit for everything except the mantle, which I added using Apoxie sculpt. I plan on using the “Crockett” solder iron method next time.
…ditto…is that the “waffle” pattern? The zimm pattern is so fine that it barely contrasts in your pics…after some more weathering it should come out a little more…I like your camo scheme…I have always liked the low and mean look of the jagdpanzer…
I used it once before and to be honest, wouldn’t again. It is fine. Cavalier or Atak are much better detailed. They are easier to work with too.
Larry, you are quick. Seems as though you started it the other day. Makes me want to break open my kit. It appears you have a good start on it. Good looking camo.
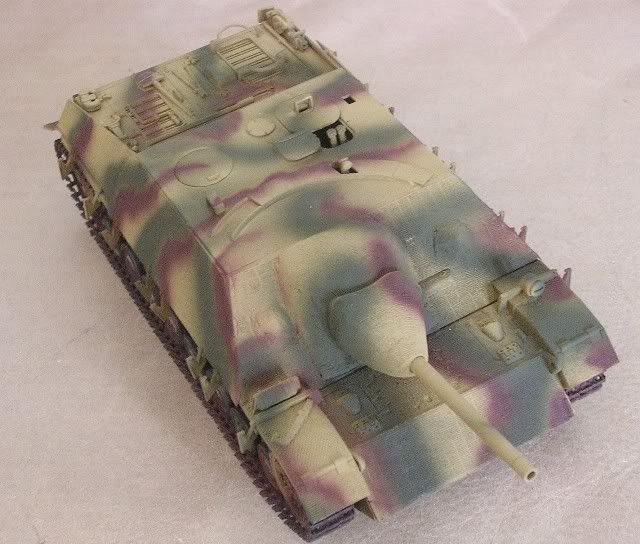
Thanks a lot guys for checking out the progress on my build. I’ve been wanting to build this kit for quite a while, since it would give me an opportunity to practice some camo.
I actually started on this kit about 7 months ago. I’m really bad with PE and felt that I did a messy job with the zimmerit…so I shelved the project unfinished. I picked it back up last week and decided to finish it come heck or high water.
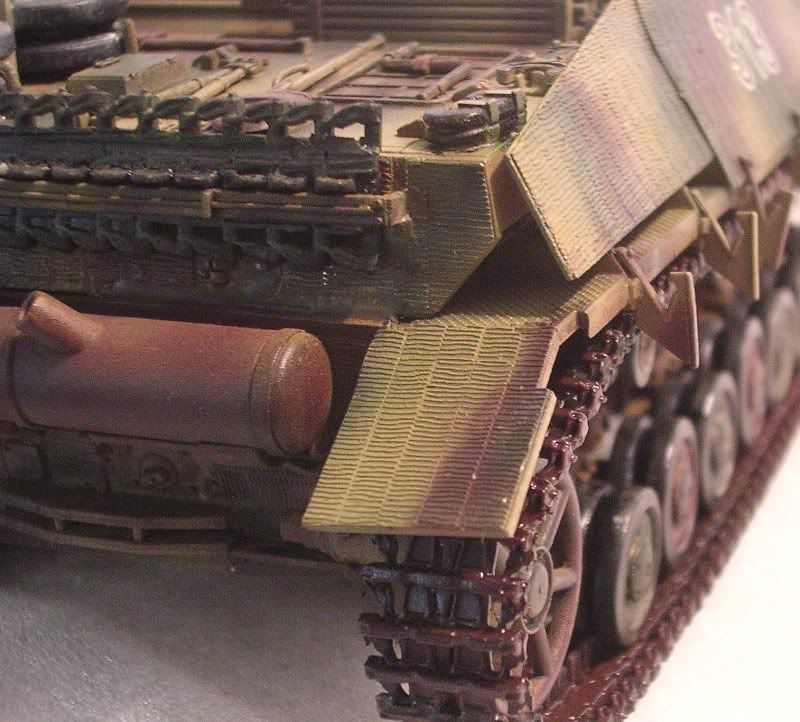
From an application perspective, the PE zimmerit is very easy to apply. I used CA glue to fix it to the model. The Eduard kit actually had several large pieces that were not needed for the kit. I used a couple of the spare pieces to imprint the zimmerit pattern on the mantle. I will take some close-up photos so that you can see the pattern better.
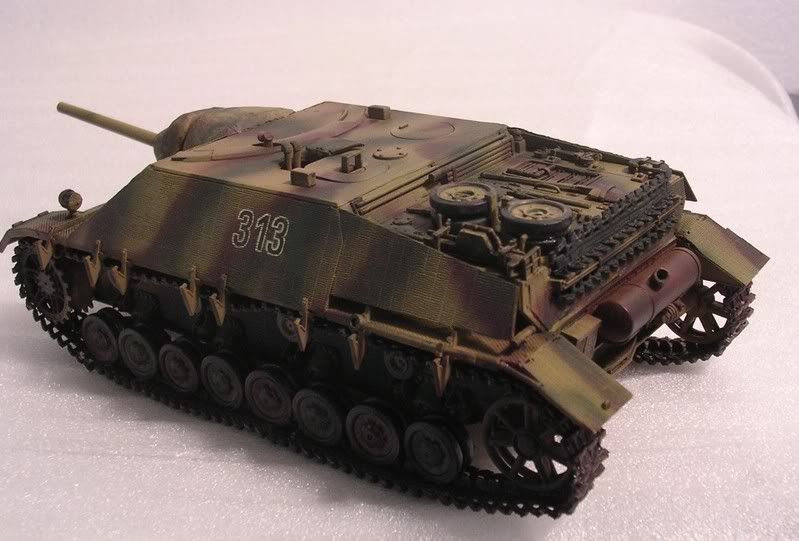
The pattern is the standard horizontal lines separated by verticle divisions:
This will become more evident after I weather it, and take more detailed pictures.
From a scale perspective - to me, the pattern looks too subtle and smaller than how it appears in photographs of actual vehicles.
If I were to use an AM zimmerit product on a future build, I would probably try the Cavalier offering. But my plan for the next project that requires zimmerit is to use the solder iron approach. I practiced this technique for a while and could not get it right. But I then purchased a variable power supply for the soldering iron which allows me to control the tip temperature - it cost about $15 on eBay.
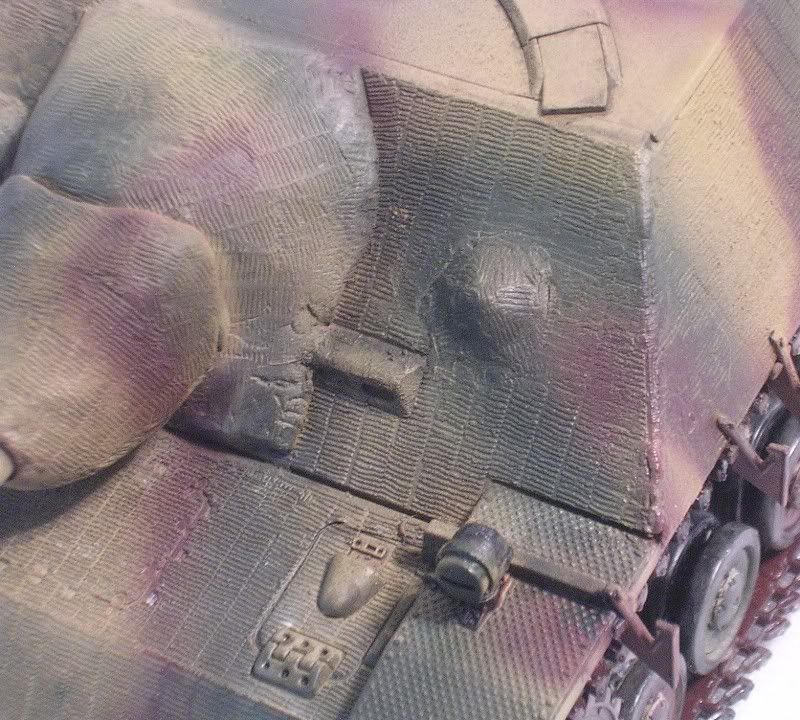
Further progress on the Jagdpanzer IV L/48. I let the paint dry a good long time (1 week) got the decals on and did the initial filter wash. There was some interest in how the Eduard zimmerit that I used looks, so I’ve included a few closeups. The zimmerit is PE, but it did not include coverage for the mantle parts, so I had to do it myself. I used Apoxie sculpt for that part, which was my first attempt at zim on a kit.
Next stop is the weathering. I’m undecided on how much/little weathering to add to complete this build. I typically keep it to a minimum, but who knows…I might get inspired to do a little more dramatic weathering.
Thanks for looking…again.
Larry
The PE kit did not provide zimmerit for the mantle, so I had to wing it.
Boy are you asking the wrong guy! I’m sitting here staring at my almost finished KV and wondering if I could mail it to Biffa or Doog to finish it up. I played with the dot formula on another old kit and it just keeps coming out like yuck. [:(!]
…nice…that wash did the trick…with the skills you showed on the mantlet I think you are up to a complete zimm job next time…decals snuggled down nicely…I have always loved the Jagdpanzer----good show!
Thank you Field Marshall, for the very generous comments. I had my fingers crossed about the decals adhering to the uneven surface of the zimmerit. I went back to using Future (stopped using it on the last several builds) before applying the decal, then used plenty of Microsol.
Thanks again, you are always extremely supportive to your comrades, and it is very much appreciated.
I’ll give ya my address if you want?[(-D] What problems are you having? Can I help you in a PM?
Plastic Cross, I have to say that I think that that zimm looks GREEEEAAAT!! SERIOUSLY! I don’t think it looks "thin’ or unrealistic at all!
I’ve got some for my Elefant, and after at first being unconvinced of it, I don’t have any doubts about it–I really like the look! Excellent job so far on the jagdpanzer!!!
Thanks a lot guys for your assessments and comments. Thanks Doog for your feedback on the PE zimm. Zokissima - That’s a real good question. I’m really not sure how to finish this off. While contemplating the weathering question I did another filter wash + pin wash, which I think improved the look a bit. I’m definitely open to suggestions.
Plastic Cross - lemme get this straight - You shelved this build a while back, because you weren’t happy with the zimm?! Man I think the zimm looks awesome! Especially on the mantlet.