Does anyone know about the Italeri Tiger I Ferdinand Porsche version/VK 4501?? I saw it on e-bay. , I am considering it ? Comments on accuracy, buildability, tracks, zimmerit? How are the other Italeri Tiger I kits?
Thanks!
Leddy
Does anyone know about the Italeri Tiger I Ferdinand Porsche version/VK 4501?? I saw it on e-bay. , I am considering it ? Comments on accuracy, buildability, tracks, zimmerit? How are the other Italeri Tiger I kits?
Thanks!
Leddy
I can’t answer you questions directly. It could have molded on zim, my Sturmtiger did. Mine also came with Link-and-length tracks. I think their Elefant comes with one-piece hard vynil tracks. It’s not going to be as accurate as the newer Dragon kits, but will build up and look the part. Italeri, unlike Tamiya, is not a shake-and-bake kit. They do require more filler and sanding than the typical newer kits. However, I do like Italeri, even though they are out-classed by the newer generation of kits that are hitting the market. If you like less, and don’t mind saving money, than this will do. sorry to be of so little help.
No zim and the tracks are awful if you can get the dragon kit its much better and they go fairly cheap on ebay
Edit Eric pretty much nailed it, the italeri kit is quick and easy but lacking much detail the dragon kit more experiance is needed but better detail im not sure either kit is totally accurate
I suspected the tracks to be one-piece, but you never know. They were pretty bad.
No zimm, as this is the prototype model, the “grey” one used in trials, not the “Command version” Italeri is the only maker of this kit. The name “Ferdinand” is a misnomer.
I built it, and the tracks are typical Italeri stuff-of-nightmares; OK, well, not as bad as they could be–they’re not two piece, but one, vinyl, but you’ll have to pin 'em down for the proper lay or sag.
Detail is farily decent, but it’s obviously not a “slide molded” kit as we’re getting more and more used to. There is some bebate as to the accuracy of the rear deck; the DML Command Version has a different rear deck layout with an access hatch that is missing on the prototypical Italeri model–could this, however, have been a “later” mod, or something cut out and fashioned ny the same engineers who adapted and customized the Command version? I haven’t heard either way.
It builds up into a decent, if rather plain representation of the prototype; I built it as a companion to the Command type which, incidentally, was NOT the DML version–I did my own conversion a year before the DML version was even announced, using this same model as a basis–so mine has the Italeri deck as well. Here’s some shots of both:


Karl, the drybrushing and tracks are just awesome on the first one. kudos on both builds.
Thanks Tigerman! This was before my introduction to chipping, so they’re both a bit clean, but I’m satisfied with the builds; after all, the VK was only a prototype in trials…
doog,
Where 'ya been man!?, haven’t seen any of your posts all week. Did you get snowed in!?
How do you do your chipping? I’ve used two methods: Add paint in lighter shades, dark rust, etc…I’ve also whipped-out the No.11 X-acto and had at it. I find for scratches in the middle of panels, fenders, etc…nothing compares to the blade, but for edges it gets dicey. I am just about ready to start this phase on my T34…debating which way to go…considering using a cosmetic applicator instead of brush on the edges…???[%-)]
SMJ, nope–just sitting here waiting for the big Nor’easter to hit; 6-14 inches predicted by tomorrow…[sigh]
Actually I’ve been working on Jenn’s Christmas presents–5 Historex horses, and an Italeri “Mideival Tournament” dio. Been keeping me away from the armor for a bit…
I do my chipping either with the sponge/foam method, or with a small brush. I mix Testors Steel with raw umber oil, black, orange and raw sienna–all of different ratios to provide variety. Dab em on with either the brush or by dipping the sponge into it and dabing it against the model; se my “DML Hetzer weathering tutorial” in the “Search” feature to see a better explanation of it!
doog,
Just read the DML Hetzer weathering tutorial. The Spanish builders you reffered to HAVE to be the ones in The Osprey book “Modelling the T34/76”. I just tried the oil “dots” technique on my T34 following their photos and desciption. Went in with both barrels blazin’!, I did the turret only…O.K. results, The hull will be better. After the “dots” I applied the decals and locked it all down with dullcote…set aside. Focusing back on hull, I finished the camo’, 3-coats burnt umber…waiting to dry…surfin Forums. I noticed you put the tan dust wash before the dots (reason?), I was planning to do it later. This worked well with the Stug winter wash. I was able to get the washed-off look, in this case I want the rain-streak look. I may post a progress photo soon.
I really related to your tutorial…living it…so to speak.
Cool, SMJ! Can’t wait to see it!
No real reason for the tan wash before the dots–just experimenting!
Thanks for your input! Sounds like all I need is a set of indy tracks and filler/sandpaper to make this work!
Leddy
doog,
Here are some in progress shots of my T34:
oil dots…before:
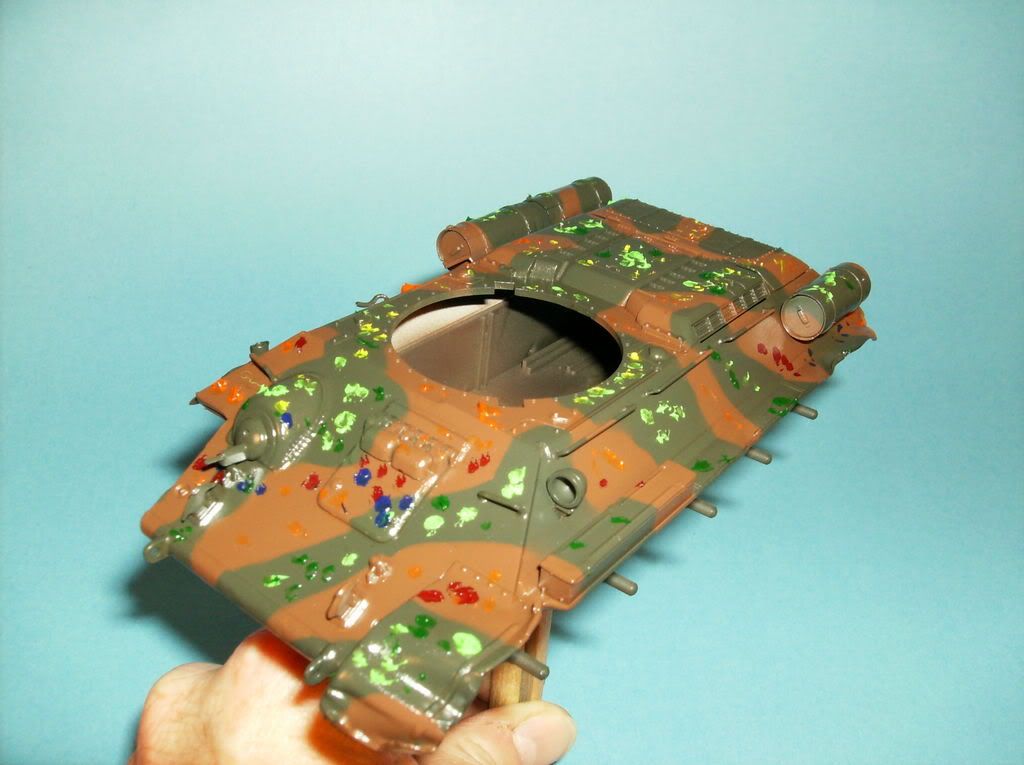

oils dots…after:
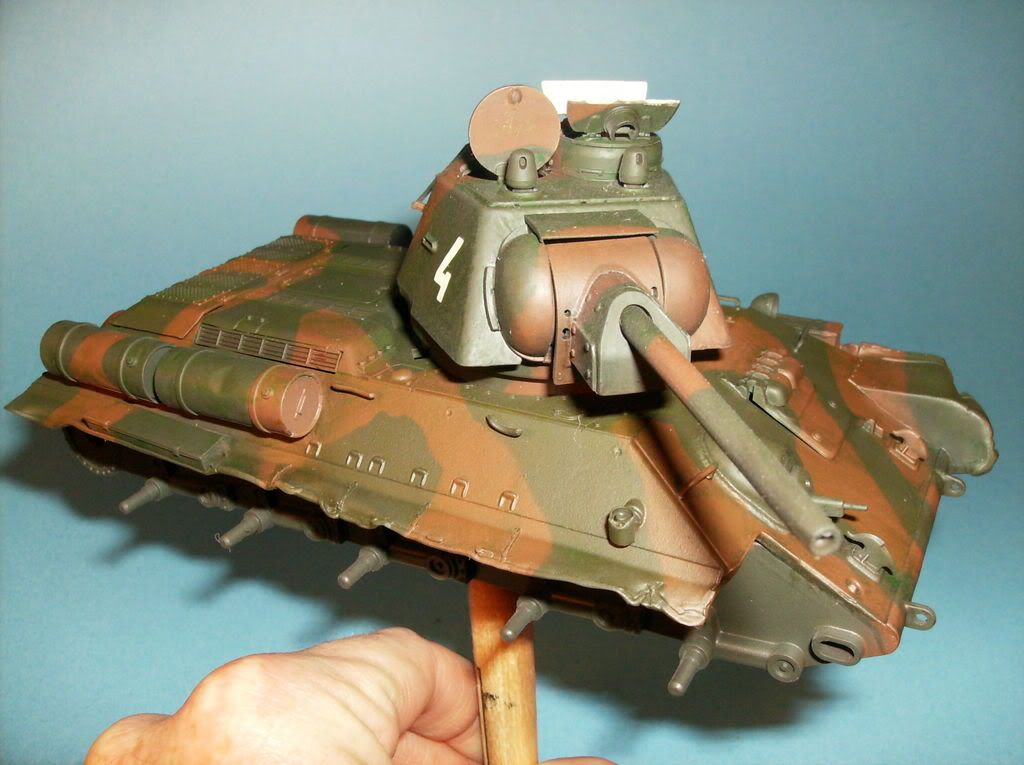
The picture may not show the variety of colors, but I’m real happy with the results…I knew the hull would be better! The chroma (big word, means vibrancy of color…sorry if you already knew that) is strong. I think a Tamiya Buff 20%/80% thinner spray is in order before the scratches…thoughts?
Did you notice the clothes hanger holder?
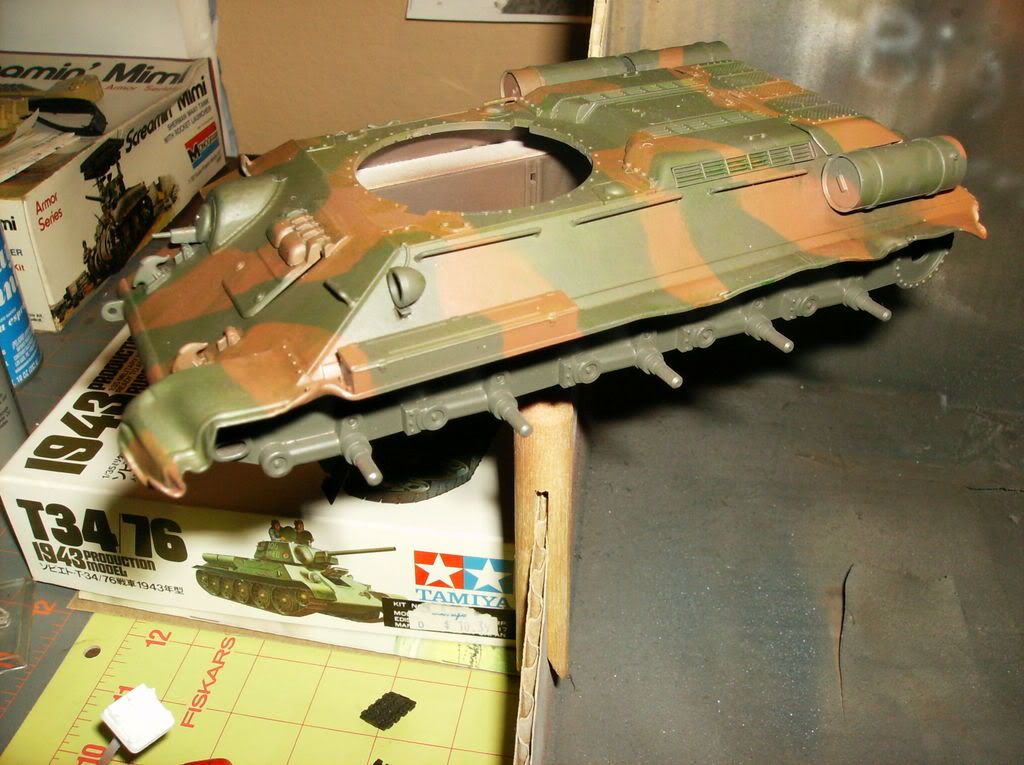
I super glued/zip-kickered it to the bottom of the hull. Makes a great handle when airbrushing, and also sits perfectly on my cardboard “spraybooth” for drying.
Leddy, don’t worry too much about the indy tracks, especially with the price of “frooleys” (Friuls" these days!
You can make these tracks work with a little TLC and carful painting; unless you’re going for a “AMPS winner”!
edit SMJ, that looks really sweet! But you should post a “WIP” post seperately, and kepp it updated there!