Earlier this year I lost my job to a layoff, and have yet to land anything new. So in the meantime, I have found myself with a bit more time to spend at the work bench, although I must restrain myself to build only what I have on-hand and supplies, generally no after market (more on that at the end). This year I’ve finished off a four-some of P-39 Airacobras, a He 111 P-1 Heinkel, a Wellington bomber and a Vindicator dive bomber. In determining what to build after the Vindicator, I was at a loss until I ran into the following thread here on FSM:
http://cs.finescale.com/fsm/modeling_subjects/f/2/t/170577.aspx
Thank you to TREYZX10R for the inspiration of what was to be my next subject.
It is the Henschel Hs 123 A-1, a little biplane the Germans used to great effect on the Eastern Front. I was really drawn to the paint scheme that TREY… did, so with that, I determined that I had everything I needed to replicate such a scheme as well.
The kit is what I believe to be the original of this particular mold, by Italeri.

No resin or PE parts included, just a basic out of the box kit with a limited decal sheet. A quick review of the kit itself. It is a simple build that goes together mostly well, but there are a few problem areas. The wing roots produce a horrid gap all the way around. A slightly less problematic gap accompanies the joining of the stabilizers to the fuselage. The cabanes were a bit flimsy but with the biplane jig I bought from a guy in Czechoslovakia a few years ago, I was able to get the upper wing attached without breaking anything or losing my patience as I did with a couple of Sopwith Camel kits (that prompted the purchase of the jig). Some of the fits are actually pretty tight, such as the wheel covers to the wing.
The paint scheme is a pre-war scheme, I believe. The instructions note that this particular aircraft belonged to L Dv 521 22nd based in France in 1940. I did no further research to verify any of that.
Paints are all Model Master Acryl. The top-side colors are RLM 76 (licht grau), RLM 62 (grun) and RLM 61 (dunkel braun). Under-side is RLM 65 (hellblau). I started with a good coating of Stynylrez dark gray primer as I knew there would be a lot of masking to achieve this paint scheme, and I did not want to get bit in the back-side again with the notorious MM paint. The interior, which is not visible unless you get right on top of it, is RLM 02 (grau) with a decal for the IP. Not much detail in there. I did next to no research on this bird prior to commencing the build, so I cannot say if Italeri accurately replicated the 123’s pit or not.
I spent a grand total of 7 days on this build. It went together well with only the aforementioned gaps as a problematic part of the build. The most complicated part of the entire build was the masking, but even that turned out to not be much more than a minor hassle.
Photographs of my build.


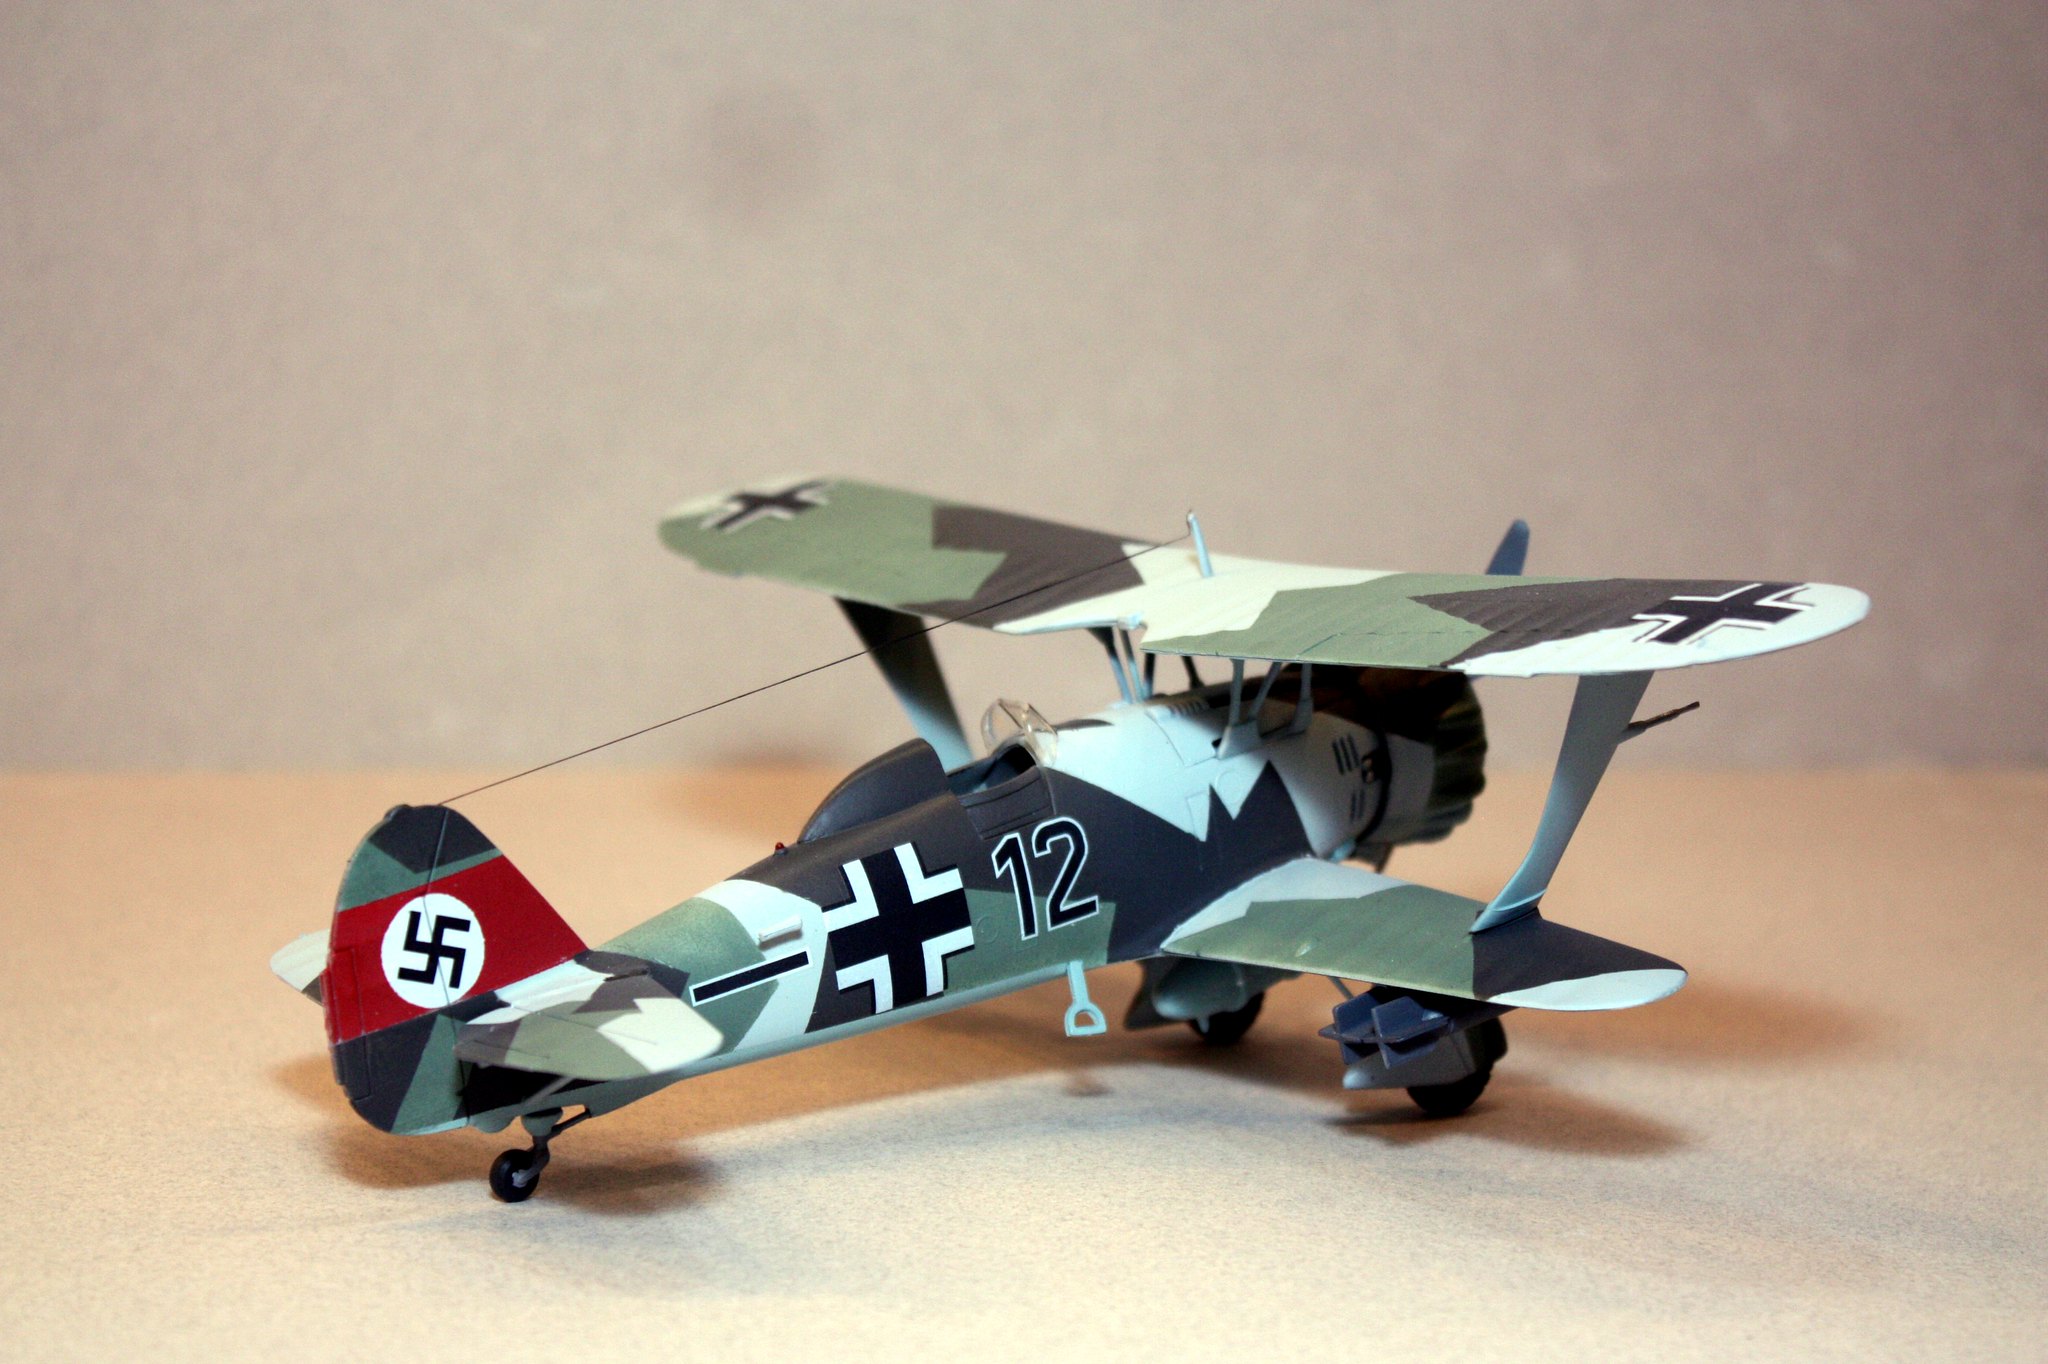


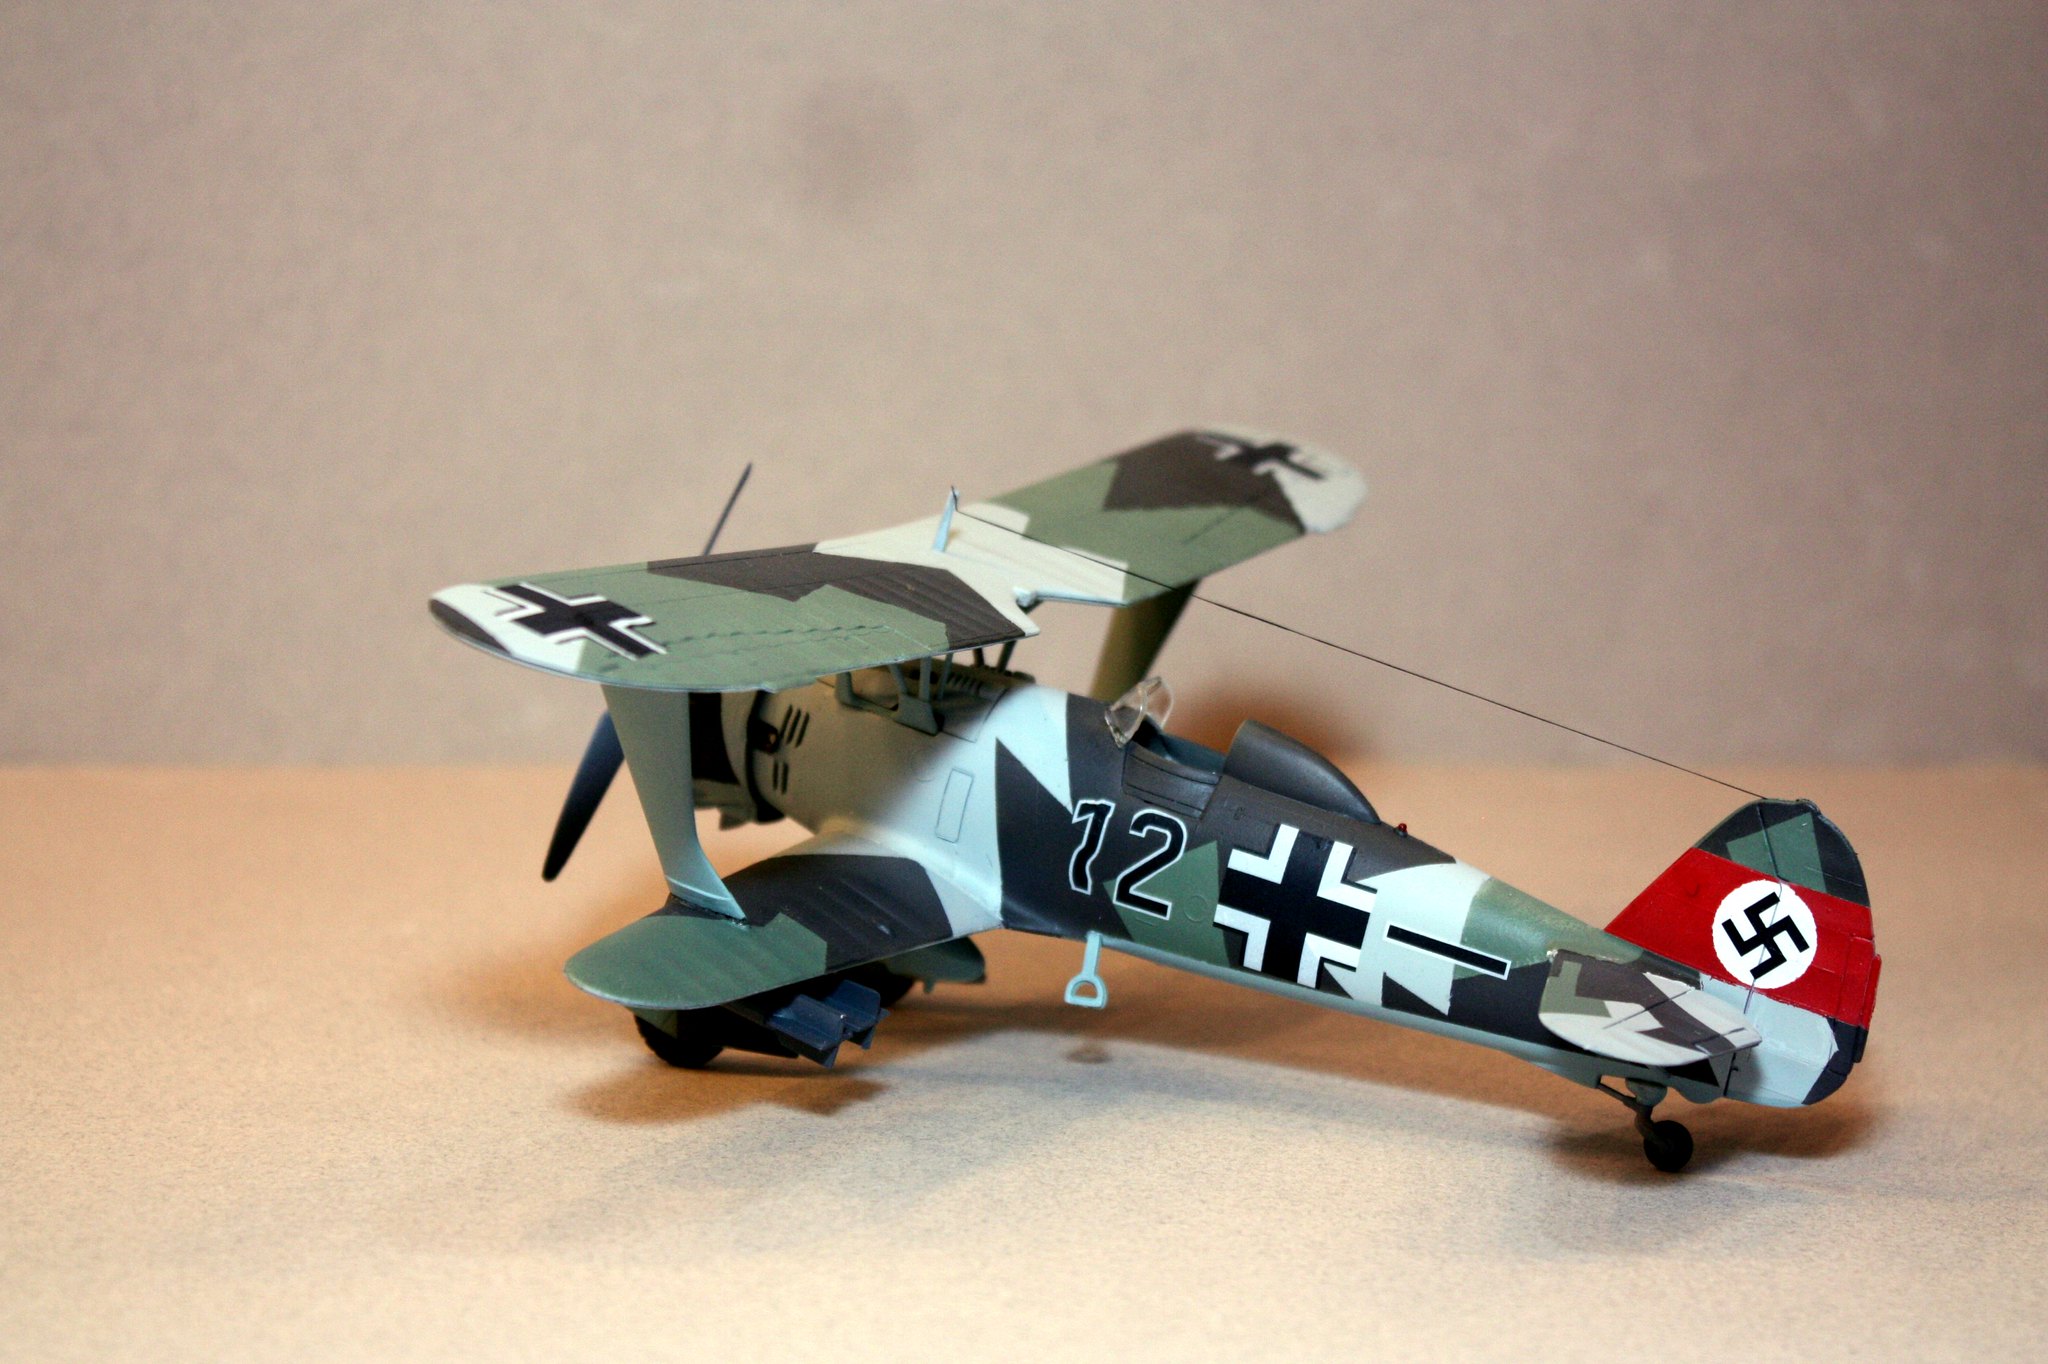

The last couple of photographs indicate an unusual problem in my build, and I imagine there are a lot of quick eyes out there that will catch it. If not, take a look at the “1” in the “12”. I always separate the digits from these types of decals, and cut away as much of the carrier film as I can to lessen or avoid silvering. Evidently I did not notice that, in handling the build after applying that “1” decal, I put my finger on it before it had fully settled, and by the time I noticed it, the only solution I had was to scrape it off. Nah, not interested in doing that (as I would have to remove the “1” on the other side as I probably do not have any spare “1” decals matching this scale and font). In any event, I find this to be a bit humorous and a lessen for next time to just leave the **** thing alone until the decals have settled.
The other thing that really drew me to this paint scheme was that red band with the swastika. You don’t see that very often. Looks sharp, political considerations aside.
Finally, my next build will be another four-some. I had decided on these kits prior to the flurry of similar builds that have popped up here in recent weeks, but I am doing a set of F4F Wildcats. I have four in my stash, and they are all coming to my bench next. One will be the old Revell 1/32 kit, which is an original I snagged off eBay a few years ago. To go along with that one will be 1/48 scale HobbyBoss, Tamiya and Monogram, another almost original that I acquired on eBay a while back. All of these are F4F-4 Wildcats, although I plan to back-date the Monogram to a -3 and do a “yellow wing” pre-war bird. With regard to the Monogram kit, it is woefully lacking in internal detail. I did break my rule of no aftermarket and grabbed a resin seat plus the Squadron canopy to use for the Monogram. I am going to scratch build the cockpit and do some work inside the wheel well. Hoping that goes well.