A quick question. For a while I’ve felt the main body moulding, impressive though it is, is a bit to smooth and clinical. What I want to do is skin the middle section of the body in thin plastic card. It’s a slightly compound curve so getting things to sit nicely is a bit scary. I’ve started to make the pattern in masking tape. So the question is, has anyone else succeeded in doing this?
To be honest Nick, I don’t really follow why you think it’s necessary but I’ll be interested to see how it turns out. I certainly haven’t done anything similar in the past. I have considered adding a reinforcing framework in the manner of Kurtl’s build but no more than that.
Why is certainly a good question. Partly it is that I thought it would be more convincing if the body appears to be made of separate bits. Partly it was to see if I could do it. I therefore decided to make a template. Cut out the shape and see if it worked. It did so, rightly or wrongly I decided to do it. Like any plastic surgery, it does not look good straight after the operation. Picture is below. Clearly I did not get the shape quite right, though it is on the large size. The critical bit though is the shoulders, where I needed put some cuts to remove material. The fit was quite good, but as usual I used to much glue to so the surface is currently a bit rough. Hopefully it will tidy up OK.

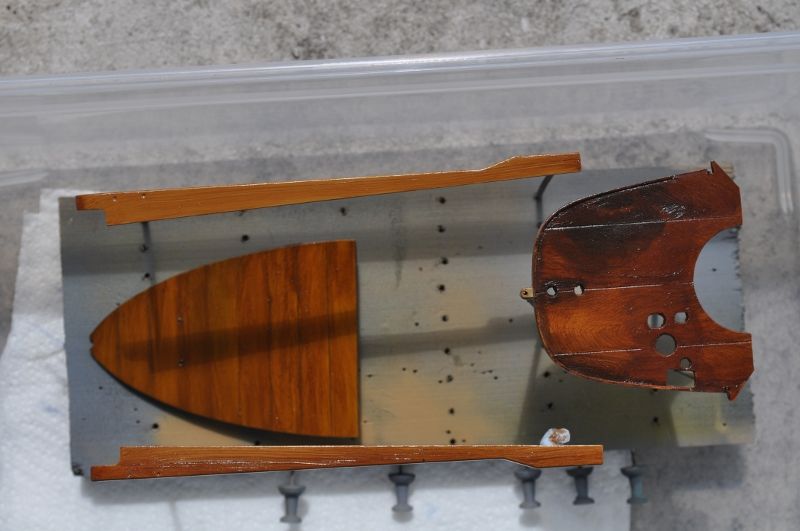
While I’m on, for completeness, the picture below is the front of the firewall. I deliberately made it darker to represent the sorching.
Hi, guys. I am new here. Building the same kit myself. Great work you have done here Nick, loved the wooden effect. I’ll try to post some pictures of my progress.
I do not have much skills in painting wooden effects, so have replaced most wooden parts with real wood or wood veneers.
Gotten to the decalling part.
Jnkm13. Thanks for the comments. As I said in an earlier post, the wood technique is surprisingly easy with the right materials. Worth a try sometime.
Sounds like you’ve got to a bit I am a bit worried about. namely a nice shiny gloss paint finish. Let us know how it goes.
Hi NickD. The actual car is nowhere near glossy. So that’s a problem. It’s actually quite rough in texture from the pictures i have seen.
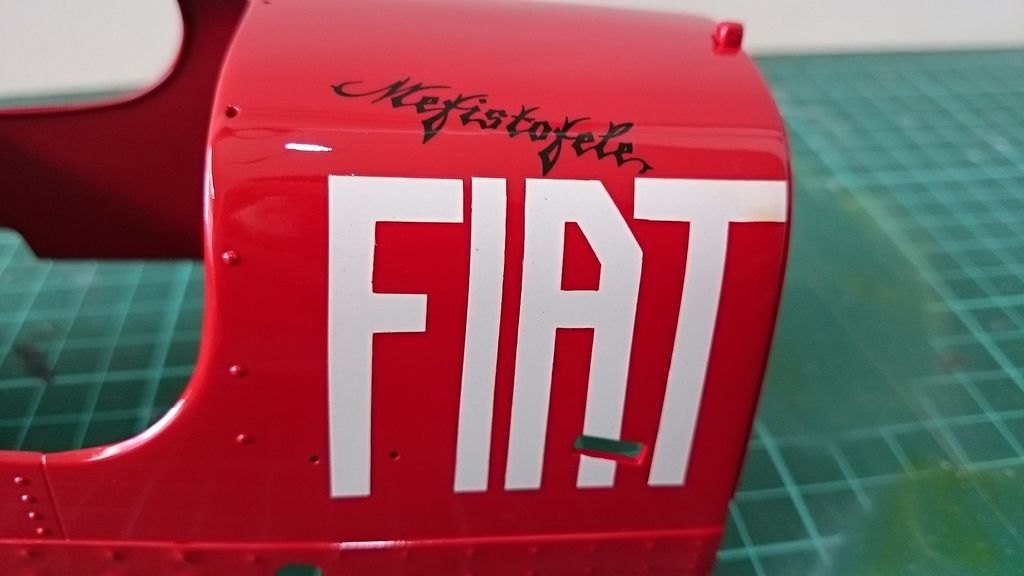
The problem i am facing is with the thickness of the decals. If you go through Kurtl’s progress, you will notice that he too has trouble blending in the “mefistofele” decals. He airbrushed the “FIAT” instead of using decals. What i did was to cut out each of the FIAT letters and also the “XD-711” and put them on separately.
I am now into my 2nd gloss coat. I think it will need another 2 or 3 wet gloss coats before polishing to get rid of the the decal edge on “Mefistofele” then i will finish off with a semi gloss coat.
The biggest weakness of this kit is the chain. There is no way to really get it right. I wonder if the motorcycle chains by Tamiya or 1/12 after market chains work. It’s a pity for such a gorgeous kit to be let down by the chains.
Jeremy.
Hi Jeremy
You’ve just described the processes that scare me most. I have models that it’s taken weeks of spraying and sanding trying to get a smooth gloss coat. Rubbing down the gloss between coats to remove the ridge on decals is something I have seen mention of before but never had the nerve to do. So thanks for the warning. Looks like that’s my next challenge, once I have rivetted all the panels on that is. Did you spot that Kurtl, as well as detailing the bonnet panels also adjusted their fit significantly…
Nick
Hi Nick,
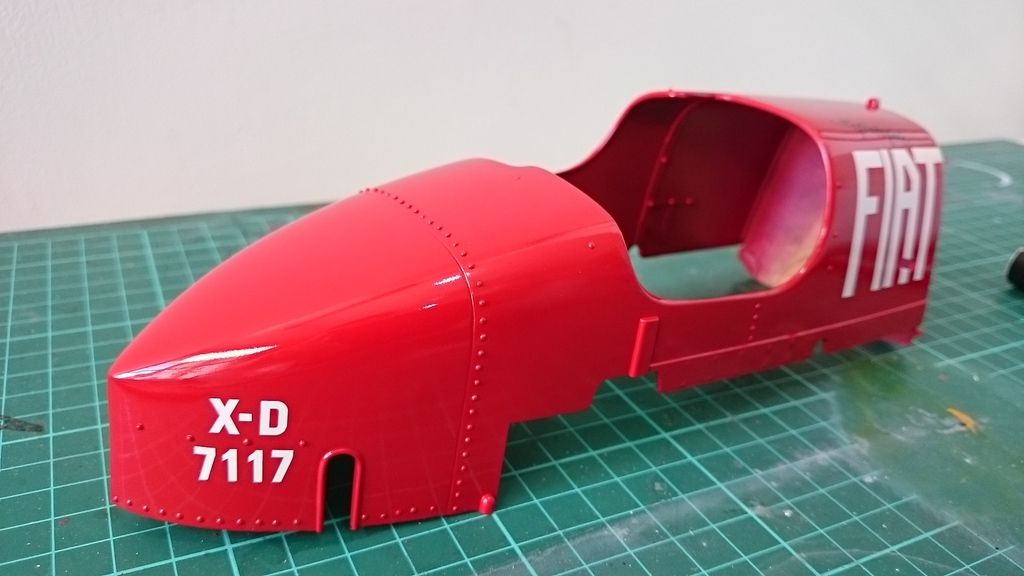
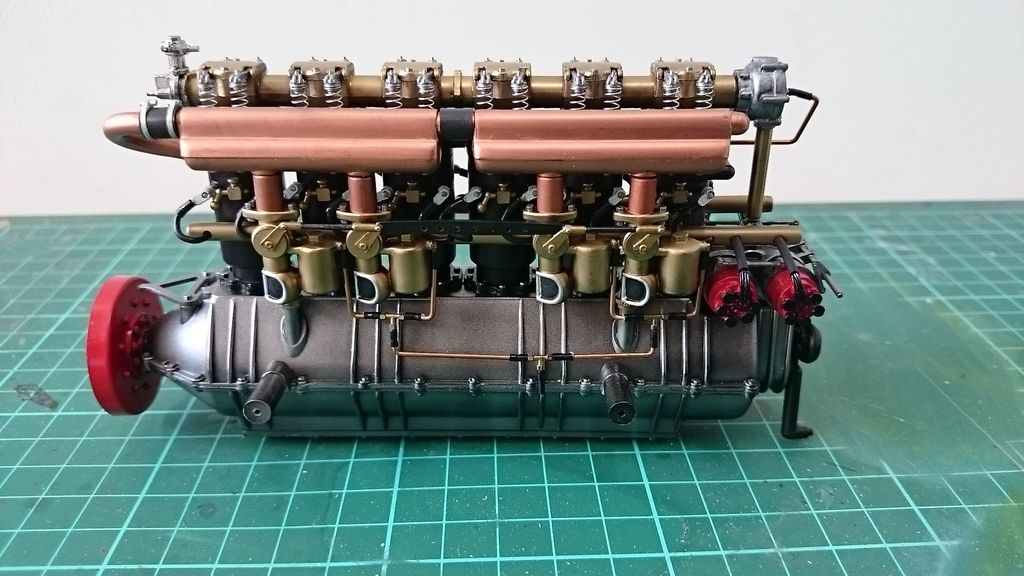
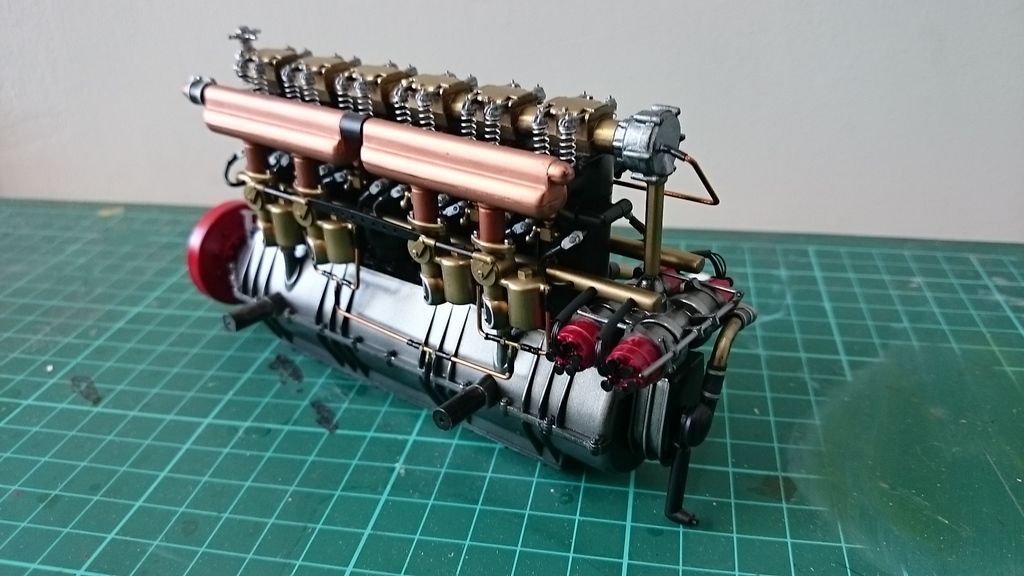
Here are some photos of my progress.
Last night, i sanded the 2nd layer of wet coat where the “mefistofele” decals are to try to blend the edges. Partial sanding and laid on another wetcoat. Will lay on another wet coat tonight and sand again tomorrow. I leave at least 24 hours for the wet coat to dry before sanding.
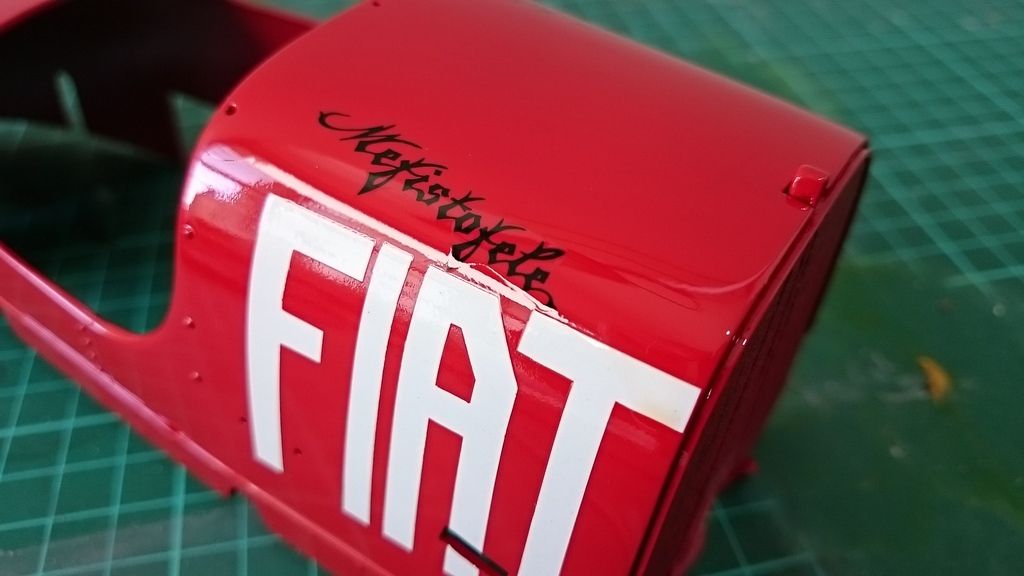
As you can see from the above photo, the decal edges are still there.

Hi Nick,
I had the main body ‘shell’ slightly elongated as well. If not, there was a slight gap between the bonnet panels and the main body. Way easier slightly elongating the panel than the 2 bonnet pieces.
I also added the strengthening pieces underneath the 2 bonnet panels as what Kurt did, as well as adding additional details to the inside of the main body as what he did.
Jeremy
Sorry I haven’t posted any progress pics but I decided to try to get this done for a contest, the COMMIES Fest IPMS Region 10 Regional held in here Denver. So here are a bunch of finished photos,; I finished in time and am quite happy with it. Evidently the judges agreed as it won a First place in Competition Vehicles category. Even though all the photos showed a somewhat beat, weathered car I kept it shiny and new; it must have been that way at some point! Various issues, such as tubing being too small, fiddly assembly order, holes for some of the screws too small, slowed down my work but it all came together. Hope you like it!


Jeremy/Ken
Ok, really jealous now! I am soooo slow. Both look great particularly the gloss. Not sure I have ever managed to get it so neat. If you don’t mind me asking what red’s did you use?
And well done Ken on the prize too.
Better go and plod on!
Nick
Thanks everyone! The paint is Tamiya TS-85 Bright Mica Red that I decanted and sprayed thru my airbrush.
Nice finish Ken. I hope to get to your stage, but really being put off by the chains supplied in the kit. I see that you have done an excellent job of blending in the thick decals.
Nick,
The color I used was Mr. Color 158 Super Italian Red, over a white base. I will be finishing off with a semi gloss layer as i prefer a less glossy finish compared it its current state.
Jeremy
Hi folks;
Some really impressive work going on here! I don’t aspire to the level of workmanship displayed here but at least it’s given me something to aim for…
Ken; What were you referring to when you said the hoses were too small and, while on the subject, what have you used for hose clamps?
Michael
The gray hose was too small in diameter; also the clear hose for the spark plug wires was too small. I got some 1/12 scale photo etch clamps.
Chaps,
Could anyone help me with a tip for how to bend the curved plastic that lines the body cutout that goes over the rear chassis tube. I’ve tried a couple of things with semi-circular rod but could not make the bend tight enough. Either the rod broke, or twisted or it did not hold the shape.
 If you are using plastic; putting the piece in hot water should soften it enough to conform to your shape–might have to repeat a few times to get to the final desired result
Hi Nick. I used the half rods by the Japanese brand Wave. This was the first time I used this brand and found the rods to be extremely flexible, able to do 90 degrees bends without snapping. I also formed the U shape by bending the half rod over a rod of the correct diameter rather than forming it on the body itself.
Or as what Steve said, soaking in hot water and coaxing them into shape will also work.
Hope it works out for you.
Jeremy
Chaps,
Thanks for the help. I had tried hot water but bottled out. More tenacity is clearly required.
Oh and thanks for the tips on the red too.
Nick
I’m almost done with this kit. Just can’t get over the fact how poor the chains will look on the finished model.
Do you guys have any idea on whether the 1/12 after market PE motorcycle chains will work on this kit? What about miniature roller chains?
Jeremy