I’ve searched, but nothing is coming up that I can discern.
I grabbed a set from the old Malibu wagon kit and have tried to cast a mold. I’m on my third try to get something usable, but am coming up very short. I’d LOVE to have a set of styrene or resin headers for street cars that I could just grab and use.
My current project is a 95 Camaro I’m building to recreate our 1:1. It has a LT4 and long-tube headers. I’d like to not have to buy some other kit to rob the headers out of when I’m doing such things, as I do have a few other projects that’ll also need headers. I’d like small block Chevy headers now, but BBC would be nice, too. The Gibson ‘Roadent’ kit has shorty headers, but I’m looking for long tubes.
I’M NOT BENDING SOLDER!!! So don’t even suggest it!
Does anyone know of some vendor out there that makes just headers?
Wow, thanks Arty. I wasn’t looking at the 'bay traders, but resin vendors. I have some deciding to do, as the prices they’re wanting for headers is really about what you can get a whole kit for. Man, that’s sad.
The Revell 69 Z-28 kit has them as well as does AMT’s 66 Nova kit. I am sending you a pm with a link to a forum where you may be able to find someone with spare parts.
Thanks, Midnight. I have the link. I also posted this query on another forum and got a reply back that headers can be purchased from Scale Modeling by Chris:
Not exactly what I’m looking for, but definitely something to drop in my spares box. I think I have the Z28 kit in my stash, but I’d really rather not rob a kit I may one day build to get parts for another I’m modding.
The Revell '69 Nova SS comes with a 350 and a set of headers for the race version. Watch eBay “parts” section and occasionally someone will sell complete engines from that kit.
So, it’s been a minute. Between waiting for parts, trying to create nice resin recasts of said parts, and failing, and the forum crash that had me unable to log in for an incredible amount of time, I’m still looking.
I put the '69 Camaro headers together and tried those. No go. One of the primary tubes on both sides kick out and hit the lower control arms. So, I ordered several 3D-printed engines from IceMan Collections (https://icemancollections.com ) and pulled a set of headers from one of those that looked good. I cleaned and painted them and tried to fit. Now, the AC compressor is in the way!
Back to the hunt, and found a couple of other 3-D printed small blocks on evil-bay and those are on the way. This time, if I run into an issue, I’ll just modify the front primary to clear the compressor and move on.
I’ve also had to order some C-channel styrene so I can redo a couple of brackets for some suspension parts. 1 step forward, 2 steps back!
If you’re in the marked for 3D printed engines, those that Ice Man Collections makes look really nice. I get nothing to recommend that place, just passing along what I think looks like a good vendor. I also picked up a couple of LS* engines so we can replicate our 3rd Gen Trans Am race car. That’ll follow the Z work. While on eBay, I also snagged a couple of Mazda 13B rotary engines so I can build a 20B 3-rotor engine for yet another custom build.
Still working on this project. None of the resin headers I got online will work. I was even tempted to use some LS headers, even though those are not accurate. Still no good. Everything is either too wide, or too ‘upright’. The primaries need to lay back some and be pretty narrow to fit between the K-member and engine.
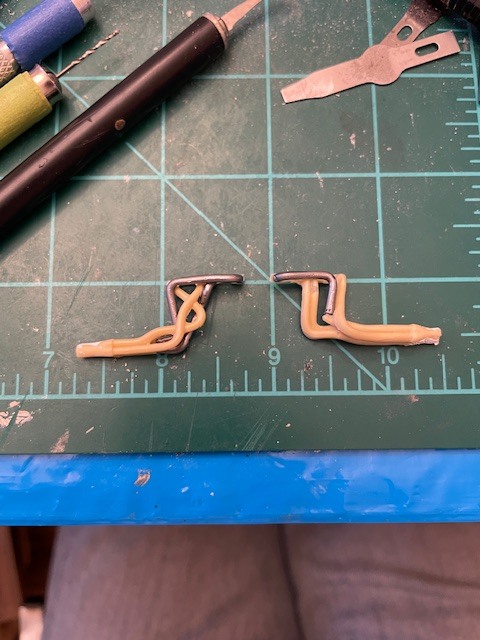
I made some resin casts of the Revell '69 Camaro Z28 set that looked good, but they, too, are too upright. So, I bit the bullet and broke out the CA adhesive, razor saw and lead solder. I cut the front primaries and ran solder replicas along the header flange and turned down mid-header. That moved the front primary back out of the way, and actually made the resin replicas look a lot like the headers on the real car. Alas, though, they’re still too wide, and hit the lower control arm mount.
While kind of tedious, the work wasn’t that bad, but this project stopped at the test fit stage. So I’m back to hunting for a set of resin replicas. I actually have a couple of sets of big block Dodge B-body headers on their way. They have a similar header flange and may actually lean back at a better angle. Failing that, I also have a set of small block Chevy shorty headers in the same order, so if push comes to shove, I’ll but the header flanges off those and build completely new headers.
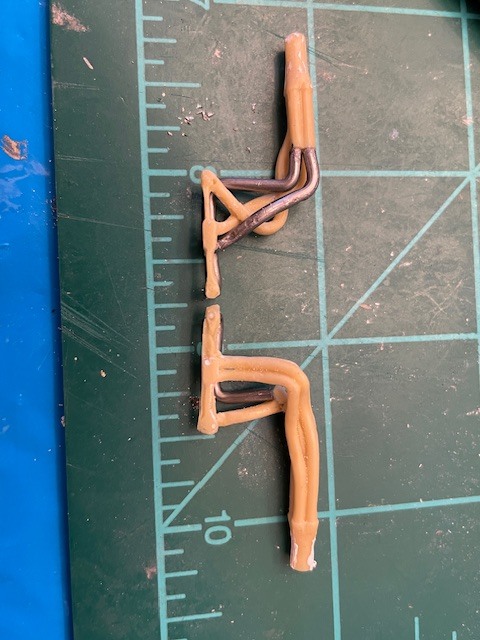
Well, punted on those headers. I could NOT make them fit. So I went back to my search and figured that if I can find something close, with the proper primary tube spacing, I might have better luck. I discovered some resin headers for a big block MOPAR that had similar spacing, even if a bit long along the primary header flange.
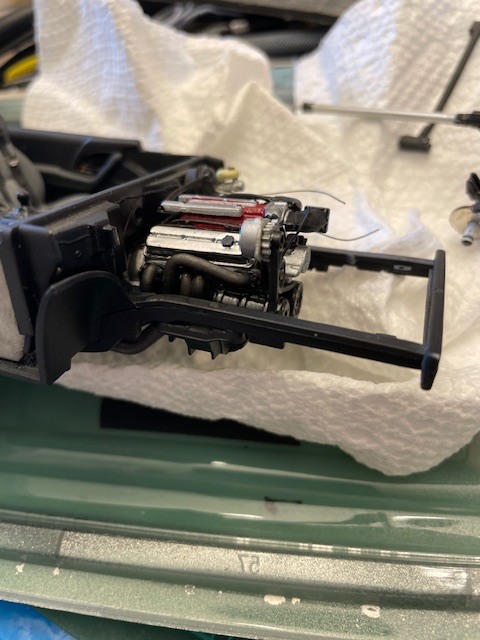
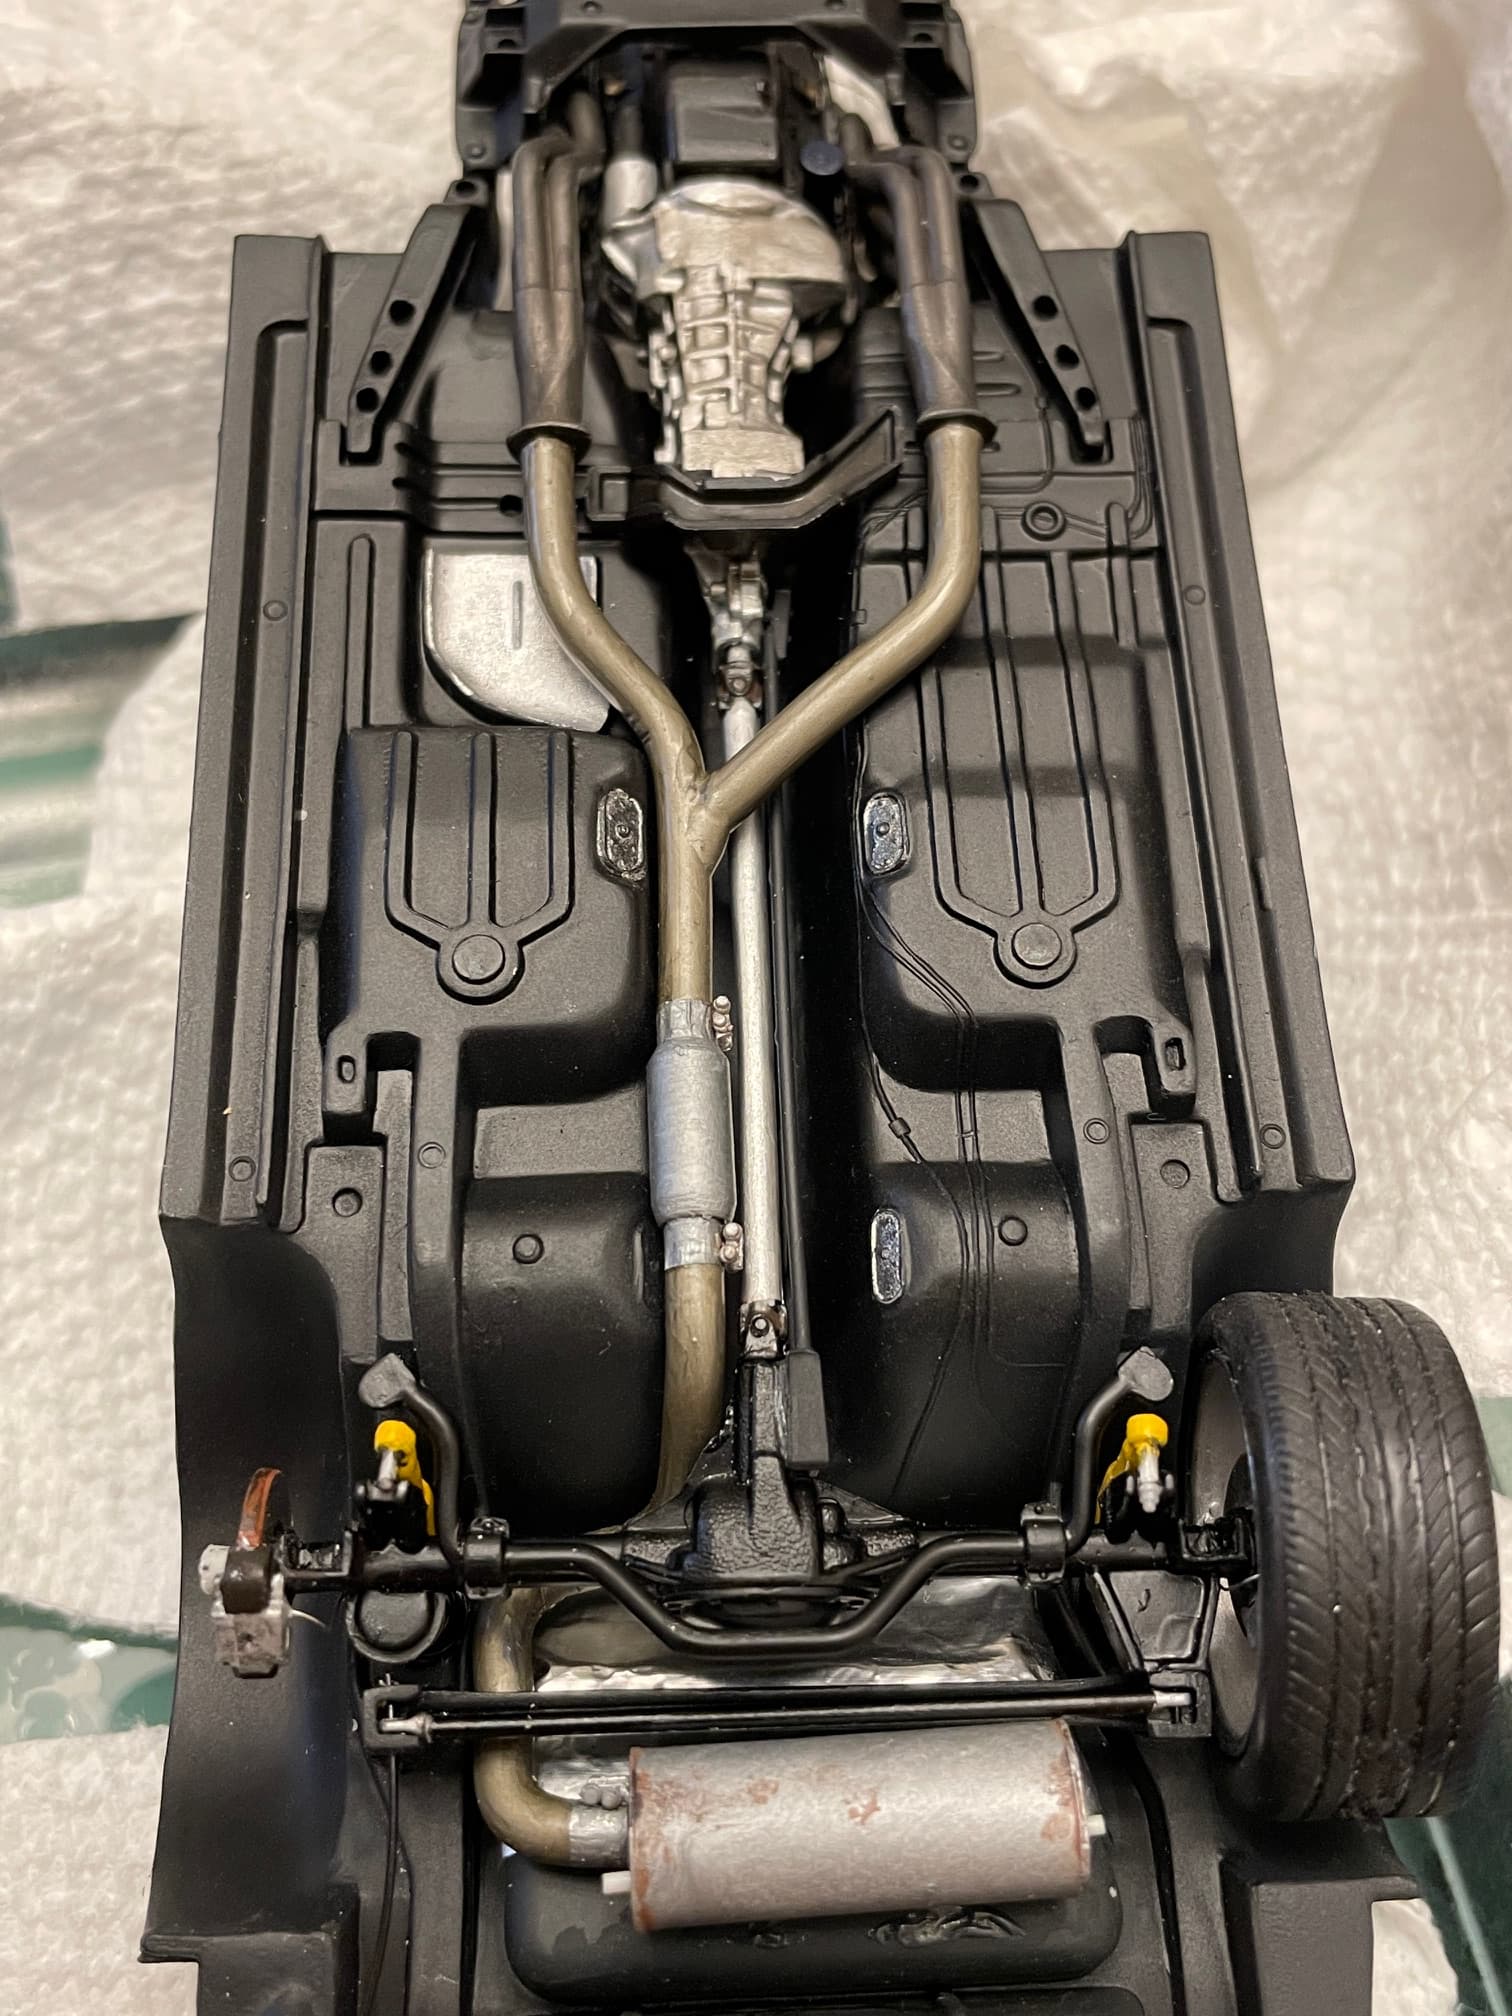
I got a couple of sets, along with some SBC shorty headers, thinking I could cut the header tubes off the primary header flange and build all my own. I did not need this, as a set of 440 B-body MOPAR headers were really* close. I cut 1-2mm out of the primary header flange on both sides of the middle primary tubes and reattached the shortened flanges together. That got me the proper length. The 440 headers actually look a lot like the headers that were on the car, and fit through a tiny passageway between the K-member and firewall. So we’re going with those.
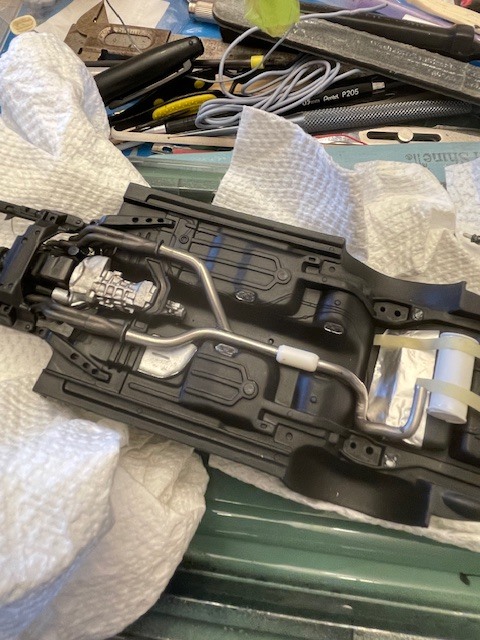
The headers are in place, and I’m starting on the exhaust system, which is, of course, 3" diameter and completely custom. I’m taking my time, though, as I’d like to only have to do this 8 or 10 more times.
Yes, Jim, $5-$7 is reasonable and the going price range for just parts from a kit. Unless the kit is rare and/or out of production, though, you can usually get the entire kit for ~$10-$12. So, if you do a lot of kit-bashing, getting an entire kit can make economic sense.
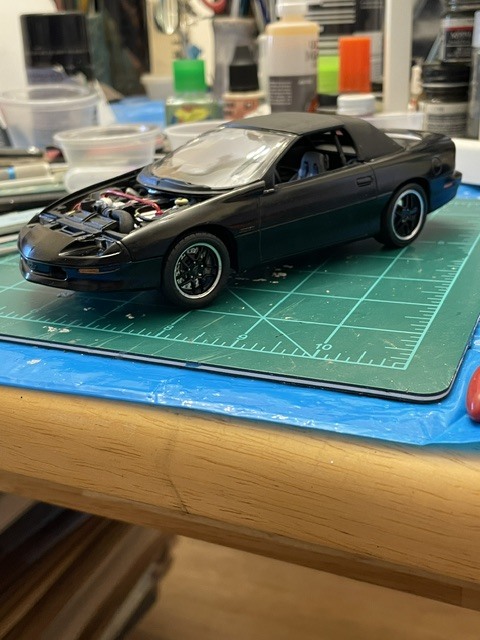
Made more progress on the underside of the car. LOTs of fitting and trimming and such, but I’m generally enjoying it! The rear end is almost in. I need to cement the driveshaft, torque arm, shocks and lower control arms in place, and then add some details and paint.
Thanks. Still progressing. Got the body on the chassis. It took a fair amount of trimming to get things to settle down, and I’m hoping that as I fit the front and rear fascias, I don’t find anything too out of alignment. I’ve already discovered that the hood has a different curve to it than the fenders, so won’t fit well closed, so I’m planning on replicating the hood struts and gluing the hood in place in the open position.
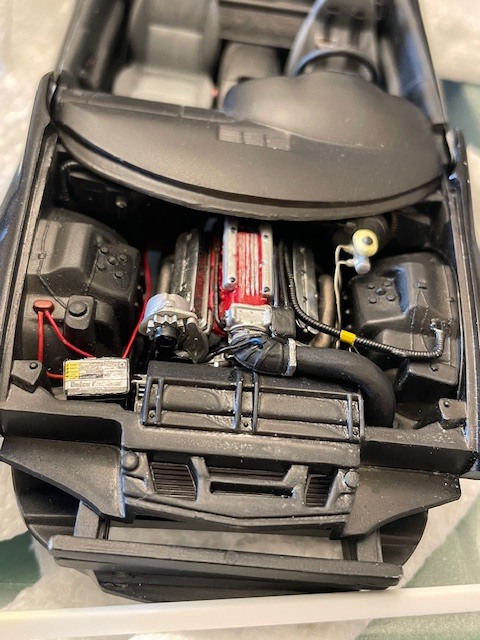
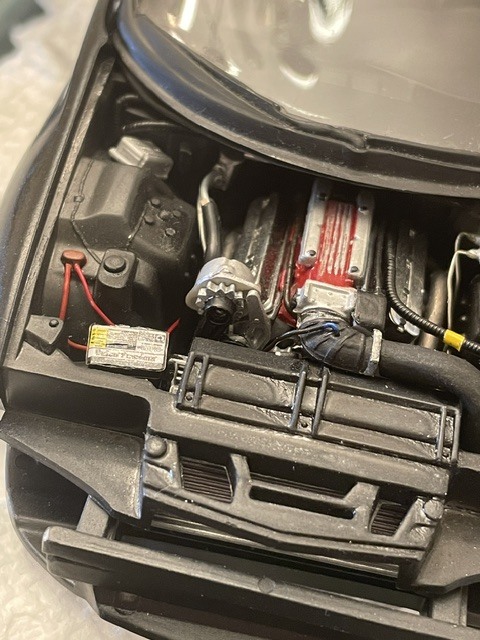
I am now working on the engine compartment. Having to do a fair amount of fab work to replicate the real car. So far:
Made a replica of the cold air intake using Milliput. This required me to order some fresh Milliput, as all the other stuff I had age-hardened. I now have what’s left in a glass jar to hopefully keep the air away.
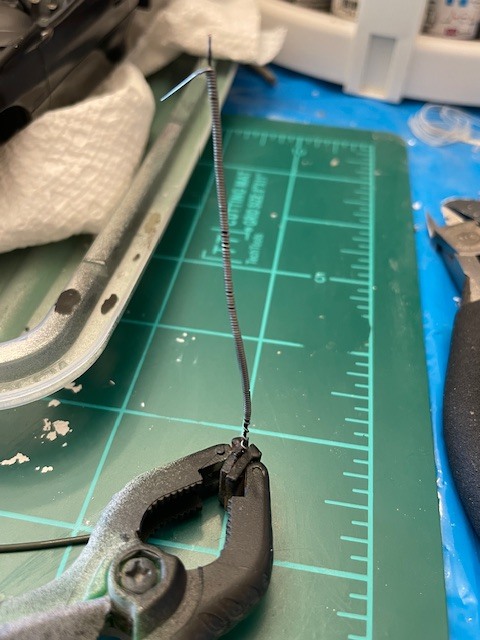
Replicating the plastic conduit that manufacturers use to cover wiring harnesses with these days. Coiled some fine solder around some stiffer wire, painted, trimmed to fit and epoxied in place. That project is still on-going on the passenger side of the engine compartment.
Ran battery cables.
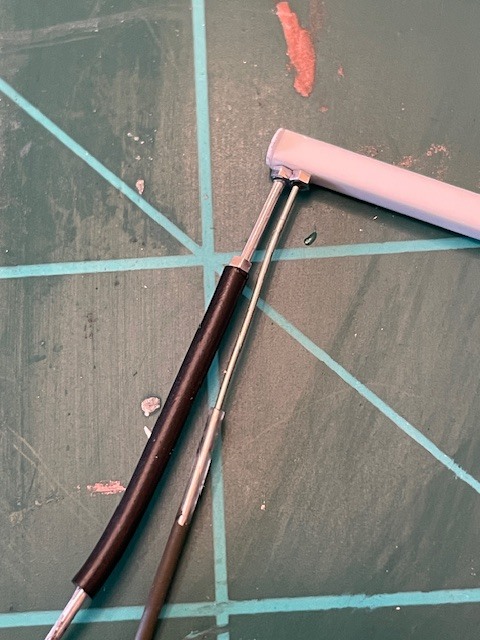
Working on my ‘gizmology’ for the right back corner of the engine compartment where the ECU and AC lines are. I plan to use a couple of resin MSD boxes epoxied together for the ECU, and am using several sizes of wiring and tubing for the AC low- and high-pressure lines.
I still need to fabricate the hood strut mounts and struts and get them in place and painted. After that, I’ll have to repaint the hood. I thought I had some scratches on the outside, but they immediately disappeared when I hit them with some 5000 grit paper, so I just went ahead and sanded the entire thing and will re-shoot it.
After all that, the strut tower bar I fabbed gets installed.
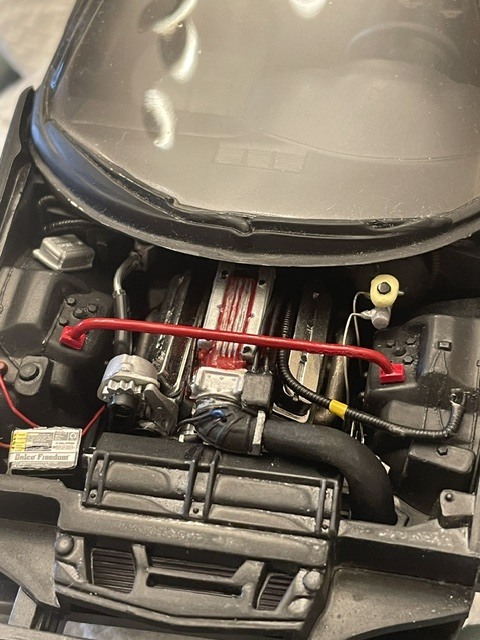
Couple of pictures of the engine compartment and fabrication work for the conduit and AC bits.
AC lines and port block. All need trimming and painting. Waiting on the epoxy to set. The white box styrene that the wires stick into will be epoxied to the firewall.
Got the AC lines in, the system evacuated, and charged. Blowing cold air now!! I took a resin MSD 7 control box, cut it down and attached it on the passenger inner fender to mimic the factory ECU. Also got the strut tower bar the car had tabbed up, painted, and ready to install. I really should do a dip-stick, since it’s also a pop in color in an otherwise black and gray engine compartment.
Now working on fabbing up the hood struts and attachment points for those.
Still chipping away at this project. I am almost to the finish line. I have discovered while reviewing some old pictures of the real car that I forgot to fab up a radio antenna. Will probably do that tomorrow, as I’ve glued one of the side-view mirrors on and am not touching it until that’s set.
Here’s the current status. Wheels are just loosely-fitted. I am thinking of doing a bit more fitting to the front left.