ICM IT-28 WWII Soviet Bridgelayer 1/35 WIP BLOG Finish

WIP BLOG and Finish photos are here: https://imgur.com/a/2GfFk

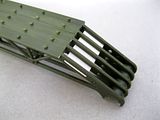
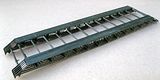
This is ICM kit # 35081 Made in the Ukraine in 1/35 scale.

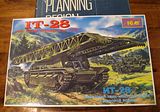
This will be an OOB build that I’ll try to slam out by the end of January.

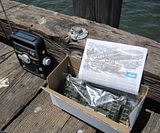
I started the kit on the local pier while fishing with friends.

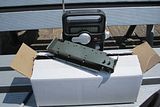
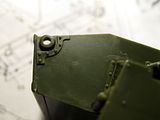
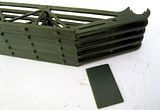
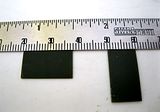
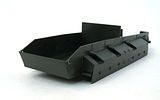
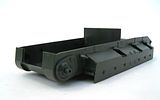
This lower hull part was warped so I submerged it into hot (not boiling) water for one minute then tweaked it straight again once I got back home.

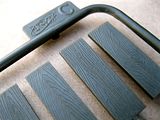
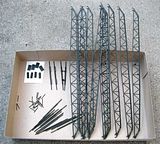
All of the parts in this kit had an incredible amount of sticky, greasy mold release agent used during manufacturing. I didn’t get pictures of this in my kit but you can see examples of this shiny grody substance pictured by Ray Mehlberger here:

http://www.cybermodeler.com/hobby/kits/aer/images/aer_t-28_parts05.jpg

http://www.cybermodeler.com/hobby/kits/aer/images/aer_t-28_parts08.jpg

I tried soaking and scrubbing in warm soapy water but it did not dissolve this substance.

I had to use a solvent, Denatured Alcohol.

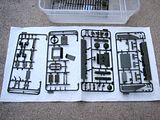
Each sprue was dunked then agitated vigerously for about a minute each. Then layed onto paper towel to air dry.

WIP BLOG and Finish photos are here: https://imgur.com/a/2GfFk

Looking forward to seeing this thing come together, tho i feel that radio may be a bit out of scale [:P]

Sucks about the molding agent, can’t believe companies would let that go unnoticed. Glad you got it sorted tho.

Thanks,

Dave

This should be fun to watch but please try not to be cruel by posting pictures from the deck by the water…[ip] everything is frozen and cold here!

Sweet! I’m gunning to get one of my own off of Evilbay one of these days. I’ve seen some really nicely built up ones in the past.

Dave < haha, that radio is a super cool solar powered unit that I got for my birthday last year. And the mold release is something I’ve never seen on a plastic kit until now. Weird though I find out, is that this same kit is notorious for this

Andy < Ok, but it’s cold here too. It must be down to around upper 50’s to lower 60’s during the day… brrrrrrr [:)]

Steven < yup, that’s where I got mine

The ICM kits are notorious for having a heavy/greasy mold release residue. I remember when I attempted the normal gun-tank version that I had to soak them overnight in a bath of hot water and Dawn dish-soap in order to just be able to handle them it was so thick and gooey!

So I have to ask…did you catch anything while at the pier? [:D]

My T-35 is all slimy as well, they look like good kits though .I will do it for later this year,in the mean time I will watch here. Good luck on your build.

WIP BLOG and Finish photos are here: https://imgur.com/a/2GfFk

Oh, ok, so I guess it’s ICM kits and not just this specific kit model. This is the only ICM kit I have.

Bill < Neither my buddies or I caught anything that day, not even a cold.

krow113 <Thanks for looking in and commenting. When you start your T-35, make a thread here in armor. I’d like to check it out.

The lower hull subassembly has been straightened out and is done for now.

The bridge parts have been cleaned and prepped. The tubular parts needed some sanding and the holes in the girder parts needed some slight enlarging to accept the other parts.

How do you suggest I paint this after assembly?

WIP BLOG and Finish photos are here: https://imgur.com/a/2GfFk

I’d say either go with an airbrush or a rattle can for the base color. Rattle can would the quickest and most painless way to do it.

Great subject. The older Russian AFV are very intresting and a bridge layer on top of that, Nice. I have a few ICM kits that I still have not looked in yet, guess I no I’ll have some cleaning to do. You could always give those pieces a quick spray of paint before assembling to ensure you get some color on everything.

My uncle actually got me this kit a couple years ago, but I haven’t built it yet. I had to wash my hands for a long time after handling the parts though. Those bridge parts look like a lot of sanding too.

FSM issue April 2002 has a build of this kit. FSM issue Febuary 2005 has the T-28 build. Both are well worth a review on this subject.

Strangely I remember reading at least one of those issues…dang that was a long long time ago in a different life.

thanks for the comments and painting advice. I think I’ll go with low pressure on my AB after assembly. Then I don’t have to mask off anything

krow113 < thanks for the heads up on that article. I dug through my past FSM issues and found that I have that issue and just finished reading it

I will be watching this one too. I did the Trump German version a cpl years ago, love all the off the wall stuff, I kinda get bored w/regular tanks. Can’t wait to see what you do with it…[t$t]

Interesting place to build a model… Drop a part and it gets committed to…

Never mind the Carpet Monster!

haha, could have been

PANZERWAFFE < you’re the builder of that outrageous Pinhead russian rivet tank model. Nice build is that

SprueOne, I’ve seen this tank completed a few years ago and it is really impressive when done. You might say the model covered itself with this funny stuff because it wanted to get alcohol - it’s from eastern Europe you know [:D] Good luck with your build and have a nice day

Paweł

haha, could be true

yes, this kit has good fit and details. A few ‘skinny’ parts in my kit that I’ll review with pictures later, but a really good kit actually

WIP BLOG and Finish photos are here: https://imgur.com/a/2GfFk

Back to the lower hull, idler wheel mount parts. The opening in the hull had to be enlarged to accept the peg on part L2, both sides

BRIDGE ASSEMBLY

The bridge assembly was surprisingly well designed for assembly and fit.

surprisingly because of all the parts that had to line up and fit together, which they did

The girder truss parts of the bridge had ejector pin and other molding flaws on one side of each of the ten identical parts.

I didn’t want to clean up all of this so I flipped the three of these with the clean side facing outward and two facing inward.

their final position is close enough to hide the flaws

Starting with the half tubular end spacer pieces (parts D3), I began assembly with plastic liquid cement.

Once five were lined up and in place, I ran the brush charged with liquid cement across the top along the line where each were butted against each other.

I assembled both bridge subassembly sides at the same time

Next, each of the holes where the smaller poles (parts D1) were to be inserted had to be drilled out again.

This created an easy lined up fit. After all of the 24 were installed and equal spacing was ‘eyeballed’.

Liquid cement was then touched to each contact point.

WIP BLOG and Finish photos are here: https://imgur.com/a/2GfFk

The flat plate (part D2) was too thick to insert through all five slots and I found it too difficult to either sand evenly thinner or to enlarge the slots evenly

new parts (4X) were scratchbuilt to replace the kit parts. The kit parts were first measured, then duplicated with .023" styrene sheet material

once each side was completed, the larger poles (parts D4, D5, D6) mated both sides then liquid cement touch at each contact point.

These holes had to be re-drilled too. At 15" (38 cm) in length, the bridge assembly is complete with exception to the wood boards that line up across the top of both sides.

Some little parts here and there needed a little putty or super glue fill but again, the design of assembly and fit of this model kit is very good

WIP BLOG and Finish photos are here: https://imgur.com/a/2GfFk