As Ronald Reagan used to say: “Well… There you go again!”
Right you are Ronald.
I suppose I should start by saying a little about what the Icarus is. Icarus is a spaceship depicted in the 1968 Planet of the Apes movie. The ship is used to ferry researchers to a distant planet, to a distant time. Follow the link below for more information.
Add lighting and more detail to the interior. This will include adding the ships cryosleep chambers. I will even add a mummified corpse as depicted in the movie.
Mount the ship in a pseudo water dio. Sadly–I am in the water again. Ugh.
Try to have fun building this.
This project will take a lot of time. With my limited bench-time I estimate up to 2 years. Maybe longer. Space travel takes time. I’ll get there… when I get there. Maybe you guys should enter the cryosleep chambers. You can come out of hibernation when it’s done. That’s the ticket.
Maxie–stock up on your morning coffee. You are gonna need it for the long haul. And watch out for that deadband.
If I recall correctly… The only window’s were in the cockpit. ( I could be wrong) Will make it hard to see any detail’s after she’s assembled. I DEFENITLY want to see what you come up with for a "Corpse .
Yea, but this time you know what your doing !
NO WAY !!! Look what happend to “what’s her name”… I’ll stay up for this one ! ( Said as he took inventory of his Coca-Cola…)
What scale is the Icarus in? (trying to get an idea of how big this will be.)
Paint scheme will be incredible. Nice mix of both deep blue and gright green water, all set against yellow sand and bright red rocks.
Y’know, one the base was roughed out, I’d be sore inclided to use Rustoleum Red Primer for the base coat of the entire thing.
From my experience in Monument and Moab, that green water is very striking. The water is not green–it’s crystal clear. But, it’s over a bottom that’s very buch a mix of zinc chromate green & yellow, and the light coming through is that bright green.
So, maybe I’d use gloss white to under-coat the sand areas (and down into the water in the green bits). Then a chrome yellow over that. Then. build up sand effects over that (probably with as bright a ZCG as I could find for the water.
I’m also not quite sure if I’d gradient the hull color on the Icarus down to a 15-25% grey, so that it would look “deeper” in the water. Froece the perspective a tad. Hmm.
Dang, but the bright yellow life raft(s), with all the red safety markings is(are) going to look cool, too.
Hmm, so the real question becomes “What would Timmy do?” [:)]
Always thought this was clever, since parts of the spacecraft could be underwater and not clearly seen, saving a lot of money on not having to build the whole thing.
I’d be tempted to add a couple of apes on horseback for scale but of course the time frame wouldn’t work if you’re having Taylor and company evacuating the craft here.
The foreground of the image is close to what I’d like to accomplish. The background may not be feasible. Considering the size of this model I’d have make a large base to keep perspective. Maybe I could make an outcrop of rock that comes up from the water as a compromise. I will give that more thought. I am open to more of your thoughts as well.
This is a good question. I don’t know. The company that I bought the kit through does not indicate the scale. I will see if I can find out. They say it measures 12 inches. That gives you a sence of it.
You hit the nail on the head. Therefore, my quest with resin will continue. I’d like to get that clarity. I have seen that water and you are right! It is striking. BTW. Moab and Monument Valley are probably my favorite areas of the country in terms of stark beauty. I have been there twice. I love the SW. It is a photographer’s paradise.
I love that idea Capn. If I go with the resin I will try this. It is a really good idea!
Timmy? I suspect a sabretooth chicken will be involved somehow. Or maybe a screaming Matilda. I think that was her name. ? LOL. Just kidding though. Timmy has excellent advice and instincts. He proved it more than once on the Seaview build.
I like this idea as well. That would be cool! I don’t have to make it exact to the movie. [:)] The problem would the same as noted above about the size.
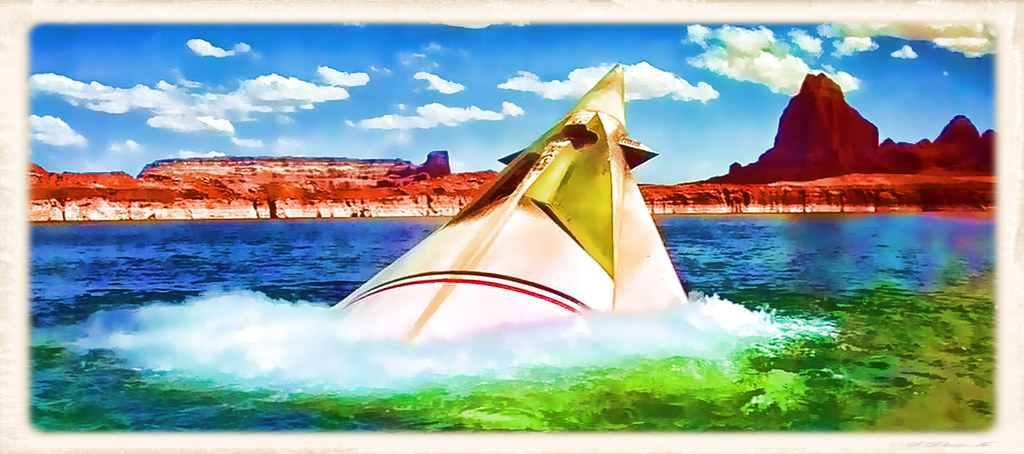
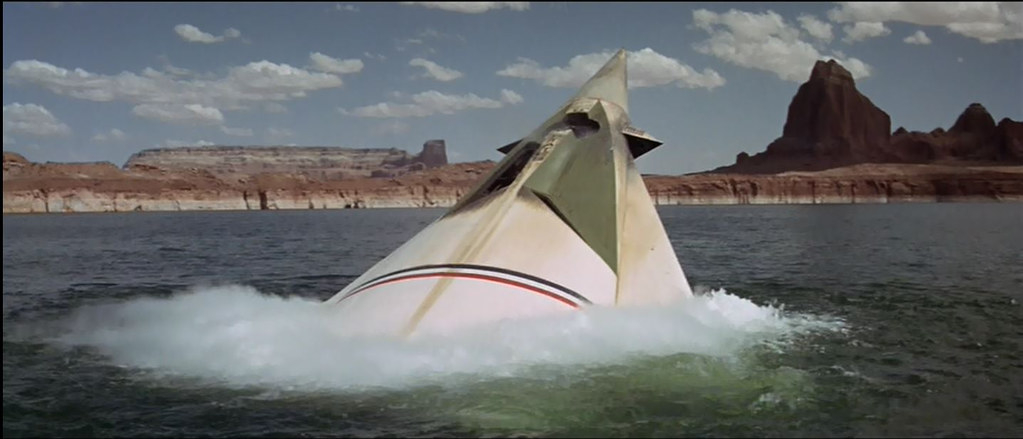
The image that I used for my intro is a screencap from the movie. I ran the image through a photo editing program to bring it some life. I was shooting for a more surreal painterly effect. The colors are blazing. Check out the image below. This is how it looks straight from the DVD. It is terribly muted and dull.
Wouldn’t that intro image make a cool postage stamp? Lol.
Well… first “Timmy” would BEAT HIS COMPUTER MERCILESSLY !!! ( I had a bit of an “Issue” just now.)
Then Timmy would find a piece of scrap plastic and paint it Testors Ivory White. Use this to see if the colors "Complement " one another. It might add depth to the kit when it’s under water.
I just got home from a 16 hour day so my brain may be on "Autopilot… let me get some sleep and I will think some more on this when I get up … at 3 AM… After I’ve had some Coca-Cola … A LOT of Coca-Cola.
It is resin casted. As such a person should not expect a perfect cast. However, this is my second copy of the kit. The first had some pretty serious flaws. The long of it is that MIM offered a return or exchange. If exchanged I’d have to wait for it. They decided that the mold needed fixing. I opted for the latter. The replacement is from the repaired mold.
MIM is providing me a 10% discount for my troubles. It is worth noting that MIM treated me well throughout this process.
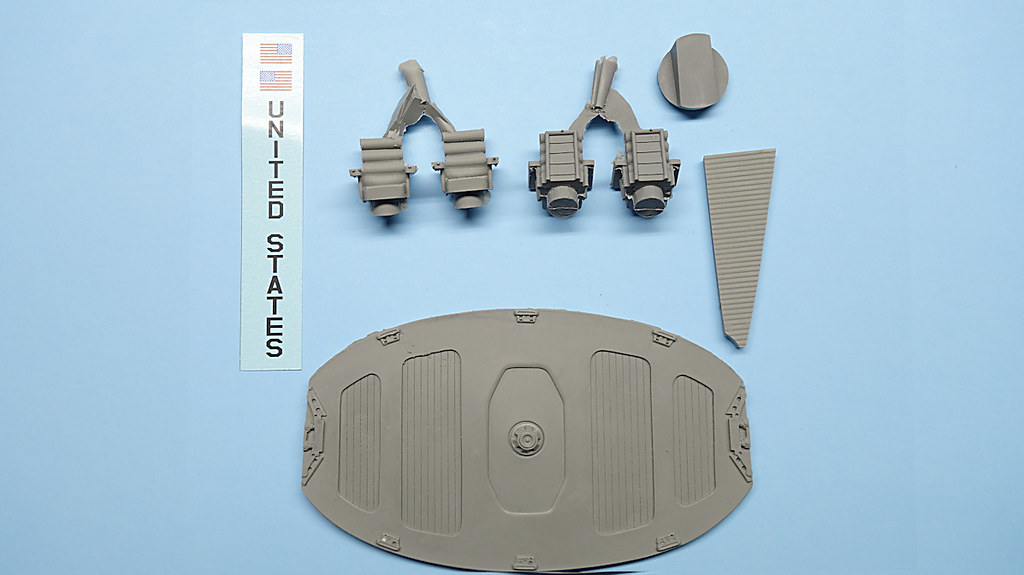
First looks
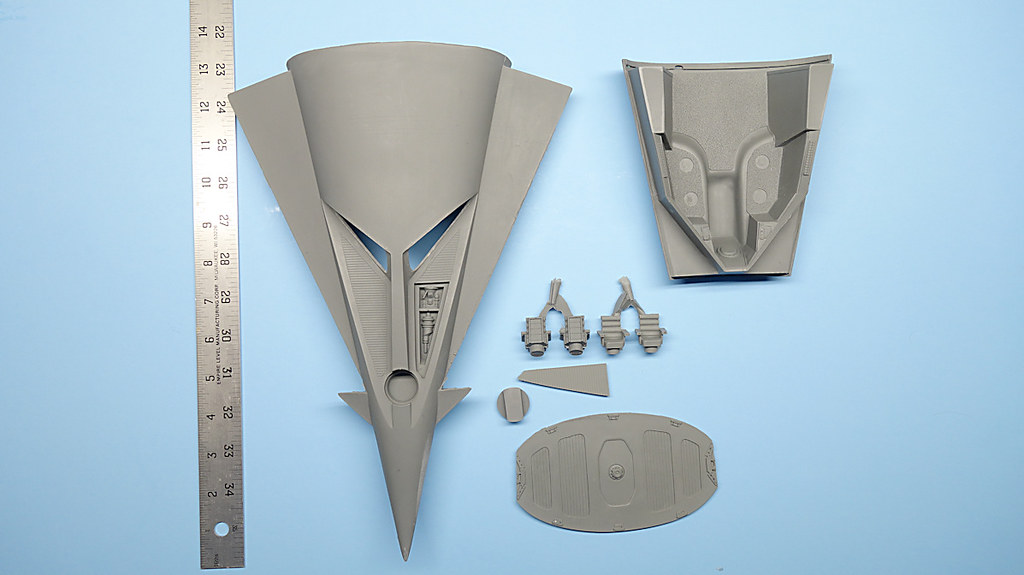
Below: This is what you get. It includes a stand, top right. I did not get plastic for the windows. I don’t know if they forgot to include it. The first kit came with a piece of clear stock. To be honest… I wouldn’t have used it. In my opinion it was poor quality. Since I’d have to cut and fit it, I’d find some better plastic to do it with.
There is some cleanup work to do. Overall, it is not terrible.
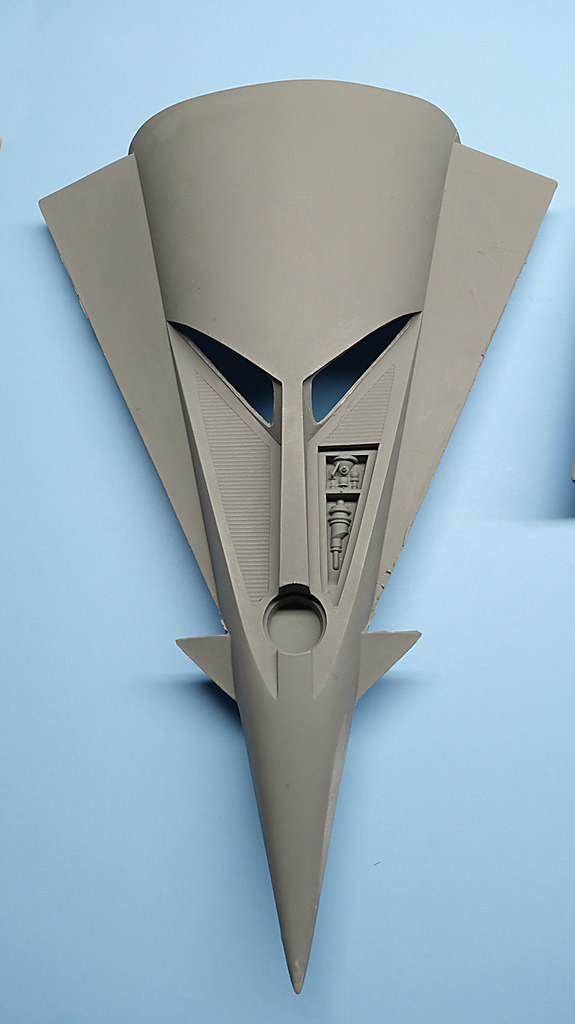
On the first kit the nose of the ship came in two pieces. The very tip of it had to be shaped and attached. I was already planning on how I’d have to anchor it with pins. I was happily surprised that the replacement came in one piece. I have a little shaping to do, but the work should be minimal.
Below:
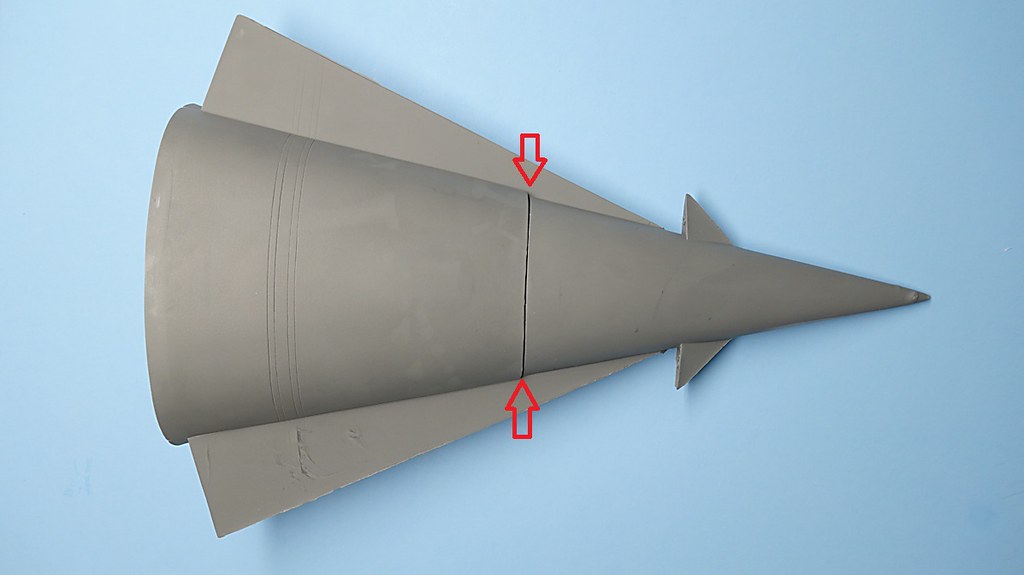
I am not too happy about how these two pieces fit. This is the best alignment that I can conjure up. This will take some careful sanding to bring those body lines into alignment. Filling work as well.
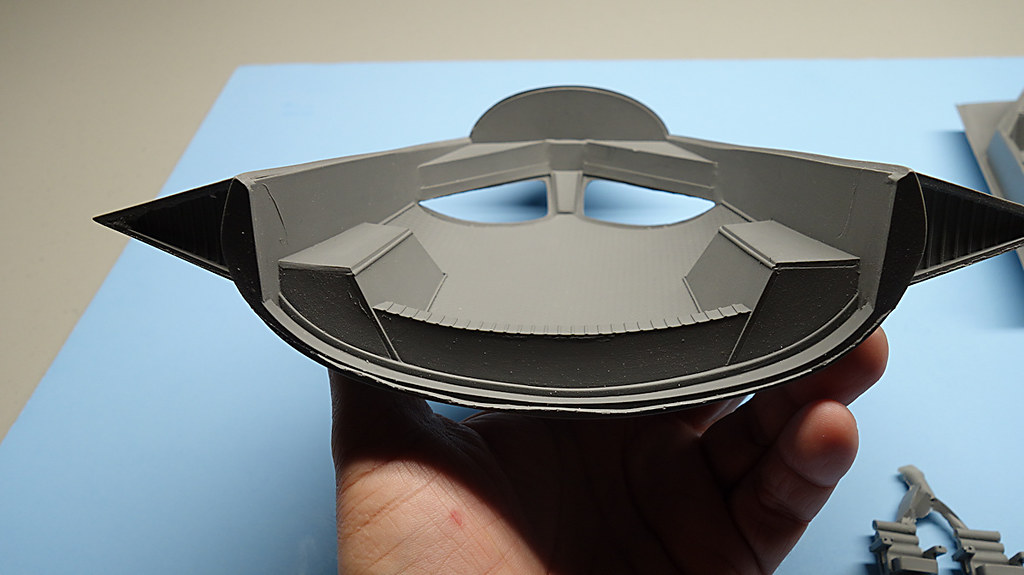
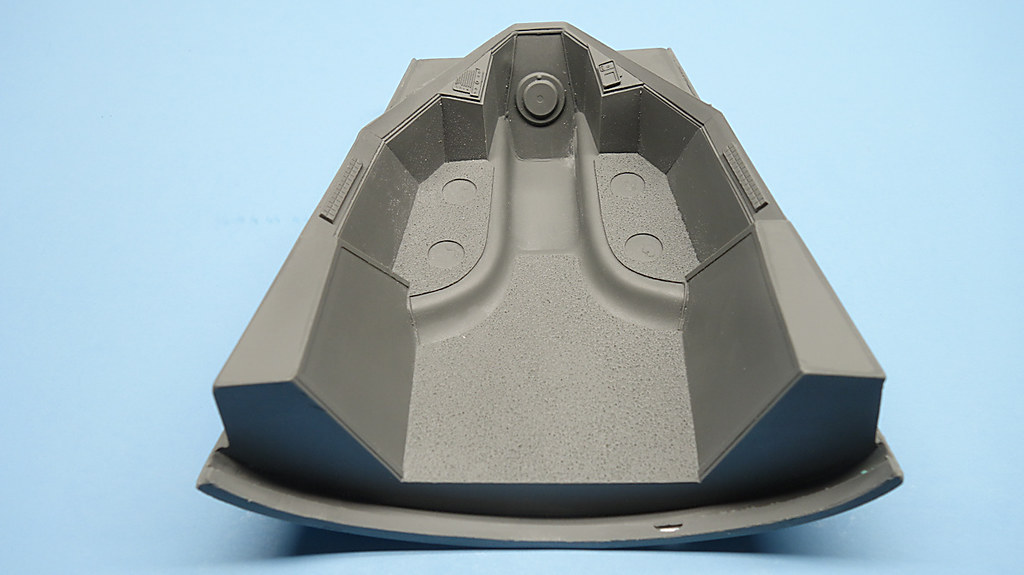
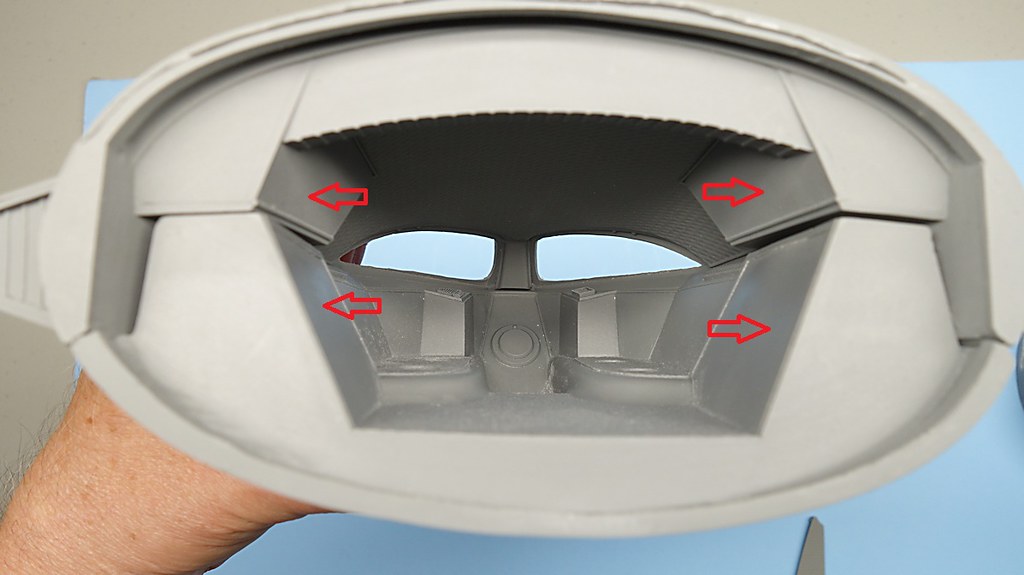
Below: This is the view from the bottom. You can see how you get a very nice view when the bulkhead is removed. It will be kind of odd to lift the dio over your head to see in. But… it is what it is. Btw. This is not my brainstorm idea. I came across another build that did this. I thought it was genius, and that person gets the credit. The rear bulkhead will be removable when so inclined.
The red arrows point to the cryosleep chambers. They are wrong in comparison to the actual prop, and useless for my purposes. The easiest way to tackle this is to remove them and fabricate my own. I will do a study of what material I should keep, and what should go. Before I bother though. I need to make sure that I have enough room to fit scaled humans in those spaces. I might scrap the idea if it is too small. I think it will be okay though.
The design of this kit is such that it offers serious customization options. Also, IMO–it is a decent representation of the movie prop. The cryochambers are wrong. But-- I think that they were shooting for a representation of them, and not a precise copy.
I am happy with it. It beats building one from scratch! I was considering that until I found this. To that point… There have been several kits available over the years from various sources. All of them are discontinued. This is the only kit available to buy.
Where do I go from here. I suppose I will start with some cleanup work. After that–tackle the windows and how I will anchor them without globs of glue being visible from the inside or out. Still muddling that. I will probably make some kind of frame.
You could use thin Black decal’s to hide the glue seam. Just like the Rubber seal around a car’s windshield. You would only need to do it on the inside.
CapnMak82 Is right about the Grey. But what Grey ? I suggested Ivory, but maybe Testor’s Camoflage Grey ? It’s more White than grey. Too Grey and it will “Muddy” the water.
That kit is H U G E ! ( Would G.I. Joe fit in there ? )
I get what you are both after here, and I will store all this for when I get there. It’s a good idea to consider.
You know what is funny? My first thought was, “What? No way a GI Joe will fit.” Then it hit me. Oh. He means the smaller ones. My generation had the near 12 inch tall version. The smaller ones are 3 3/4 tall. Still too big. I measured one of the cryochambers and it is about 2 inches at it’s longest. Joe would be a giant.
The questions regarding scale made me realize that I should have given you some reference. See below. It is near 13 inches long.
MIM advised me that they will look into getting me the window plastic. Apparently it should have come with. It would be nice if they were precut. Then I’d have a stencil should the plastic stink. I will advise when I know more.
Nino sent me this great link that has really good info on the movie prop. It will be helpful to me with this build. Thanks Nino.
I’m not sure, but you may try some HO ( 1/87 scale ) figure’s . They are roughly an inch or so . Possably some S scale (1/64 ) they would be closer to the right size, but harder to find.
If you look at Ninos link there are some drawings. But–I am less concerned with exactness than I am with scale. An engine bell with maybe be some piping, or I can make my own piping. I tried looking for scale aftermarket rocket engines with little to no luck. I found some machined ones but too large and too expensive. No real detail either. Something like Nasa hardware should work. I have some Nasa kits I could cannibalize but I don’t want to waste a kit doing that.
Nino is “Awesome” when it come’s to reference material !
But I cant really get a feel for the look of the nozzle’s from the drawing’s. They sort of look like the cap to a Valejo Air Color’s paint bottle.
It’s too late for me now ( I should have gone to bed 2 hour’s ago ) but let me “Rummage” around in my spare part’s trunk. I might have just what you need… Maybe…
I’ll get back to you tommorrow. Same “Bat Time” same “Bat Channel” .
BTW: 4 day’s and you already have over 500 "view’s "… and you havent even started yet !