This is a build log of the kit that will go along with the review. I will be adding some scratch-building and a couple resin parts to add some details.
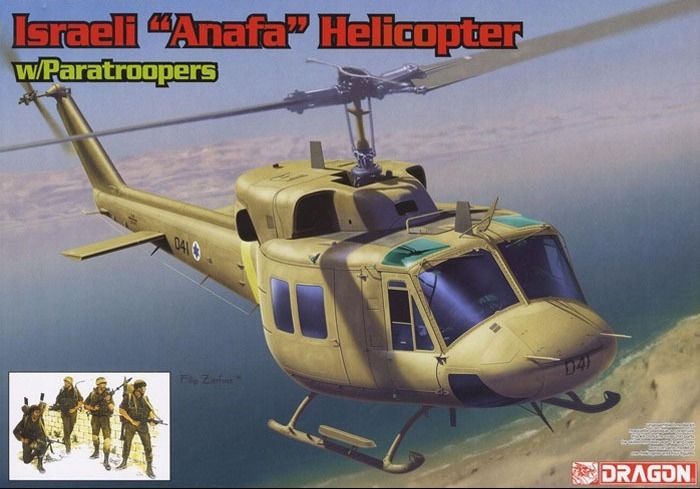
The box art
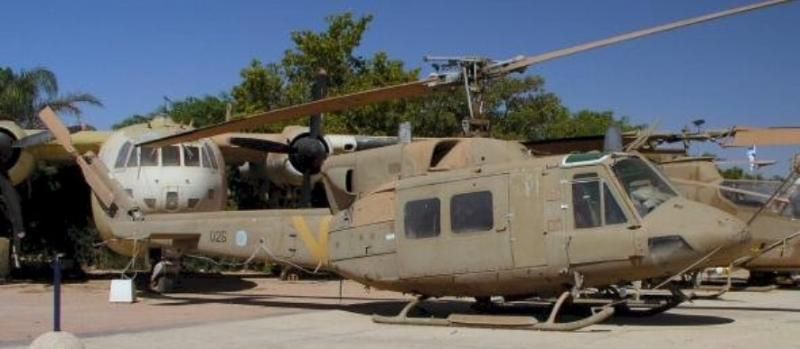
This is what I am going for. It is from the early '80s with an all grey interior.
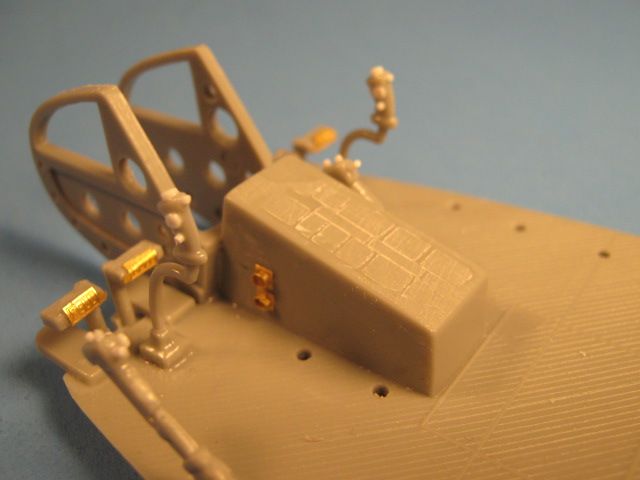
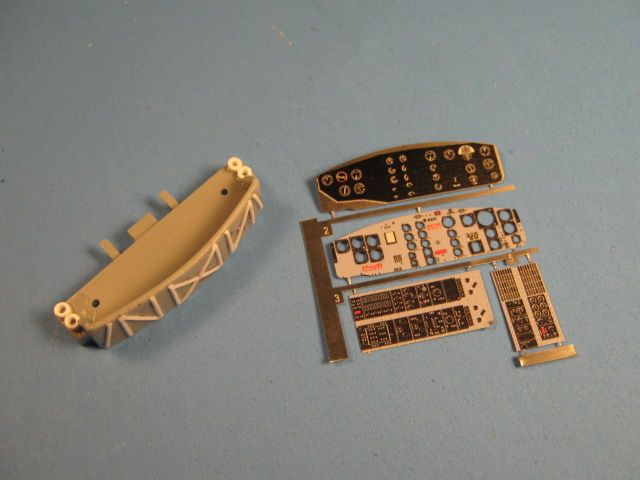
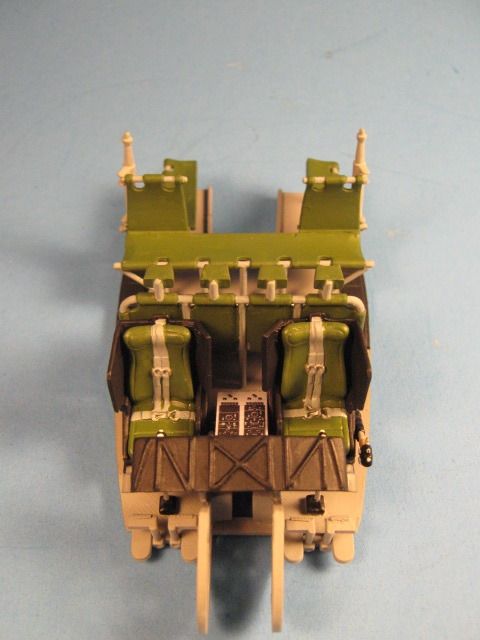
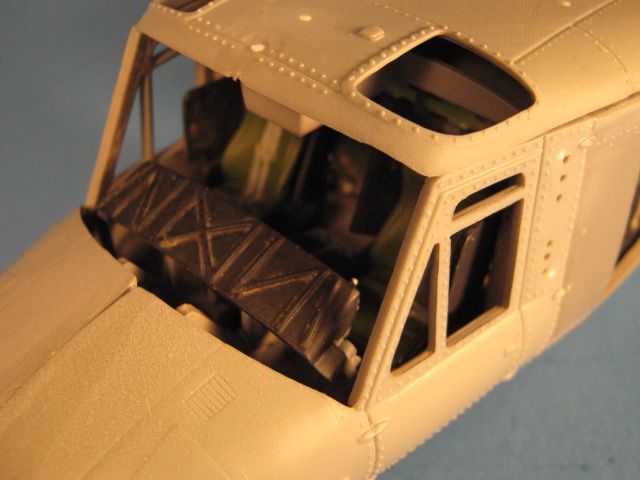
I started with the cockpit by adding knobs to the cyclic and collective handles. The PE in this pic is from the kit.
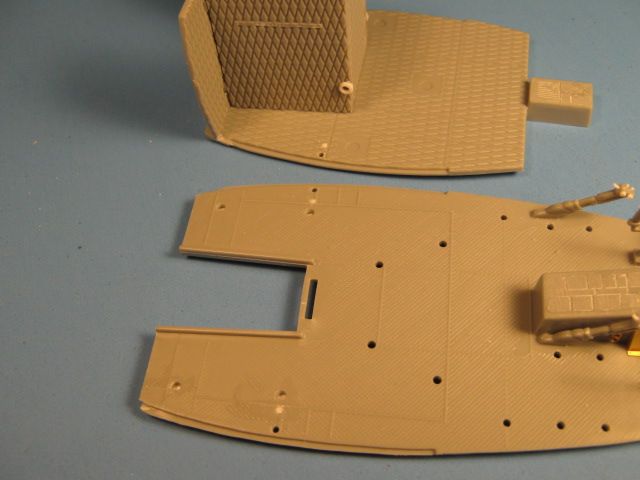
On the floor and roof, I filled in the holes for the vertical stanchions that hold the troop seat. They are too far inboard. I drilled new holes about 1/8 inch farther outboard on both sides; top and bottom.
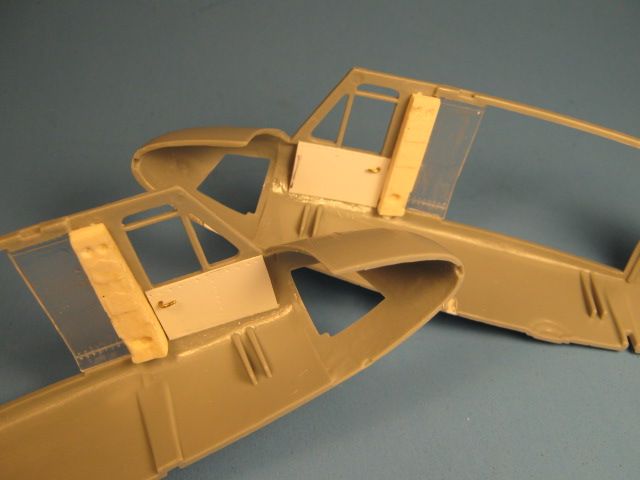
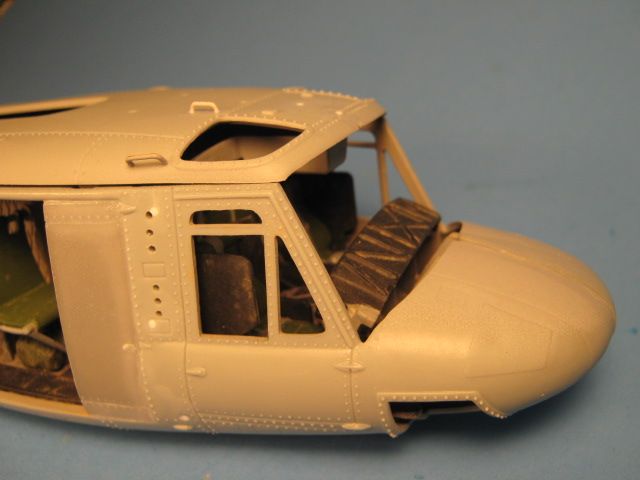
I added details to the IP such as the ribbing on top of the anti-glare panel and air vents on each side. I will be using the pre-printed IP and control panels from the earlier USMC UH-1N release as the kit PE is weak and not pre-printed.
This is the crappy PE that comes in the kit.
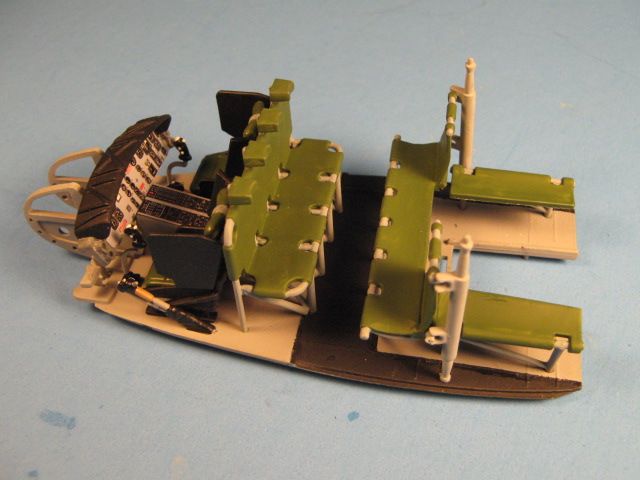
I added cross supports to the seat legs and reworked the back troop seat to have the curved lower supports and I removed part of the lower back section to allow it to sit all the way back against the rear wall properly.
I added interior door panels from sheet styrene and handles from wire. I also used a couple of Cobra Company B pillar resin pieces. I sanded smooth the jump doors to remove the windows as IAF 212s have the solid doors as opposed to ones with windows.
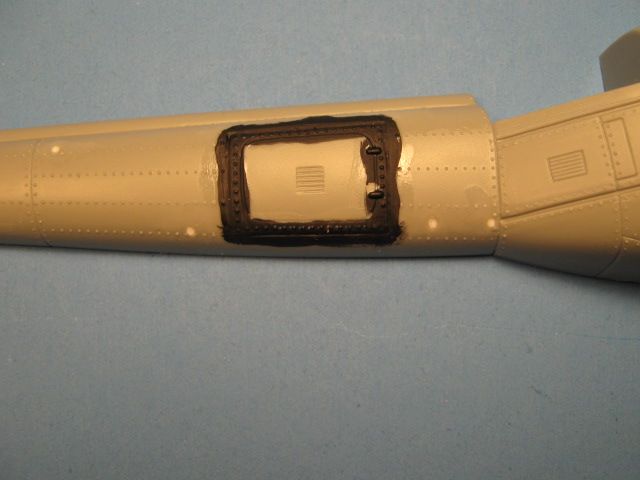
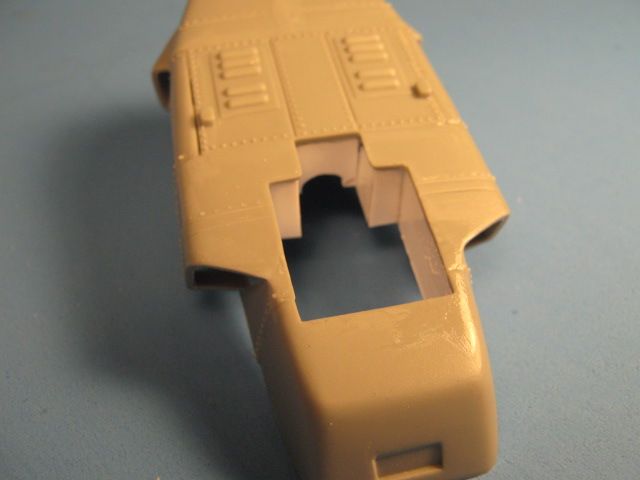
You can also see above and below where I filled in the holes that I will not be using that are intended for various antennas not used on this version. Also note that I used the tail boom insert with the cargo door (part B23). All civilian and export Bell 212s have this cargo compartment. US military UH-1Ns do not have this compartment.
Lastly, I added interior side walls to the main rotor transmission compartment.
That is all for tonight. Hopefully I can get some paint on it soon.
Nice work Gino! I really admire the amount of detail that you put into your kits! I’m sure this build will be just as amazing as the others that you have done!
No it is a stretch version of the Huey UH-1N / Bell 212. It is much larger than the Bell 222. The 222 only seats 5 plus a 2-man crew. The 214ST seats 18 plus a 2-man crew.
Thanks Gino, I have seen, and gone for a ride in the 222, I was thinking that it looked quite a bit longer than the 222. Learn something new here every day, model based and real world!
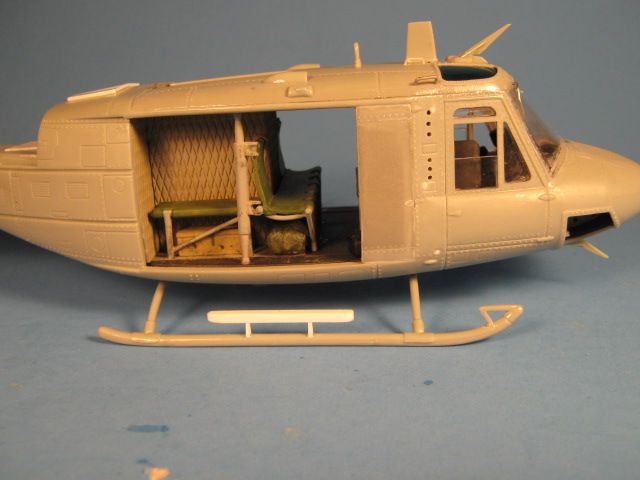
I have completed painting and assembling the interior. I like how the pre-printed IP came out.
I also added the rear troop seats and gunners’ seats. These are left off in the kit instructions, but the rear-facing seat is shown being installed. This doesn’t make sense to me as they are usually used together as a troop-carrying configuration. So I used all the seats.
I should be closing up the fuselage next. More to come soon…
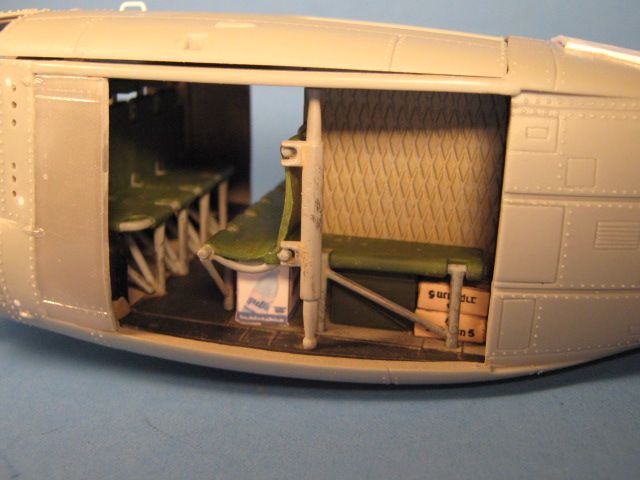
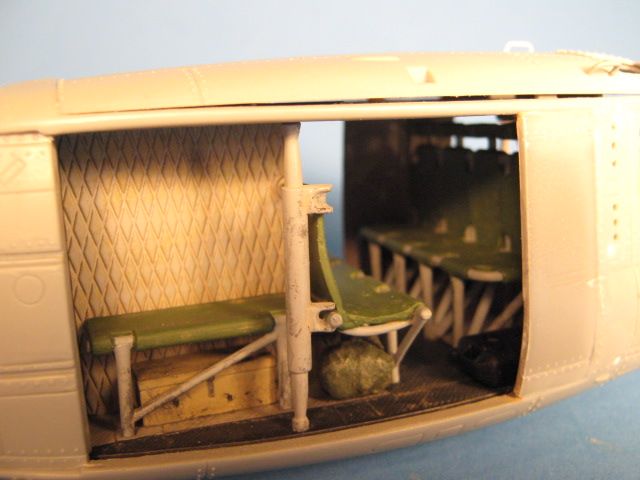
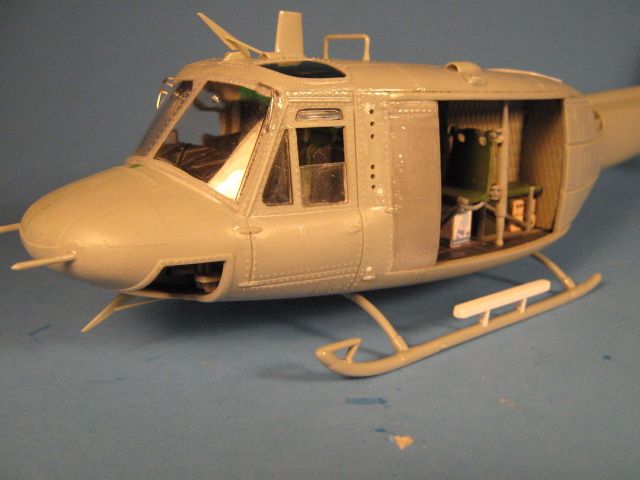
Work continues. I have detailed and weathered the interior and closed up the fuselage halves. I added a few pieces to add some interest to the rear cabin; a couple Israeli ration boxes, a couple water cans, a couple commercial water boxes, a 40mm ammo can, a sleeping bag, and a tool box. I also washed the interior with a sandy color to dirty it up and make it look lived in.
Port side cabin
Starboard side cabin
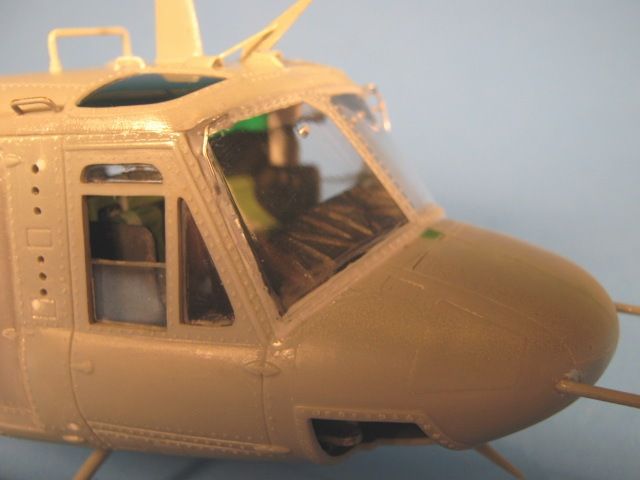
Cockpit
Starboard pilot’s door. I drilled 6 holes on the upper B pillar. These are flare launchers that the Israelis added in this location. They are the same on both sides.
That is it for now. Next up is hiding the fuselage seam lines along the underside, nose, and tail boom. Then on to the exterior details. I still may add seat belts in the rear cabin too, we shall see.
Looking good Gino, I like the sandy weathering inside. I’d love to have a 1/35 scale helo in my collection; however, I wouldnt have anywhere to put it once it got finished.
I have always enjoyed following your build threads. I read your comment on AJ’s thread and wanted to follow up. I can see that knowing from the beginning it was for someone else , and the money would help. I guess from my perspective, I would be so stunned that it turned out nice, I would want to keep it When you know you have the talent to do it again maybe it wouldn’t be so hard. You do awesome work. knox
Thanks Knox. Glad you like it. Hopefully I can get some paint on it soon…if it would go above freezing here. Ice and sleet tonight ; 3 more inches of snow tomorrow night. I am ready for spring.
I have a small update today. The snow is finally melting as we are getting into the mid-upper 40s. The next couple days are supposed to be even warner, so I should be able to get some paint on it soon. Today’s update. I closed it up and added the steps on the skids out of a couple different sizes of C channel plastic stock. I also added handholds to climb up to the roof on the starboard side. Lastly, I added the wire strike deflectors that go around the windshield wiper arms at the top if the windshield corners. More to come soon.


 More to come soon.