I am a beginner, and I am just finishing my second model. It is a 1:48 scale aircraft. The directions call for painting the signal lights and other lights. I tried to paint them freehand on my first model (also a 1:48 aircraft), but would like to do a more perfect job this time.
So I need to make a circular mask, for a pretty small circle (somewhere in the 1 to 2 mm range). All I can think of to accomplish this is to drill a hole in some masking tape. Which would consist of fixing some tape on a piece of wood, drilling a few holes through it, and then using that tape on the model.
Circle templates are plastic with a number of accurate circles cut out. They are used to draw circles of set diameters/sizes and are particularly useful if the circle is small. Small circles are difficult to draw using a traditional compass because the compass can easily slip on the paper. With a template, the circle diameter is selected and a craft knife is used to draw round the cutout circle.
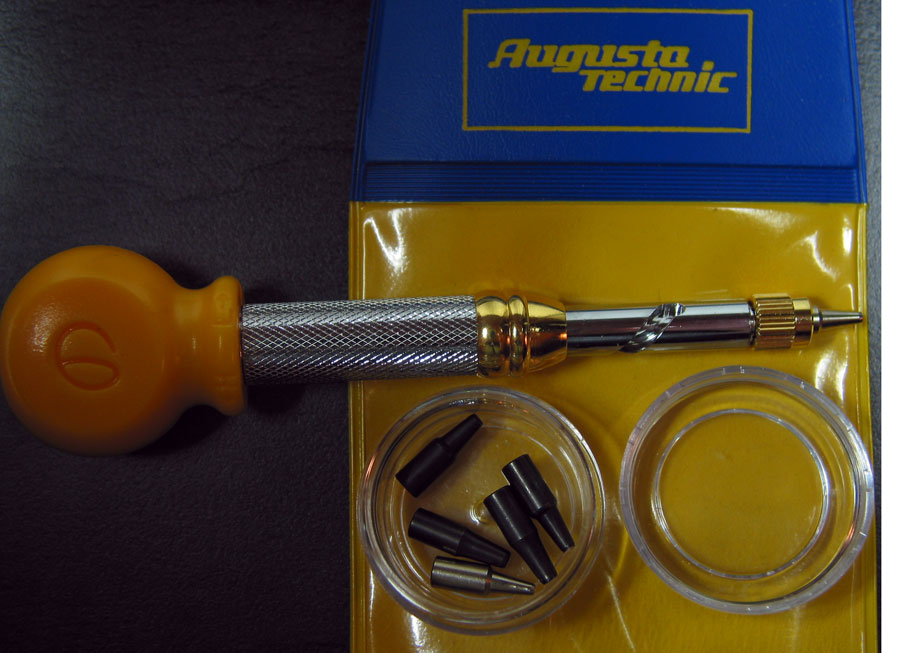
The best available professional Punching Toolset for leather and rubber straps, made by Augusta Germany, includes 6 different hole punches 1 mm,1.5 mm,1.8 mm, 2.0 mm,2.5 mm and 3.0 mm. Price is $ US 99.
For things like that I like to use a toothpick rather than a small brush. It will take up a smaller amount of paint than any brush I have. II shake up a bottle of paint and remove the cap, turning the cap upside down on the bench. The amount of paint that lines the cap is just the right thickness to daub the end of the toothpick down into. It may take several dips of paint to complete a light, but it works. I can get a spot less than a mm in diameter with a sharp toothpick.
I’ll second Don’s toothpick suggestion and add this- if that part is clear and not already on the model then paint the appropriate color on the backside of the part with the toothpick, let dry and then glue on with white glue (Elmer’s) or a dedicated clear glue. Traditional model glue will most likely ruin the paint and/or ruin the clear pieces.
For such a small diameter circle I don’t think that an airbrush would be of any value as you’d waste more paint in cleanup than you’d use on the part itself.
Don’s idea works for me as, well but consider using the head of a pin and lightly dapping it into the cap and very carefully us it as a “stamp”, I have used this technique on instruments panels or radio dials for AFVs. just dont did it to much and you should be fine.
Here’s my trick. I bought a bag of various sized metal tube and rod (steel, brass, copper) from Hobby Lobby. Usually there’s a tube the size I need, in which case I’ll lay a strip of masking tape on a self healing mat. I’ll punch a hole in the tape with the tube and a big hammer, and then I can use either the hole or the circle I’ve punched on the model. I also have the green circle template as shown by a previous poster, but I’ve found my hammer punch method to be easier and quicker most times.
I have found that using the end of one of these tubes as it comes, squared off, I could not get a decent punch. I find I have to “sharpen” the end of the tube. Brass seems to sharpen better than aluminum. I have a tapered reamer I stick in the end of the tube a twirl a bit to get a sharpened edge. Then it cuts through the tape cleanly.
It’s a bit pricey, but super useful not just for small circle masks but punching out individual instrument panel dials from a decal sheet, small discs from acetate for simulating glass gauge faces or gunsight reflectors, small styrene discs to fill ejector pin marks, and so on. It’s about the price of a PE bender, but to be honest I use this thing 3x as often.
Or you can just like my Father does. Get an assortment of brass tubing, find the size that works best for your need and chuck it into a drill press and make as many as you need. You don’t need the drill press to be running, just press it into the tape…
Well, thanks everyone for all the responses. I tried my idea today and it didn’t work. There was excessive fraying of the tape. I may try to make a mask by drilling a hole in an overhead projector transparency. Maybe that won’t fray.
I may just suck it up and go for the punch set, but I think I’ll give the “do-it-yourself punch made out of tubing bought from Hobby Lobby” a try, first. After all, the punch set is somewhat of overkill for punching holes in masking tape. And I am a long way from becoming a scratchbuilder.
I am quite familiar with the green templates. I took drafting courses before the age of personal computers. I had circle templates and ellipse templates and french curves, etc. I don’t think I am facile enough with an X-acto knife to make that work, though. At least not yet.
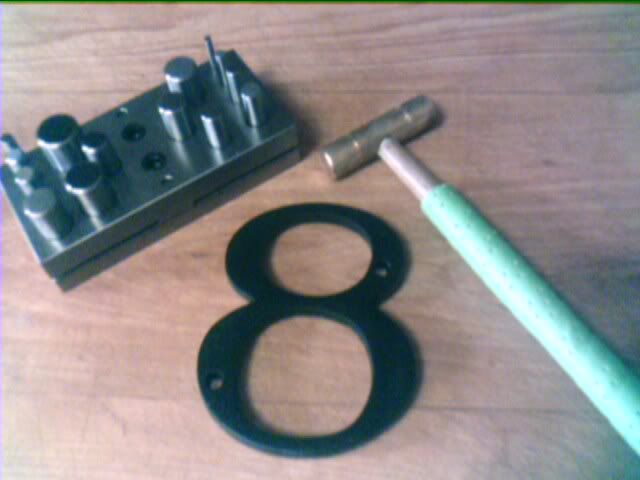
(1) Get a brass hammer (or at least a hammer with a brass face). It will pay for itself the first time you strike a punch’s cutting face accidentally. Note my picture that I wrapped the brass hammer with bicycle tape. It is a little safer in case I do something totally stupid like attack someone with a 3-oz hammer (Mjölnir it ain’t!).
(2) Buy a 1/4"-thick house number — “8” by preference — for use as a work surface standoff. Mine was some kind of hollow metal (plywood might’ve been better; plastic is useless) so I stuffed it with the highest-density foam I could find.
(A) You can beat the [dinkywongo] out of that house number and never harm whatever is supporting your punch set.
(B) The voids are catchments for the punch-outs. Trust me, you WILL want something to contain those wandering discs.