I would like to lengthen a fuselage mainly a space shuttle what would be the best way to do this I have several donor kits and would like to keep the cargo bays door operational.
Thanks
I would like to lengthen a fuselage mainly a space shuttle what would be the best way to do this I have several donor kits and would like to keep the cargo bays door operational.
Thanks
Pick a cross section with the least complicated curves and cut in half. Add the desired length to this section from the donor kits(s). Expect some filling & sanding unless the donor section is not tapered.
Good luck & post pictures of your progress!
You can use a piece of wood. Lets say you need to add 1". Trace the cross-section on a piece of 1" thick wood plank. Cut out with band saw or coping saw, glue pieces of fuselage to the wood. Glue with either epoxy or gel CA. It is best to cut that plank from a block, so that grain runs parallel to fuselage axis. Basswood is wood of choice.
Well, THAR’S your problem…

The top side of an Orbiter shouldn’t be bad (it is basically a (cylindrical) flying truck), but the underside… Hoo-boy! That double-delta (everybody raise their hands who knew that the Orbiter was a double-delta configuration) is going to be a pain. How believable (the shape is determined by the laws of fluid dynamics, so whatever you come up with isn’t going to be “accurate”, the best you can hope for is “believable”) do you want it to be?
Its easier if you have two models to start with but it isn’t completely necessary. Start by finding the spot where you want to insert the “plug”. Cut the model as cleanly and squarely as possible. You can cut a corresponding section from the second kit to use as a filler section to for the extension or use some bass wood. I’ve used wood and even resin to create a plug to lengthen a fuselage.
What ever method you use, be sure to plan it out carefully! Incorporate reinforcements to make the structure strong. Avoid using tons of fillers as they can shrink, crack and warp if sufficient structure isn’t supporting it.
Whether you are lengthening or shortening, you have to plan and make your cuts square to ensure perfect alignment.

Measure twice, cut once! Use the proper tools!!! I’m using a micro razor saw to make this cut…note I have the fuselage half supported off the bench to allow travel space for the saw. To keep it from moving while I cut, its also taped to the bench. Once I reach the tape, I move the tape to an area where I have already cut. I’m increasing the height of this DC-6 fuselage to make it a “Guppy” type aircraft. The fuselage is going to be lengthened as well as made taller in cross section. The more precise the measurements and cutting, the easier it will be to piece it all together.

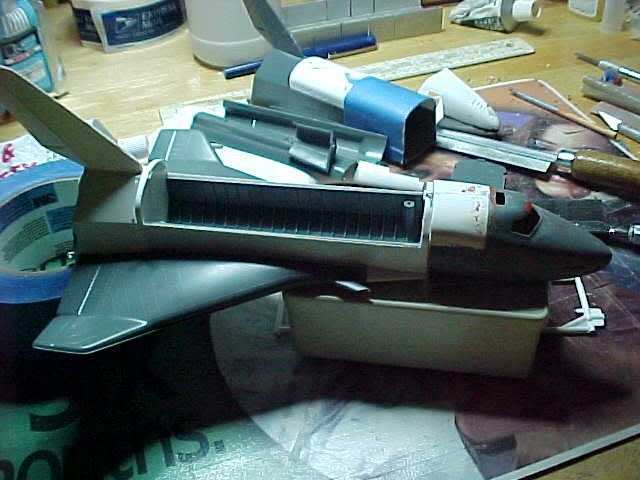
Well I hope I started this right and want to thank you all for the input . I started by building the main body (white shuttle) to get it reinforced an as you can see ,I have marked the cut mark just at the mid-deck observation window. I did this thinking it make everything, stronger when I start cutting. The gray shuttle is going together tomorrow and there is the mark were I want to extend the main model. Well I have several dilemmas’ on my hands and mind. One is, did I do the right thing by assembling the two before cutting and second I wanted to add windows to the “new addition” how and what is the best way to do this. And last but least is getting the Cojones to start making the cut ,these are the only two saws I have.
Well guys the cuts where made and now the fun begins , need to "bled in the extension and figure a easy window 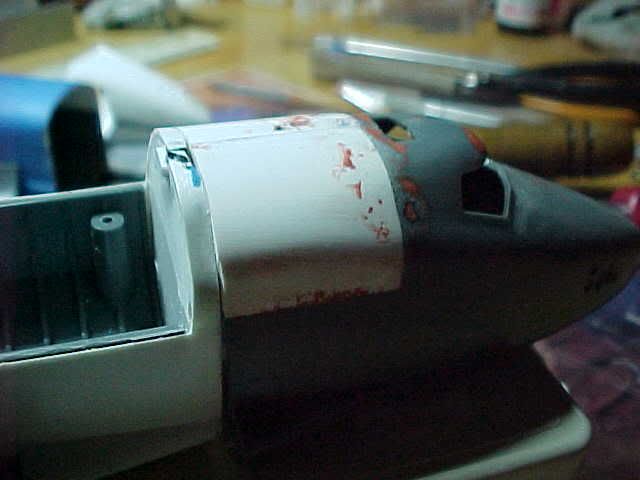 solution