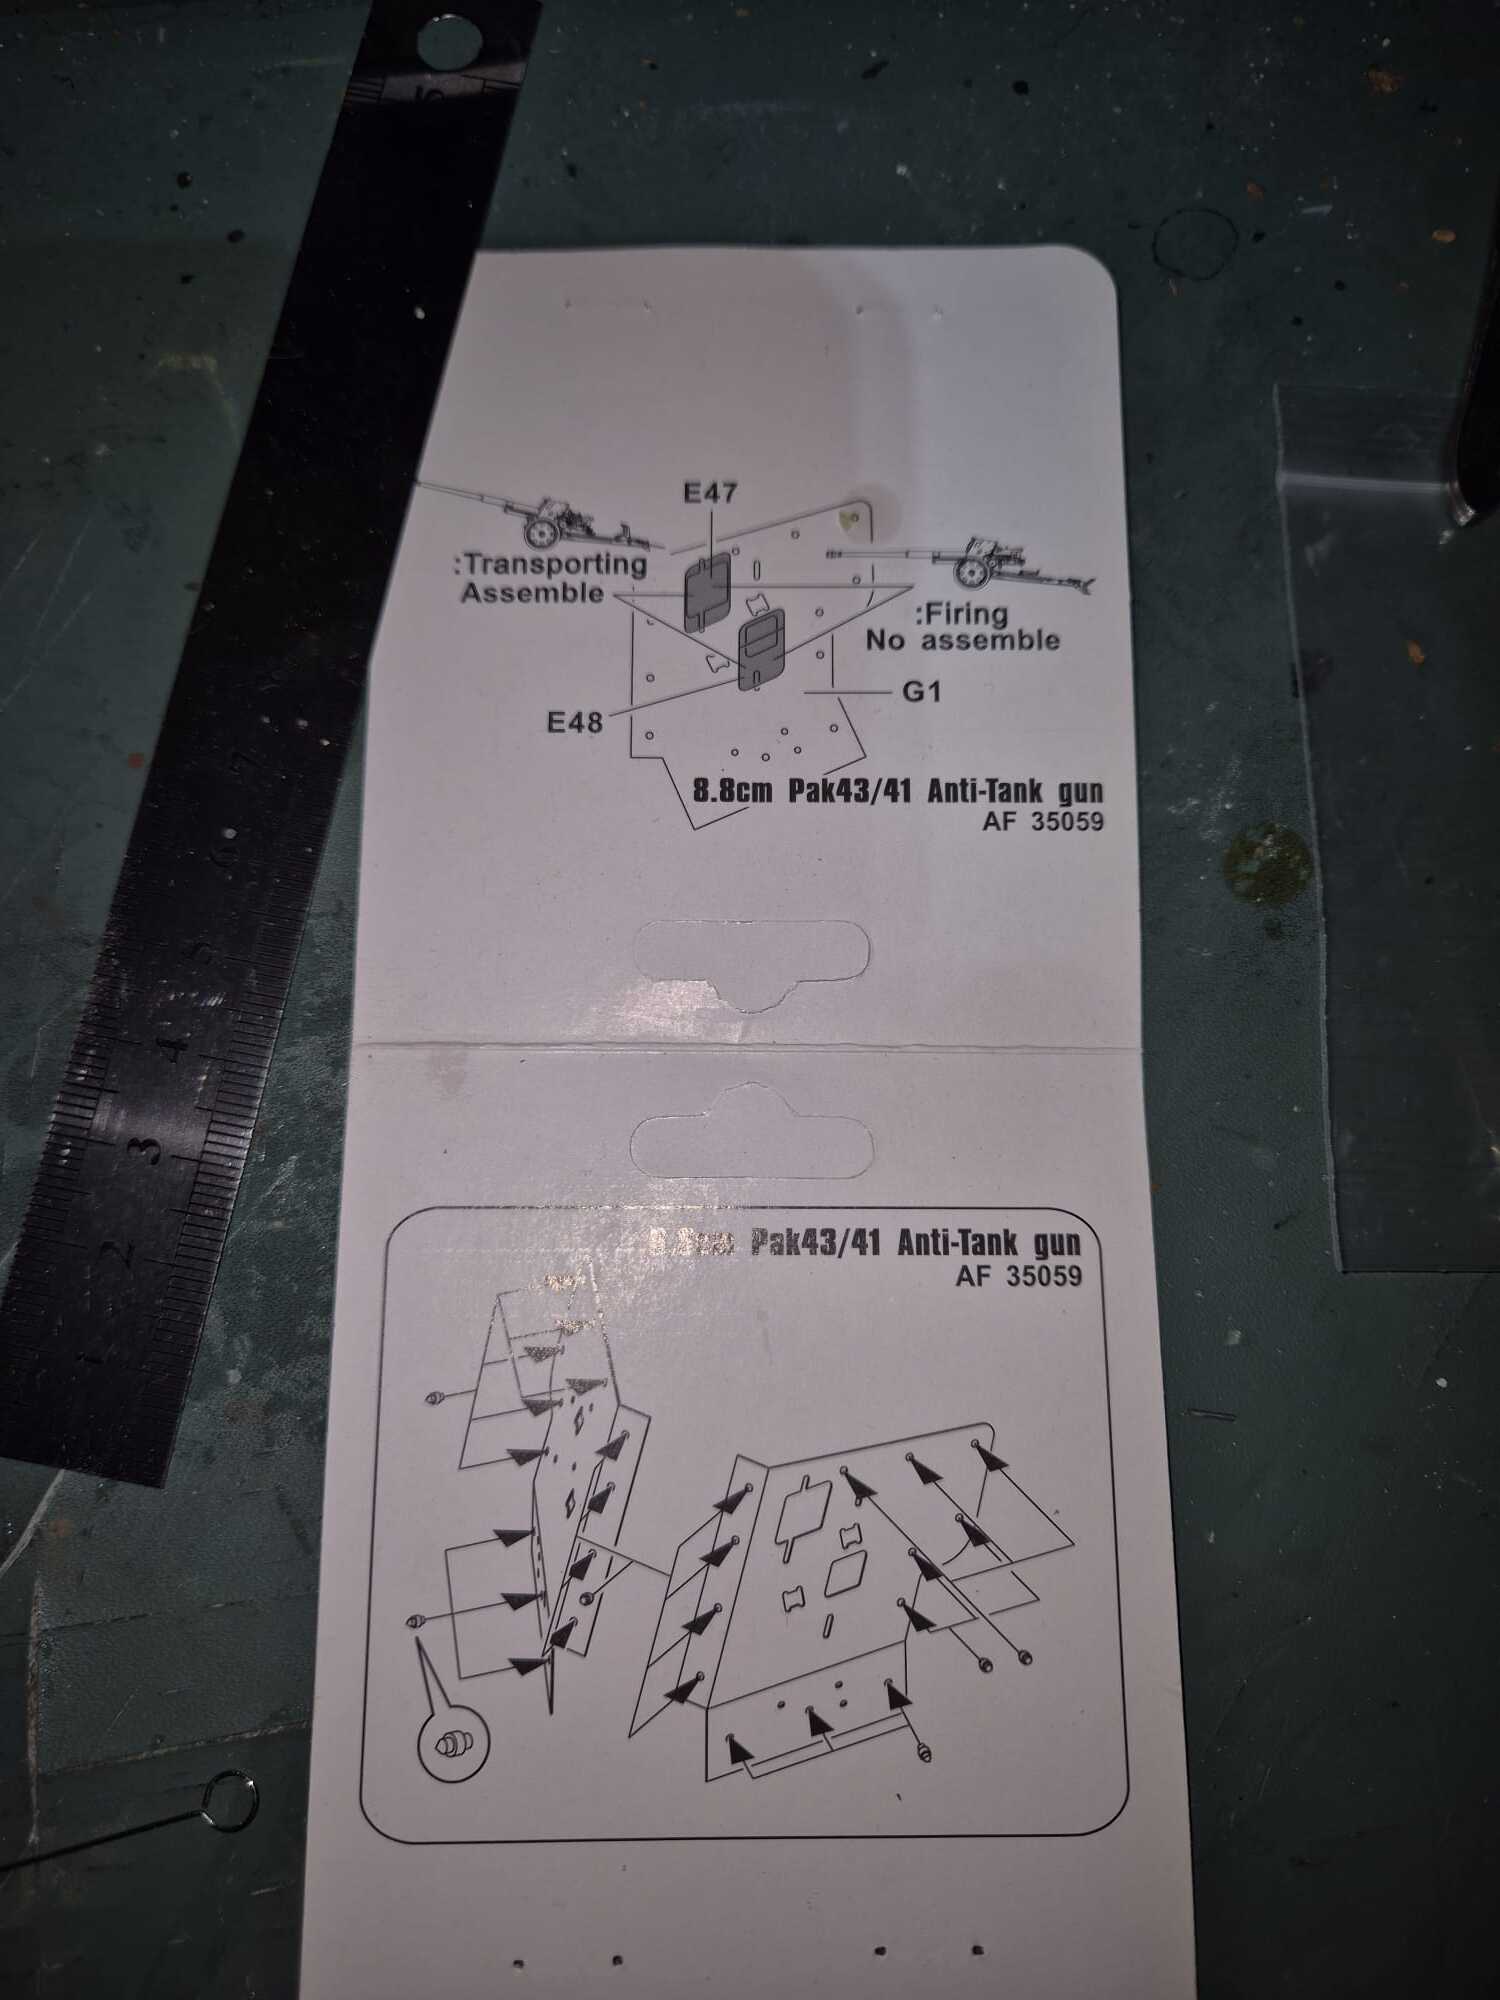
For those planning to build either an AFV Club PAK43/41 88mm or a PAK40 75mm anti-tank guns and have difficulties with the double shield mounting
I found an easier way to apply the bolts.
First of all forget the plastic ones that come in the kits. They are useless. Rather spend a little more money to acquire AFV Club AF35073 Brass Shield Bolts (possibly two sets just in case you may loose one or two because they are very tiny).
Also completely forget using any tweezers because they cannot grab the bolts correctly and tend to easily slip away before they are actually placed into the tiny holes of the rear shield.
Use instead (don’t laugh, I am serious) the Tamiya snippers for decal cutting (see the picture).

It is not magic and it needs a firm hand and a bit of patience to grab one of the brass bolts correctly.
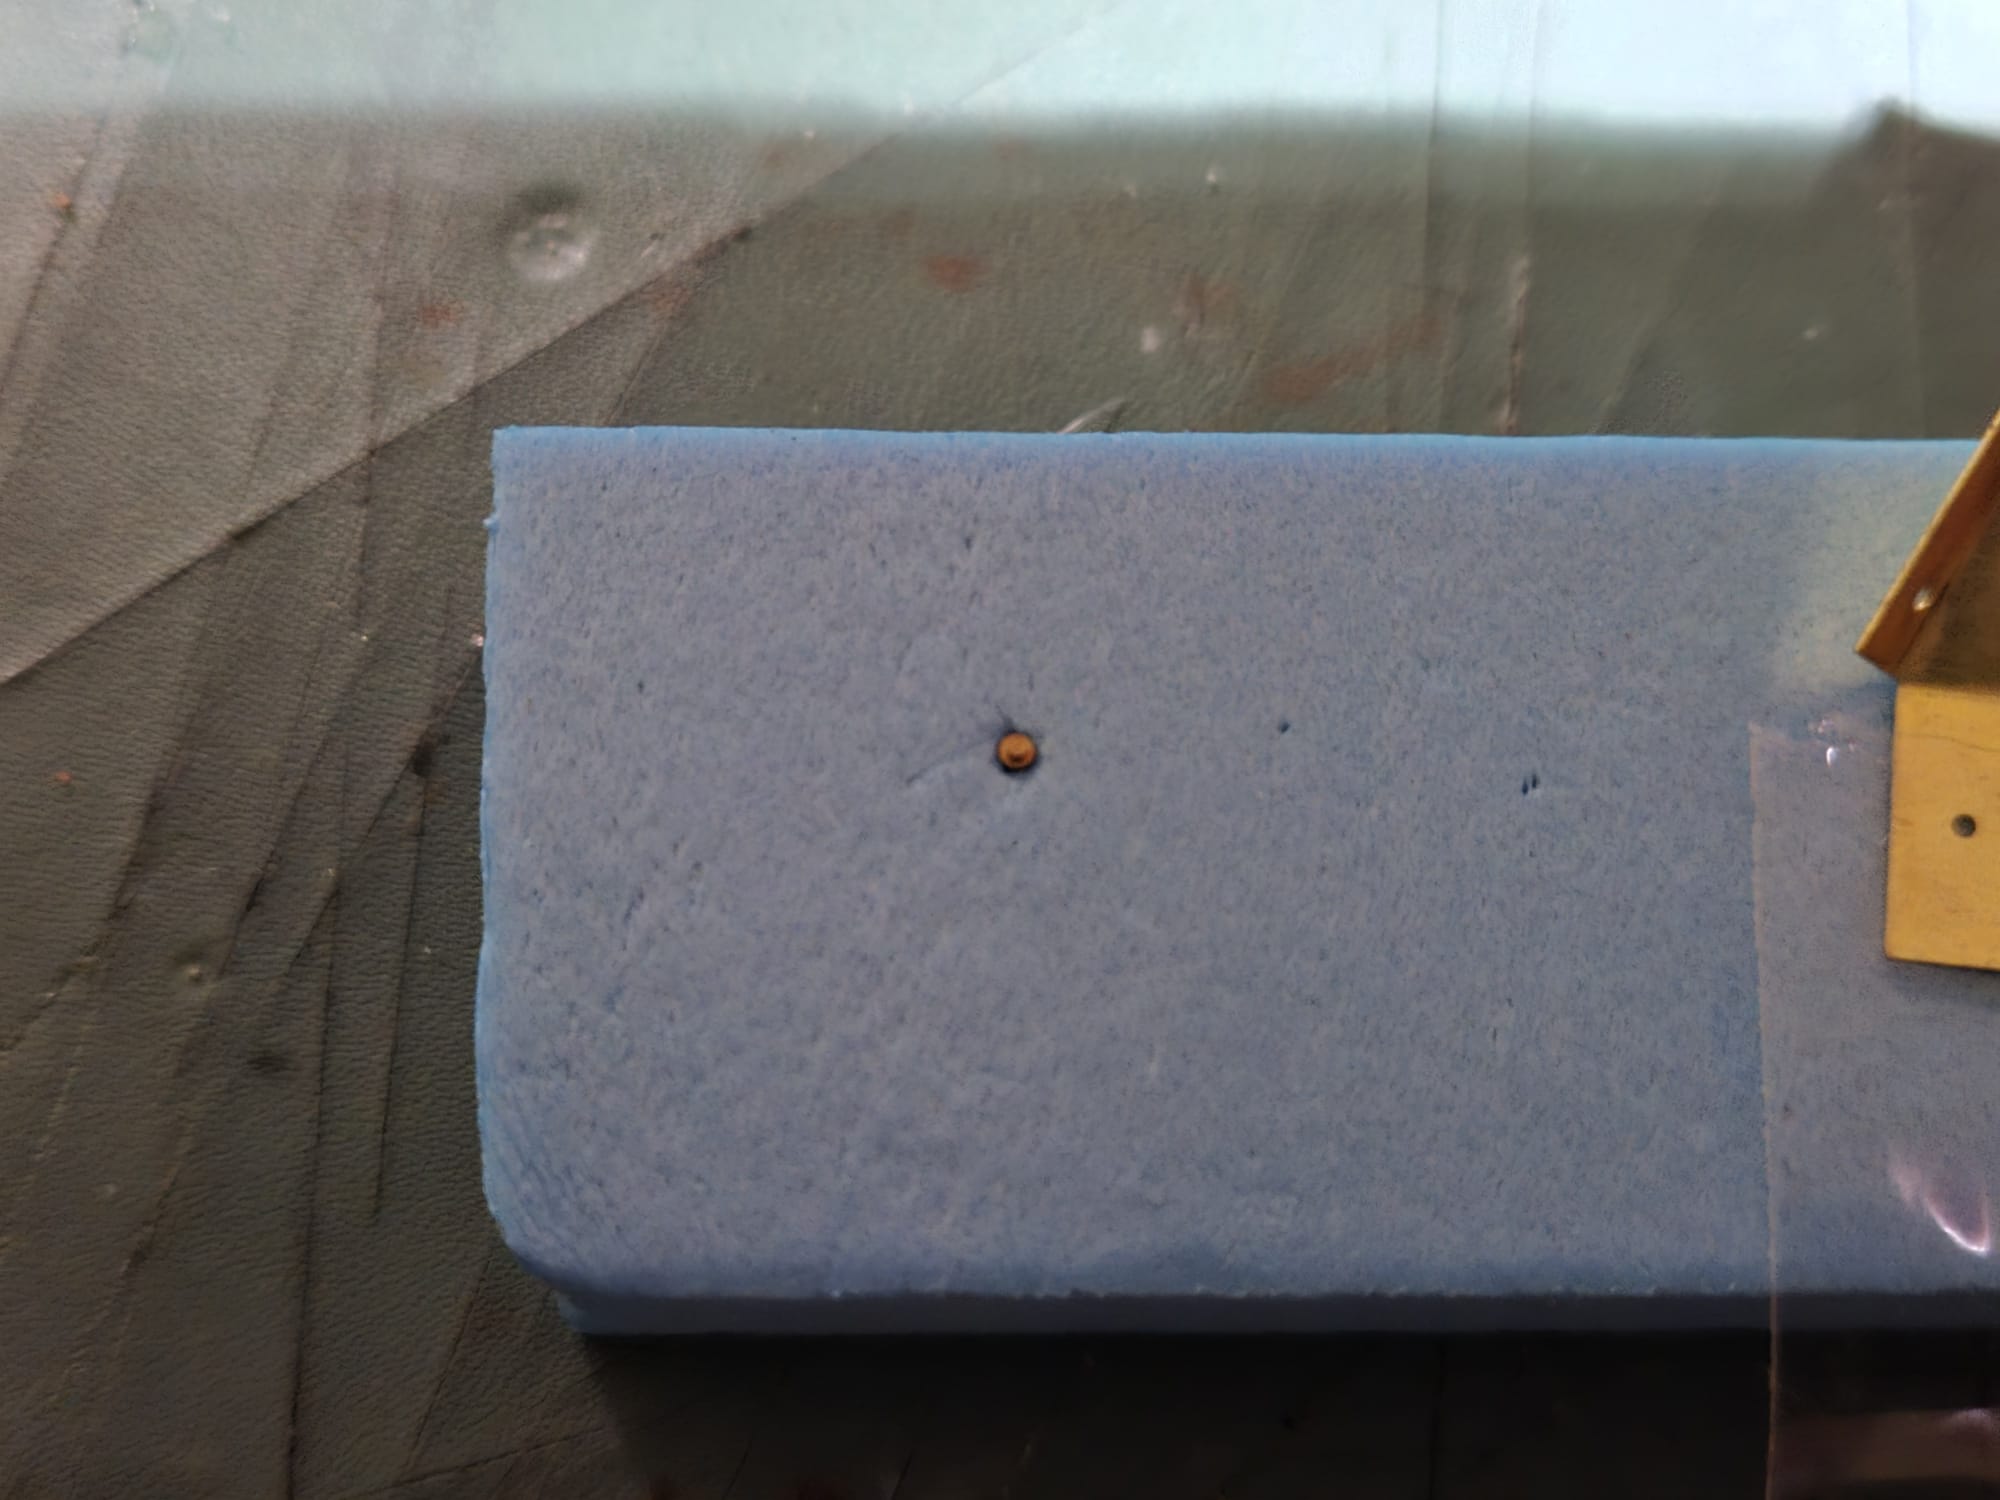
Note: use magnifying glasses to identify them. The bolts have two ends: one is cylinder like, the other is pointy. The cylinder one has to fit in the hole of the rear shield exposing the pointy one.
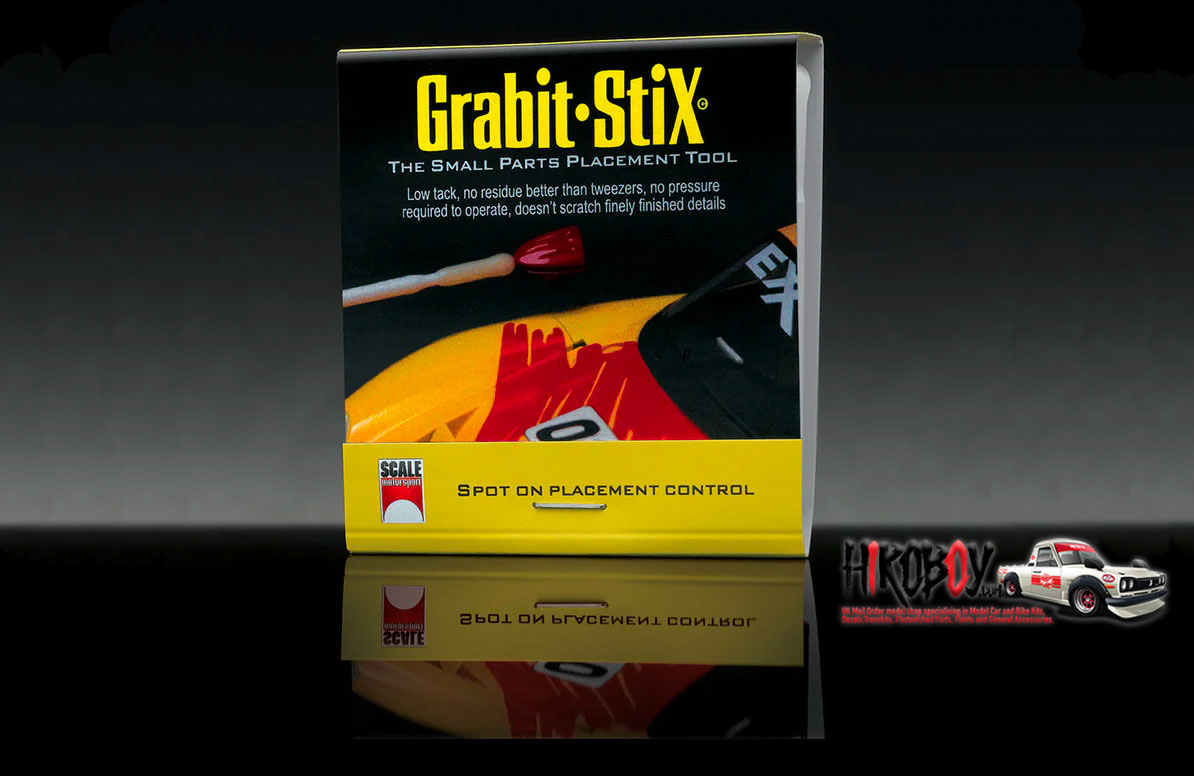
Even better is to use this product:
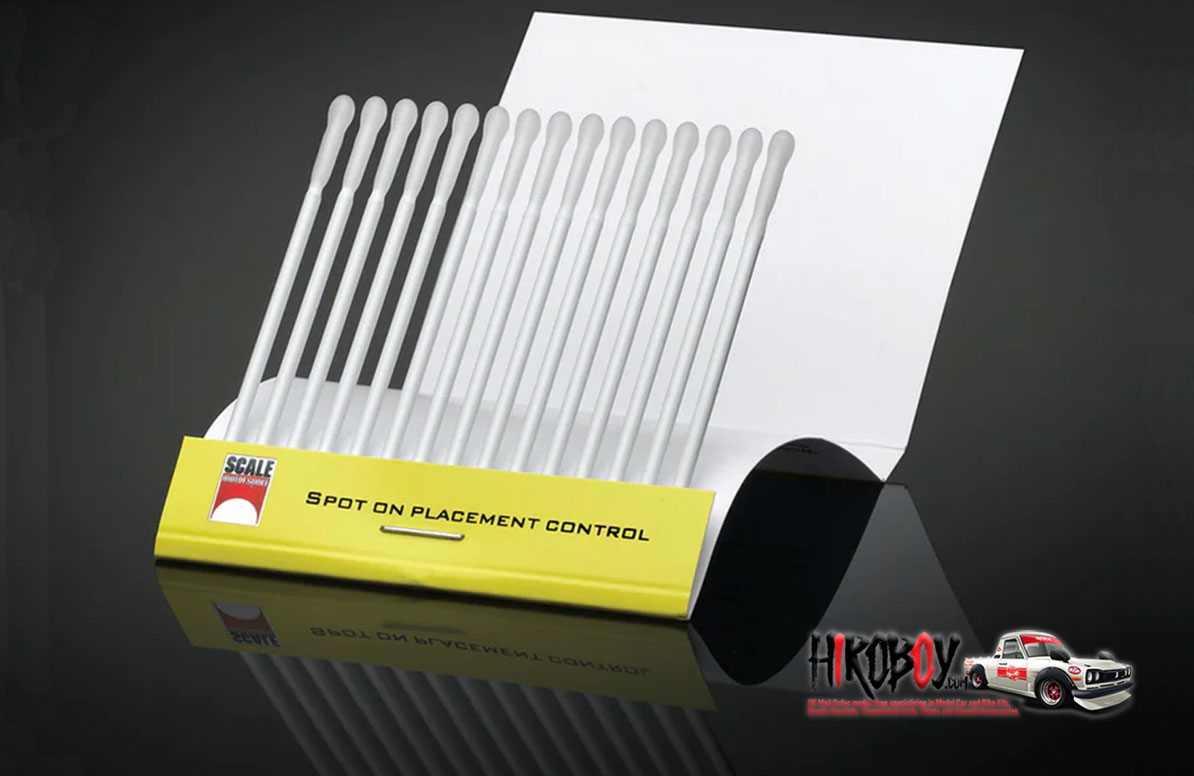
These sticky sticks, if used properly can take up the bolt from its cylinder part and insert it into the foam hole and using a toothpick release it in it.
Now on how to make it easier to fix them all in the correct holes of the rear shields.
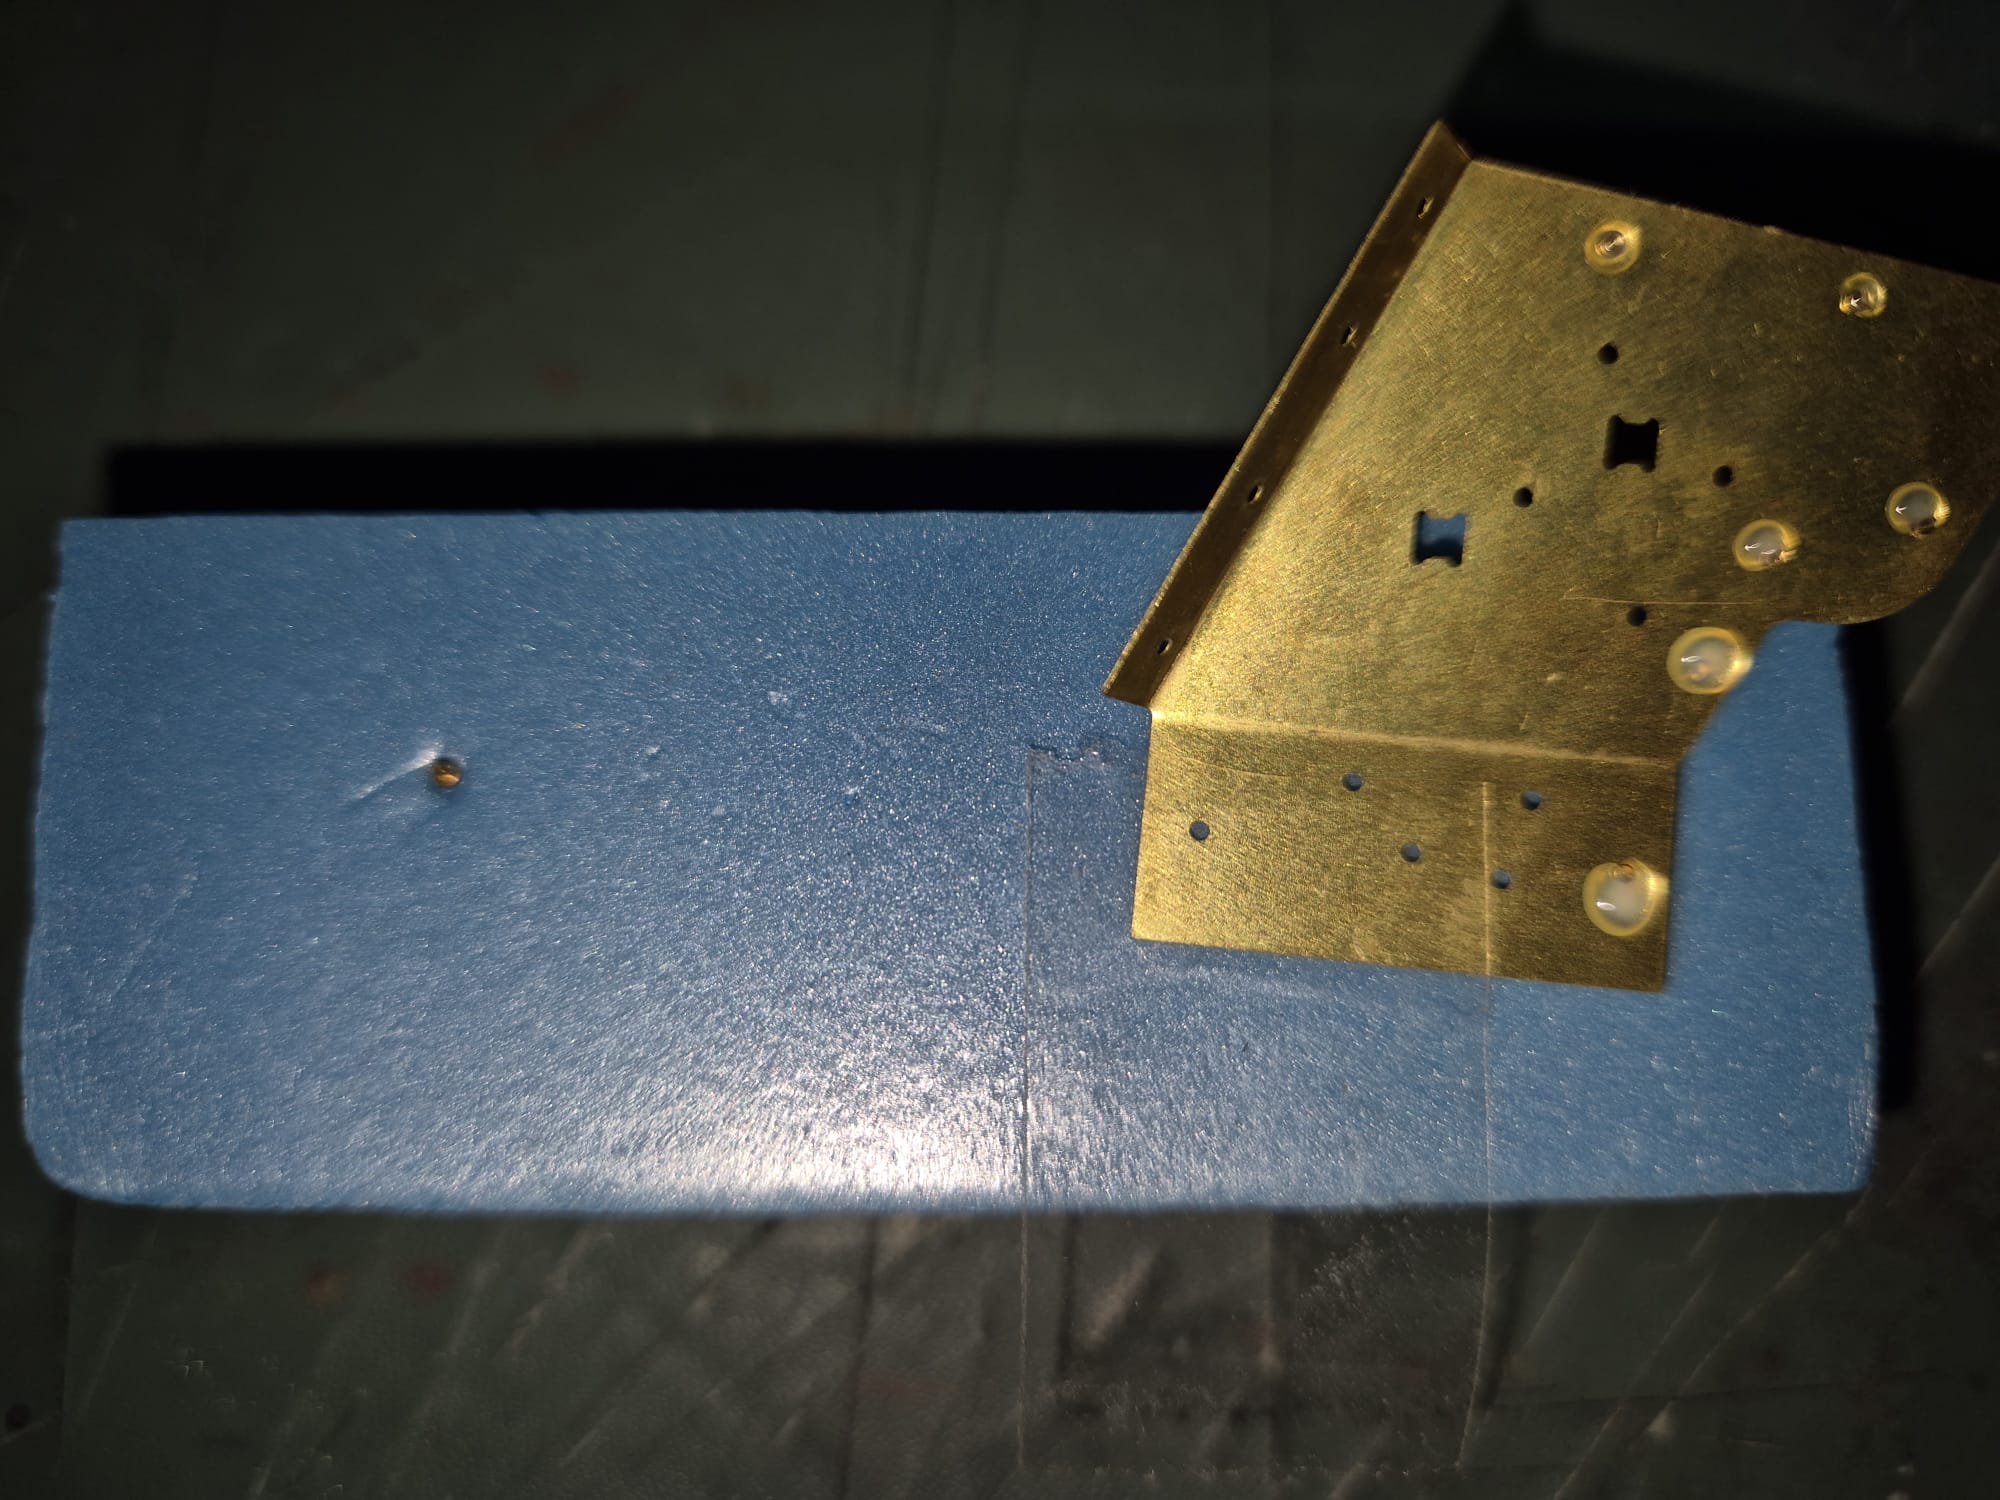
Once you have managed to grab one of them with the pointed side facing downwards, use a piece of polystyrene foam and fix the bolt into it.
You might slightly and carefully push it in with your finger, but not too deeply, allowing the cylinder end to be exposed.
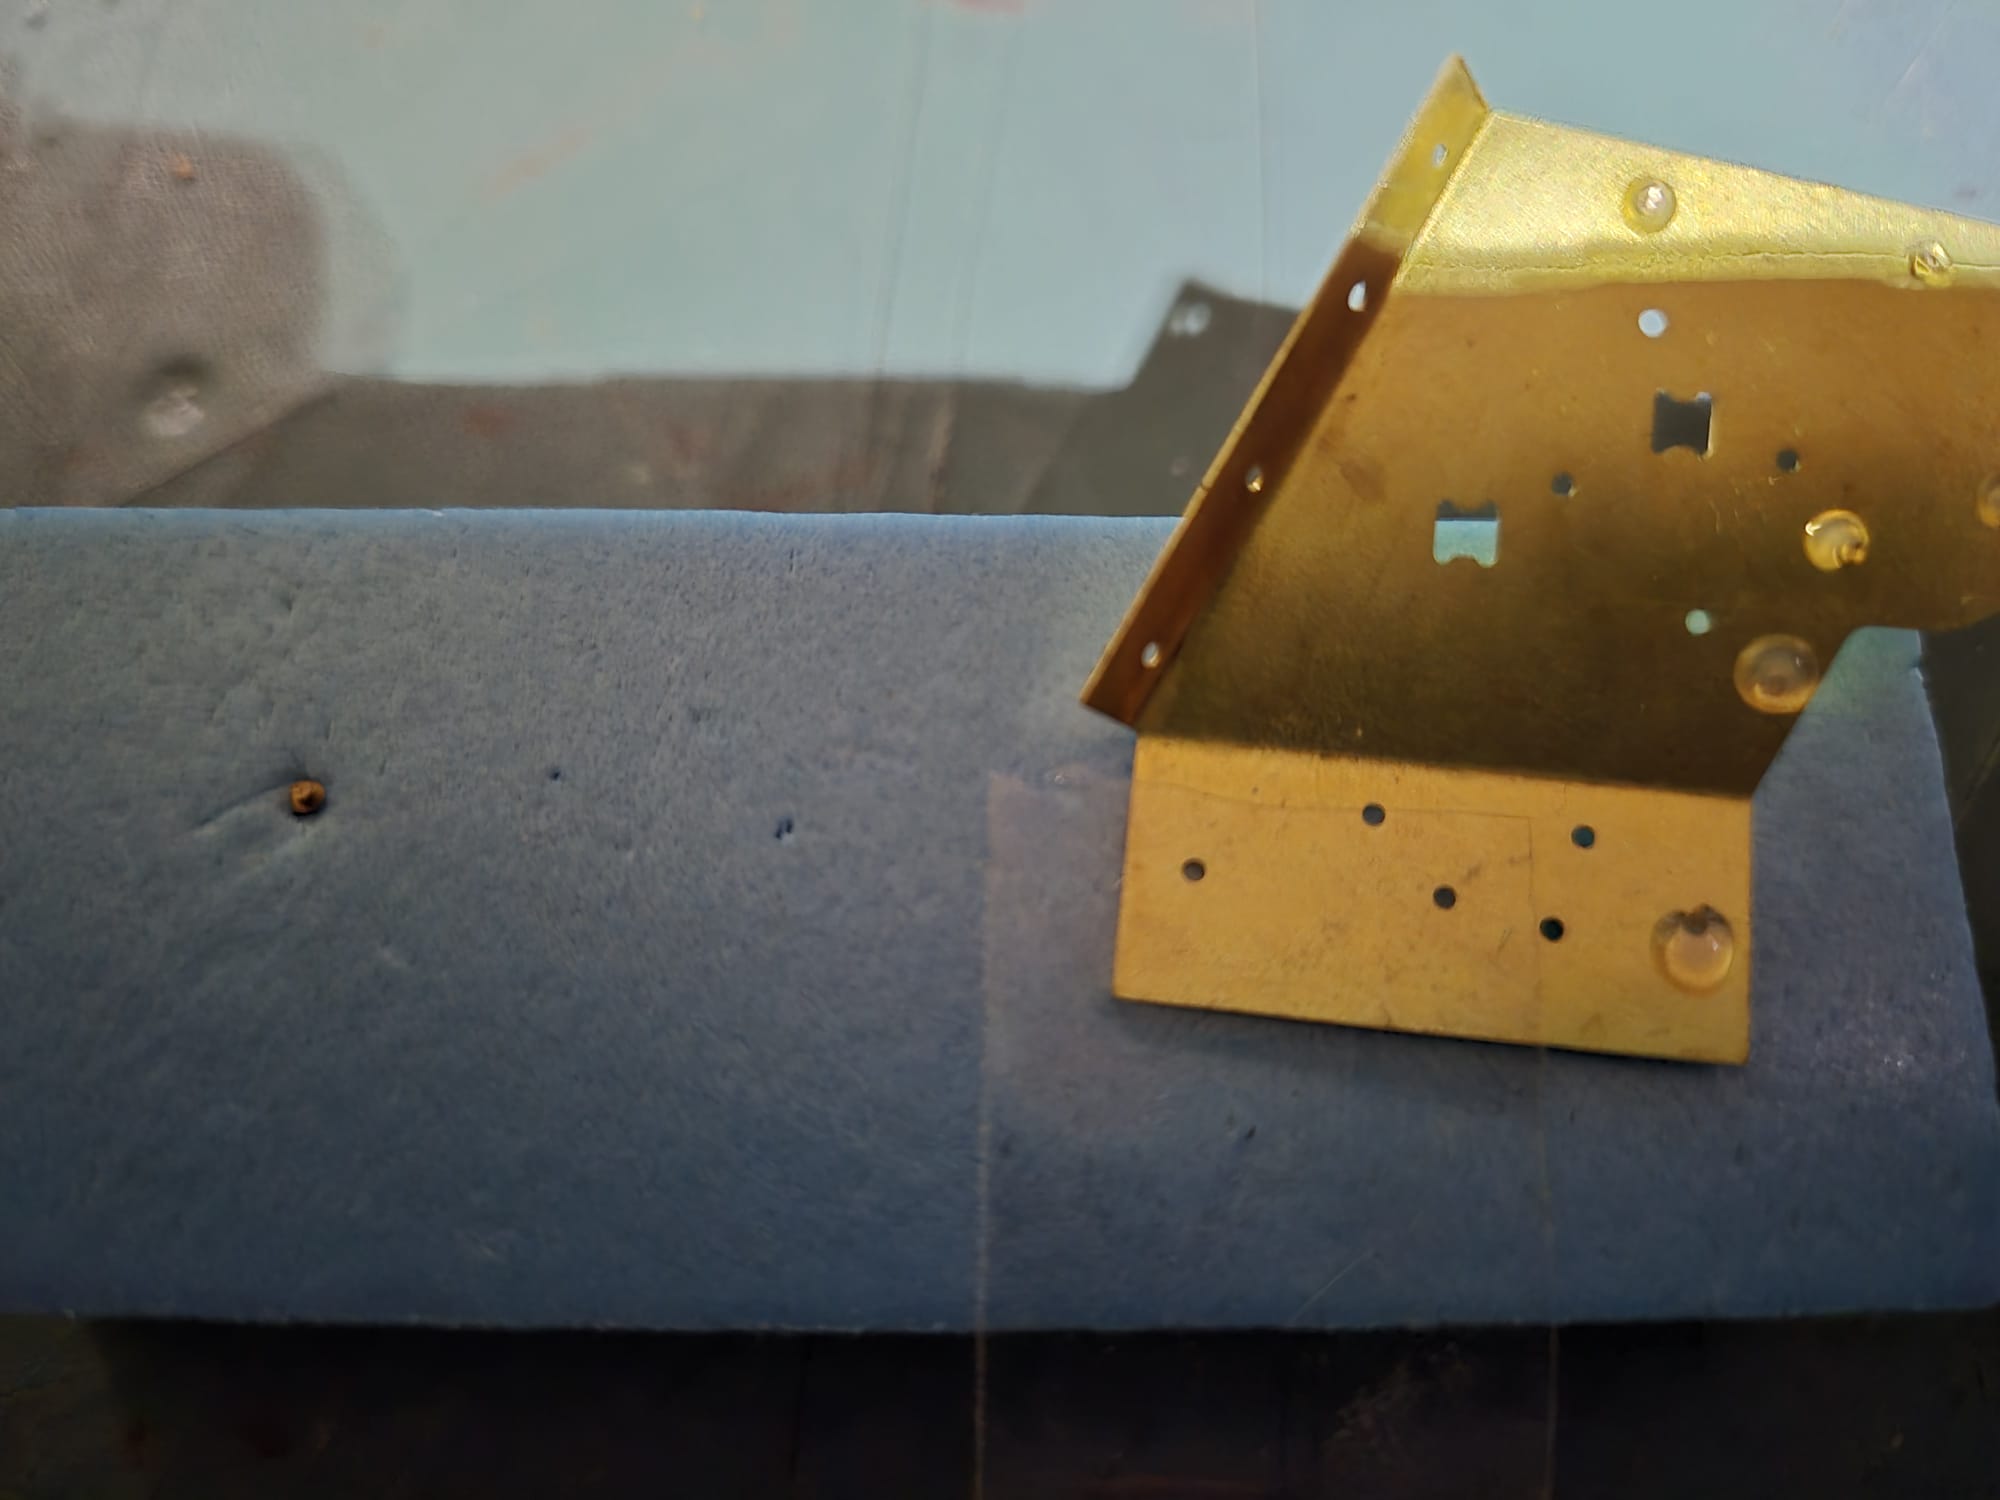
Once you have managed that carefully pose the lower shield with the desired hole (pay close attention to the instructions in the box) over it until you see the cylindrical end appear, then simply apply a tiny bit of Scotch tape to hold the rear shield flat over it and apply a droplet of Deluxe Photo-etch glue to the exposed cylinder on the rear shield and let it dry completely, then remove the Schotch tape and repeat the operation for all the remaining bolts.
Why am I suggesting the Deluxe glue? Because it is not as aggressive, nor as fast drying as other CA glues. I would also suggest to apply flexible pinpoint glue dispensers to the main nozzle in order to have a more precise gluing point.
Note that the glue comes out looking milky white, but worry not, once it dries it turns completely transparent and actually flattens itself as long as you do not apply too much of it. Once completely cured it is as hard as stone. It takes a couple of hours before it does.
And here are a couple of pictures of what I have done.
As said, it is a bit fiddly, but much easier to do than struggling to apply the bolts in any other way.
And this way to apply them can completely be forgotten…
Fixing them from the rear is by far more practical than doing it from the front and less risky when speaking of loosing a bolt in the process since it is ready to be firmly inserted into the right hole without having to handle it.
I hope this has been helpful for those of you planning to do such works, and in my view, much easier to do even with other tiny pieces of brass or of any other material since once they are fixed into a piece of foam they are simply ready to be glued.
And whether gluing directly into the hole or from behind makes no difference with CA glue, since the glue actually even seals the joint between the part to be glued and the receptacle hole.
All the best to you all and let me know whether my trick has helped you in any way or not. I would be interested to know your own results.
![]()
![]()
![]()