How to build a paper airplane model - tips based on a 1/33 Il-2 Stormovik - FINISHED AT LAST!!

Hello!

I recently had to switch from my “regular” to a “field” workshop for some time. To minimize the number of tools and other stuff to take with me in order to continue tinkering I decided to dig out a paper model that I have started years ago while on a long business trip. It’s a GPM 1/33 Il-2m3 Stormovik. I thought while watching Philo build his Focke Wulf that I’d make some photos and share some tips on building a paper aircraft model - maybe it will help somebody.

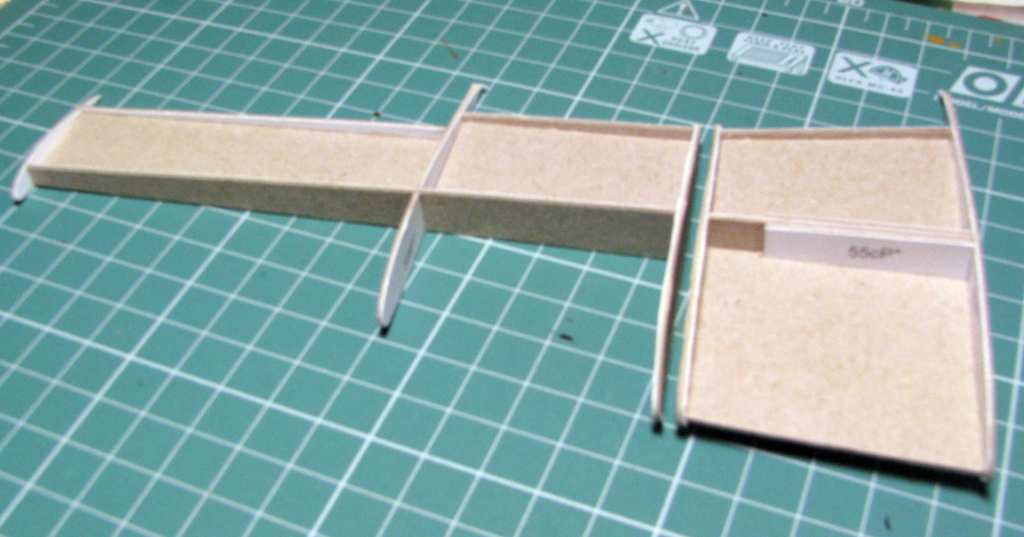
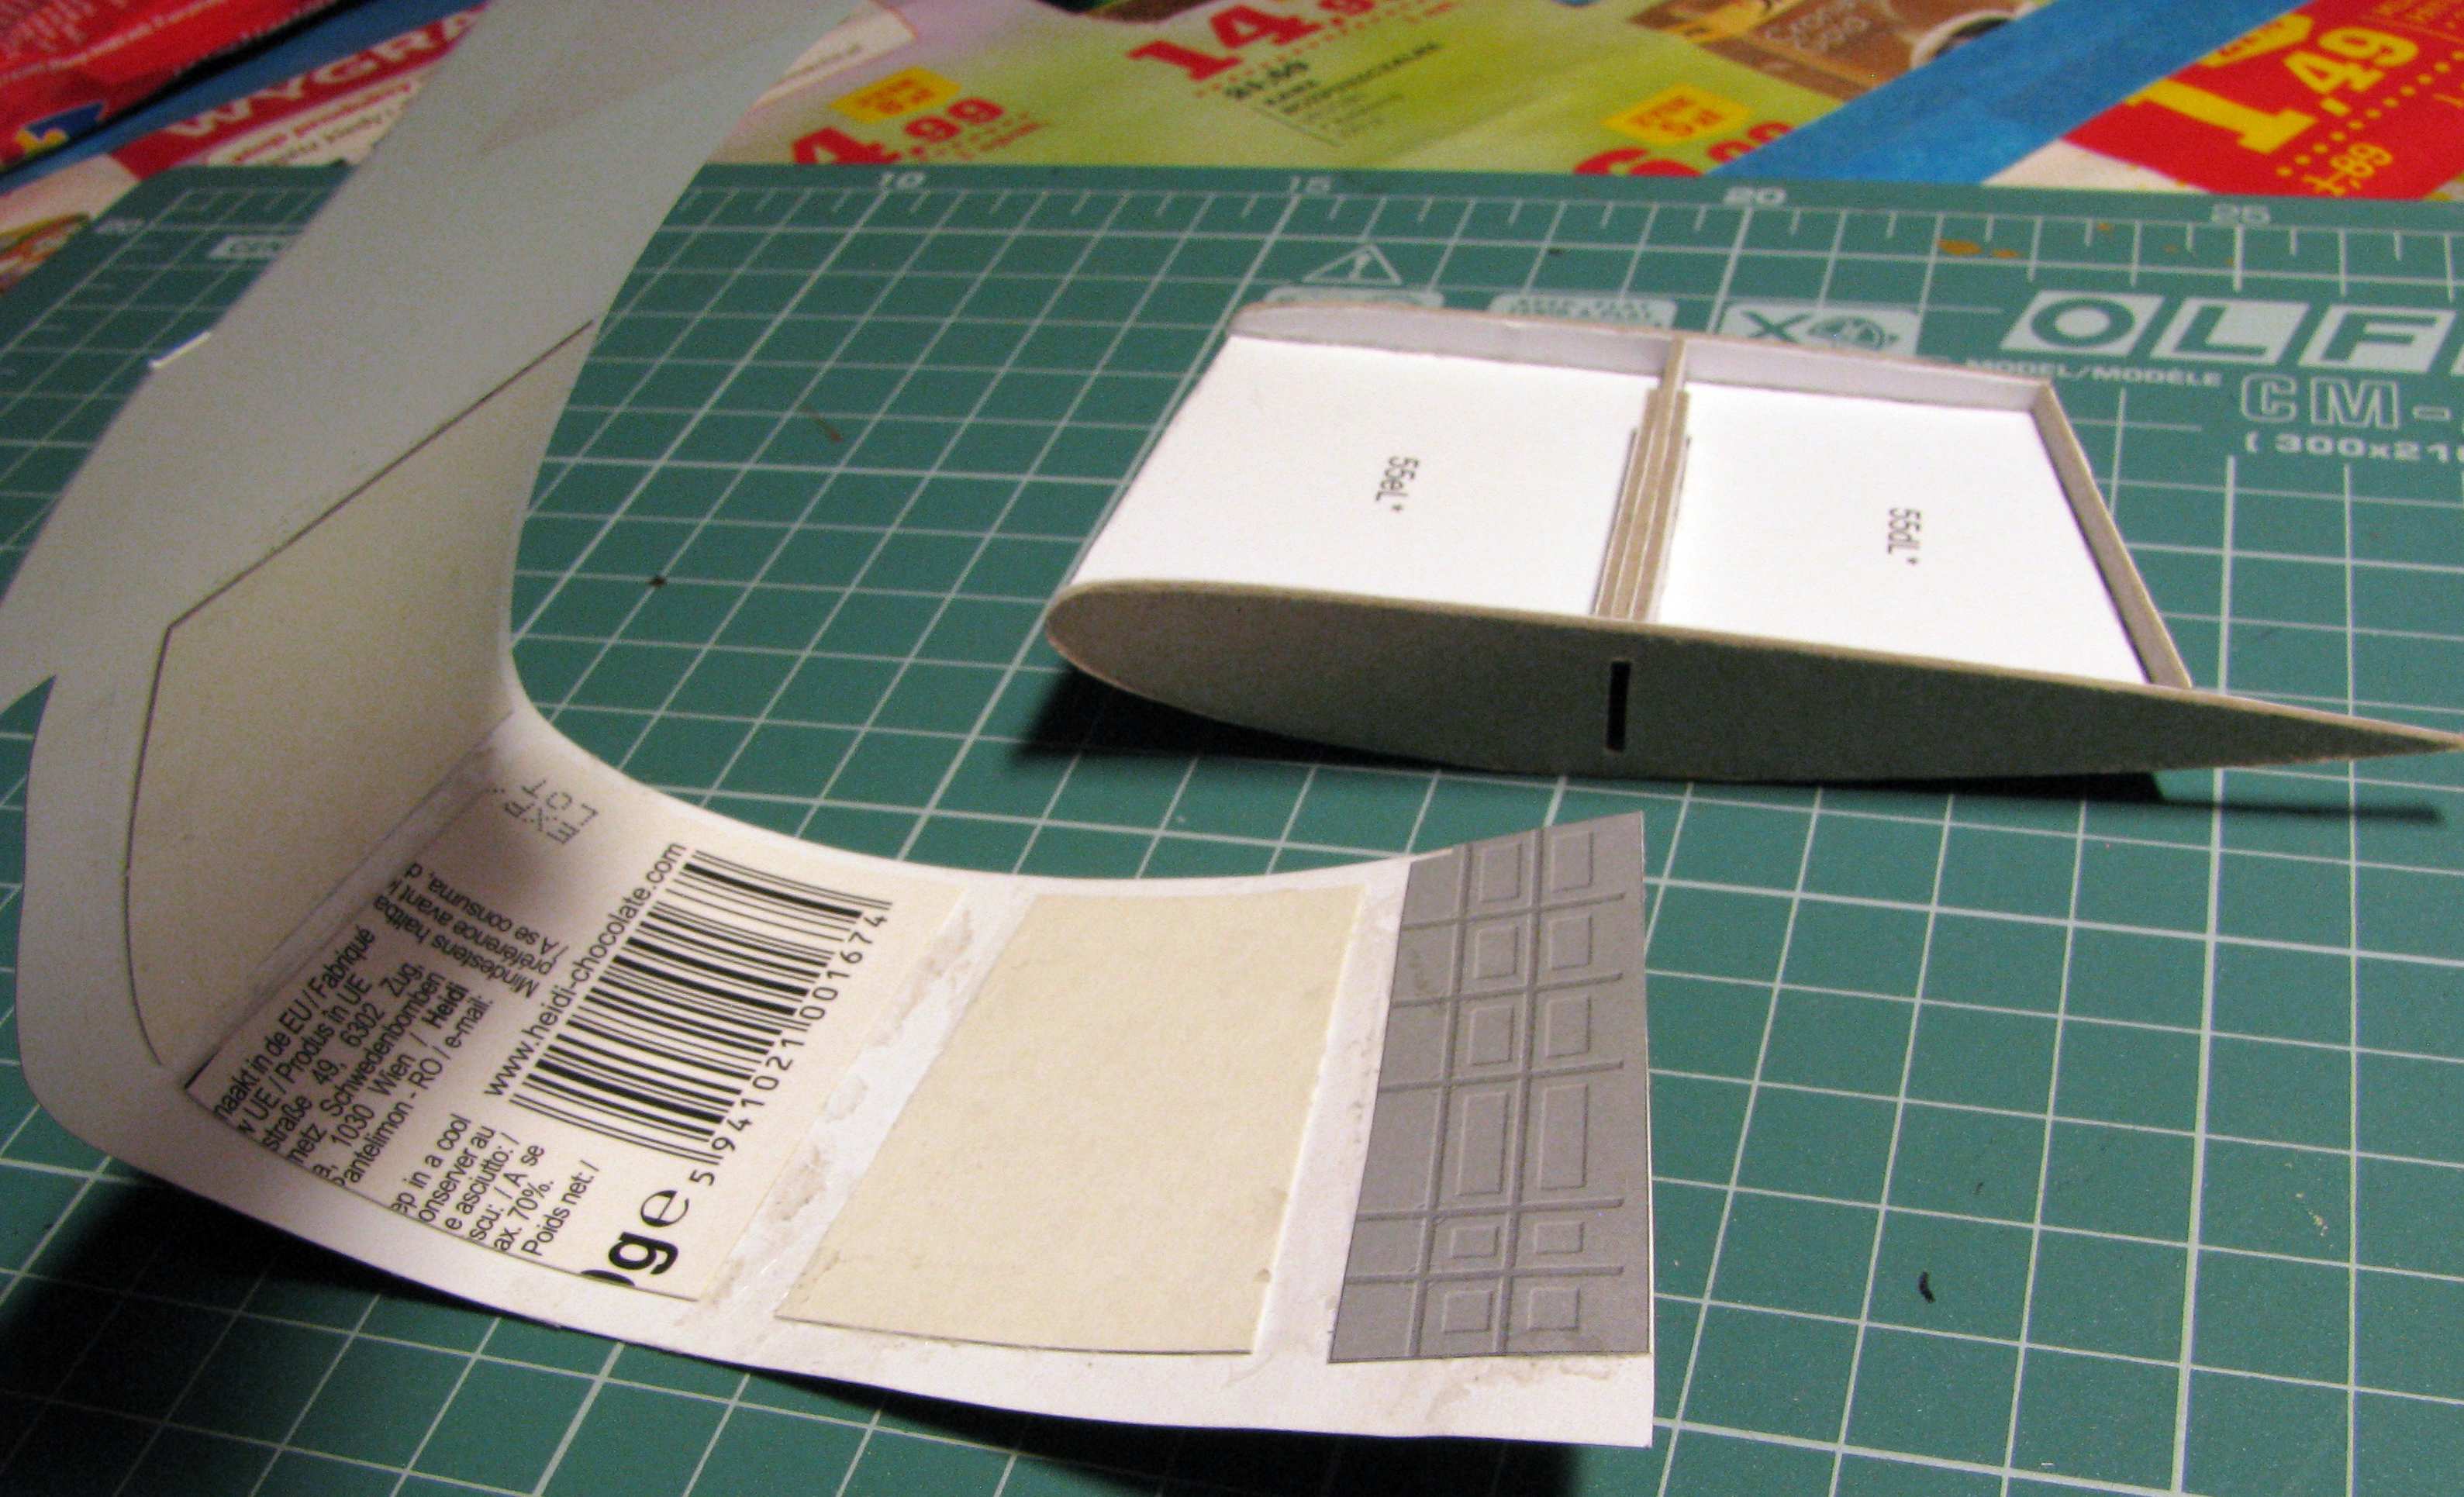
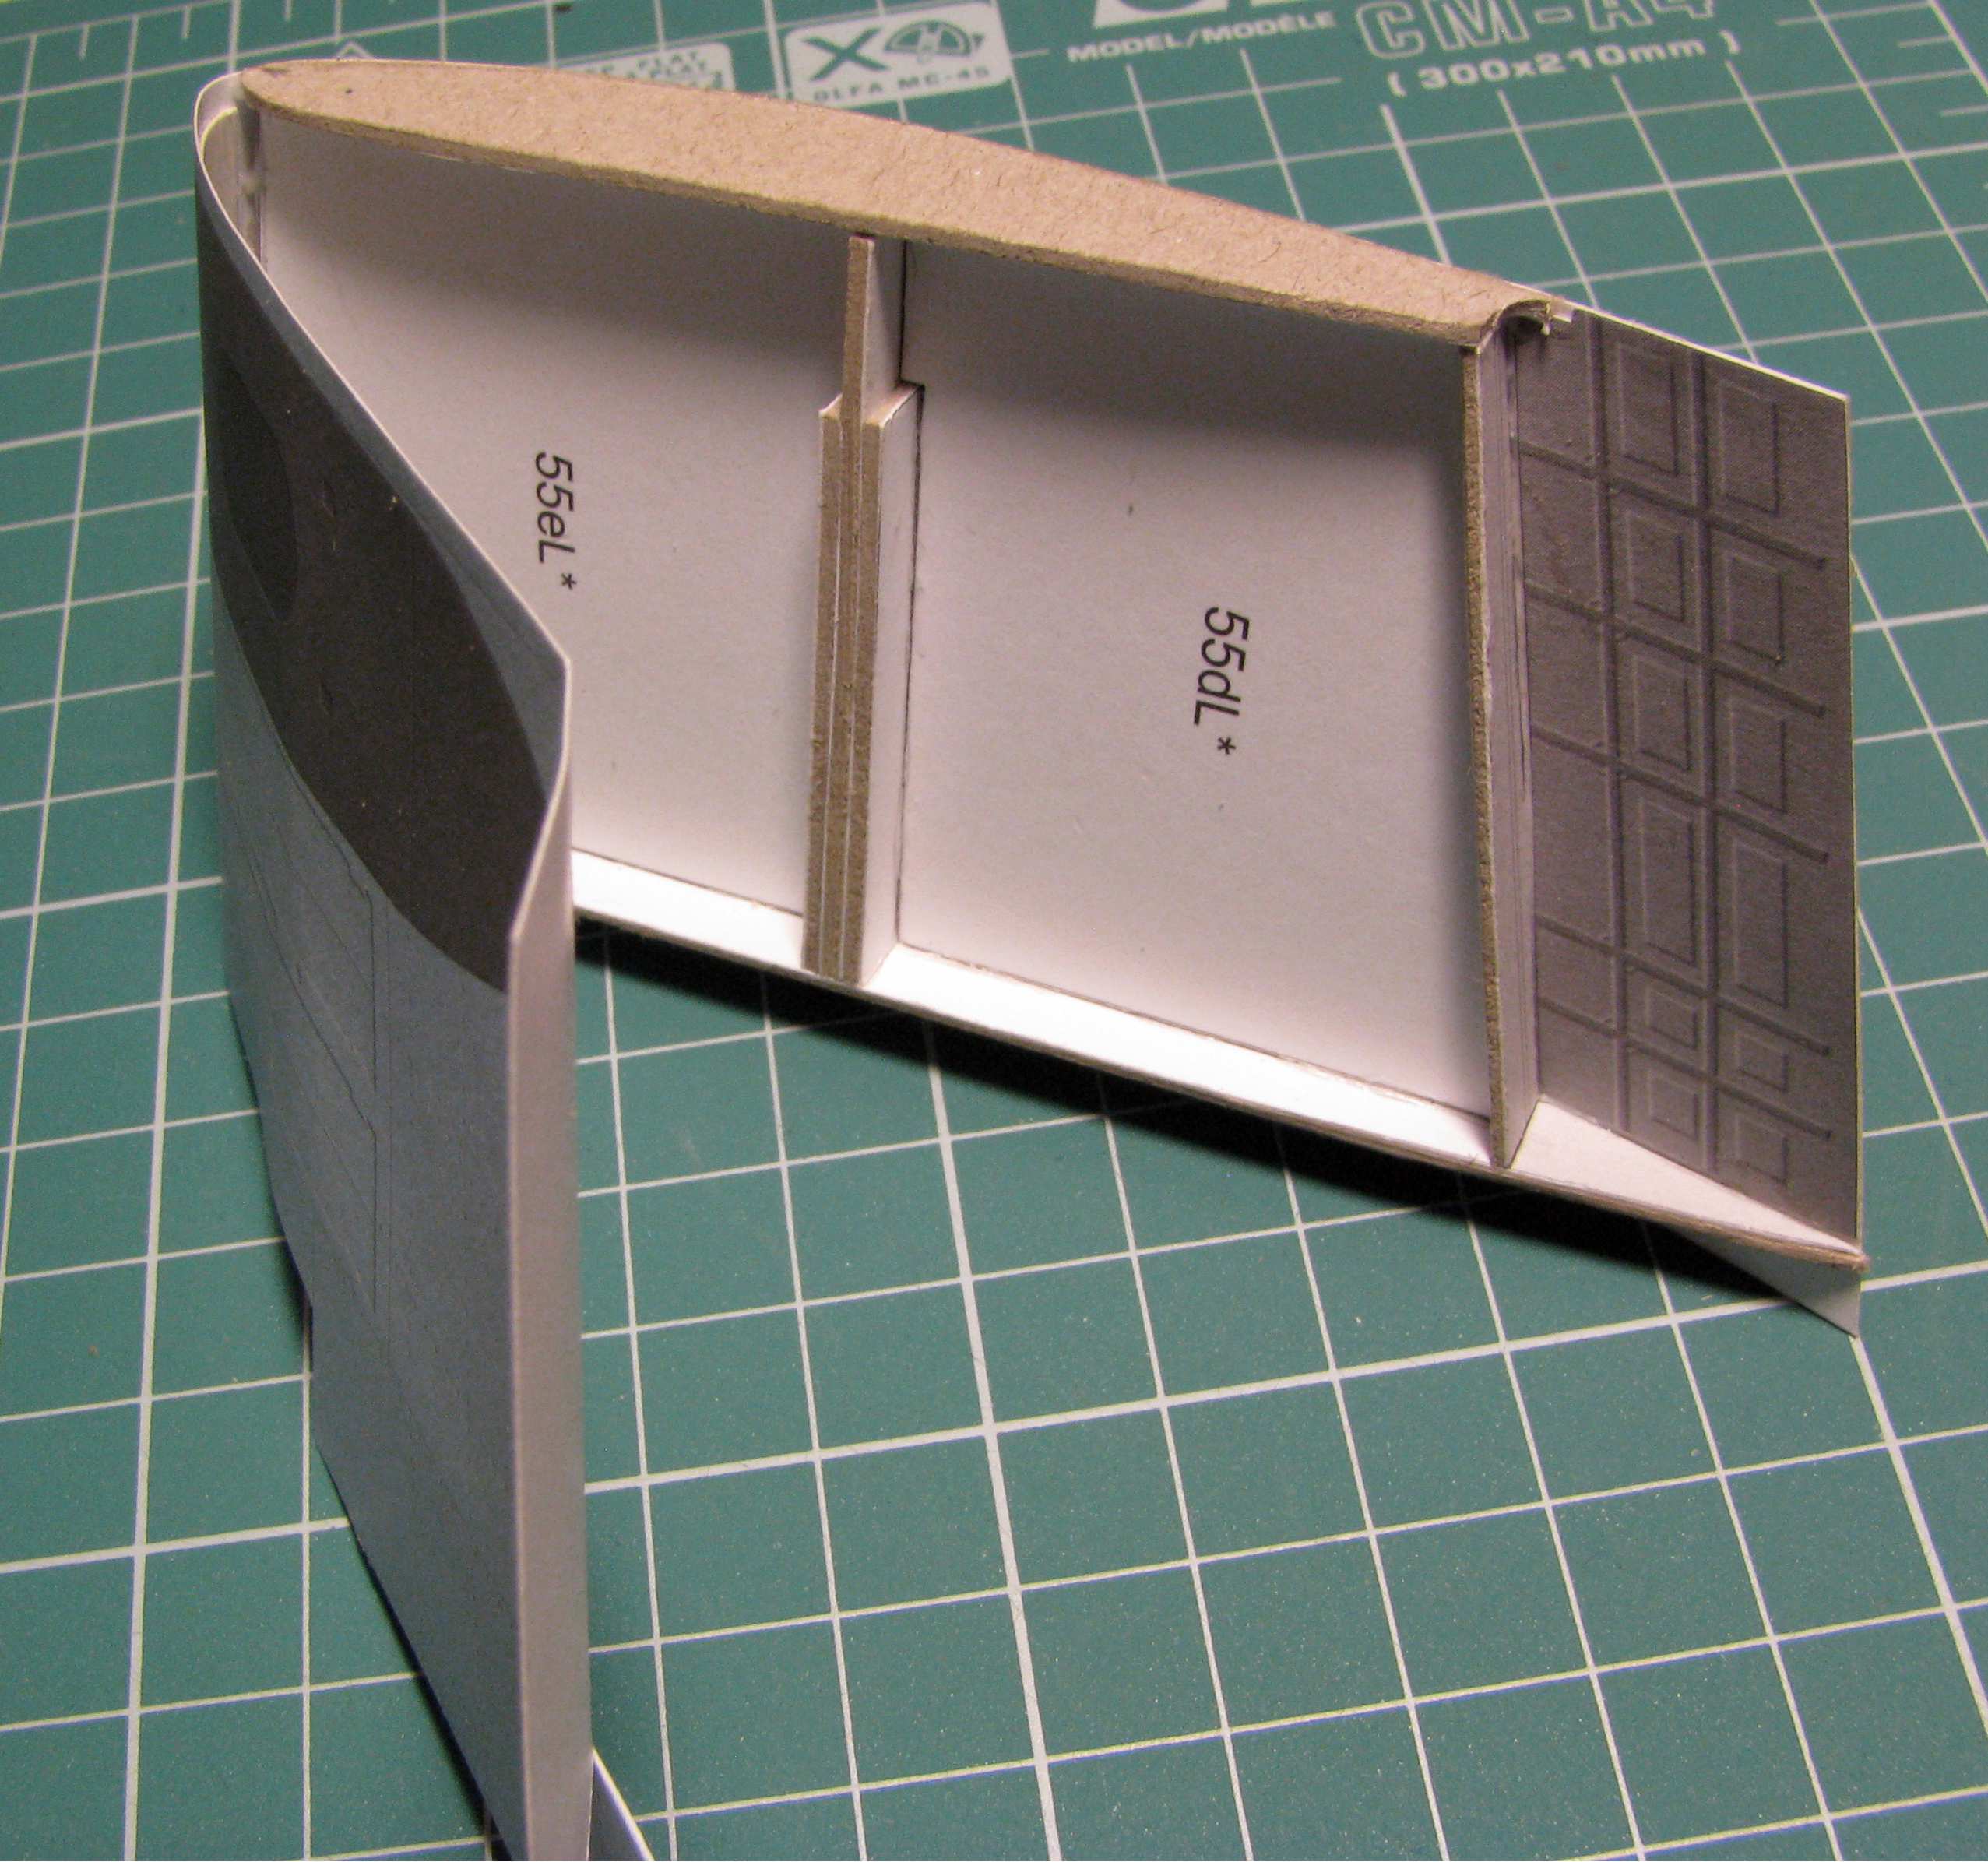
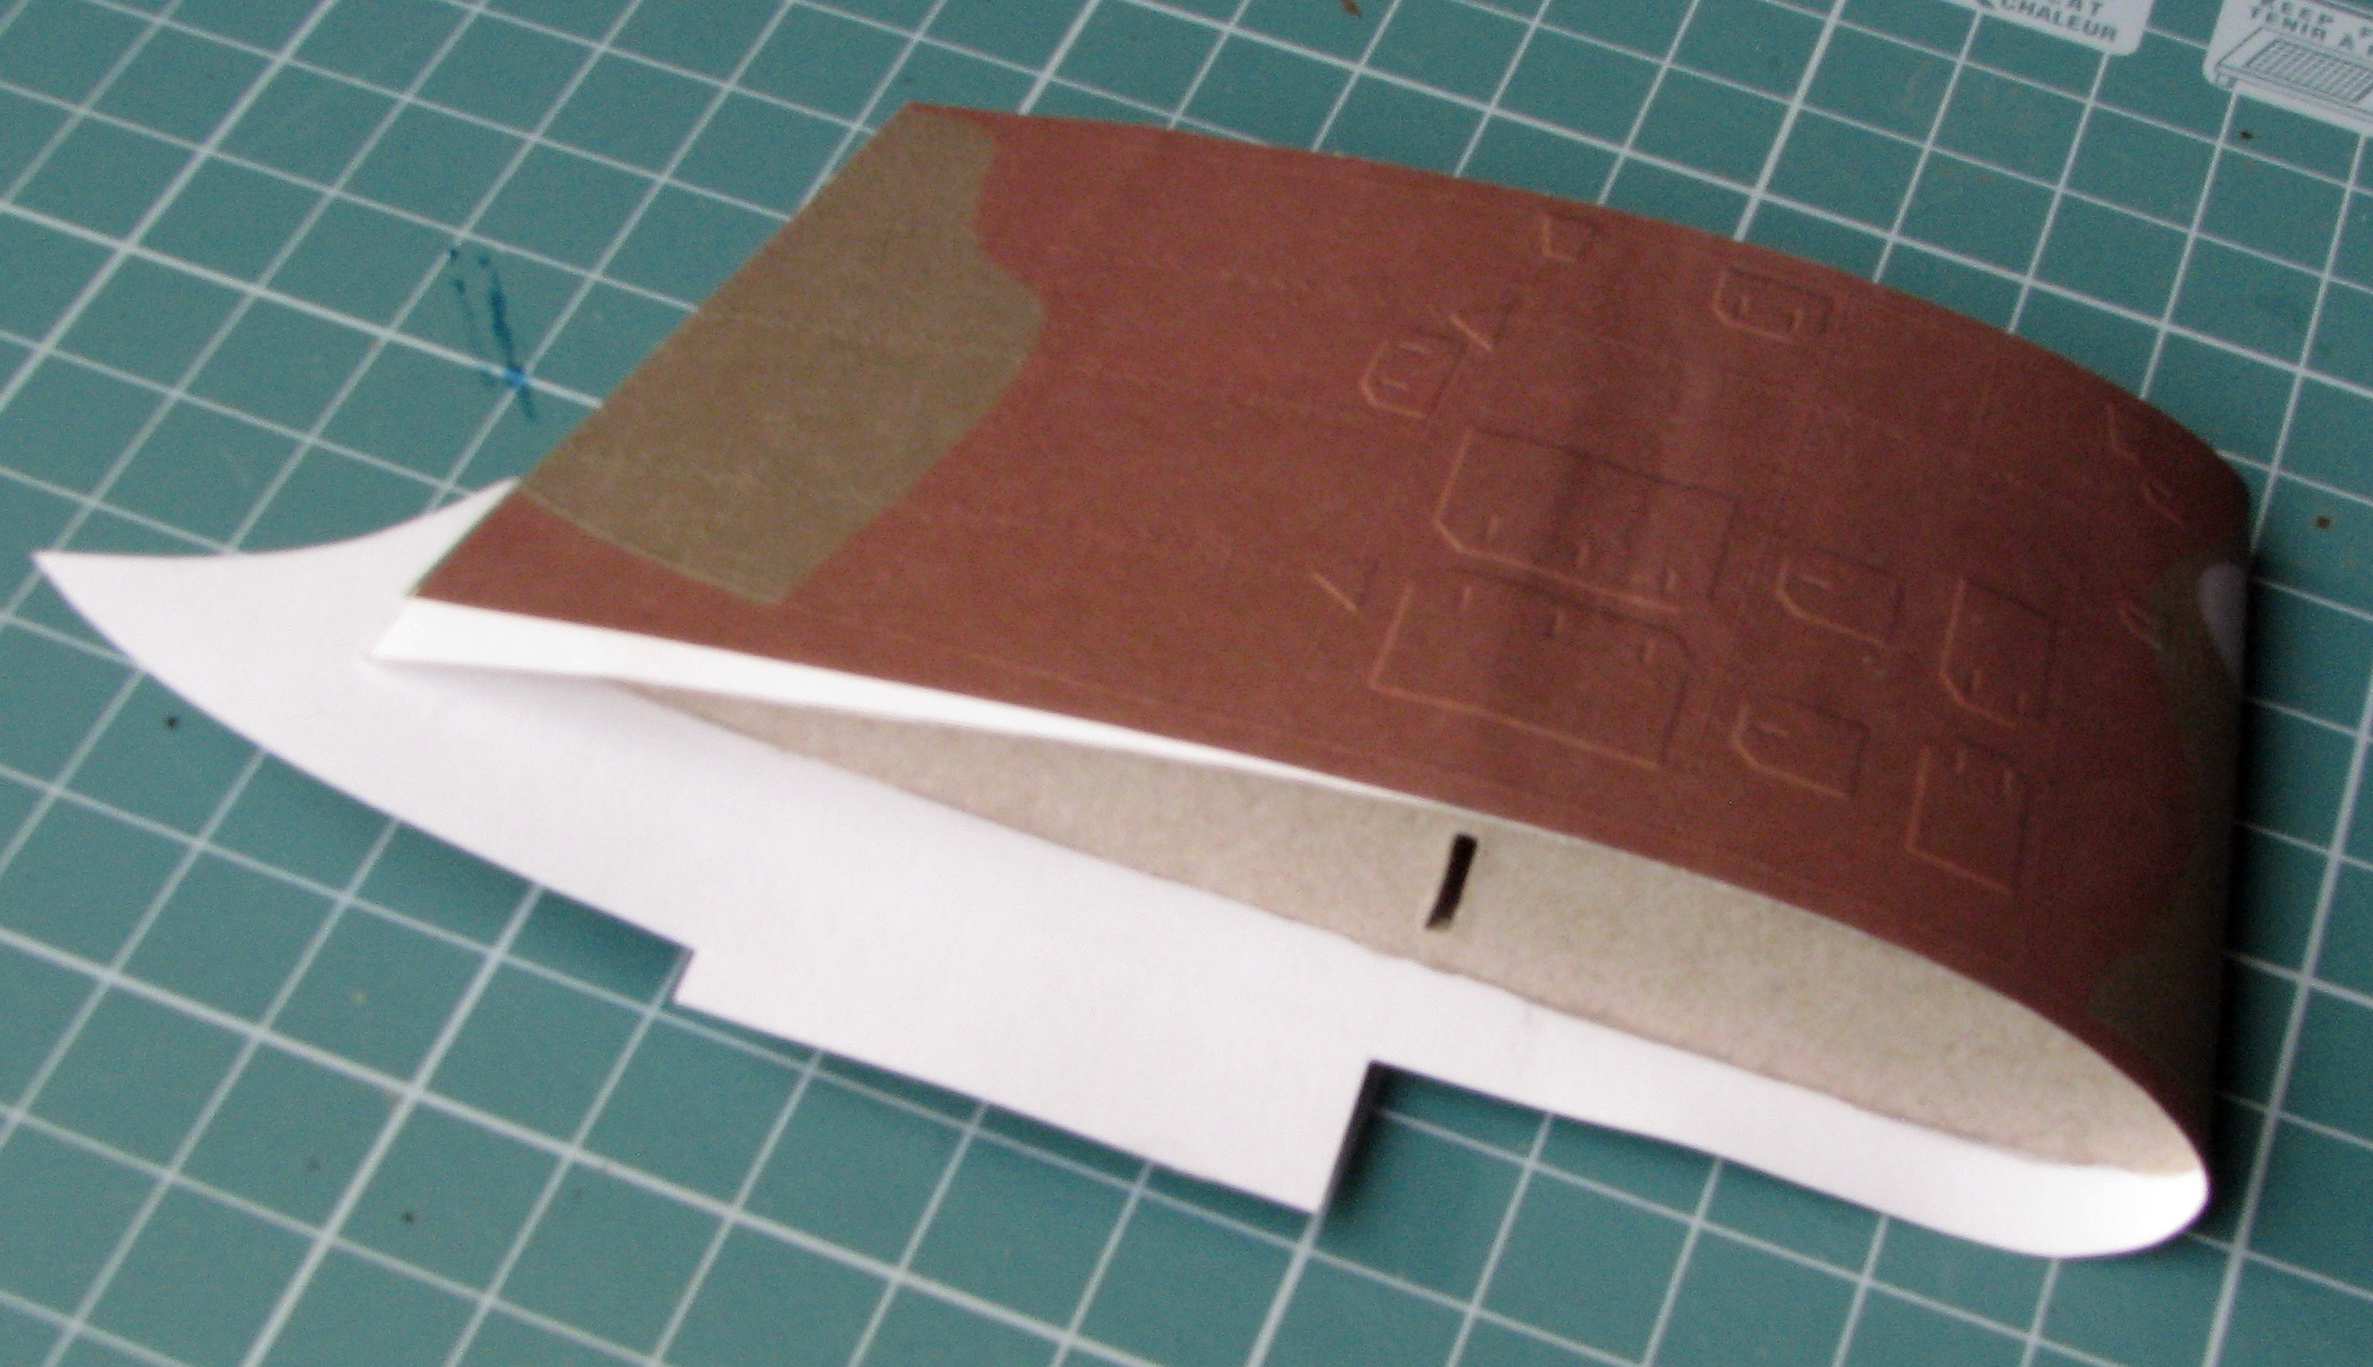
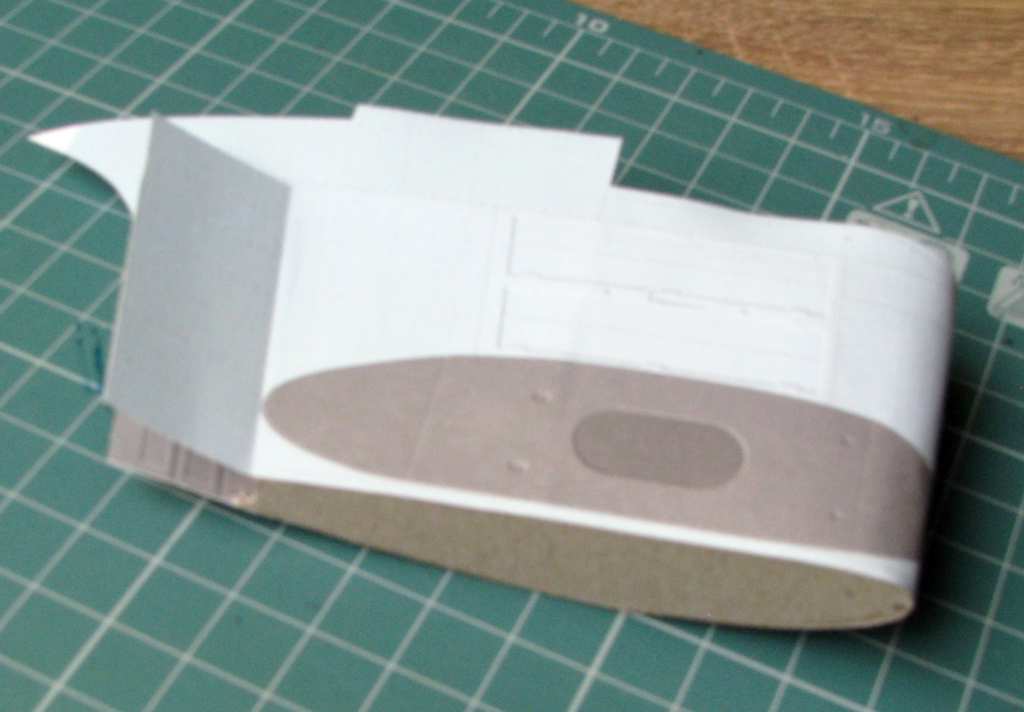
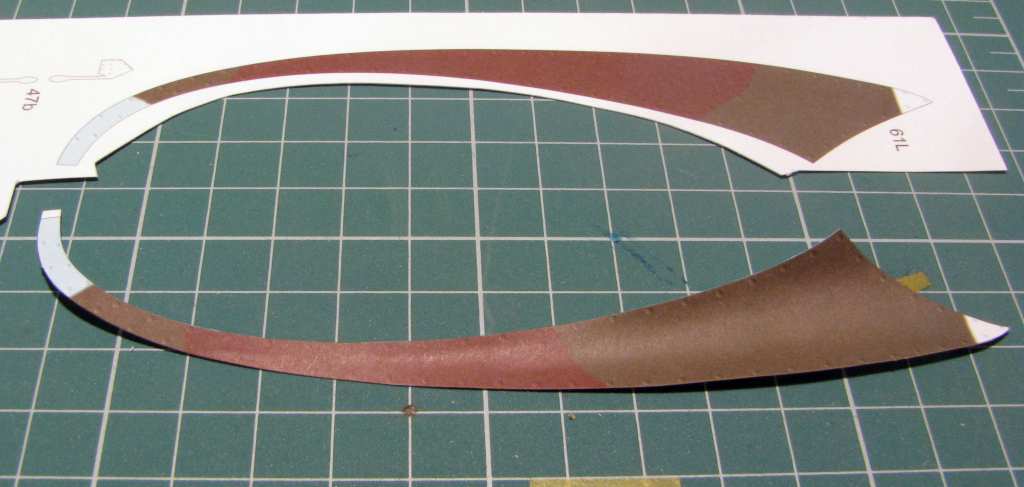
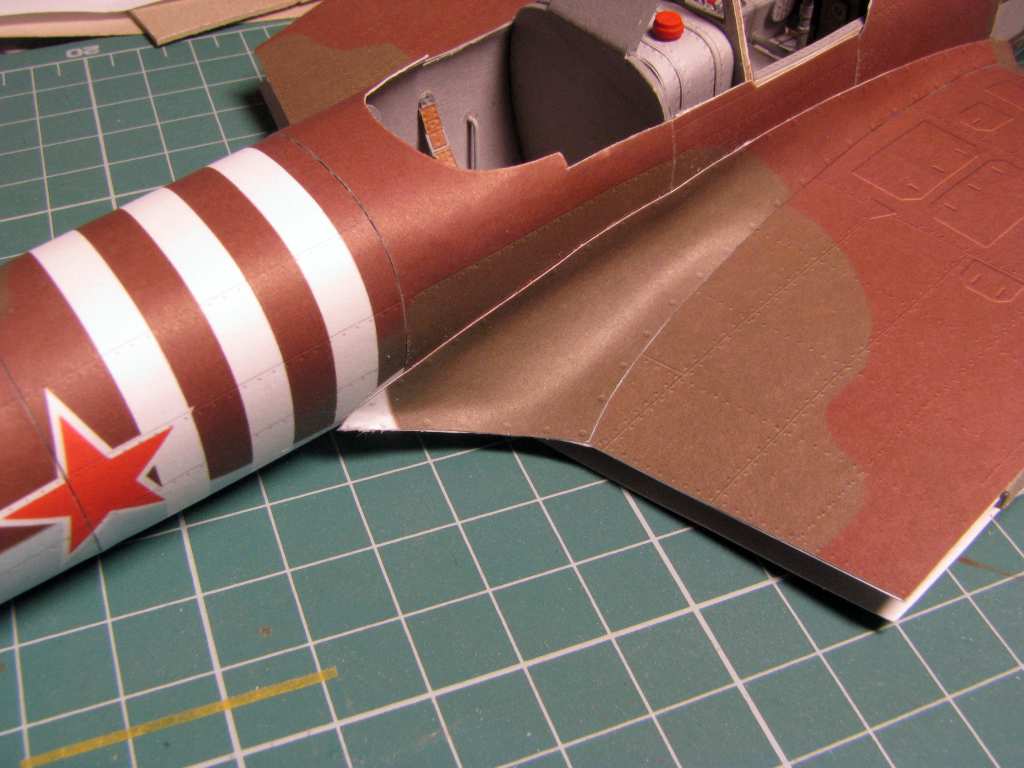
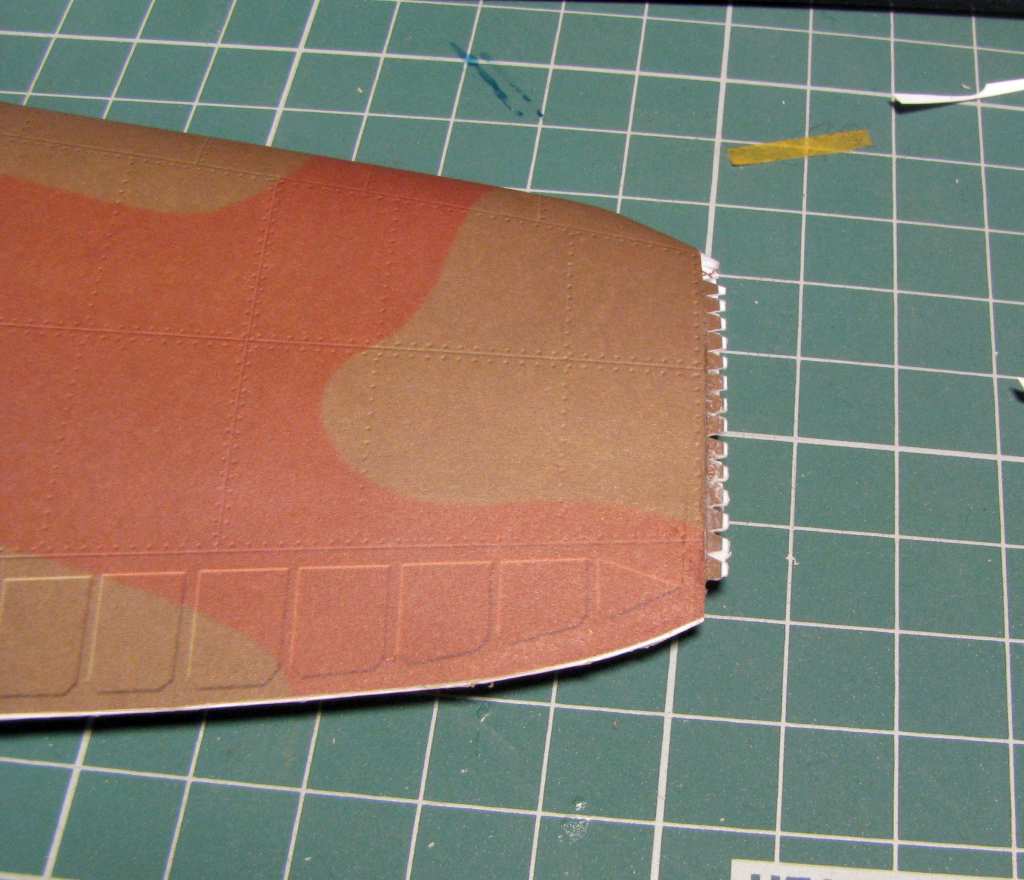
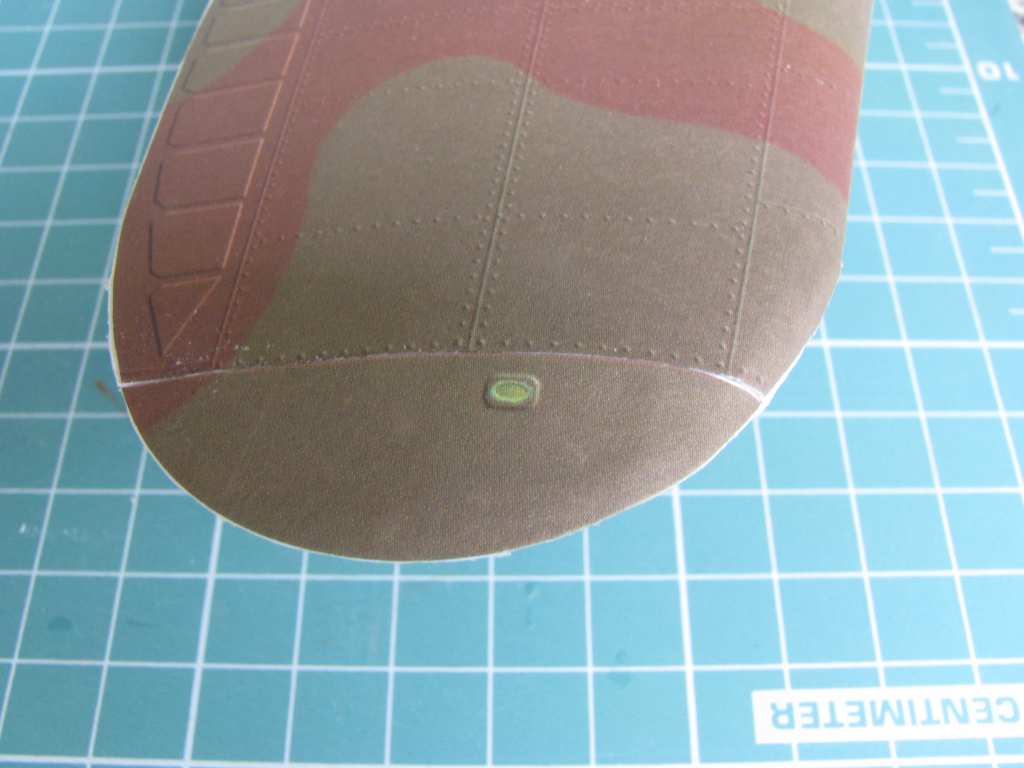
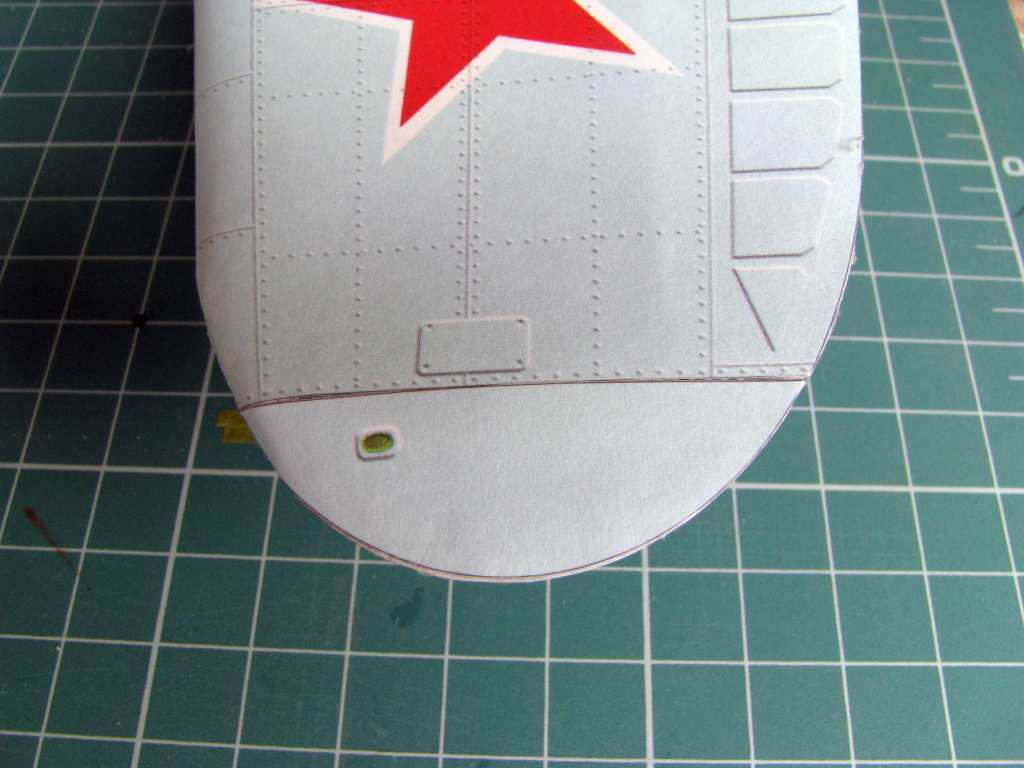
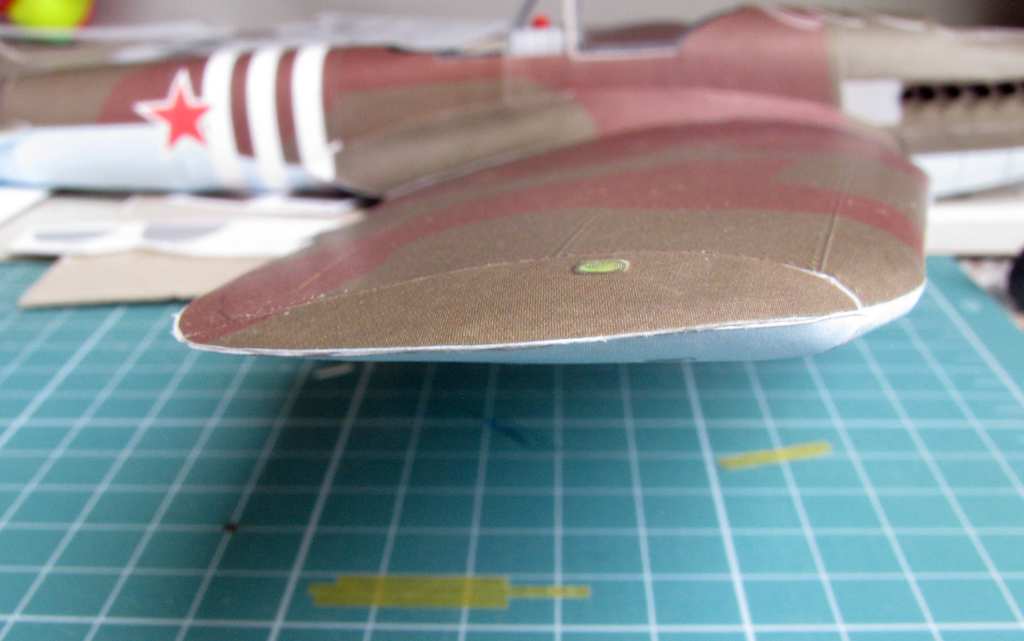
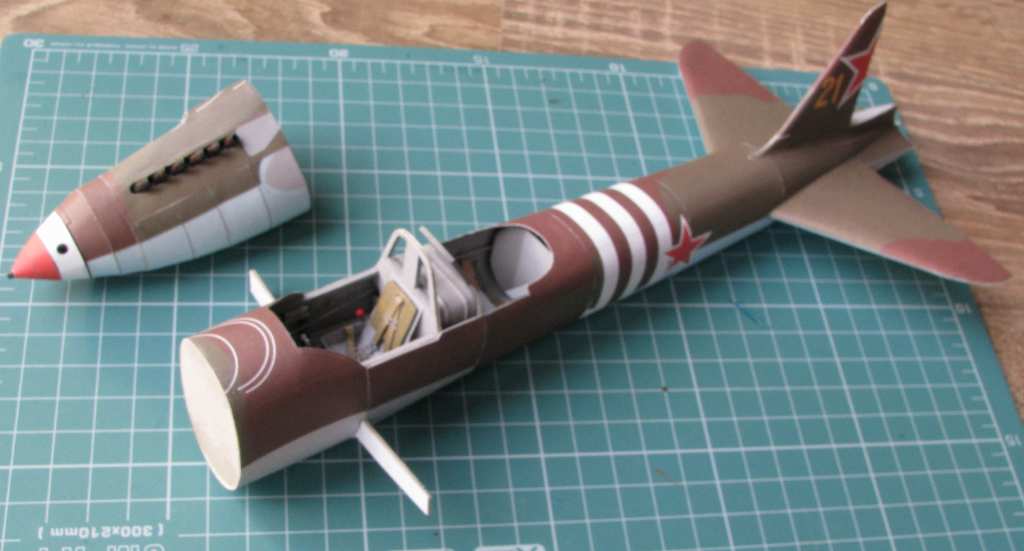
I started building my model with the fuselage. Most paper models of aircraft that I have seen, with an exception of models for little kids and modern jets have fuselages constructed out of segments. You can either have one bulkhead per segment or two bulheads per segment (the main ones). Two bulkheads per segment is more popular - in a model constructed this way every segment with the exception of the noce and tail cone resembles a funny can. When all the segments are done you just glue them together, bulkhead to bulkhead. My Ilyushin was also constructed way. Most segments are already joined together, but the motor segment is still separate:

GPM 1:33 Il-2m3 Stormovik by Pawel

The trick here is to always make sure the bulkheads that will be glued together have identical shape. This is achieved by holding the two bulkheads aligned face to face and sanding them together on their edges. The bulkheads have two marks on them, one marking the top and the other marking the bottom of the bulkhead. You have to make sure these markings are aligned when sanding and when glueing the skin on the segment. The bottom seam usually aligns with the bottom mark on the segment. Plus you have to make sure the bulkhead is not too big for both of the corresponding segments (it usually is before sanding). You have to sand the pair of the bulkheads until it fits both of the corresponding segment skins.

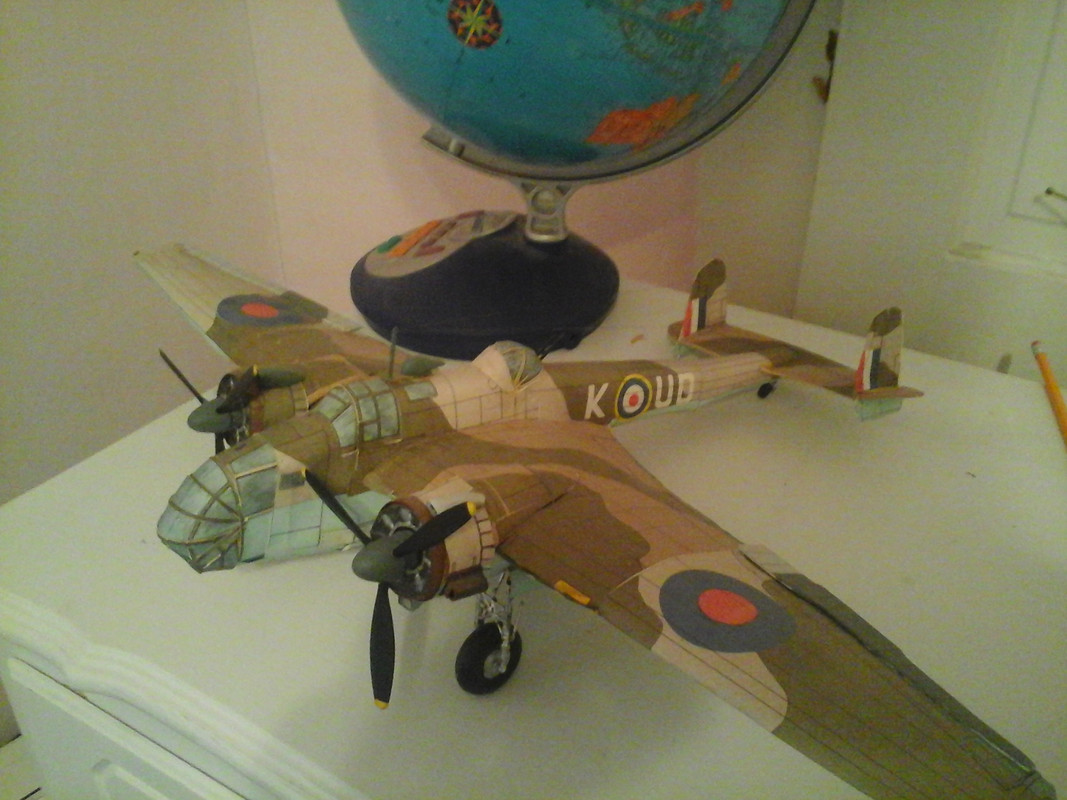
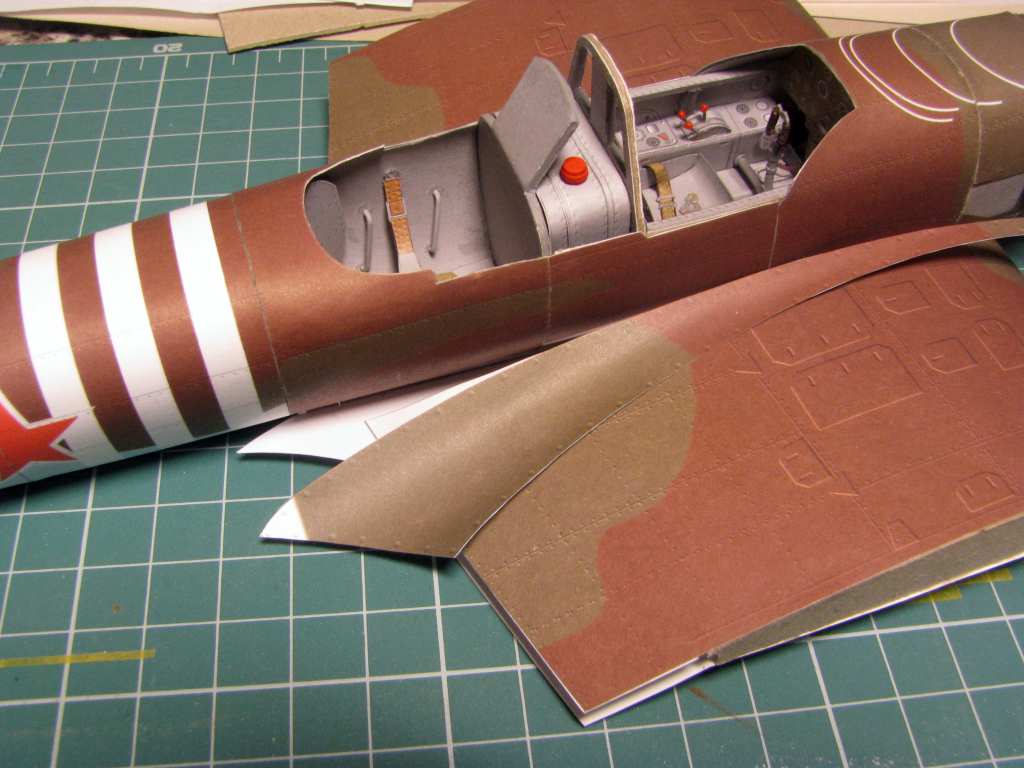
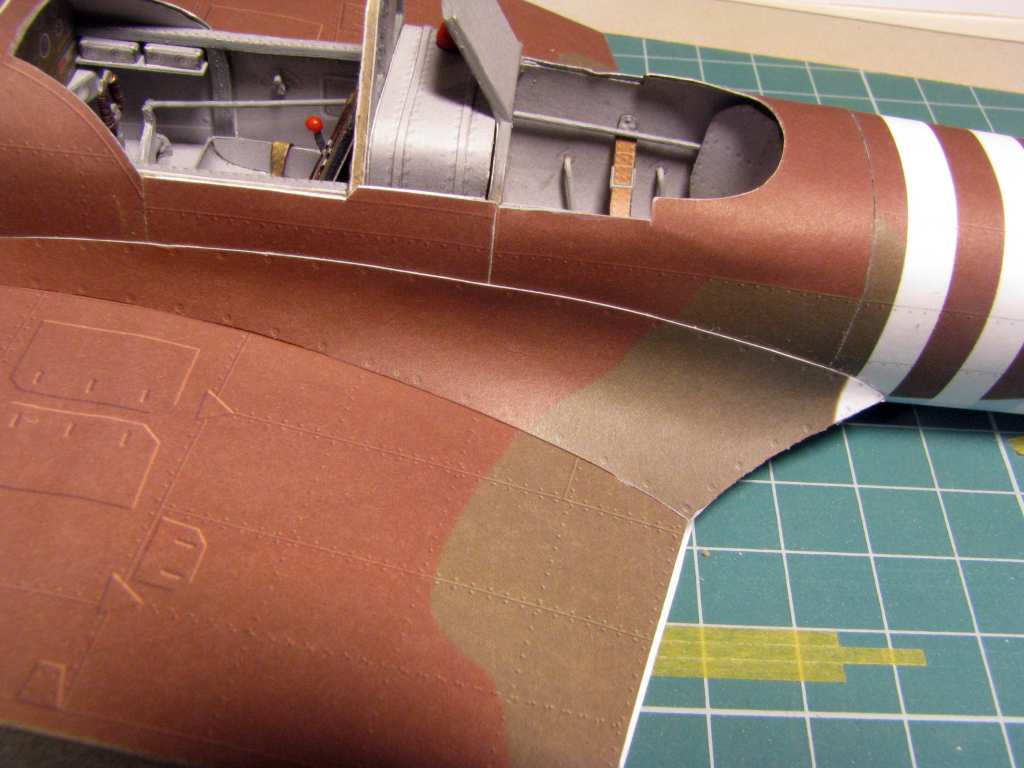
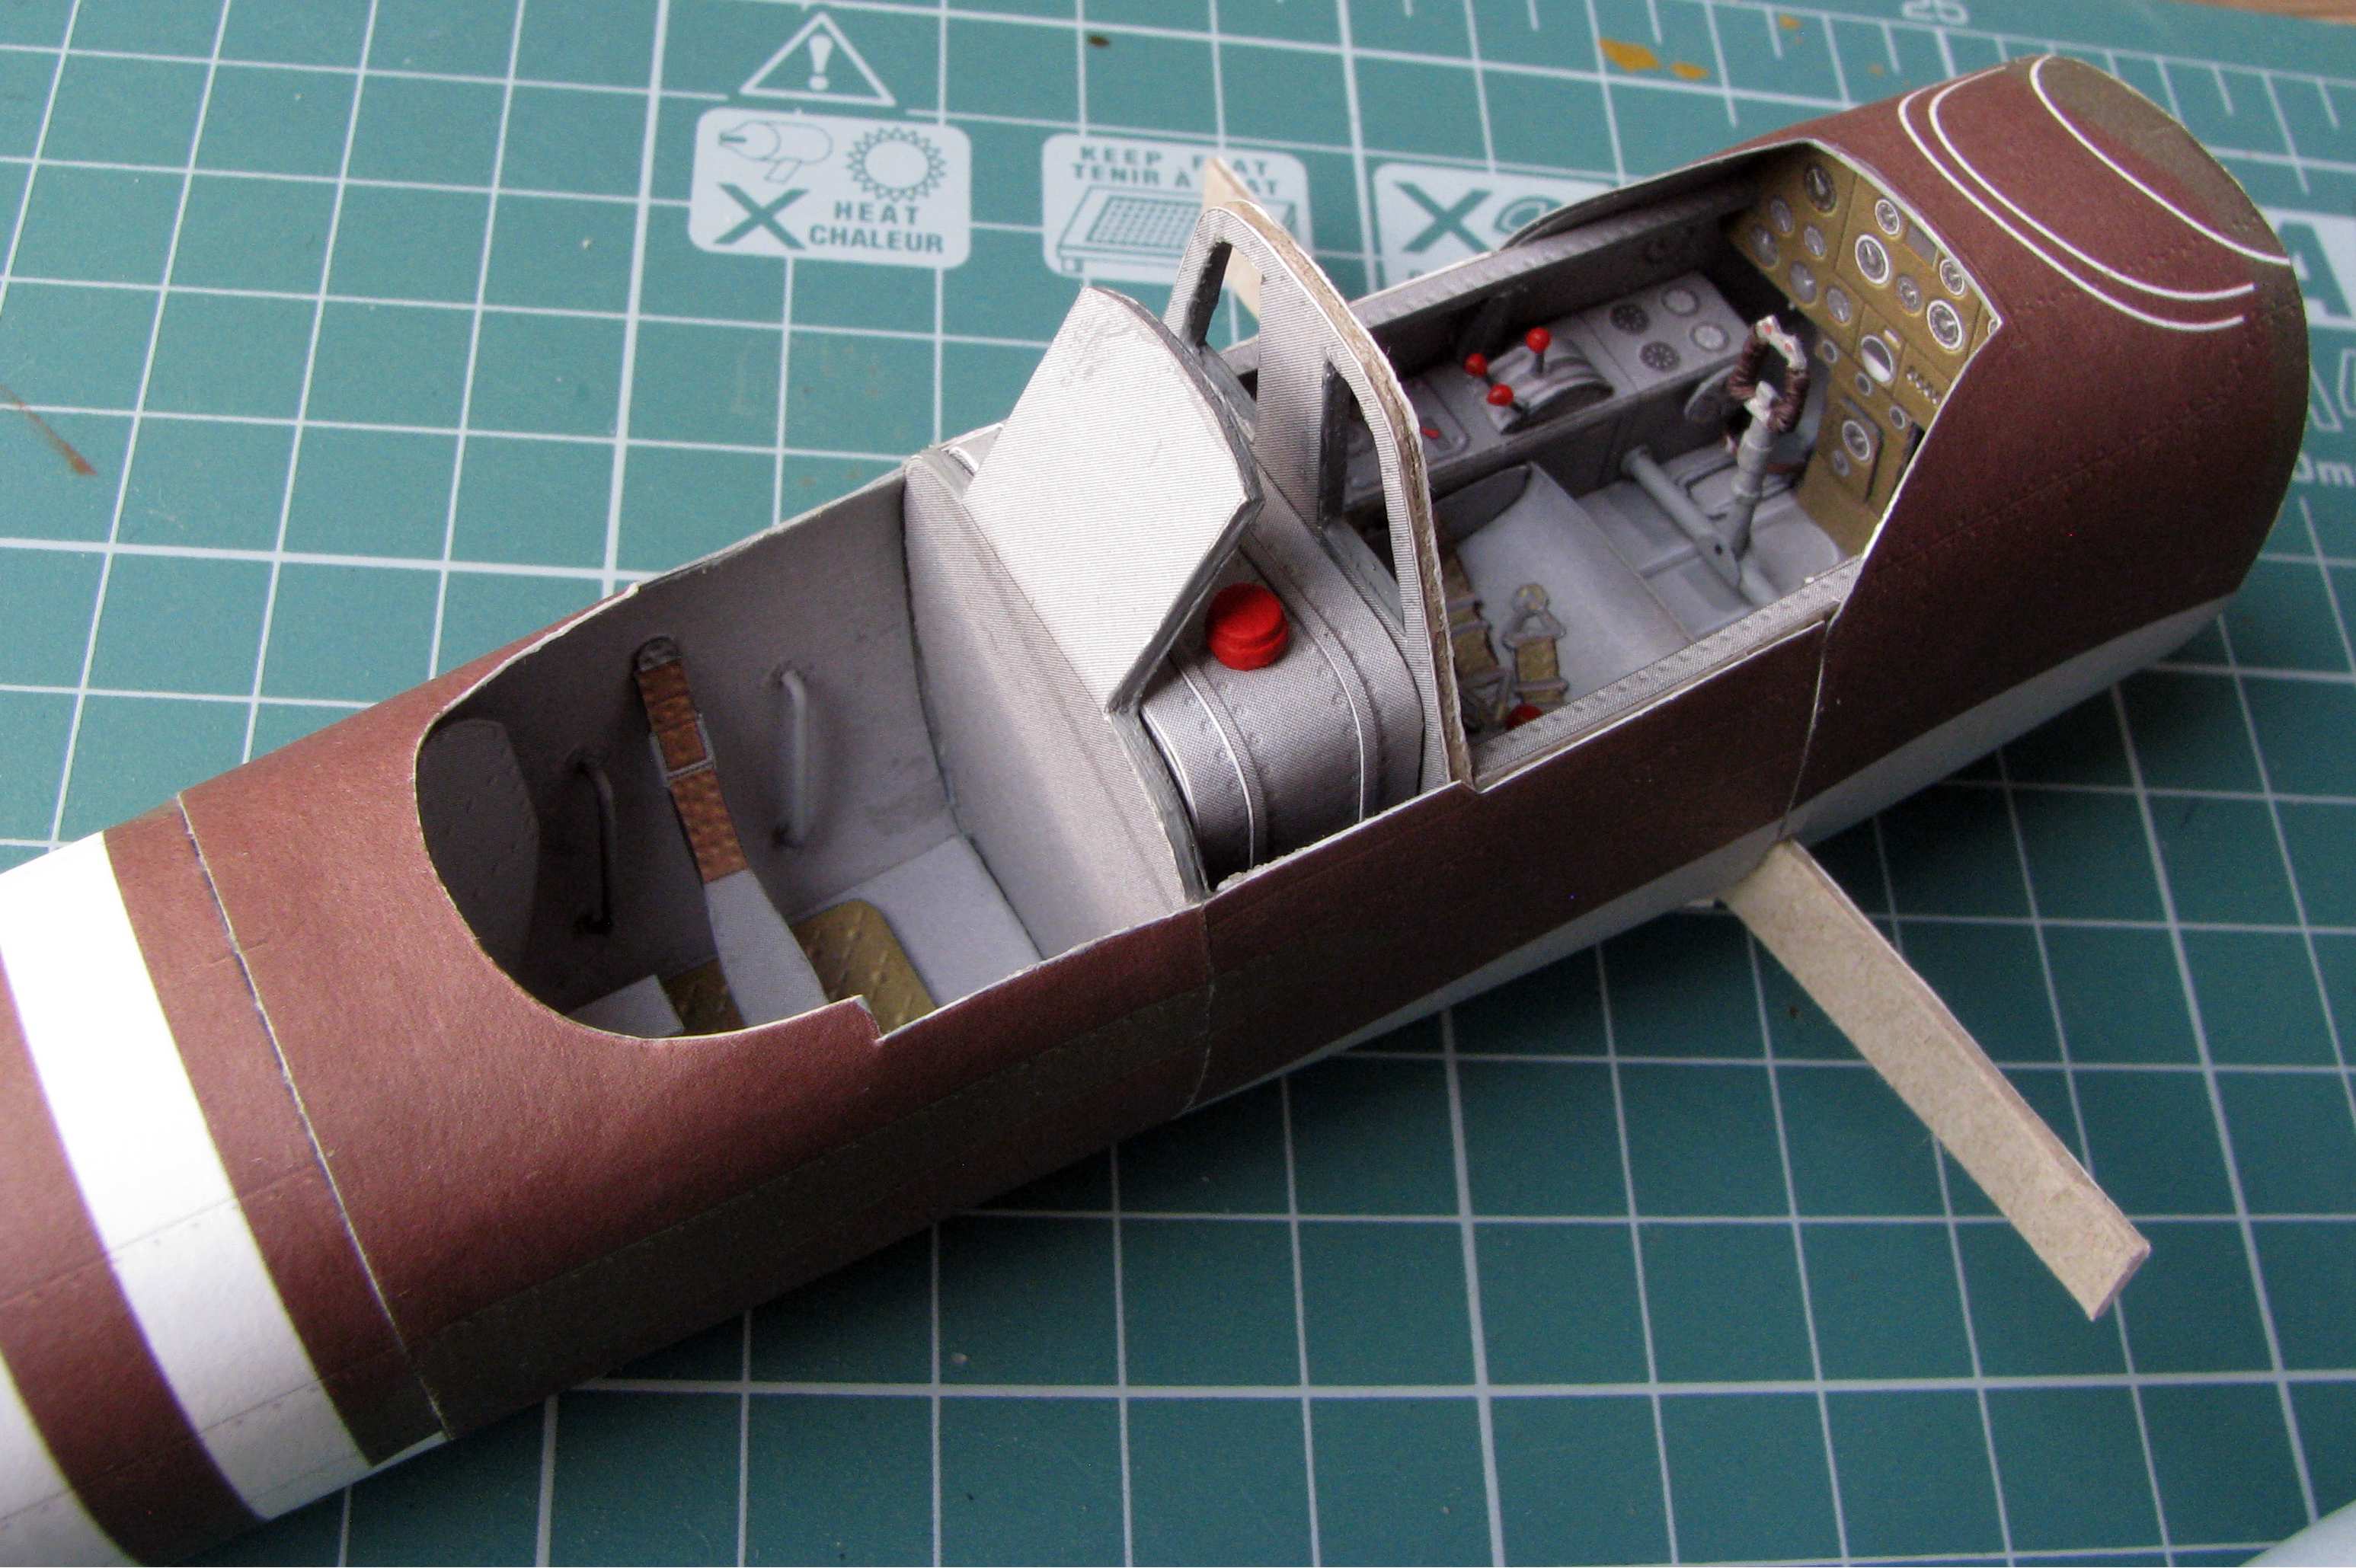
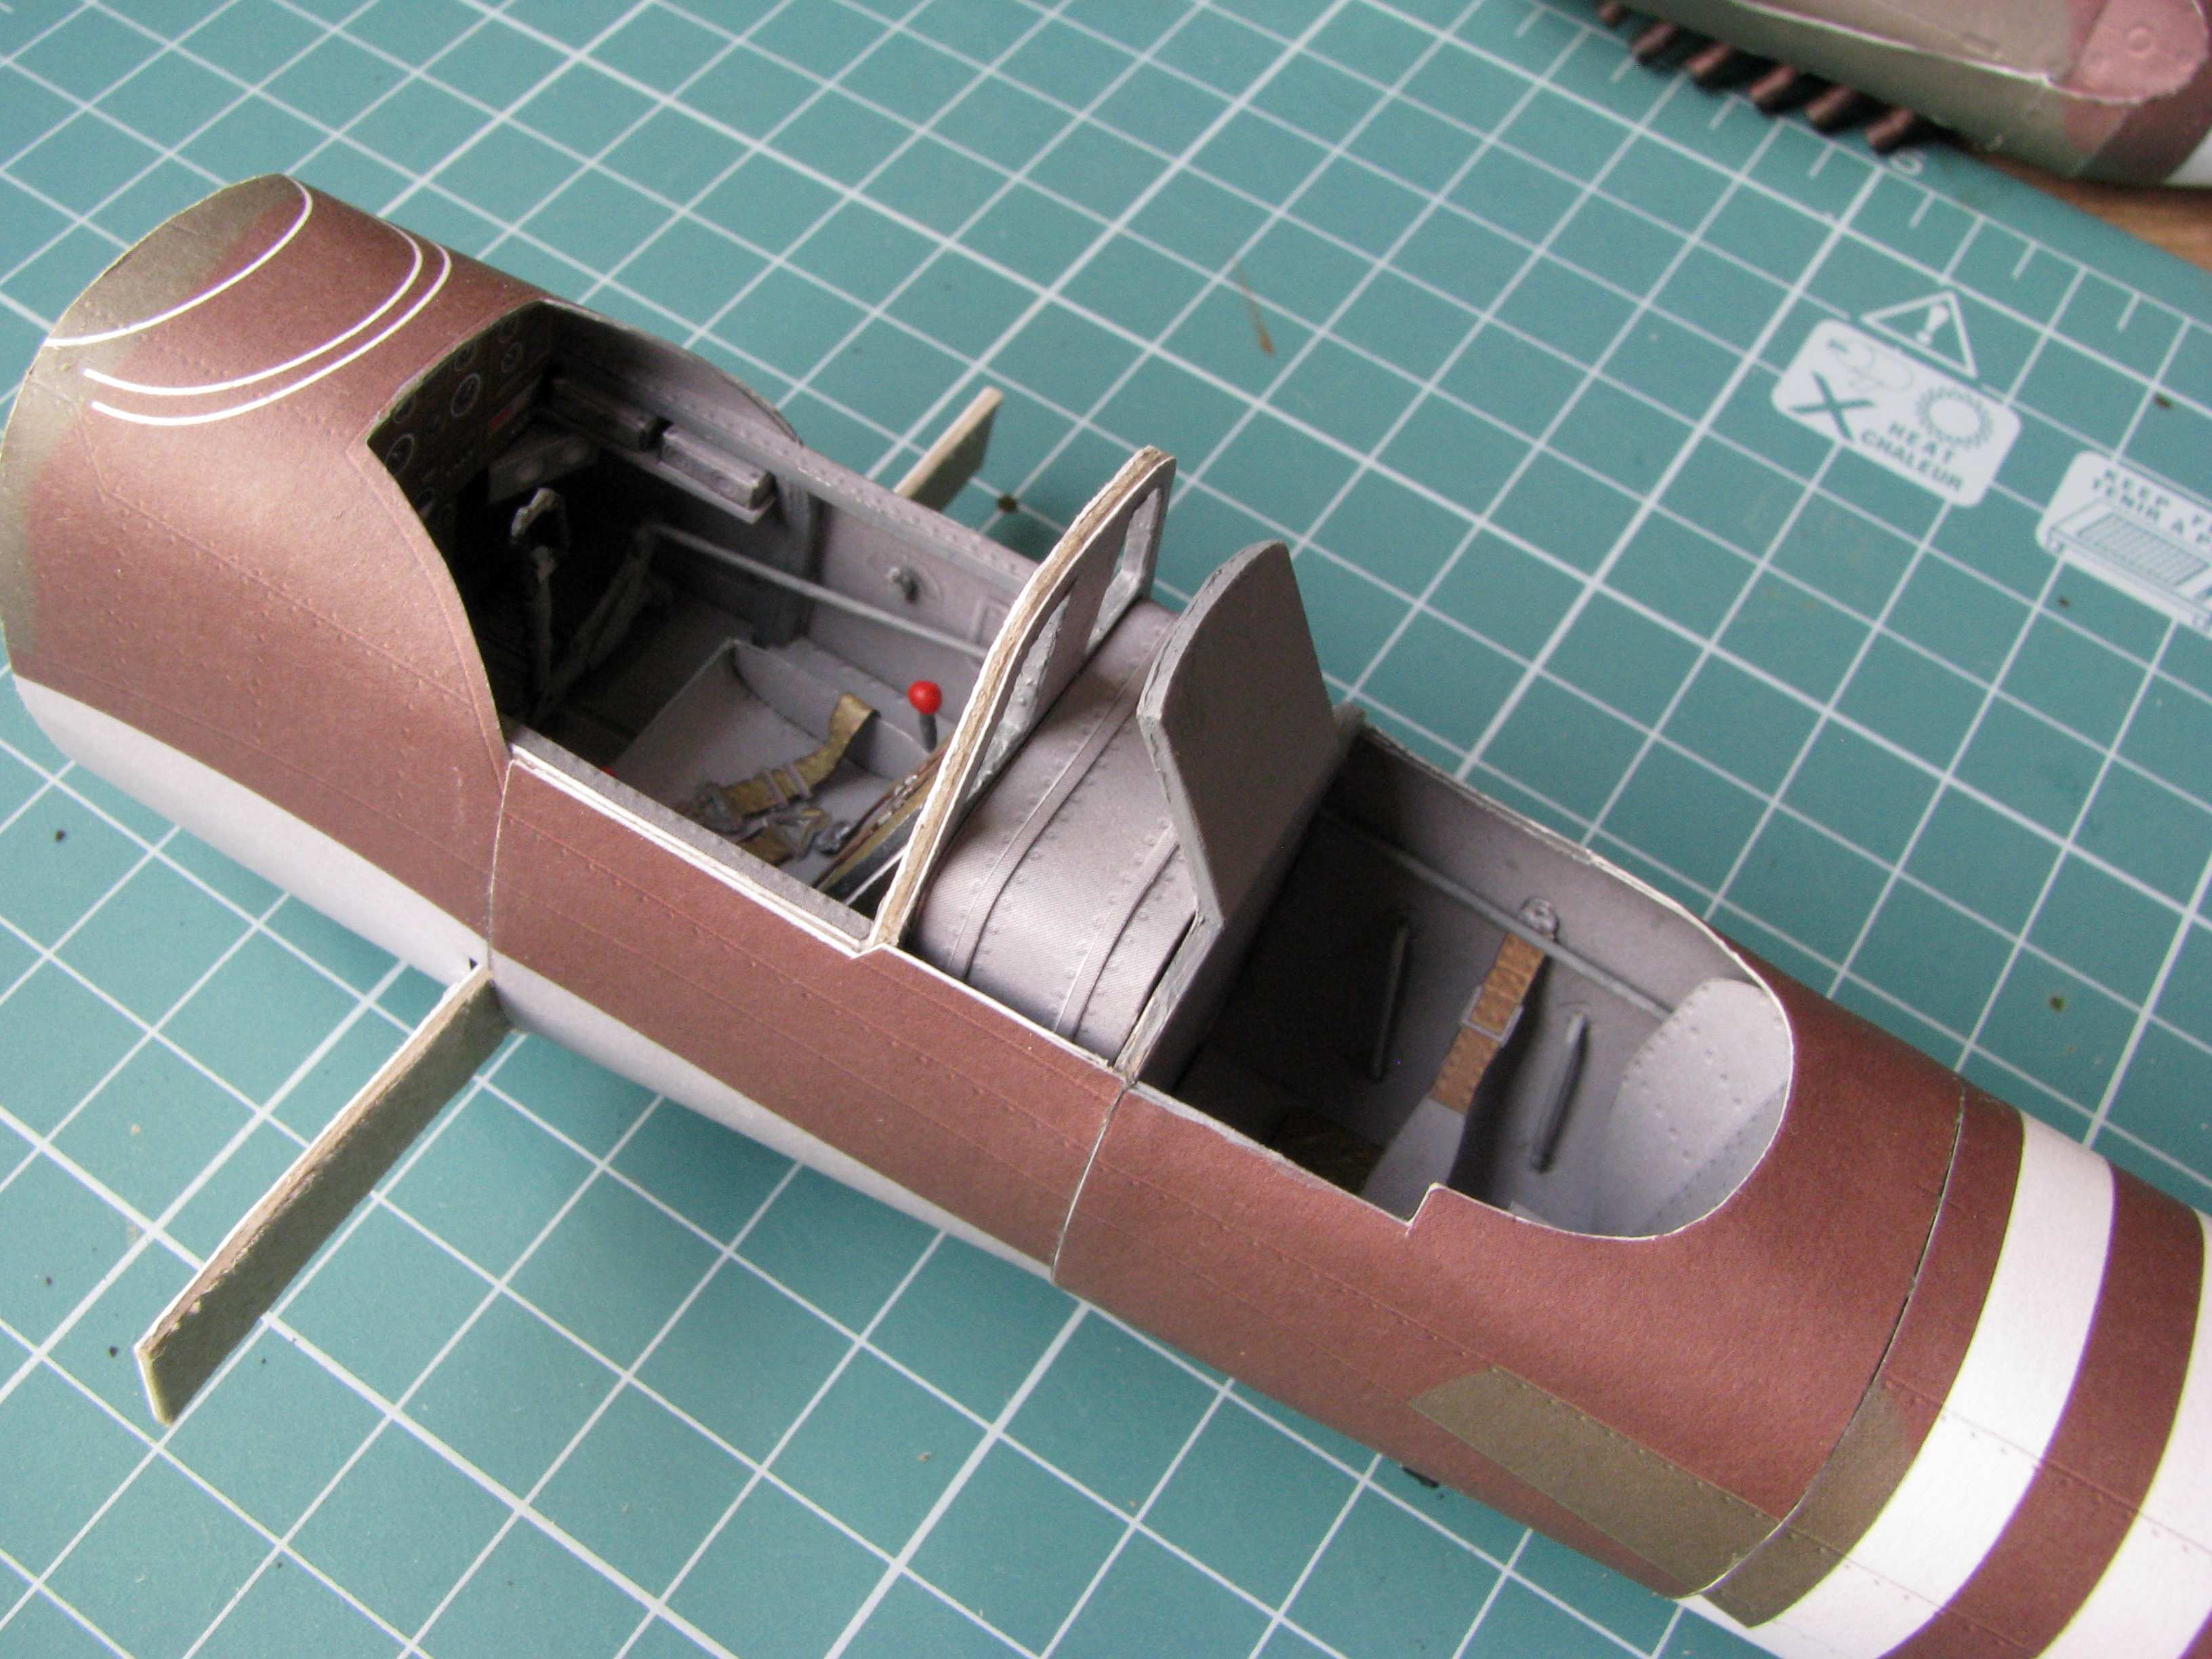
The GPM model has a nice cockpit interior that I have enhanced a little with wire and knobs made out of white glue. A little painting also helps to make everything look better. On the paper model you generally should paint the white paper edges and all the wire parts that are used. My cockpit at the moment looks like this:

GPM 1:33 Il-2m3 Stormovik by Pawel

GPM 1:33 Il-2m3 Stormovik by Pawel

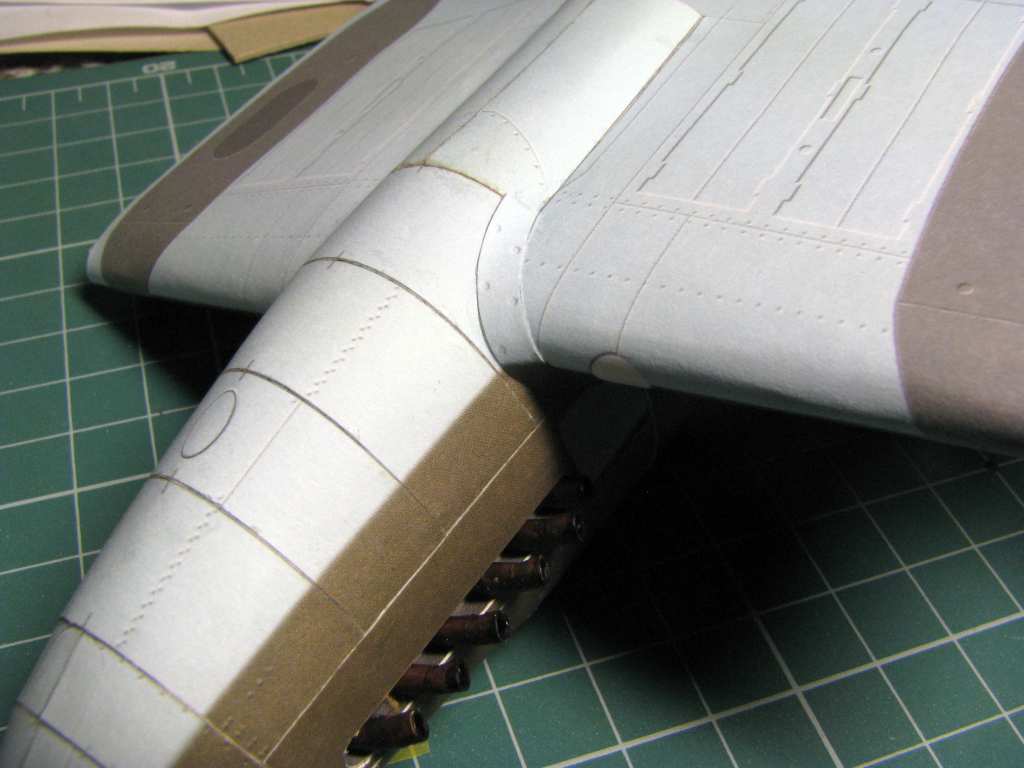
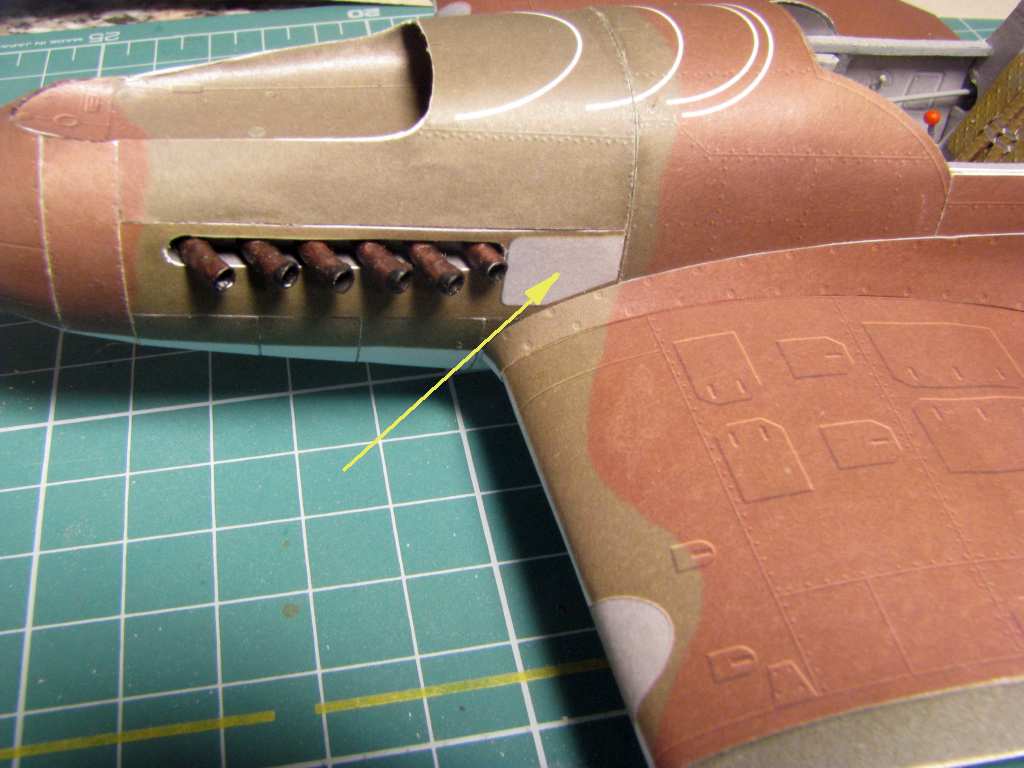
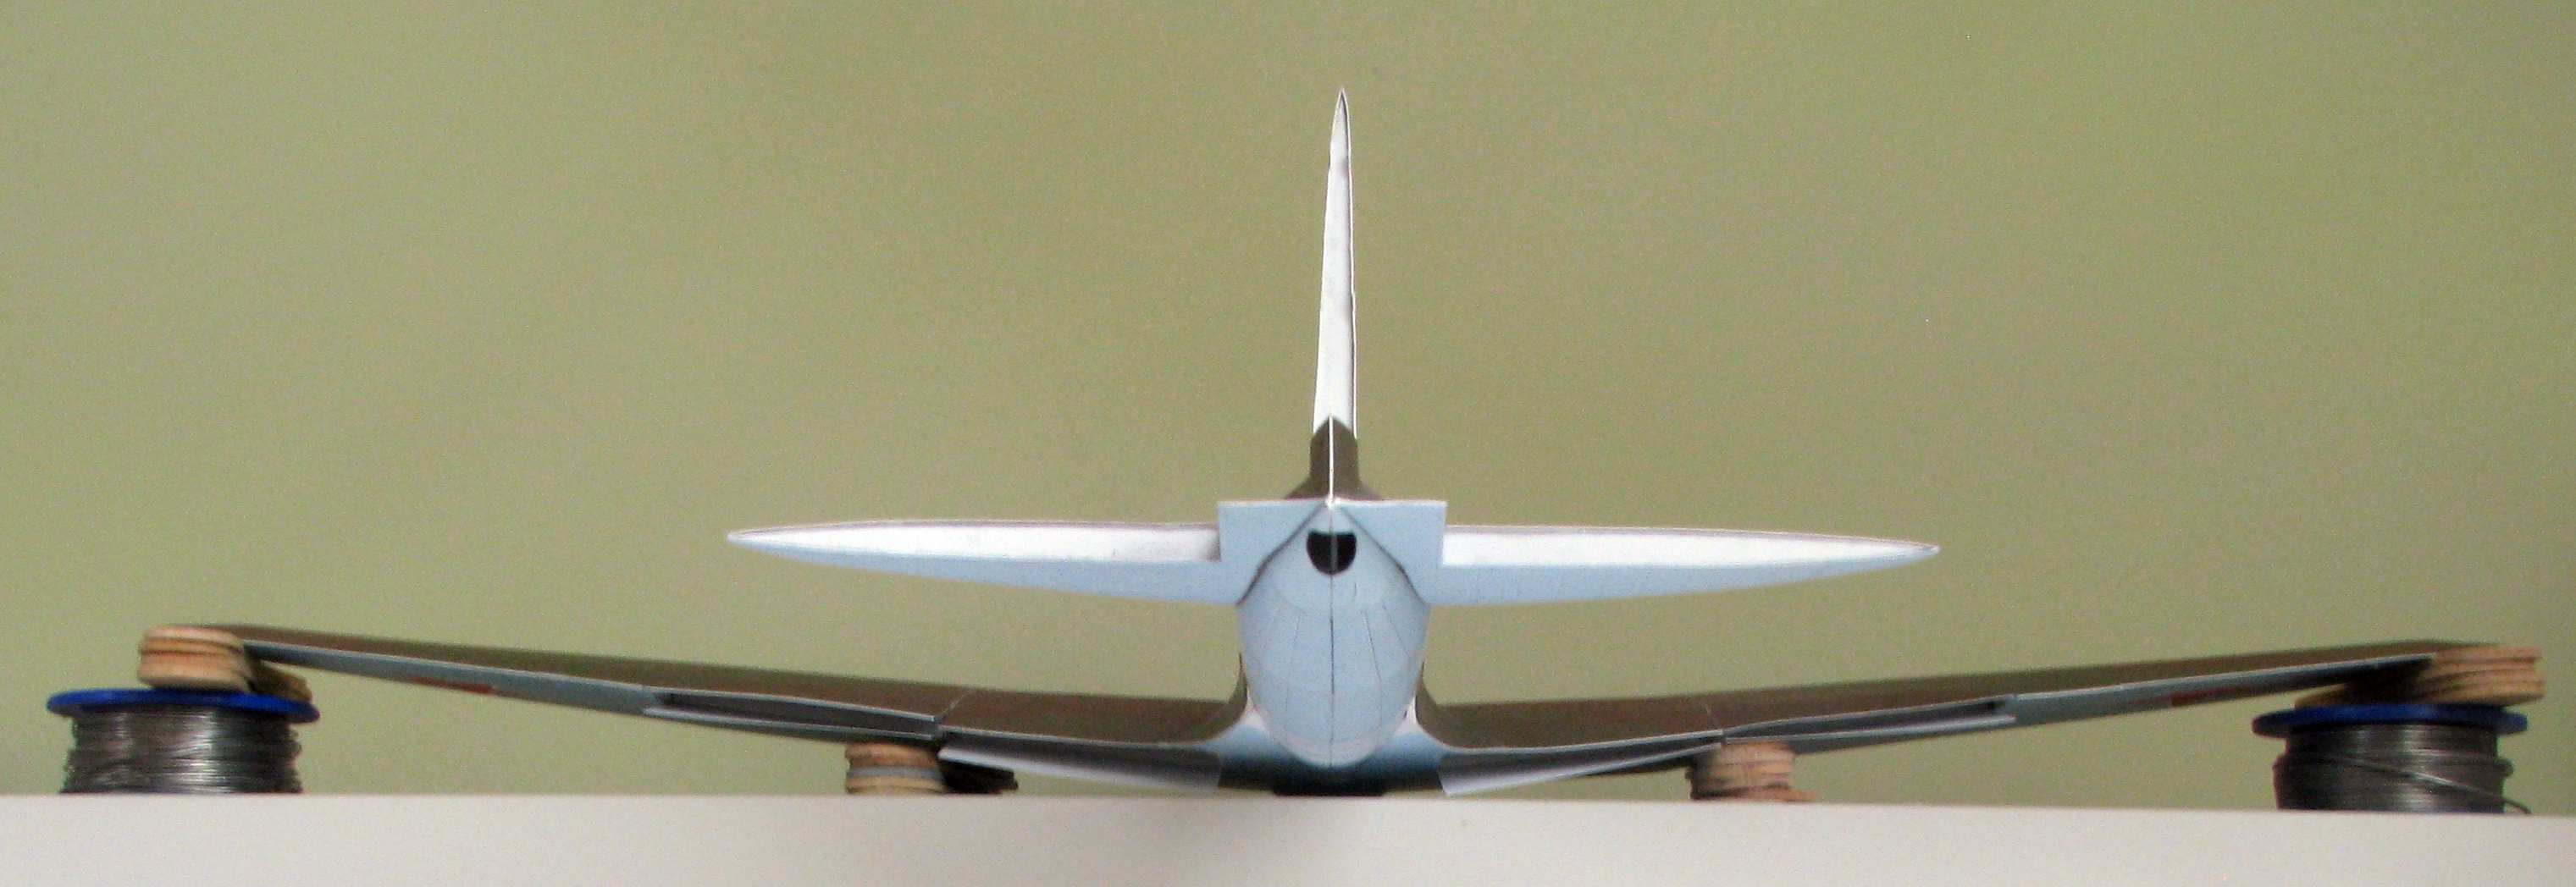
I have also constructed the motor segment with the exhaust, the air intake and rotating prop spinner. The prop blades will be installed later. The empennage is also there and it has positionable steering surfaces - a nice design feature of the GPM model.

Thanks for lookin’ and have a nice day

Paweł

Hey , Pawel .

That’s a nice looking " Stormy " there . Doc

This is truly amazing. Would love to see the completed version.

Hello!

Thing with this thread here is after TB kindly replied to my post I said OK, let’s wait for one or two more responses before replying (very sorry about that, TB!) - and those never came. Shortly thereafter I was forced to shelve the project once again, and didn’t think much about this, as there was almost no interest for this subject here in the forums. I have managed to do the inner wing portions before that happened. I hope to get back to this one some day, and then I’ll post more photos. Thanks a lot for your interest and have a nice day!

Paweł

I just subscribed anyway.

I asked santa claus for a paper corsair model but he didn’t deliver… this year.

If you decide to pick it back up, I’ll be watching.

You have a nice day as well.

T e d

Thank You , Ted :

I was beginning to wonder if anyone besides Pawel read this .I think more folks should try them .Shoot , you can get a whole forty years stash in one large desk drawer ( till you build them , that is ) T.B.

Ted, TB - thanks a lot for your comments here. TB is right, paper models are cool! Ted - if you need any help maybe I could help you find a nice paper Corsair model here in Poland?

Thanks again and have a nice day

Paweł

Pawel

The one I had picked out was a Huntly’s paper warplane.

Once I decide to order (I need to build more of my stash first) I’ll do more research. I’ll keep your offer in mind without a doubt.

Thank you!

T e d

Hello!

I have looked up the Huntly model - while it’s OK, you might want to take a look at some Polish paper models of the Corsair, they are a little more detailed, maybe you’ll like them?

This one is pretty nice:

https://www.mojehobby.pl/products/F4U-1D-CORSAIR-713944.html

This one is simpler and a better deal:

https://www.mojehobby.pl/products/Kawasaki-Ki-61-versus-Corsair.html

Good luck with you modelling projects, and have a nice day

Paweł

Pawel

Thanks for the links. I think i like these kits more. The website has other good stuff too.

I’d imagine I’d have to order several things to make the shopping worth it.

I’ve bookmarked the site. Thanks again for the tips.

T e d

Never have done a paper/card model. Have a Mustang and P-40 in the drawer to try one day.

Will keeep an eye on this when you get back to it.

That cockpit is truly amazing. I would also like to see the finished product. I am also interested in the tools you use. Thanks for posting.

Hello!

Thanks a lot for your comments!

goldhammer - let’s see when I can get back to work on this one.

ManCityFan - thanks a lot for your kind words! As for the tools, you don’t need as many as for the plastic models, that’s why I take my paper model with me, when I’m on a business trip lasting more than two or three weeks. The base is of course a pair of good scissors, then you need a sharp knife, the one with segmented and narrow blade works really well. A tube of white glue and a small stick for applying it, and a bottle of CA take care of glueing. A pair of tweezers for handling small parts, and that’s almost it. A sanding block comes handy, too. Then you often can use some wire, with good needle-nosed pliers for bending it and maybe some fine drill bits for making holes to put the wire parts into - but in a pinch those drill bits can be replaced by a needle or hot wire to burn the holes through. A fine brush and some acrylic colours can also be used. Again, in a pinch you can only use black paint. And that would do it - fits into a small pouch that can be comfortably carried in a suitcase, and the finished subassemblies are carried in a shoe box.

Hope it helps and have a nice day

Paweł

I would like to see the finished “product” of your model.

Yeah tackle this monster!

Hello everybody!

I have just completed the first phase of my move to a new apartment. In this new apartment I have set up a new workbench (more about it here: http://cs.finescale.com/fsm/tools_techniques_and_reference_materials/f/23/t/183808.aspx) and I decided that the best way to gradually break it in would be to finish that Stormovik - it’s been sitting in a box way too long.

So first, let me post the photos from 1,5 years ago - that’s when I built the wings for the Stormovik. Here’s how it went:

GPM 1:33 Il-2m3 Stormovik by Pawel

First step is to prepare the inner structure of the wing. In this case it consists of two segments each - the inner wing and the outer wing. Both are reinforced with 1mm cardboard, carefully cut out - many times it’s good to take a knife for it rather than scissors, to avoid bending the ribs - and the edges are sanded to make them smooth and to give you more glueing surface.

Thing is the mating ribs, where the inner wing meets the outer wing have to be identical to match nicely - the trick here is to hold them together tightly and sand them together - after that they are pretty close!

GPM 1:33 Il-2m3 Stormovik by Pawel

I have prepared the outer skin for the wing by carefully bending it - using the bench edge is one of the tricks here. It’s important not to create any sharp bends where they aren’t needed - and in older aircraft the leading edge of the wing was nice, round. I have also reinforced the skin from the inside with thin cardboard to make it a little stronger and to keep the ribs from showing through - that didn’t quite work out though. I still recommend doing that on most larger parts. Checking for the right fit is very important at every step!

GPM 1:33 Il-2m3 Stormovik by Pawel

It’s important to constantly keep checking the fit of the parts. Any problems spotted early enough can mostly be corrected, for example by sanding the ribs. Here, the ribs have already been fixed to the top of the wing skin, the bottom can still be adjusted some. You can also see I have decided to take the option this model gives - to make the flaps extended.

GPM 1:33 Il-2m3 Stormovik by Pawel

GPM 1:33 Il-2m3 Stormovik by Pawel

Here you can see the inner wings closed up. As I said, not everything went as planned - the wing beam shows through the skin a little - I could have probably sanded it down a little more, maybe I have used a little too much glue - now I’ll have to live with it!

I hope to give you more progress shots soon - I hope you’ll like it, have a nice day

Paweł

Hello!

Today I’d like to write a little about building the wing root on paper airplanes. Let me start with cutting the part out and shaping it:

GPM 1:33 Il-2m3 Stormovik by Pawel

As with many parts on paper models, it’s important to properly shape the part efore even thinking about glueing it. Sometimes you need a sharp edge, sometimes, like here, an edge would be undesirable - for this part you need smooth bends that can be obtained by rolling the part around various objects like pencils, drill bits and stuff like that - or by running the part around a suitable edge, like the egde of scissors or the edge of the workbench - but with care, so that the part isn’t “broken”, just bent a little, this needs some feeling. Then you have to make some test fitting:

GPM 1:33 Il-2m3 Stormovik by Pawel

As you see the fuselage, the engine and the iner wings are already put together. Now especially with parts like the wing root you need just the right glue to do it. I’m using white glue here, but one that is used for bookbinding - this glue dries transparent, can be wiped from the model surface to avoid ugly marks. This glue gives enough time to adjust the parts before seting but doesn’t contain too much water, so as not to “soak” the parts and make them too soft and to distort their shape.

After I’m sure the shape of the part is OK, with all the right bends where they are needed, I gradually apply glue and work my way along the part, from the rear towards the fron of the wing root:

GPM 1:33 Il-2m3 Stormovik by Pawel

As you can see the colours around the white fuselage bands don’t quite match. This happens on paper models from time to time, that’s why it’s good to mix some paint matching the colours of the kit and then you can do some re-touching. It’s also good to paint up the white paper edges - I’ll do that later. Here’s a close-up of the problematic spot - other than the colouring it doesn’t look too bad:

GPM 1:33 Il-2m3 Stormovik by Pawel

Here’s the underside of the model and the front-most portion of the wing root:

GPM 1:33 Il-2m3 Stormovik by Pawel

Using the same procedure I have also tackled the other side:

GPM 1:33 Il-2m3 Stormovik by Pawel

The yellow arrow on the photo below shows a spot for an air vent that I didn’t attach yet - if I did, it would cause a problem for me to build that wing root - just goes to show how important the planning of the build sequence can be. Some colour mismatch is also visible here - looks a bit like a faulty kit design, but not really a big deal.

GPM 1:33 Il-2m3 Stormovik by Pawel

That would be it for now - thanks for looking and have a nice day

Paweł

Hello!

Moving on with the wing - today the wingtips.

Here are the parts of the wingtips before cutting them out. I mean the parts 63P (top) and 63aP (bottom). A little remark - on Polish models they often use the letter P (as in polish “prawy”) to indicate parts that go to the right side of the model (looking of course toward the fron of the model). Corresponding left parts are marked with L:

GPM 1:33 Il-2m3 Stormovik by Pawel

Again, after cutting them out the parts must be properly shaped before checking them for proper fit. Here I’m using a little trick - I’m rounding the edges of the parts by embossing them with a tip of a paintbrush handle. This works better on sligtly soft work surface - in this case I have used some broadcloth:

GPM 1:33 Il-2m3 Stormovik by Pawel

The outer wing has some “teeth” prepared for the wingtip to attach to:

GPM 1:33 Il-2m3 Stormovik by Pawel

I started with glueing the top part for the wingtip to the “teeth”, of course after careful checking for fit. After a few minutes I have checked the bottom, adjusted the bends a little and then I have also glued the bottom part of the wingtip. The fit was very nice:

GPM 1:33 Il-2m3 Stormovik by Pawel

GPM 1:33 Il-2m3 Stormovik by Pawel

GPM 1:33 Il-2m3 Stormovik by Pawel

As I wrote before, I’ll mix some paint and I’ll paint over the white edges later, that will help the looks of the model a lot.

Next thing to do will be joining the inner and outer wings together. Thanks for looking and have a nice day

Paweł

Hello!

In order to comfortably work on the undercarriage, the wings should have the final geometry, that’s why I’m joining the outer wings with the remainder of the model today. The inner and outer wings end with a rib. Those ribs should be identical, so there’s no “step” at the joint. That’s why before those ribs are installed, they are sanded together (on their edge). Now after adding the wing skin it is good to sand the faces of the ribs, to ensure nice fit. Then those sanded faces are covered with glue and joined - but those joints will remain soft for some time - this is both good and bad. Good because it gives you time for adjustments - and bad because without control the geometry of the model can become something we don’t want. That’s why it’s important to put the model in some kind of improvised jig that holds the desired geometry while the glue dries. Here’s what I have built:

GPM 1:33 Il-2m3 Stormovik by Pawel

Now the dihedral of the wing might be a bit much - but that’s the way the model was designed. I’ve already decreased the dihedral as much as the fuselage spar would allow. Changing it further might be challenging, because it would involve also redesigning everything under the wing - undercarriage, it’s nacelles and so on. There’s of course the question - how much dihedral should it really have?

That would be it for now - thanks for looking and have a nice day

Paweł