Hey guys
Is there anything I should consider before purchasing this kit?, such as severe inaccuracies, fit problems, bang for the buck, you know, that whole bit…
Hey guys
Is there anything I should consider before purchasing this kit?, such as severe inaccuracies, fit problems, bang for the buck, you know, that whole bit…
As far as bang for the buck, this is a very good kit.
Fit problems, some people have experienced problems with the hull roof, and the bulkhead behind the driver.
Severe inaccuracies, depends on what severe is ?? the ammo stowage in the hull panniers is wrong, it holds 3 rounds side by side where it should be four. The radio stack next to the driver could be better.
I would consider something very obvious to be a severe innaccuracy, thanks for the info, I think I will get it, depends on the feedback I get from this thread, Also, what would anyone suggest? the DML Late tiger or the Flak 36??
I have their mid production Tiger I with interior, it’s fairly similar problems all around with that series of releases, but then again, for a fairly good price you do get a full interior.
The DML Tiger I late isn’t out yet, but it will be a superb kit, full of bonuses. The Flak 36 is a fabulous kit as well. I’d say, if you don’t have a model of either, get both, but it’s a matter of personal preference. Here are some reviews:
Tiger late:
http://www.perthmilitarymodelling.com/reviews/vehicles/dragon/dr6253.htm
88mm flak 36:
http://www.perthmilitarymodelling.com/reviews/vehicles/dragon/dr6260.htm
It is a superb kit. I have one (yup got mine at the Nats)[^] and it is beautiful comes with everything but the kitchen sink and zimmerit. I can’t wait to start building mine.
I dont have money for both, which is why I ask
get the two Dragon kits and forget the Academy kit
I recommend a pass on the Academy Tiger, unless you are prepared to do major rework to not only correct inaccuracies that you are paying for, but to scratch build and modify structural issues with the kit.
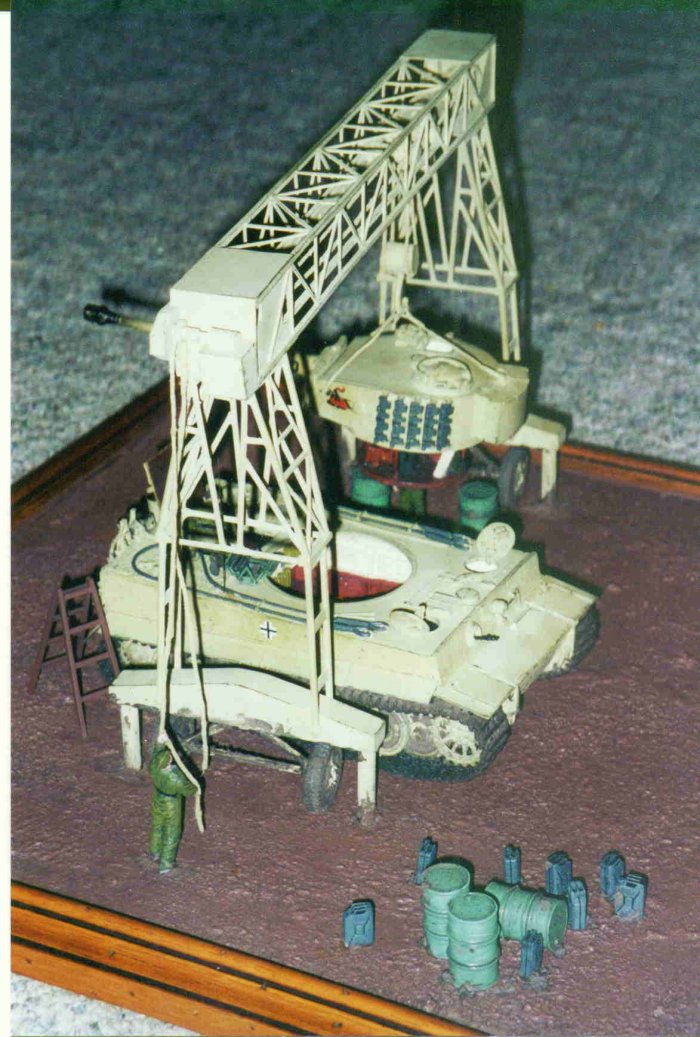
I mean, if you want to do a Tiger in 1/35th with a displayable interior, you will probably get more accuracy scratch building. This Tiger below is a long way from perfect accuracy wise, but it is an example of what can be acheived with a little styrene sheet and some balsa wood.
Steve

just do as Crocket sugests and use the Dragon kit as a base, the cooling,fans and torsian suspention are already on it for a start
[:)]I built the early version without any fit problems. I now have the early version with interior to build. The kit looks good to me, I know others have built this kit and made a good job of it. If it does need a bit of scratch build, so what; makes the model that more interesting and extends your skills.Enjoy it…Kenny[;)]
I had an article bookmarked somewhere dealing with correcting this kit, but I lost all my IE links recently. Anyone have one?
Lee Lloyd showed us what was possible (at least by him) with the interior of a 1/35 Tiger in AFV Modeller.
Here’s a review of the issue from Perth Millitary Modelling…
http://www.perthmilitarymodelling.com/reviews/books/avfmod/afvm15.htm
If you can’t locate a back issue, you can buy a downloadable PDF of the article for $2 here on this AFV Modellers back issue articles page…
http://shop.afvmodeller.com/customer/product.php?productid=16413&cat=&page=4&XCARTSESSID=ae0b874cb7861a013a2846598fa6fba6
i don’t know how good it is but i got it for $20 at a local hobby shop in illinois because the box was dented. it’s been sitting on my shelf for over half a year now, just not a tiger fan.
Hey guys
Umm, I dont have money for even two kits right now, I am planning on getting one of the two DML kits in the distant future, and I have always wanted to make a full interior tiger 1, I’m no good at scratchbuilding small detail parts, but I can do balsa wood, Maybe I’ll get the one of the Tamiya kits and save up 70$ for tank workshops tiger 1 interior, I think academys would be WAYYYYYY cheaper though
Zokissima mentioned an article on the net about correcting the kit. That rang a bell and I found I had bookmarked one. It might not be the one they had, but here’s a lengthy article by John Prigent on Missing-Lynx about it (too bad it doesn’t have any pictures)…
http://www.missing-lynx.com/articles/german/jptiger/jptiger.htm
At the end, he says…
“The Academy early Tiger I is a splendid kit, capable of being made even better by simple methods as I hope I’ve shown. The things which I’ve dealt with are minor errors by the kit designers and omissions forced on them by simple economics - to add any more to such a complete model would have pushed the price to an unacceptable level. More advanced modellers can take things even further than I’ve done by adding internal pipework and wiring, and some small fittings left out of this series due to time and space constraints.”
Since we’re talkin’ Academy Tiger interiors…here’s a detailed article by Matt Messmer, also on Missing-Lynx, about how to improve the interior of the mid-production version. This one does have pictures…
http://www.missing-lynx.com/articles/german/mmtiger/mmtiger.htm
…and he did a great dio to show it off…
Oh yeah, price wise, Great models sells both the early and mid versions for $42. If you want to look around for a better price, the kit numbers are 1348 and 1387.
The Academy’s full interior is a very good kit! The interior is not off by much and can be fixed very easy. Not even these new dragon kits are perfect. Im taking my academys interior and putting it in my new DML initial Tiger-1 because my three year old did more harm to it then any T-34’s…hihi. But the interior is still useable…hihi.I will get me another academy kit in the future.If your skills arent good enough for scratch building and you want and interior go with this kit.
Here are just a couple of structural assembly issues with this “splendid” kit…
“As you may have seen in reviews of the kit, the air filters are too shallow. This seems to be because the kit designers misinterpreted the depth of the actual engine block and had to raise its mounts to clear the torsion bars, leaving insufficient room on top for accurate air cleaners”
"Now there’s only the turret to complete. You’ll need to fit its stowage bin slightly off-centre to clear the escape hatch - I’m not quite sure whether this is accurate or if the hatch is slightly misplaced. The hatch itself, if you want it open, should be positioned to rest on the engine deck- the real one just hung open like that. Academy shows its locking bar secured to the inside of the turret, which is wrong. Cut the ends of the bar to the diameter of the hatch and fix two scraps of plastic card for the parts which stick out from each end of its housing, then cement it vertically to the hatch. "
"While fitting the plate I realised that the transmission assembly in the hull was sticking up above the hull edge, so it wouldn’t fit. I had to cut the top of the transmission down to let the plate go in place, but if you haven’t stuck everything in place it would be easier to cut off the pins of the external final drive housings, which fit through the hull into the transmission assembly, and simply push the transmission lower in the hull. "
Even John Pringent described this as a spendid kit after he made the above comments about it. I suppose it just boils down to whether you can justify the price of the kit with the amount of corrections that need to be made. Perhaps you enjoy these types of things so if you bought it you would be in hog heaven.
IMHO, Academy kits (armor) just don’t cut it.
Good luck with your project.
Steve