At the behest of several fellow modelers, I’m posting pics to show the techniques I used to make this large, complex diorama. So, bear with me while it get this all down!
Keep scrolling … I talk a lot.

4 Likes
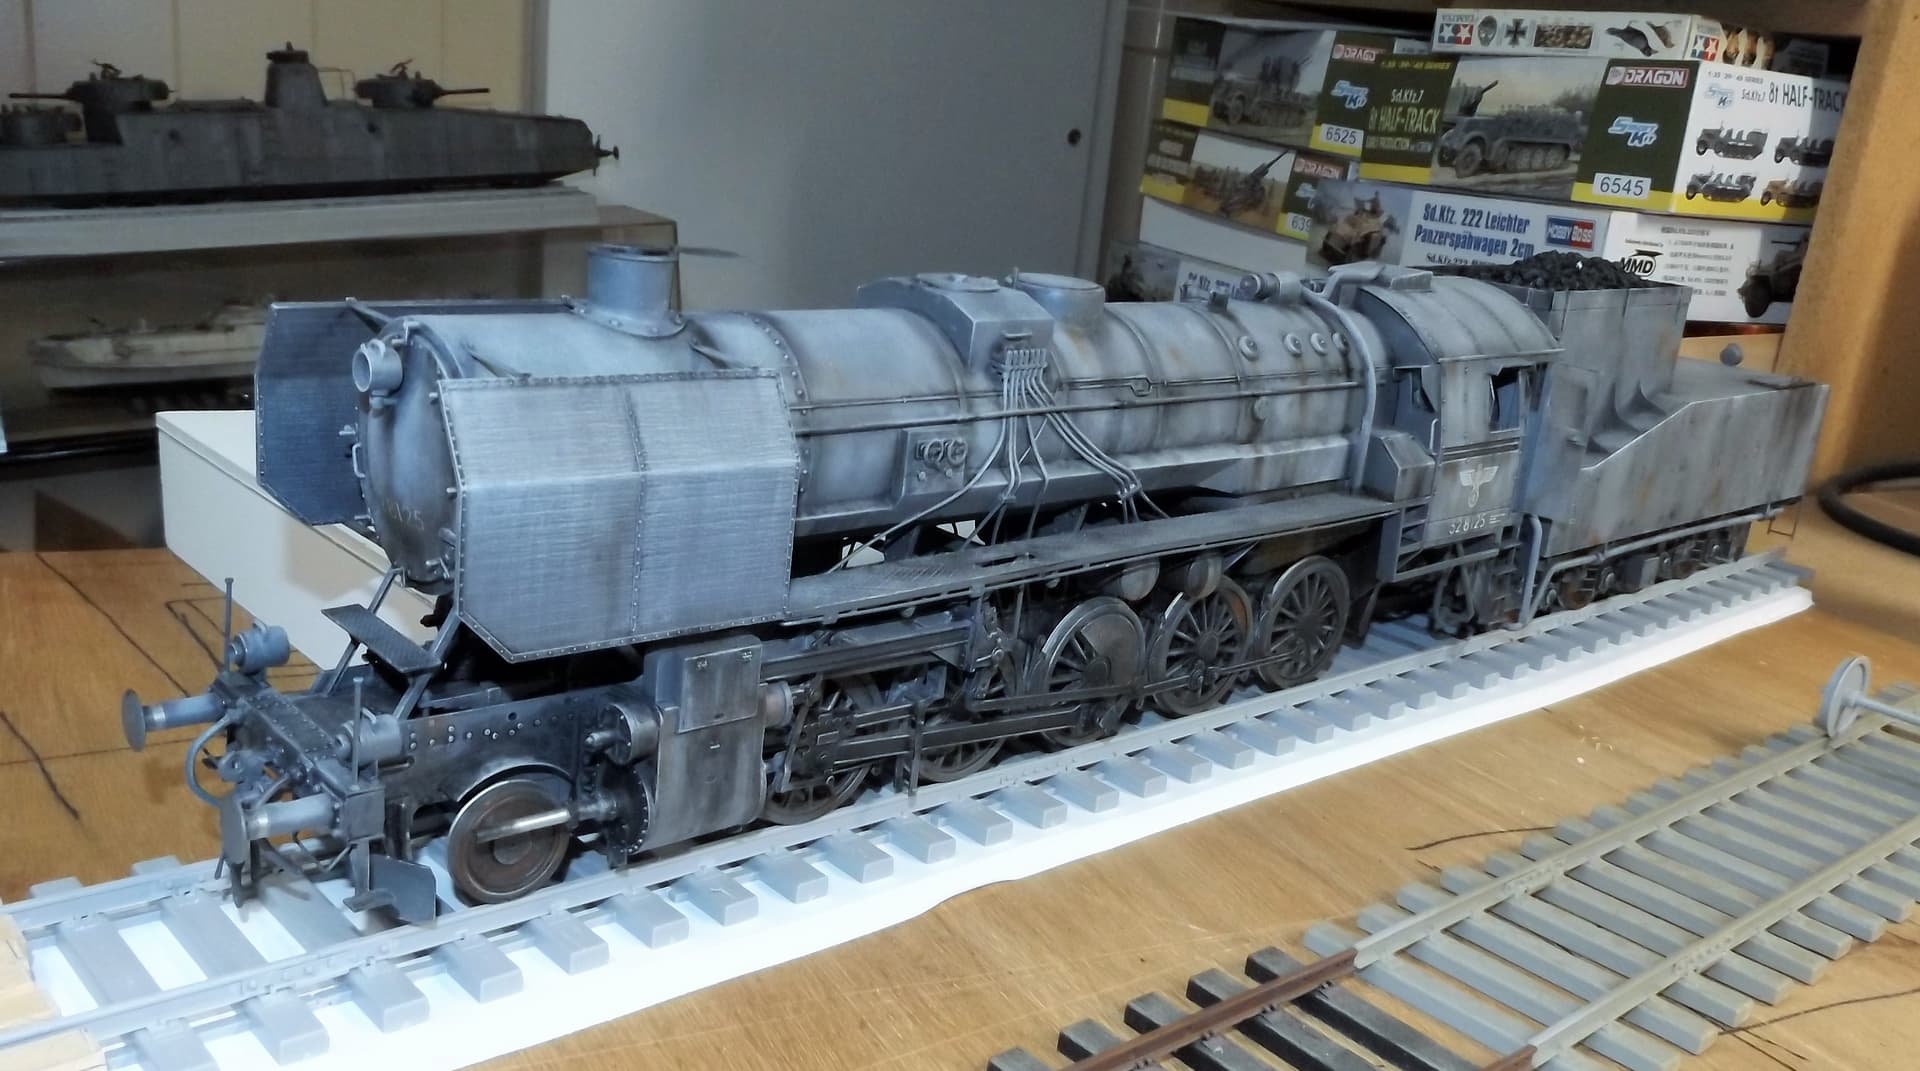
Trumpeter’s Baureihe (BR) 52 mit Steiframentender kit. It was a lot of fun; a lot of complex subassemblies ending in a great payoff. A very well-engineered kit (no pun intended). It was built primarily out-of-box, the only change I made was replacing the awful vinyl casting intended to depict the sanding pipes. I used Evergreen styrene rod. The weather boot between the tender and the locomotive was dressed up a bit with some black tissue paper soaked in diluted white glue. The load of “coal” on the hopper is Woodland Scenics “Tallus,” (crushed stone), repeatedly washed with blue-tinted black. I discovered later I had put the cabin doors on incorrectly; they open in, not out. Meh, what do I know? I’m a nurse, not an engineer.
I decided to have the locomotive sitting next to a loading platform, use two parallel lengths of track, and place MiniArt’s Railway Water Crane between the tracks. The platform was constructed with foam core board and covered with Houseworks half-scale styrene sheet brick (this is used in half-scale dollhouse construction, so it’s 1/24 scale, but the difference from 1/35 brick is small; bricks come in all sizes, anyway). The top received a generous application of Ammo by Mig Jimenez Concrete Texture Paste (great stuff), and styrene “angle” covers the front edge. The platform was painted and weathered with artist acrylic and oil colors. Much of the weathering is hidden, but I know it’s there.
At this stage I was still playing with layout and final dimensions; the base ended up being a 22" X 34" piece of 3/4" birch plywood.
3 Likes


MiniArt’s Railway Water Crane. Not as much fun as the locomotive, but a good kit. I added a length of very fine chain (30 links per inch) to the valve wheel. It seemed more realistic to me than the string provided in the kit.
The base is a wood block covered with Vallejo Concrete Paste.
Two sets of Trumpeter’s German Railway Track were assembled and painted—an exercise in tedium I do not recommend. As they were going to be angled across the long length of the base, I had to carefully cut the ends of each track run to end up with them: (1) being parallel and: (2) fitting inside the base dimensions. Because of the size of the base, there was just enough track to fit, using all of the track in both sets; I cut off about ¾” on either end of each run to the correct angle.
3 Likes
Final placement of the tracks, platform, and water crane.
Before affixing the platform, track, and water crane, black foam core board was glued to the plywood. Foam core is lightweight, cheap, easily fixed with white glue, and resistant to moisture. It can be cut and carved to whatever contours you need. I used layers of the foam core to build up the track beds, road, and other contours of the ground. While the glue dried, the foam pieces were held in place with long pins.
2 Likes

A grade crossing was added using basswood strips treated with Walther’s Weather-It solution. Recessed bolt heads were placed before installation.
2 Likes

Not wanting just a dirt road leading to the crossing, I pirated some styrene roadway from another MiniArt kit. I trimmed it to the size I wanted and added a few of my own touches, roughing it up and removing some of the stones. In my younger days, I would have laid this road out, brick by tedious brick. I’m too old, and life is too short, and frankly, the plastic roadbed is nicely detailed, anyway.
2 Likes

Cellu-Clay, a papier-mache material many of you are undoubtedly familiar with, was mixed with diluted white glue and applied to the open areas of the base. Using diluted glue rather than water aids in adhesion to the foam core and makes the material slightly harder when it dries. I would recommend wearing latex or nitrile gloves when working with Cellu-Clay in this case–it won’t stick to the gloves the way I promise it will stick to your skin.
Woodland Scenics “Talus” medium-grade rock debris serves as the track ballast. It was the wrong color—it looked too new—but several washes of black and brown toned it down nicely.
3 Likes

After the Cellu-Clay dried, white glue was brushed on the surface, and finely ground soil was sifted over the areas of bare earth. Static grass and AK-Interactive foliage clumps went on next, but sparingly; this is early spring, and a rail yard, so it’s not exactly going to be a garden spot. Once all the glue had dried, the groundwork was painted with artist acrylic and oil colors. Later, Hudson & Allen dried foliage was liberally sprinkled over the entire scene.
A collection of trackside junk was placed near the tracks; it consists of parts pirated from other railway kits, a few parts from my spares, and some scrap plastic bits, all painted with artist oil colors.
3 Likes


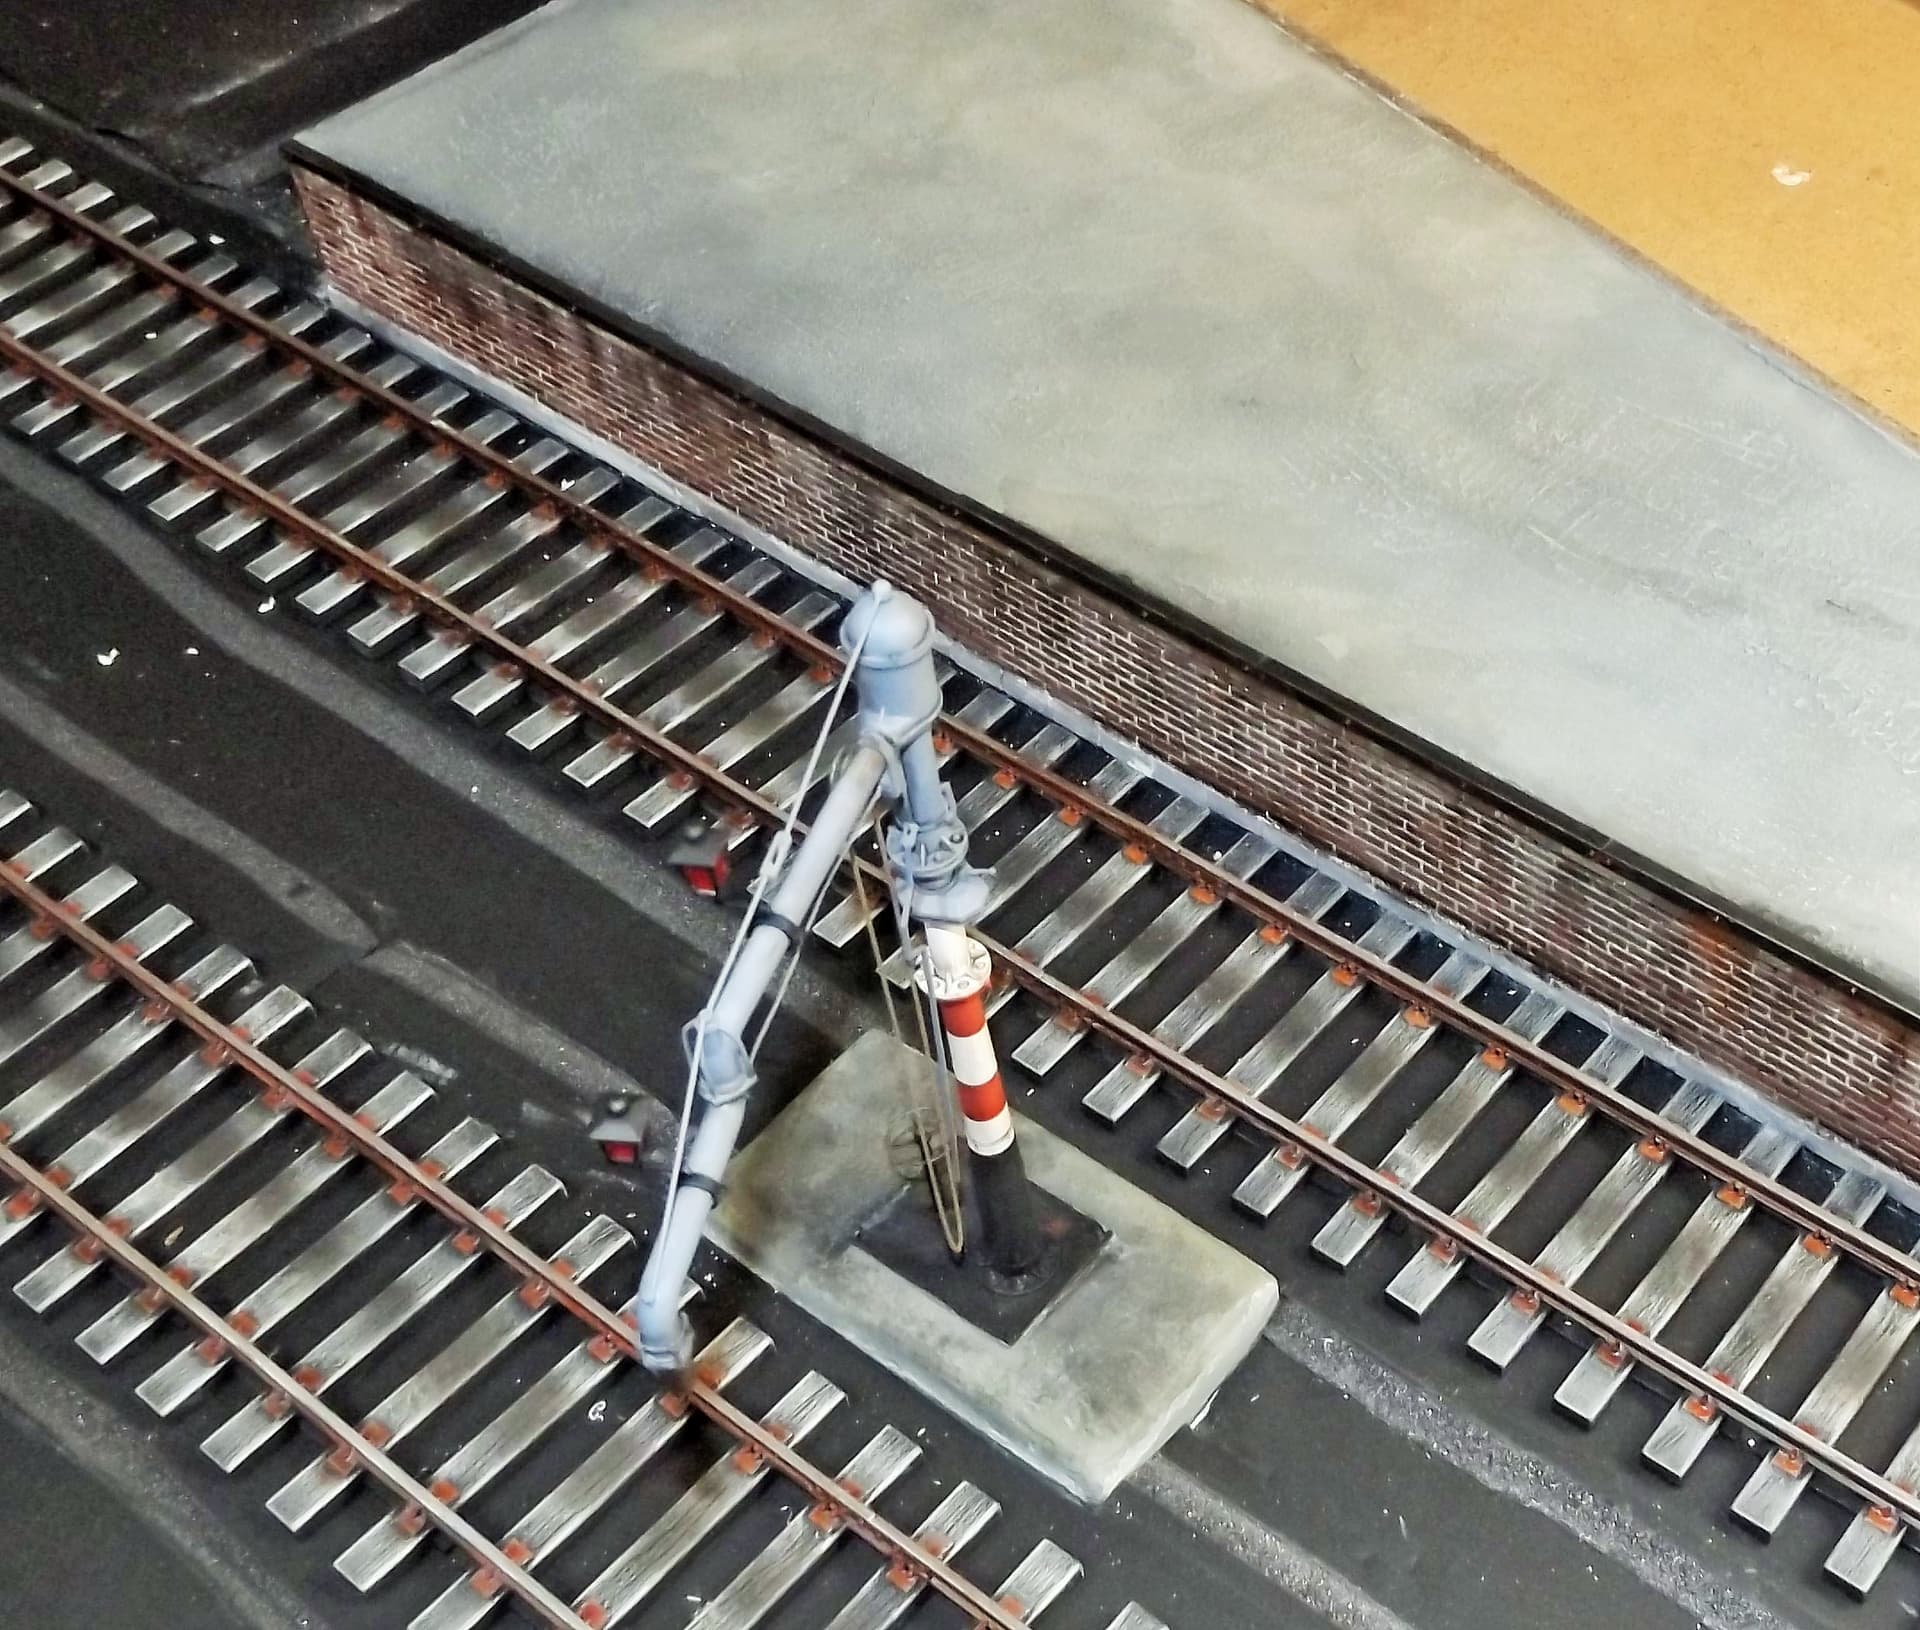
Prominently featured here is MiniArt’s Railway Semaphore. OY, this kit. If you Google “fiddly,” they show you this. It’s beautifully detailed, and the final payoff is great, but the journey is annoying. The only modification was the addition of large bolt heads to the base. It was affixed to a small plaster “pad” which had previously been set into the wet Cellu-Clay.
3 Likes

MiniArt Concrete Power Poles were glued into holes drilled into the groundwork. The drilling part was fun; I used a motor tool with a cutting bit, in order to make the holes the right shape. That big piece of birch acted like the soundboard of a grand piano. The entire neighborhood knew I was drilling into hardened Cellu-Clay. The power poles are also fine kits, easy to assemble and with several options. The streetlights came from a different MiniArt kit. The broken wires are lengths of bass fishing line, super glued in place and painted black.
3 Likes


Taska/Asuka’s M4A3E8 Sherman was built essentially out-of-box. A fine kit, featuring PE light guards; I added a turned aluminum barrel. The workable tracks are easy, with no fit issues. One nice feature is the addition of a commander’s cupola molded as a clear part; all it needs is some masking over the view ports. Accurate and easy. Stowage came from my spares boxes. Painted Model Master Olive Drab, weathering consisted of washes and old-school dry brushing. Old guys like me are just fine with the established methods. I will add, however, I’ve fallen in love with Vallejo’s “Thick Mud” pastes. Boy, do they save a lot of time (and relax, okay? Those are cans of water).
The crew figures are rescues from other projects (Pro tip: Never throw away a well-painted figure). At this point I hadn’t added the commander; he was a new figure. Our loader wears an early 1940s-vintage Cleveland Indians cap–hometown pride, after all. Oh, and that’s a baseball team in case my friends from outside the USA aren’t familiar.
The M2HB machine guns are also Asuka kits; for my money, they’re among the best available in styrene.
3 Likes

Dragon’s M2A1 halftrack is another good kit. Those sagged front tires are a problem, but what can you do? I have to say I love the way they did the track suspension and tracks. The tracks were just big, steel-reinforced rubber bands, after all. The sprocket and idler wheels are superb. I made a couple of minor corrections, including new side racks made of styrene, and the support for the exhaust pipe (given the level of detail in this kit it’s a surprising omission). The front wheels were also turned slightly. Again, it is festooned with stowage from spares.
3 Likes
This looks real familiar. Did you display this diorama at any shows over the past year or so? I’d swear I’ve seen it before, and I remember how impressive it is.
I second your tip to never throw anything out. For you who are new to the hobby, when you hear us talk about the spares box, that’s how you accumulate one.
1 Like

Zvezda Mercedes-Benz L4500A Schwerer LKW is converted to a railway truck with the Plusmodel resin kit. In reality the only parts from the Plusmodel kit are the wheels; I dislike working with resin, so I used the resin parts as patterns to scratch-build the major components from styrene. There are also a few parts pirated from other railway kits. The Zvezda kit goes fine until you get to the cab–yikes. Very poor fits, and a lot of filling and sanding. At least the clear parts fit well. I was determined to have this truck in the scene–at any cost, as it turned out. It fought me well, but I’ve not been defeated by plastic yet. I’ve not been able to find any reference pictures of this truck. I’m usually a stickler for accuracy, but I liked the look of this vehicle, and it seemed–to me at least–plausible. As for the door decoration, well … a little artistic license, perhaps. They’re decals from Peddinghaus. The tools in the bed are from various sources, and the welding set is from MiniArt. Incidentally, this pic was taken before final placement; I was advised by a welder you don’t store acetylene tanks horizontally, even in wartime.
3 Likes

Tamiya Citroen CV-11 Traction: Nice little kit, with typical Tamiya fall-together engineering. I added some interior details (a gear shift in the dashboard, door handles), but basically out-of-the-box otherwise. I did some surgery on the front axle to turn the wheels a bit.
2 Likes

The Skybow WC-51Weapons Carrier (now a release from AFV Club) was built around 17 years ago and was also just sitting in a box. It’s a lovely kit, light years ahead of the old Italeri kit (which was originally a Peerless/MAX release from the late 1960s/early 1970s). Very little extra detail was added or needed.
3 Likes
Mixing white glue into your Celluclay will also help prevent curling at the edges as it dries, if the edges are relatively thin. And it can help prevent cracking as it dries, too.
1 Like


The figures are a mixed bag. Some of them were liberated from earlier projects, and some are new. They consist of figures from Tamiya, Dragon, Masterbox, and MiniArt. Fun fact: The photographer figure was made in 1981, and repainted. Nearly all of them are modified in some way, even the dog. All are finished with acrylic primers and artist’s oil colors.
The platform litter consists of MiniArt wine bottles (thoughtfully molded in clear green and brown), a couple of MiniArt crates, a MiniArt hand truck, and a fire barrel made from an oil drum. The other small bits came from my spares boxes.
I found MiniArt’s “Pigeons” in my local hobby store, and by the gods I had to have them. You must give MiniArt credit for coming up with this stuff. 1/35 scale pigeons? Perfection.
I dug into my diorama spares and found several oil drums. Since these had been in various other projects over the years, their paint shades varied widely; together, they make a nice display at the end of the platform.
4 Likes