I want to make them. I know you can use a pncil but are there other methods?
Un, i don’t know how well this would work, but:
try maybe cutting chunks out of the model with a knife? Matbe? I dunno.
Depending on the base color you want to reproduce, you have a couple options. If you want to show it scraped thru to the steel underneath, an artist pencil works nice. You will need to spray it with a dull coat to kill the shine. You can also use a toothpick or real fine brush dipped in paint to do chips to the base coat I usually do a combination of the two to show different depths in scratches. One thing to keep in mind is to avoid falling into a pattern when applying. I did it once and then only after realized that all my chips on one panel looked too uniform and all went exactly the same direction
FSM had an article a year or so ago about a ‘salt’ technique. In summary:
-
First step is putting down the color you’d like to show through the top color(s). Only paint sections of the model you want to show wear and the chipping effect. Let dry thoroughly.
-
Mix some regular table salt and a little water together to make a slurry
-
Apply salt slurry to pre-painted sections from above. Let dry.
-
Airbrush top colors as desired.
-
As the top colors dry, begin flaking off the salted portions of the model with a toothpick, paintbrush, etc.
By noodling with certain variables, such as drying time for the salt, airbrush air pressure, top color mix, drying time for top color, etc. you get a lot of different effects.
i use a really fine brush and/or toothpick and “paint” on chips with Tamiya Gun Metal… you may want to add a little black to it if you go that route…
That salt thing sounds cool.[:)]
Hobbycraft T-72. I used the “salt” method to apply and chip the paint on this model. Standard Morton table salt applied with a brush and water in the areas I thought needed it. When I do this again, I will apply rather thicker in certain areas and much lighter in others.


On this Trumpeter M1A2, I used popcorn salt which is smaller grain than standard table salt. Unfortunately it also dissolves rather quickly. However, it worked well in the end as it still had enought texture to do the job of making irregular shaped chip areas.

For a good article see
http://www.missing-lynx.com/rare_world/rw03.htm
Be careful with chipping as it can easily be over done. Some things to remember, Red Primer is tougher than most people think and more often than not, the paint chip only goes to the primer not the bare metal. The German WW2 armour red brown primer was almost an epoxy and all but scratch proof, although most contemorary pictures are of vehicles open to the elements for 60 odd years and not an indication of what they really lookedlike. Here is a pic of an actual worn and chipped fire extinguisher, as a close an example as you can get, of how little bare metal shows up:

Most chipping would be on very high traffic areas such as the lip of hatch openings, tread plate in fighting compartments such as the floor of the turret of an M10, Nashorn, Su-76, etc. The hob nailed boots wear paint of over time.
Also rolled armour plate does not have the silver colour that is often used. It is a dull dark grey colour. Deep chips should be done with a dark red colour such as Revell #86 and perhaps with a dark graphite pencil for places with extreme wear. Even then, the graphite should have a little red primer showing through around the edges as the chip is rarely perpendicular to the face of the plate (paint the chip with red-brown, then use the pencil to mark the centre of the chip.) I prefer not to use pencil as it produces too much shine.
Hope this helps.
Rust streaks usually form where fittings are welded to the armour plate, as the steel welding rods are of a less dense metal than plate.
Rubber cement works really well as well. I, however, question the chipping of paint on armor/tracked vehicles. I spent 11 years in the military 9 of which were in mech infantry, armor and artillery units and I have never ever seen the equipment in such deplorable paint (both allied (US) and captured)as is modeled.
Ch
I have seen with my own eyes in Iraq and many, many more vehicles in referrence books, especially Iraqi armor that had the most abominable paint maintenance. They do get jacked up bro.
petbat,thats a cool tank,whats its history?
Please take a look at this Famo & Sd. Ah. 116 :
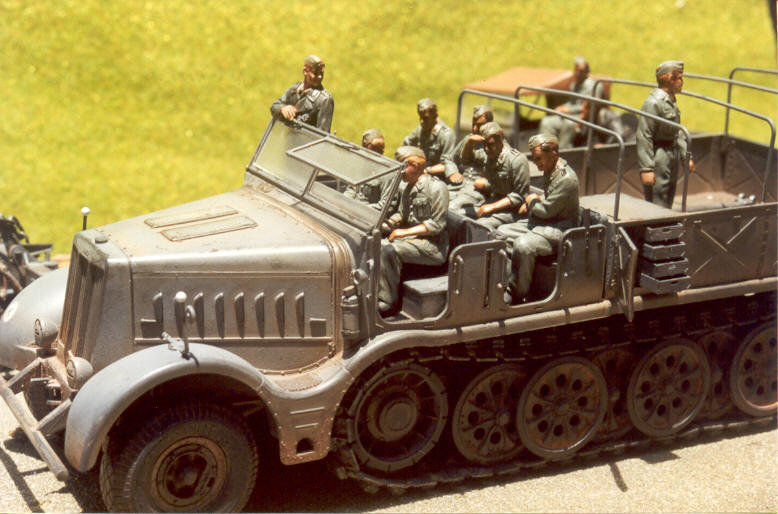
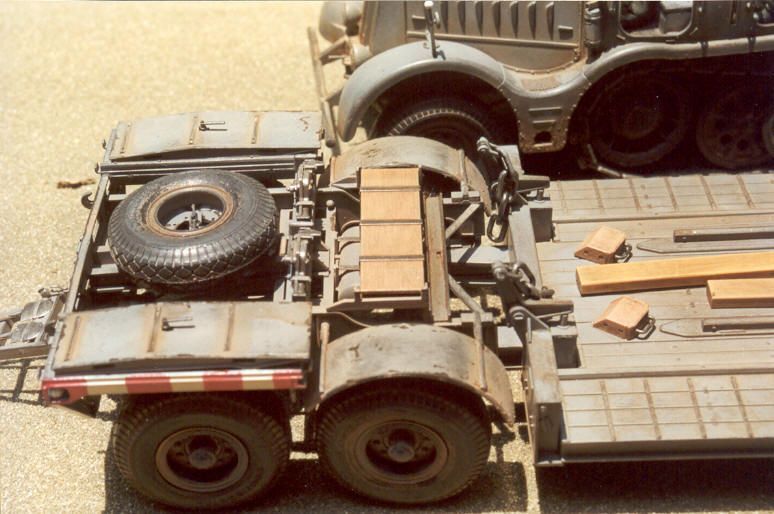
If you like the paint chipping, you may read about how the modeler painted it in this article : http://www.falconbbs.com/famo-eng.htm [:)]
I use Maskol. It’s a limited tool because its hard to use to make a small area look heavily chipped. I find it difficult, but not impossible to put it down in a blob the size of a grain of salt. I use it to make chips that are a little larger. When I’m done painting over it, I just rub it off with a pencil eraser.
–CAVEAT: War stories enclosed. Read at own risk–
Our tracks in Korea looked downright terrible because of the weather. In the winter, we were under water restrictions, meaning we couldn’t wash the vehicles as much as they needed it. This meant things like minor fuel and lubricant spills got to soak into the paint, even after careful cleanup. As a result, paint scruffed up and chipped off with regularity. The skirts on our M1s looked as if somone had taken a scouring pad to the paint before it dried in some cases. I remember at one point we sanded down the really, really bad areas and painted over them with appropriate colored Krylon spray paints purchased from the PX. Not exactly Monster Garage perfection lemme tell ya.
Our tracks in Op Desert Storm looked pretty bad too, for numerous reasons:
-
The paint used was of a lower quality.
-
The paint was opened to the elements for an entire day as painting went on…
-
The painters just wanted to get it on there and get as many vehicles done as possible. A such, they weren’t exactly careful about how it got applied or where it went for the most part
-
It had numerous types of debris inadvertently mixed into it at times, from soda pop to spit to sand.
-
The paint was never given sufficient time to dry before the vehicle was sent off into operation, nor was the vehicle kept out of the elements after being painted.
Take the above, add in sandstorms, a few rain showers with sand mixed in for a good “wet sanding” feel, and some glancing blows from lousy gunnery skills, and you have yourself one beat up, scuffed, scraped, and chipped paint job. By the end of the ground campaign, a number of our vehicles had large swathes of paint missing from them.
This says nothing about the deplorable paint jobs on the Iraqi vehicles we shot at or the Syrian vehicles that worked near our sectors. Let’s just say that vehicle maintenance doesn’t seem to be a strong suit for some non-U.S. military organizations.
In my unit, equipment was kept up to pmcs standards both mechanically and cosmetic. If there were parts that could be damaged but not effect the vehicle, it was removed and not replaced, strengthened if contributed to the vehicle. We kept our vehicles well maintained as there are no Pvt Snuffy armored vehicle rental agencys. I still disagree on the extremeness of the weathering having been around equipment at Ft Riley and Ft Carson or while in Germany.
Ch
This is a German WW2 fire extinguisher of the type common to most tanks and halftracks 1940-1941 onwards. Who knows where it came from, could be anything. The handles on the side fold down around the canister, and are often mistaken as some sort of buckle by modellers. Usually a yellow or white instruction sticker was affixed to them, but that has long since gone off this one.
This pic was posted on another forum some time ago, when discussion took place over whether they were painted red or not. Obviously this one was green, and general concensus is that red is not approriate for german Extinguishers despite what is often seen in diagrams. Early ones were slightly different in shape and were painted grey. The latter ones were green but sometimes oversprayed in yellow or camo.
Scorn, could you describ this method in details, I still do not understand how it works. thanks,t
What I did for my M1A1, is I sprayed silver spray pint enamel on the botome and then painted the desert color on top, and when it diried?
I took a sharp object to subtlely “chip” it by scraping. I will be too unreallistic ifthe silver is too shiny, so you might wann put flat coat over it.
Every time I’ve tried the salt method I’ve ended up with white salt stains on the kit. It ruins the appearance unless I paint over it again, which obviously defeats the purpose. Anybody else have this problem?
Well, not to belabor the point, but “cosmetically pleasing” and “well-maintained” are sometimes mutually exclusive. An untrustworthy car salesman can easily hide bad maintenance or serious defects with some cosmetic touches and a chinzty, cheap paint job, for example.
Our vehicles LOOKED rough, as I described, but they were well-maintained, always operational, and we managed to put steel on target when ordered to do so. That’s all that mattered, looks be darned.
Never hurts to have an example either.
[img.nr]http://image18.webshots.com/18/4/28/11/212142811YebcRd_ph.jpg[/img.nr]
![http://image18.webshots.com/18/4/28/11/212142811YebcRd_ph.jpg[/img.nr]](http://image18.webshots.com/18/4/28/11/212142811YebcRd_ph.jpg%5B/img.nr%5D)