I only got the last one too
Hmm, they’re showing on my machine, I wonder if the pixels are out of your machines range
Hello folks,
Hope this post finds you all well. Me, nursing a very serious shoulder injury, not looking forward to the surgery coming up (way too old for the job I have, very physical, need to leave it to the yunguns, but I digress), but it may give me some time to get back to Connie. At any rate, I modified my channels based loosely on Evan’s work except I reinforced the entire underside using .60 Evergreen and took his advice on notching rather than drilling holes for the deadeyes, it is clearly the way to go. Additionally I added ribbing to the boats as well as a keel and still have the rudders and oarlocks to add. Pics to follow shortly.
Now I will start prep to step the lower masts and and bowsprit. However, and this question is for Evan or Arnie, I am going to be using the Blue Jacket deadeyes but going with the boxwood blocks by Syren.com and basing the rigging on Blue Jackets plans. The problem I have is the plans as they arrived from BJ do not include a breakdown of the various blocks, single, double, triple, hearts, open and closed, needed for the build and it seems you Evan mentioned your plans had just such a list. If so, would you mind sharing that info? I will be using 1/8 blocks instead of 3/16 as the larger size will allow slight reaming to accept thicker cordage, and as is evident from my ring bolts, slight variations in scale do not bother me much.
Thanks in advance, looking forward to when you will begin posting more pics of your progress, it’s been a while.
Dan
Hello all, been awhile, shoulder surgery and other “events” have prohibited me from posting lately.
I thought long and hard about what to do regarding the rather flimsy channels, ultimately going with a combination of Evan’s and Randy’s suggestion. I used the original channels but reinforced the underside with .80 sheet styrene, and further reinforcement where it attaches to the hull. Evan had suggested notching rather that drilling holes for the deadeyes and the logic of it dictated I follow said suggestion


A question, the kit lower masts, are all cast with iron hoops, however Marquardt’s Anatomy of the Ship, page 93 clearly shows in the mast drawings and lists rope wooldings, as well as mast hoops. I really like the look of the wooldings and am curious what the concensus is regarding this subject, I’m turning all other masts from cherry but the lowers will be the kit pieces. I can’t find a definitive answer on whether wooldings were used circa 1812, any opinions? Professor Tilley, I’m looking at you.


I wound up having to cut the damage bowsprit off just past the boards and using a cherrywood dowel as an internal splint, splice the replacement piece on, after adding more material to the end in order to pin the martingale in for added strength.

Next I bent a piece of steel wire to match the dolphin striker, hollowed out a bed for it, and layed a piece of .020 styrene over the repair, note the piece of doweling extending past the bowsprit to ensure a good attachment point for the matringale.

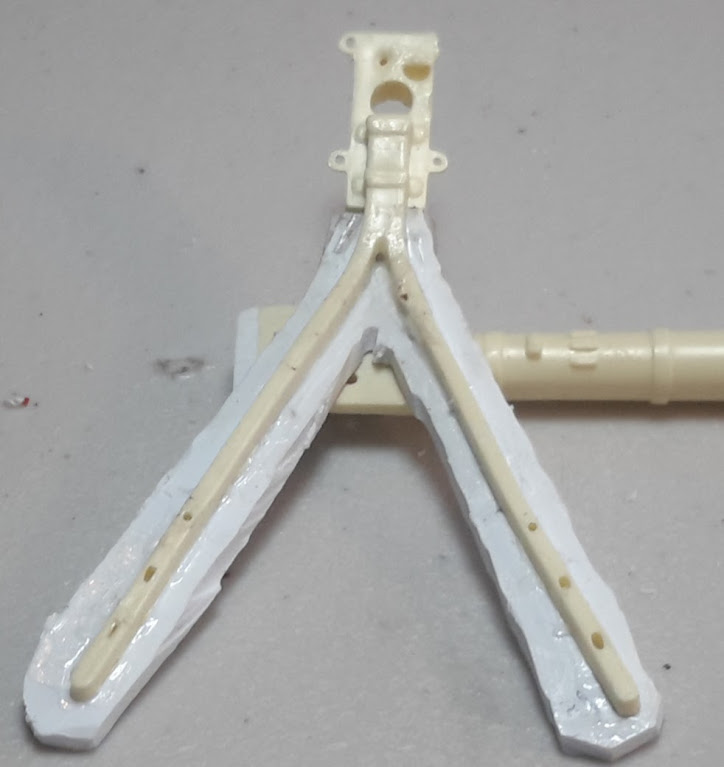
Next was to trim down the sandwiched piece and prepare for paint
Next was brass reinforcement of the lower dolphin strikers, out of scale now but breakage is now not a serious issue
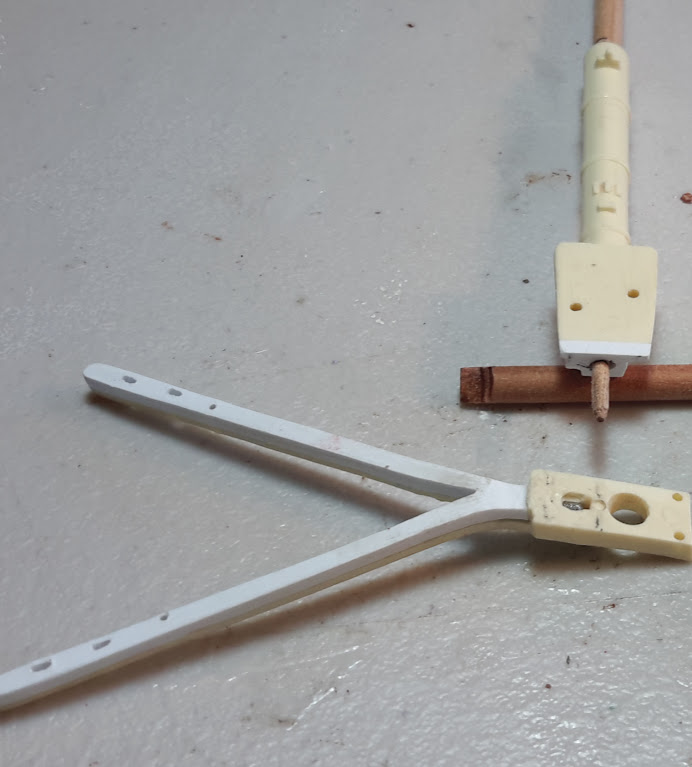

This was way more work than it should have been. But in the end, there is nothing worse than breaking these delicate parts hanging out there for the whole world to bump against and reduce you to tears at the thought of having to repair!
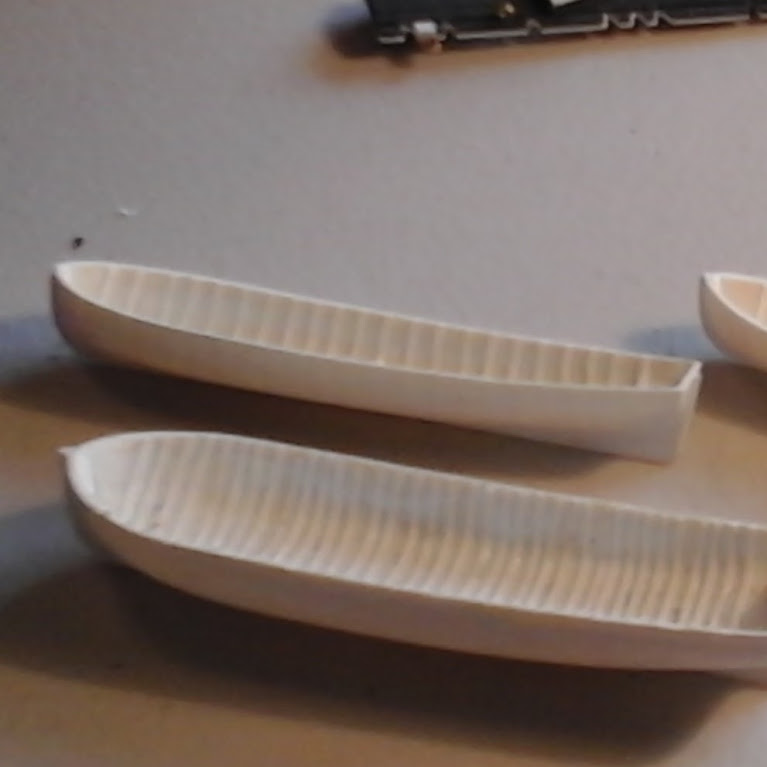
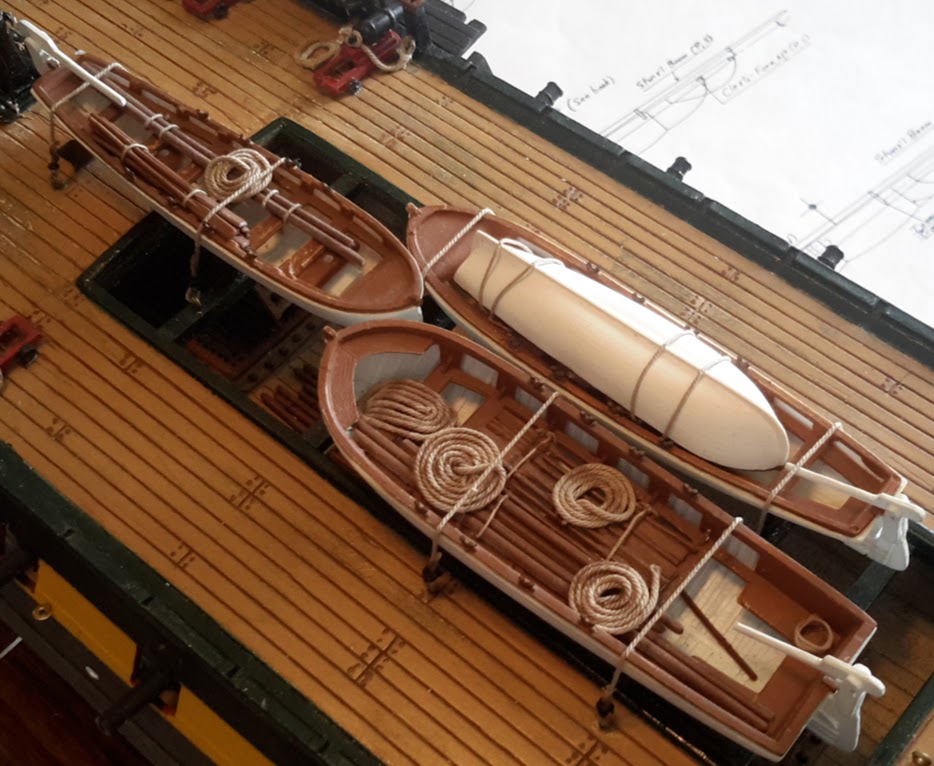
Still attempting to catch up on this blog, prior to my bowsprit disaster, I had spent some time modifying the existing boats as they will be the ones I use, including some ribbing and keel board
Added tiller assembly and some other details

The time finally arrived to replace the temporary 2x4 base I had been using due to the fact that soon the jib and flying jib will be installed and it would be too difficult to replace the base with those pieces in place. Blue Jacket’s base is ridiculously long and since woodworking is one of my great passions, I decided to make my own base out of white oak that will only stretch the length of the hull.
2 light coats of Dark Walnut stain and 2 coats of satin finish urethane and I think it will work. BTW, the dining room table it is sitting on is also my creation [:D]
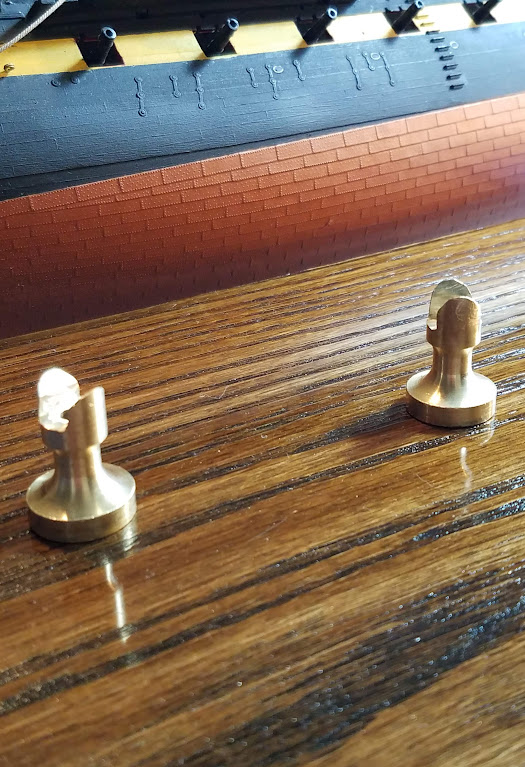
The Blue Jacket pedestals needed to be trimmed down to fit, fortunately my Revell kit had the bosses to mount it to a pedestal molded in so it wasn’t too challenging
Final assemby looks pretty good, will have to remove the base one more time however, in order to spray the copper down with a weathering solution, as well as weather the rest of the hull




Having followed Evan (Force9) with great interest, I decided his approach to the Charlie Noble and capstan, as the kit provided ones are woefully inadequate. The Charlie Noble was a a breeze in terms of construction, getting it look aged and a little worse for wear involved a heavy, almost sticky flat black, tying off the guy wires at this scale was a pain, a single malt night for sure!


I really liked the way Evan’s capstan he built for the spar deck turned out however I did think the base was a little too small diameter-wise even though it does match the Hull model. I decided to have a base equal in size to the drum cap, with a taper toward the whelps. I used Evan’s method for creating the drum heads however I used pine for the whelps and cherry for the center spindle, and finished them with a diluted leather.
I also put a cross-wise sheet of styrene down and scribed planking in to represent a re-enforced base to handle the stresses the decking here was no doubt subjected to, for the bars, at this scale I simply snipped some of my spare boat oars down and likewise applied the diluted leather, my wont is to represent a ship months at sea and therefore a little more weathered, repainted, weathered again. I hope I am achieving this.
Professor Tilley was correct, cherrywood is the only way to go!
Stark contrast between the kit piece, the Blue Jacket piece (anyone need one?) and the wood/styrene one that will go on the ship

I filed the whelps down once the were in place, just seemed easier, next was diluted leather with an eye to weathering, same for the rods, and mount to the re-enforced deck


I have to admit Evan has been a huge influence, it is further evident in the ship’s bell, I merely copied what he built. There seems to be no super clear consensus regarding its location in 1812, but methinks close proximity to the helm and binnacles makes the most sense, especially for my purposes as I am rigging my ship with the boats placed according to the Revell plans which makes positioning the bell aft of the Charlie Noble impossible, plus there is ample room to mount it on the coming of the hatch just forward of the helm and binnacles


AOS,
First, you are doing a marvelous job. Coincidence had our two posts next to each other for a day or so. I also have read through Evan’s blog several times and “copied” quite a few of his ideas as well. You are a bit ahead of my build, as I am still working on finishing out the gun deck cannon rigging.
I have a few concerns over the dolphin strikers as well. My first attempt at this (35 years ago) resulted in breaking those twice. My bigger concern is that if you look at the plans from the museum and also those in the “Anatomy of the ship” book, the angle and arrangement for the strikers is different than the one provided. I plan on scratch building one with the proper angles and also “beefing it up” a bit. Liked your idea of running a stiff wire in there. Also thinking about brass square stock. Tougher to braze metal together, but I won’t be breaking them!
Again, fine workmanship. I shall be following along.
Bob (Luvspinball)
Thanks Bob! This is my 4th 1/96 ship and dolphin strikers and the thin wimpy little top gallants are absolutely the bane of these kits, I’ve repaired and splinted them on Cutty Sark so much it’s downright embarrassing, so while out of scale now I am reasonably confident it won’t break so easily. I wish I had taken more photos of the process, the wire runs all the way to just under where the jib comes through and terminates at the bottom just above the sheave holes. At that point there is serious weakness due to the sheave holes through the strikers so I banded it with brass and filled the seams with Milliput. It came ok but not with the same thin elegance of the unique look of the original, oh well [:^)]
Anatomy of a Ship has been roundly critisized on this and other threads however I do use it for reference quite a bit. I think the look of the dolphin striker in the Revell kit and the diagrams in AOS as well as the Corne painting clearly reflect a completely different look from today’s version in Boston. Additonally Marquardt lists woldings as part of the structural bracing of the lower masts in addition to iron hoops which makes sense to me as well as adding a detail I don’t recall seeing on other models. Plus the eyebolts for guy wires for the Charlie Noble, which Evan likewise included on his magnificent build. Methinks I will research the woldings more before I actually add them but I definately am leaning that direction.
This site as well as a few others, have really opened up a whole new world to modelers like myself, who heretofore, at least when it came to sailing ships, buillt OOB. I’ve built dozens of cars, modern warships, and aircraft that were modified, including the famous diorama of the Revell B-17, but the skill level of the cats here, particularly Even and Arnie60, just blows me away and I find myself pushing my skill level because of it.
I have been at this kit just over 4 years, 392 logged hours, a lot of it just research, and I’ve yet to mount a mast or start rigging anything except the guns. It has been more fulfilling than any model I’ve ever built. I retired from my 2nd career at Delta Airlines last year and thought I would have more time for this build, Alas! When you are empty nesters and you and your bride of 37 years have lifetime free flight benefits anywhere in the world, it is amazing how quickly time runs away from you!
Happy Modeling,
Dan
Dan,
Coincidences abound. I also used to build OOB up until I started scratch building and modifying parts for pinball machines. Spent a lot of time dreaming up ways to light up things as well - hence my desire to light up the Connie. I also decided to spend a considerable amount of time doing more (any) research this time. And while my build may not end up being entirely correct for the 1812 period, it will be something I am already quite proud of. It will enjoy a prime location on the end of our bar (it’s a big bar). I plan on adding a few more nautical elements to give it some flair (sextant, compass, ship’s bell, etc.). I easily have probably 200 hours into this so far, and I haven’t cleared the gun deck or touched a mast or spar yet either. But I am in no hurry. A job worth doing well takes time.
My wife and I will be married 38 years this June. And while I don’t have pilot’s status, my wife has flown well over a million miles, and I do enjoy getting the perks of her upgrade status. We plan on spending a couple of weeks in Europe this summer thanks to her miles.
I will be watching your progress. Glad to see you back building.
Bob
Thanks again Bob, My thoughts on building any model historically accurate for the era it is supposed to represent is a little different from most I think. I grew up in Pasadena, CA building hot rod and famous race car models in the 60’s and 70’s sticking like glue to the original look, same with aircraft and modern warships (Enterprise, Arizona, New Jersey etc). This was because there is no doubt with these models what they looked like, because for the most part, they are still amongst us and contemporary with us.
With historic ships like Constitution, Cutty Sark, Victory and so on, it is far more subjective, especially I think Constitution, as she has gone through many phases in her life, methinks the recieving ship era forever changed the way she would look in the future.
That said, I think attempts to depict during whichever period we choose to, is somewhat open to interpretation based on documents, paintings, and written descriptions of the time. In Force9’s case I think he is coming as close to an accurate representation of her in 1812 as I have seen and it is clearly his intent. Myself, I want to represent that era but not to the point I can’t get a little creative, for example my belaying pins are not going to be blackened, I like the brass look, which will darken naturally over time, the same with my oversized out of scale eyebolts from Jotika. Plus I am not overly concerned with the decking reflecting a lighter colored heart of yellow pine, I prefer a somewhat more weathered and splotchy look, typically a working naval vessel would present a little cleaner and more highly maintained, but I am going for the look of a working vessel returned from months at sea where maintainance was done but months at sea still took their toll. I mentioned before that if everyone goes for the exact same look, we lose individual interpretations, where’s the fun in that?
Dan
BTW, I can’t seem to find any photos of your build, gotta a link?
Dan
Hello Dan!
Great work on your build… A wonderful project to follow. Glad to see you back at it and posting progress. I’ve been fumbling around with my build in the background, but haven’t gotten everything re-organized enough to start posting again. Hopefully I can take a cue from you and Bob and get my blog in forward motion. I’m glad you’ve found inspiration from my project and others on this forum - it is a fantastic environment for fostering discussion and triggering new ideas. I especially like to see other folks enjoying the research and micro-decisions involved in scratch building… regardless of the extent.
Thanks for the insight regarding the delicate Dolphin-Striker and other spars. I may soon be grappling with those issues myself and it is good to see some solutions posted. I agree that the sources vary a bit on how the Dolphin Striker should be represented, but it is consistent that it has a “double” pronged set up. That seems to be a general characteristic of American Navy ships in that period. Probably not quite as widely spread as the Revell kit has it if the Corne paintings and the Hull model are followed.
I’ll be actively following your progress.
Cheers,
Evan
Evan! I am so happy you are not dead! (ht Indiana Jones [:D])
I appreciate the props, as you can see, while your work has been a serious influence, my desire to represent a less than pristine, well weathered ship will differ from a lot of modelers. Your build, (and Arnie60, where oh where is he?) really helped me to this point.
Regarding the bowsprit, I have managed to break EVERY SINGLE ONE on the 1/96 kits I’ve built, Cutty Sark must be a record, at least 5 times. my modeling buddy who shares my hobby shop with me suggested the steel wire insert, I came up with the brass banding, I just wish it wasn’t so out of scale now, As far as the spread on the strikers, the Corne painting does seem to agree with the spread in Marquardt’s AOS, not quite as wide but certainly more accurate the the current iteration. my problem will be the fair leads due to the brass banding.
I know your locating the ship’s bell just aft of the Charlie Noble works with the resin boats from Blue Jacket, however, seeing as how I am using the Revell pieces which considerably crowd that deck space, locating it just forward of the helm makes sense, especially since it seems to me the bell, used to signal the crew beyond the bo’s’n’s pipe, would logically be located near the helm.
I am particularly happy with the base I built, not too dark, and not overlong like the BJ piece, all in all with my time constraints, (my wife is loving the free air travel retiree thingy) I am not too disappointed with my progress, the broken bowsprit occupied WAAAY to much time. I should be starting the Jibs next week and then the real fun begins, thanks to you and Arnie I am not using the kit deadeyes, far too pathetic for the effort I’ve put in.
I know I speak for everyone here when I say we are looking forward to you getting back to posting your progress.
Happy modeling!
Dan
So I decided to take a little break from detailing the spar deck and face the inevitable, the yards, spars studding sail booms, jibs, and spankers.
As I have stated, I reinforced the lower yards and lower masts with dowel inserts so I plan on using them, the rest, for the most part not so much, simply too wimpy.
I will be using Blue Jackets superb template and turning pretty much everything from above the upper masts including the yards and studding sail booms, and adding the skys’l yard Revell omits from its kit using cherry doweling, Thanks Professor Tilley for the advise.
This will take a while but it will be a nice break from the work on the ship itself especially since it is still too cold here to spray the weathering solution on the copper hull, which must be done before I start rigging the jibs.
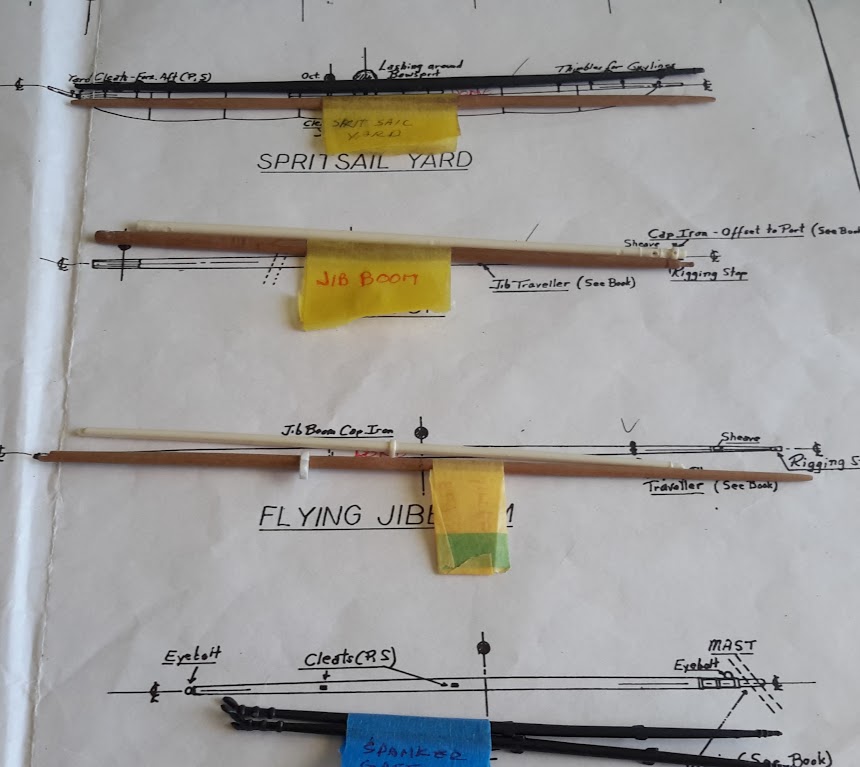
I took all the Revell pieces, labeled them and marked them according to the BJ plans, the ones I know will be subject to breakage will replaced with cherrywood pieces

I’ve already turned the jibs and spritsail yard as you can see the scale is quite different from between the 2
AOS,
Since you are making your own yards, will you be going with parrals?
Bob