Hey guys
I’m working on that old Monogram (now Revell re-issue) P-61 Black Widow kit, 1/48. This is now the 2nd model I’ve had this problem with, which is this: when I test-fit the wing to the fuselage, there is a huge gap (probably .5 mm) between the two. The mating surfaces of both wing and fuselage look parallel to me. What could cause this? Is there a way to fix it? Or am I stuck with just an old, bad molding and I’ll have to just deal with it? What if I cut off that tab that sticks out of the wing mating surface and plugs into the fuselage? Do ya think I’ll get a better fit? Hope someone has some tips.
Thanks,
Chris
Cutting the tabs off will weaken the wing joint. You could use strip plastic stock to build up the gap then and a fill as necessary after that. This is the method I use and I have always had good success with it. The older kits are prone with this problem.
Another technique that sometimes works well is to attach the lower wing to the fuselage, nacelle, or whatever; remove any locating pins between the wing halves and position the top of the wing against the fuselage. This moves the problem out to the wing tip, where it may be easier to fix. Sanding at body-wing joints is probably the most difficult and tends to destroy surface detail. Moving it to the tip may simplify things.
Do a lot of test fitting and careful thinking before you decide how to handle it.
Sounds like you have some good advice already. Assuming you have already glued together the top and bottom wing half, try filling the gap wtih the sheet plastic and than putty and sand as reccomended.
Don’t blame yourself- it is the kit. These old Monogram kits were not the best fitting!
For this kit I think Mark has the best advice, shim it then fill what’s left.
Yeah, I guess that’s what I’ll have to do. Shim and fill. Mmmm…ain’t it great?
Thanks guys for your help.
Chris
You can also try using diluted white glue (like Elmer’s) to fill the gap. This may take repeated applications, but it’s much less labor intensive that putty and sanding, plus you won’t lose any detail that has to be restored. When the glue is dry, you wipe it down with a water-dampened q-tip to remove any excess. In most cases, after painting it looks pretty good–and being unambitious, it’s the method I always use now.
I’ve heard (not tried, mind you) that Sobo brand is particularly good for this.
Another method I haven’t tried yet, but intend to, is correction tape—just run it along the seam and sand the edges with very fine grit. If you try it, post results, please!
Triarius,
I think you’re right about Sobo. It’s what I always use now. I’ve tried Elmer’s, which is easily available, but Sobo runs a little thicker, which helps prevent it from draining away. I usually thin the Sobo a little with water and some dish detergent to make it flow better, but a thicker initial application does the job very well.
I’ve used latex caulk for places where I can’t get in to sand. Lay it in there then shape with a wet paint brush and wait for it to dry. Sometimes it takes a couple of appications but you can paint it and it won’t mold [:)]
That latex caulk is a great idea—I’ve been 1:1 scale modeling our house and use a lot of that stuff (What is this mythological thing called a “right angle”?) (house built in 1911!).
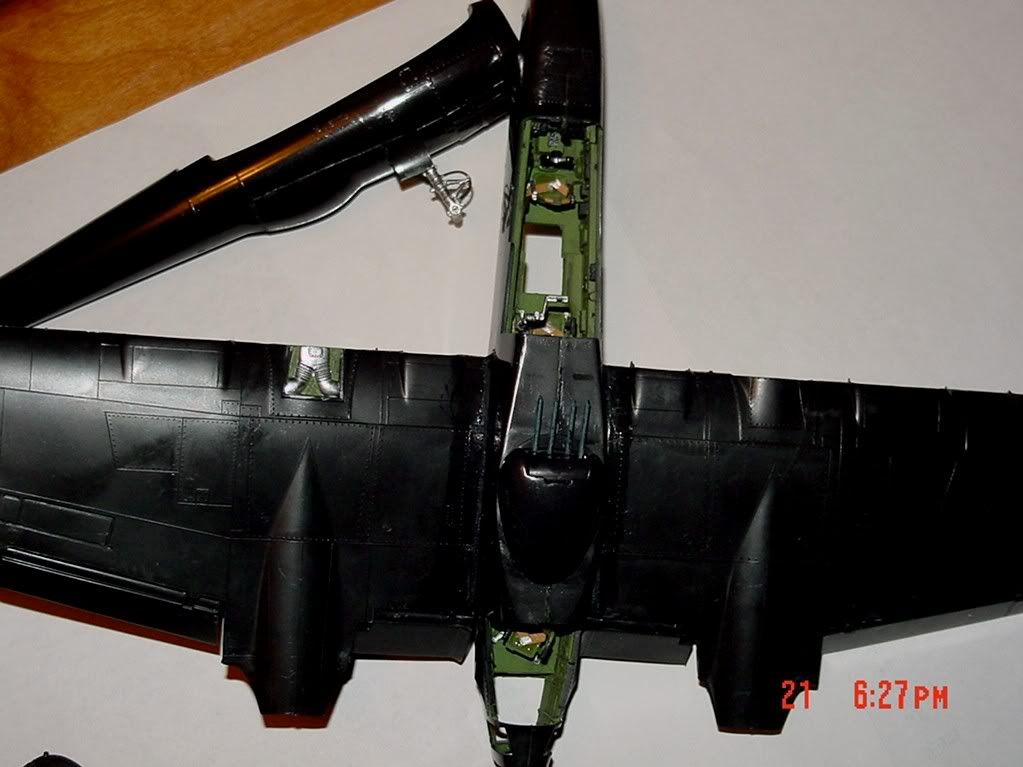
For my [2c], I like Elmer’s, mixed with a small amount of microballons - it is eaasier to work with than putty in a tight location, and doesn’t require sanding if you smooth it up nice. Here is a pic of my P-61, wing root gap filled as above:
Hope this helps!
Brian [C):-)]