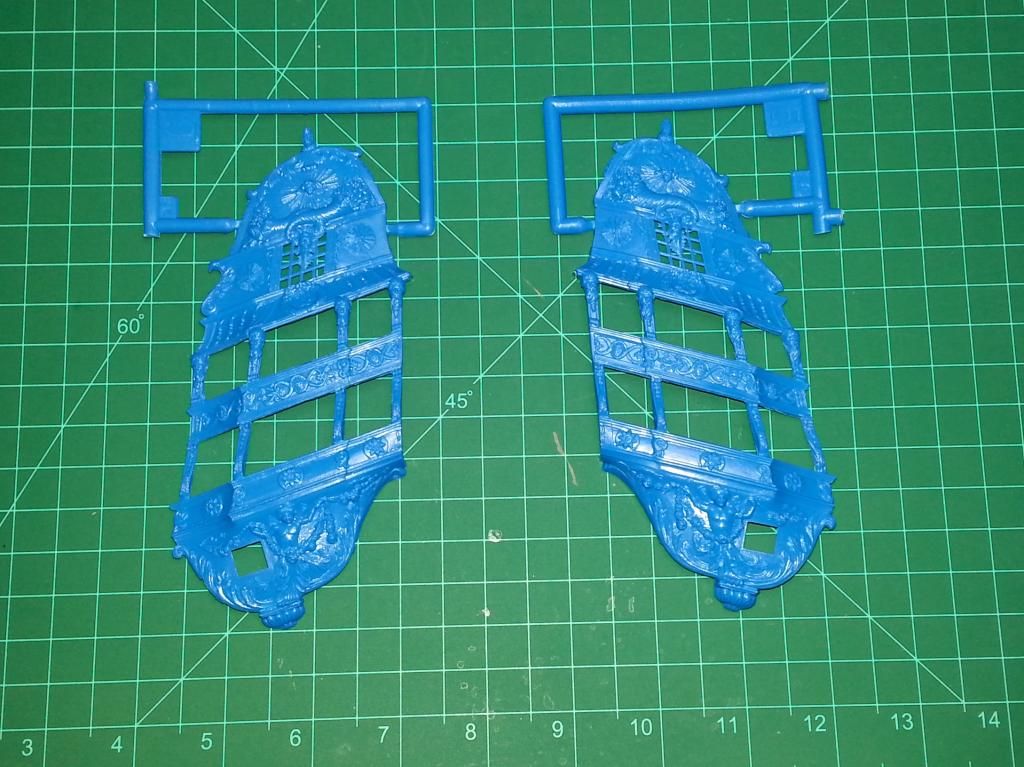
Heller Soleil Royal (WIP)

Here goes:

I finally decided that the SR would be a good subject for my next WIP thread…

There are other build logs for this kit elsewhere on the internet, some are very well done, and some…well, just never seemed to get finished. It’s like the builders sailed into the Bermuda Triangle or something!

Anyway, I’m hoping to learn a bunch of stuff during this build, and I’d love it if I could count on my fellow modelers to help with advice/insight along the way…I already have questions! But I also feel like my skills have developed enough since I started building ship models (almost 3 years ago!) that I may have what it takes to do a decent job on this one.

Please feel free to chime in, but I do ask that remarks be kept positive and more or less on-topic…especially since this build will likely stretch on for many, many months (or years), and I hope it will serve future builders of this kit, should any dare to follow in my footsteps! :slight_smile:

Though I have lately begun to consider myself a little more of a serious scale modeler, most of you know that I don’t trouble myself too much with certain aspects of authenticity or correctness in modeling. I like to make things that look cool to me, and some stuff doesn’t matter so much. The plan is to make several changes to the kit, but I won’t be addressing ALL of the known and oft-mentioned shortcomings…mostly just the ones that I think make it look better to my eye. We’ll get more into that later.

For now, I would like to start with a current progress update:

I have some parts prepped, no painting done yet. I washed everything in the bathtub in a warm bath of Water and Dawn dishwashing soap…then rinsed them copiously and let them dry for 36 hours…anyone who knows abbout this kit knows that there are LOTS of parts, so the Dave-Cave was littered with plastic sprues over the weekend!

I have removed the windows from the rear quarter galleries, and assembled a couple of gun barrels, just to test the fit of them.

I am torn on whether to assemble the masts and yards first, then airbrush the basecoats…it’s much easier to handle and paint parts while they’re on the sprue, but it’s also difficult to paint halves separately and then assemble them, while trying to keep the seams of each part hidden. So that’s on my mind…though I’ll probably go ahead and glue them before painting.

Same problem with the gun barrels. But they will be painted while on the sprue, then assembled later, for reasons of convenience.

For now, my biggest holdup is the what-have-you of chainplates and lower deadeyes. I have some material on order from ME, so when that stuff comes I can start experimenting with how the chainplates will be set up…once I figure that out, then I can make the necessary hull and bulwark modifications to accommodate whatever means I’ll use to fasten the chainplates (of course, the plastic kit eyebolts will not withstand the tension of the shrouds, so that’s the issue)…

So, there it is. I’ll put a couple of quick pics, just as a headline.

Hope you guys find this project interesting and provocative!

Thanks!

David_K
Well, you really grabbed the bull by the horns when you opened up the quarter galleries. As molded, they’re one of the most inaccurate aspects of the kit.

I’ll be interested to see what problems you run into in fixing the rest of the stern. If I remember correctly, there were some pretty elaborate “carved” devices between the spurious windows; those carvings belong on the hull itself. When I built mine (almost forty years ago), I didn’t notice the problem till I’d almost finished the model. I don’t know how difficult it would be to either move the devices to the hull halves or replace them. Then there need to be decks inside the quarter galleries, etc. And I don’t remember whether there are windows in the hull over the quarter galleries; probably so.

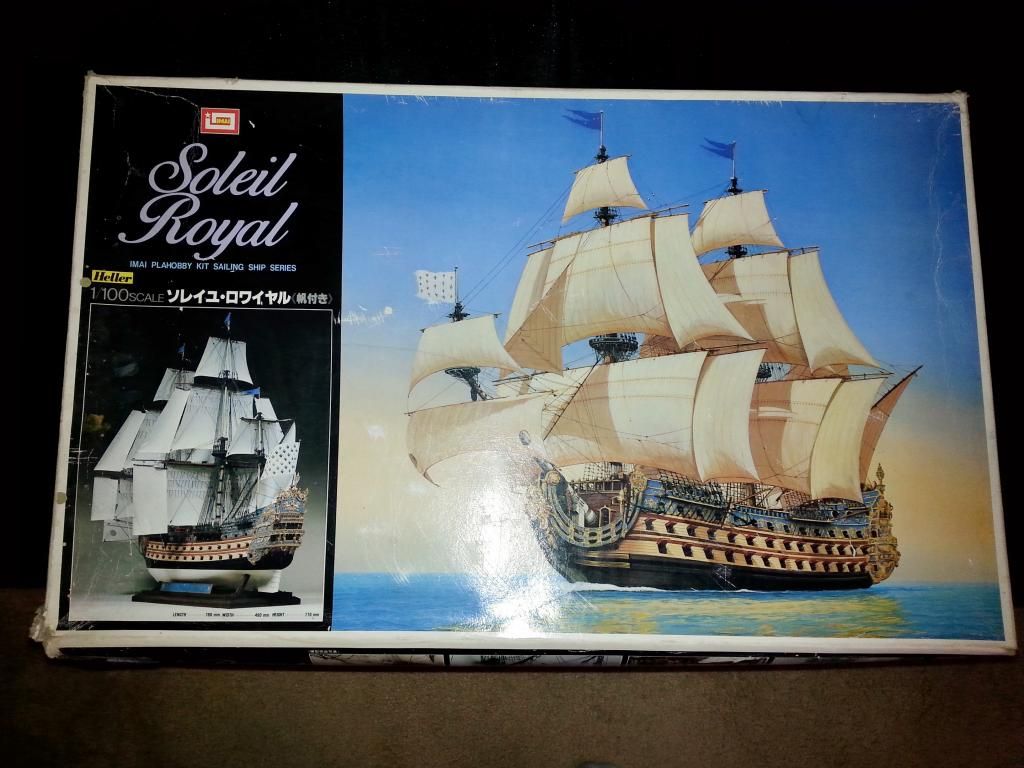
One interesting point. On my monitor I can’t blow up your picture quite enough to be certain, but it looks as though the artist who painted the picture on the Imai box figured out that the quarter galleries were supposed to be open. Interesting.

I hope you’ve found some good photos of the old, unfinished model in the Musee de Marine. They’re your best guide - along with the drawings and paintings that are in other threads of the Forum.

Good luck.

David,

I’m sure you’ve already done your research on your SR and my posting these two links are probably useless to you now but, you never know.

Best of luck - and, more importantly, lots of wonderfully entertaining, frustrating, conquering, and satisfying states of mind to you while you build her [:D].

Mike

http://en.wikipedia.org/wiki/French_ship_Soleil_Royal_(1670)
http://cs.finescale.com/fsm/modeling_subjects/f/7/t/68138.aspx?sort=DESC&pi240=1

Good luck. I “took a break” almost exactly two years ago before starting the rigging and it’s still sitting there. Because of the elaborate paint scheme people who see it immediately seems drawn to it. Somehow I’ve become immune to the darn thing but have high hopes for the future.

David,

I would strongly recommend raising the waterline to the lower wale. I forget the source for this, but I have seen period drawings of 17th and early 18th century French ships-of-the-line showing the same run contained in the kit and the waterline touching upon the lower wale. It will greatly help the sense of proportion in your model. Also, fill in the knee of the head if you can. You will not regret it!

Bill

Yeah, that hole in the knee of the head is a real howler. It’s apparently there because Heller was copying an unfinished model. (That model didn’t have a figurehead either. Heller did notice that.)

The missing panel almost certainly should have some carved ornamentation on it. Dave, have you ever messed around with Milliput?

Dave, an overarching comment.

This seems to be a very difficult and inaccurate kit from comments I’ve read.

I am currently in year four of the Heller Victory, which is wholly satisfactory straight out of the box so long as you get your hands on the Imai instruction set.

So my one piece of advice is to make yourself NOT think ahead. Concentrate on the hull only. Do not concern yourself with the masts and yards yet and for heavens sake don’t buy ahead with any AM parts.

Get your guns and decks under control, the cables and such. I’d give myself a three month or so goal of getting up to daylight and then start looking up, metaphorically.

Back to your quarter galleries . . . nice job!

Bill

I’m building one too! Been at it for about ten years now :frowning: Have the sprit mast rigged and starting foremast rigging.

Don,

I’d love to see what you have done.

Bill

Don as would I.

Dave one more mot.

I know this from the shelf of death which currently carries my Victory. BTW that is shown in its current stasis on the Heller Victory website under “Bills Victory”.

Get another model up and going.

Something easy like a little sailboat.

Thanks for the support, o excellent peers!

I have been spending some time scouring the interwebs for photos, build logs, etc., trying to build a cache of reference material…I’m hopeful that, despite the common fate, I’ll be able to finish it without taking too many 5-year breaks! haha

I do realize that a project of this magnitude will require certain amounts of time-off to regroup and generally recover from periods of overwhelmity (just made that word up)…but I believe I’m up to the task.

A big part of why I pursue hobbies is to give my overactive mind something to chew on while I’m conducting my day-to-day duties of life…I like to ponder and ruminate, and eventually formulate solutions that agree with my taste. We’ll see if my temperament is conducive to satisfactory completion of the SR.

I have already seen the difference between the kit-suggested waterline, and one that is raised a bit…I like the raised waterline better…otherwise, I feel like the ship looks like it would tip over too easily.

Ah, the knee of the head.

I do have some experience with Milliput, but only a little…mostly I’ve used it to make repairs for cast-resin statues…but the suggestion does give me some ideas…whatever happens, I do think I’ll have to fill that gap with something, but it’s still down the road apiece.

I’ve got the masts assembled, and now I’m assembling all the yard halves…but, some of the smaller yards are so wimpy and flimsy, I’m now considering swapping them out with wood…I’ll see how that goes, also…for now, my main concern is part prep. After the yards, I’ll still have to drill some holes in the hull for gunport rigging, and also for chainplate fastening.

Once that’s done, I’ll separate all the parts by intended basecoat color (I’m using 8 different colors for this kit, all MM acrylic, except for the metallics, which will be Tamiya…I have to forego the Vallejo paint this time…one of the downfalls of it is that it doesn’t seem to hold the oil paint weathering).

Then I’m going to prime a lot of the parts with Tamiya Fine Grey Primer, since many parts are molded different colors and I want all parts of a desired color to begin a certain color (meaning, some of the yards are from light colored sprues, and some from dark sprues, so I want to even them out before I spray the basecoat so I don’t have to worry about any lack-of-hiding)…

Once I lay down all the basecoats with the ol’ airbrush, then I can really start digging into things and detailing.

It is by all accounts a difficult (and inaccurate) kit, and I think with a lot of patience, a little creativity, and just a dash of who-gives-a-crap, I’ll end up with something pretty to display at the house!

Yes, Don…please share your pics with us! I will never be able to say that I’ve seen enough reference material for this model! Feel free to post some here, or make a separate thread, if you want…

Anyway, thanks again…I’ll let you guys know when I have something worth reporting!

Dave

Dave,

The quarter galleries are looking good so far! Did you use metal tubing or rods in the masts by chance? I would love to see more of your kit as as you progress on “the ship that shall not be named.”

Steve

The masts are actually pretty sturdy, I didn’t fill them in with anything…the yards, on the other hands, especially the topgallant and sprit yards…very flimsy. They will undoubtedly sag under any tension. I’ll have to score a supply of dowels and start experimenting with making wooden yards. And in that case, I might as well just do all the yards out of wood…we’ll see how that goes.

Thanks for watching!

D

I built mine many years ago, so my recollections of the experience are unreliable. And I’ve hears that the quality of Heller’s plastic has gone down since then. For what it’s worth, though, I don’t remember having to replace any of the spars.

My memory might be playing tricks on me but I seem to remember once reading that the mast and yard proportions were incorrect in this kit. Also, you must pay attention to attaching the yards to the masts since the kit does not provide any method for doing so.

Bill

Ahh Bill, dear Bill…

Somewheres a bit back in this thread there’s a link to a thread started in maybe 2008 about this model, that really went on too long and ended in a stand off between those (like me although I wasn’t involved) who believe that a model should at least have a fair modicum of accuracy, and a sort of “Chicken of the Sea” much looser attitude.

The mast and spar topic was well covered, as was just about everything else except Marie Antoinette’s knickers.

The point was that the top masts were taller than the lower masts, which would make stepping/ unstepping them with the ships own gear rather… dificult, or at least accompanied by quite a bit of “Zut, alors!” and no doubt ending in “m erde!”.

EDIT: and with a small apology to the PTB; whodathunk the nannybot spoke French???

The link is “Soleil Royal . . . The Ultimate Building Guide”. I wasn’t sure about the exact nature of the conversation concerning masts and spars, but I knew I read it somewhere. I was a part of that discussion, and I believe that the model does have some merit and many flaws that can be corrected if identified.

I wish you had been part of the discussion then, and I am glad that you are a part of this new one. I appreciate your insight!

Bill

David, I’ve finished one and the other is sitting waiting to rig. I can tell you this ship wears you out, for example you could spend a long time on cannons, DONT, only the upper deck actually show. If you plan on closing the hatches don’t even bother building them but if you leave them open don’t waste a lot of time for a perfect assembly because only barrel ends show. I built my first and gave it away but I do have quite a few photos of my current one if you need any reference.

Heres a pic from about a year ago, I’ve since done some additional work but its certainly at my leisure. As I said if you need anything maybe I can help.

Terry

David now that I’m starting to think a little bit about her, One thing I would do over again would be to build a jig to hold the hull while you’re working on her, test fit the decks because this is where I had most of my problems, warpage. I did add some styrene for additional glue points. That helped a lot. Oh and I really thought that the gold paint from the old Testors square bottles really painted on well, and cheap too. Terry