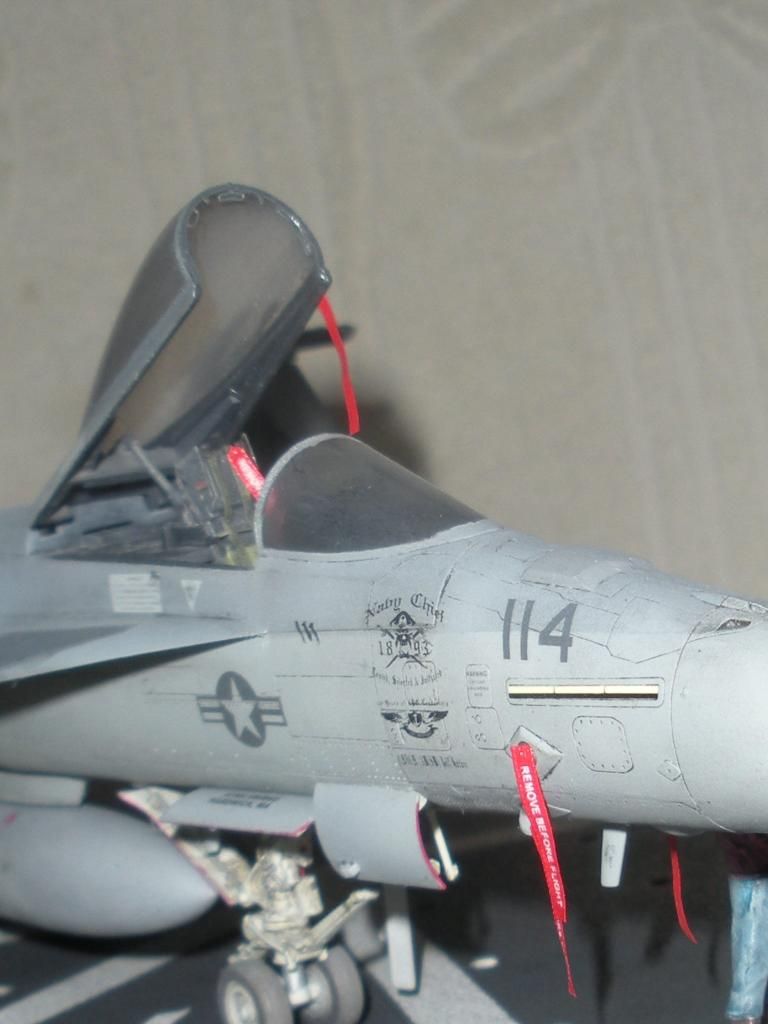
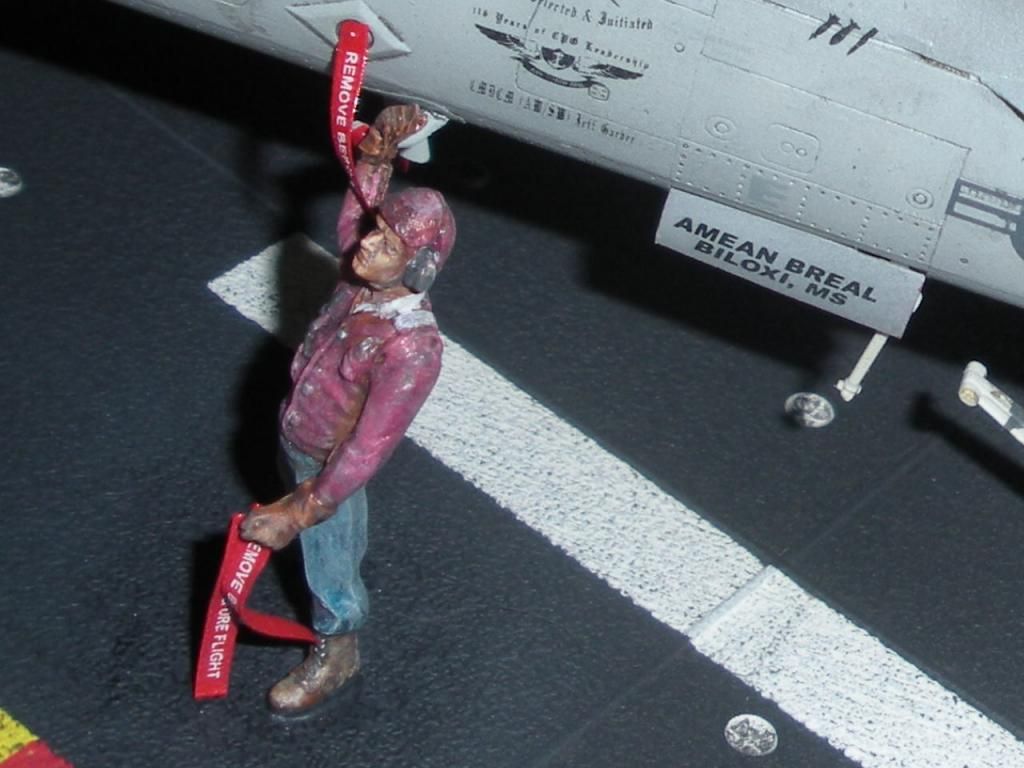
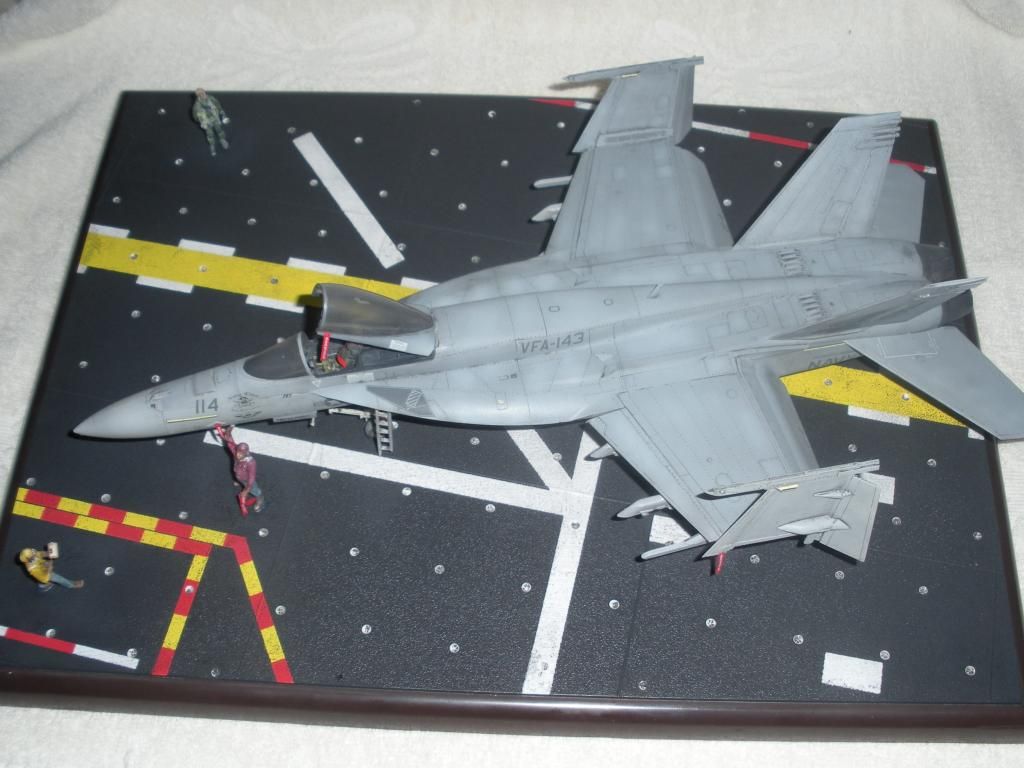
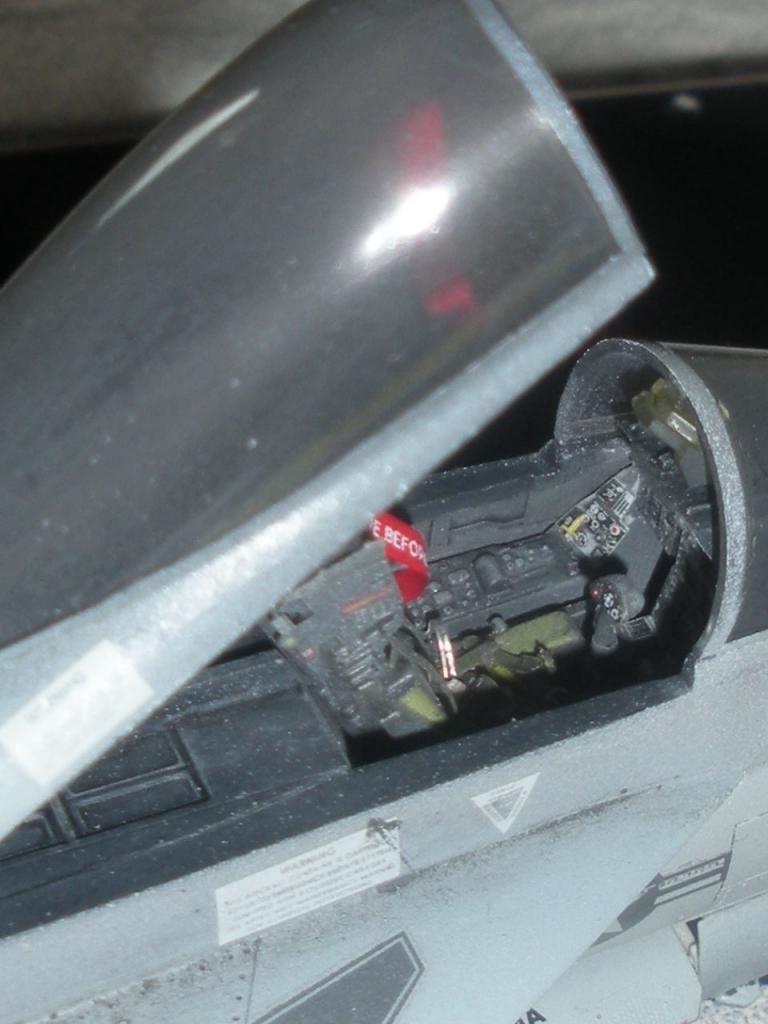
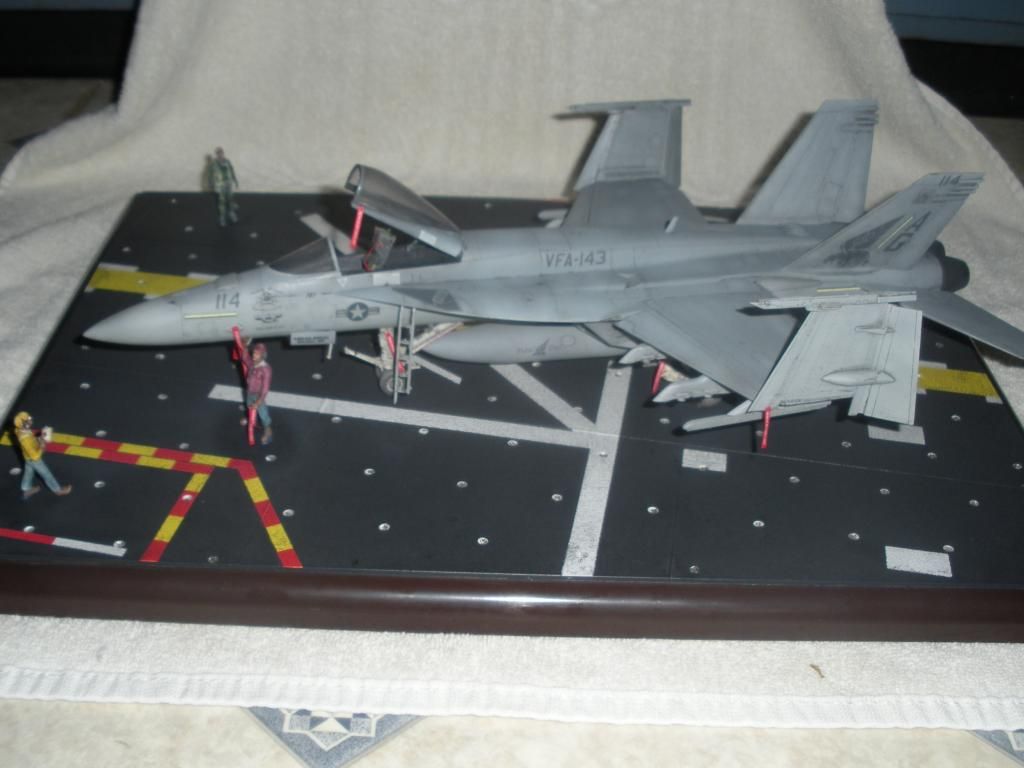
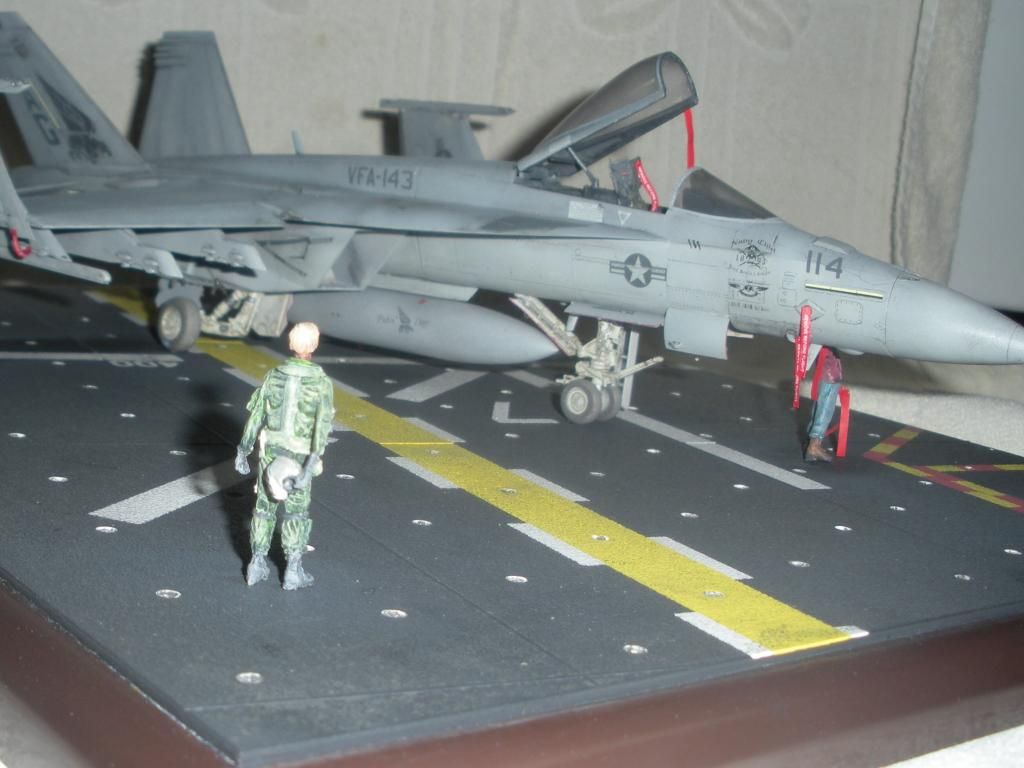
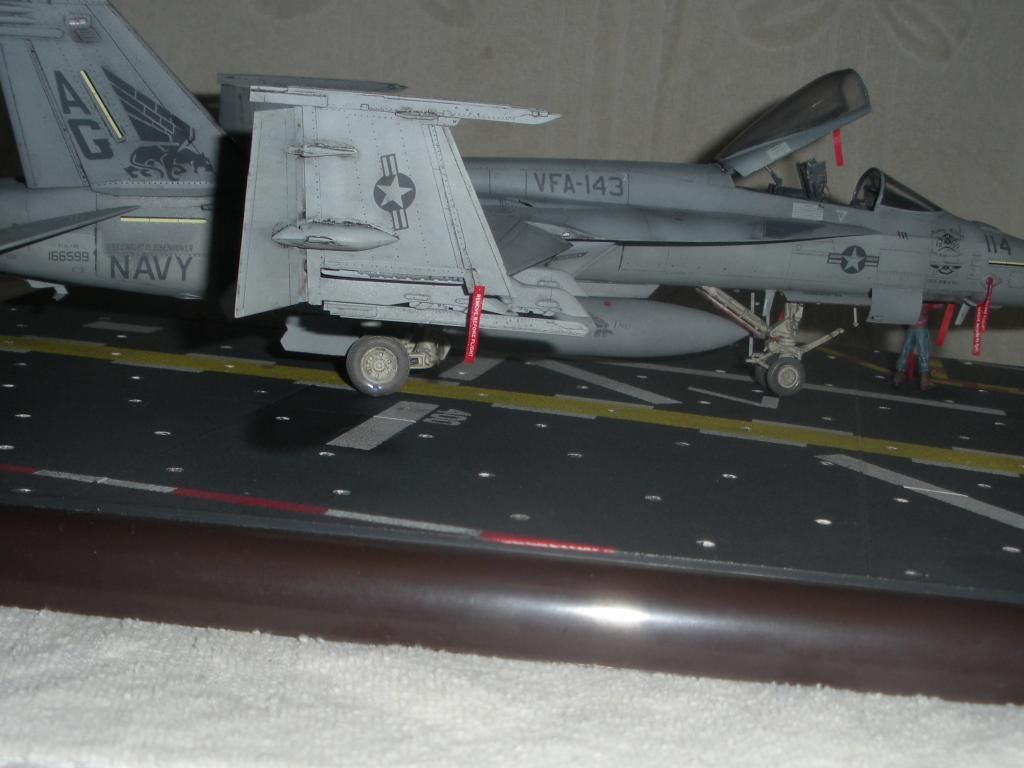
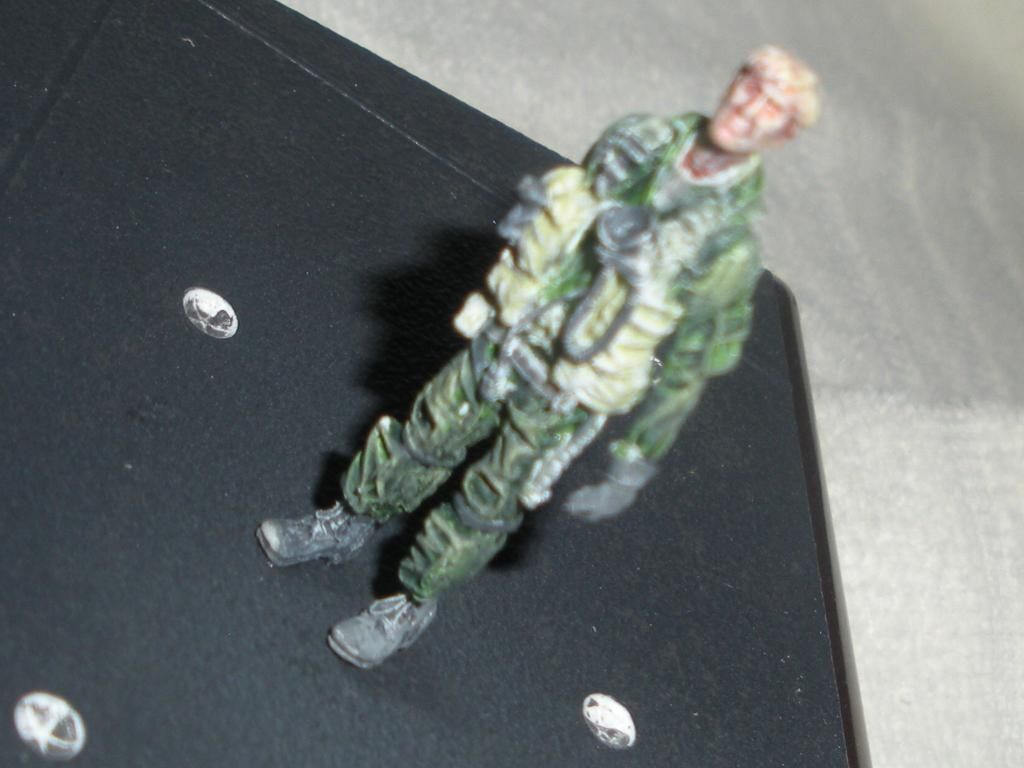
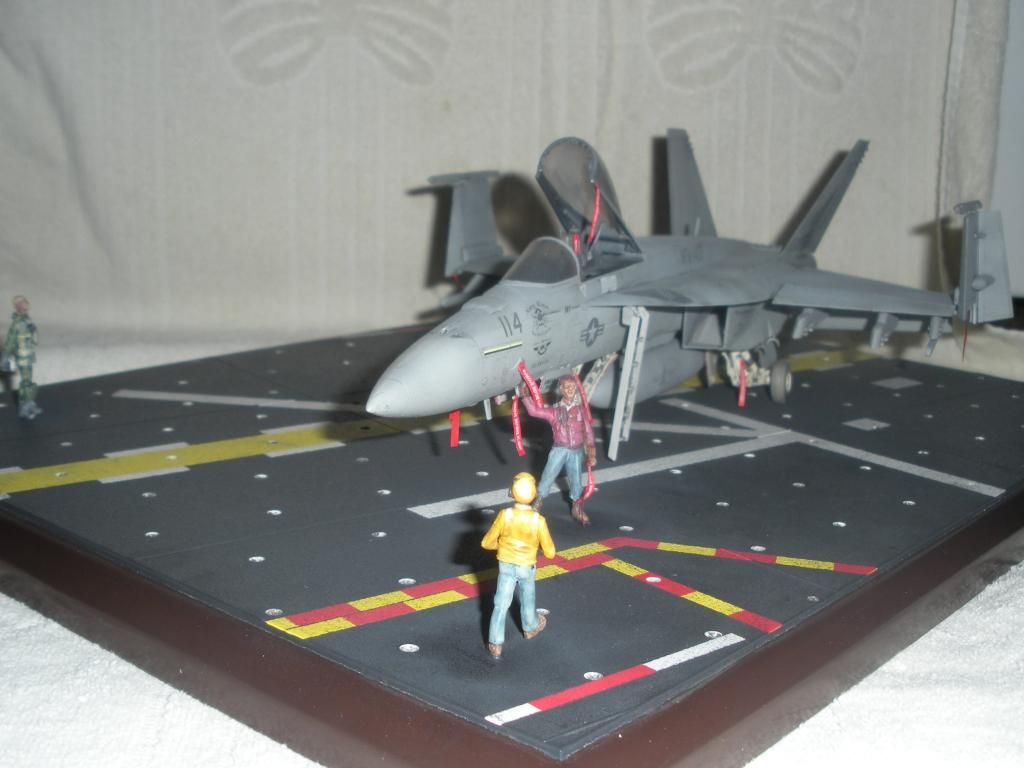
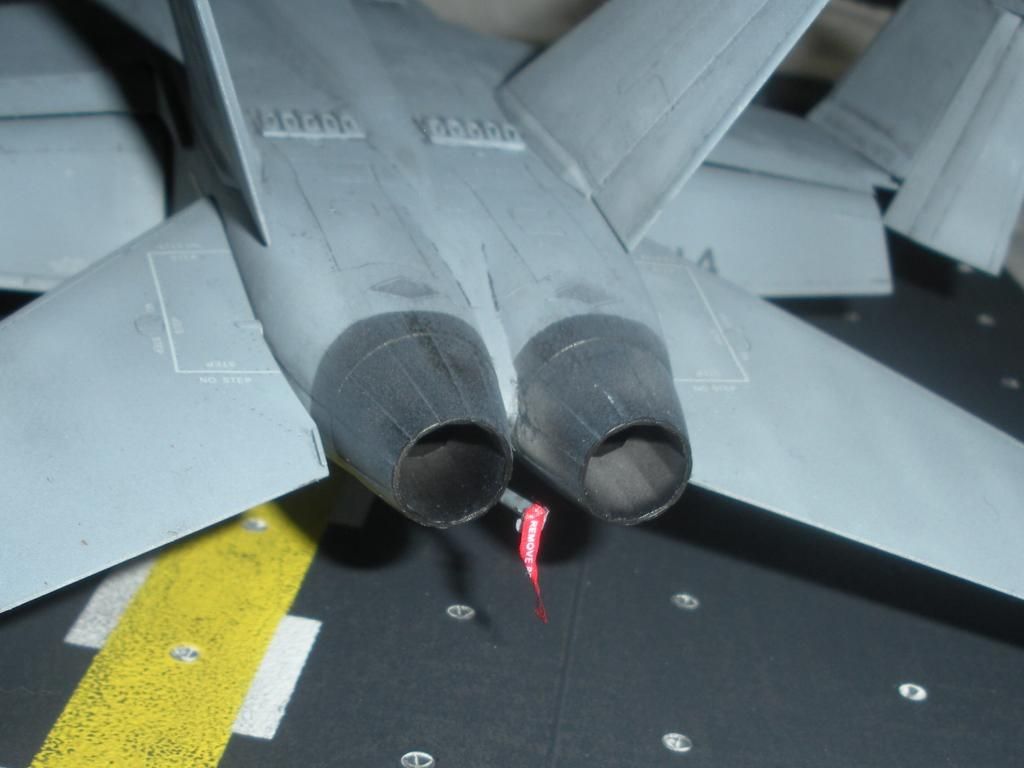
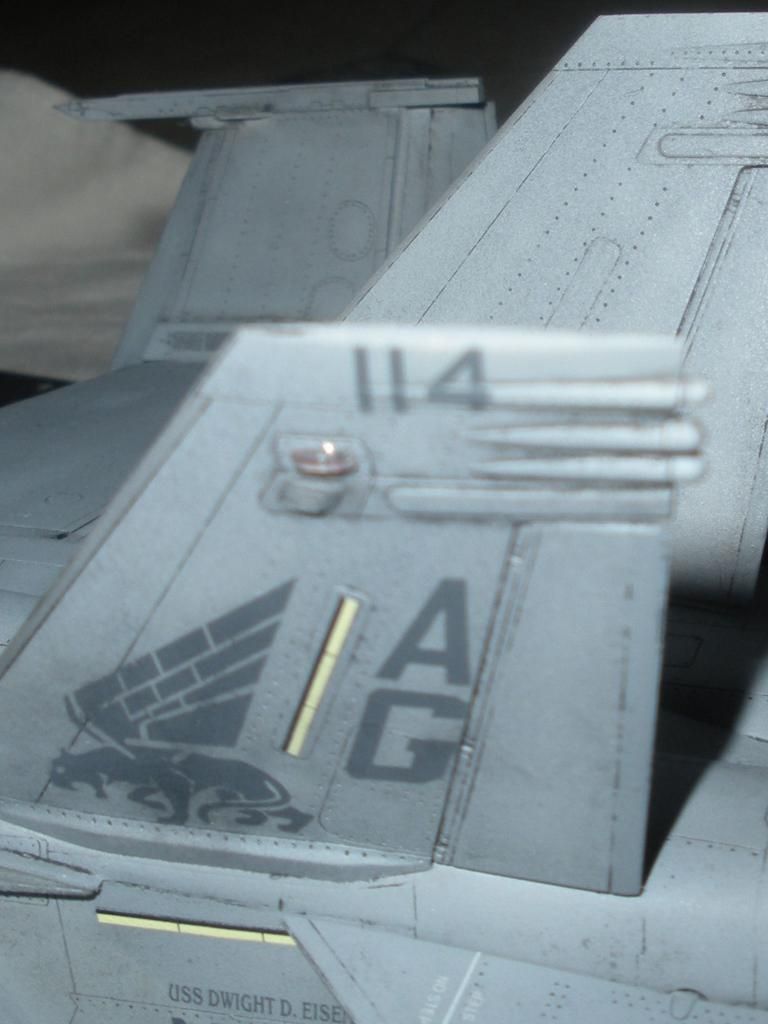
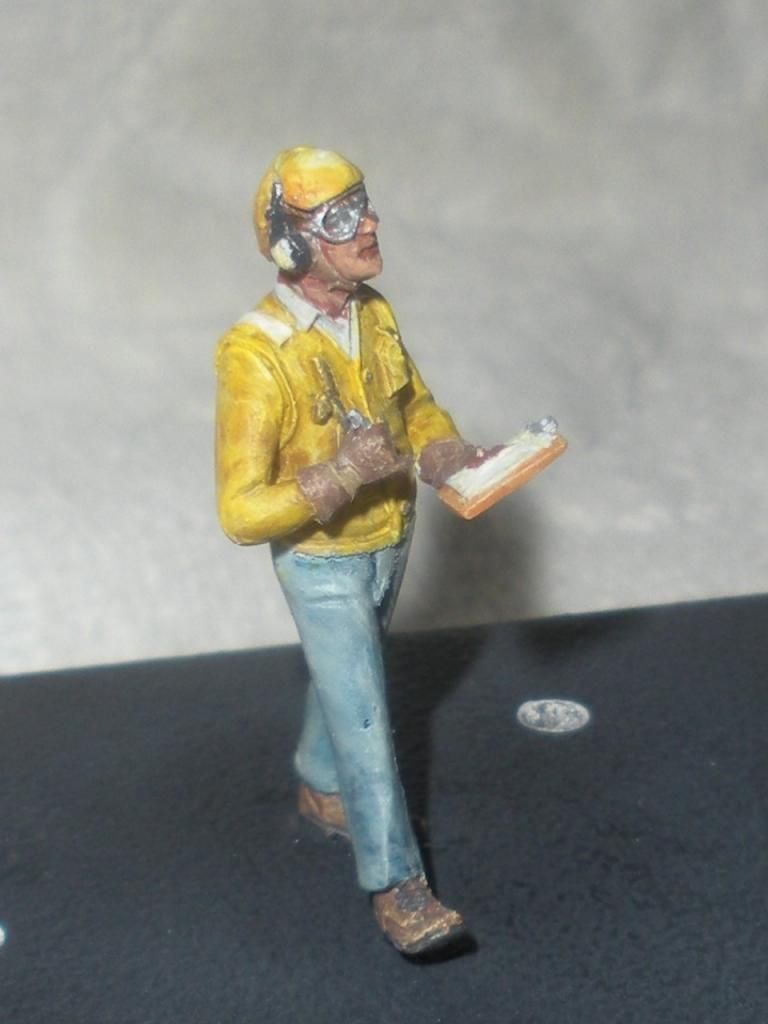
I’ve spent the last little while making my first successful (I think) foray into the jet age with Hasagawa’s F-18 E marked out for VFA -143 (Pukin’ Dogs of War, hence the title sick puppy). I went largely out of the box, using an Eduard detail set and Steel Beach ECS vents to correct the kit to the 143rd standard. The decals were from Fightertown, really nice set, even including a helmet decal for the pilot. I used some Eduard ‘fabric’ RBF tags (not really 100% on their placement, but I think I got it close) and Aires / Verlinden figures. The entire aircraft was painted using AK Interactive’s primer, Vallejo paints, Alclad gloss and metallics for the exhaust, weathered with Flory washes before some Vallejo semi gloss and dull coat.
I mostly chose this subject for the low viz decals, preferring these to the high viz.
While not perfect, it’s the first jet I’ve attempted that I’m happy with and the first time I’ve had Flory washes work for me (thanks very much to the Alclad gloss!). Comments and criticisms are more than welcome.
I really like the panel highlighting you done to show the patchiness those jets tend to pick up from age.
Also, that base looks unreal! Did you make that too?
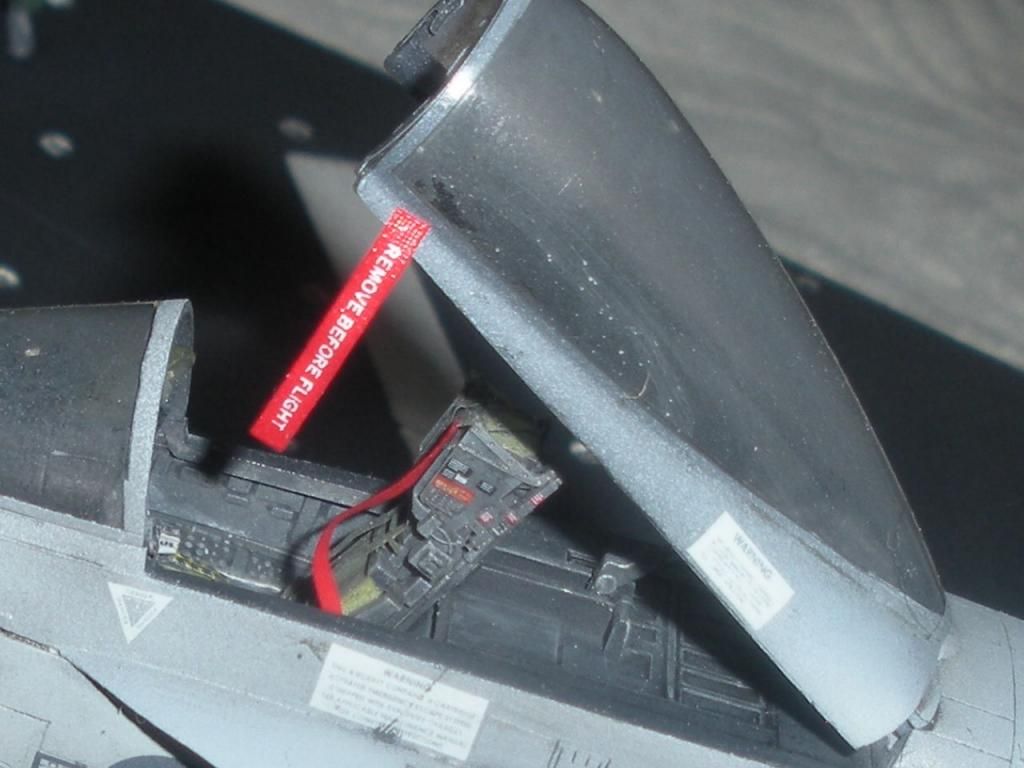
One comment - the canopy looks a little fuzzy. Just wondering if that’s the camera angle or if it accidentally received a matte clear coat? If so, you might be able to bring it back with some Future/Pledge or a clear gloss.
Thank you. The base was a pre-painted piece I’d ordered online, I cannot remember right now who makes it. All I did was give it a sludge wash. I think the canopy’s “fuzziness” is because I tried to paint a bit of shade on it before dipping it in Future, it never did look right after that. I’ll have to figure out a better method for it next time. Something else to improve on i guess. Thanks again for the comments.
If you want to tint your canopies, best to use either clear colours (you can even buy a Tamiya colour called Smoke, which gives the dark tint), or, i’ve heard of (but never tried) colouring Future with food colouring, then dipping the canopy.
I’ve seen a helo modeler do that with the green Huey canopy.
I think your build is fantastic. Especialy the shaded panel lines effect. I’m inspired to try the pre shade again as my first two attempts got covered up with the base coats. I guess I have to thin the paint more. Thanks for sharing your build mate.
Jay Jay, I’ve bought my Flory washes through Sprue Brothers in the States. My trick for pre shading, and this is just what works for me, is to do a base of my dark shade all over. I then build very slowly my highlights, making sure I have no runs or spiders. Then I make one or two very light, thin mists with my proper color, leave it alone for a day and see if it needs another pass or not. I’ve always found the paint looks thinner as it sprays on, and dries more opaque. Another trick I’ve been playing with is adding a bit of gloss coat to the top coat to assist with transparancy, which I suppose might also help with my canopies. That rest time inbetween helps me to judge it better. Just what works for me. Also, building my colors slowly, i’m none too scared to try a bit of post shading where i have to. I’m sure you could try a Google search for Flory. CML, I’ll have to try that food coloring technique next time. I’ve recently added a Phantom (again with low viz) to the stash, so I’m sure that will give me a chance to try it. And thanks, Nathan, I also thought none too shabby for a first jab, of course still lots of room for me to improve.
Though my memory isn’t too good, I think some canopies would be “gold” tint for combat? Seems as though I saw that once or heard it. An Air Force vet told me they had different ones to mount if the cold war got hot. Great decals. Bob