I have carved from basswood a Hamilton Standard prop for my 1/44 scale Corsair and I would like to cast it in resin. Due to the flatness and the inflections on the surface, I’m puzzled about how best to do this. In particular, how does one make a mold for a prop?
My first guess is to try to make a flat mold by first mounting the propeller in platicene, then applying mold release, then pouring over silicone, then removing plasticene and finally pouring silicone over the other side. A lot of work!
On the other hand, can I simply pour silicone into a small box, cover the prop with mold release, and plunge it vertically into the silicone? My worry here is that, once dry, the silicone wont be flexible enough to allow release of the propeller (due to its complex curvature). But from looking at the castings made by some aftermarket companies, it does seem that they take this approach.
I’ve never actually done this, nor have I stayed at a Holiday Inn Express recently BUT I believe I read a few articles on this, perhaps even in Finescale. I’ve seen people make a frame out of legos (of all things), and using plaster, pour it around the part to mold. I would imagine some type of “mold release agent” would be needed. In theory it looked relatively easy. I think you;ve conquered the tough part…making the part out of basswood.
Really, though, I’m wondering if it’s best to make the mold in two parts (the way you would if you were interested in casting a silver dollar), or alternatively to dip the prop vertically into a box like the one you suggest (the way you would if you were interested in casting a pen, e.g.).
I should clarify: I’ve carved only a single blade, which I’ll reproduce three times. No hub.
I’ve never done a casting in my life so take this with a grain of salt: Make the mold with the provision for assembling into the hub and the front face of the prop and leave the top (back of prop) thick and flat. Then file the back of the prop to shape. The hub would be easiest to cast without the holes. The trick would be drilling it at the exact 120 degree mark.
First, thanks a lot for your help. I think I understand what you’re saying: basically cast a single side, say, the top. Then sand the back to shape. This is not a bad idea, but maybe clarifies my problem. The carved propeller is not flat on either side, but has an inflection on both sides. When set on a flat surface, parts of both the top and bottom of the blade are exposed. This makes it difficult to properly cast a single side (or, as I’m considering, making a two-piece mold one side at a time). (Maybe you have a loose propeller lying around. If you think of trying to recast it, you may get a better idea of my problem than from my poor attempt to explain).
I’m very happy with the shape of the piece I’ve carved, but it’s a thin and complex shape. Both its thinness and curvature make it difficult to cast, but my first choice would be to cast it as is. There must be some way to do so. From ads I’ve seen, Aires and other after-market companies are able to do so somehow. Ahh, but how?
Check Bare Metal Foil website and see their mold making instructions. I use the RTV mold making products from them and cast lots of weird shaped things.
I’ve never cast a prop but I have cast some thin parts that would be similar. I mounted the part on a couple pieces of modeling clay compatable with silicone. Then I poured the silicone over the part so it was completely covered (a solid block of silicone with the part inside). Once the silicone cured I just cut a slit in the mold down the center between the clay plugs. The silicone is flexible enough to let you work the part out. To make a casting I pulled the silicone so the slit opened up, then I poured in some resin until it looked like enough and let the silicone mold go back to its original shape. I usually open and close it 2 or 3 times to make sure the resin gets into the whole mold, as long as you get a little resin to fill the plugs where the clay was you should have enough resin. When the resin is freshly cured it is still slightly flexable which helps you remove the part from the mold, I usually have to do a little reshaping to get the part right but that isn’t much of a problem. I did this with a stokes litter, it is very thin and has a more complex shape and detail so I don’t see why this wouldn’t work for you.
I used Legos to contain the silicone during the mold making process.
If any of this doesn’t make sense let me know and I’ll try to see if I can explain it better.
Markworthi,
Yes, you CAN cast your own prop blades - or anything else for that matter - successfully.
All it takes is a little planning and common sense - and a little luck!
Now - the type of mold you make depends a lot upon the type of RTV that you’re planning on using - some are very hard when cured, others are very soft.
I’m lucky in that here in Melbourne there’s a place that sells resins, RTV, carbon fibre cloth etc etc to industry - they have about every type of RTV or resin made - lots to choose from depending on your requirements, and they give good advice. They were invaluable in getting me started on the right foot with my resin casting.
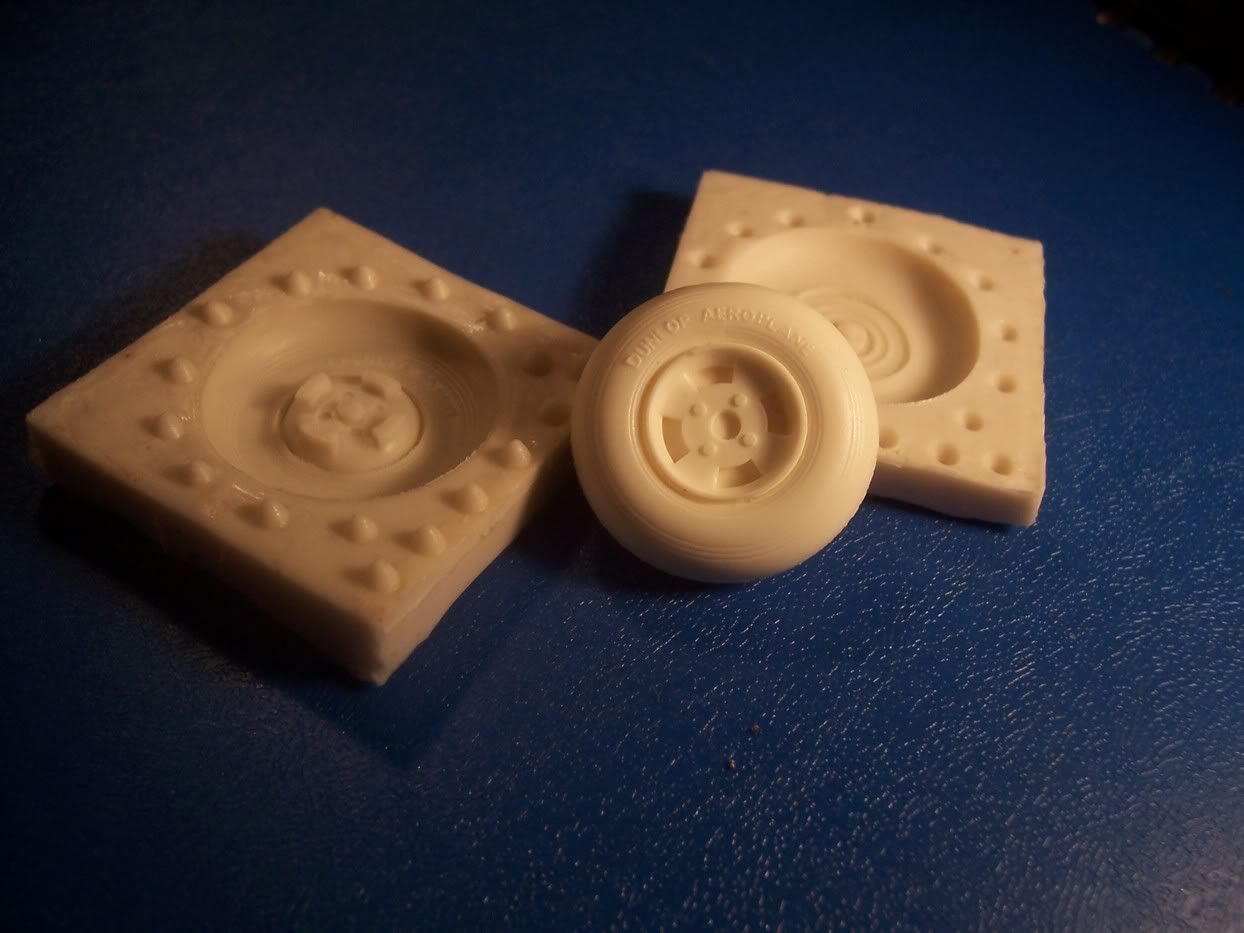
Have a look at the 1/24 Hurricane wheel…I used a fairly hard RTV for this.
Using the “squash” method, I built a little LEGO box, lined the bottom with modeling clay, then stuck the wheel into the clay halfway - then very carefully smoothed the edges so that where the wheel stopped and the clay began, there was a clean 90 degree edge. I poured one half of the mold in RTV, let it cure, then removed the modelling clay - placed the RTV half mold into the LEGO box again (making sure to increase the height of the box walls) and sprayed mold release onto the wheel - then poured again, ending up with a whole mold - MOST IMPORTANT…if you do NOT apply mold release, you WILL NEVER be able to separate the two halves and retrieve your prop blade - without cutting up the mold. RTV stucks to itself like you wouldn’t believe (the voice of experience!!)
To cast a wheel, all I did was to fill each half of the mold with resin, waited 30 seconds for it to get a little gelled-up, then squashed the two halves together. Note the “keys” I put into the molds when I was making them - I just pushed the end of a paintbrush into the modeling clay - this allows the molds to line up properly when you’re casting your part.
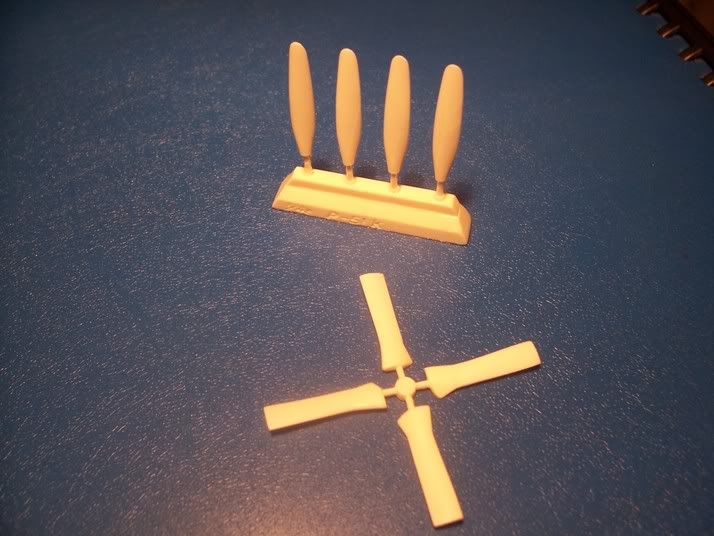
The H-130 four bladed props were made this way - I ended up with a little “flash” in between the blades, which was easily removed.
Now - the P-51K blades were made in a different way - I stuck the individual blades onto a plinth, stuck it into a LEGO box, then using an extremely soft RTV (this was very important in allowing the blades to be removed from the mold) I simply poured the RTV into the box.
Casting the blades was fairly easy - I poured the resin into the void left by the plinth and kinda squeezed the air out of the mold - the resin ran down and filled the void.
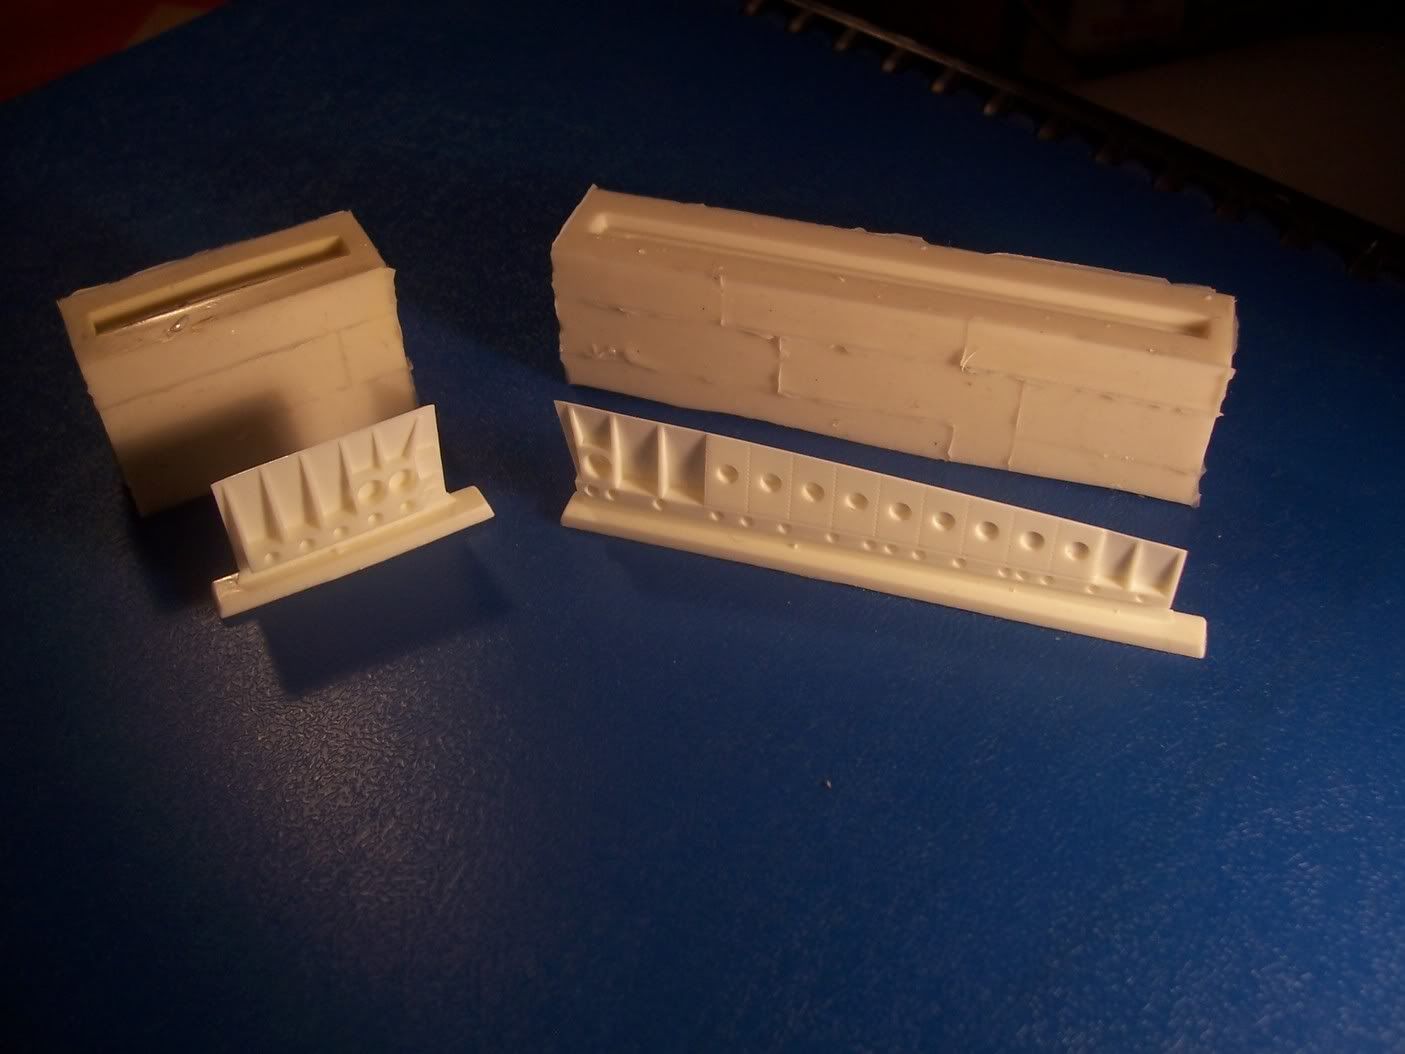
The same method was used for my TBM flaps - you can see the plinth and the mold - the RTV I used for this was a mid strength - holds its shape well but was flexible.
Mate, if you need a hand, and have a digital camera so you can take some shots of what you’re doing, I can lend a hand and steer you in the right direction, no problems.
The RTV and resin are expensive, so failed experiments can really hurt the wallet. Getting the right advice can make all the difference.
Thanks very much! You’ve answered a question I’ve had for a long time regarding “slicing” silicone. I’ve contemplated this method before, but wasn’t sure whether or not I’d destroy the mold by slicing. I’ve never used a pourable silicone, since my earlier projects exclusively required a brush-on type.
So it looks as though a careful slice won’t totally ruin the mold. Hmmm… very interesting to know. This is definitely a way to go.
Your advice is quite helpful! Thanks again for helping.
Your work looks great! This is exactly what I am trying to do, though I imagine I’ll have to go through a few iterations to get props that look that nice.
It seems any of these methods could work, and the method for the H-130 seems like the best candidate. The reason this seems better than the method
for the P-51 is that, using the latter method, the slight curve on the propeller surface may make extraction from the mold difficult . (I’m guessing that this is why you
went with the two-part mold for the H-130).
On the other hand, if the rubber was flexible enough, maybe I could pull it from the mold by carefully twisting.
At any rate, I’m probably going to have a few dozen pieces of all varieties to cast, as I’m building in an unusual scale. All of these methods will come in handy at some
point, I’m sure of that.
My wife returns from Atlanta tomorrow, and she’ll bring the digital camera. I will definitely post shots of the pieces I have carved, and maybe you can tell me which
method you’d use. Thanks again for your generous advice! Take care,
Well, you’ve certainly had some better exposure to your problem than I could ever give. But I want to test my ability to describe a propeller: The shape is a complex, compound, tapered ‘wing.’ It is not unlike a sail on a boat. It’s thick, mostly round at the hub and tapers, and twists flatter, as if it were stretched. All of the propeller shape is an air foil, wing, with a twist. Now just mold the damn thing!