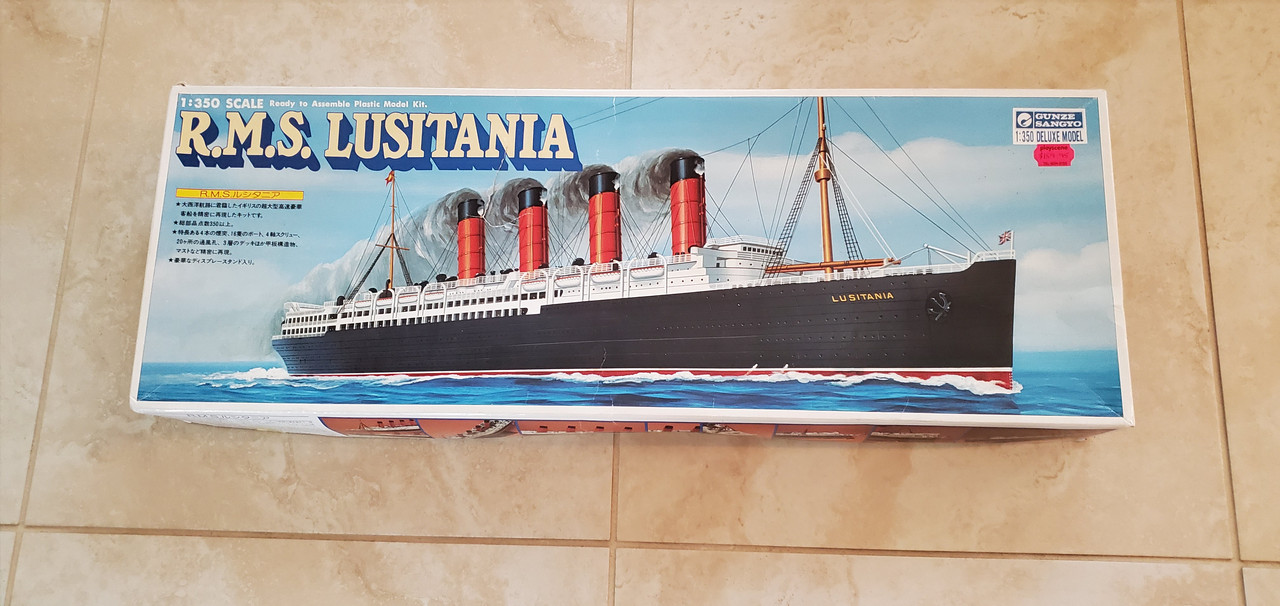
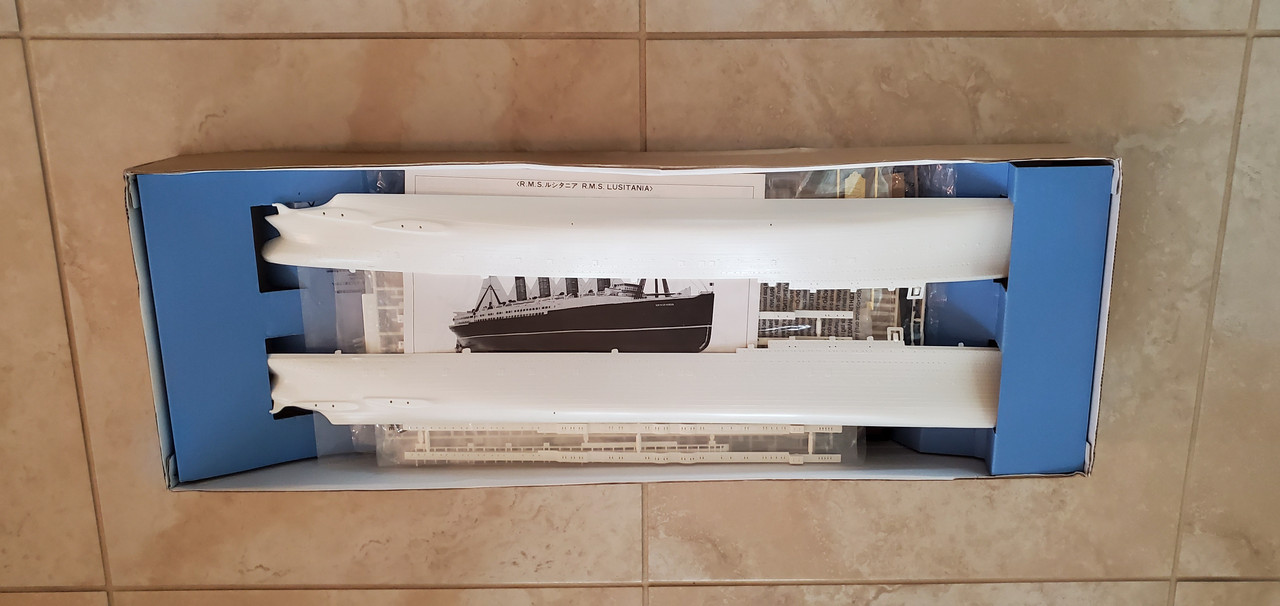
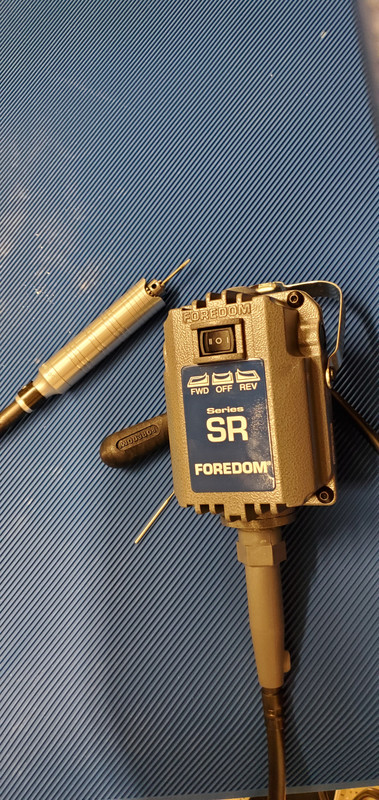
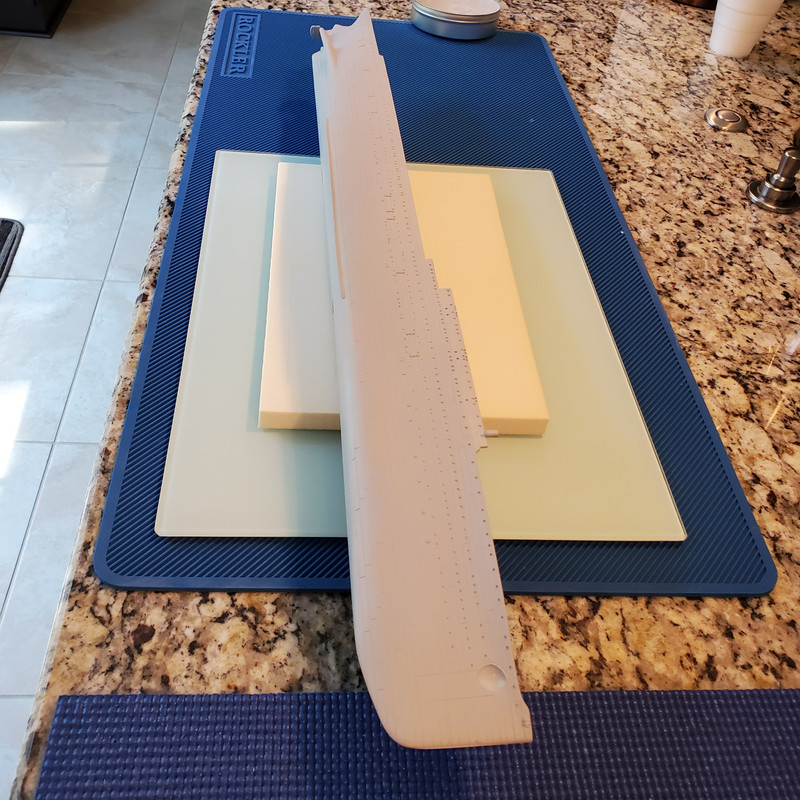
I got this kit from Australia on ebay. They are hard to find. It was brand new, all the parts still in the bags. The first thing I’m doing is removing the molded on plastic railings so I can replace them with brass. Some are easy to clip off, others are impossible to get to. For the tightly placed ones I’m using a Foredom Tool to make enough room for me to get small files in there to fine tune the openings. The tool works great for stuff like this as it can operate from 0 RPM and reverse which helps to stop any climbing.
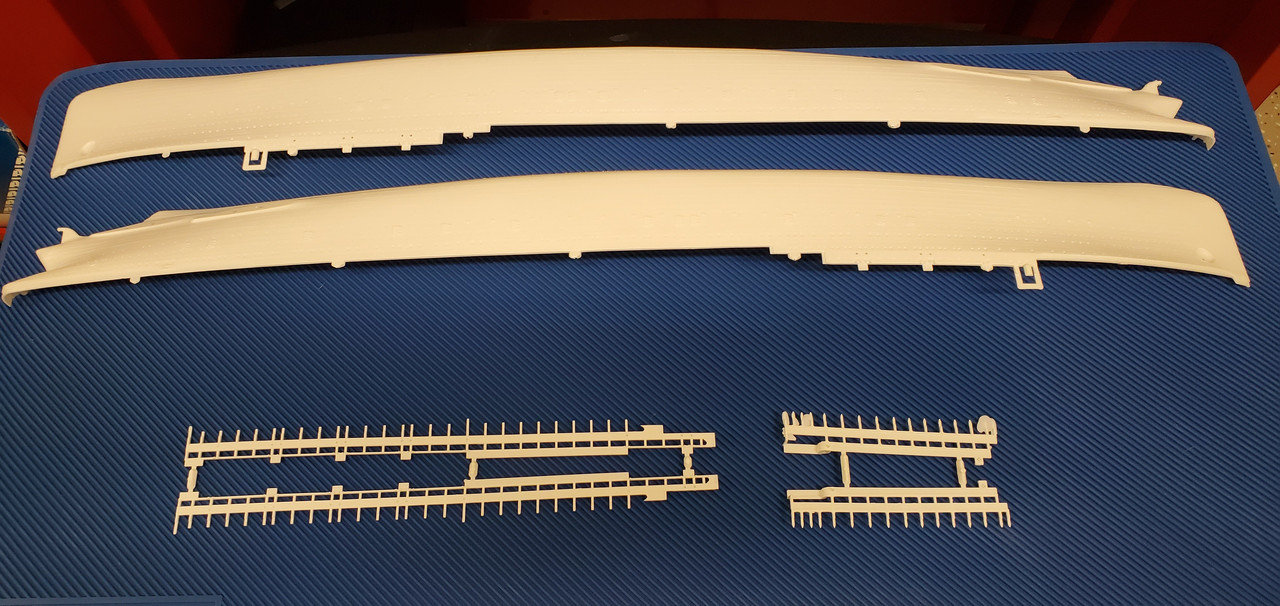
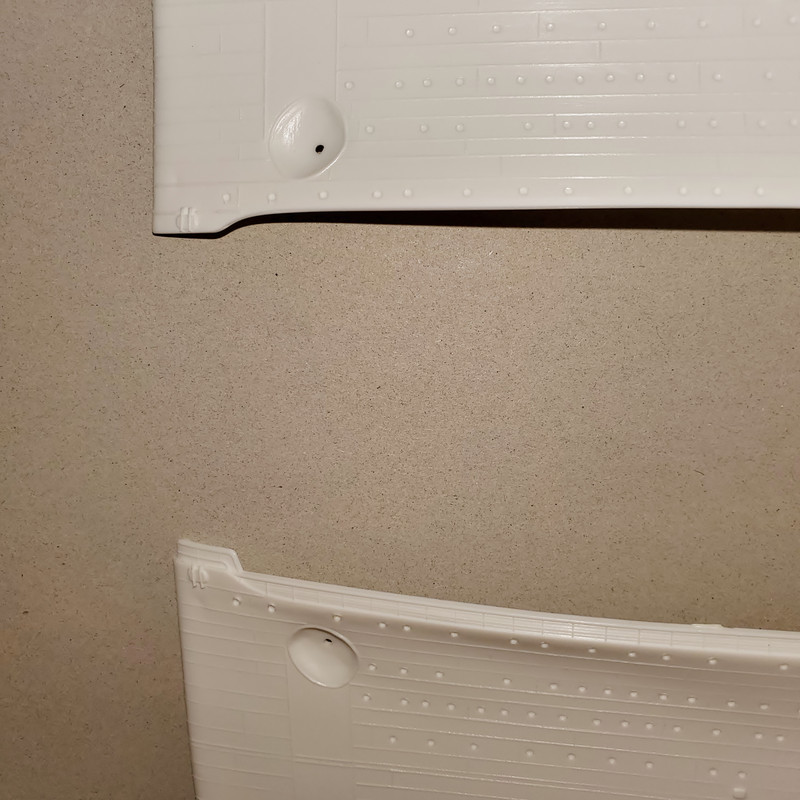
Three down and one to go. Very time consuming working with tiny files in tight places. Then come the railings on the hull which I am a little worried about removing. This kit is old and probably brittle, and there is quite a good length of railing on the hull.
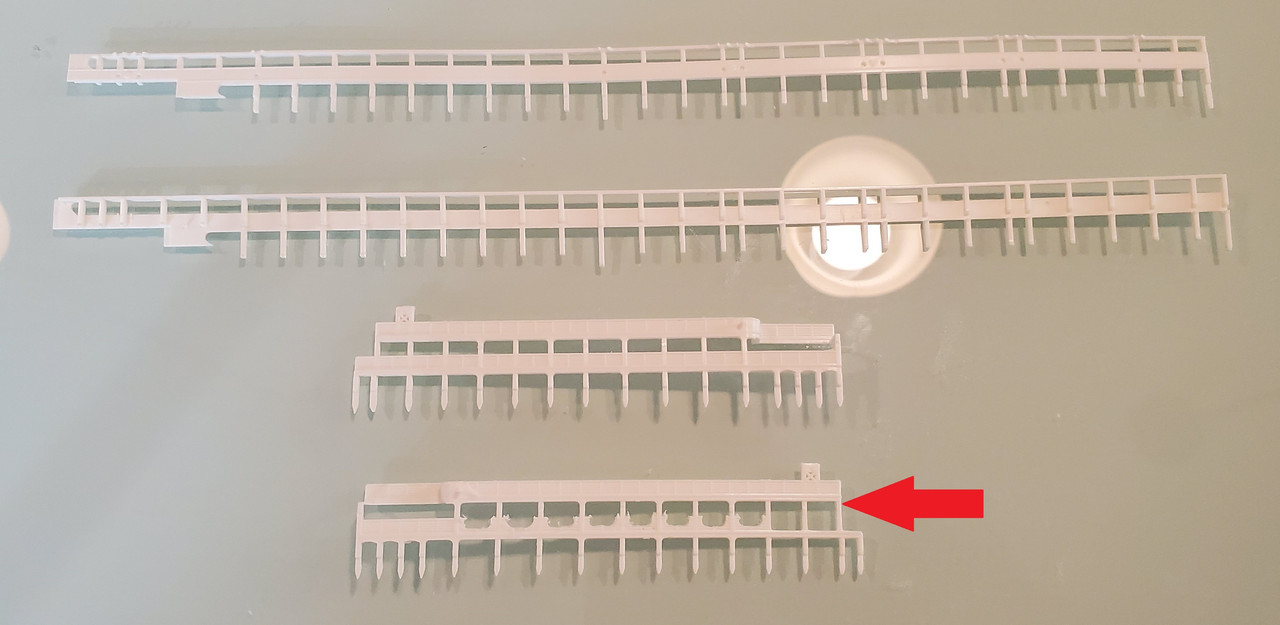
I removed one bow railing on the hull. I had to do it by hand. With the smaller pieces I did yesterday I was able to place them down flat on the bench and use my Foredom tool to remove some material and then finish it off by hand. With the whole half hull the railing sits off the bench in midair and doesn’t have enough rigidity and support to use the tool. It’s too risky as the whole piece jumps around too much even at low RPM. One slip would gouge a chunk out of the plastic. So I’ll just have to take my time and remove the rest by sanding and filing.
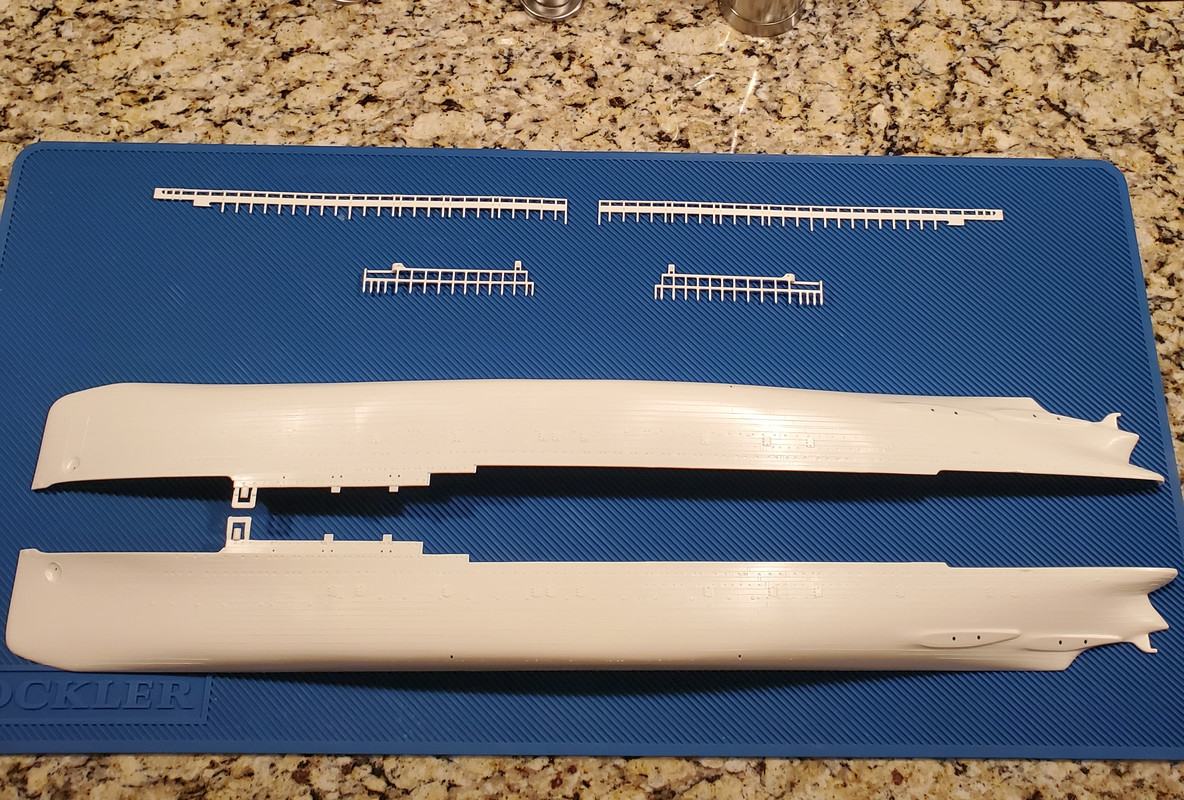
All the plastic railings are removed. It was a lot of filing and sanding. So far I’m really impressed by the quality of this model kit. Everything seems straight and clean. The Minicraft Titanic I recently built was a total horror show quality wise compared to this one. I think I’m going to enjoy building this one a lot more as I hopefully won’t be wrestling with all the warped junk like I did on the Titanic.
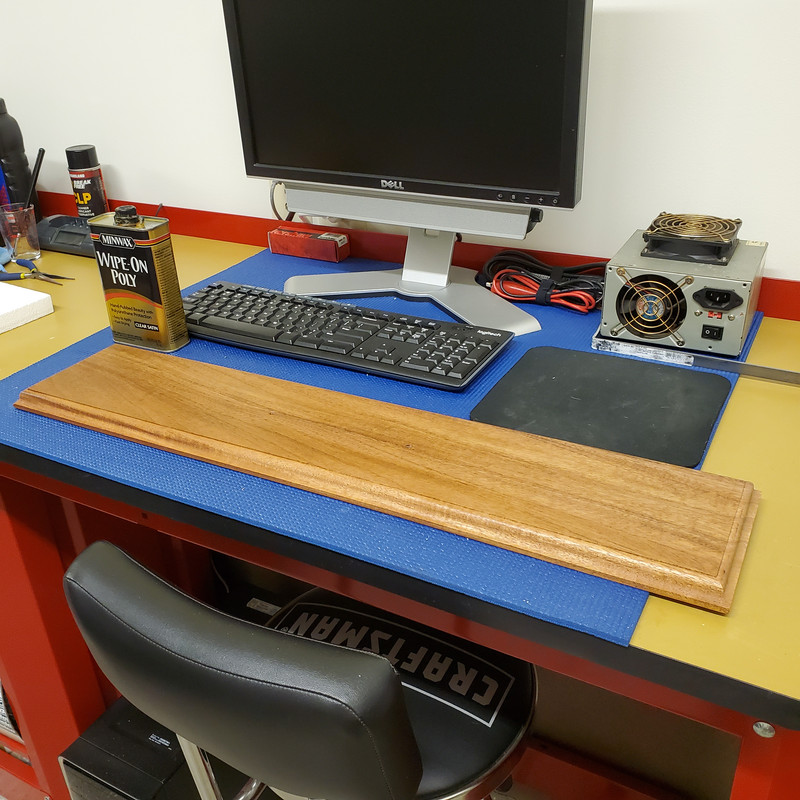
I cut and routed a piece of Mahogany for the display base. I just have to give it a few more coats of Polyurethane.
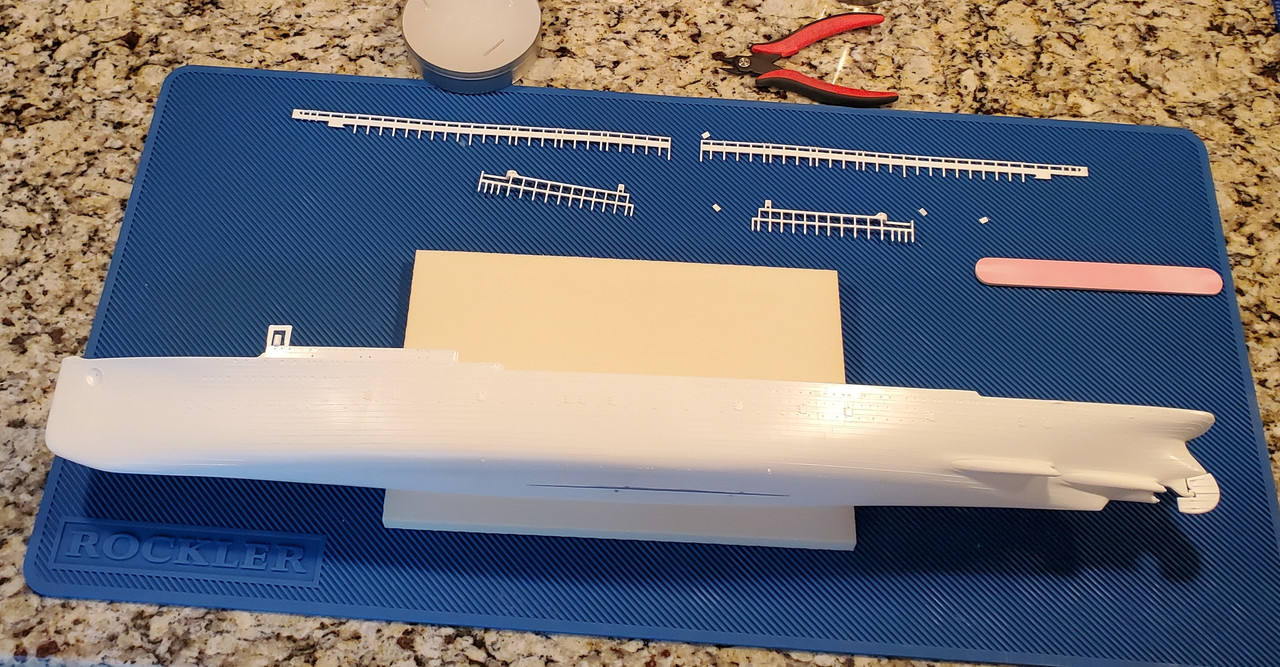
I also bought a color laser printer and some decal paper and printed up some decals. I was pleasantly surprised how nice they came out. Now I just have to figure out how to apply them correctly. I made a lot of spares for this Lusitania so now I can afford to mess up a few. I guess I’ll have to shoot the hull in gloss to apply them and then put a coat or two of flat clear over it. I learned from my mistake on the last one not to paint it dull until the decals are on. I am also going to mess around with panel line accent and see what that’s all about.
I got a hold of some stencils, tracing paper, hole punches, and a 24x12 piece of uncut Scaledeck… I am going to try and make wood decks for it. I am not really holding out much hope for that though. There are a lot of tiny details molded onto the decks that I don’t think I can cleanly cut out. It’s worth a try though.
Chris, drill out the port holes and fill with model masters clear glue and window maker. It takes time but makes a world of difference. Do that before p[ainting the hull.
Looking good. I like to build on a construction base and switch to the final one when I get to deck level.
I have a collection of them. The feature I like is a upturned piece at one end. It really helps because it allows the ship to be layed on it’s side on the bench.
Watching this one with interest. If I am correct the Kit was originally done by Entex in the mid 70’s. Gunze got the Moulds and re popped it in the mid 80’s…Cheers mark
Thanks. Lots of good ideas from you all. It’s all very helpful to me!
As far as Entex is concerned, I had bought an old used Entex Titanic for spare parts and the quality of its parts was much better than the Minicraft version. I don’t know much about all the history of these kits but I know a lot of people on other more Titanic oriented forums rave about how great the updated Minicraft Titanic is. That’s why I bought it. I found it to be horrible, bordering on junk parts. I can’t emphasize that enough! It almost turned me off to the idea of getting into this hobby. I’m glad they all don’t appear to be like that. I don’t know how hard it is to scratch build stuff but it almost seems like it would be easier to start from scratch than try to fix all the mess on that kit. This one is lots better.
You are a very lucky person. In all the years I have looked for her specifically, most shops or sites said they didn’t know if one existed. And 1/350 at that? Good luck and I will be watching this build.
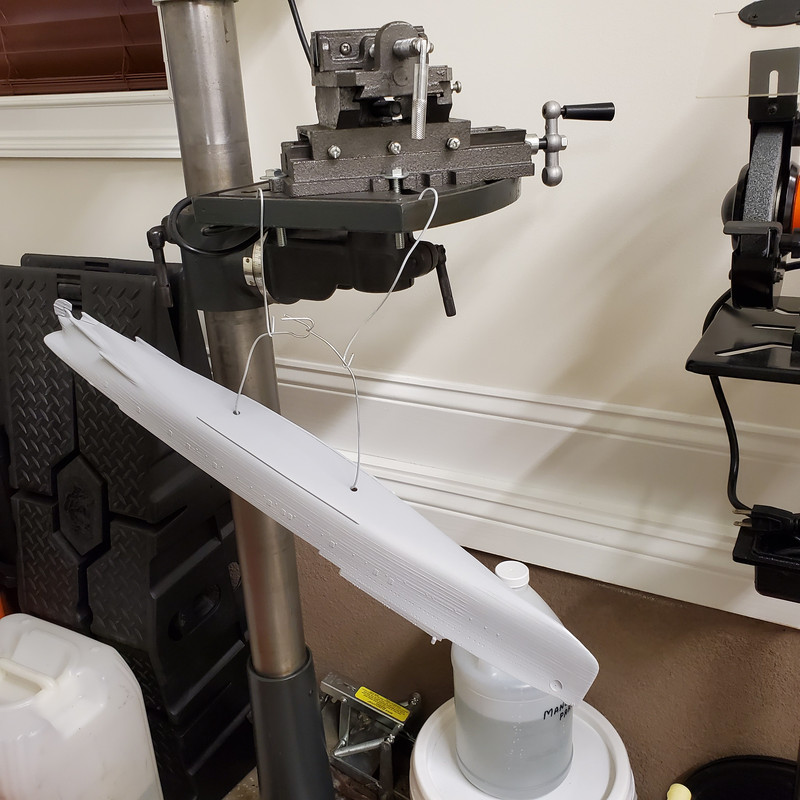
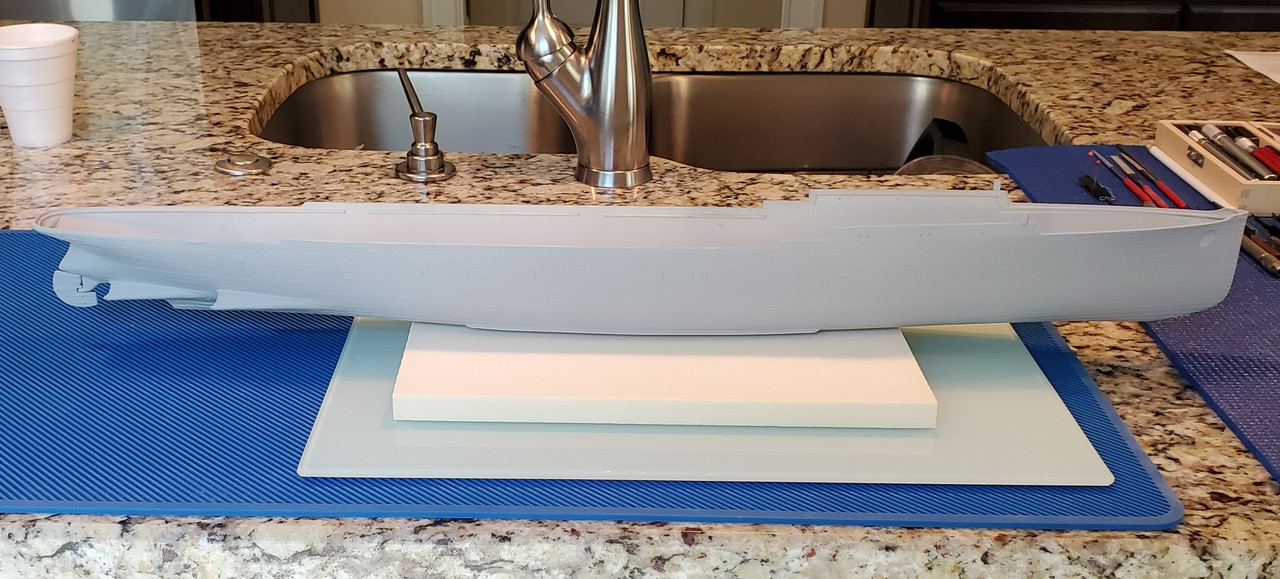
I assembled the two piece hull, propeller shaft housings, rudder, and bilge keels. There are a few male and female connection points on the hull which I put modeling glue into the holes and let them get tacky. This left gaps along the length of the hulls division which I tacked with CA glue until the two halves were flush. I then ran a bead of modeling glue along the hulls interior length. After it was all dry I painted on a large bead of epoxy so after all that I think the two halves should be solid.
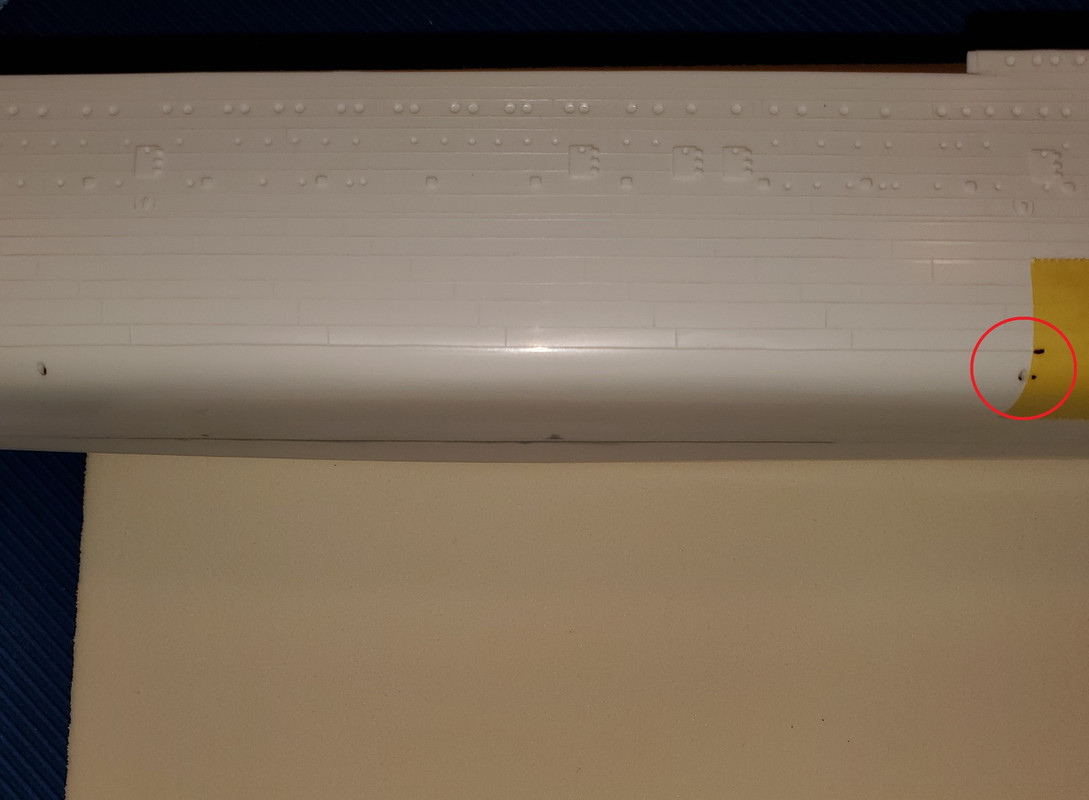
There was a hole not molded for one of the bilge keels. I found this out when I tried to affix them. It was quite a tricky hole to drill as it has to be drilled on a rounded surface but yet be parallel with the keel. I couldn’t use a starter punch on this delicate plastic so I used the smallest bit I have on my pin vise to just do basically the same thing. As I worked up in bit size I gradually sent the bits in parallel. It came out fine.
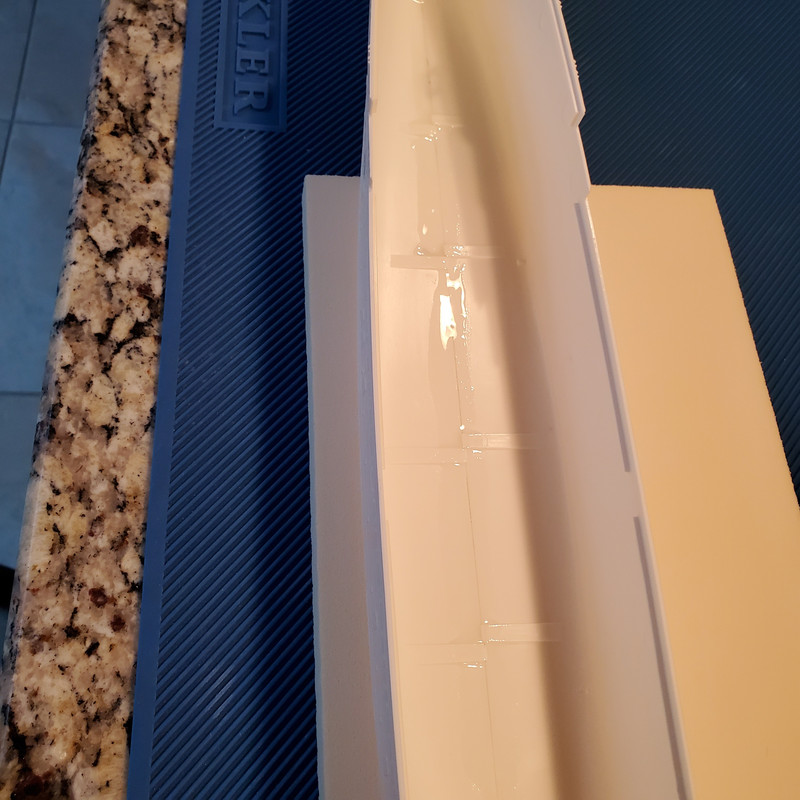
I tried and failed at my attempt to use putty. I initially used Tamiya putty on the seem on the bottom of the hull. I could tell immediately it was not what I would be using on the other area I needed to do, the propeller shaft housings. The Tamiya cures fast, doesn’t spread easily for me, and dries like a rock.
I see models with the shaft housings blended in nicely. I tried this and wound up just making a giant mess. I was able to fill in the small gaps between the housings and the hull but there would be no feathering the housings in. It’s like bondo on a car, some people are good at feathering and some are not. I’m not. Aside from making a mess, the hull panel lines run right up to these housings and when I began sanding away the putty I could see that I was going to take away the hull accents with it. I chickened out and removed the water based putty with some wet Q Tips. It’s a confined space that requires more talent than I have. I’ll have to be happy with just having filled the spaces I did. I’m capable of filling seems but I can’t feather and blend in large objects.
I also finished sanding, steel wooling, and coating the display base. That kept me busy for a good part of the day.
I hear ya on the Tamiya Putty! I prefer using Automotive Glazing Putty ( the large tube) in red. All you have to do is dip your finger in a little lacquer thinner or just moisten it with saliva and it spreads and blends well ! This does require more than one application, but this will work for you.
Thanks for the tip. I have had experience with red auto putty in the past. I did bodywork on some of my cars/trucks years ago…never liked doing it lol.
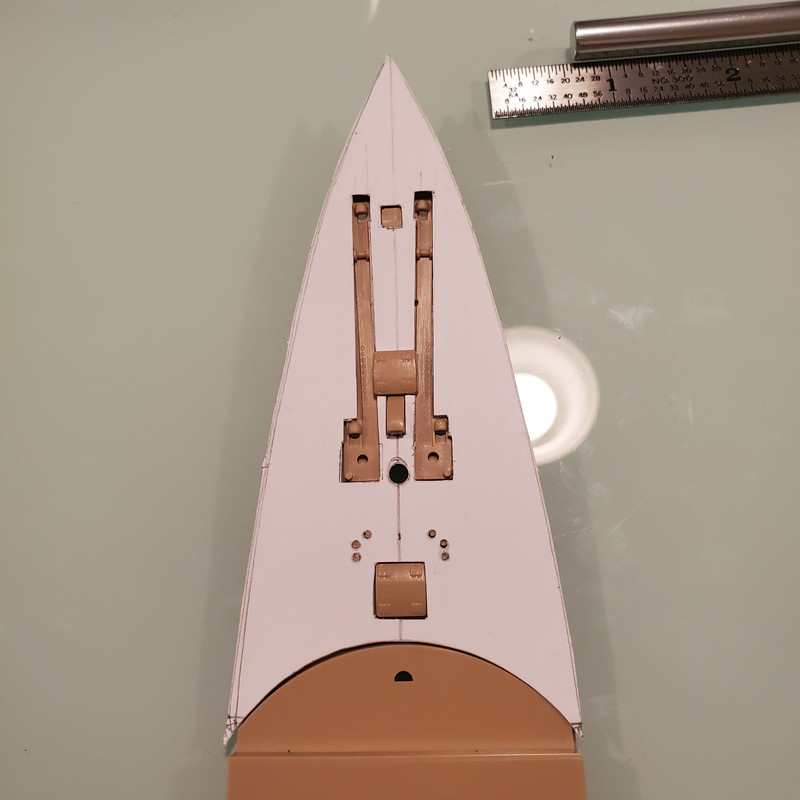
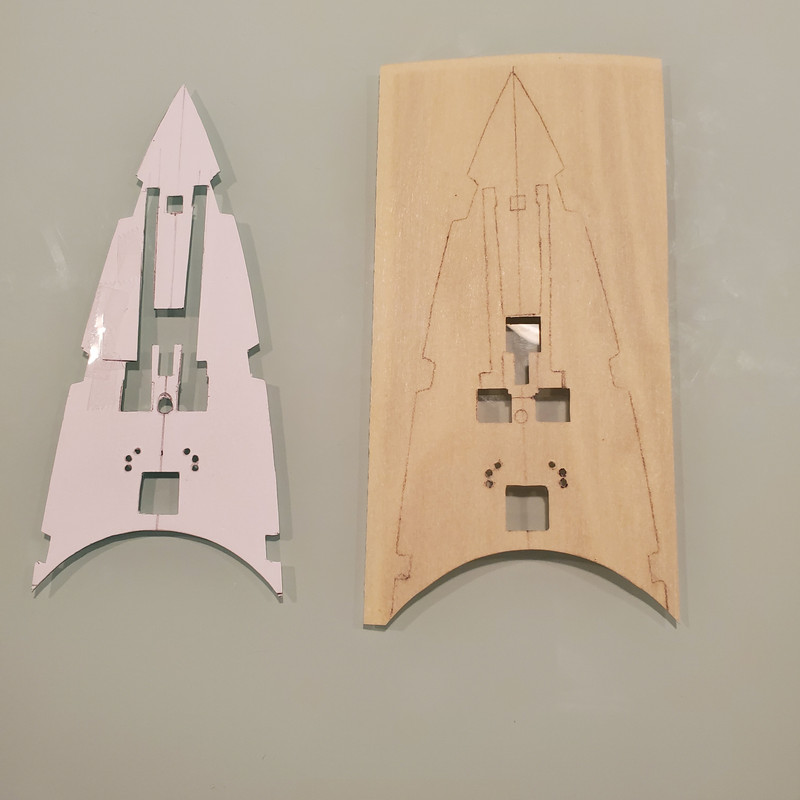
I ordered more supplies to try and give making wood decks for this Lusitania a go. I think I can get it done but time will tell. I’ll see how the first one turns out and then decide if I should continue. It will be very time consuming. I bought a load of stencils, chipboard, graph paper etc. I also bought a BUNCH of X-acto blades!!
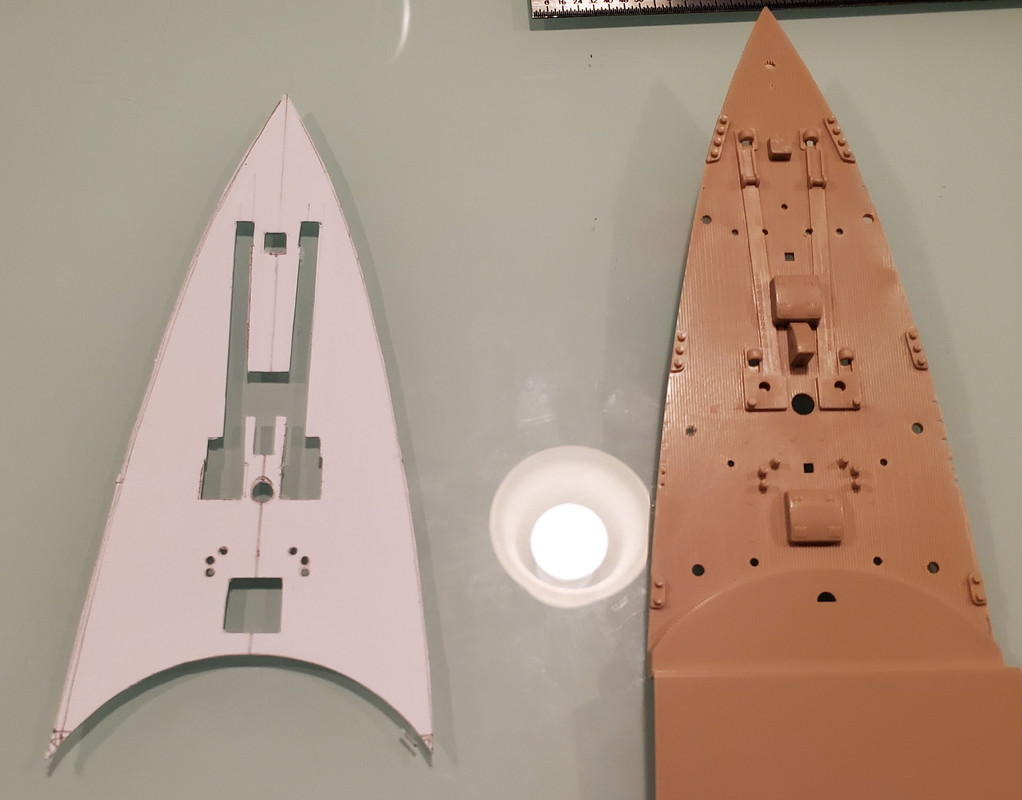
I figure on making drawings I can scan into my computer in the actual scale of what I’m trying to cut. I can make a base drawing that I can always go back to. I’m going to try and update the drawing as I progress but always keep the latest mistake free drawing to fall back on. Once I get it the way I want it I’ll print out the drawing and then transfer it to and cut it into thin chipboard. Hopefully I can use that template for fine tuning sort of like dry fitting the actual pre made decks. If I can get the template to fit nicely I’ll cut the wood decking from a tracing of the template. A lot of the cuts will be tiny so I don’t know if any of this will pan out but that’s my plan. The plan can change if it doesn’t seem to be working. I’ll know if it’s going to be something I’ll keep at if I can get the forecastle to look acceptable. If not. Then it’s painted decks lol!
I will be idling for awhile as I have to wait for the supplies to arrive. Then I’m sure I’ll be spending a lot of time drawing and other stuff that isn’t actually model building. That just goes to show how much I like the look of the wood decks to even attempt this kind of nutty project. I wish somebody made wood decks for this model but I don’t see that happening on an out of production kit. Hopefully it won’t be a huge waste of time.
I have the same kit and, I think, the same wood deck material. Your skills are several paygrades above mine so I’ll be following along with great interest.
I’m sure you’ve done your research but, just in case you haven’t seen these 20 pages:
I aslo have the Gold Medal Models PE for the kit. I’ve invested enough $ in this kit so that I really should build it LOL! Your build may push me toward that end.
Hi Mike. It looks like you’re trying the same exact thing as me. I have the Gold Medal stuff for this kit too. I’m using an uncut sheet of decking from Scaledecks. I wish someone would make a deck for this thing, it would save a lot of work and time,
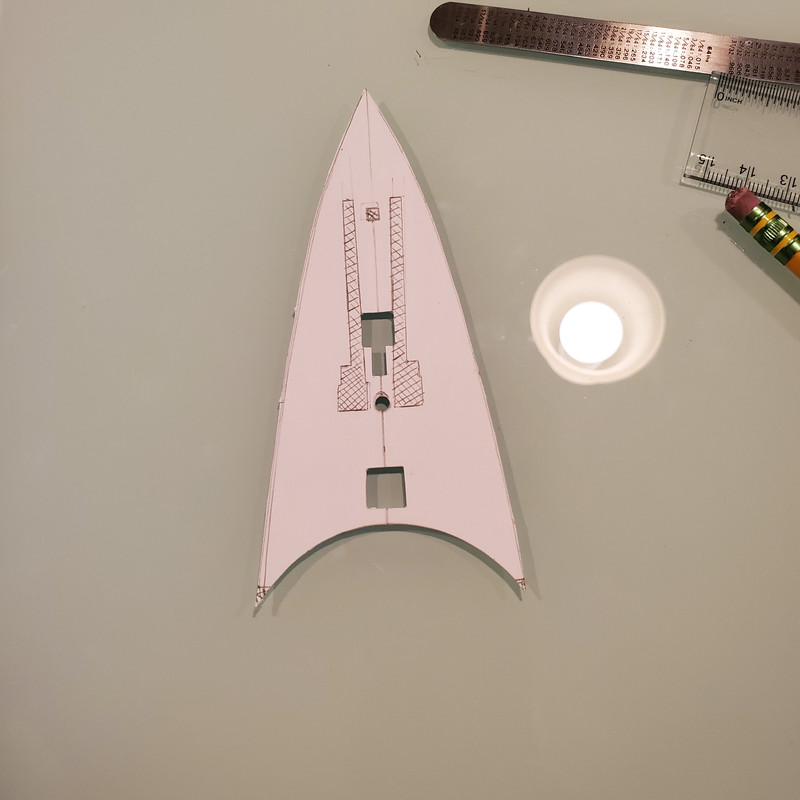
I am about 80% done with one template for one deck lol. If I’m successful with this deck project it’s going to take a LONG time. Cutting the decks themselves from the template should be interesting since the point of the pencil takes up enough room to throw everything off. I’ll be at this for a while. Good luck with yours, let me know when you get started.
The camera doesn’t lie. After looking at the photos of my template I could see I over cut one spot. I added some material to that area. I will have to clean up all the edges when I actually cut the wood decks. I figure since this deck is a mirror image I will draw the lines on the underside of the wood so I won’t have pencil marks to deal with.
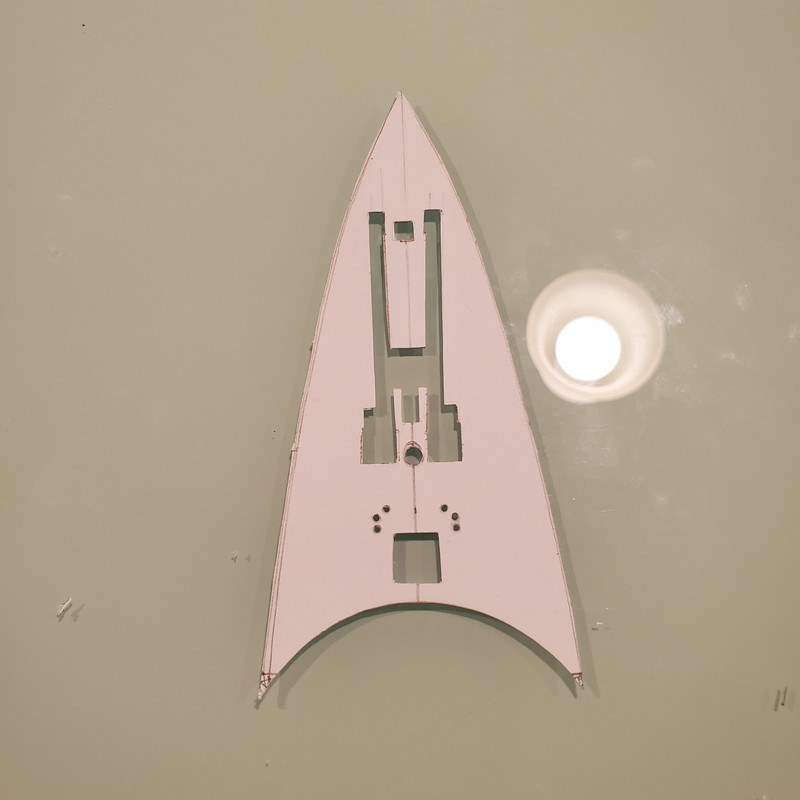
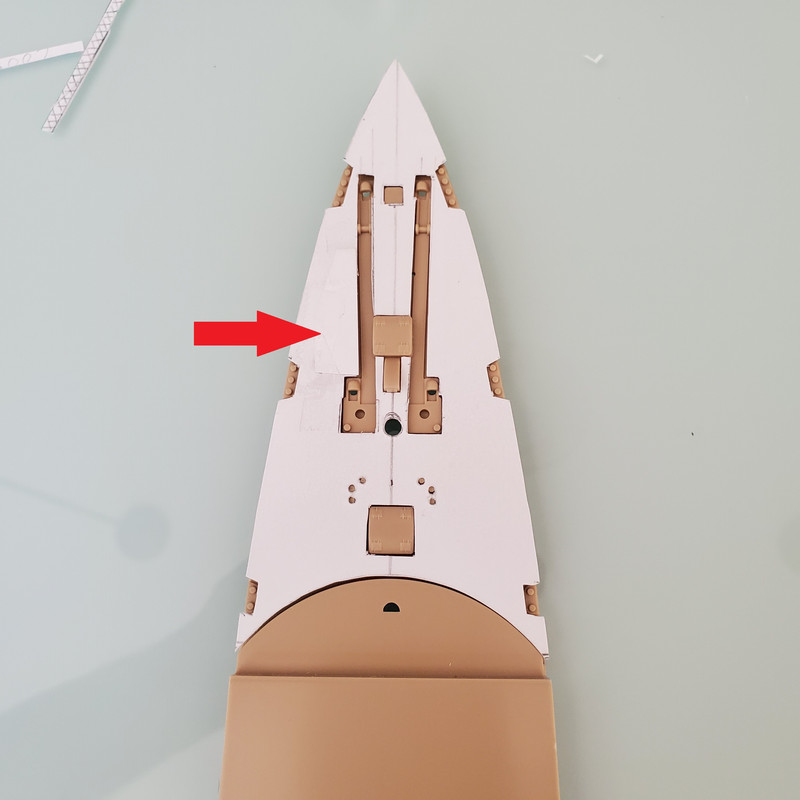
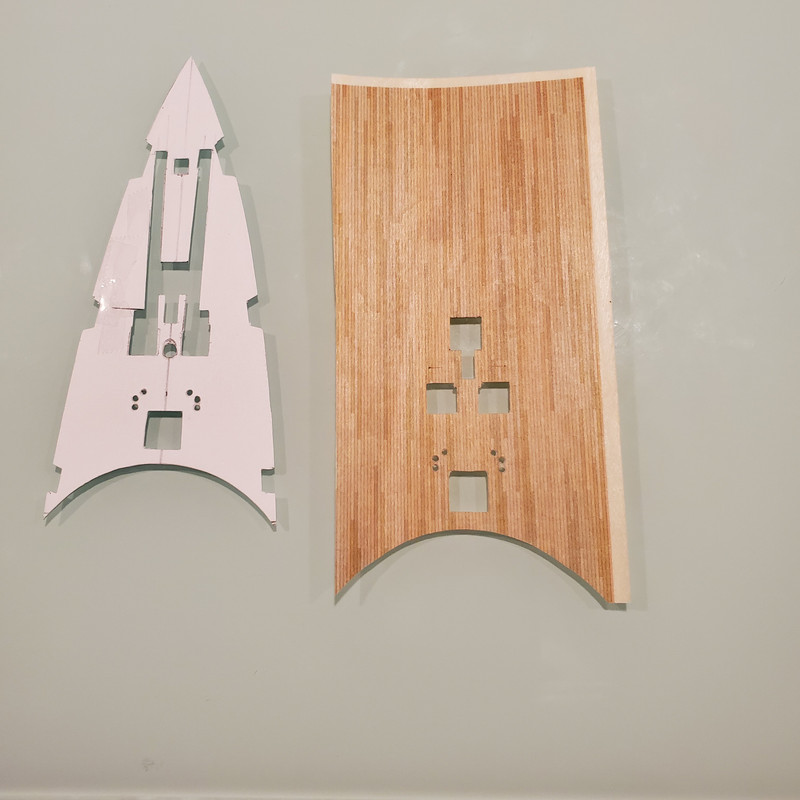
Well the template really isn’t accurate enough to use for cutting. I am now just cutting the deck by measuring the location of each individual cut from points on the plastic itself. It takes forever. This is as far as I got after a few hours. I’m trying not to make a mistake because then I have to start all over. Just painting the decks is looking better and better all the time. I’m not giving up yet though.