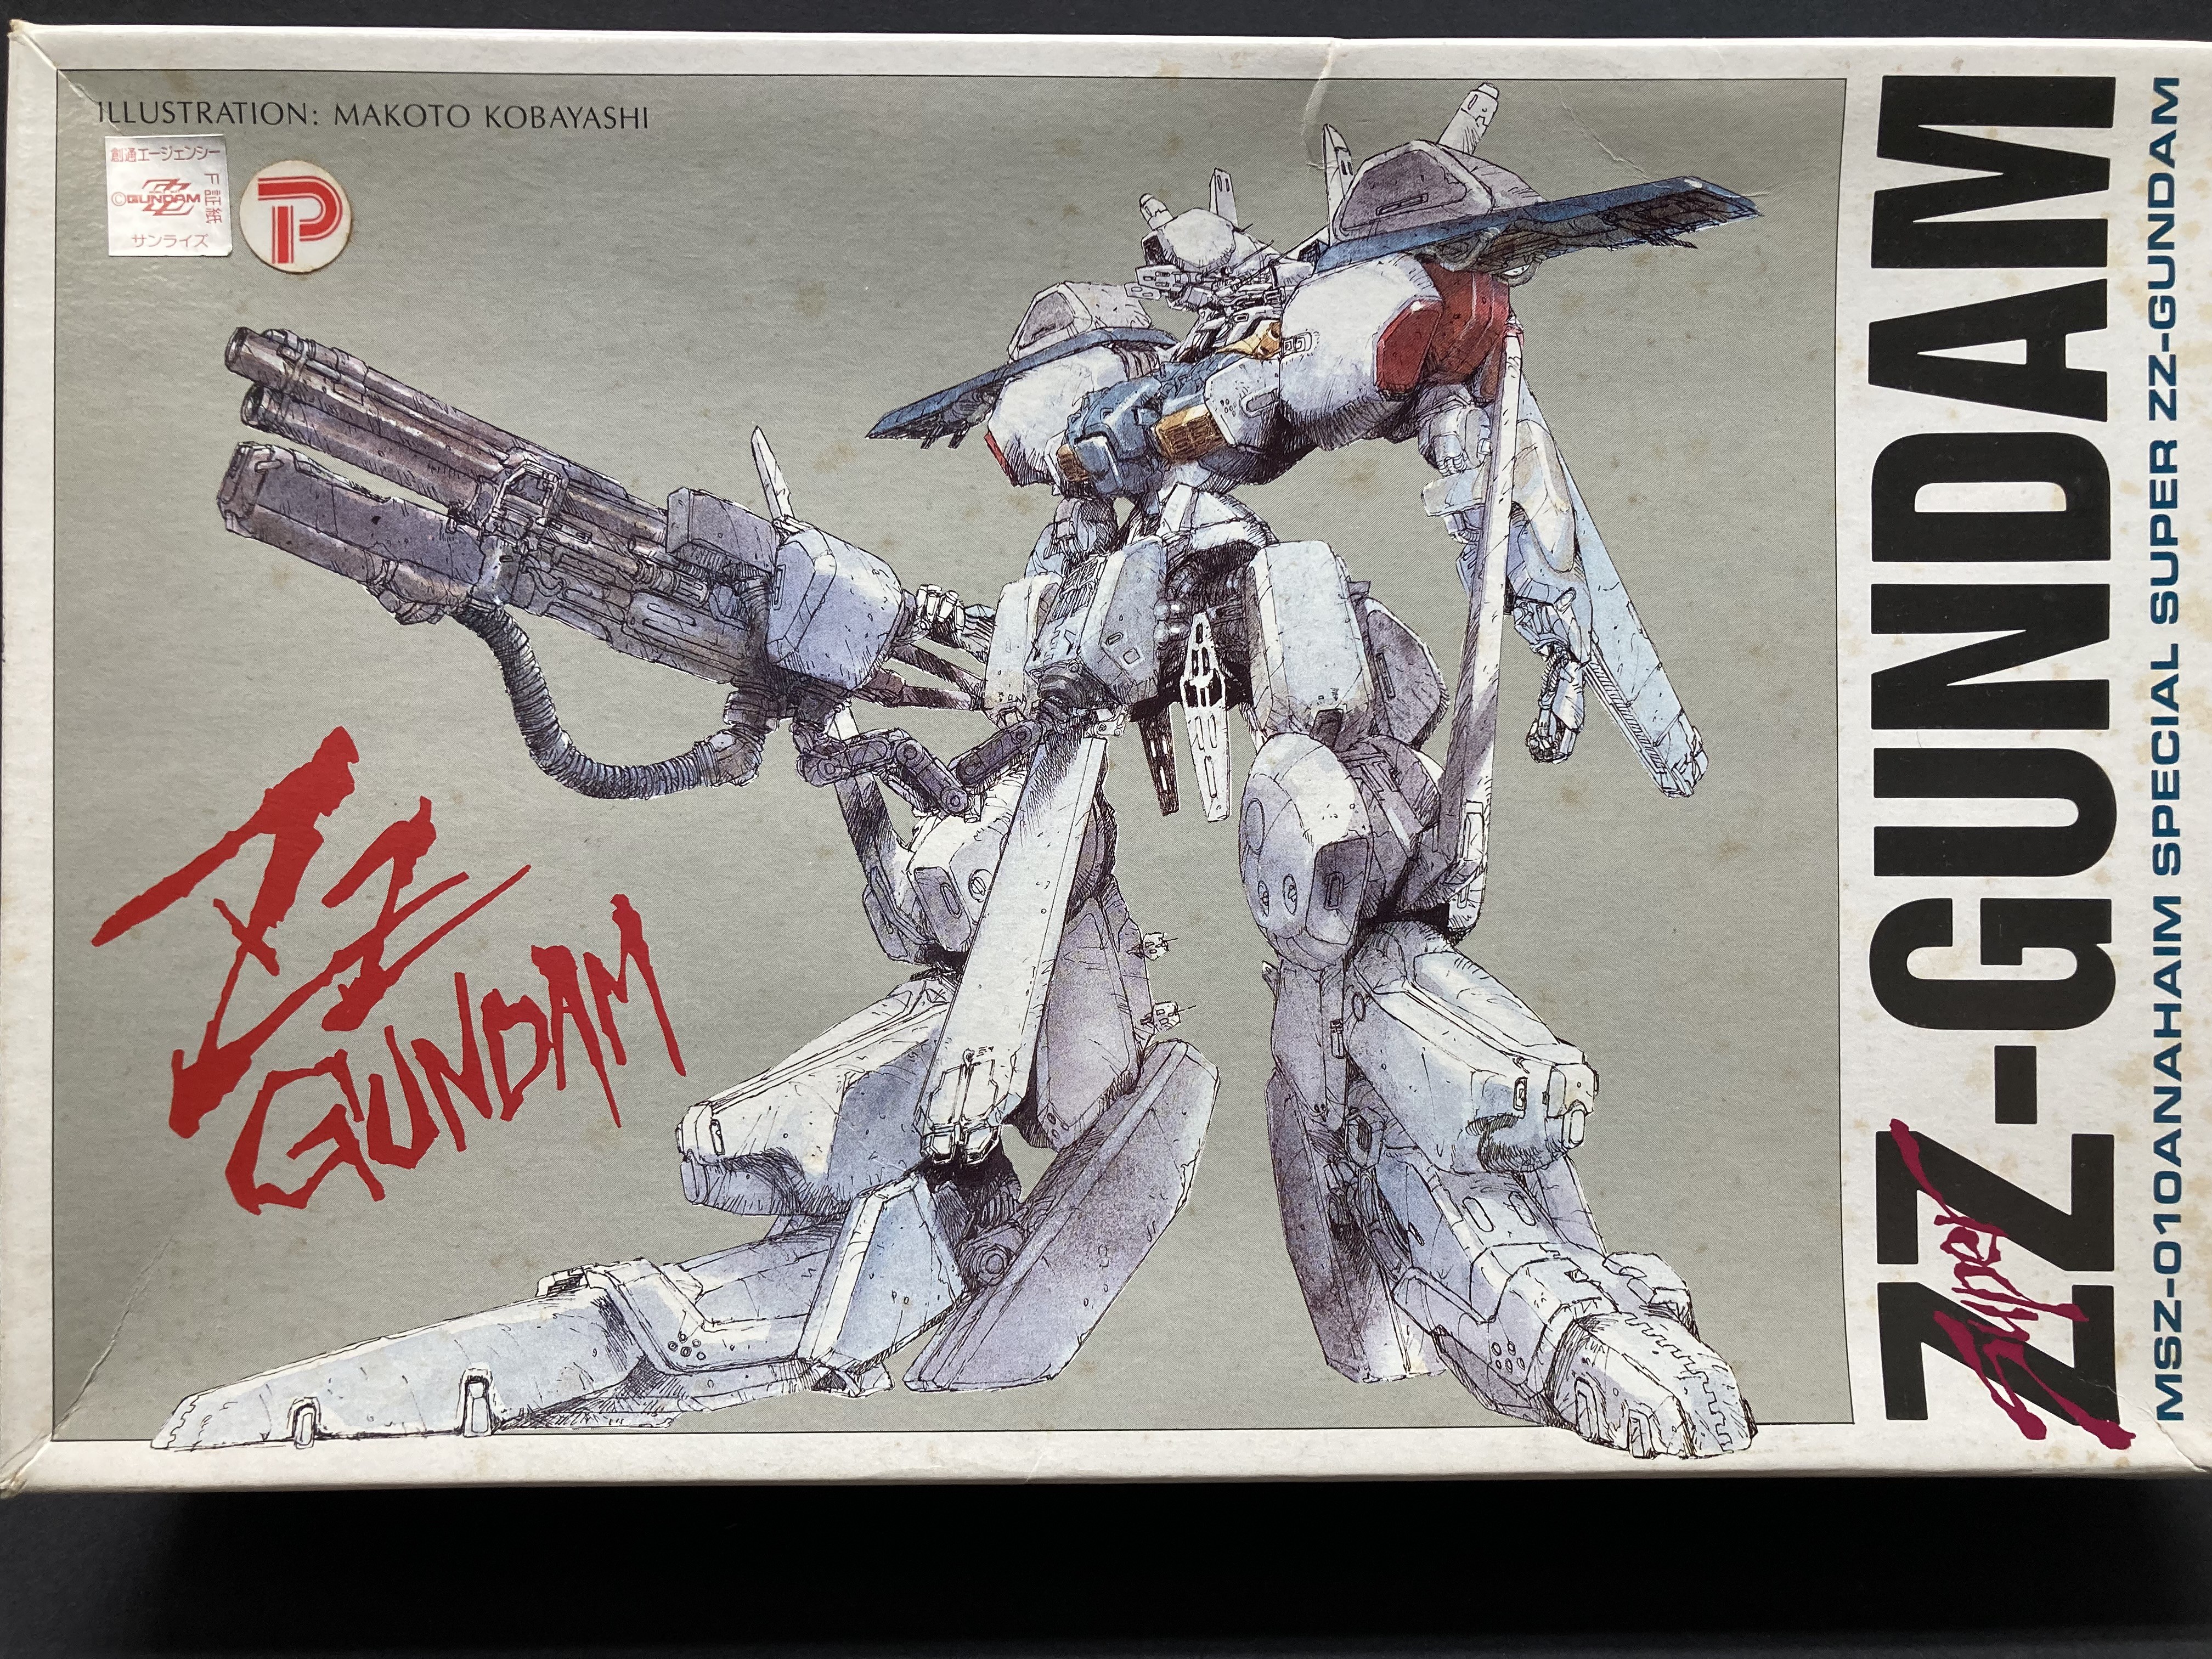
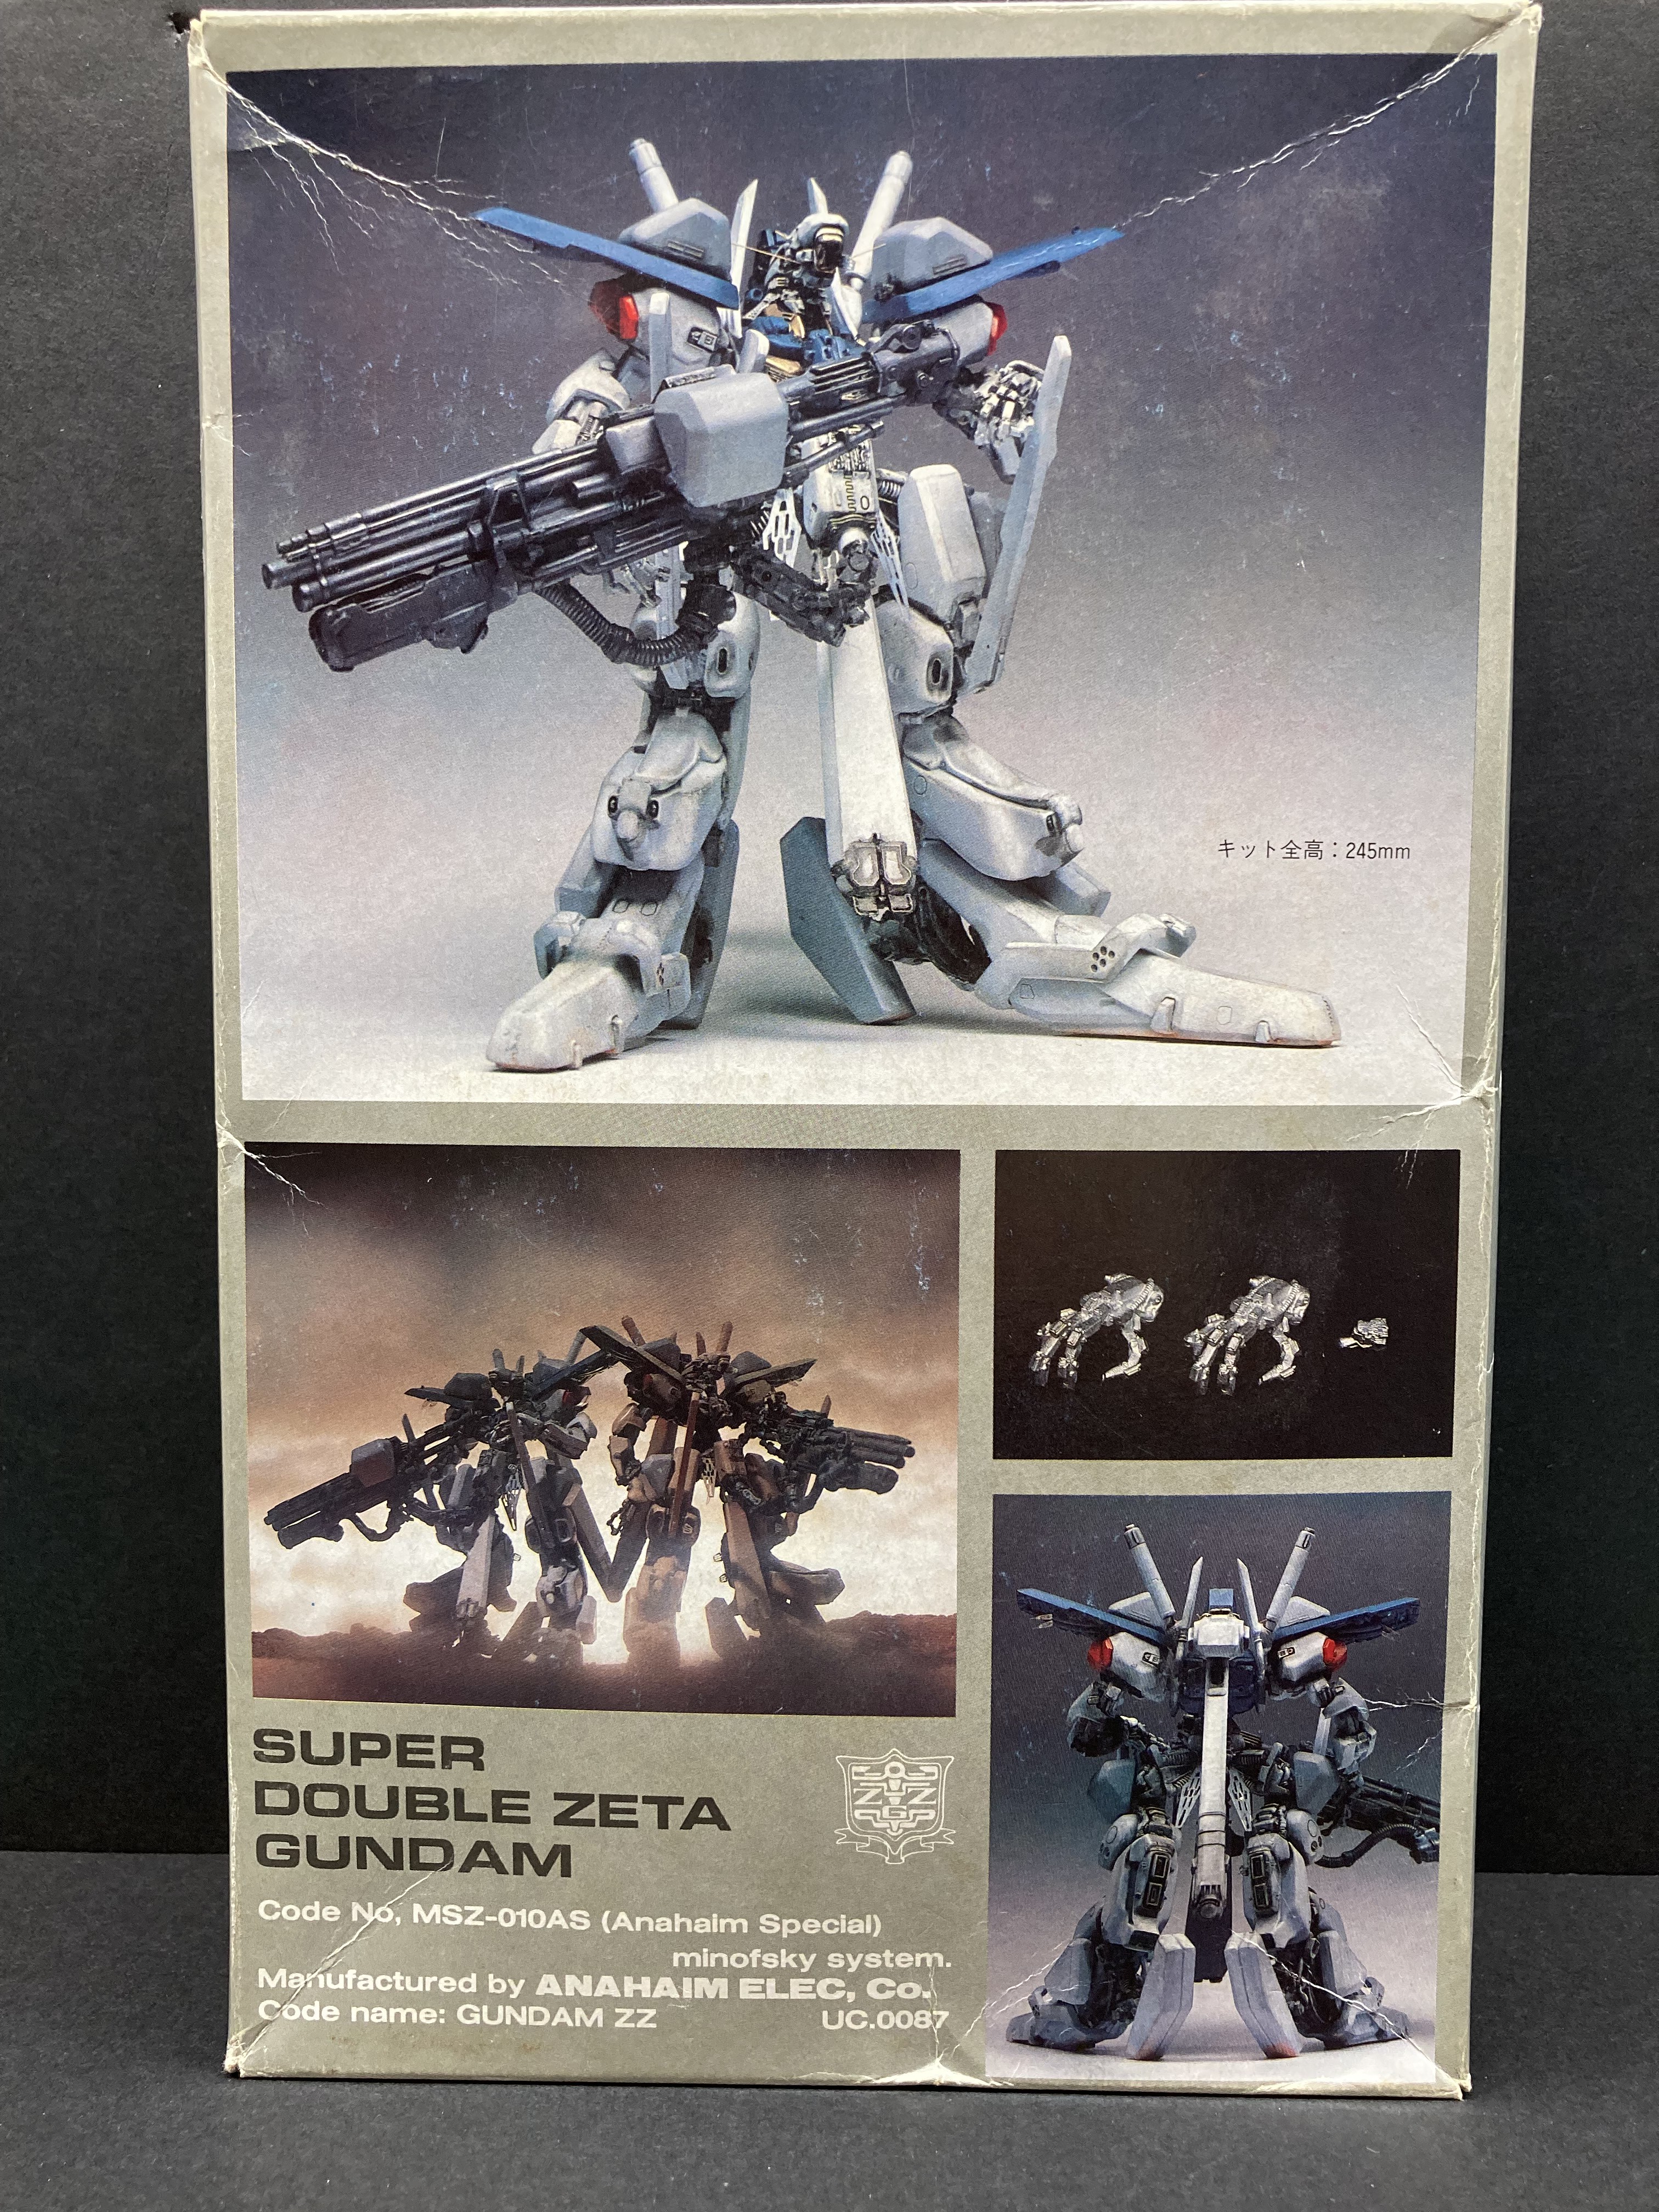
I gleefully purchased this kit at Yamashiro-Ya in Ueno, Tokyo in the early 1990s. Resin garage kits were all the rage at the time, and this kit was fully representative of the best you could find in those heady days. It had it all - outrageous subject, outrageous detail… and outrageous price (12,000 Yen)! In addition to the resin parts, a PE fret with various fins, vanes, and vents was provided, along with some coiled hoses and brass wire. The instruction sheet included a really cool comic strip which originally ran in B-Club magazine. Kotobukiya was selling their own brand of resin de-greasing detergent called “Liqcaper”, and a small bottle of said detergent was included with the kit. What a package!
After returning home, I marvelled at the pile of resin parts that just oozed with insane detail. And then I realized I had zero experience with resin kits. The parts were extremely well molded, and cleanup was tedious only because of the intricate details. The PE parts had no means of attachment to the model, so it was all DIY. The resin parts also had no locator pins or aids either, but to be fair the kit was “free pose” in design to allow the builder to adjust to taste.
So after cleaning up the kit and giving the parts a wash using the included Liqcaper (which worked very well in stripping all the release agent), I assembled a few parts, added some locator pins, and applied some primer. The arm supporting the enormous gun was the only kind of wonky looking bit in the box, and I had no confidence that the spindly thing would support the gun’s weight for any appreciable time. What to do? What to do. And then it sat in the box until I could figure out how to put this beast together.
Funny how 30 years changes one’s perspective. My younger self did all the heavy lifting by cleaning up most of the parts (the big, block-like energy capacitors for the main gun are still untouched), repairing a few broken parts, and adding some small details. The articulated gun support arm will be replaced with a suitably bent up piece of wire with my own details. I was really taken by the box art, but had no idea how to get that aged effect. But model painting has evolved greatly in recent years, so achieving that look (might) be in reach.
Interesting. I quite like the rough designs of these concept arts. And sometimes when irregularty transfers to garage kits, nature of hand made products, it lends to the same charm. It is part of the reason I bought Yellow Submarine’s 1/4000 SDF kits, even after Hasegawa released their plastic kits. The crisp molding, straight lines etc of the Hasegawa kit is lacking the organic look of line drawings - sometimes you actually want unstraight lines and rounded edges and asymetric parts, which ironically gives a bigger sense of scale.
Potchip, you apparently understand the Zen art of the unstraight straight line. You speak the truth about how the imperfect organic look appears to look more natural than perfectly razor straight lines.
And this kit has unstraight lines up the wazoo! [:P]
That’s a spectacular looking kit! If more Gundam looked like that I’d be more tempted to pick it up. Hope you get the opportunity to finish it.
I’d have to agree that there is something about the imperfections in a resin kit which give it a certain “liveliness” that is missing from the injection kits.
It was that which caught me when I first saw the reissue of this kit.
I’ve never done resin but I was ready to jump into the deep end for this one. Sadly, finances determined otherwise. [:'(]
Actually, I think it WAS based on a Zoids King Kong. I felt when Kow started leaning on the Zoids aesthetic was when his MaK design edge began to wander off course. The Grosserhund is a prime example.
All artists have their off days though. Kobayashi did that weird Space Battleship Yamato with the greenhouse window. Heck, even the late, great Syd Mead did… Turn A Gundam. I heaved about in rage/despair when I saw the design, asking myself how the artist who penned the Spinner and Sulaco could produce such a travesty of a mobile suit.
And if there is anyone with a high-pitched nasal voice who is about to tisk at me, saying Turn A Gundam was a great series - you are not welcome in my house. [6]
Never hire a westerner to do anime mecha. It never ends well.
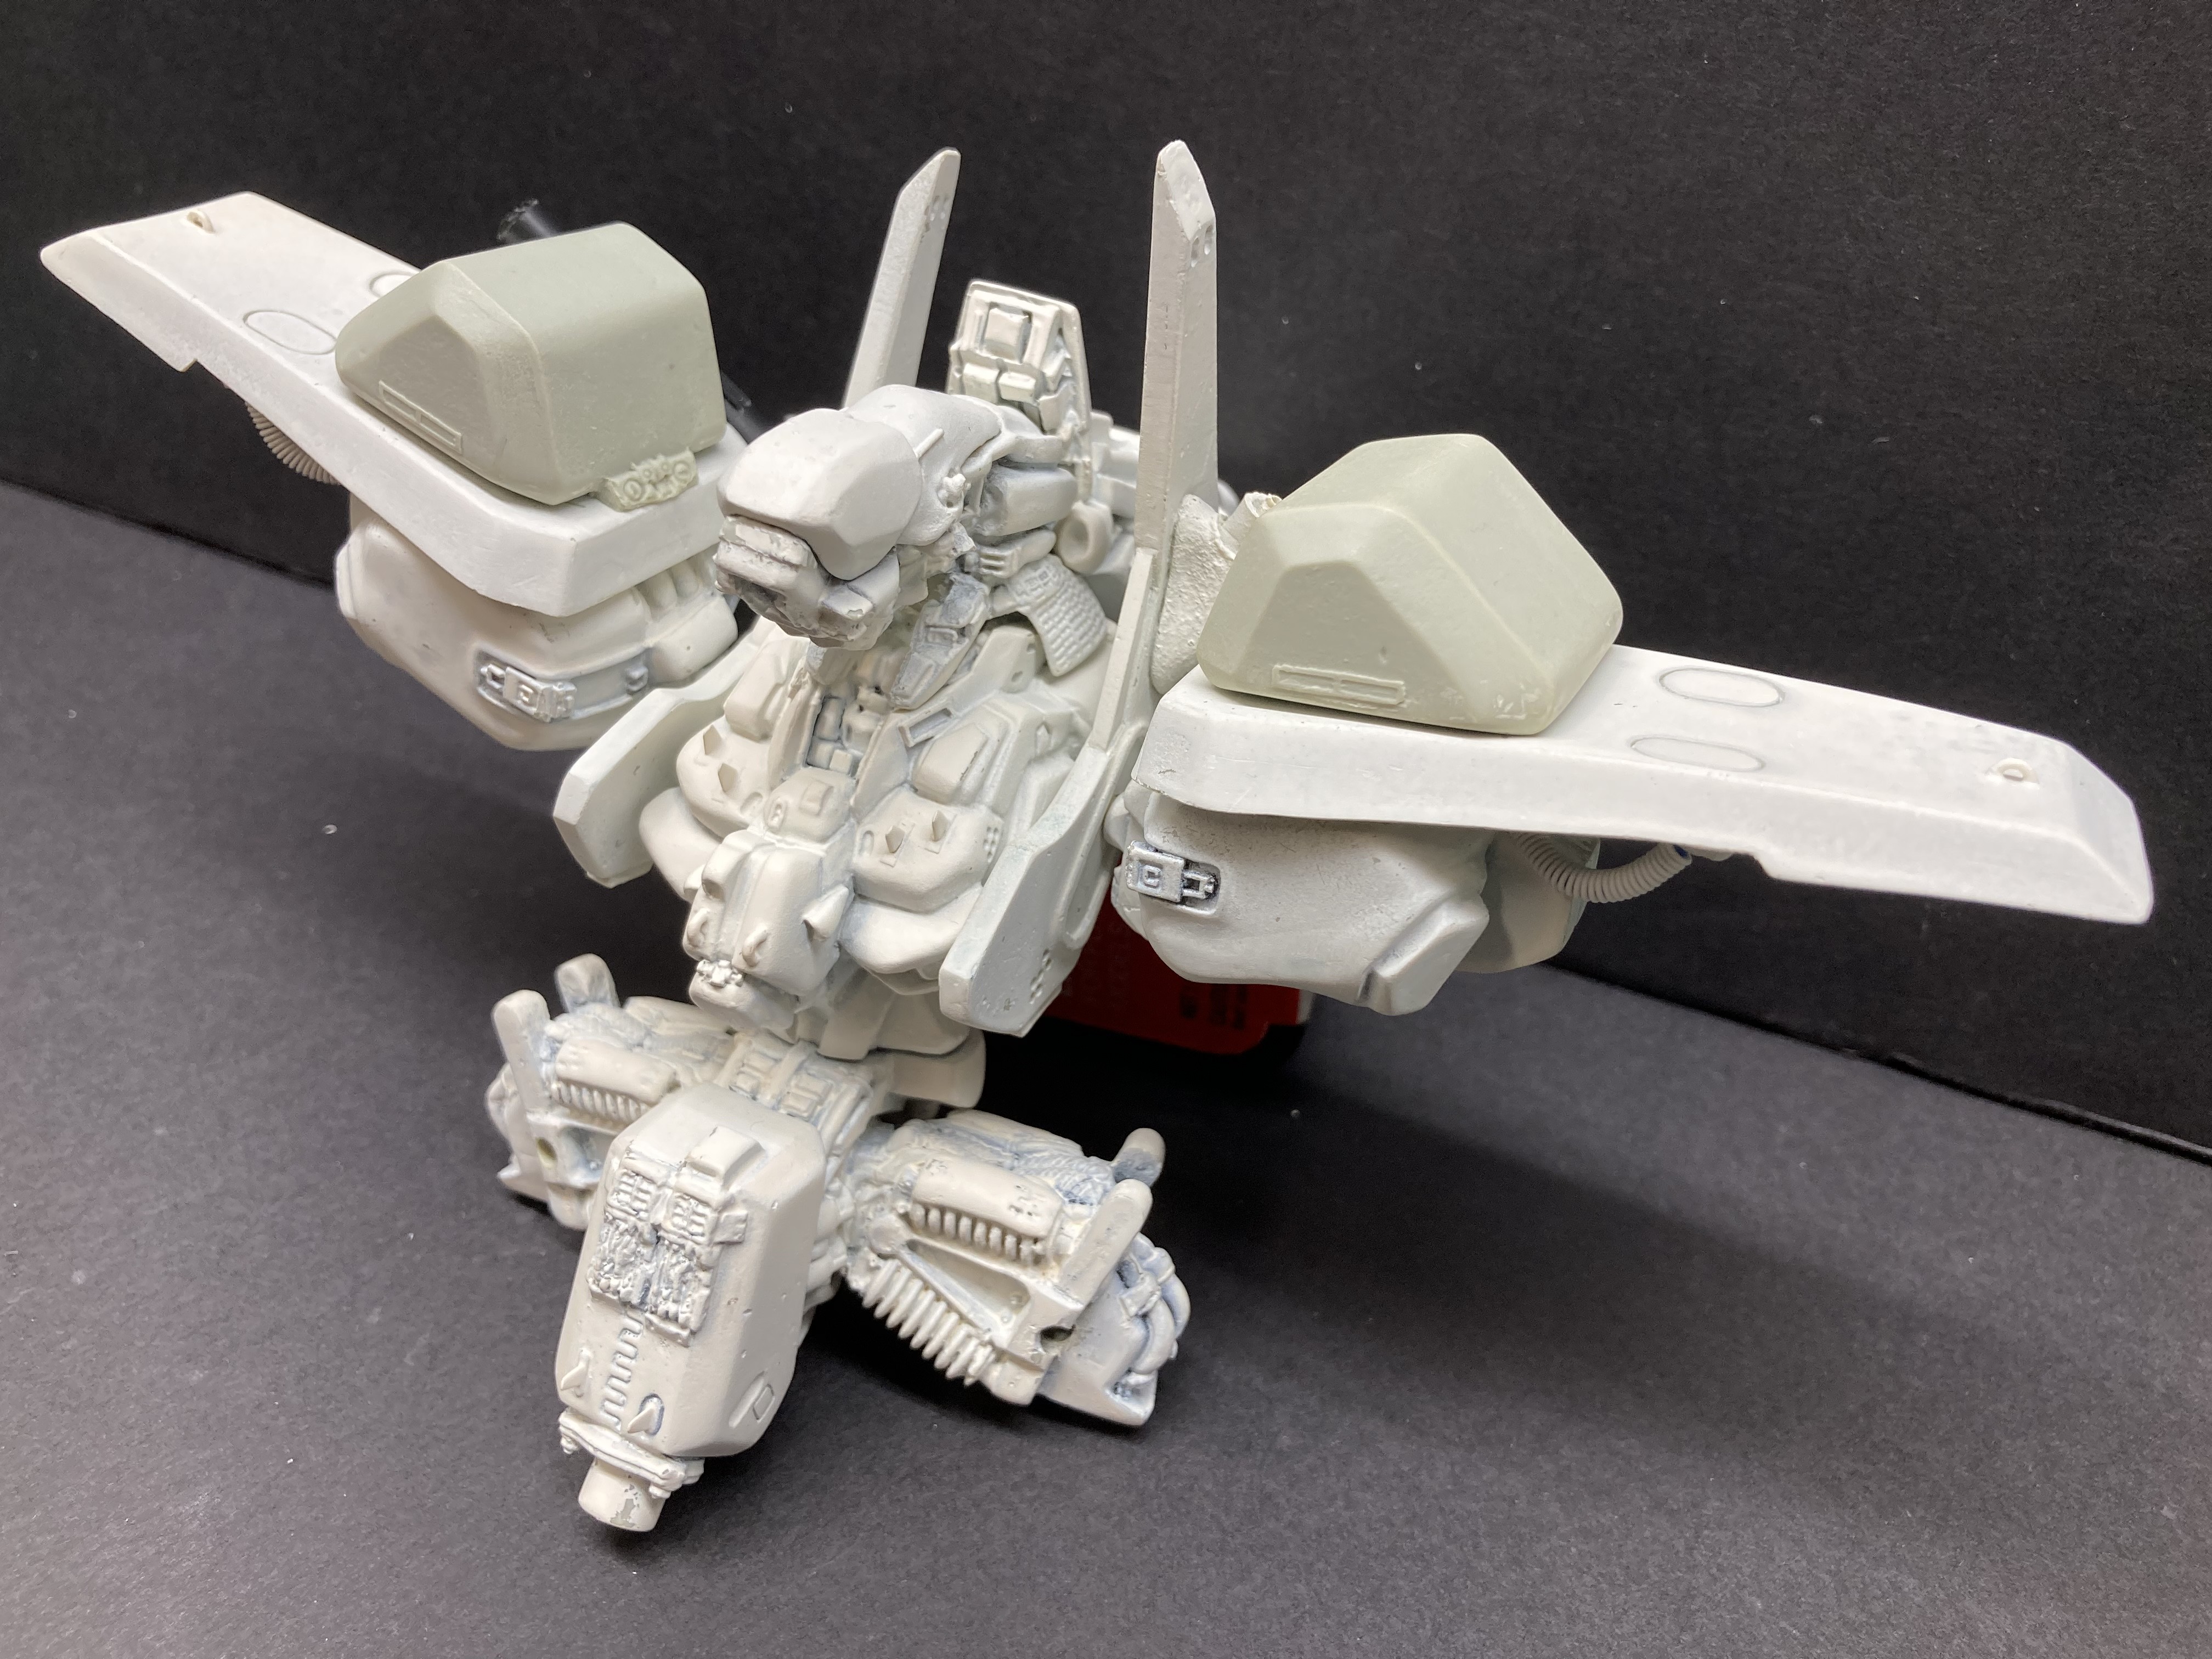
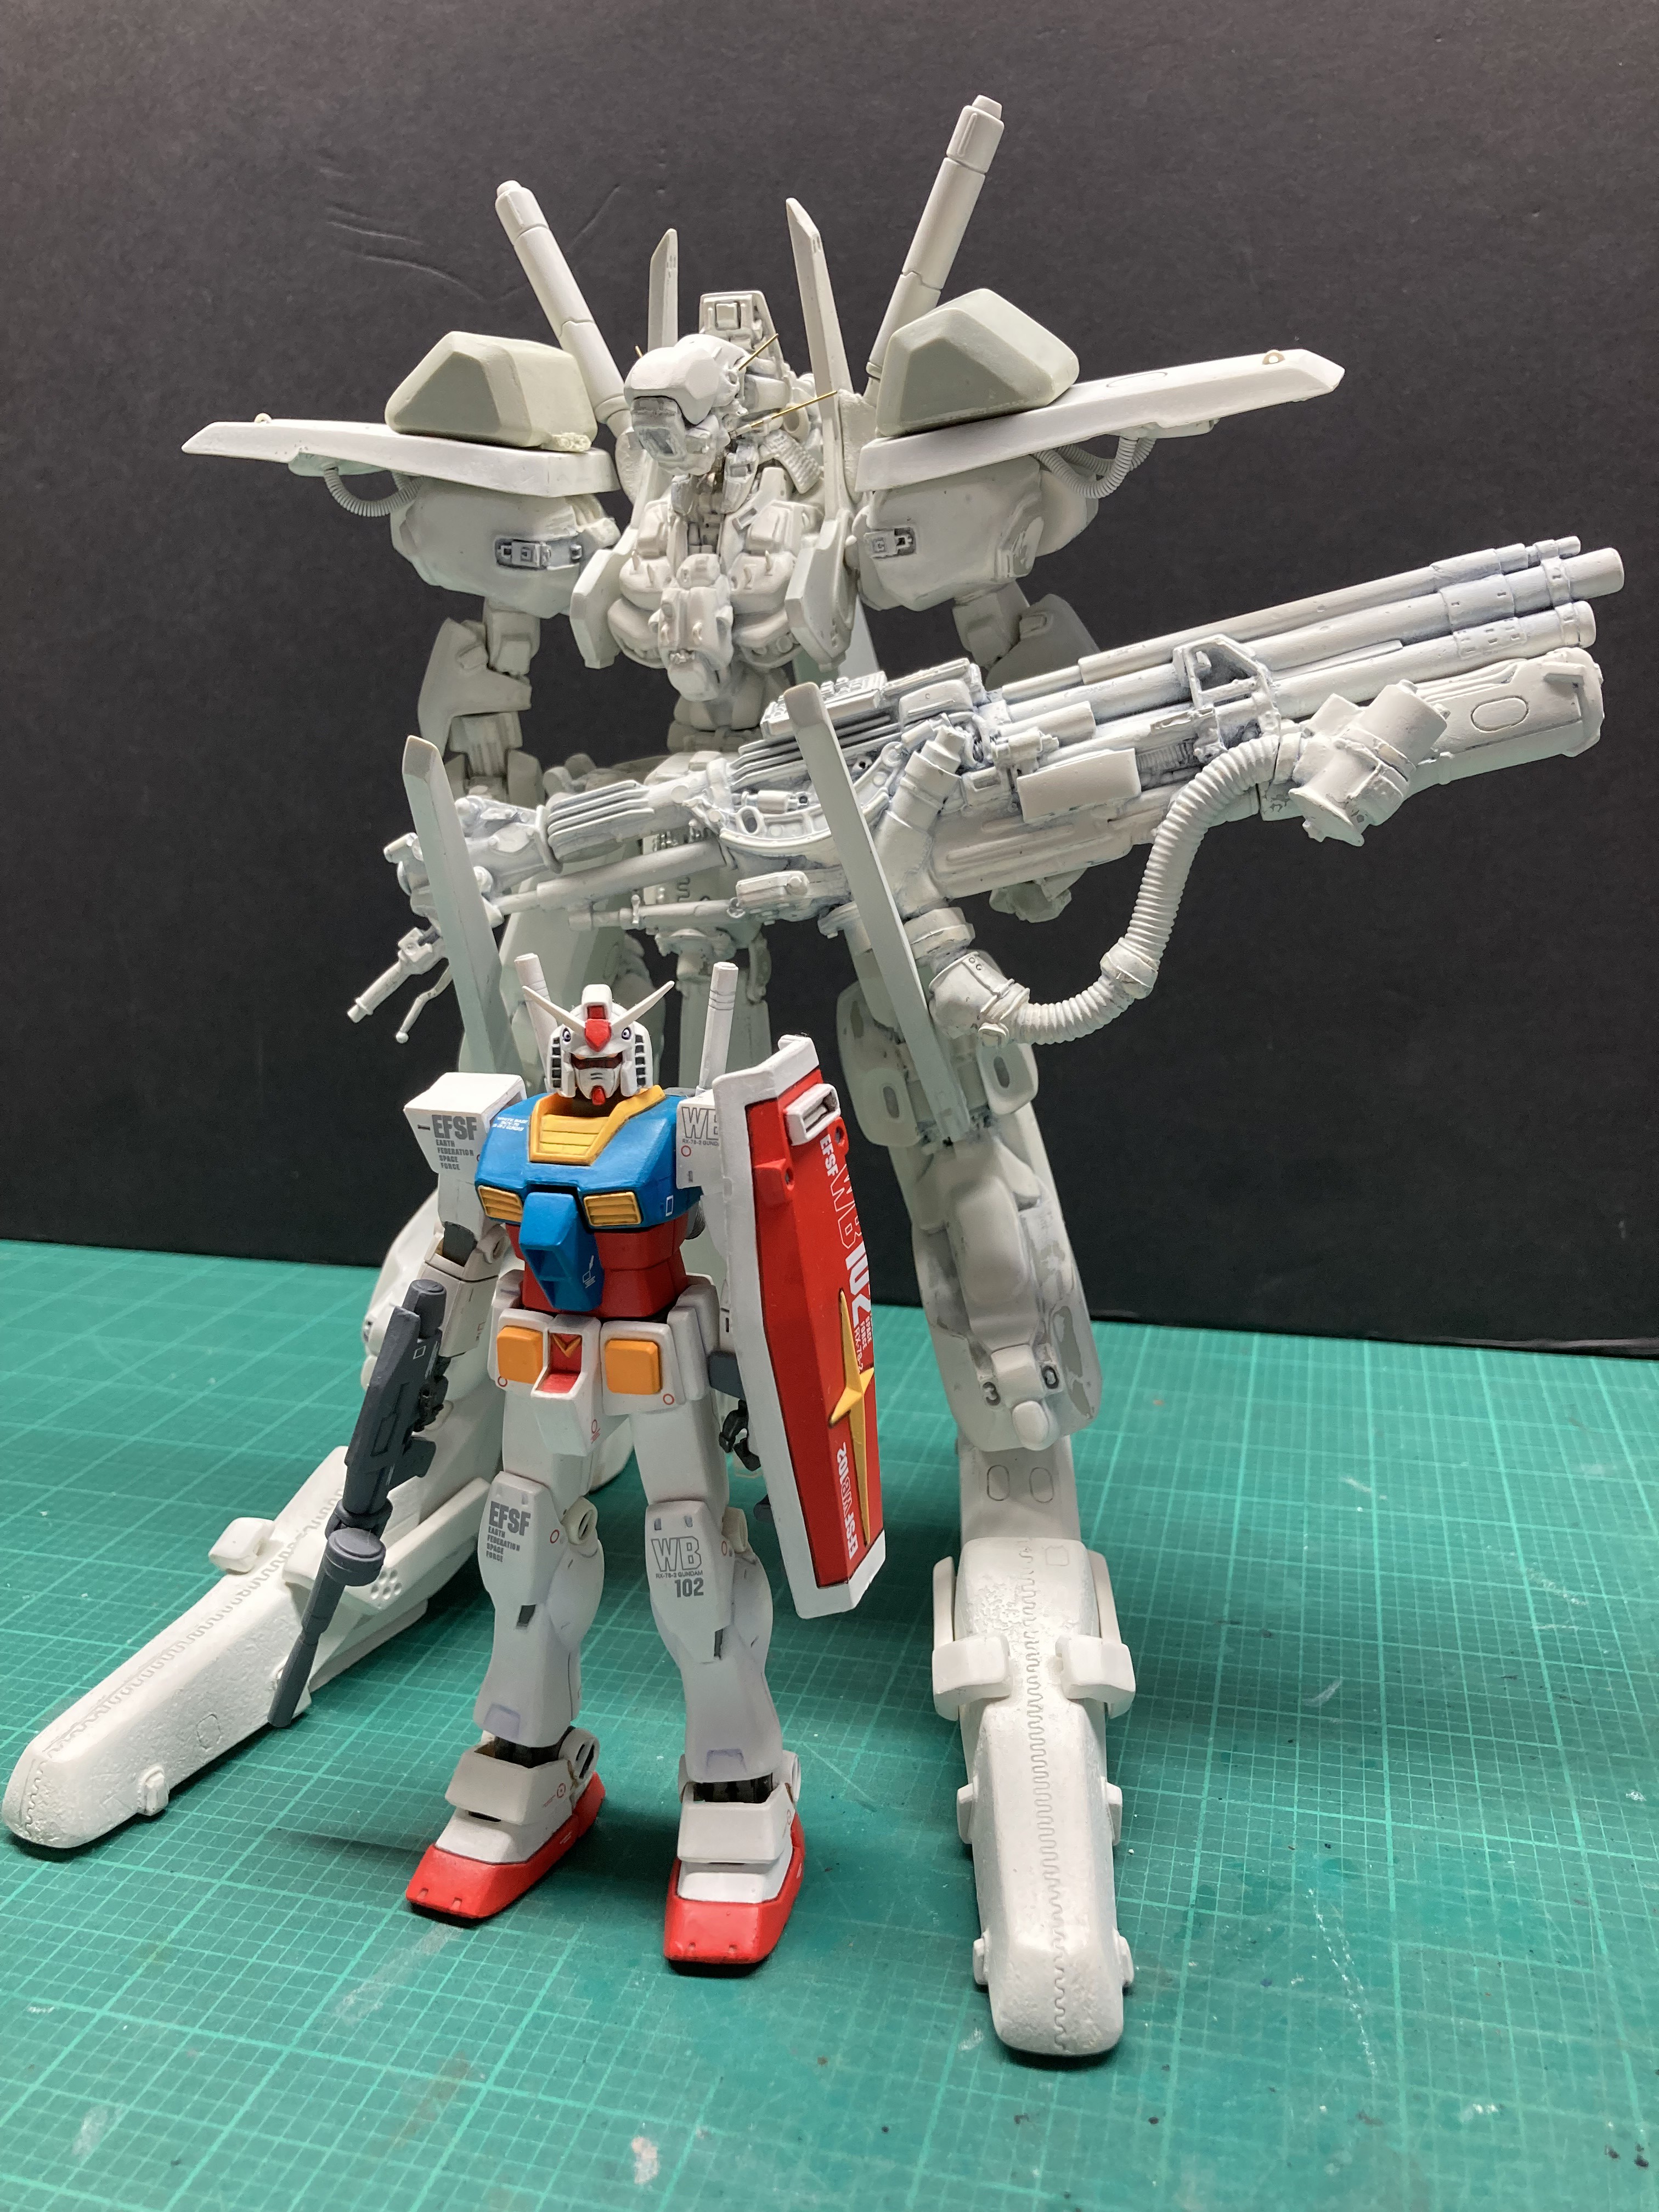
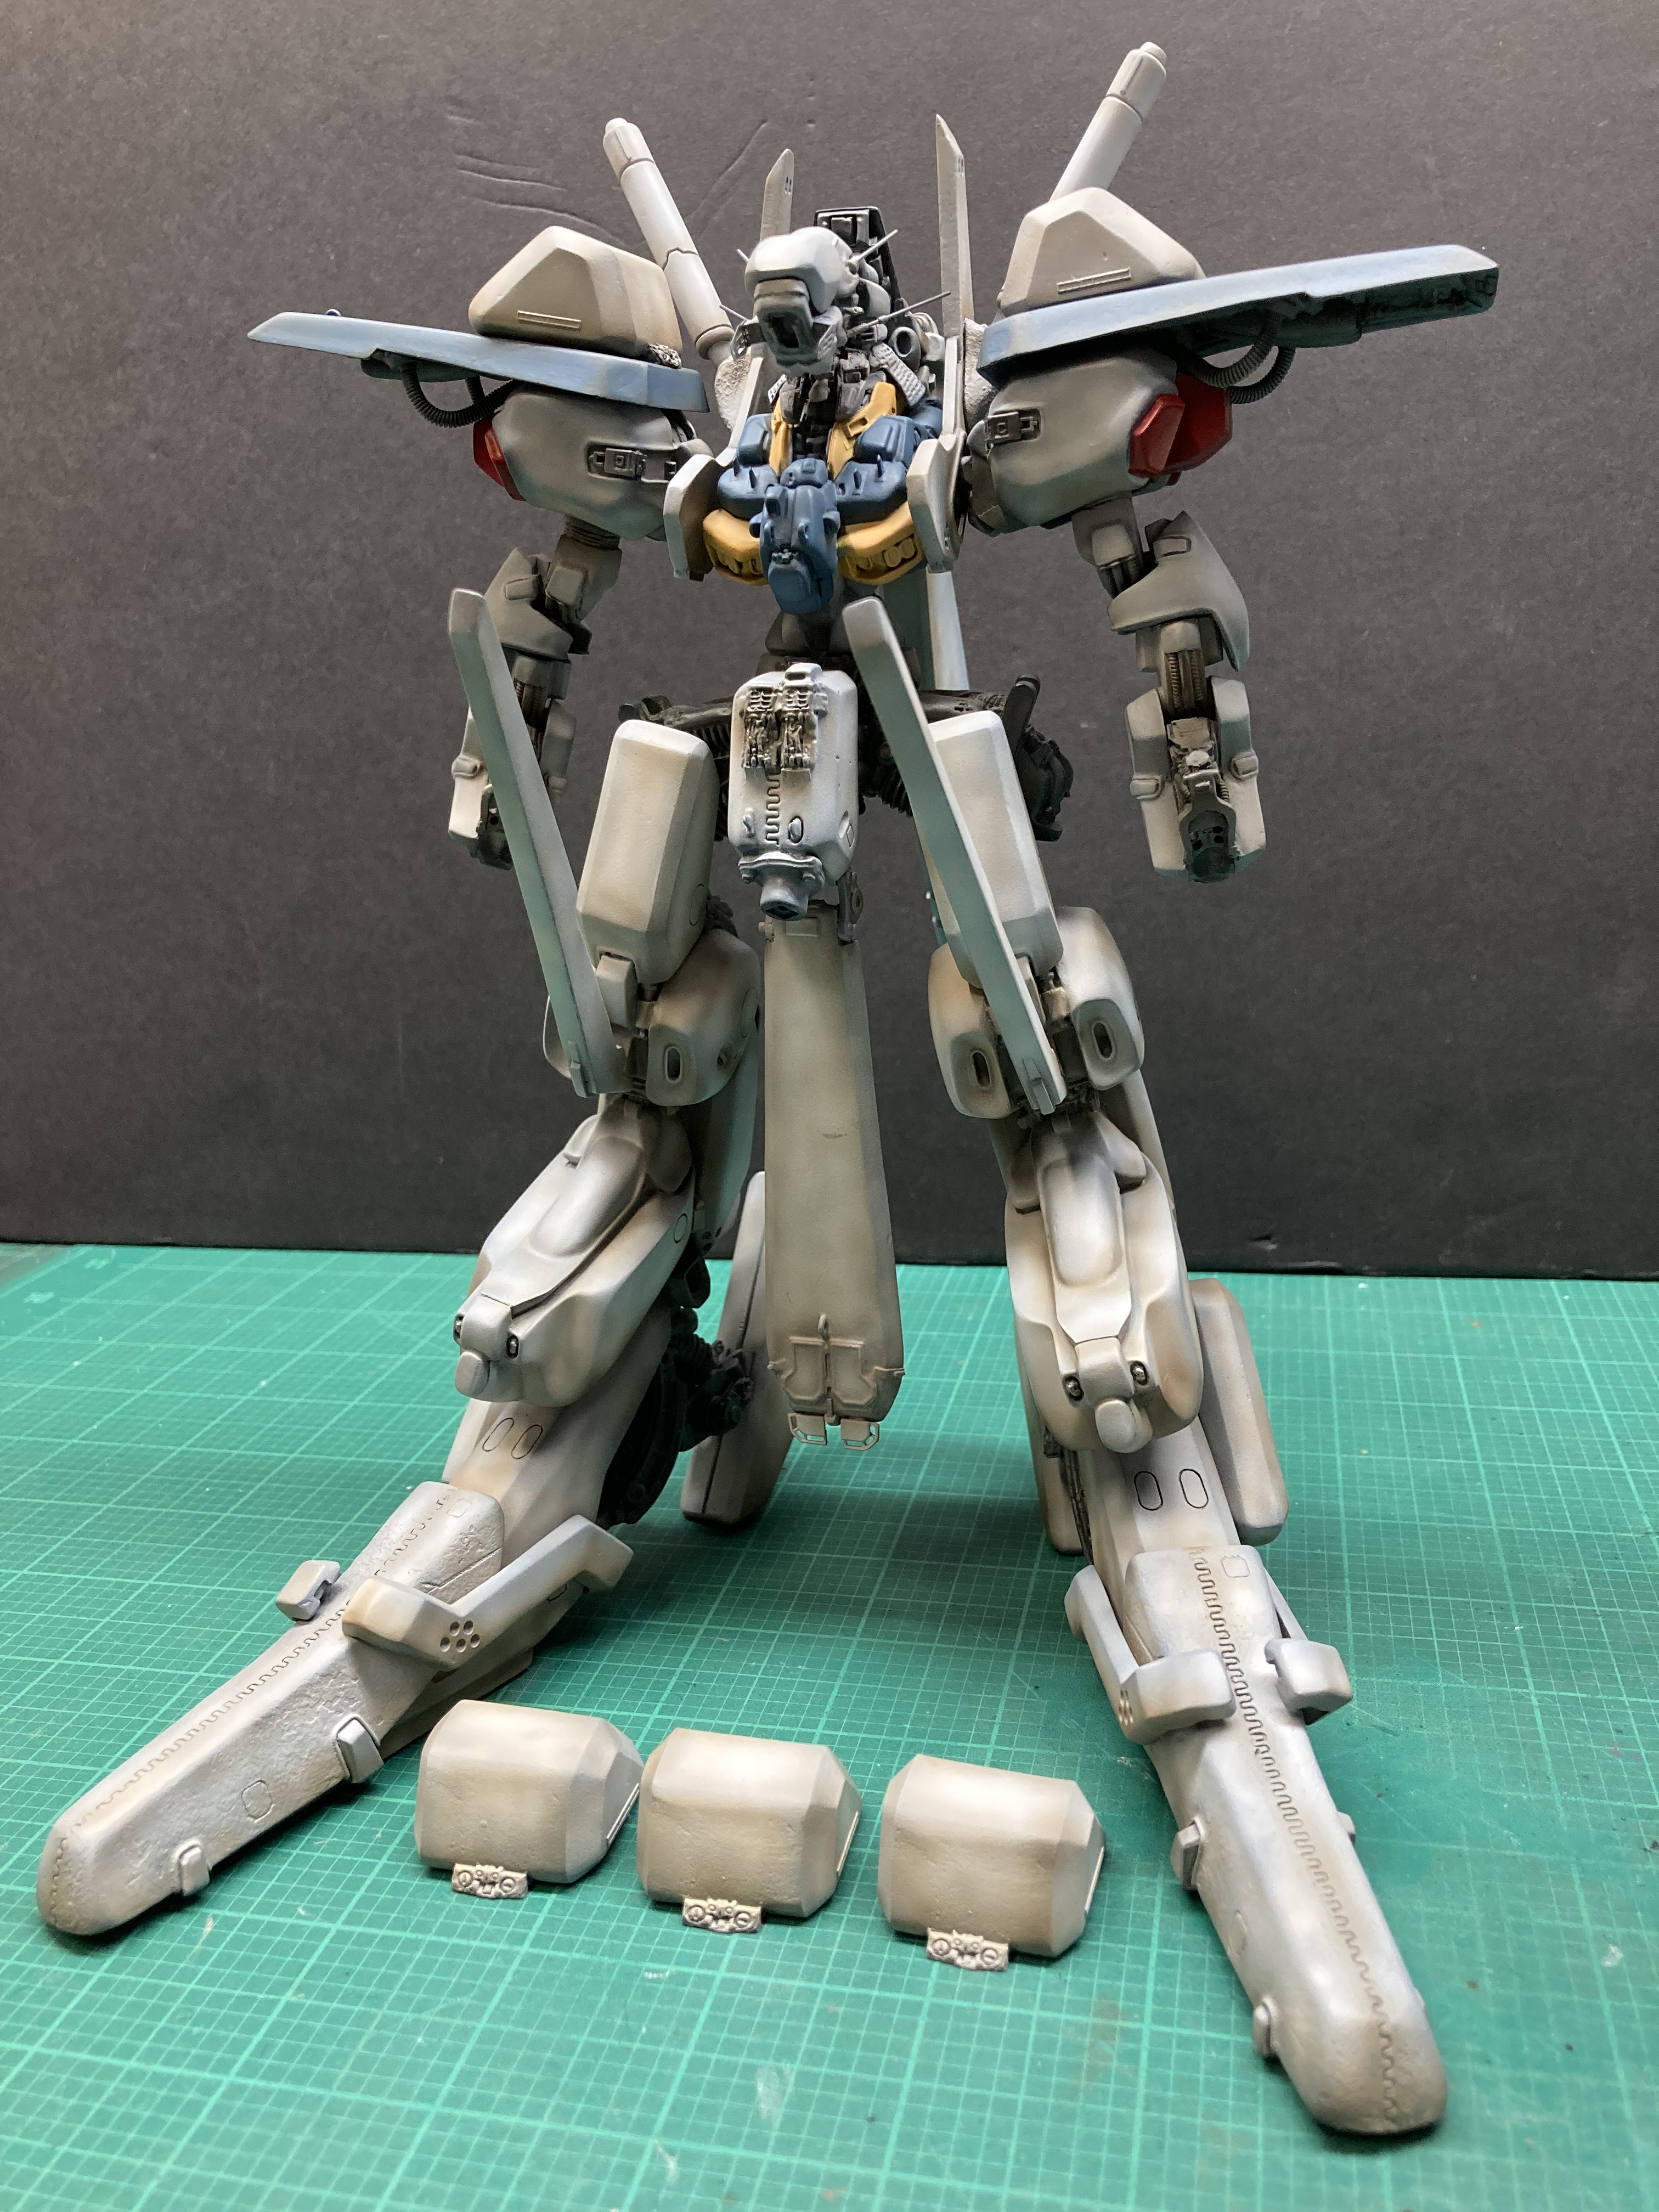
The unpainted blocks on the shoulders are one-shot(!) energy capacitors for the twin beam guns.
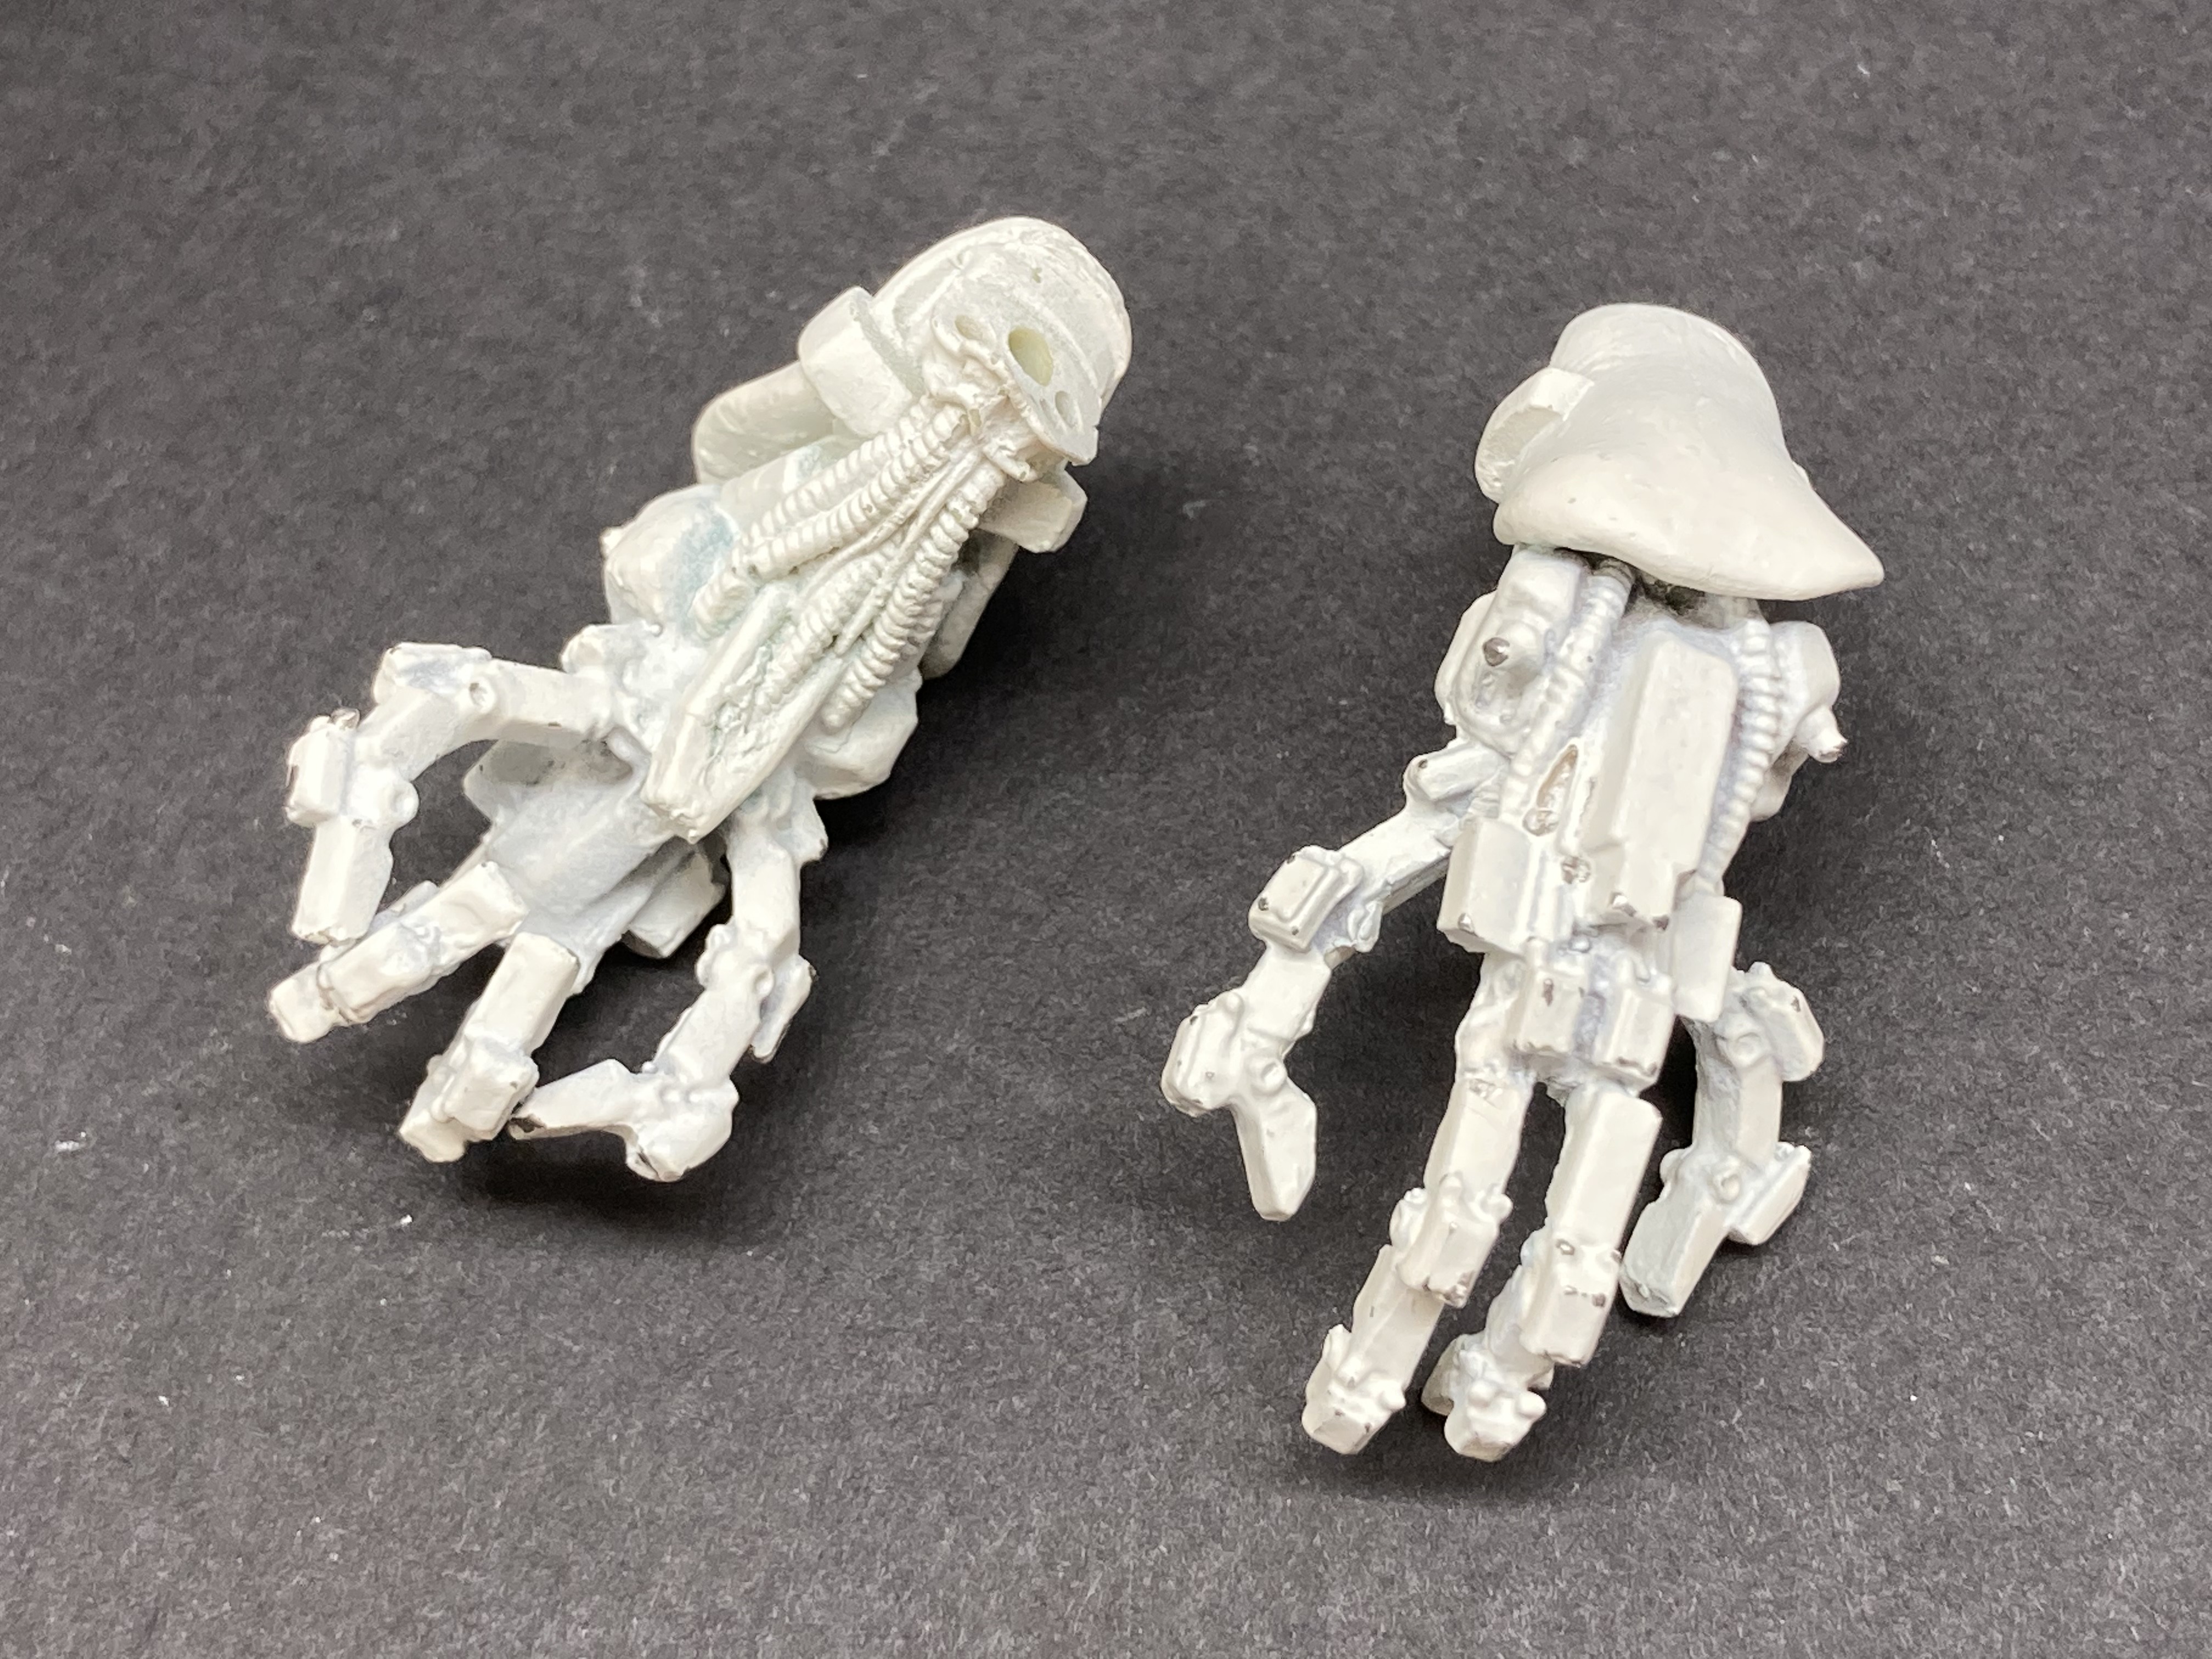
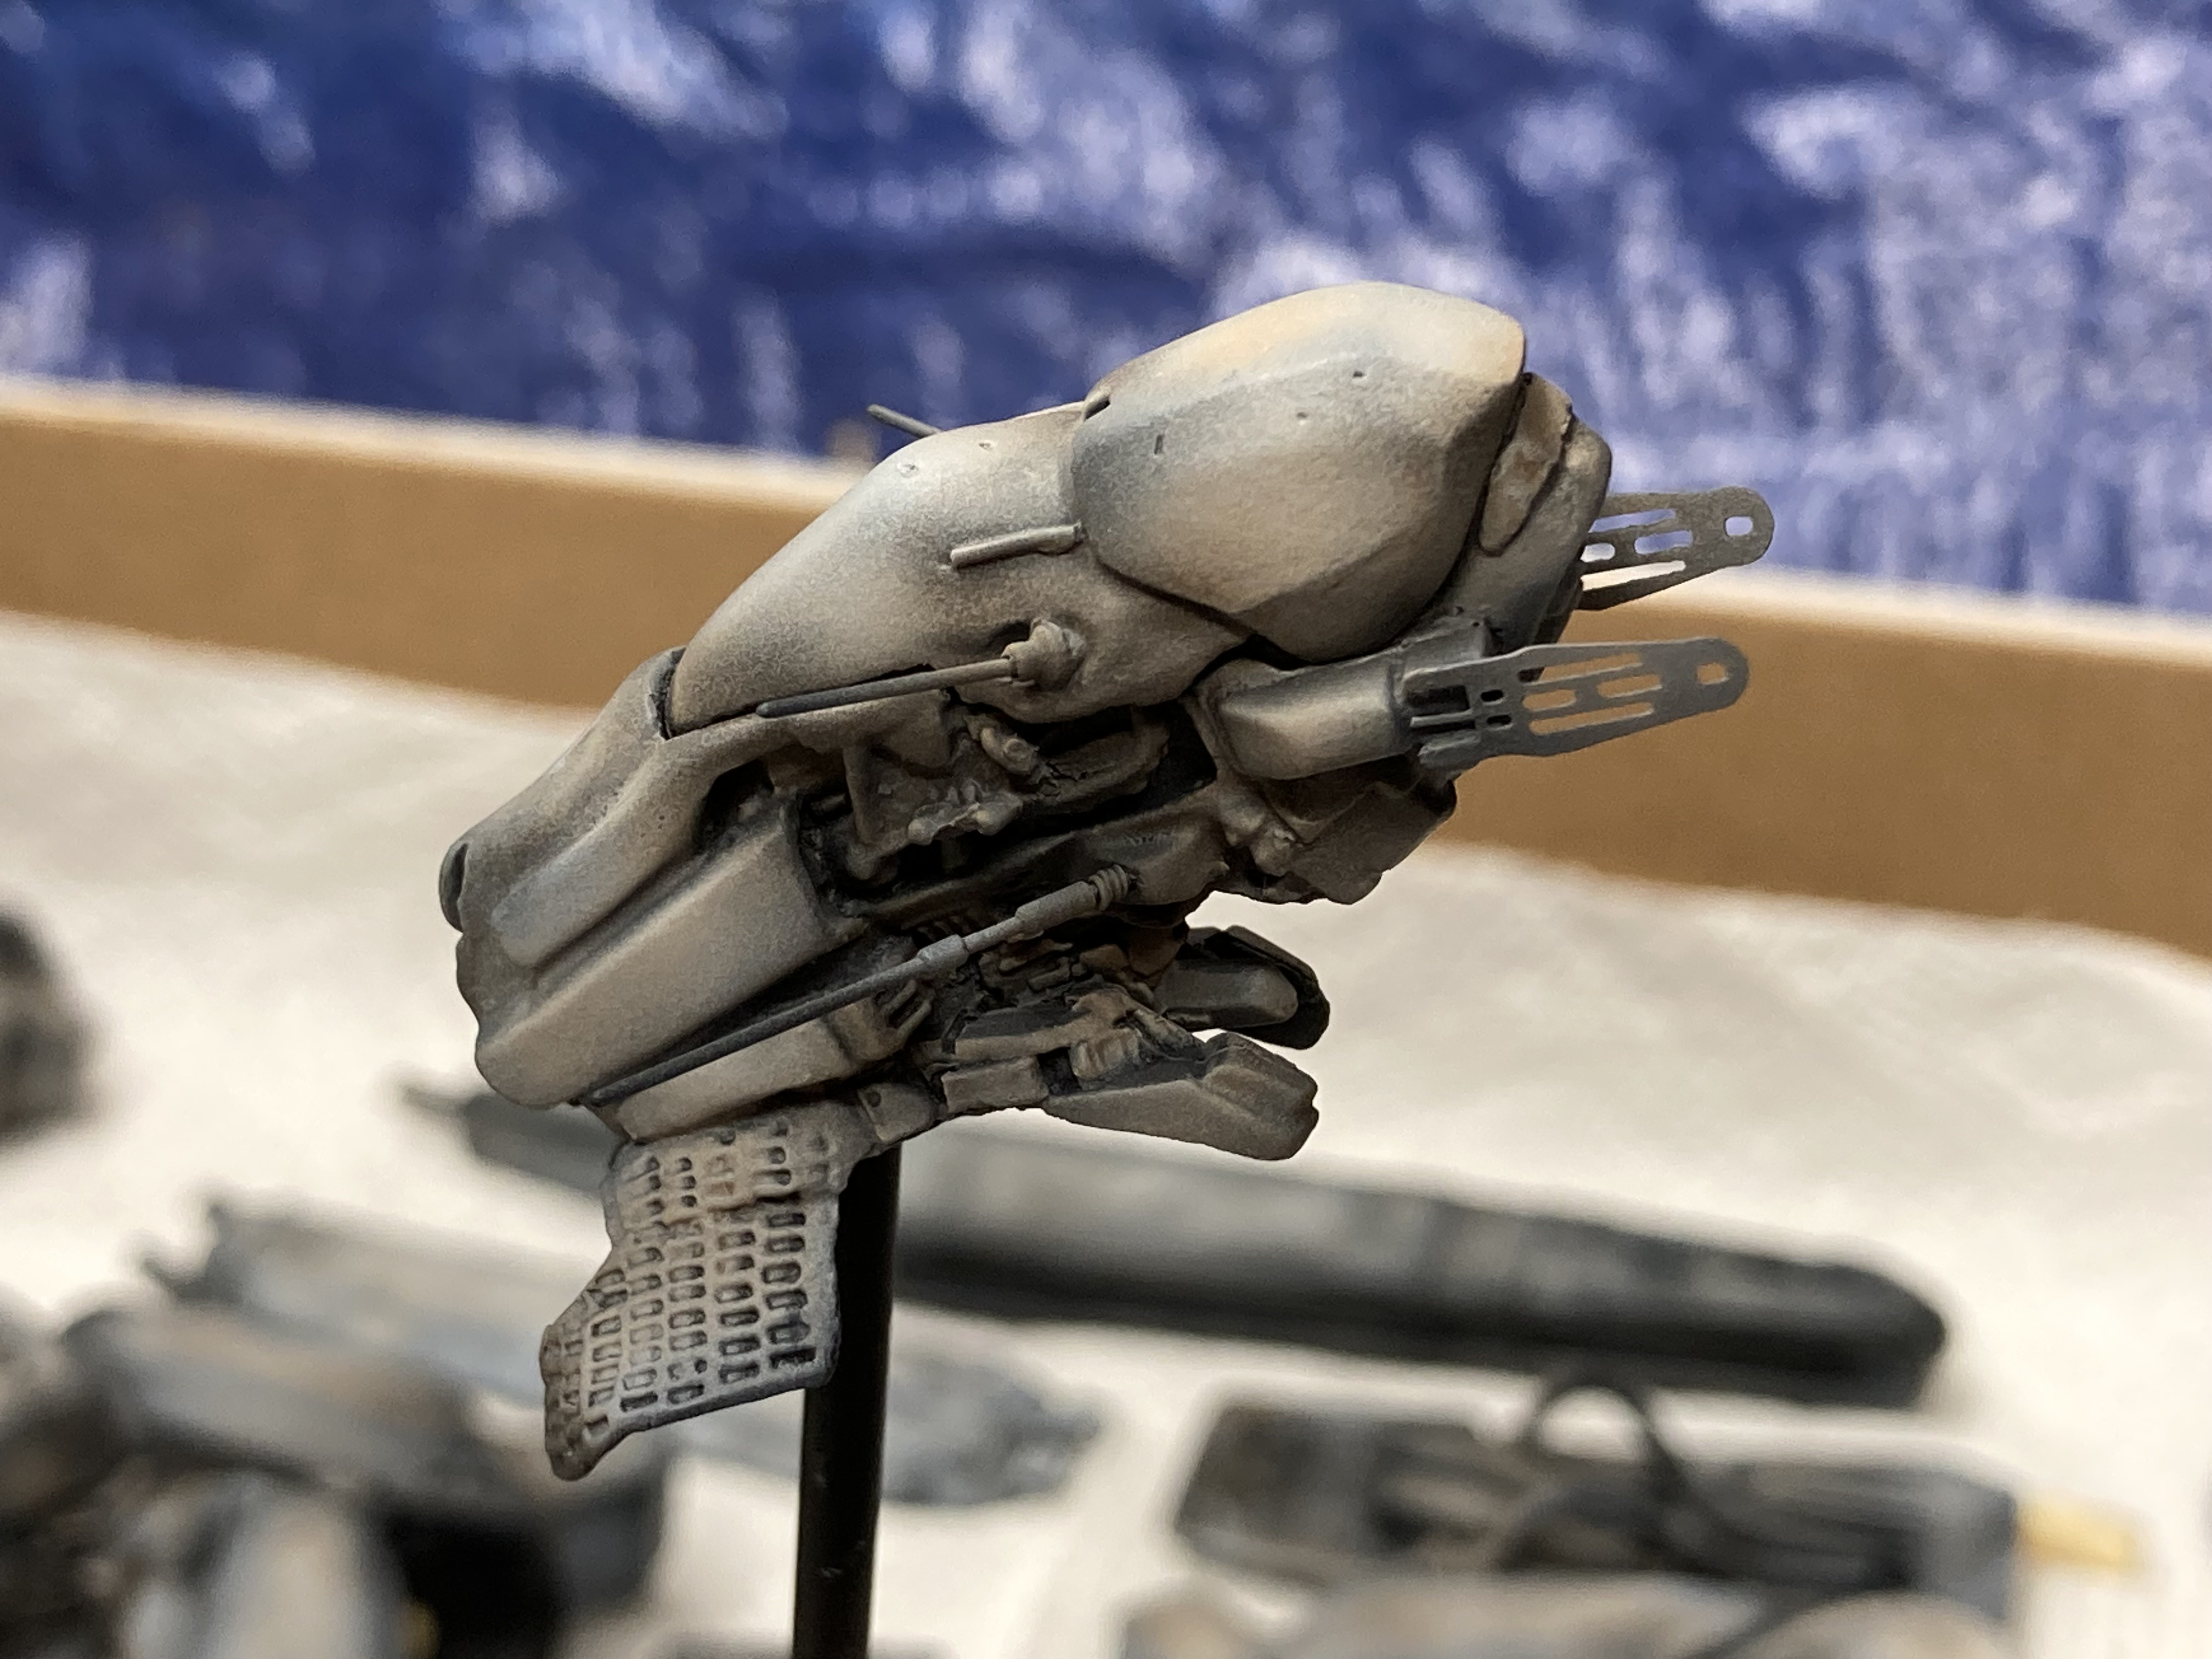
There is a small white metal insert “face” that goes into the resin head.
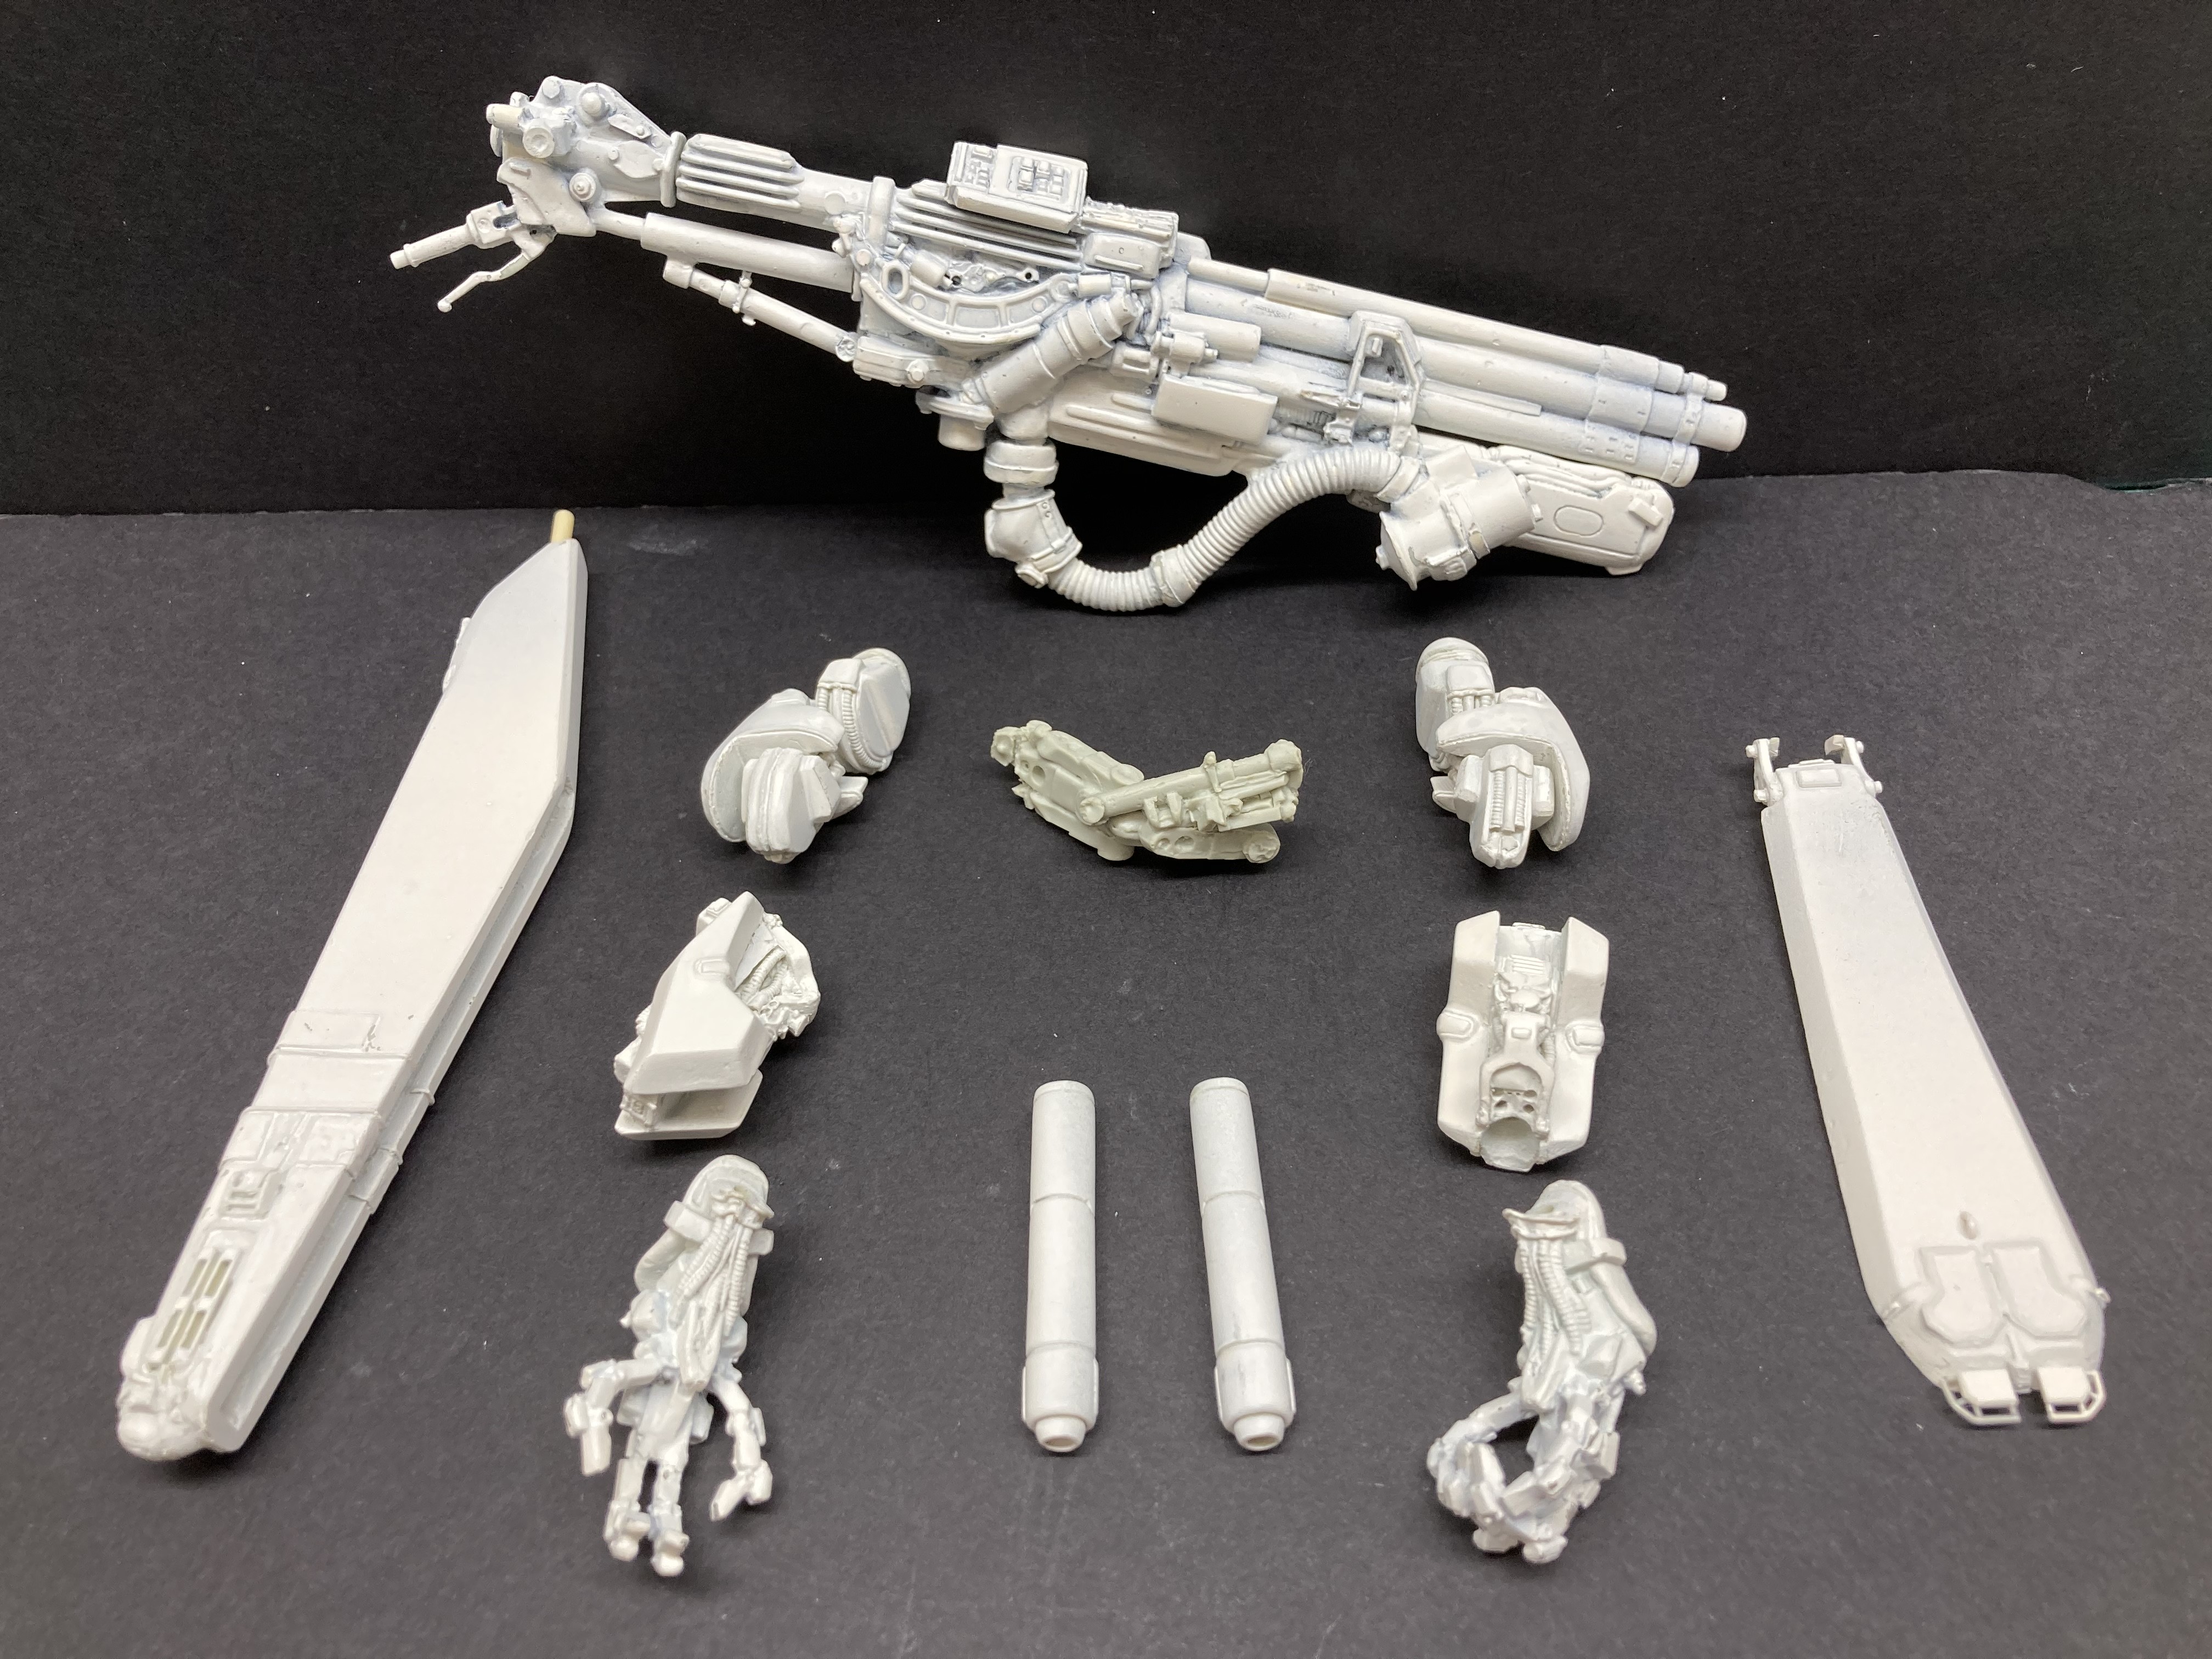
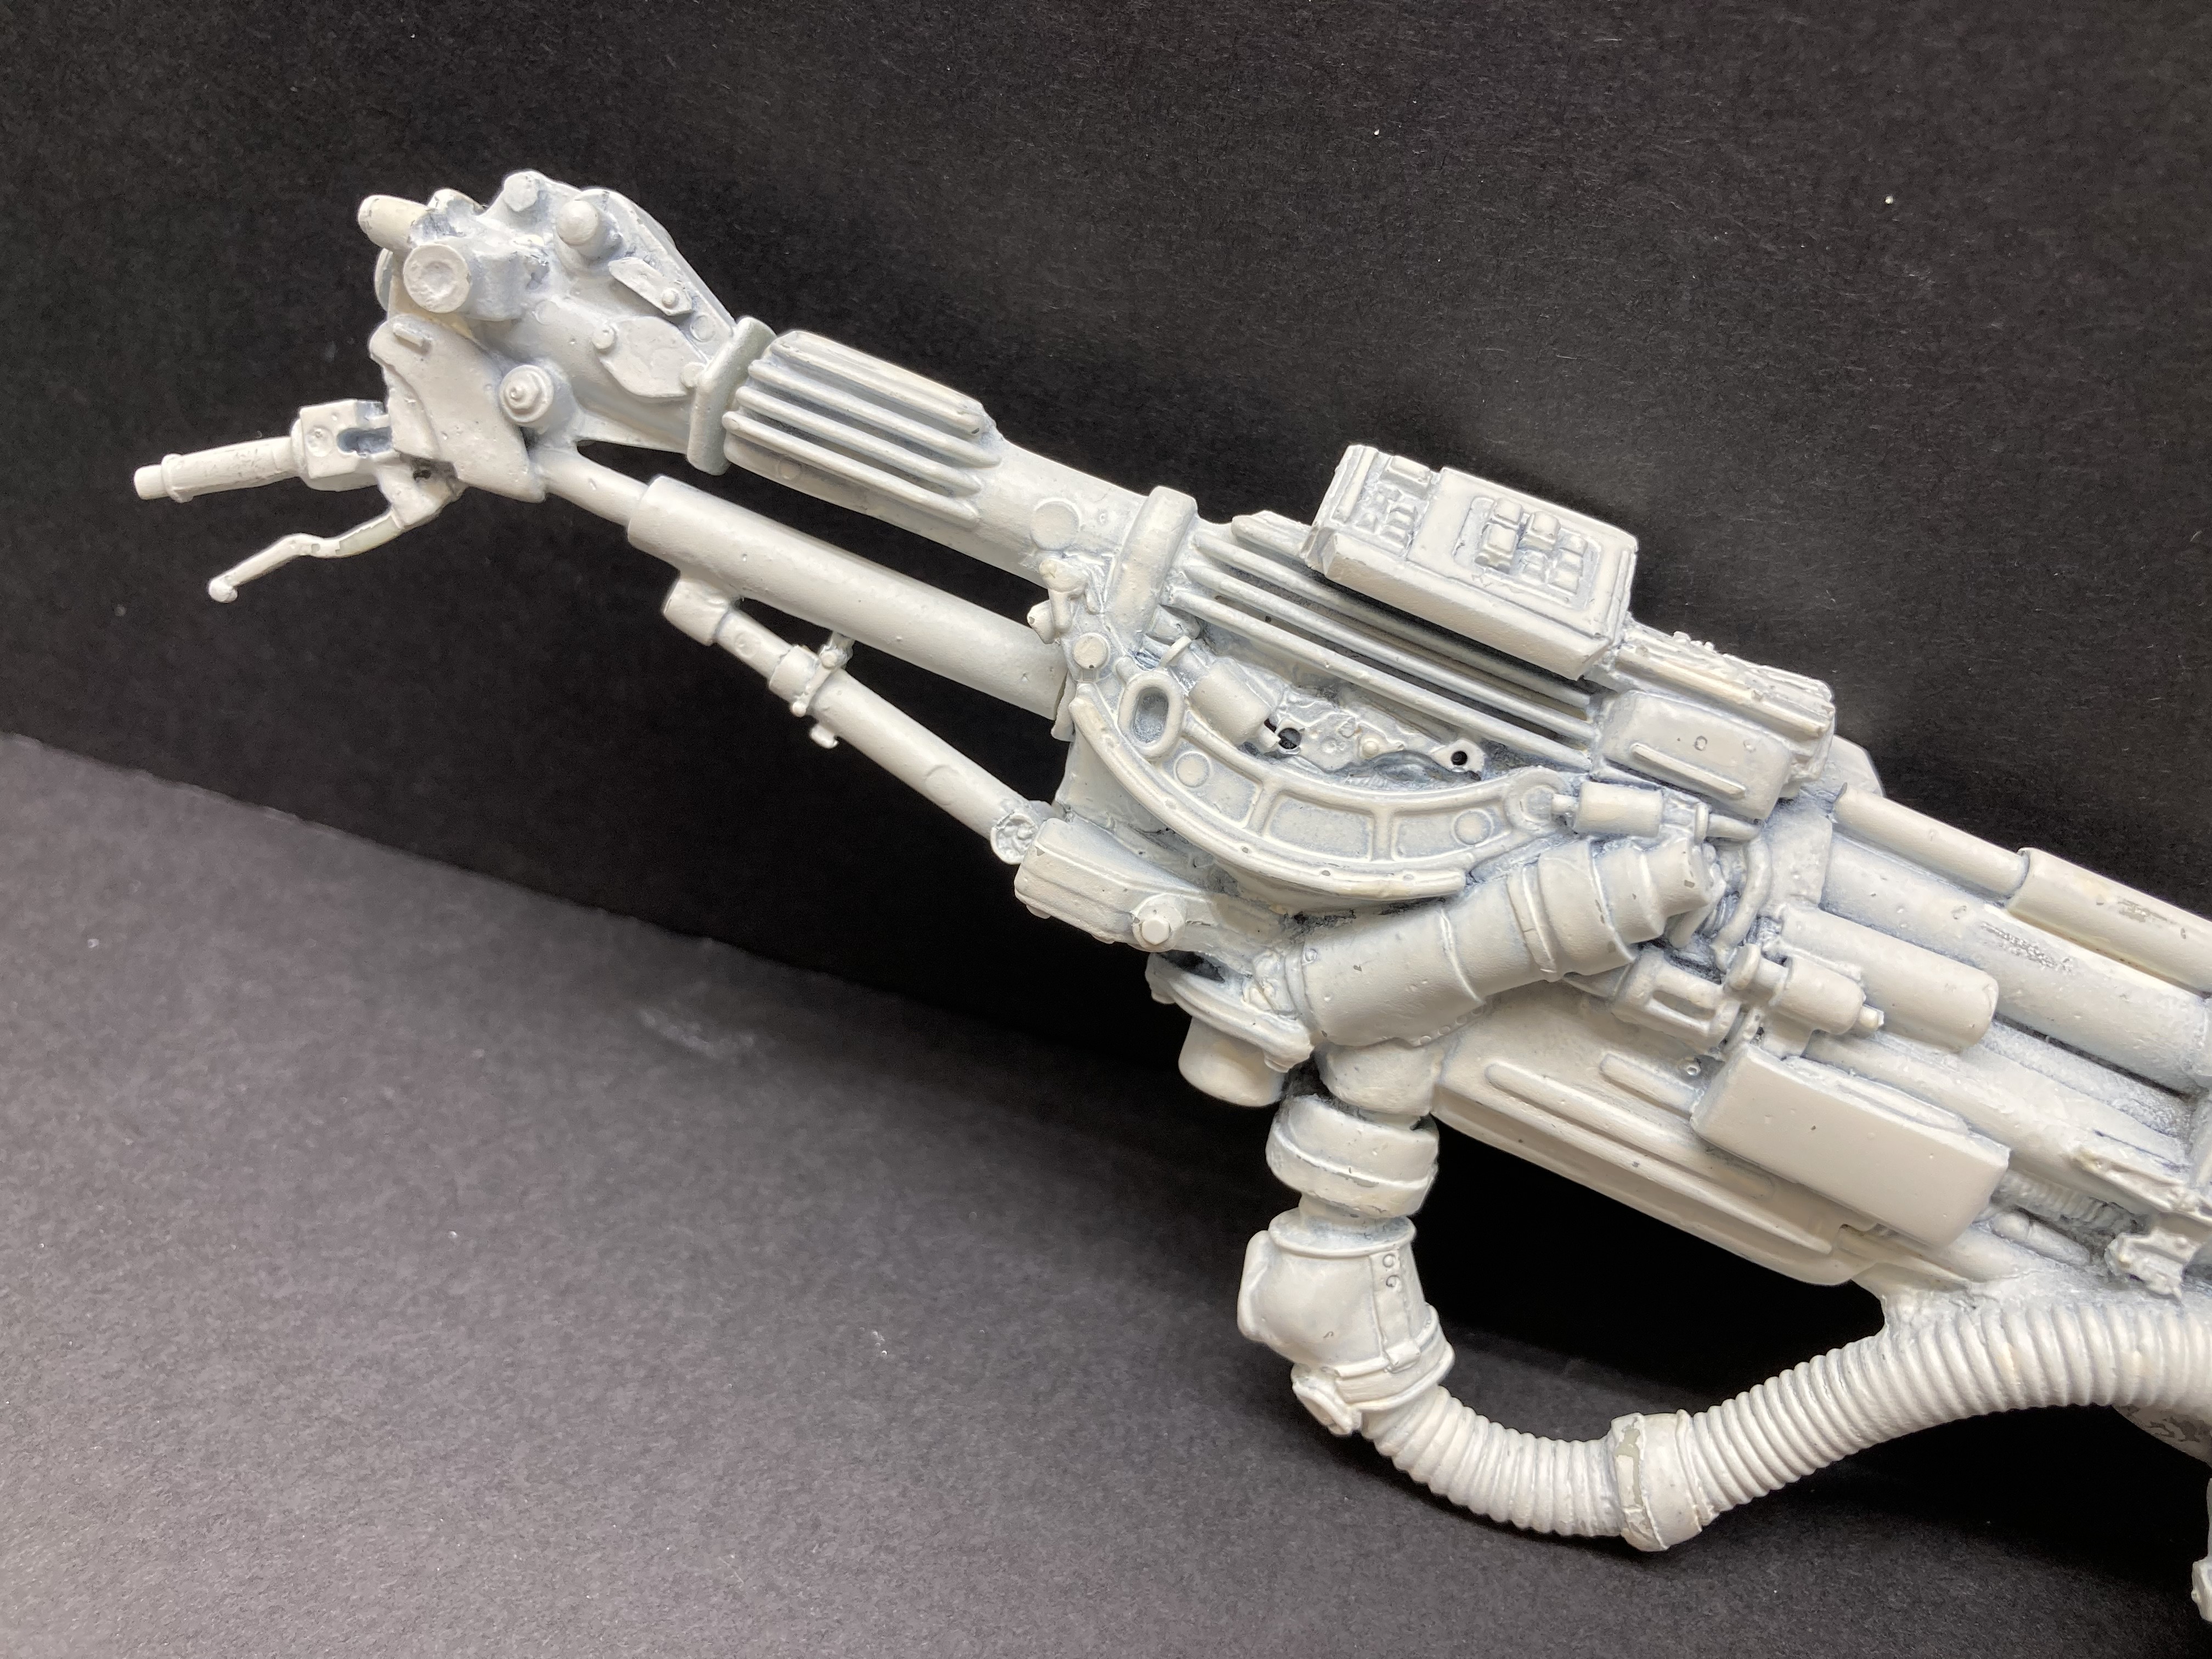
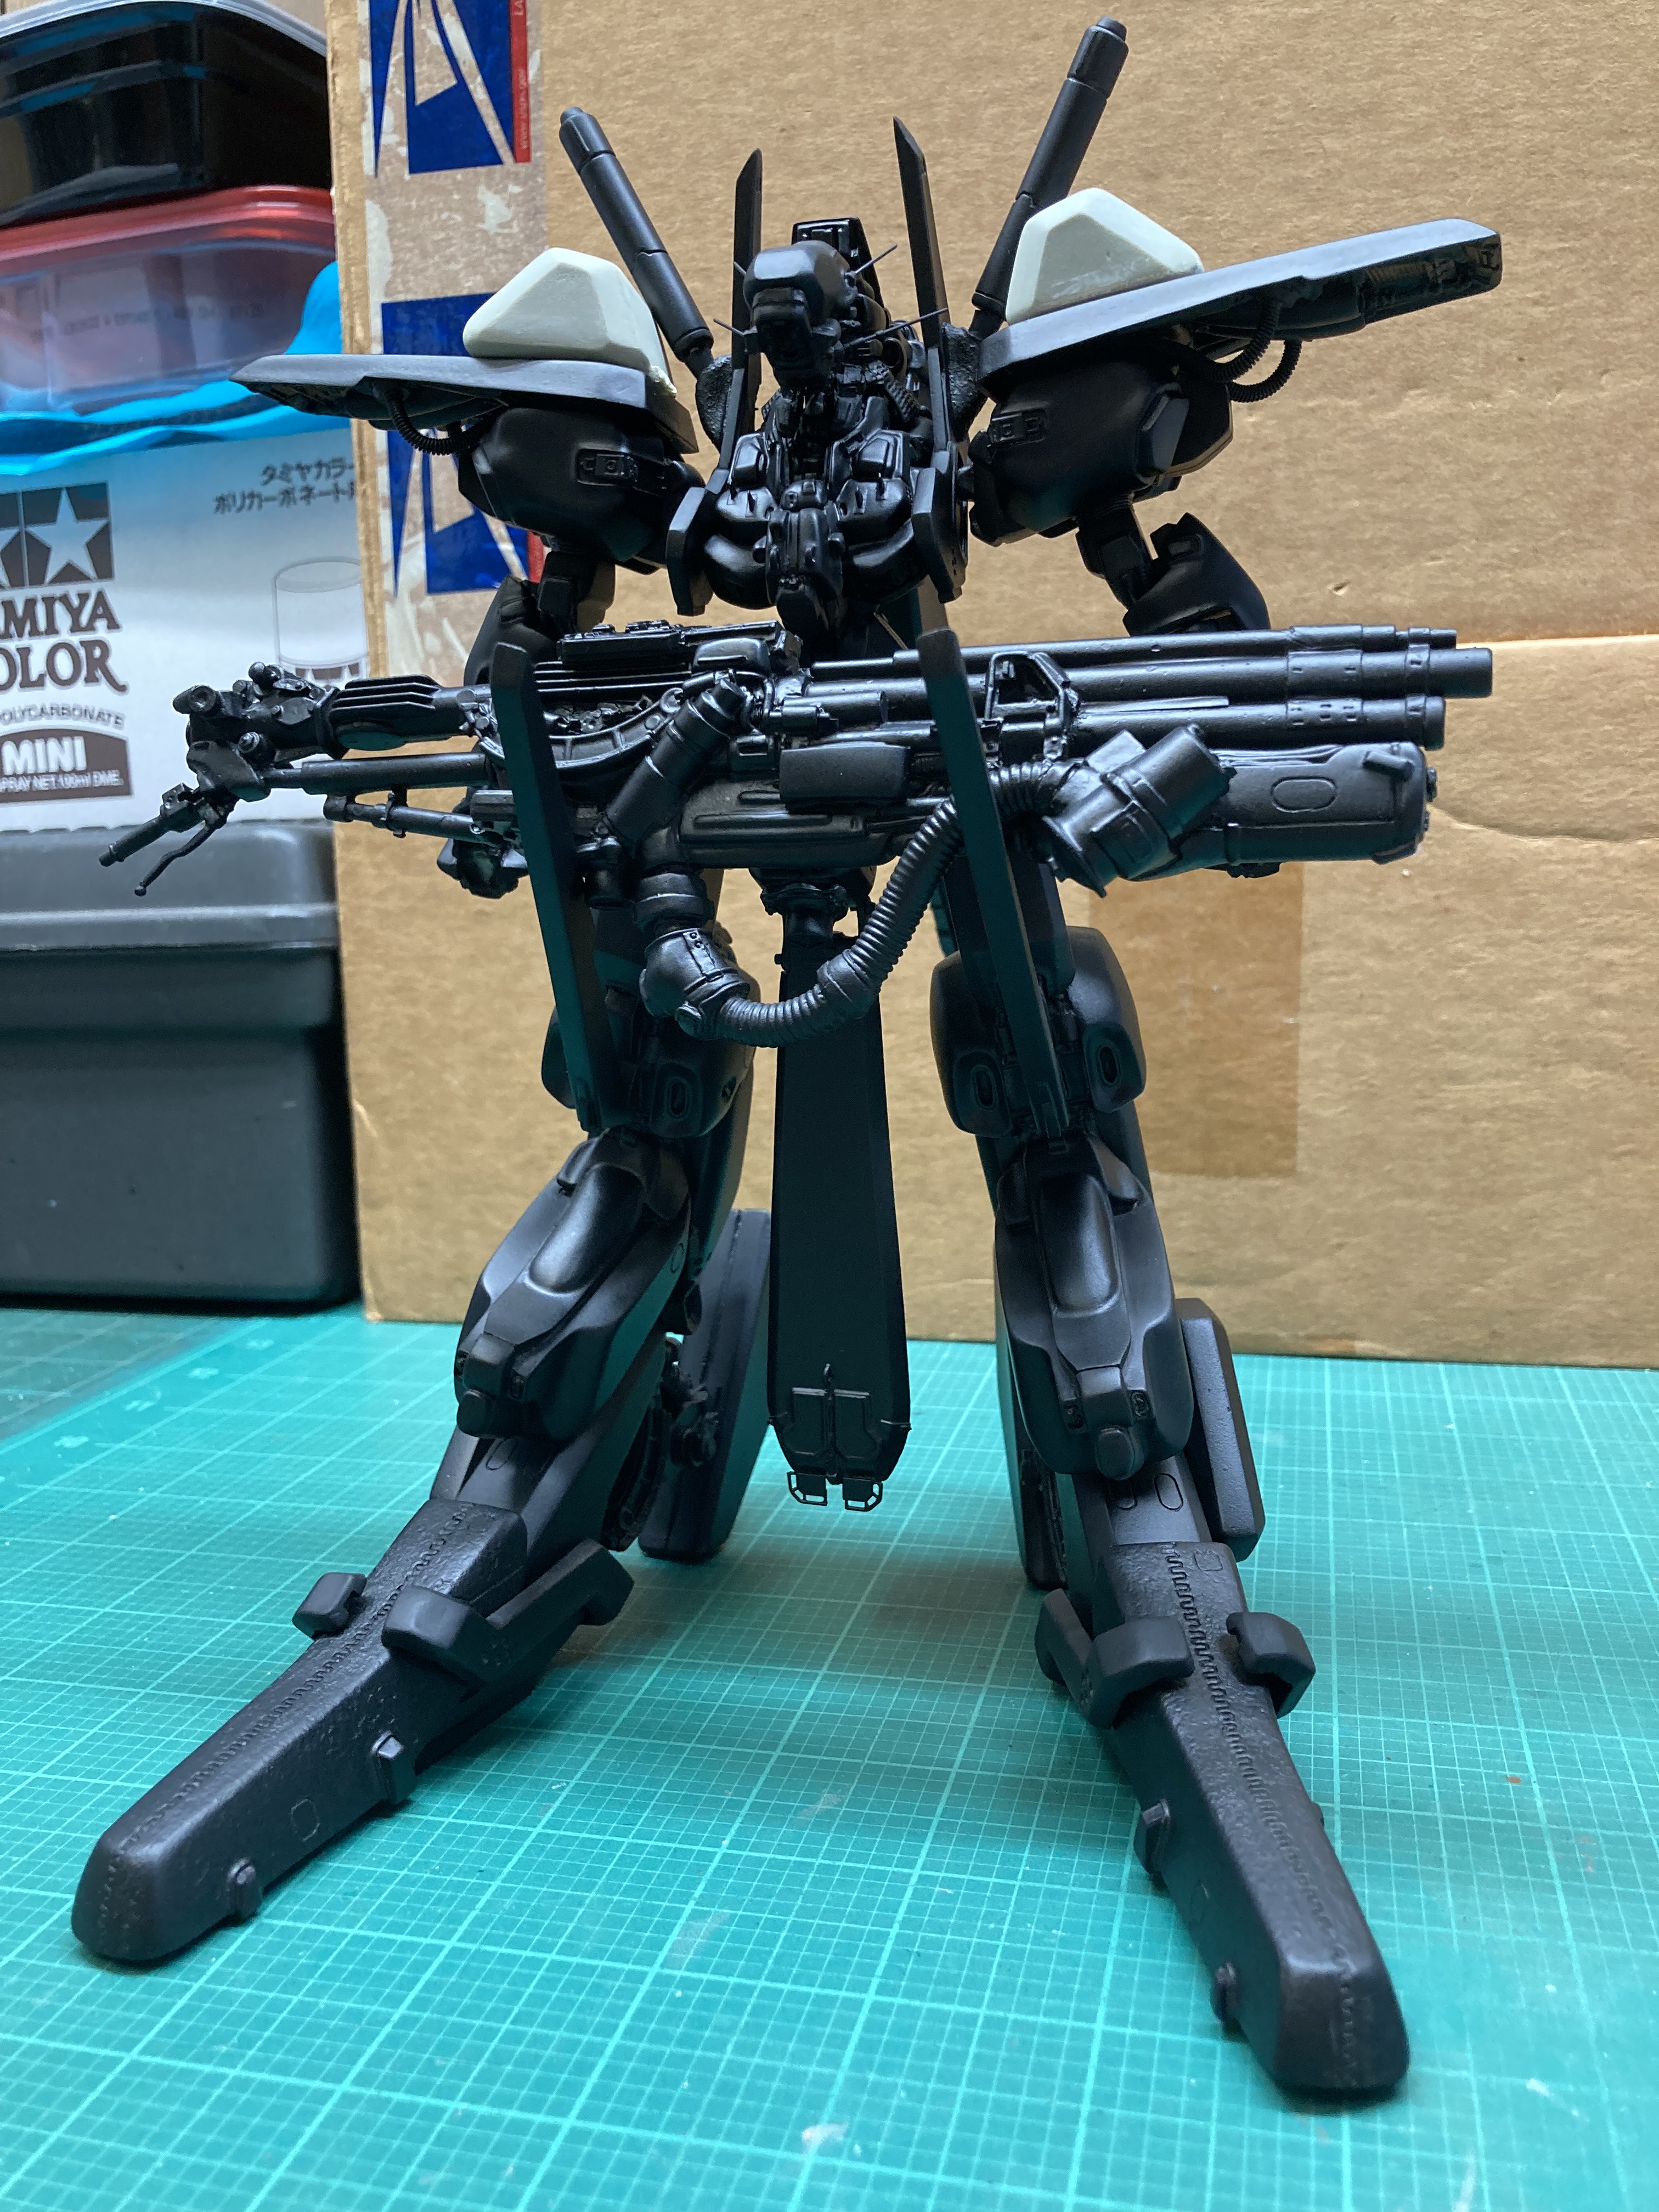
Gigantic “smart gun”, rear stabilizer fin, beam sabres, front armor skirt, and arm parts.
The hands are white metal, so the fingers can be adjusted a bit to handle the smart gun. I think Kobayashi was inspired by Ripley’s ad-hoc taped-together machine gun/flame thrower in Aliens, since this kit’s gun includes a twin beam gun, grenade launcher, and flame thrower!
Ok you take that back about Turn-A Gundam! The bearded one has very elegant lines.
The worst thing that happened to gundam design was Hajime Katoki IMO. When I read the background of that super ZZ at least I can appreciate back in the 80’s there were competing asthetics and designers bring different styles to the table. Nowadays, it’s all the same proportion and same concepts, with different backpacks. I scoffed at most of the Unicorn designs even if it’s set in UC (unicorn mode itself, maybe, but the body proportions is an abomination). Just not interesting at all and stop making mecha with anime-human proportions already! /ENDRANT
We’ll have to agree to disagree Potchip. I found Katoki’s aesthetic refreshing in the late 1980s/early 1990s. At the time, I found the folded paper edges and sleek industrial looks to be an attractive and sophisticated step up from Kunio Okawara’s kind of dumpy super robot designs. I liked Syd Mead’s work for similar reasons, but his take on Gundam was just too weird and off-key for me.
Perhaps Katoki’s current work has become cliche, since it appears Bandai has chosen him to pen most of the new kits’ lines. I was hoping there would be a true Katoki Zaku II, since the Zaku II 2.0 was so darned near perfect. But I don’t gush over all of his works, as I dislike anything Gundam Wing (perhaps that smacks of blasphemy here in the US, but I got my Gundam indoctrination elsewhere, years before Cartoon Network aired the show).
Makoto Kobayashi is like the Picasso of the Gundam world, kind of the end marker of the farthest that the extremes of Gundam designs will go. And I like it. A lot. None of my friends do, but I don’t care.
I pulled out this monstrosity from the Deep Storage Vault.
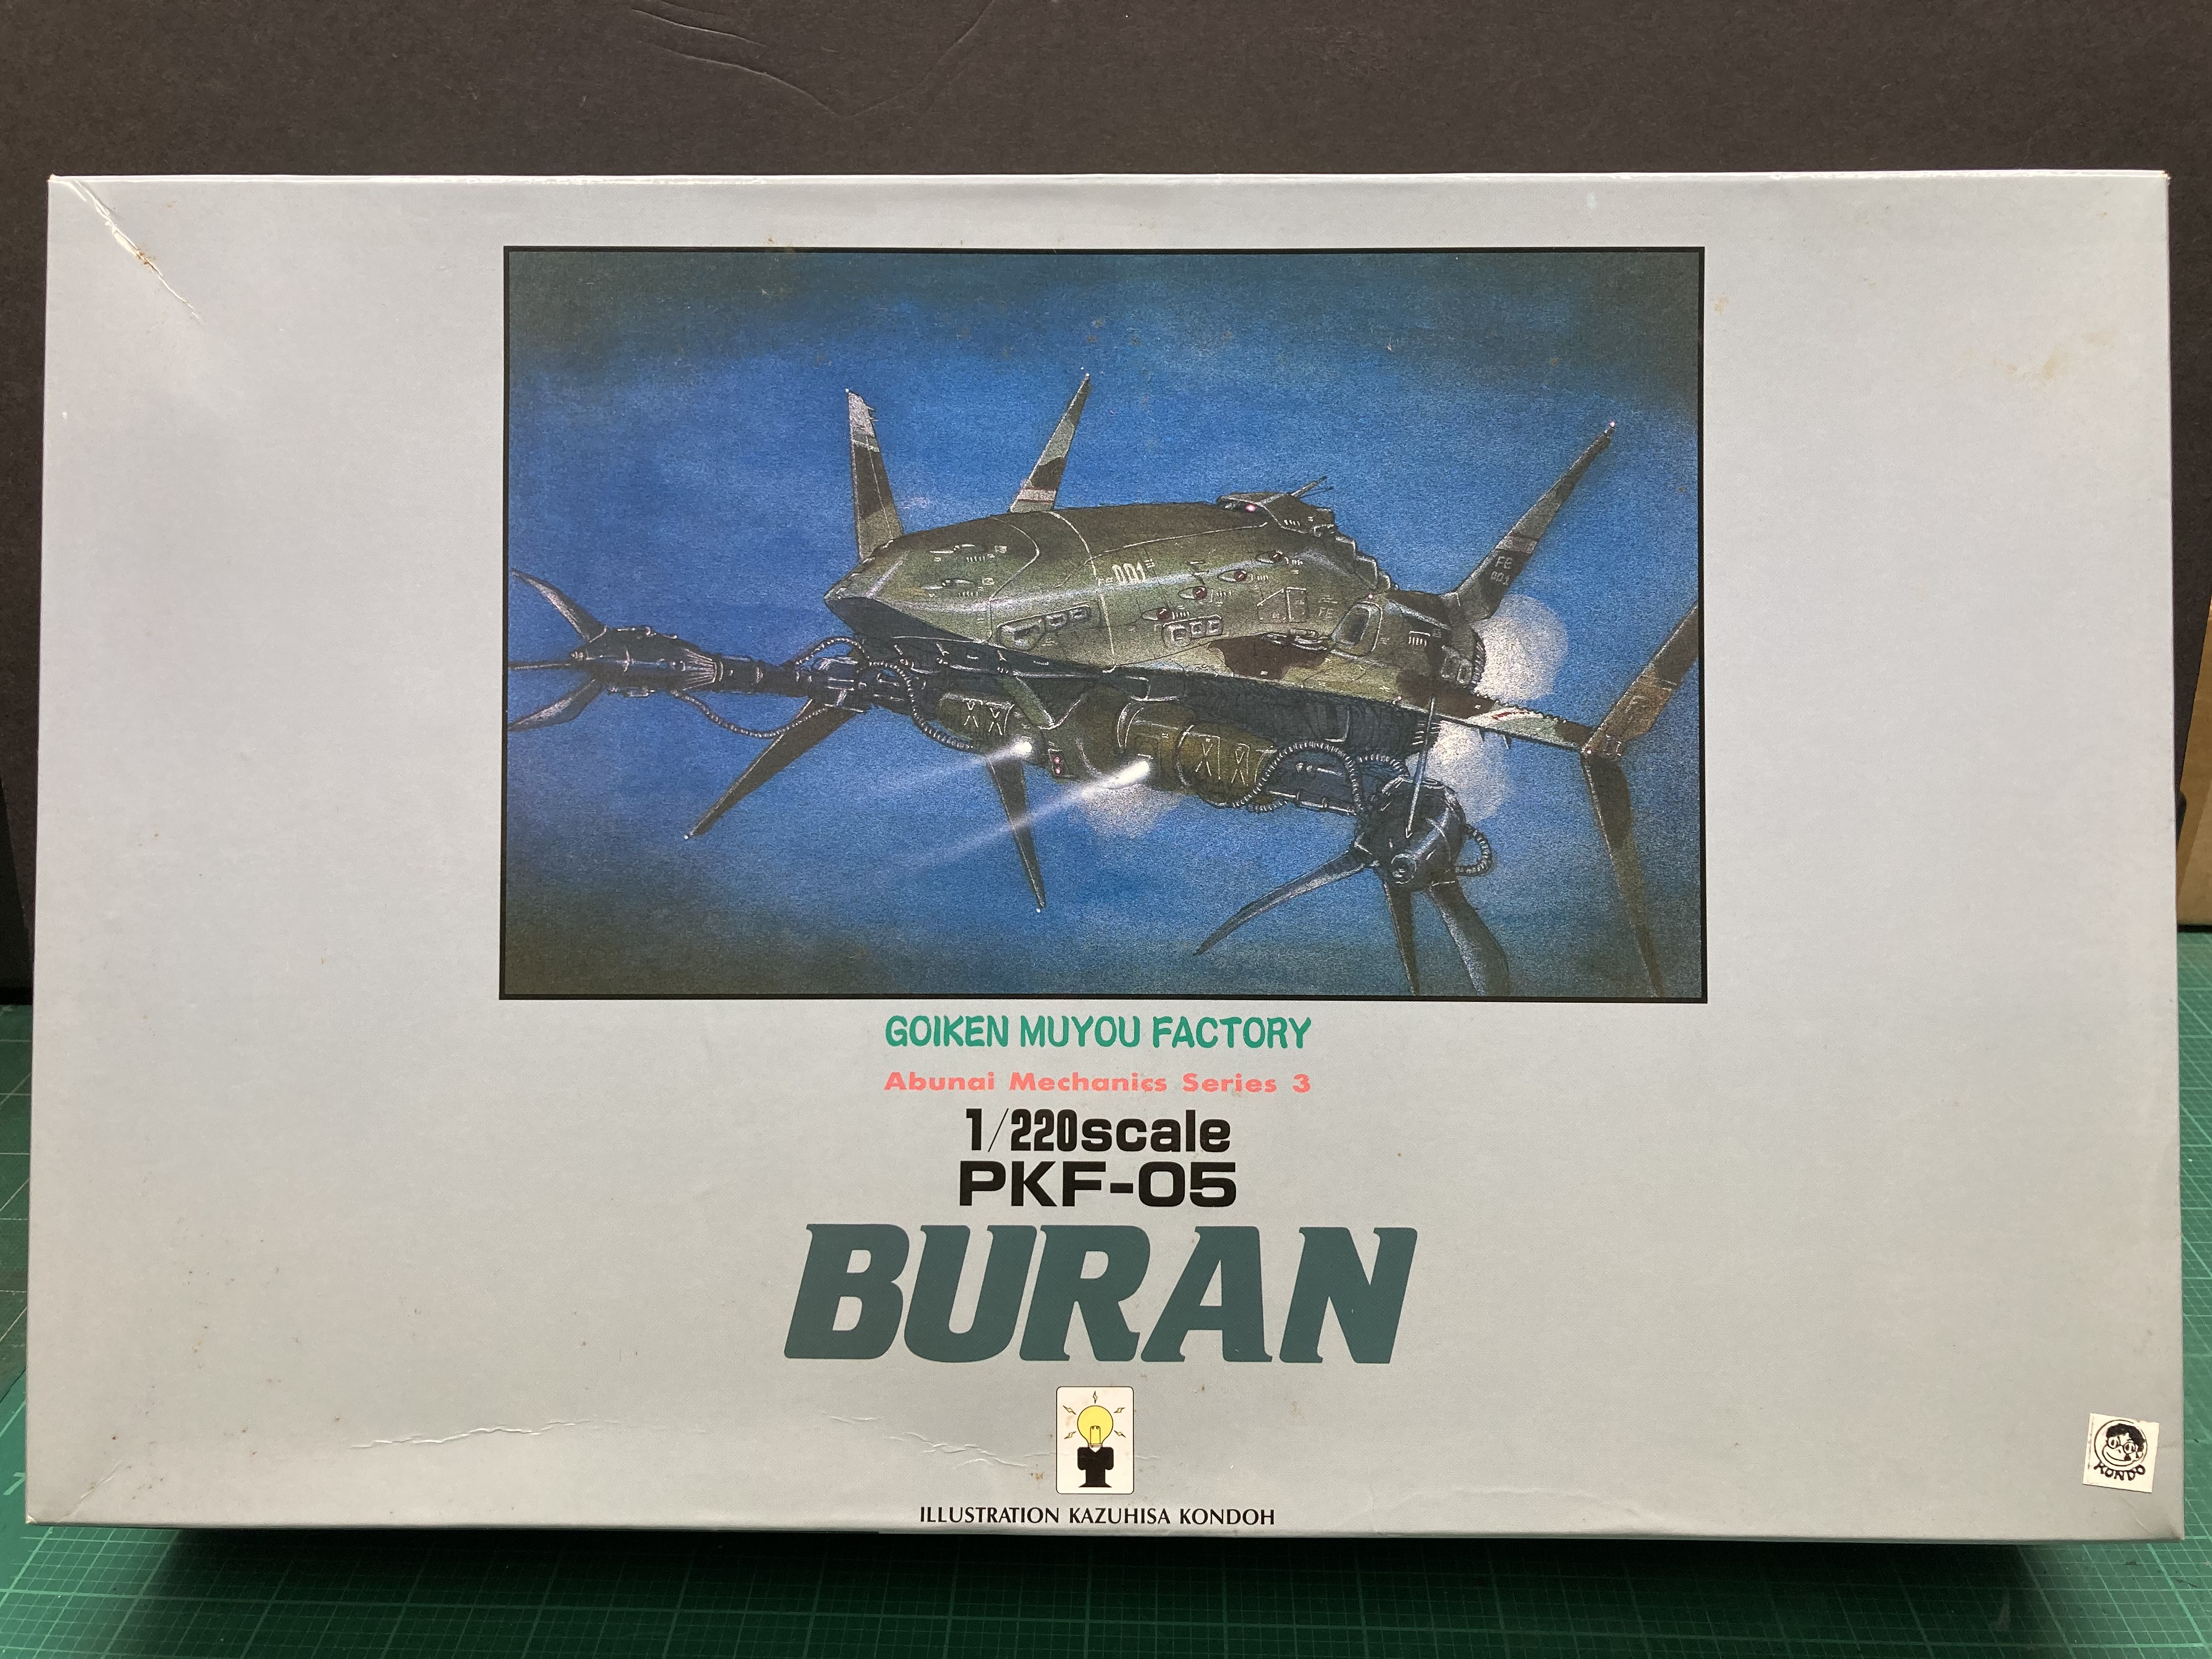
The Buran is mecha designer Kazuhisa Kondoh’s interpretation of the MA-05 Bigro from the original Mobile Suit Gundam TV show. Kondoh did a manga series which featured the Buran, as well as many other designs from various Gundam shows. Kondoh’s aesthetic felt kind of like anime meets Star Wars. Such cool stuff in the heyday of the “hardware show” anime era.
The kit was purchased in Japan in the early 1990s, around the same time as the Super ZZ Gundam. It was part of Goikken Muyou’s “Abunai Mechanics Series”. “Goikken Muyou” means “Your opinion is not needed”! And “Abunai” means dangerous, so the kit was from the “Dangerous Mechanics Series”. [:D]
The main components are big and chunky. And HEAVY! No roto-casting here; it’s all solid blocks of resin!
Anyway, the reason this kit got pulled out of the stash is because I belatedly wanted to check if the 3-D printed F-15 exhaust nozzles I purchased were a good fit - and they were NOT! [:|] They were too small. Oh bugger, I need 1/48 nozzles. Oh well, my friends have 1/72 F-15s so I can let them use them.
We now return you to your regularly scheduled program.
Okay, enough wiffle and waffle! I got a deadline that is approaching fast.
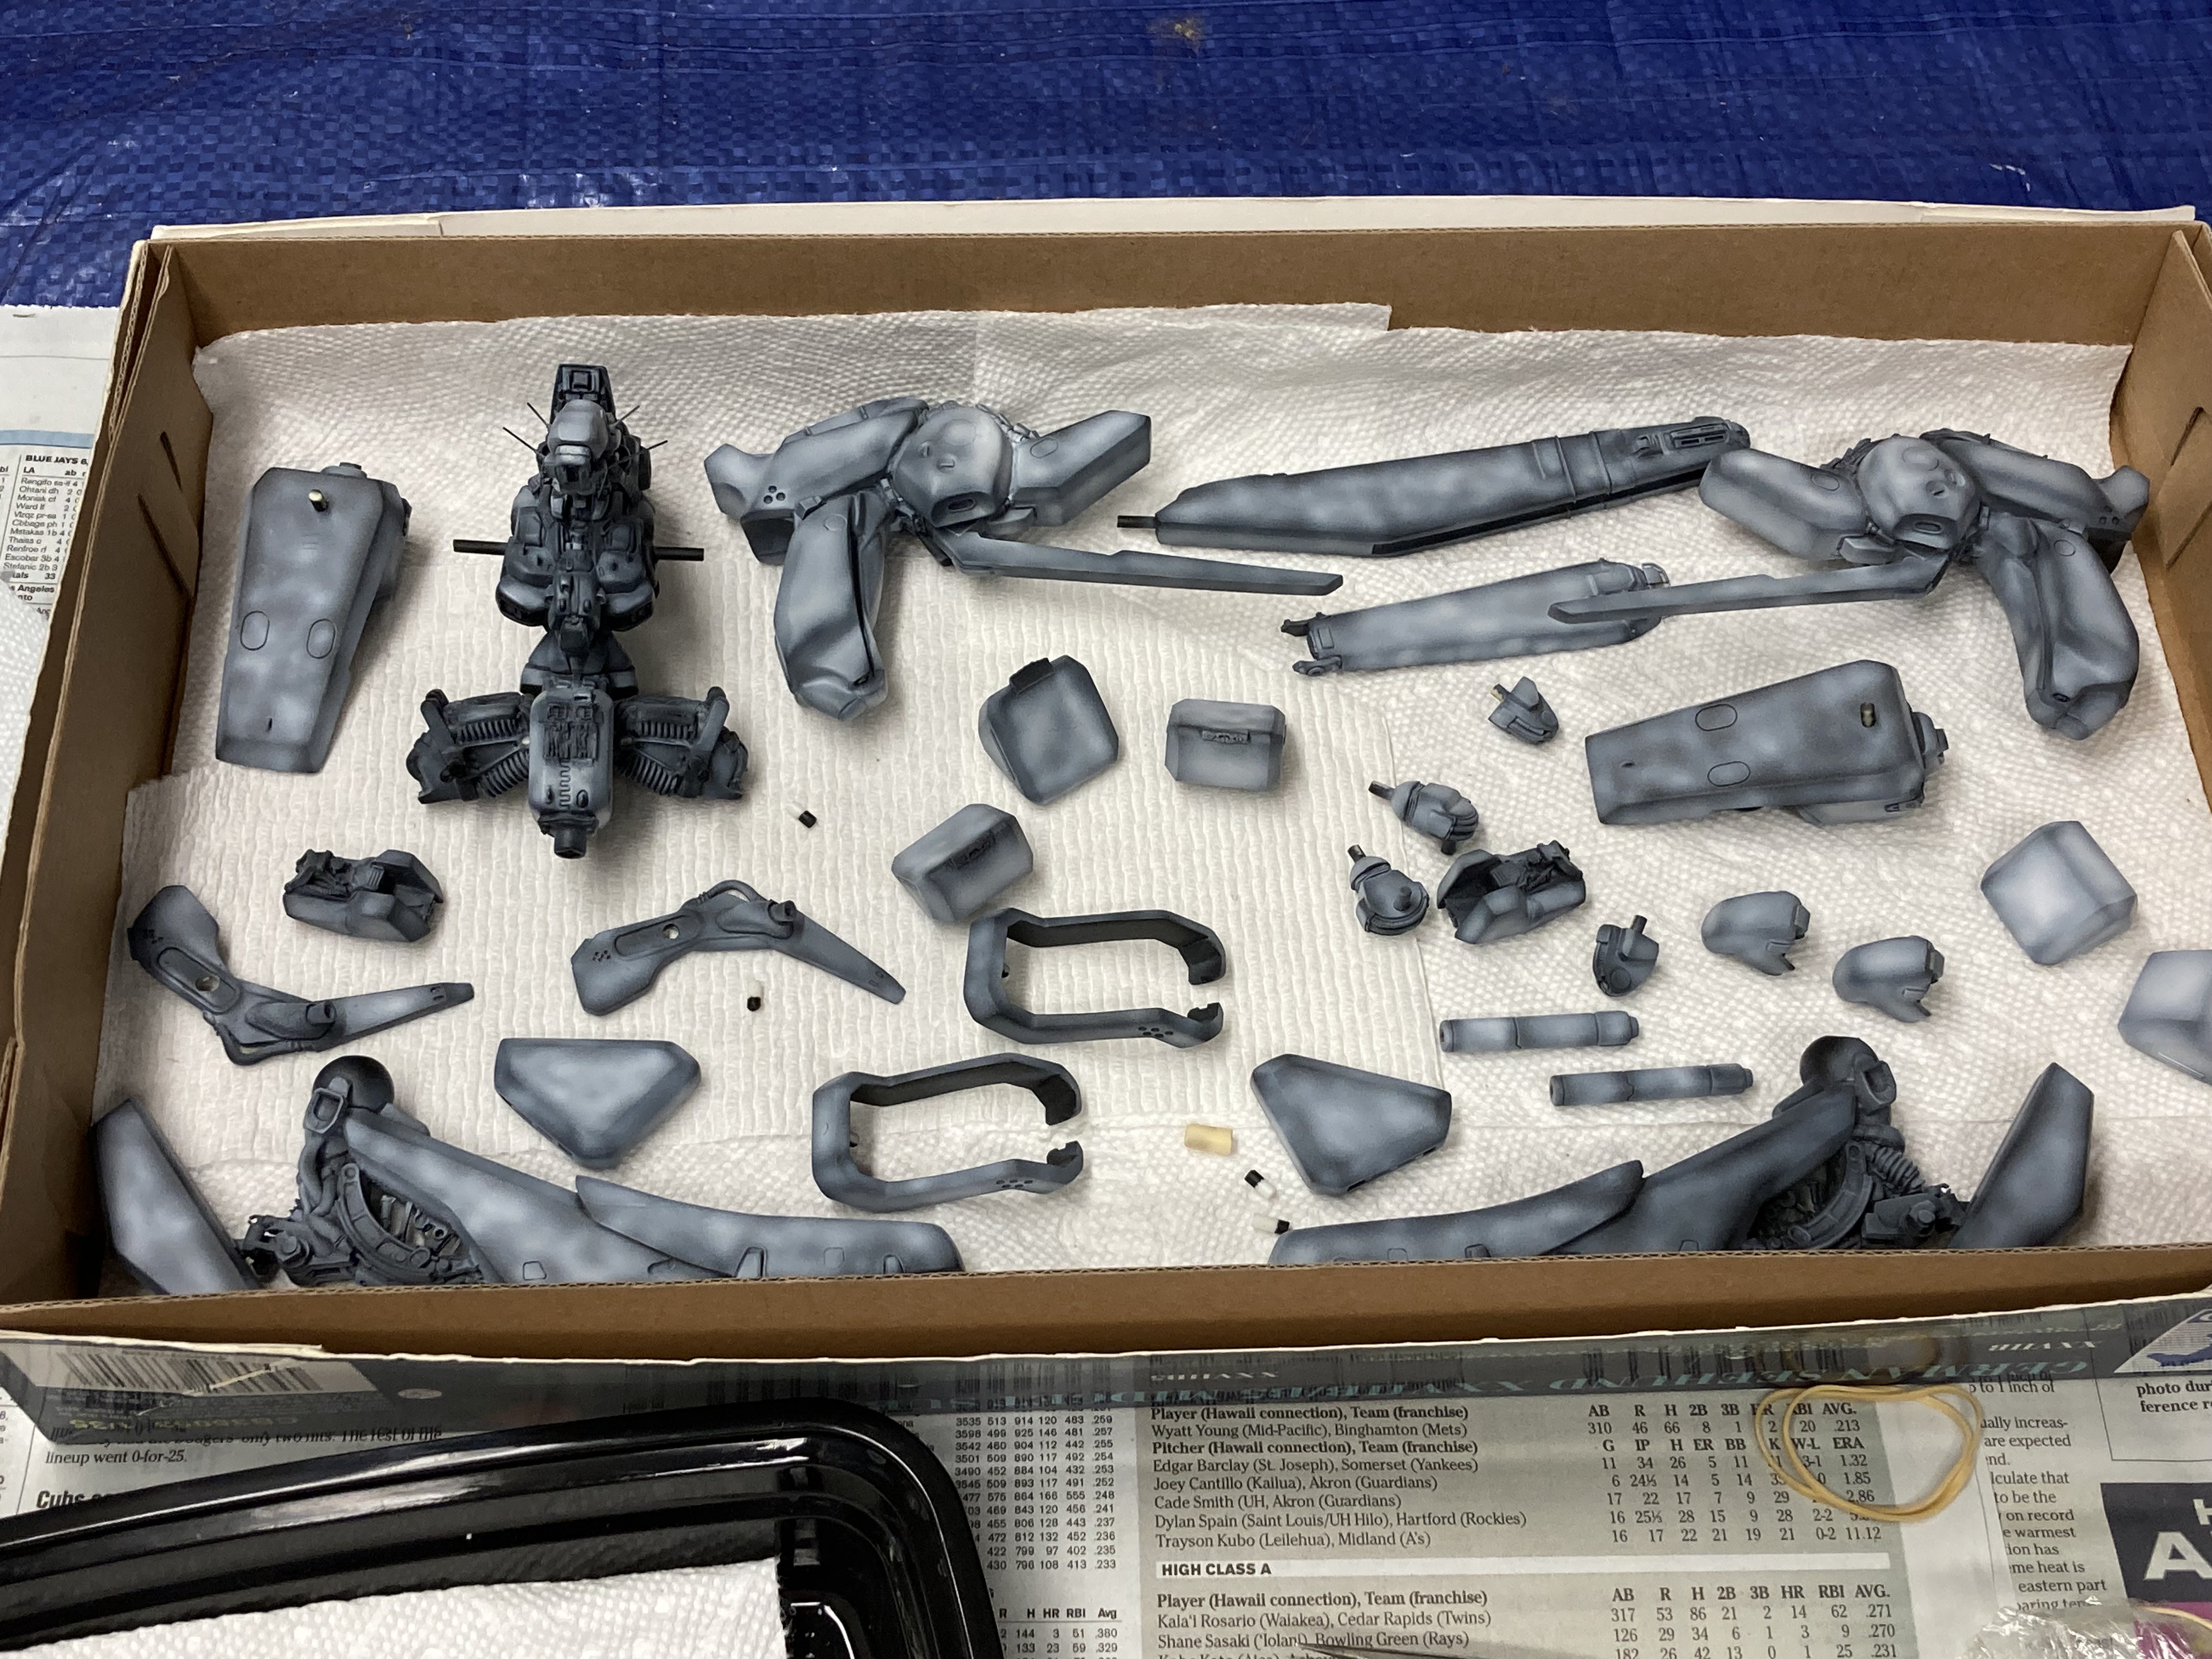
Parts have been pinned. This kit has pretty much no locators, so it’s all DIY.
Black base.
Some mottling.
Base color on.
Clown colors on.
I am finally really, really, really tired of fiddling with my single-action airbrush needle stop during fine detail painting. I will switch to my Iwata double-action from now on. I’ll still use the old battered Badger 200 for simple stuff, so it’s not going to the toolbox graveyard.
The instructions suggest using a bit of PE runner to make the eyes. I thought the idea was ludicrous, but have come around to embracing it. But where is the face?
The eyes will go a long way to answer that question!