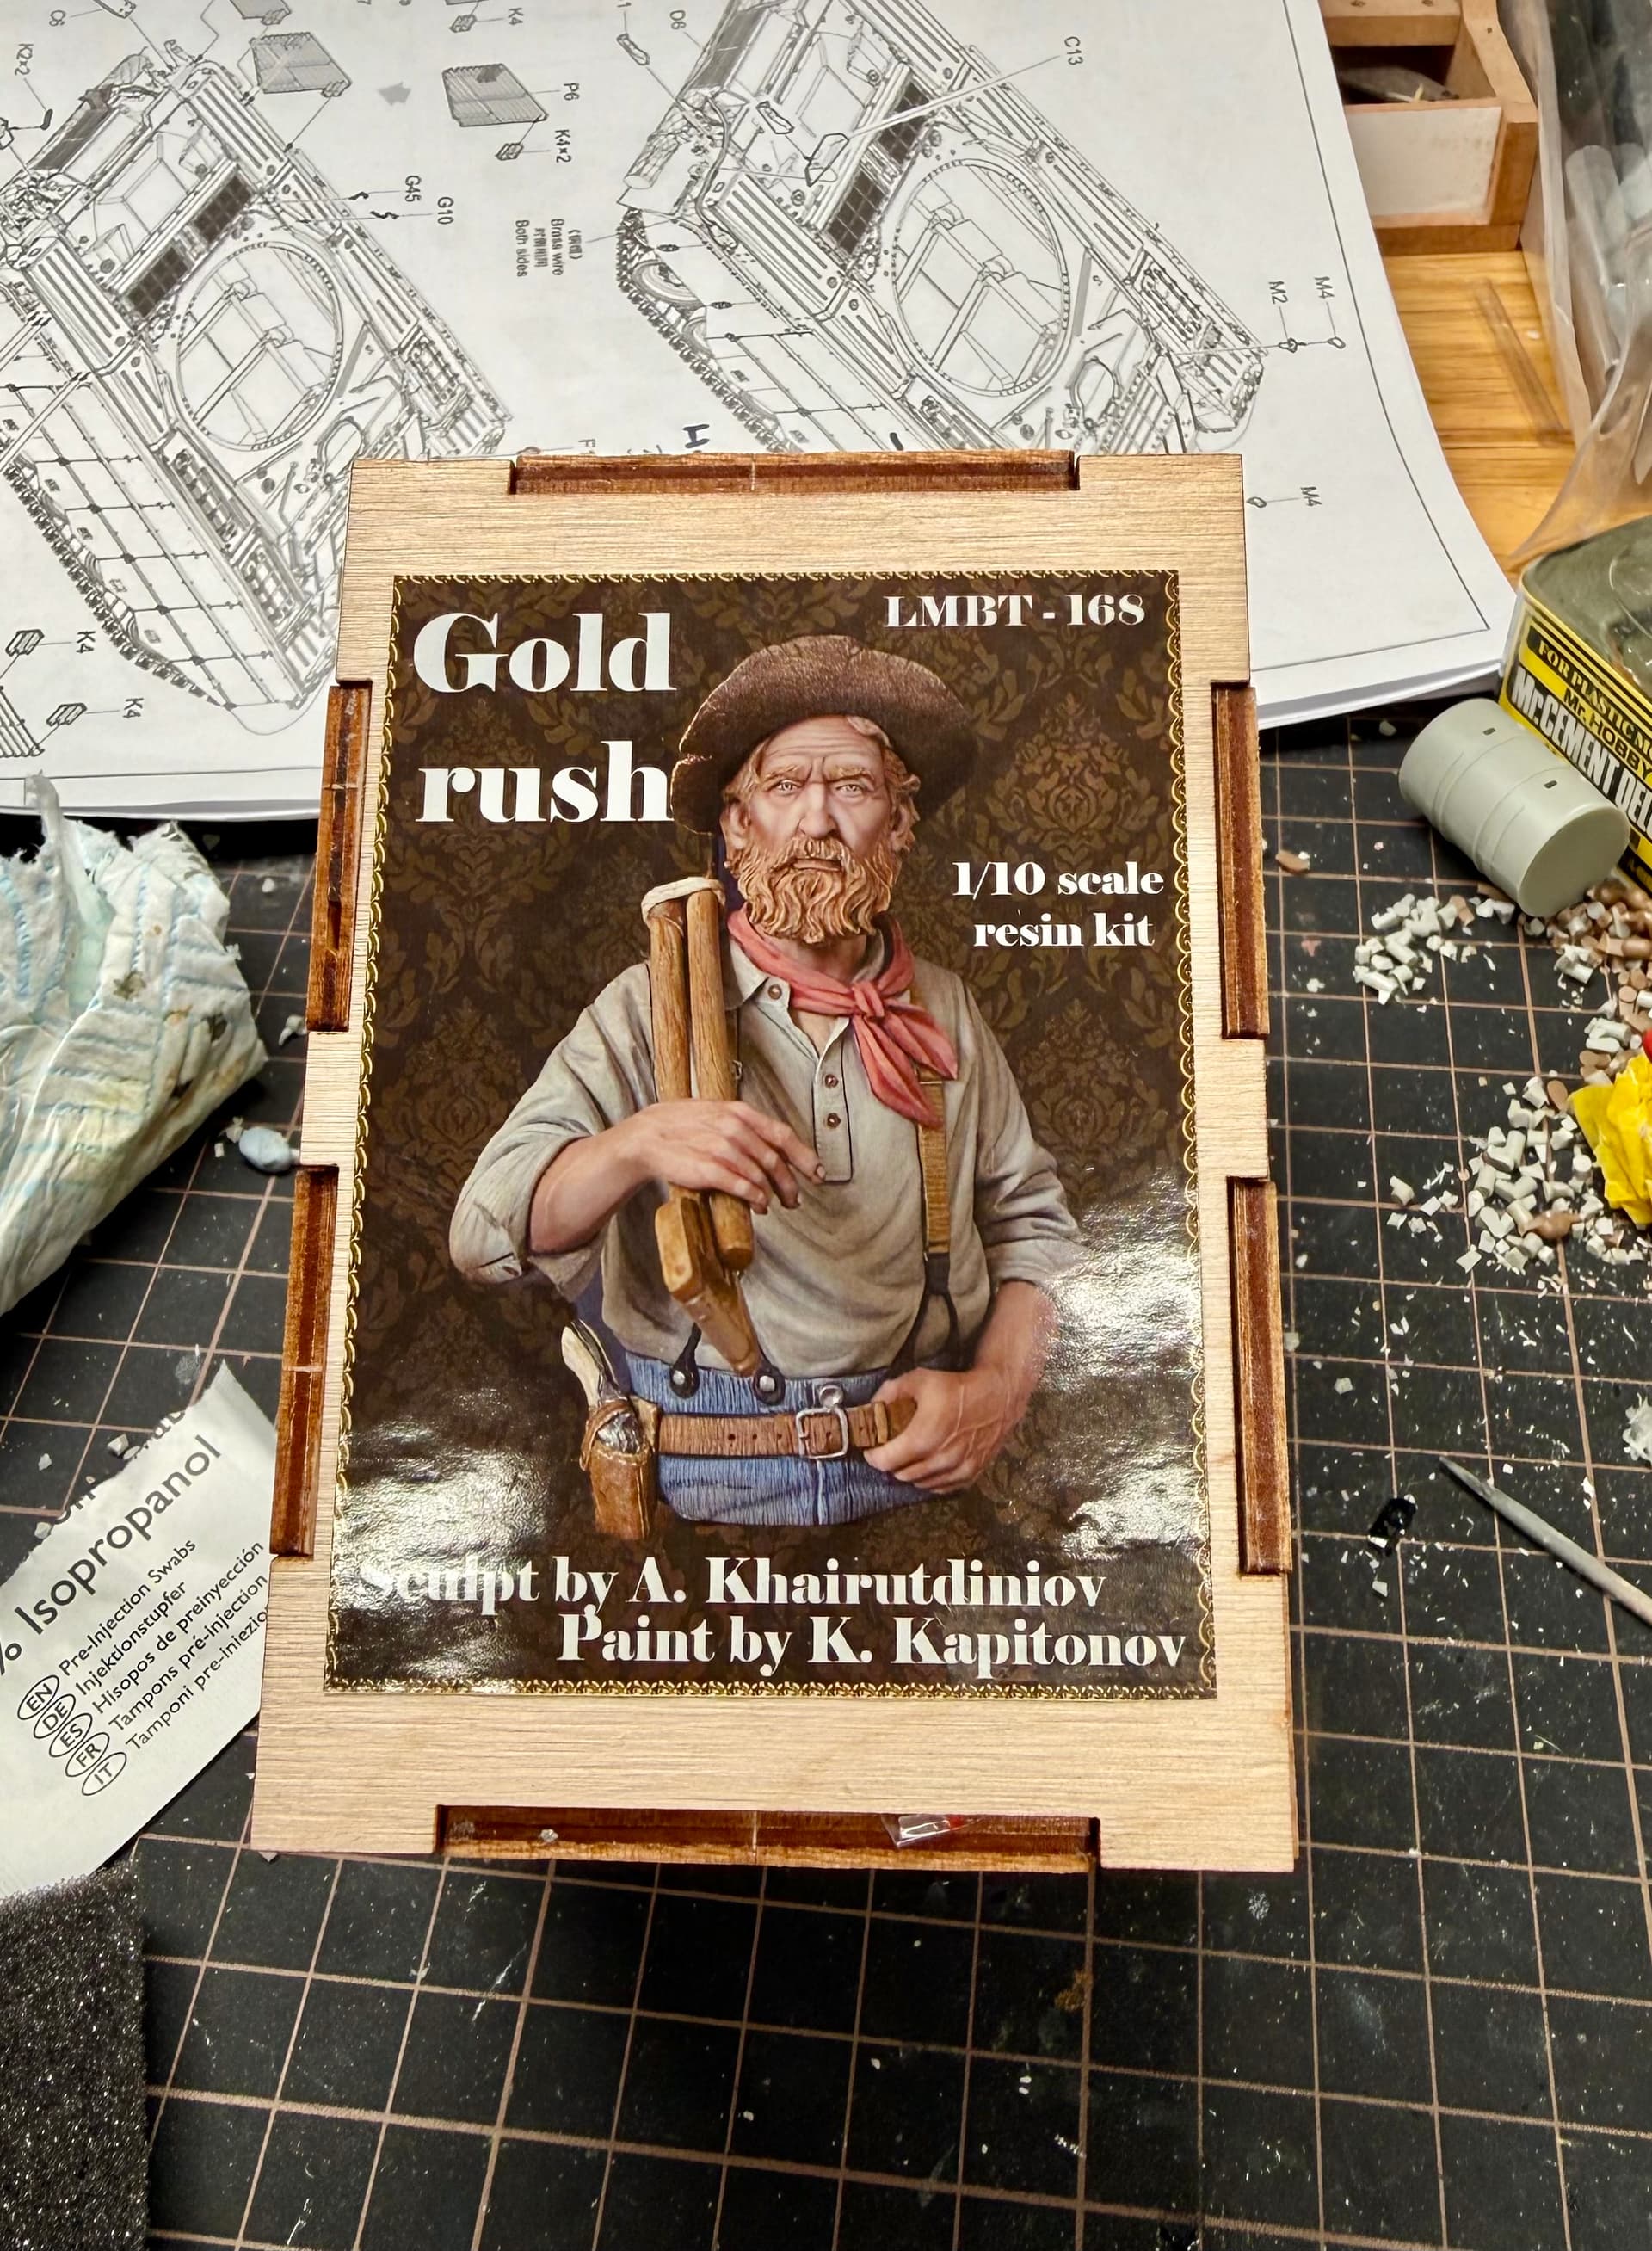
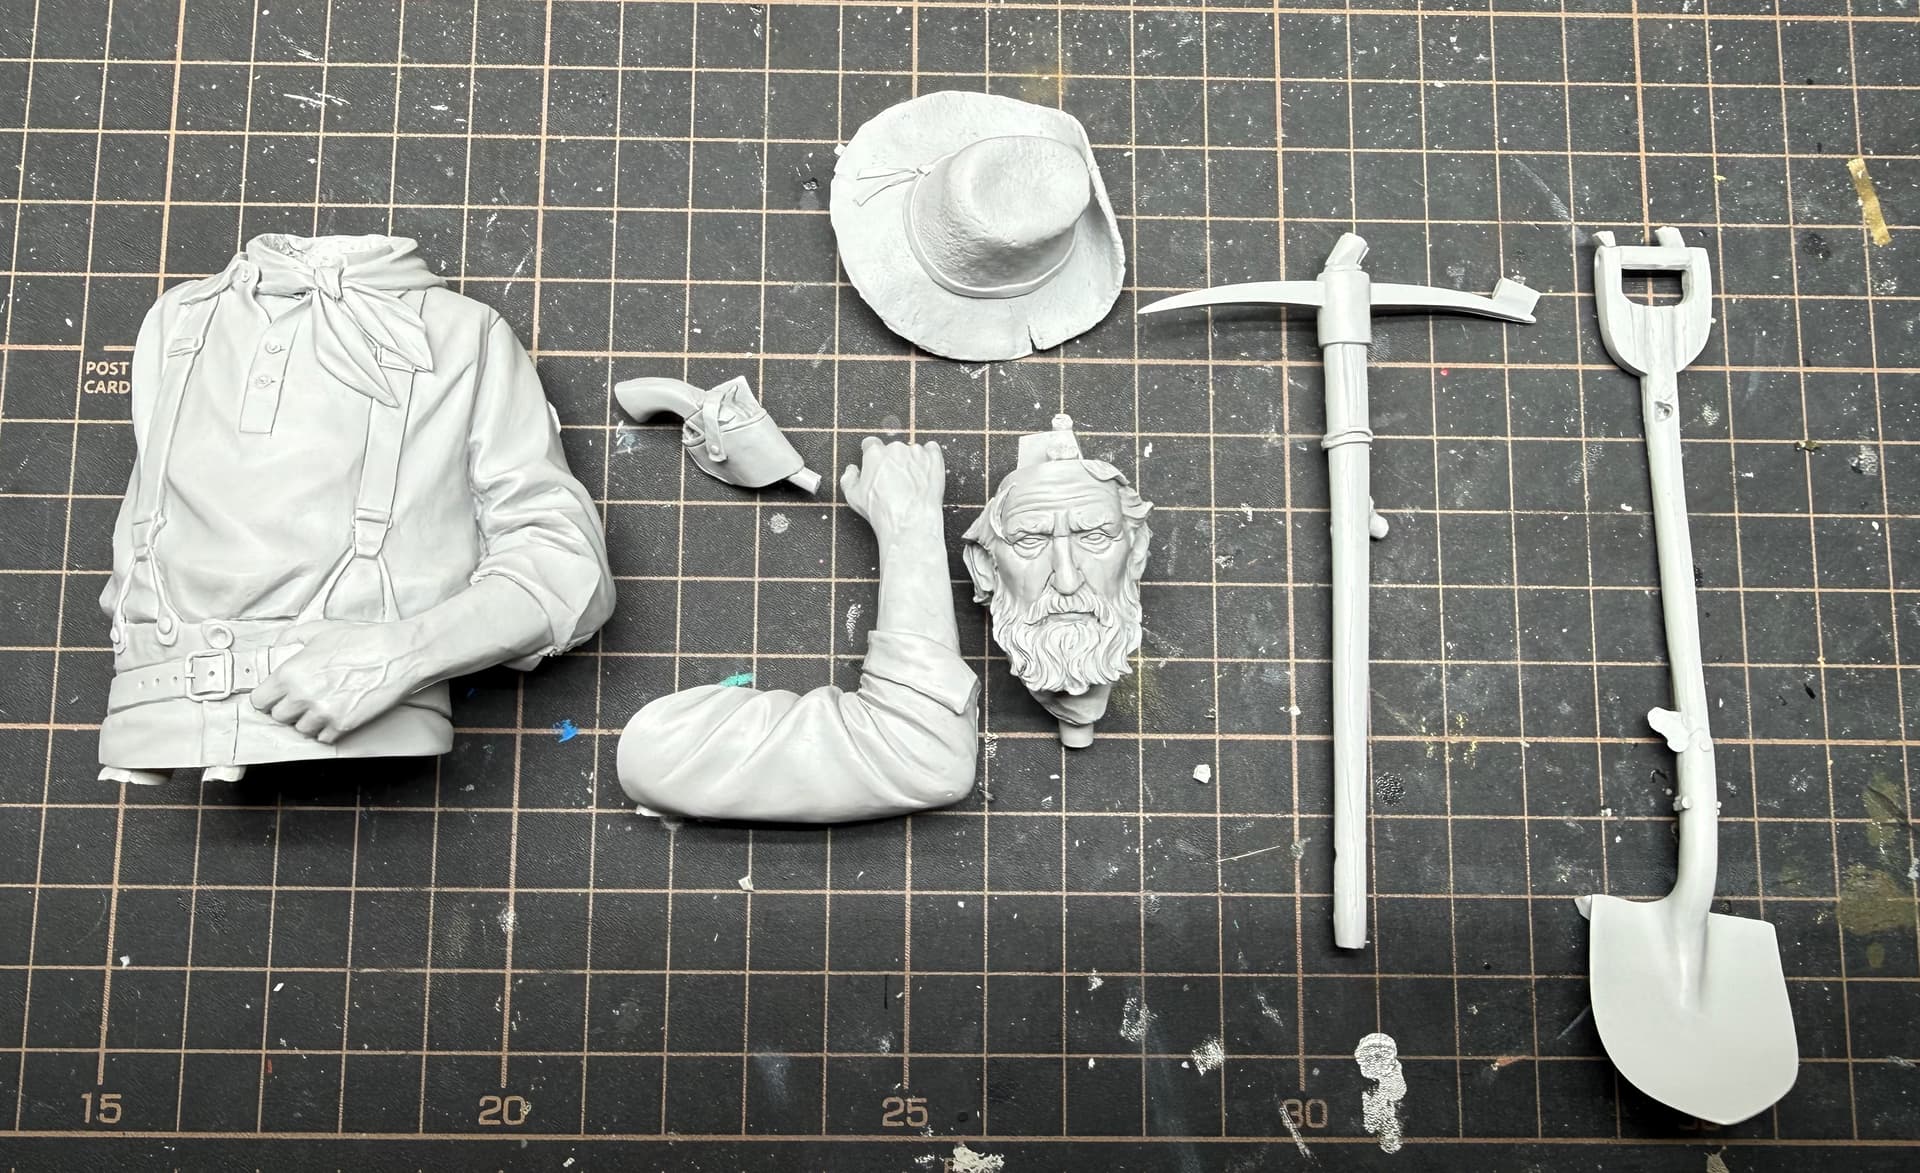
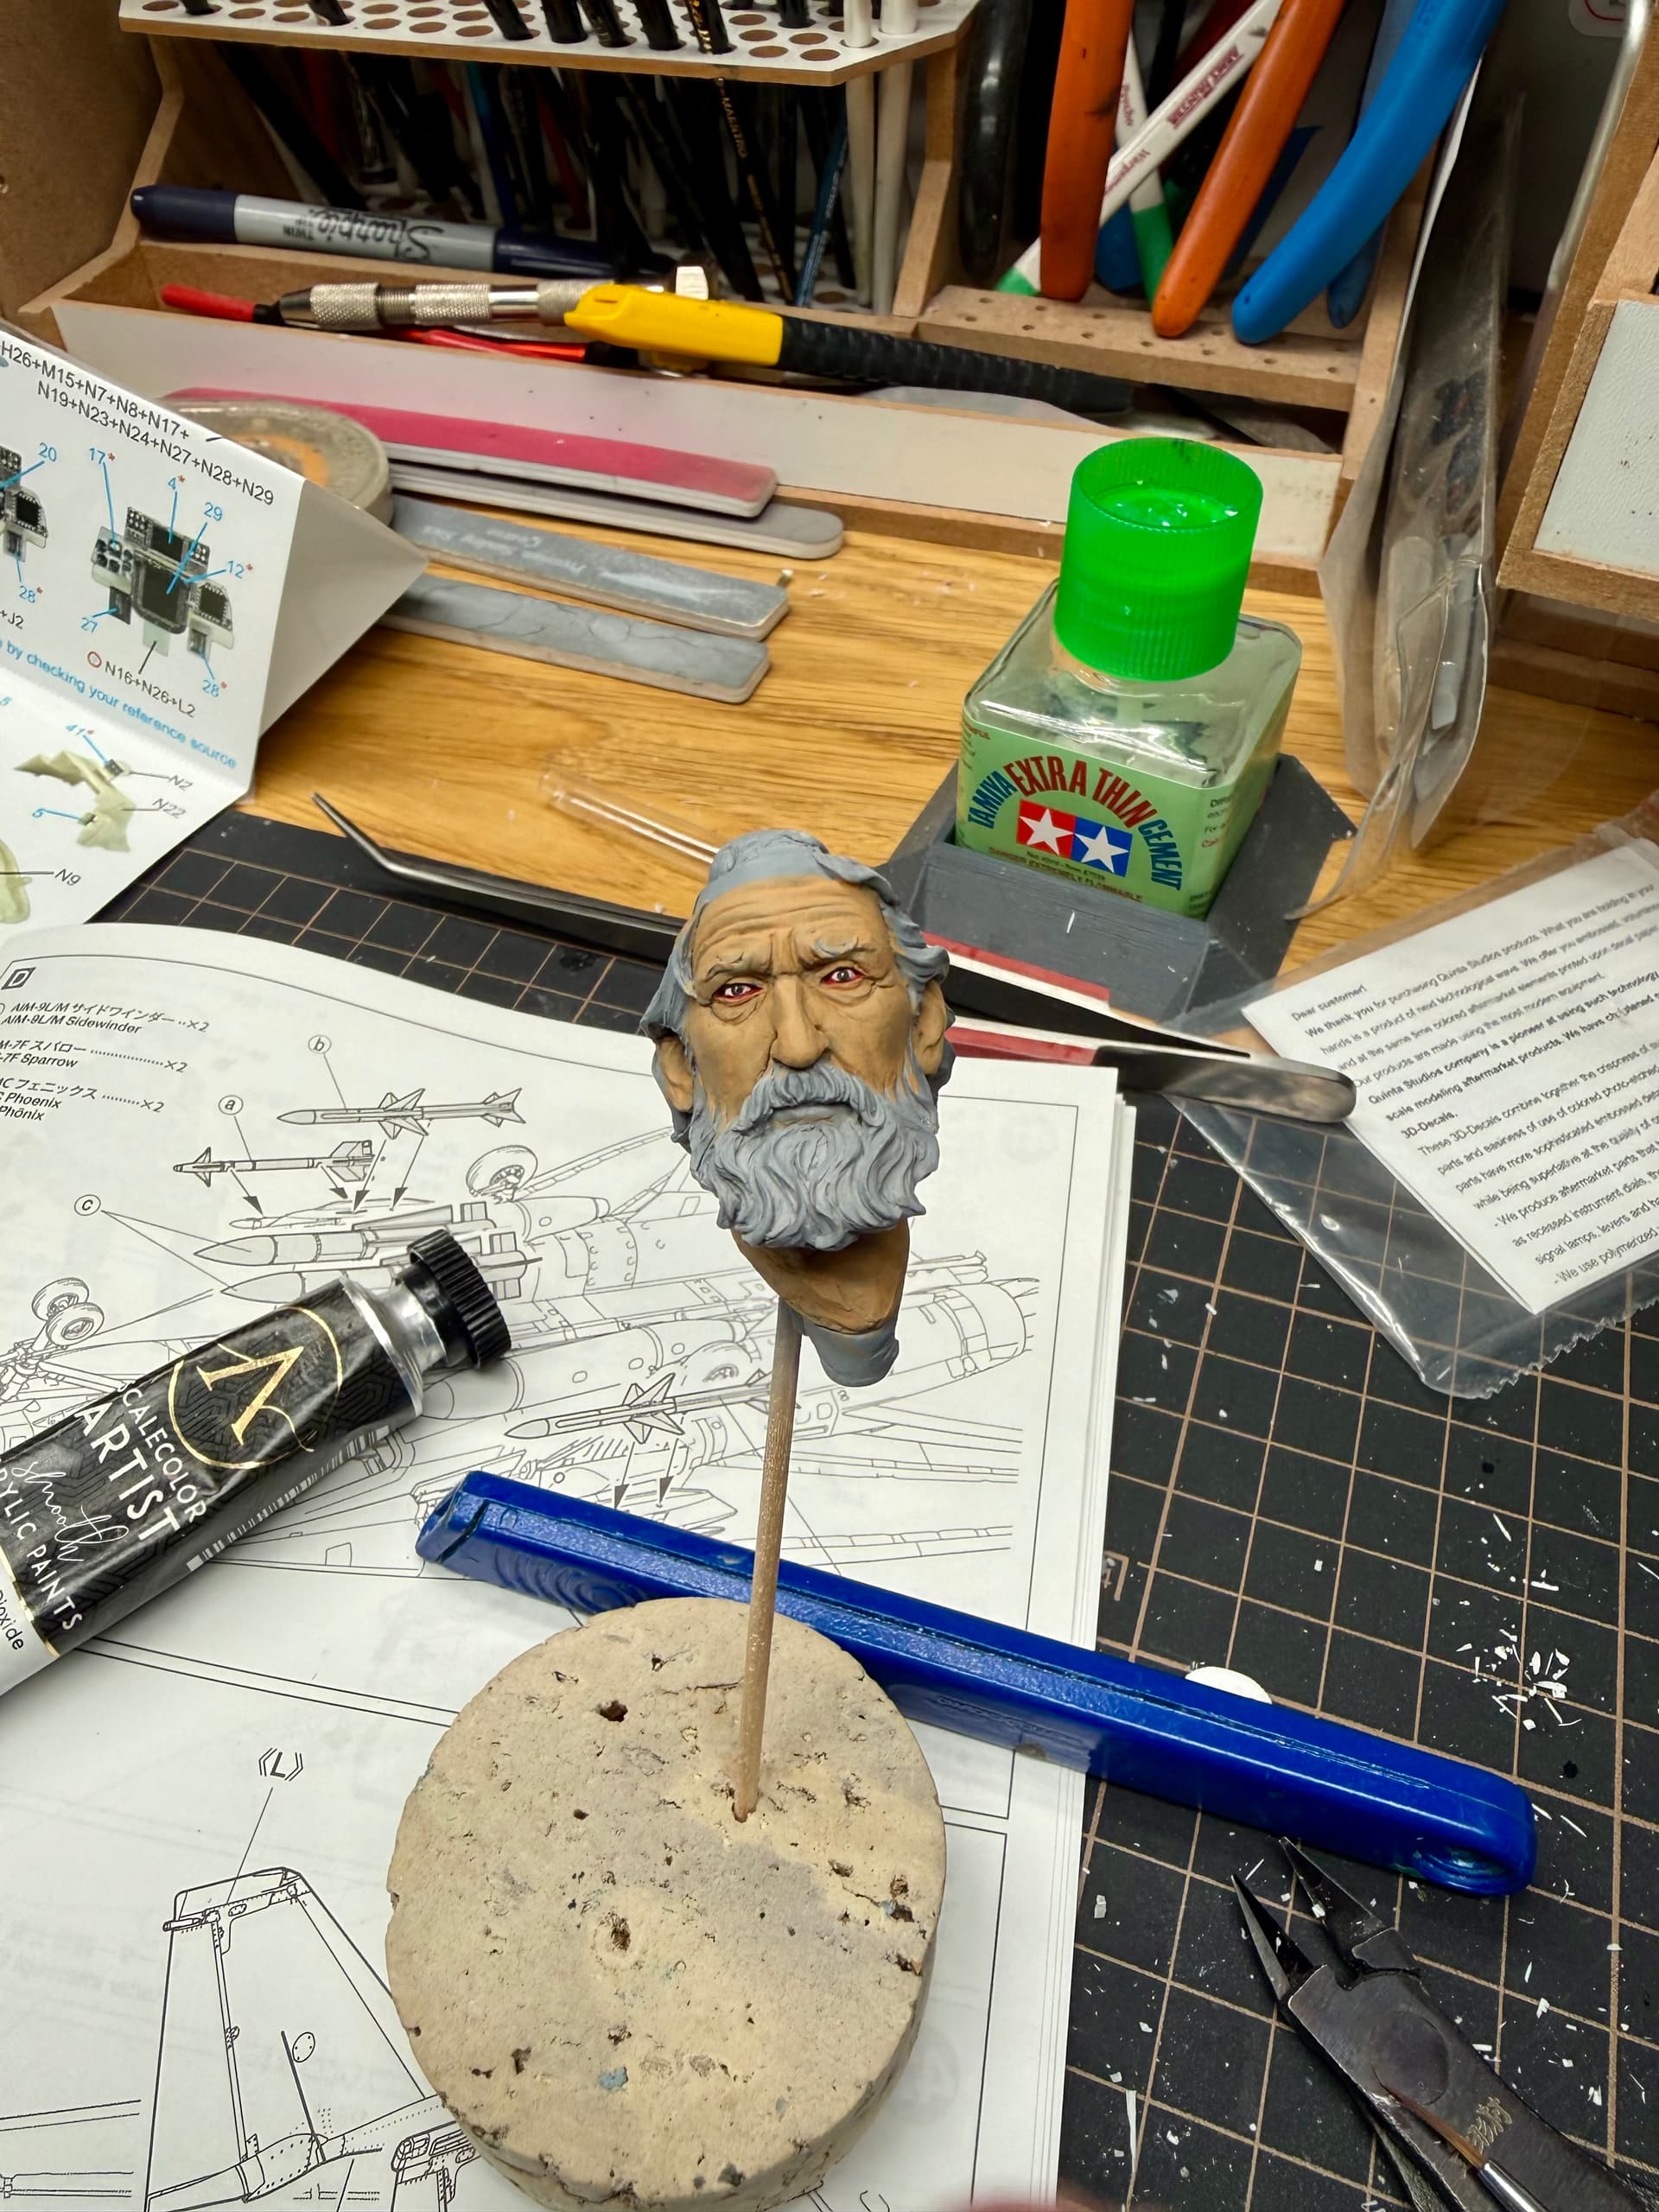
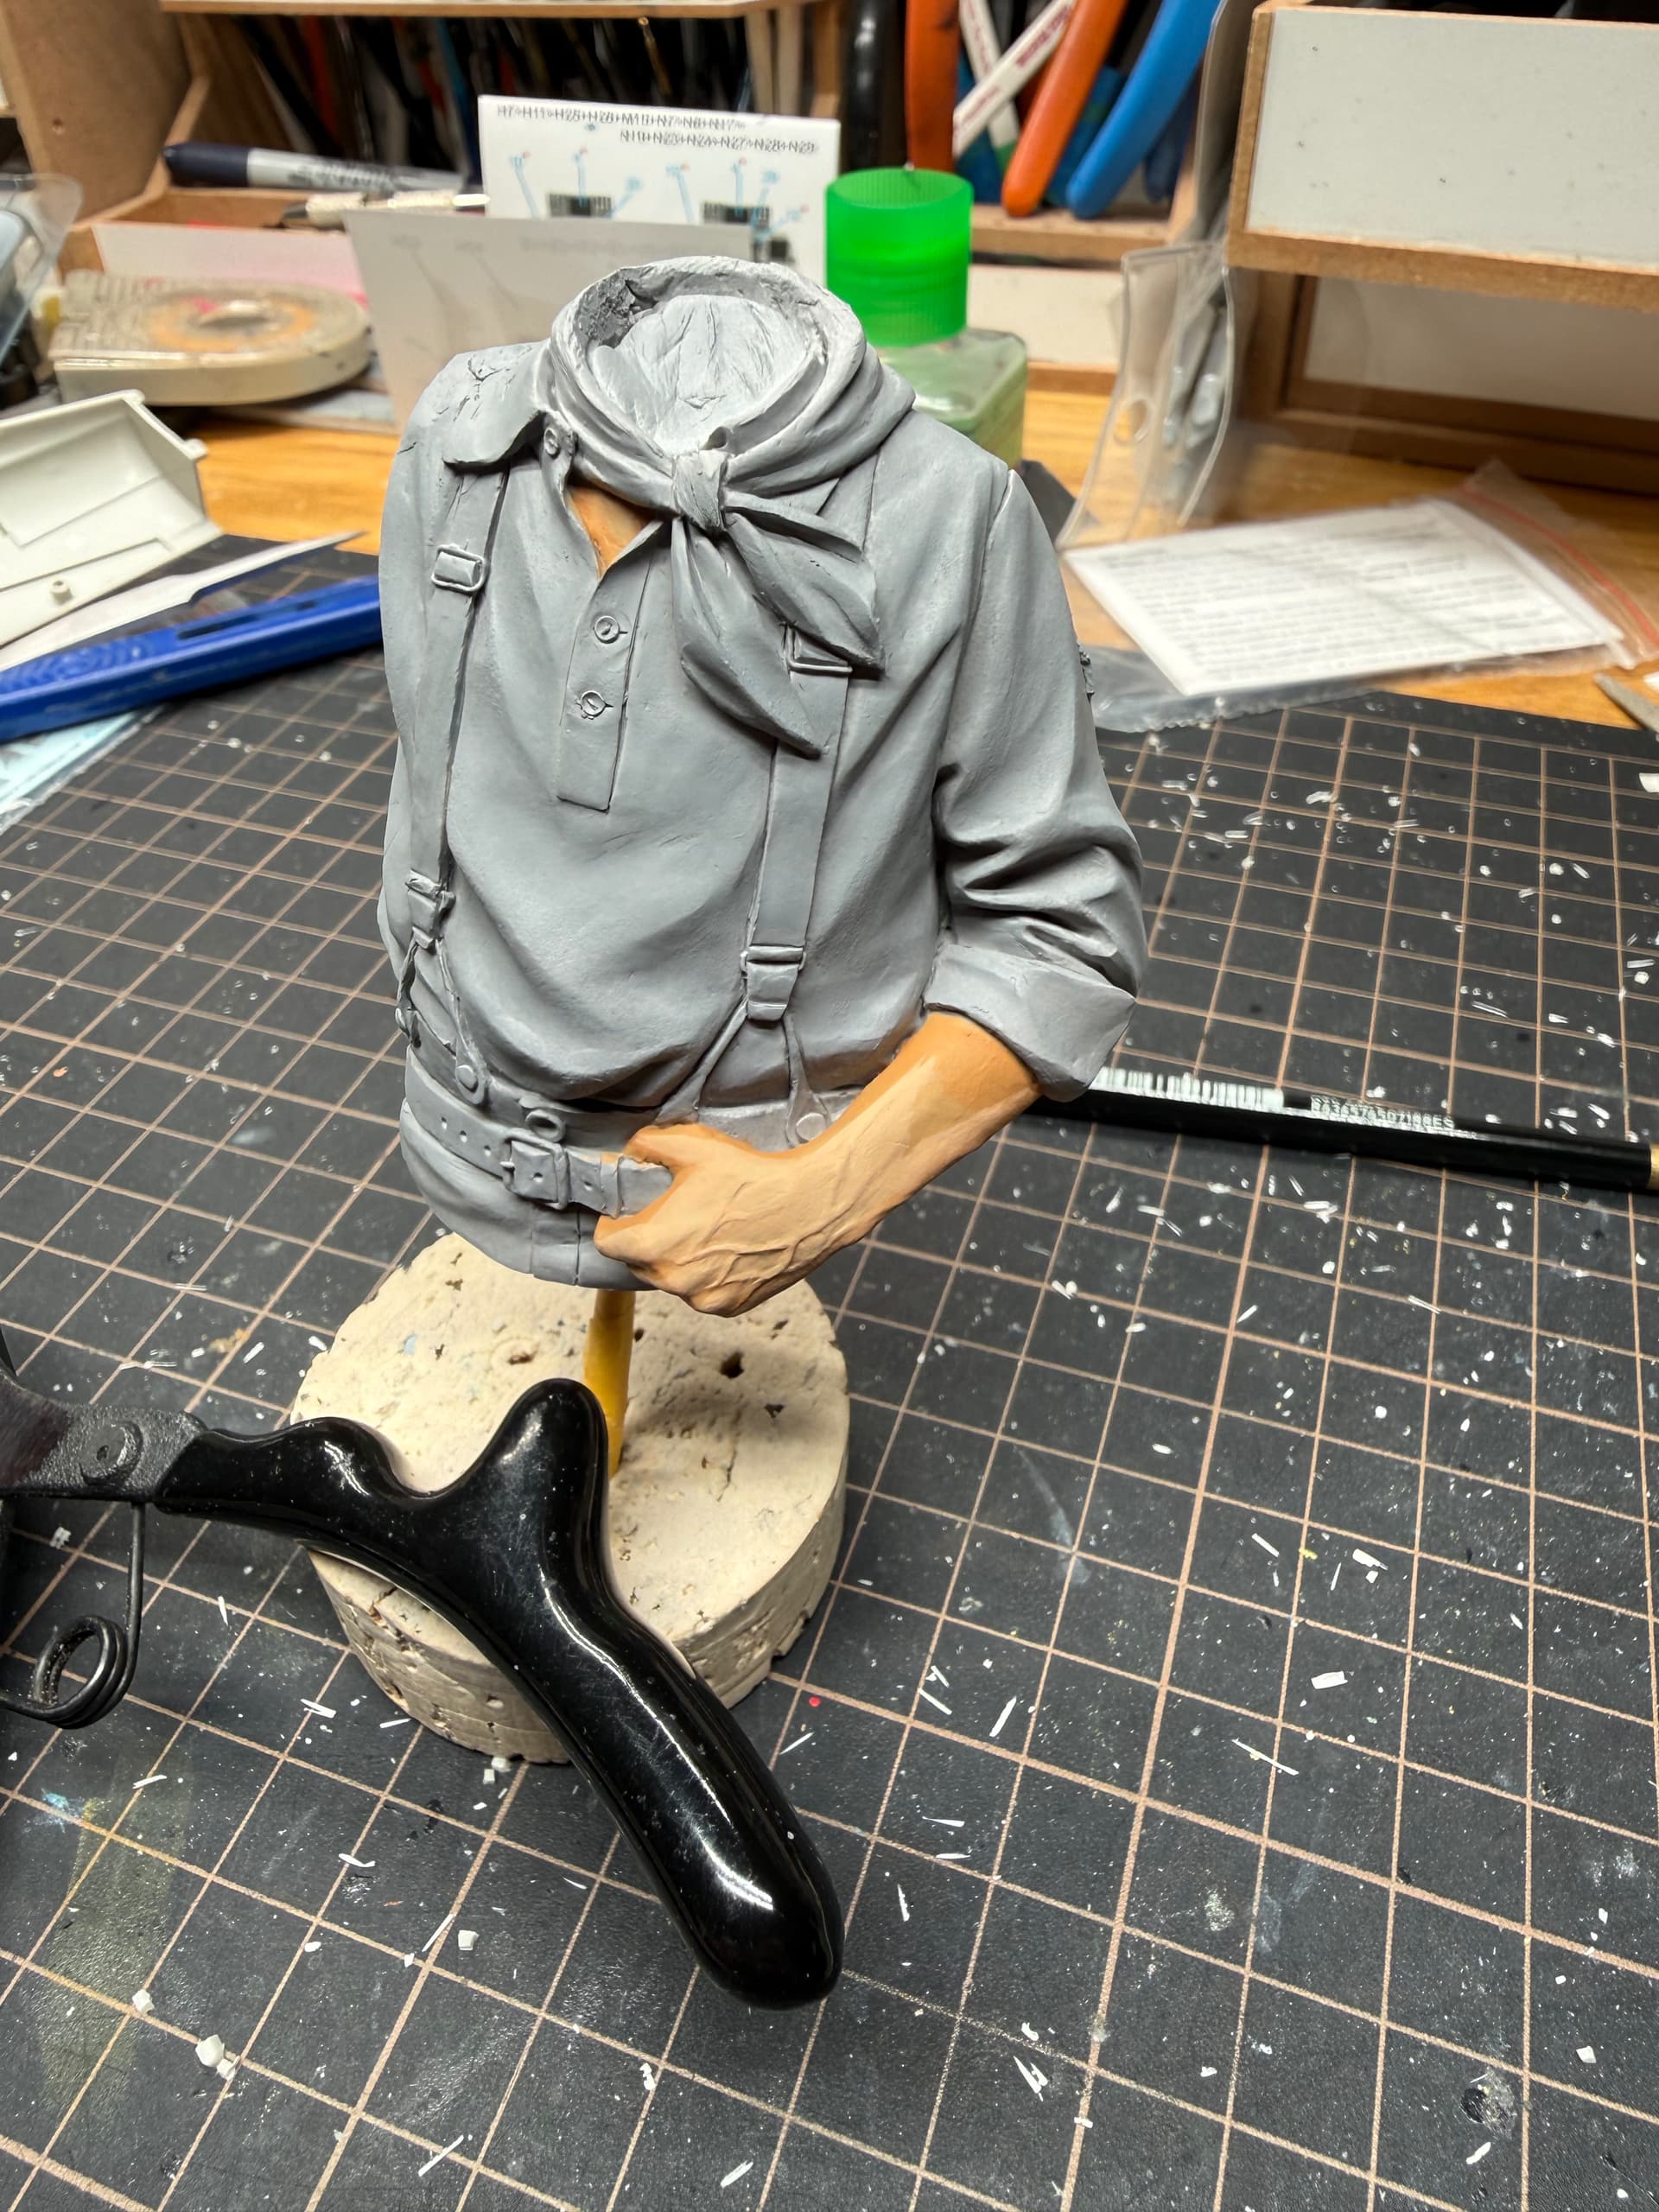
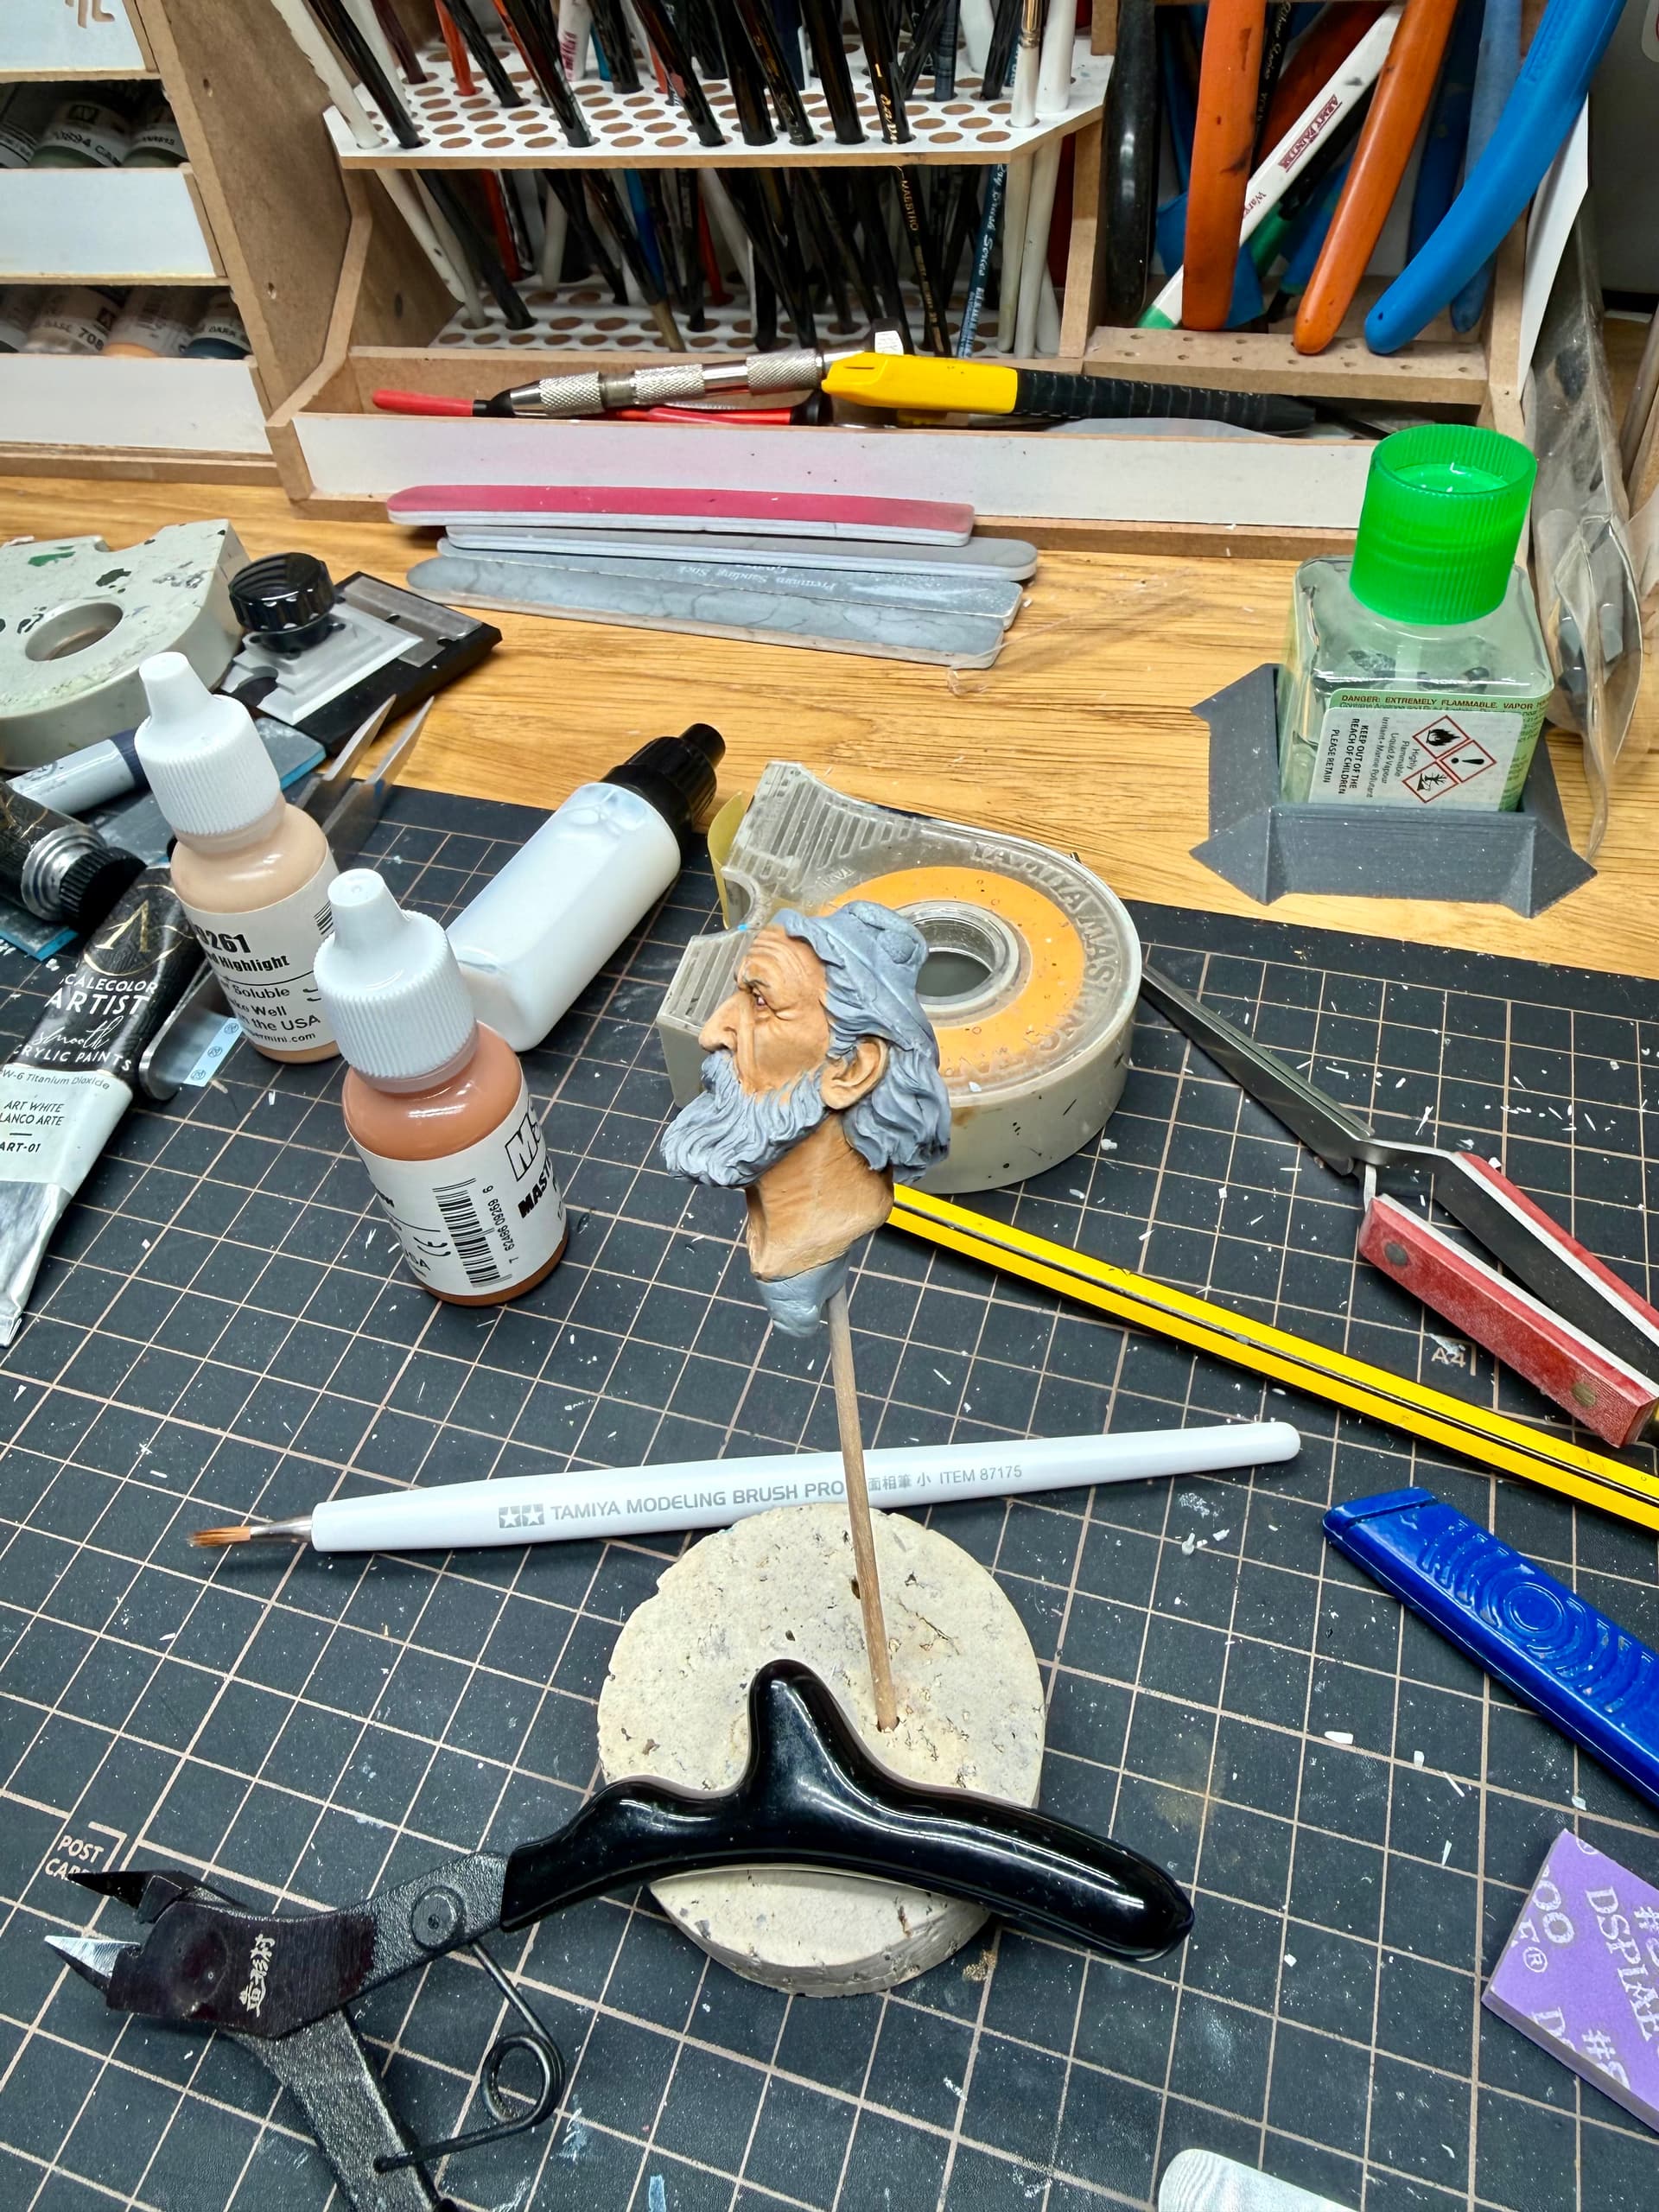
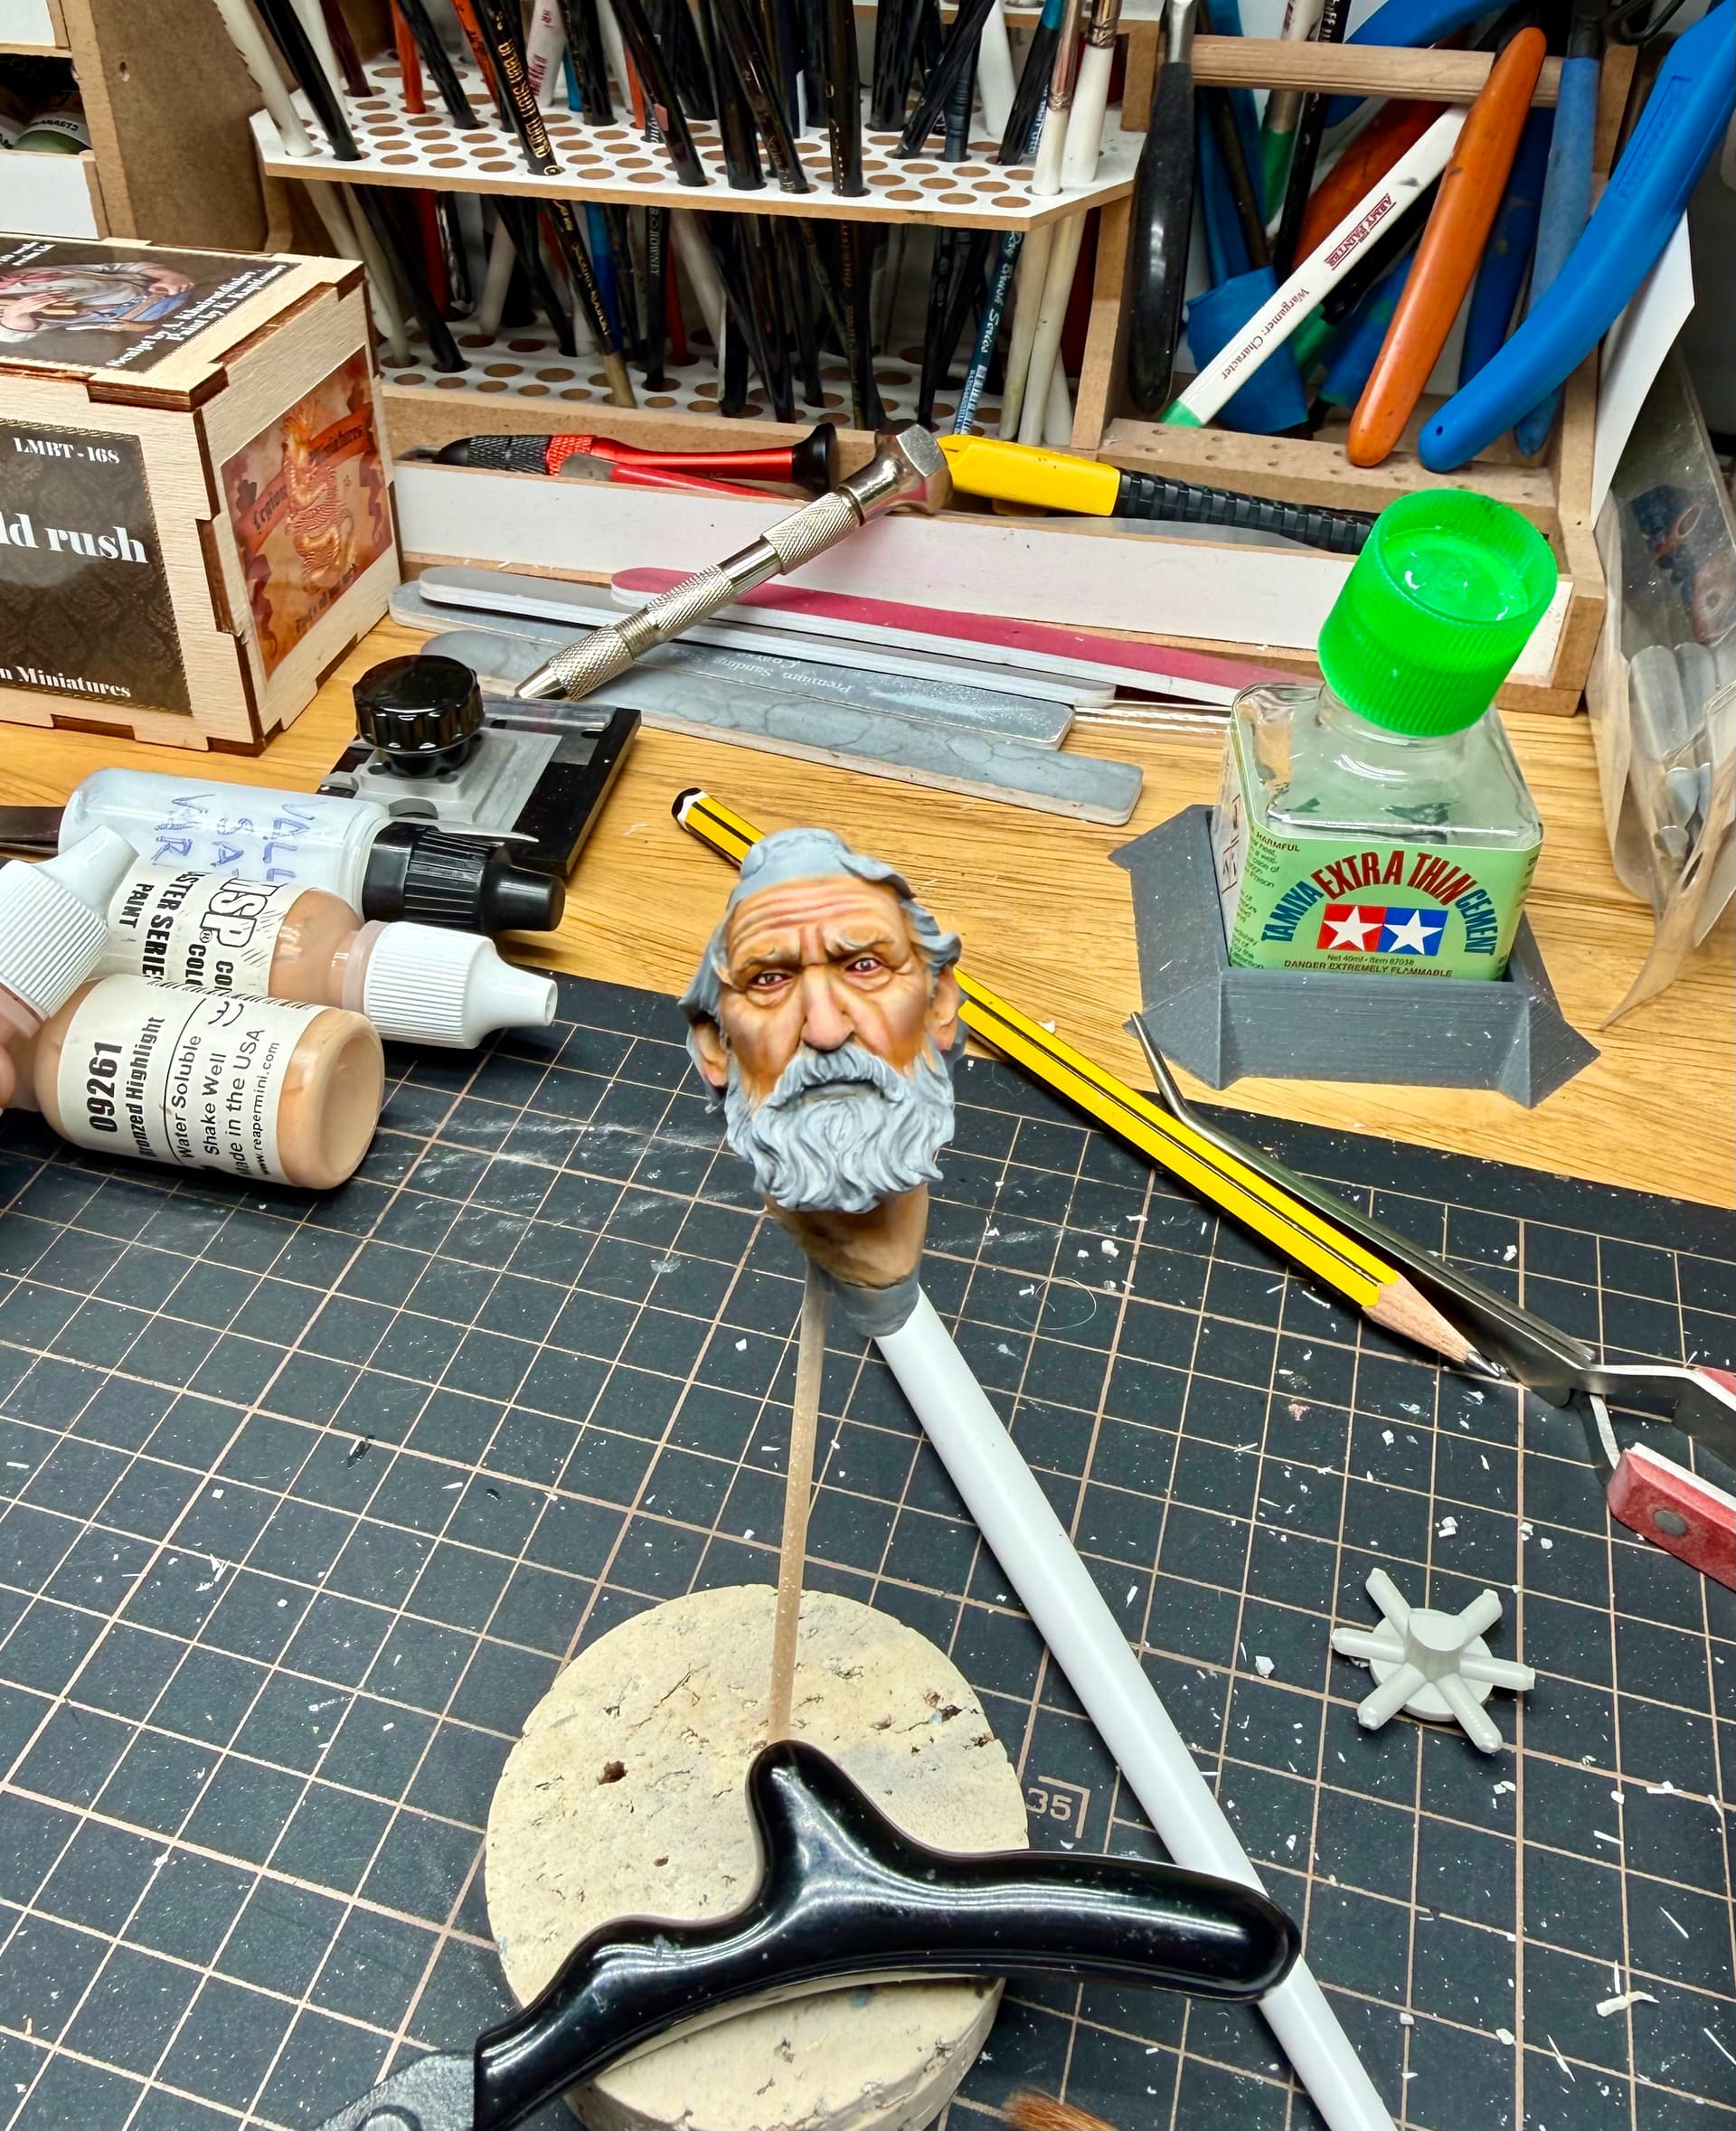
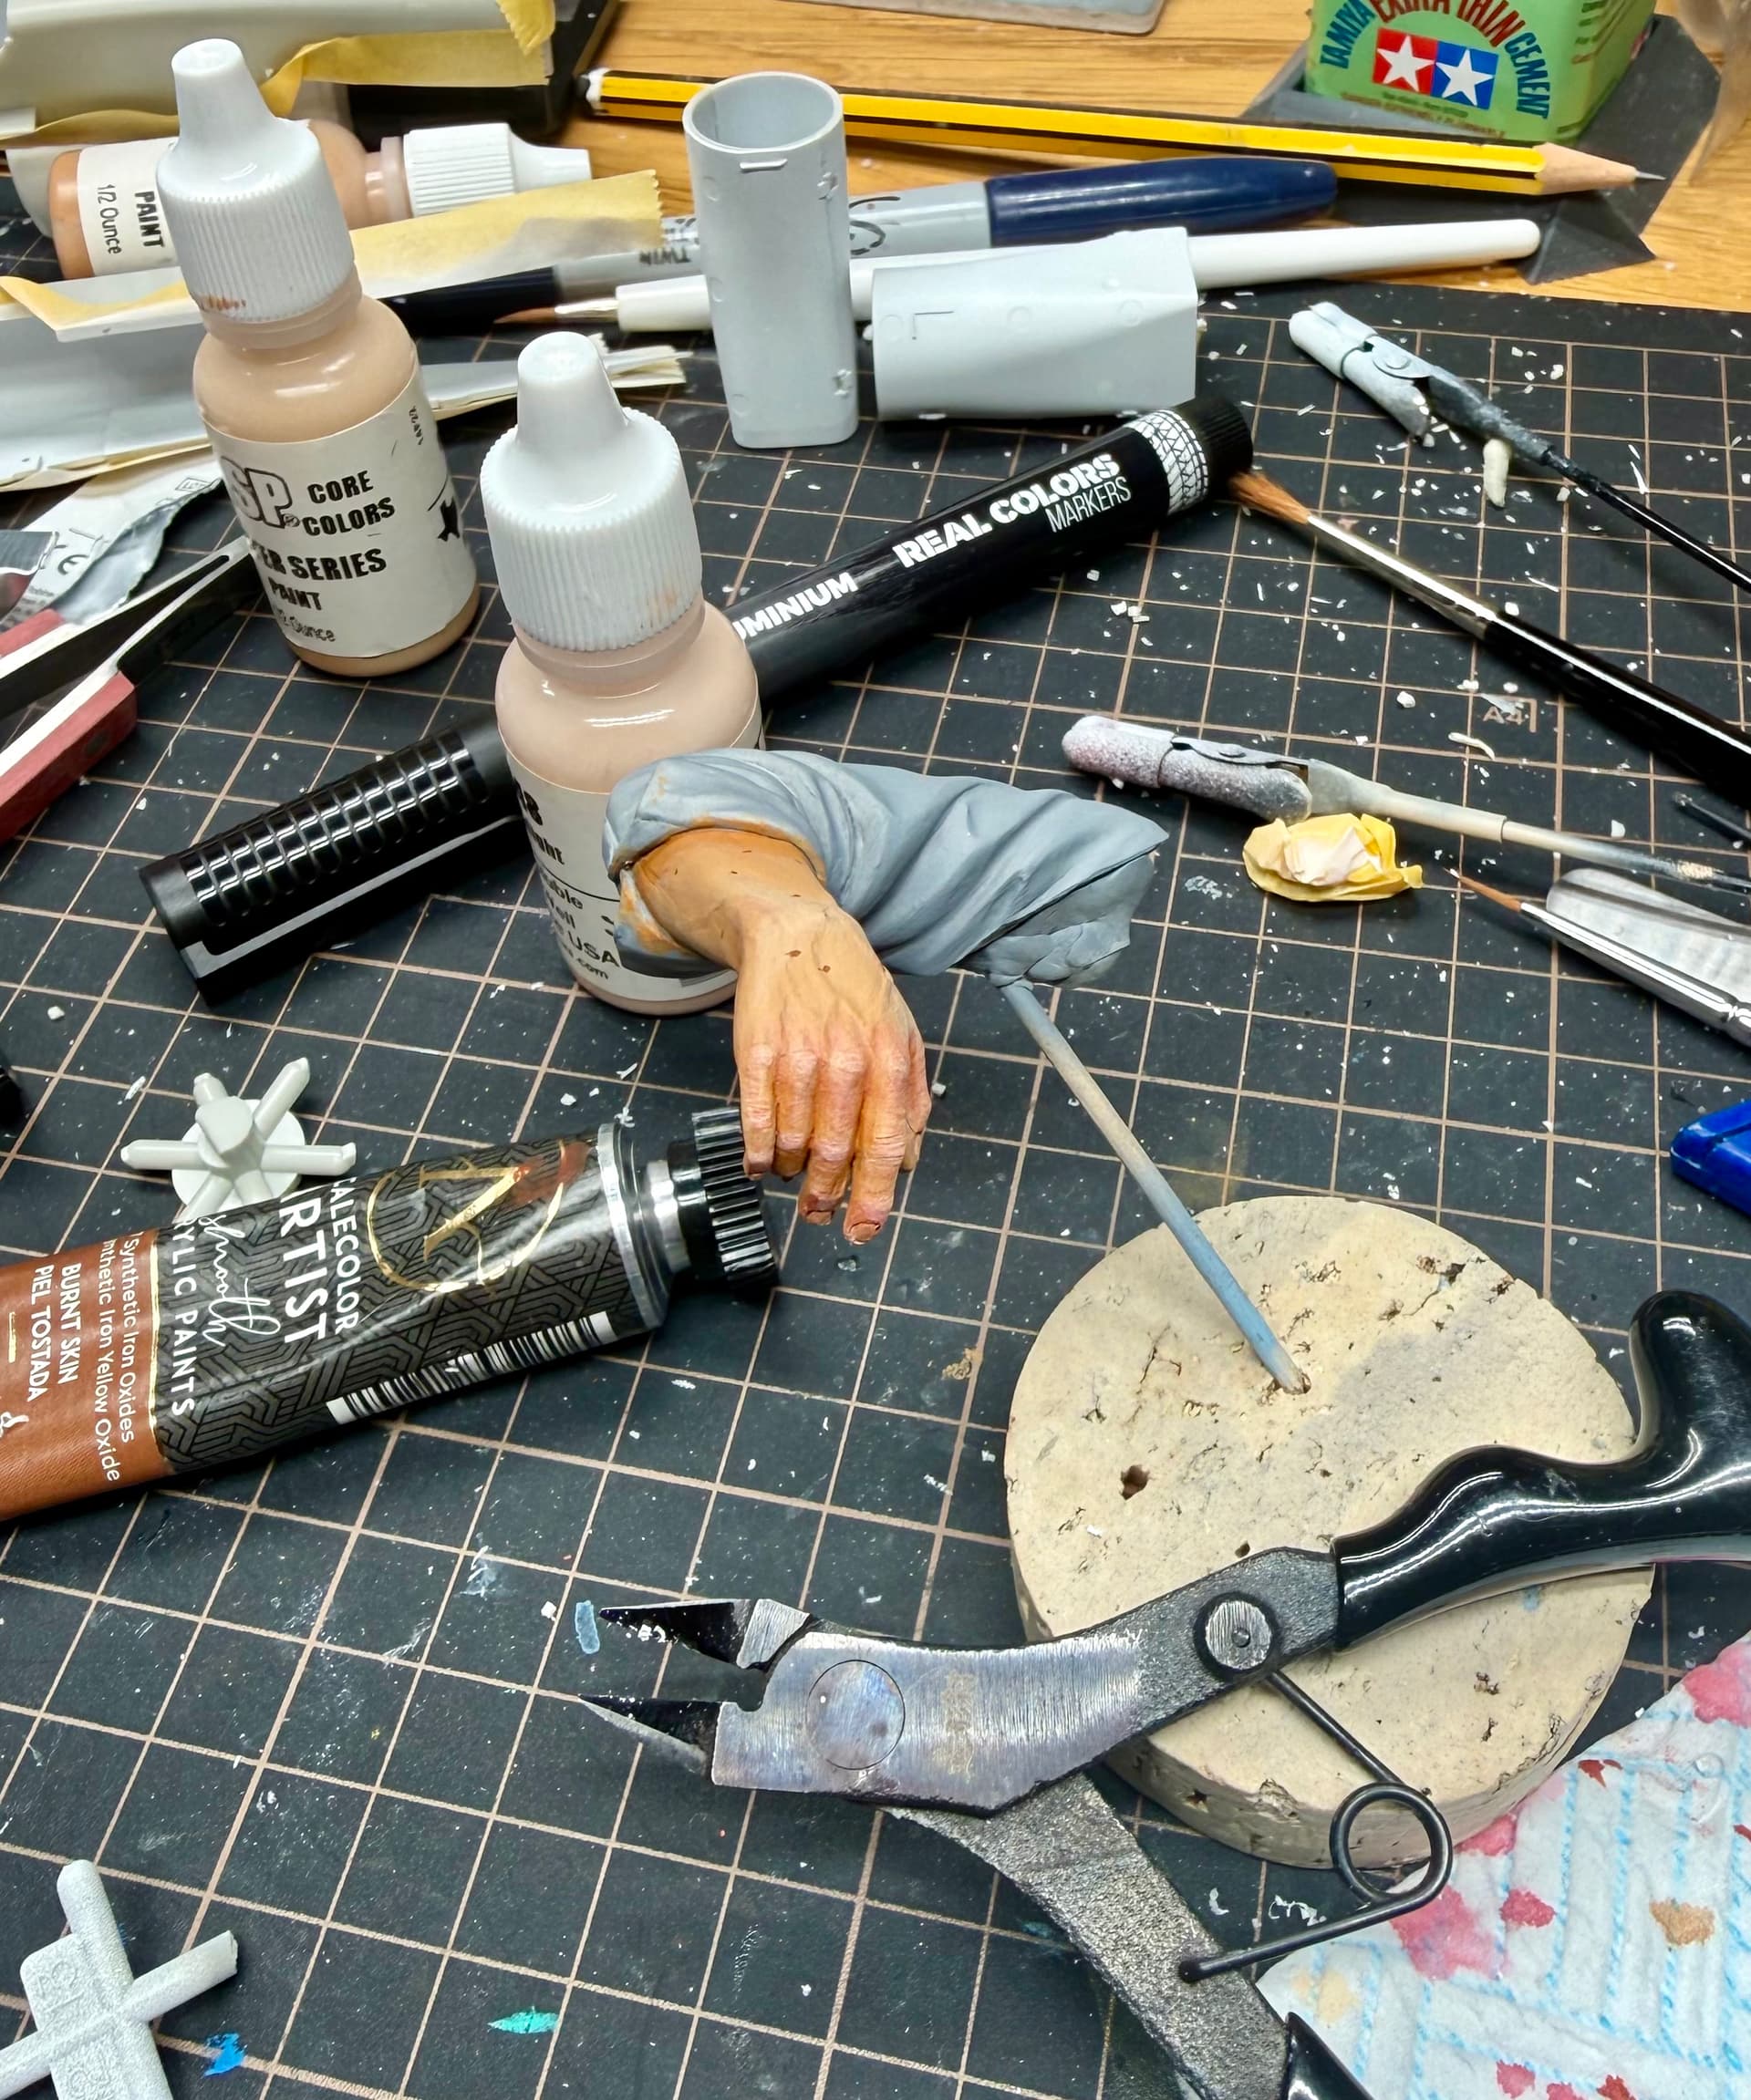
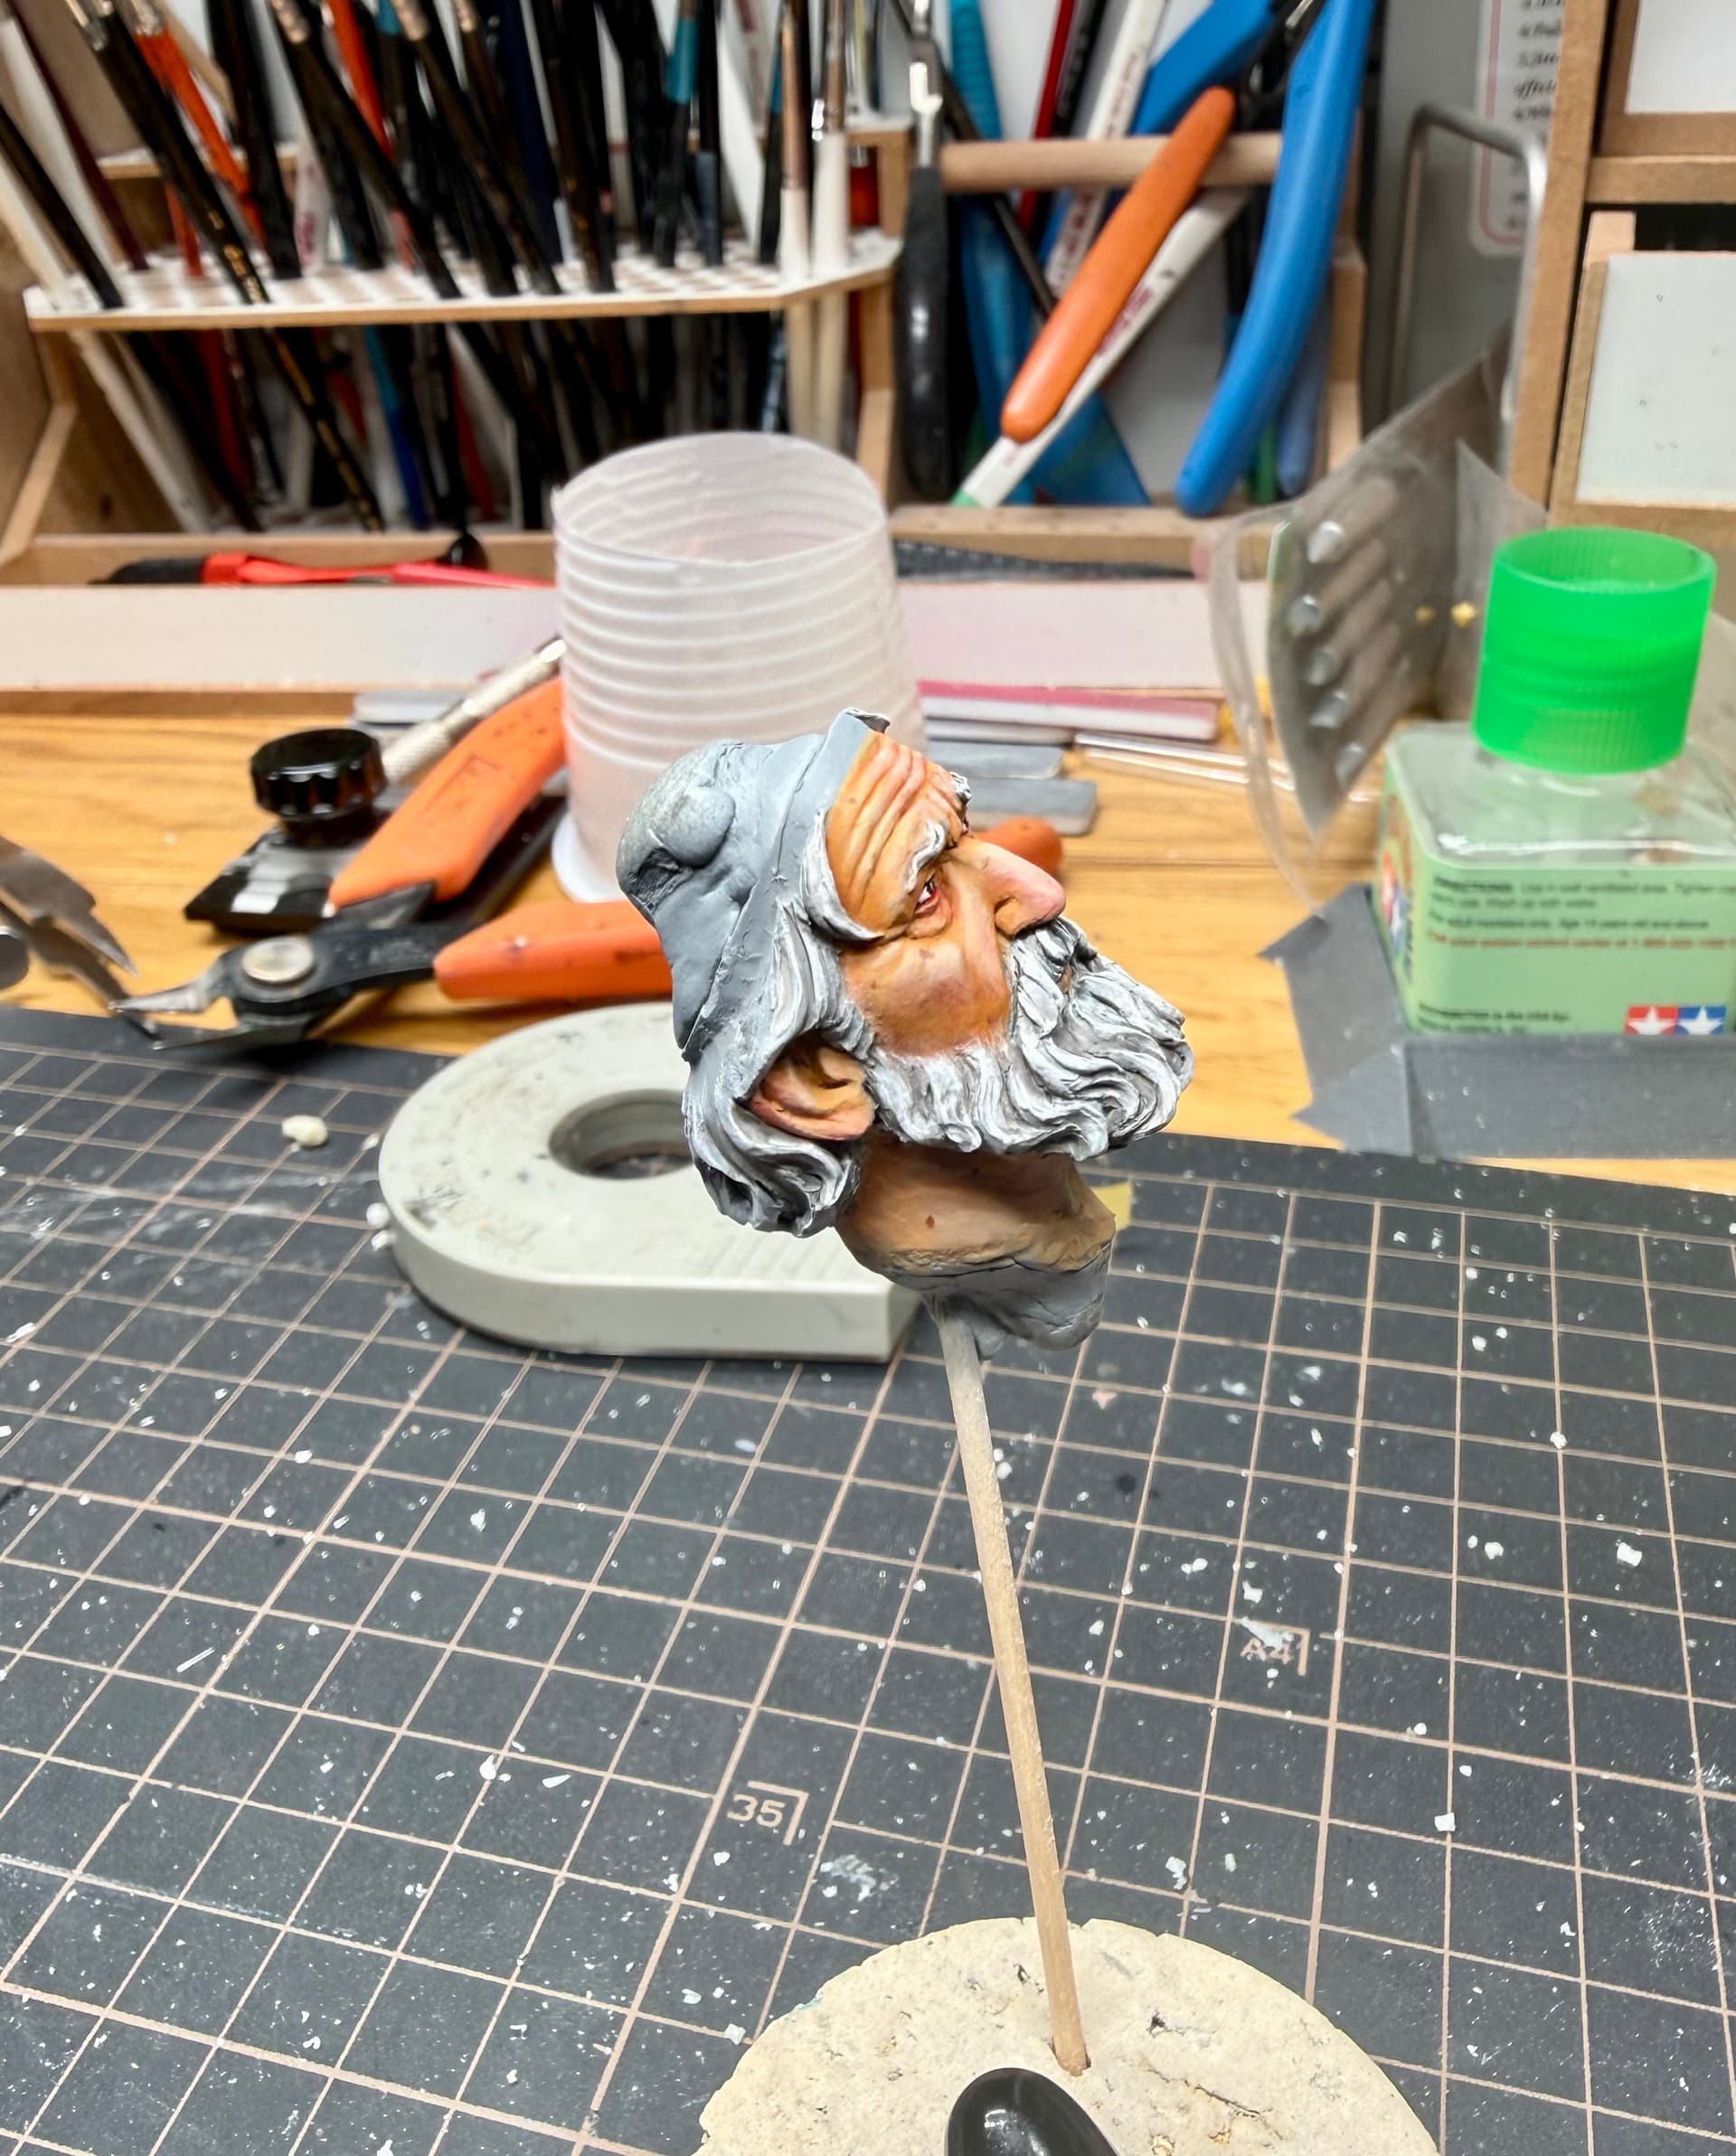
I’ve just started this bust from Legion Miniatures. As you can see in the pictures it is of a gold prospector in the 1800s complete with a few tools. It is a beautiful sculpt with plenty of character.
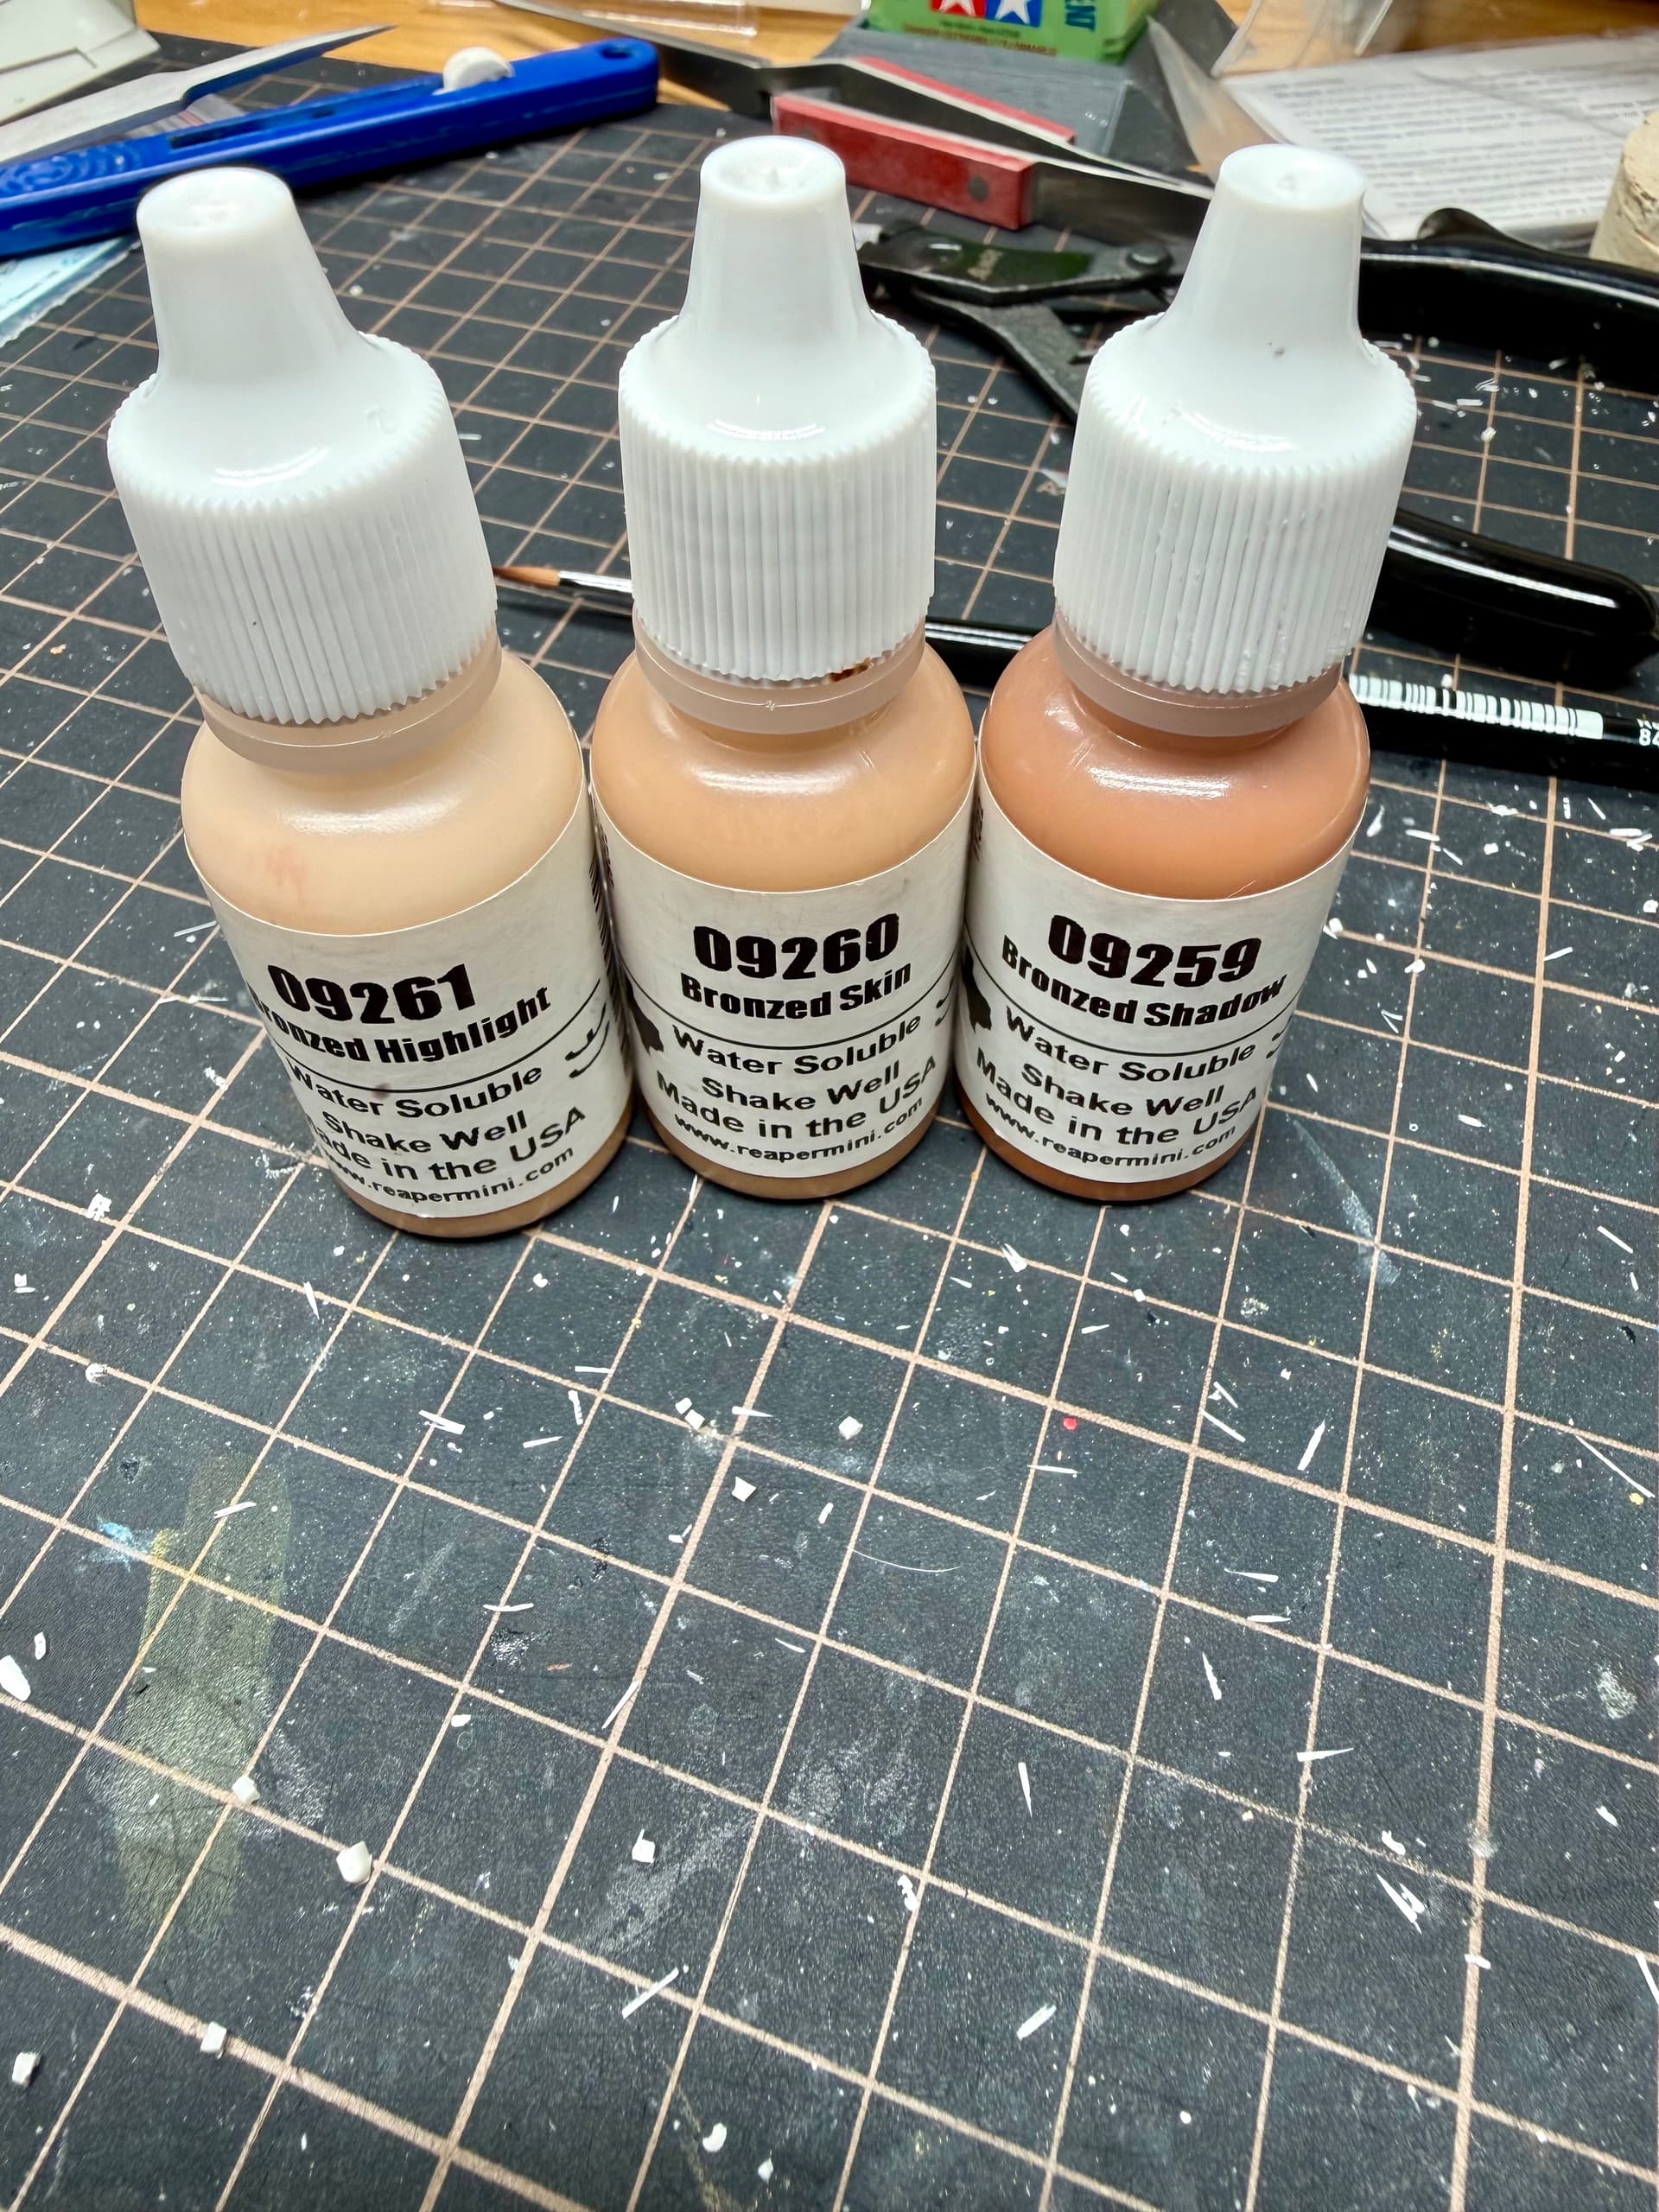
I’m using Reaper Miniatures paints, their Bronzed Skin trio set for this. I’ve used quite a few different brands of flesh paint over the years and these are the best I’ve come across- the fact they come in these sets of three (and there are others for lighter skin tones) makes everything just that bit easier to do.
Below you can see the 1st highlight and 1st shadow colors have been added to the skin. For this I thinned the relevant paints 50/50 with the base color.
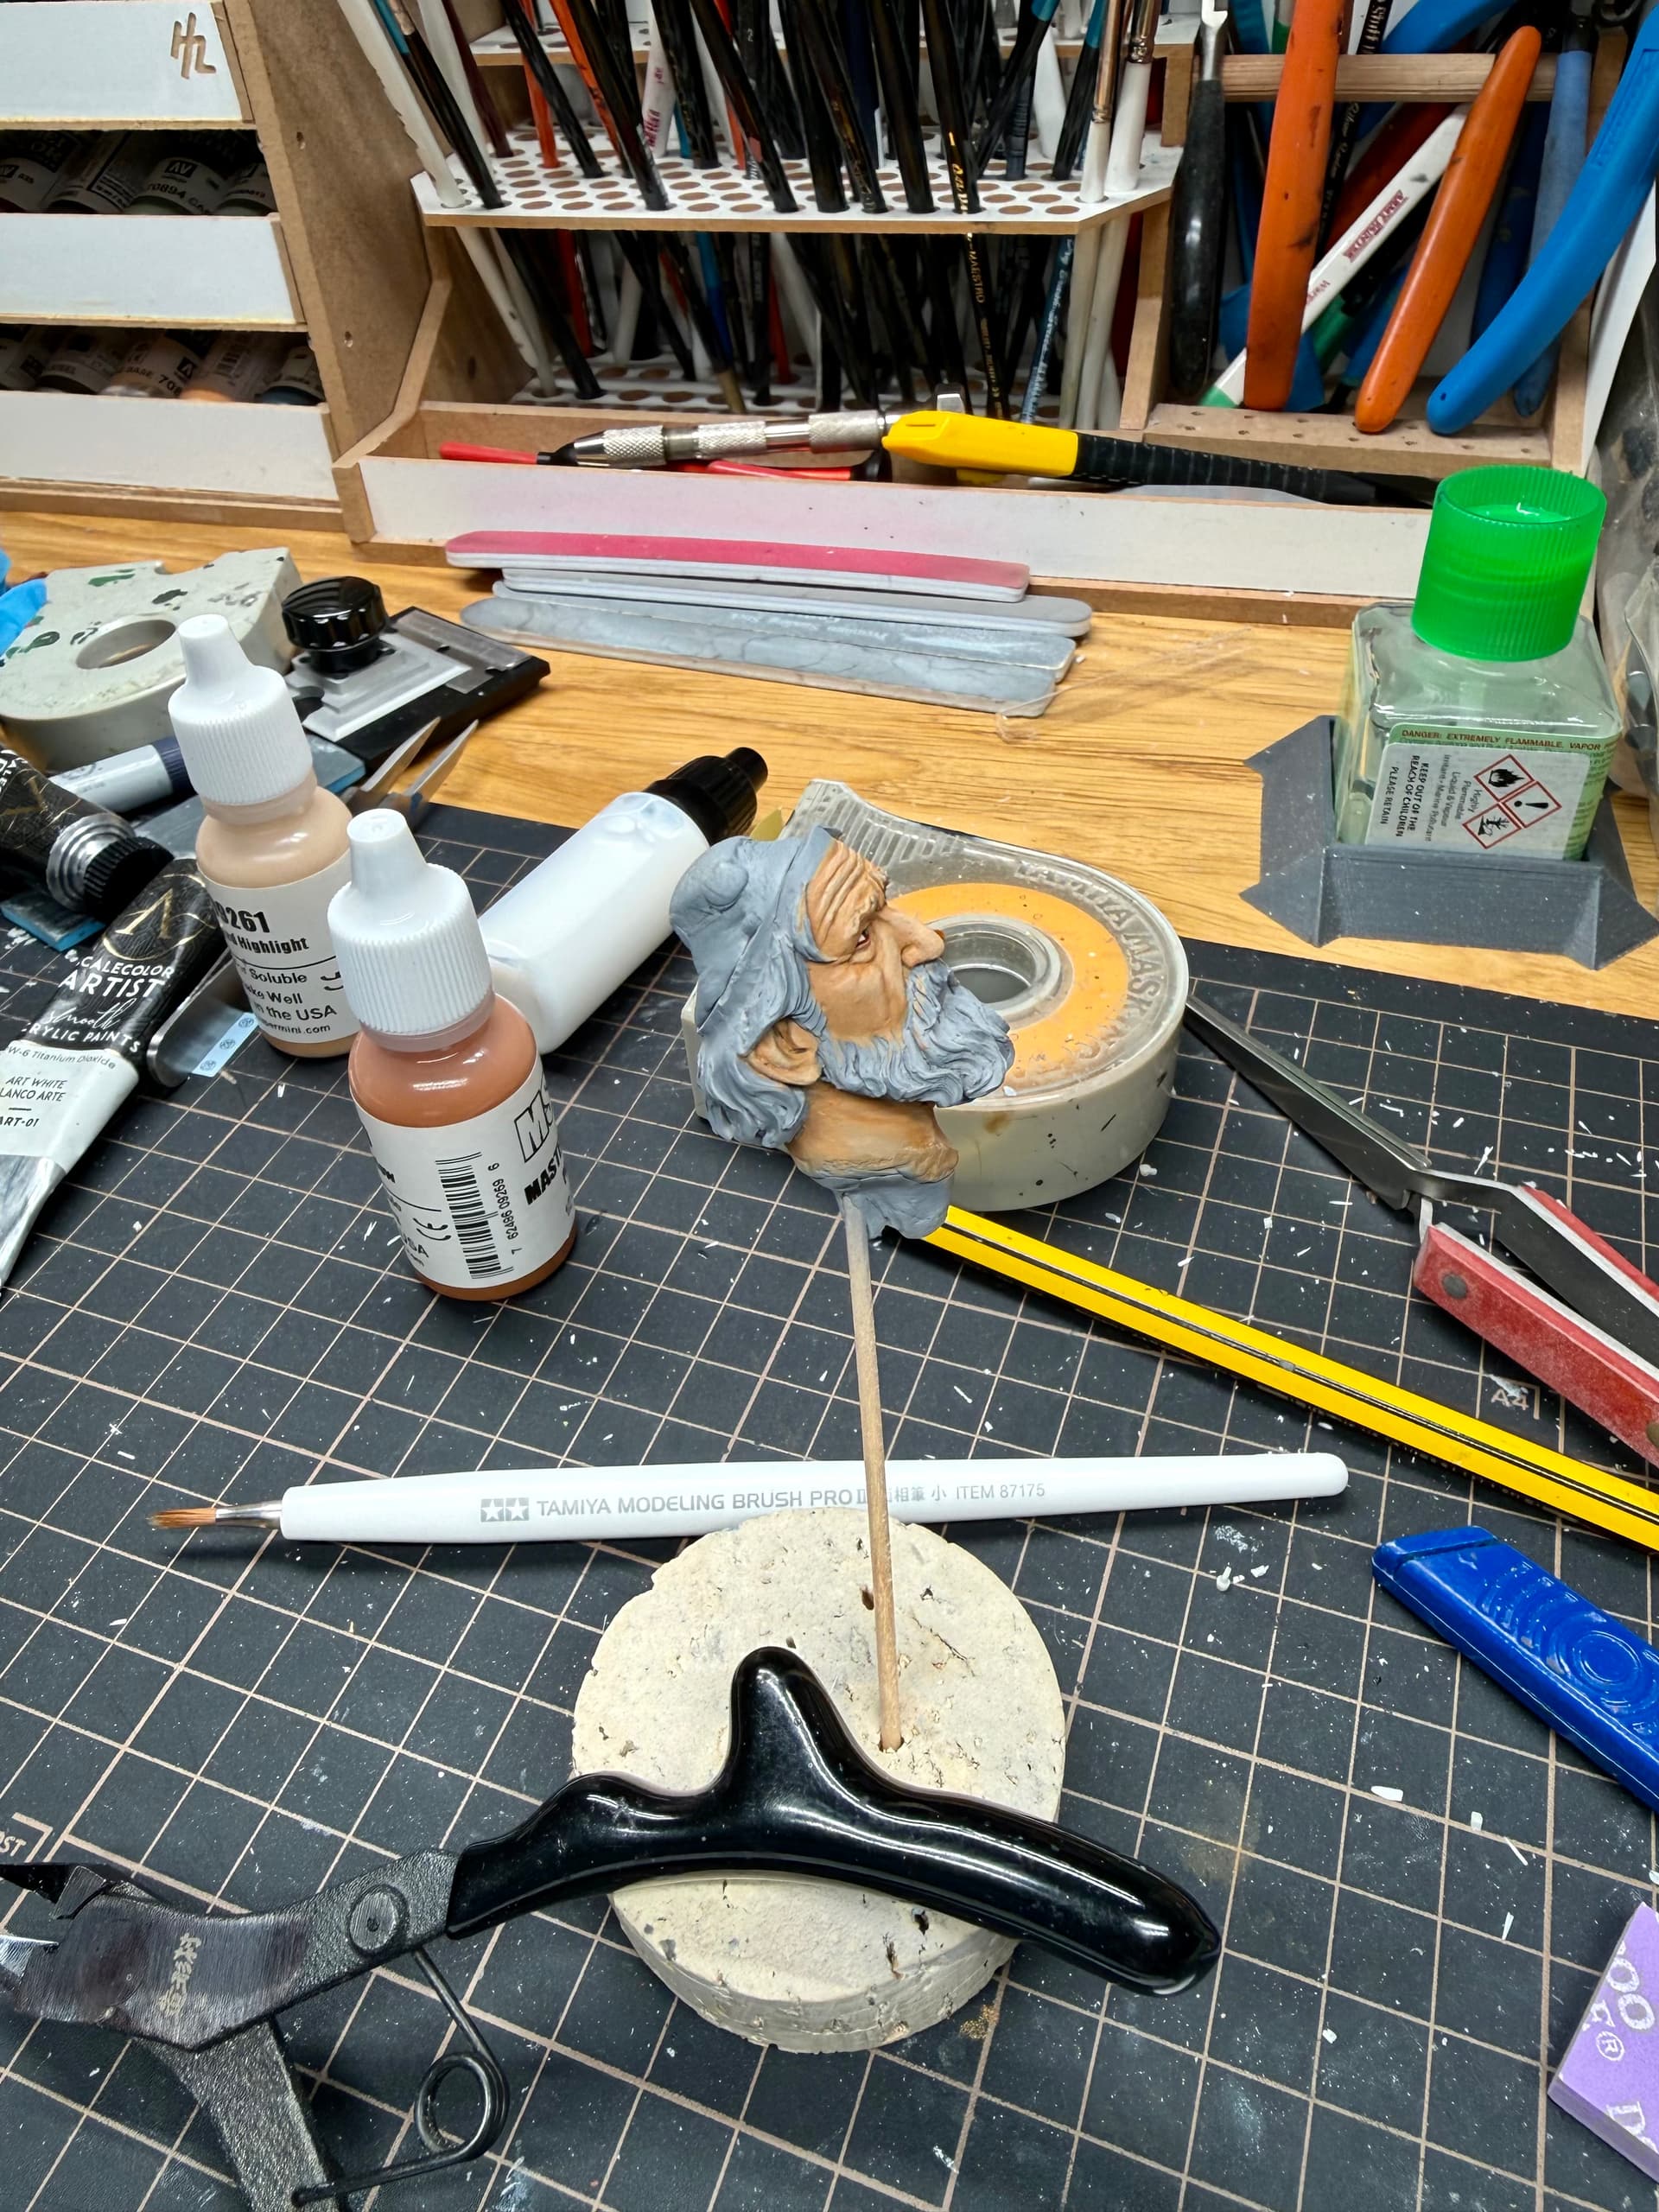
Below you can see the difference between the unblended side of the face (on the left side of the photo) versus the blended side. Still, this is very far from finished- much more work to do!
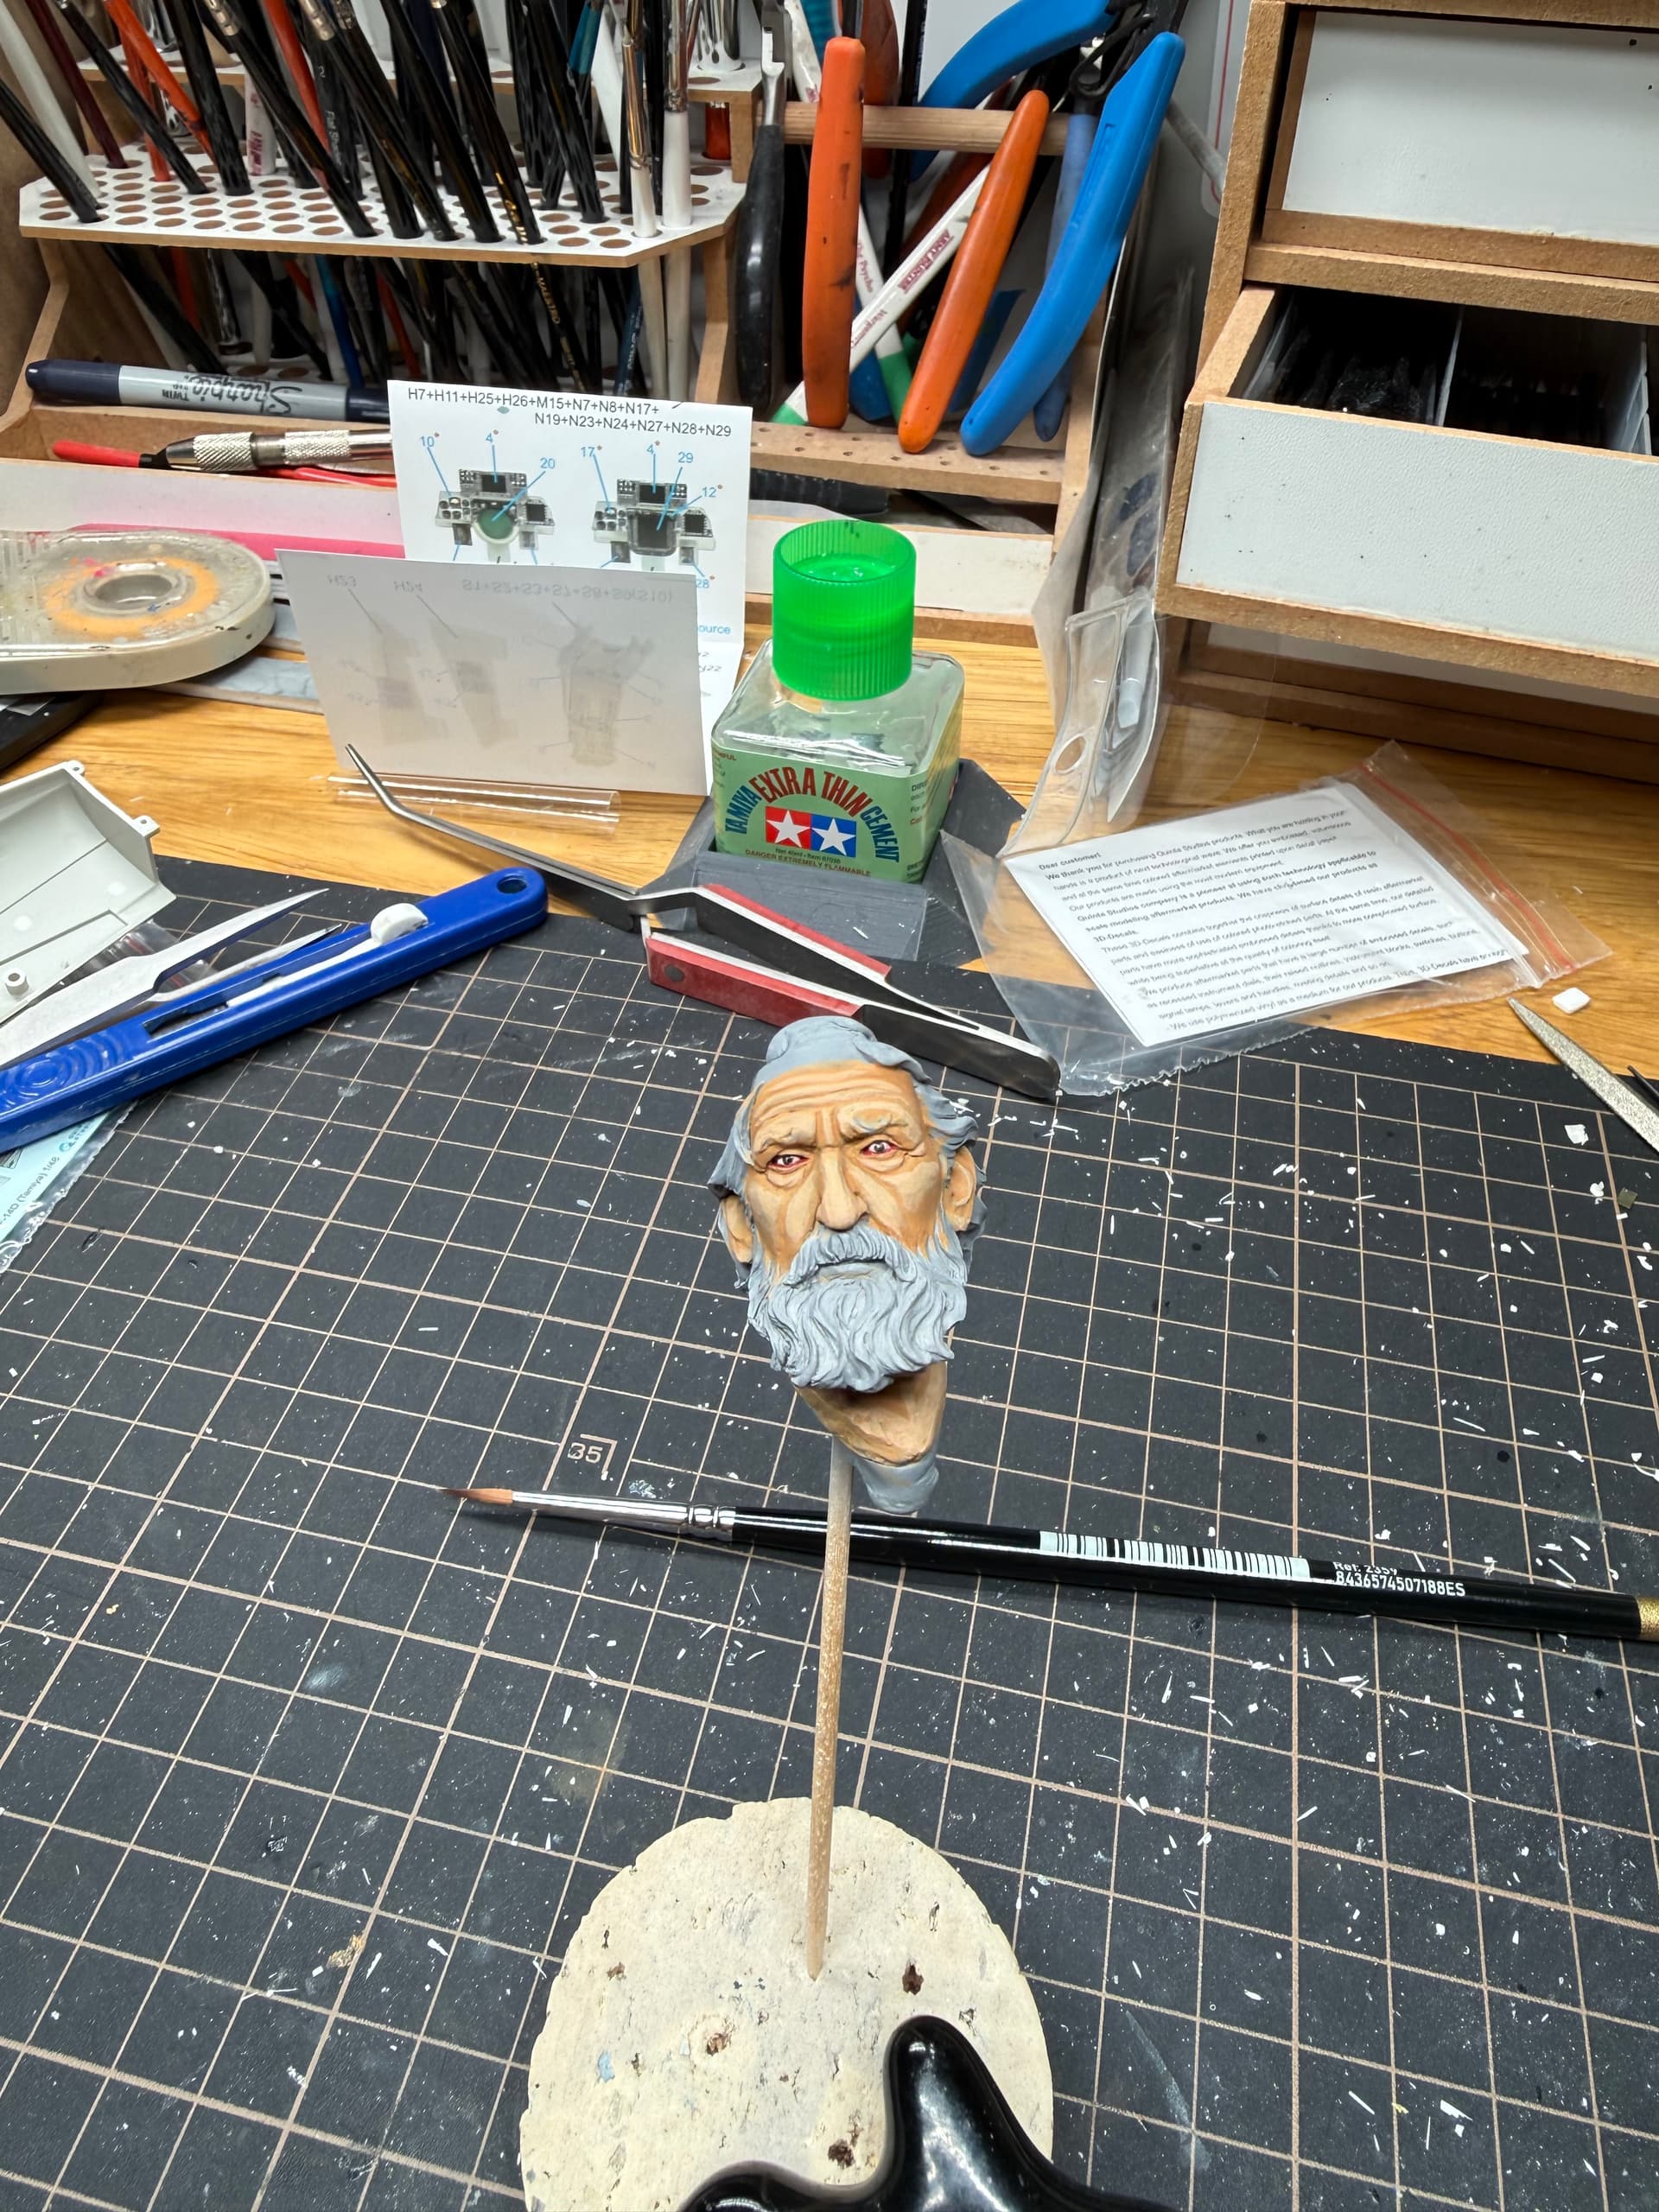
At this stage I take stock of the progress- often when smoothing the transitions between the 1st highlight and shadow you will shrink those areas of light and shade in order to smooth the skin. This is beneficial if you are seeking quite youthful, smooth and unblemished skin. For older skin (or for more contrast) you might need to go back and re-apply some of those shadows or highlights. For this I work cautiously and slowly via glazes of my 1st highlight and 1st shadow colors. I mostly kept the highlights drawn up toward the high points of the face where I felt some contrast was lost. For the shadows I didn’t do too much but I did start to add in the beginnings of wrinkles- most notably on the lower neck and around the sides of the eyes.
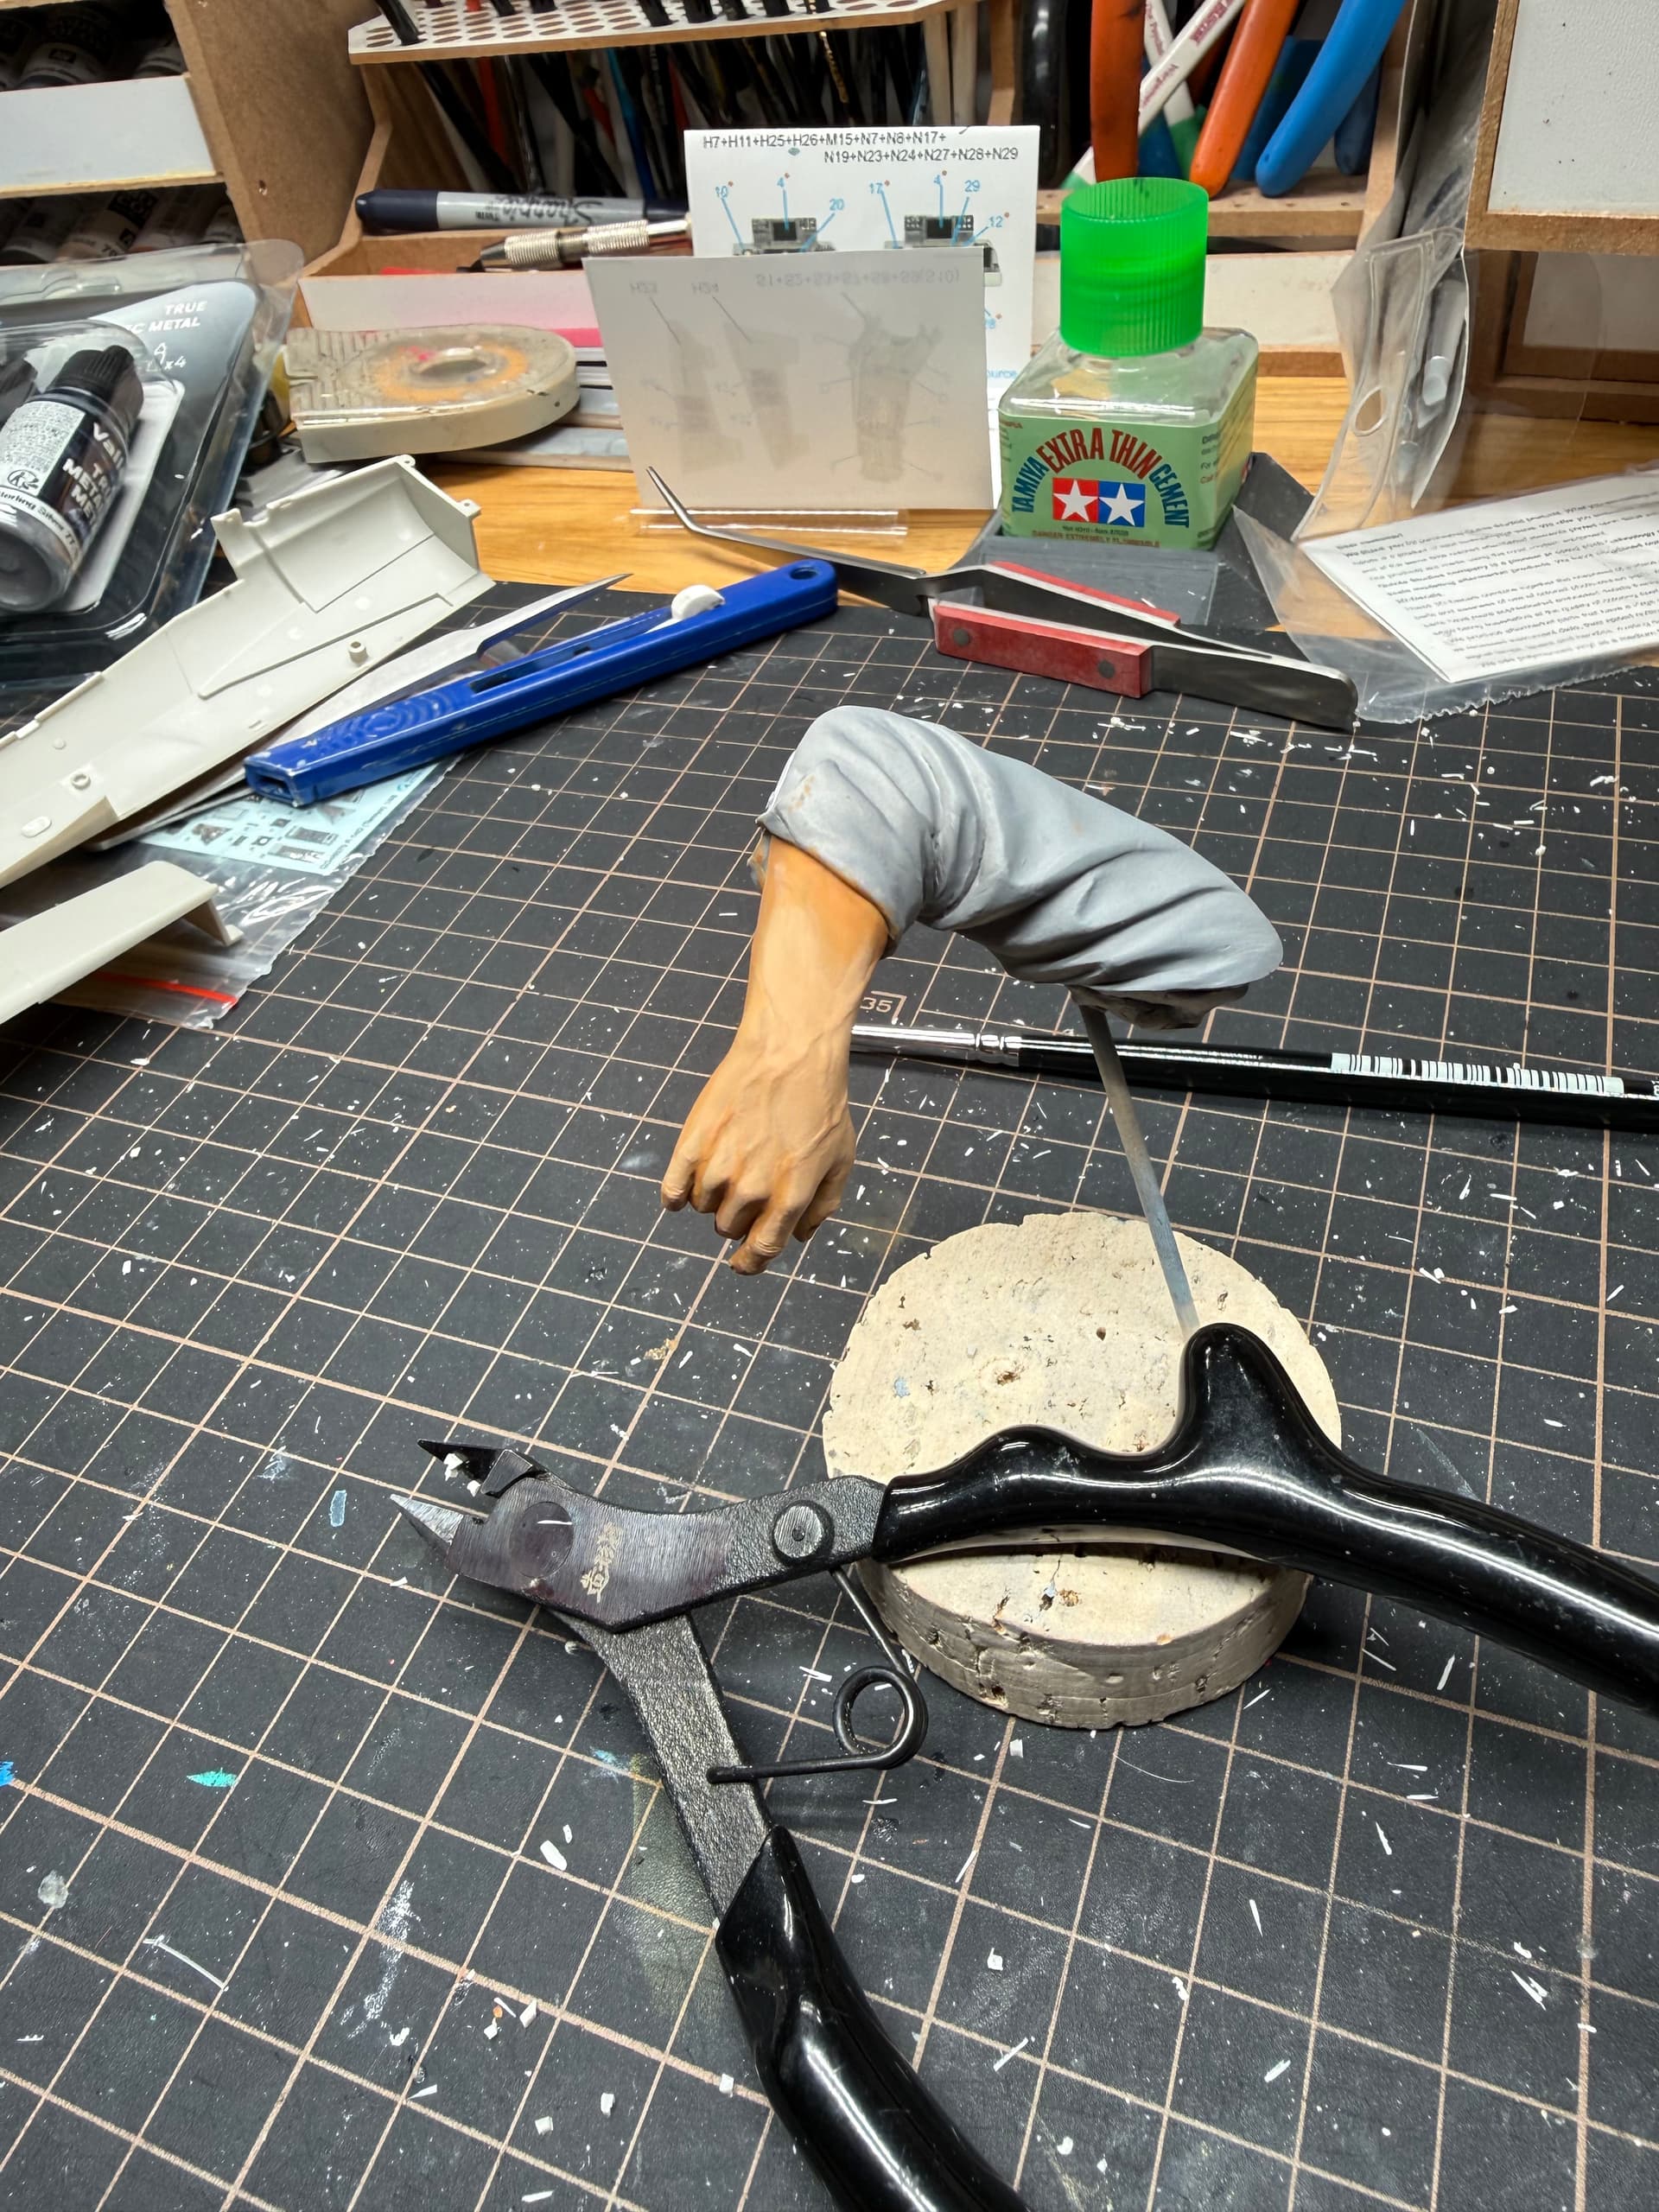
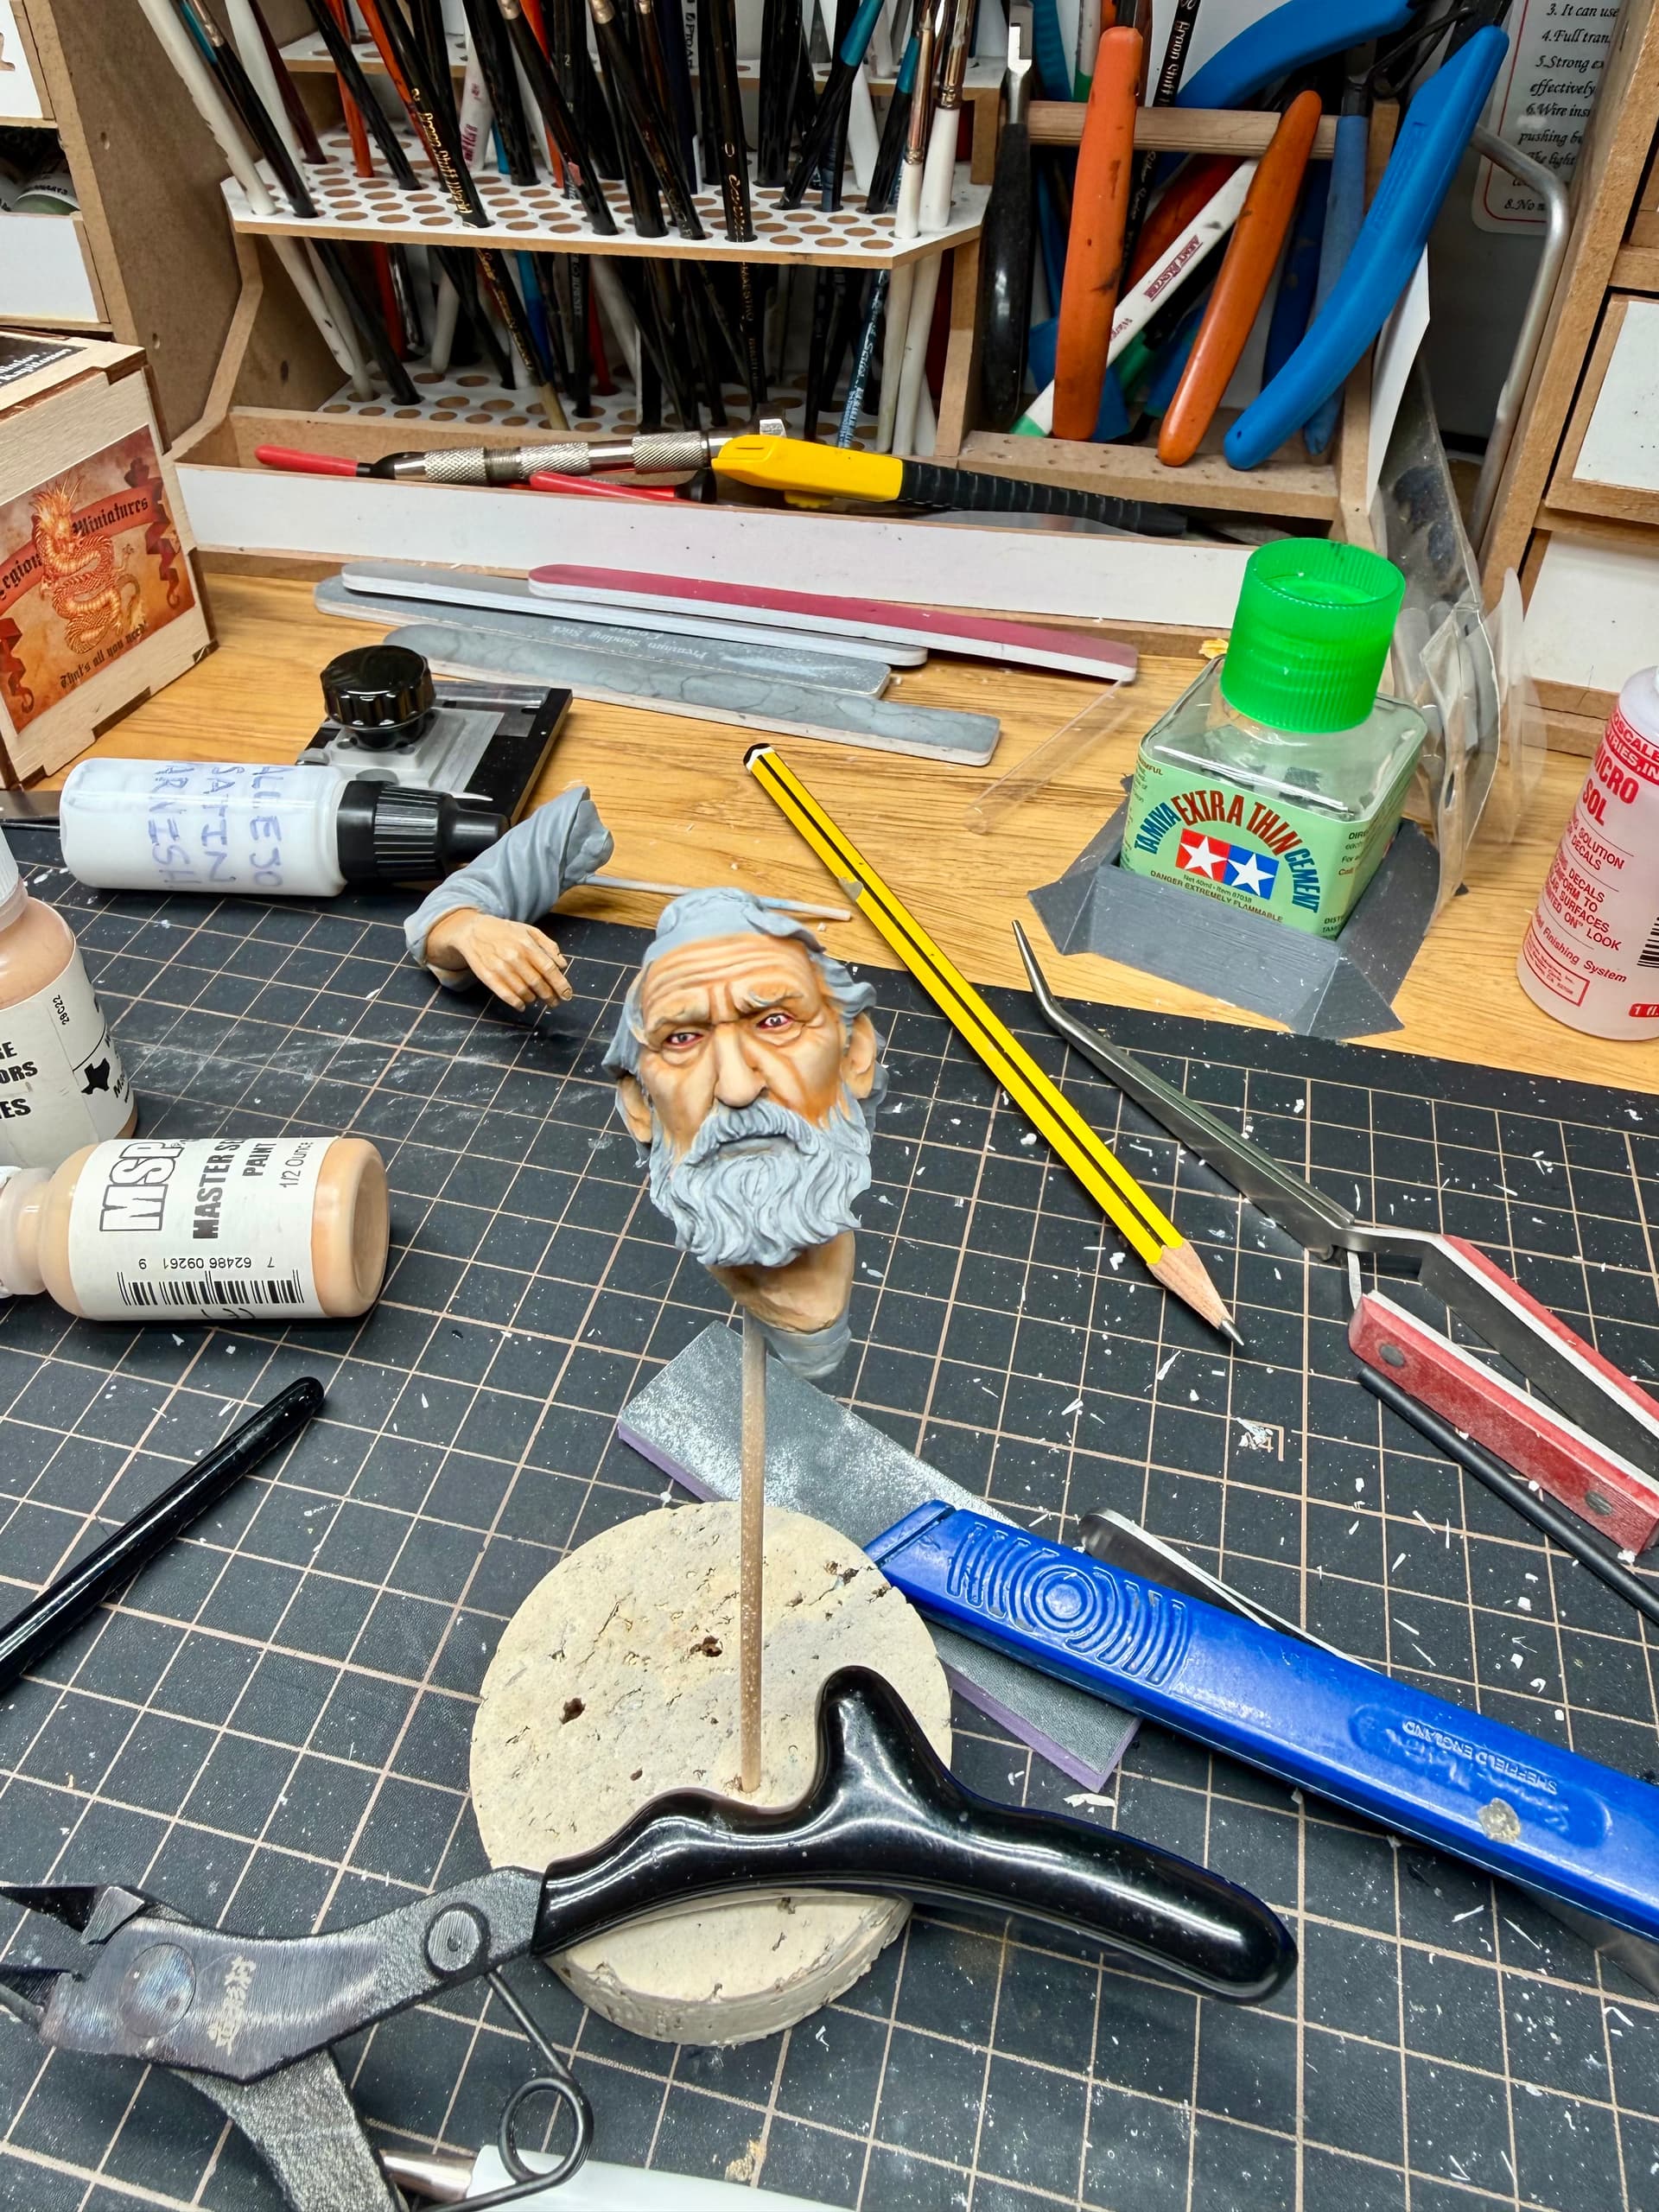
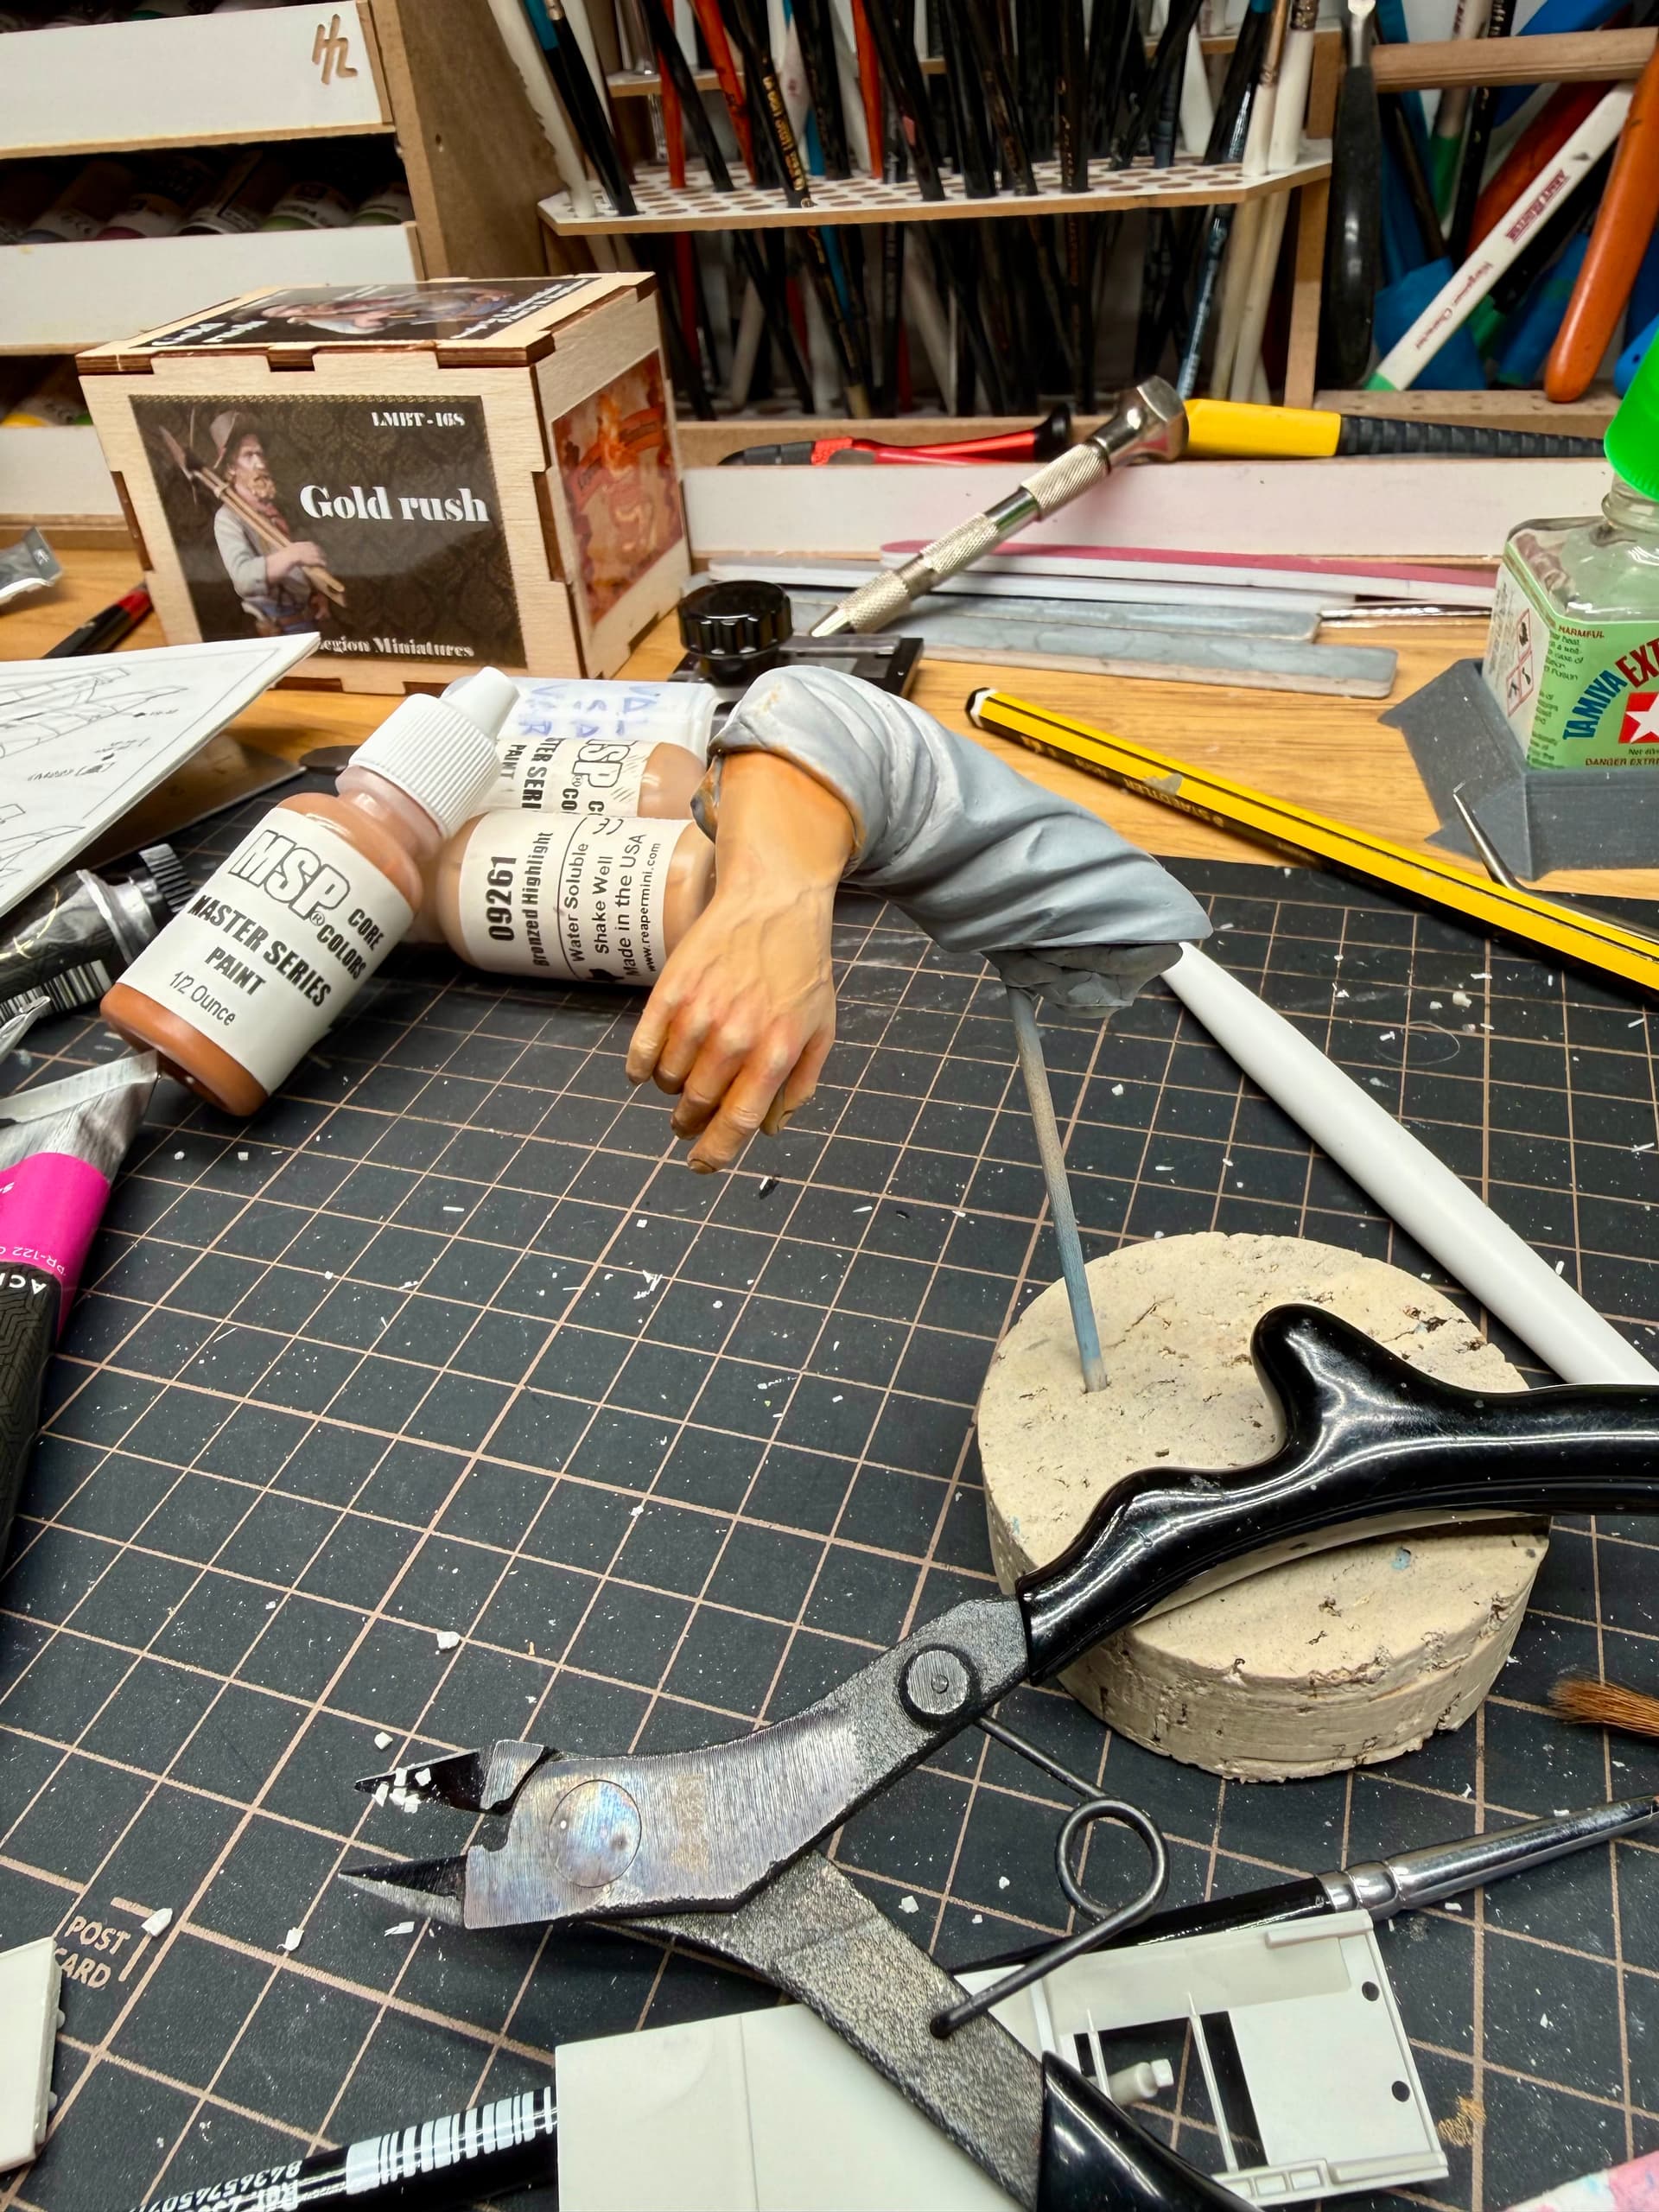
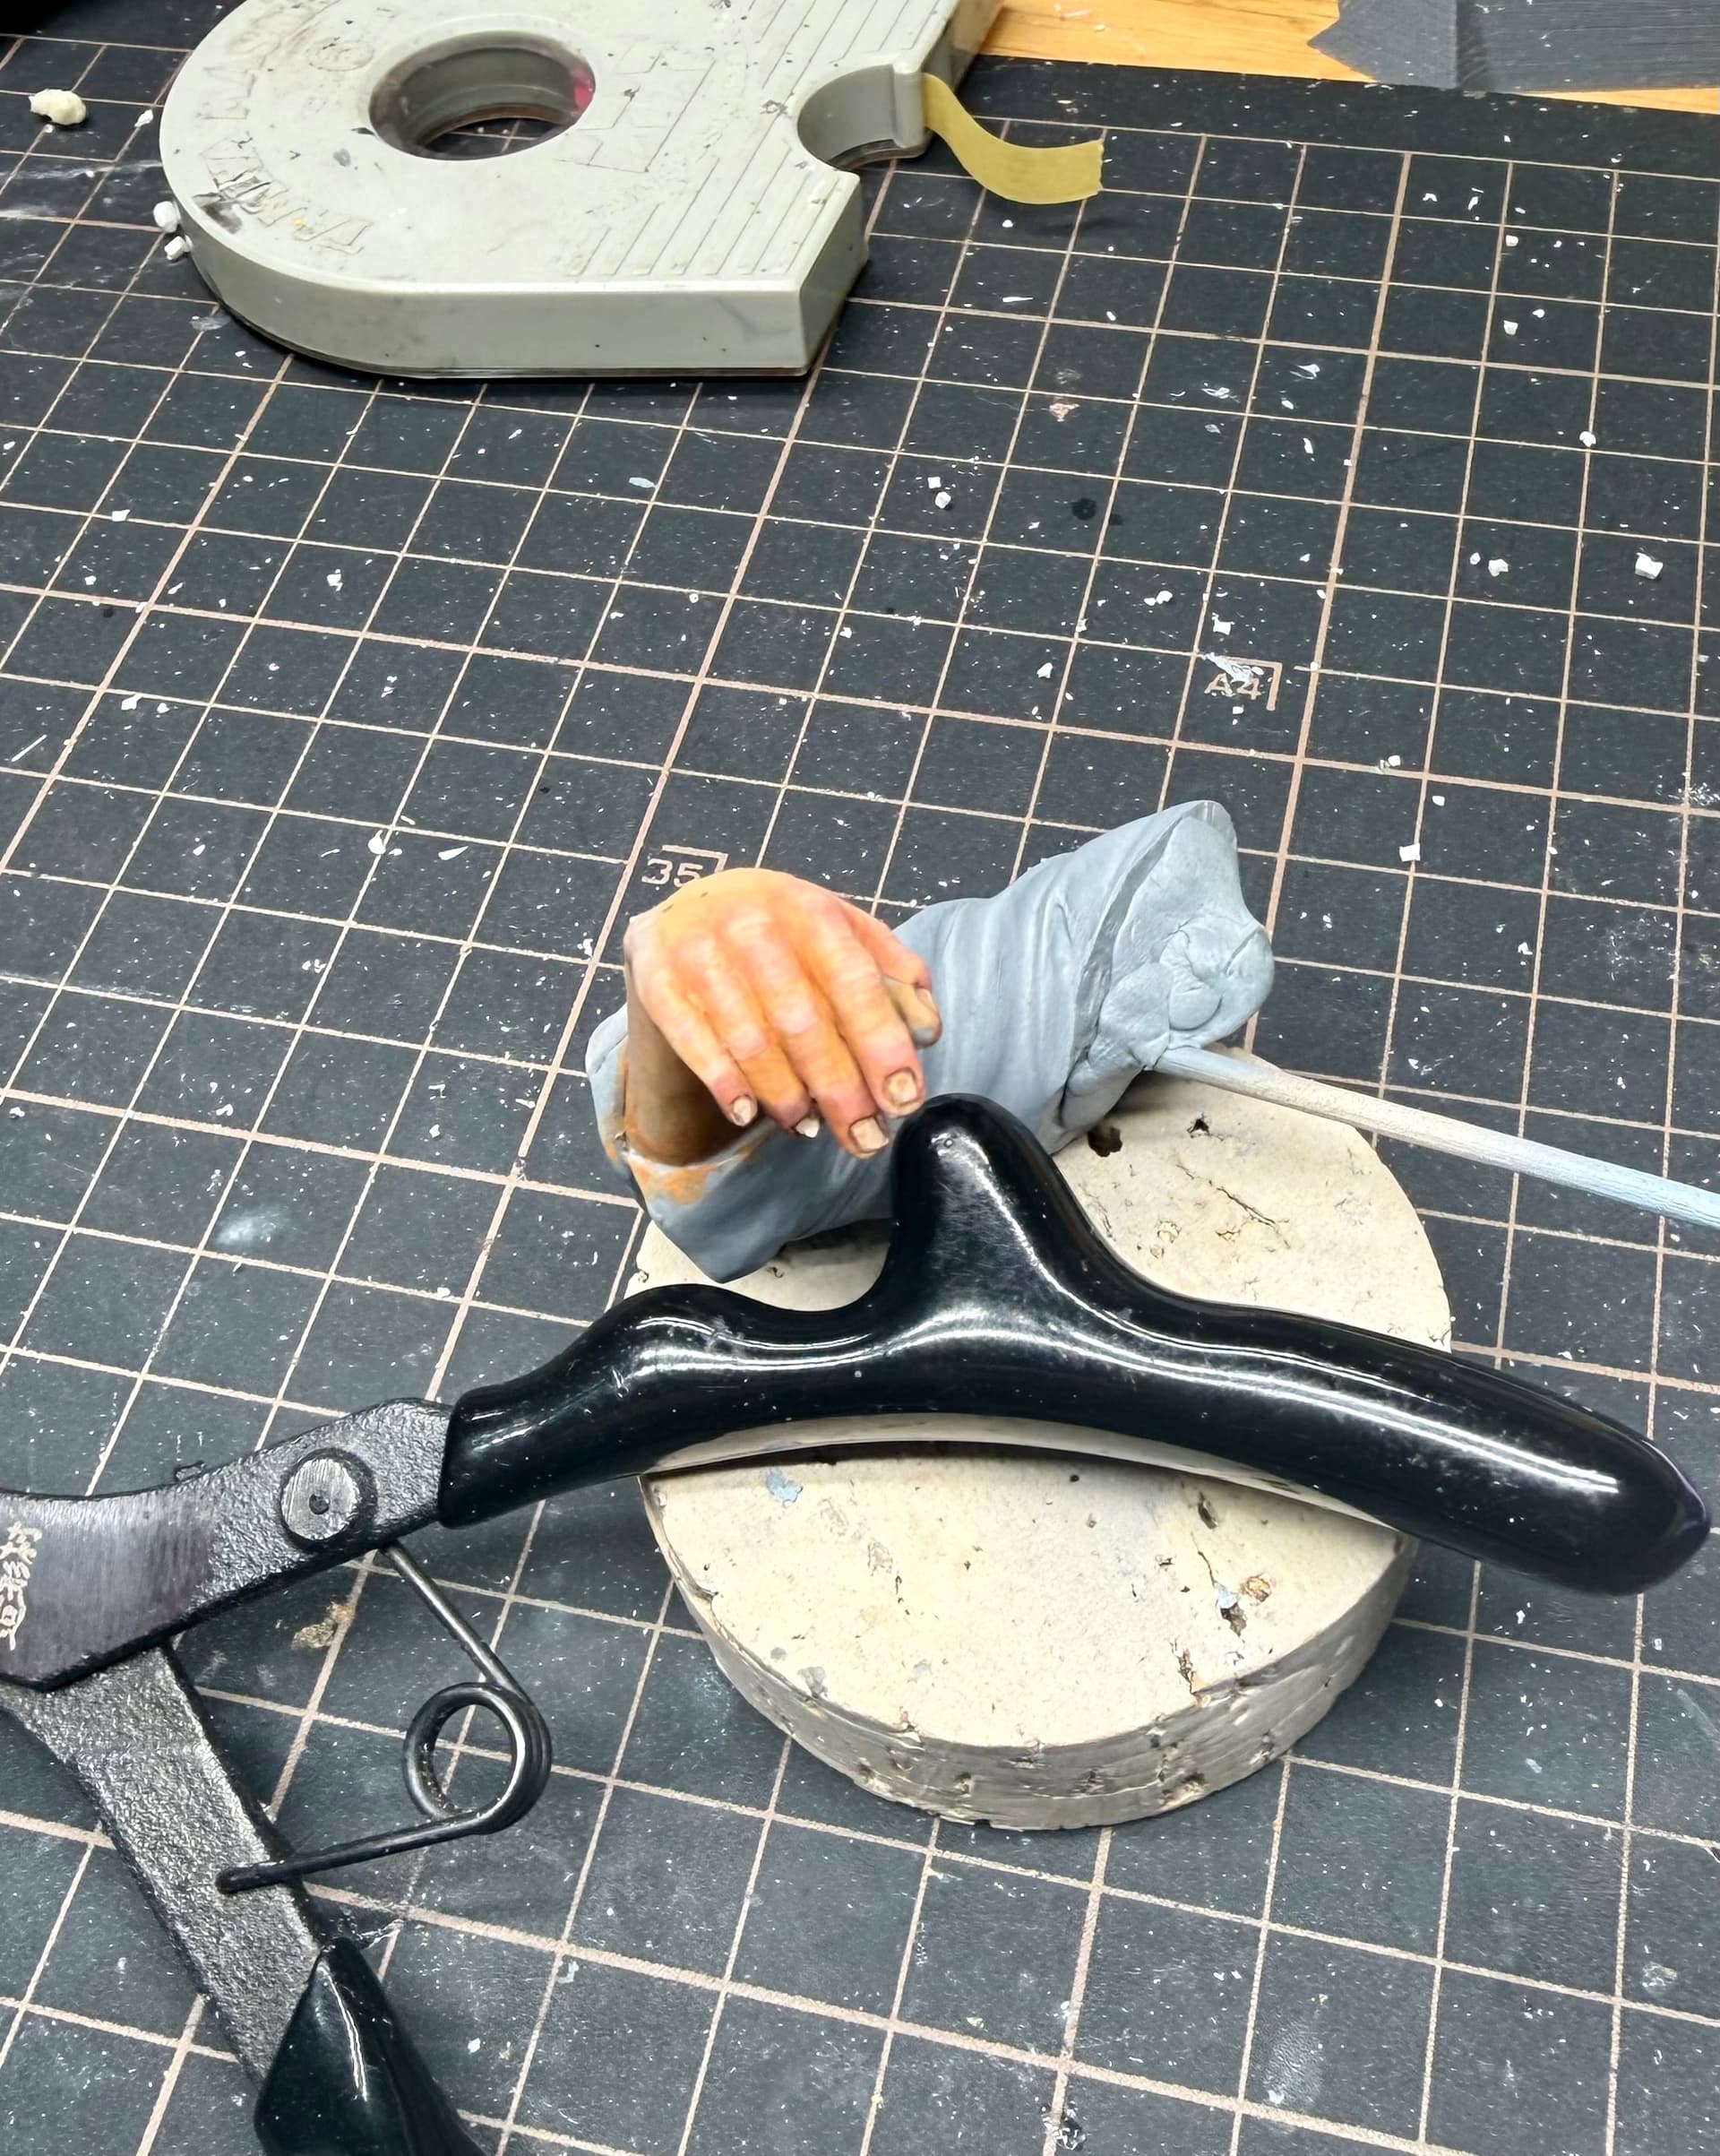
Right now I’m doing a similar job as I’ve just described on the hands and arms. I’ve also begun the second highlight color on the face- once again applied quite sparingly with a glaze.
Below you can see how I have deepened the shadows on the left side of his face (on the right of the picture) versus the as yet to be worked on opposite side of the face.
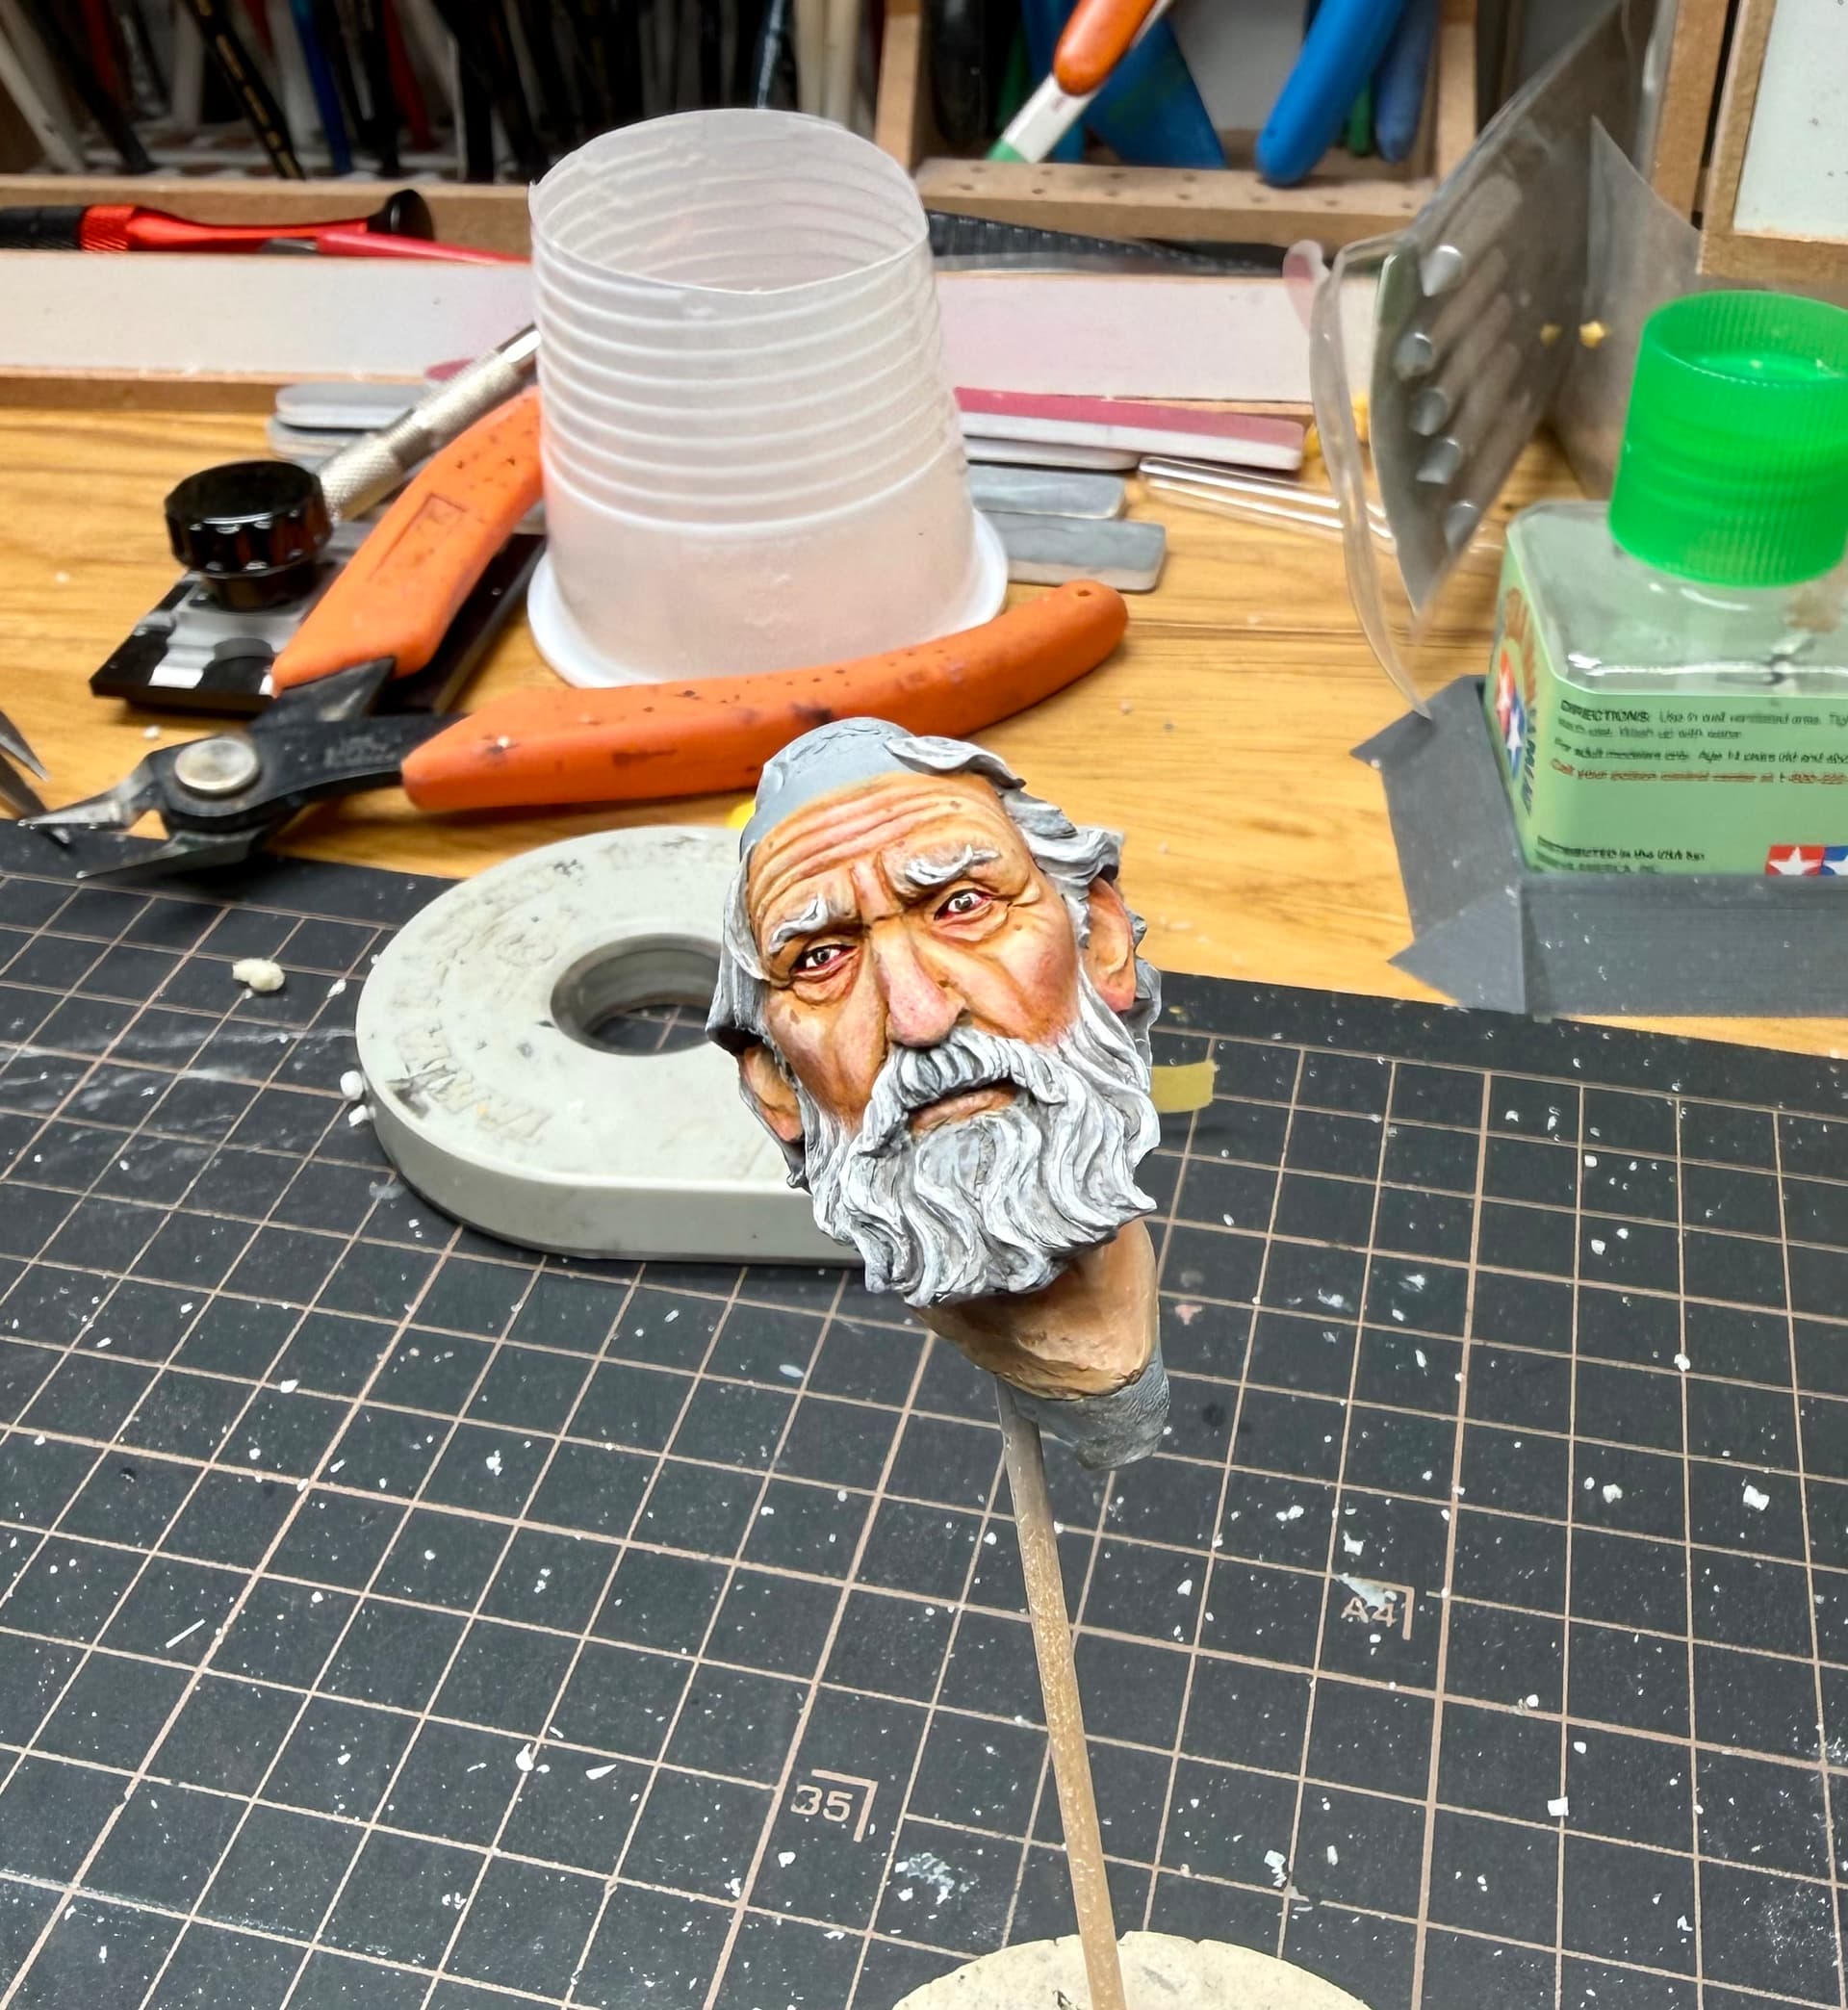
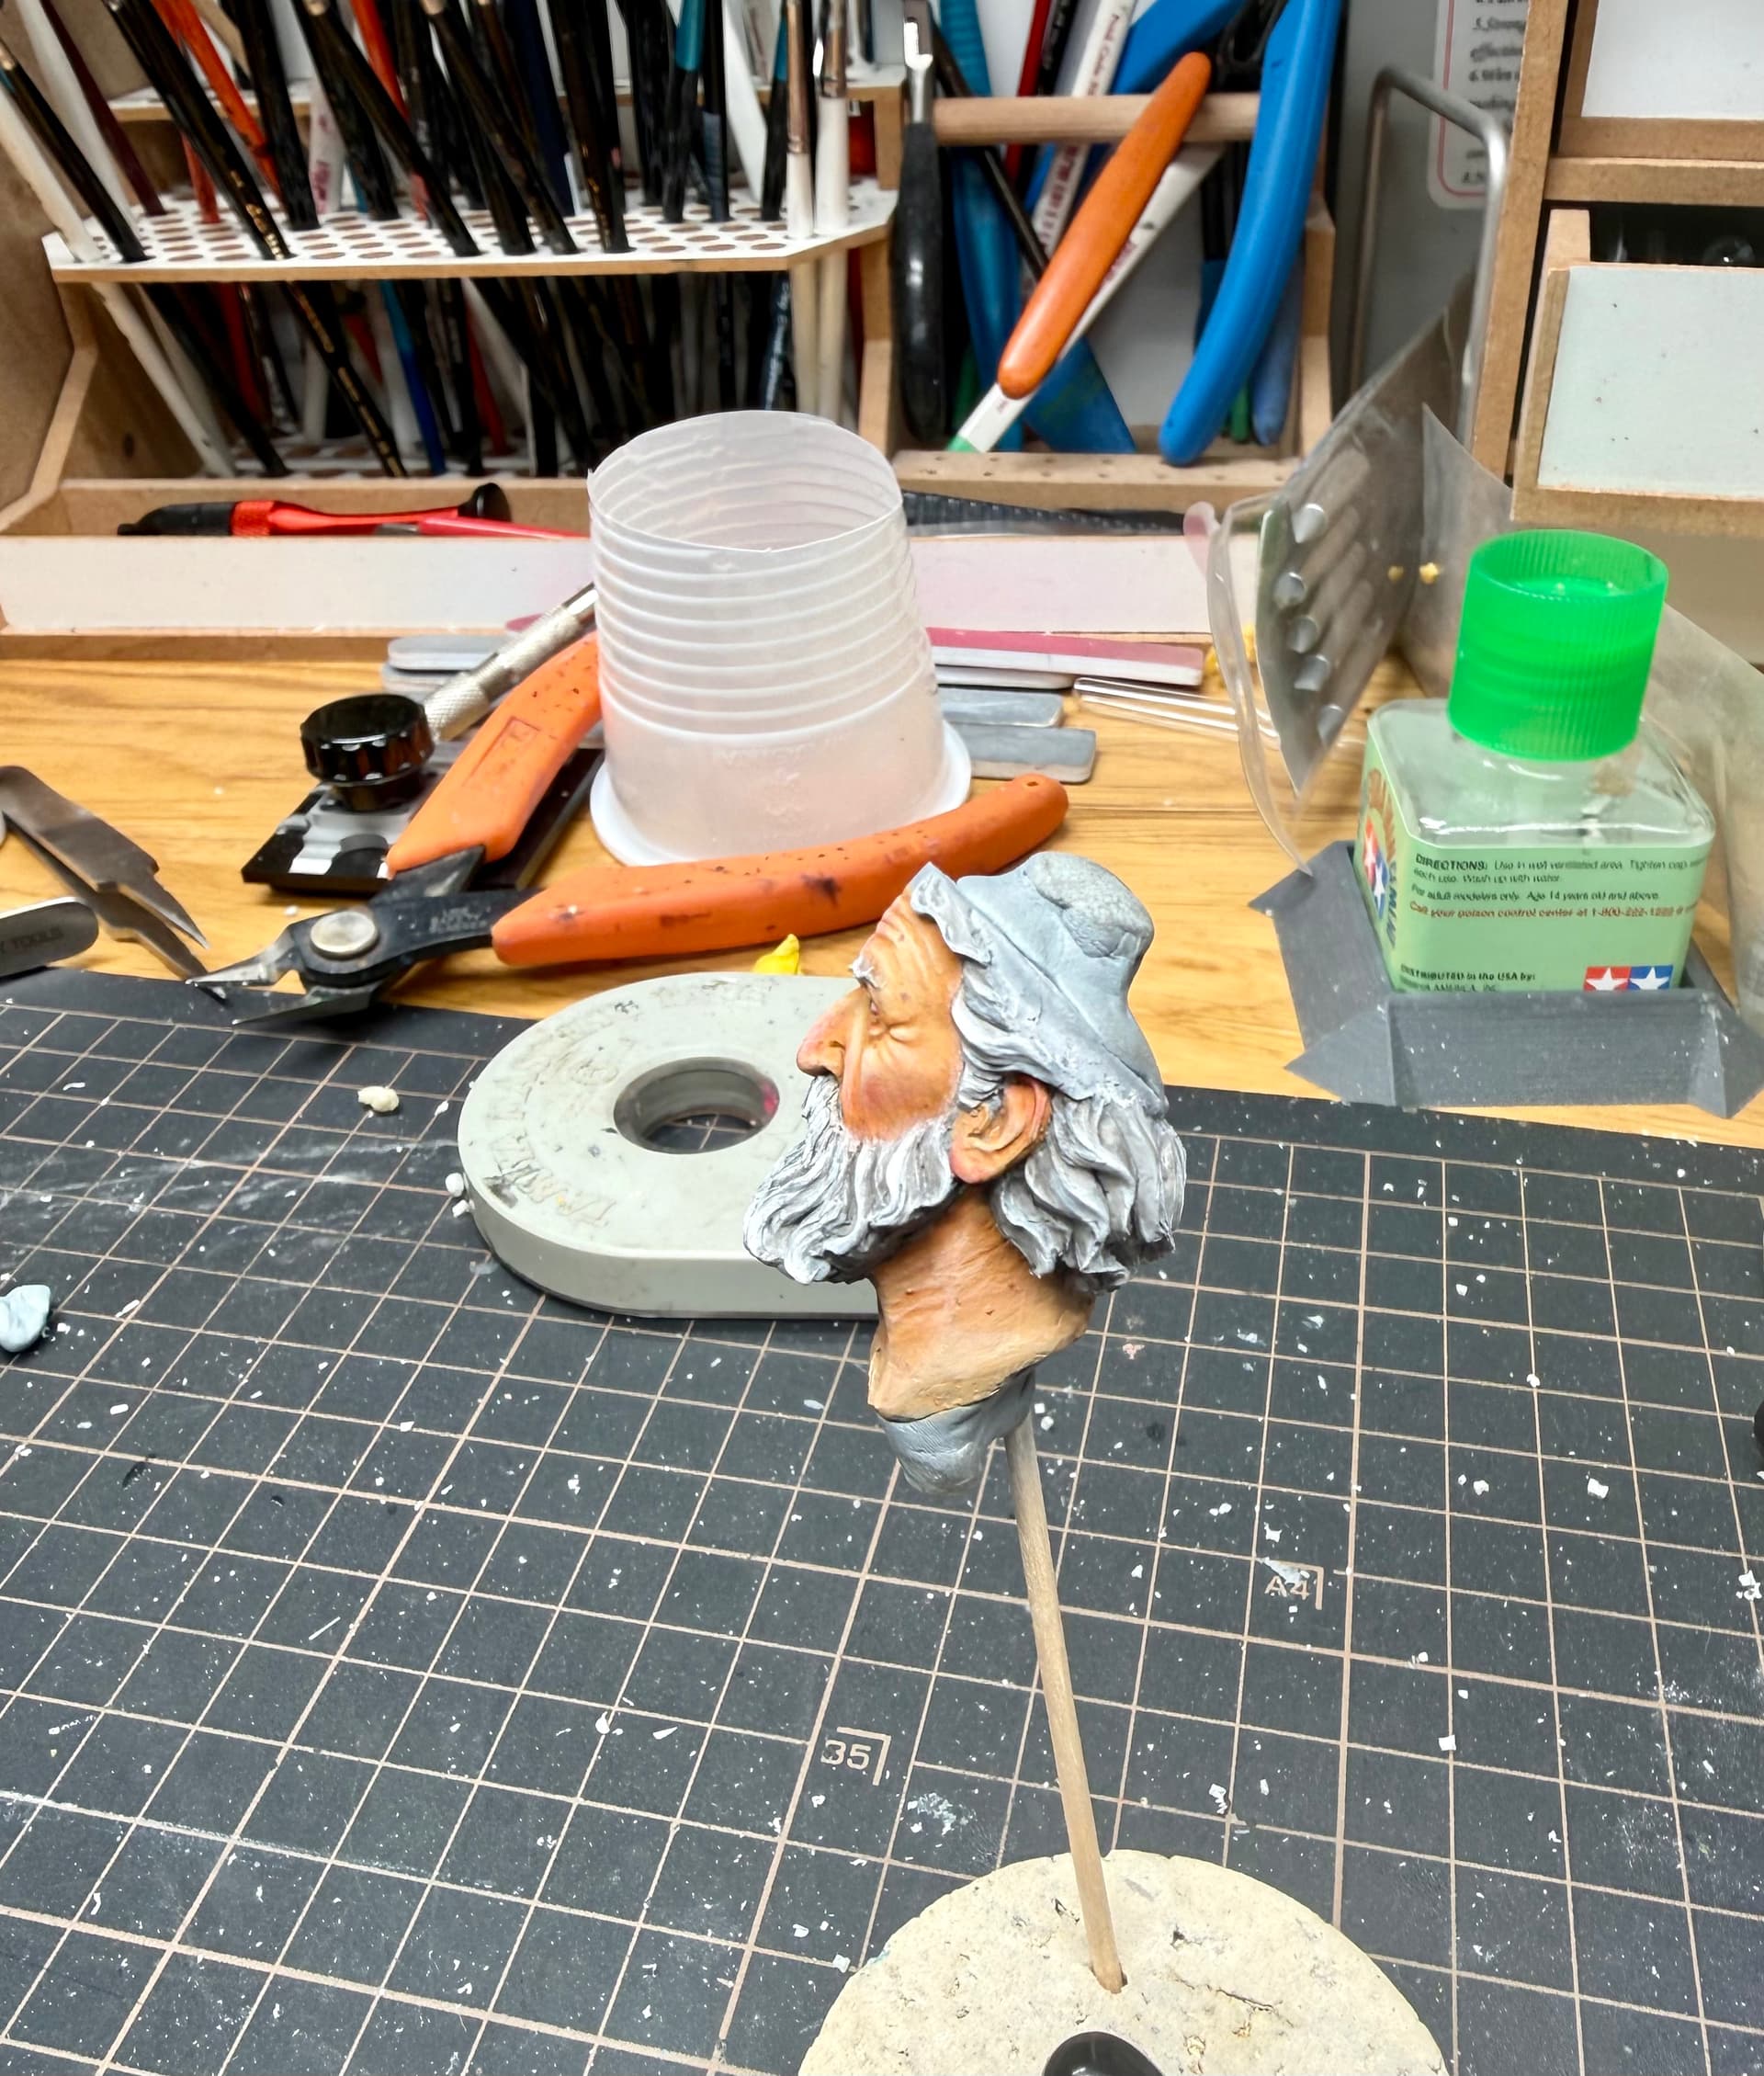
It was then time to add in the areas of high blood flow on the face- which appear more pink or red- typically the cheeks, forehead, parts of the ear and nose. I have also concentrated a little more red around the eyebags to suggest fatigue and around the nose to suggest both sun damage and heavy alcohol use.
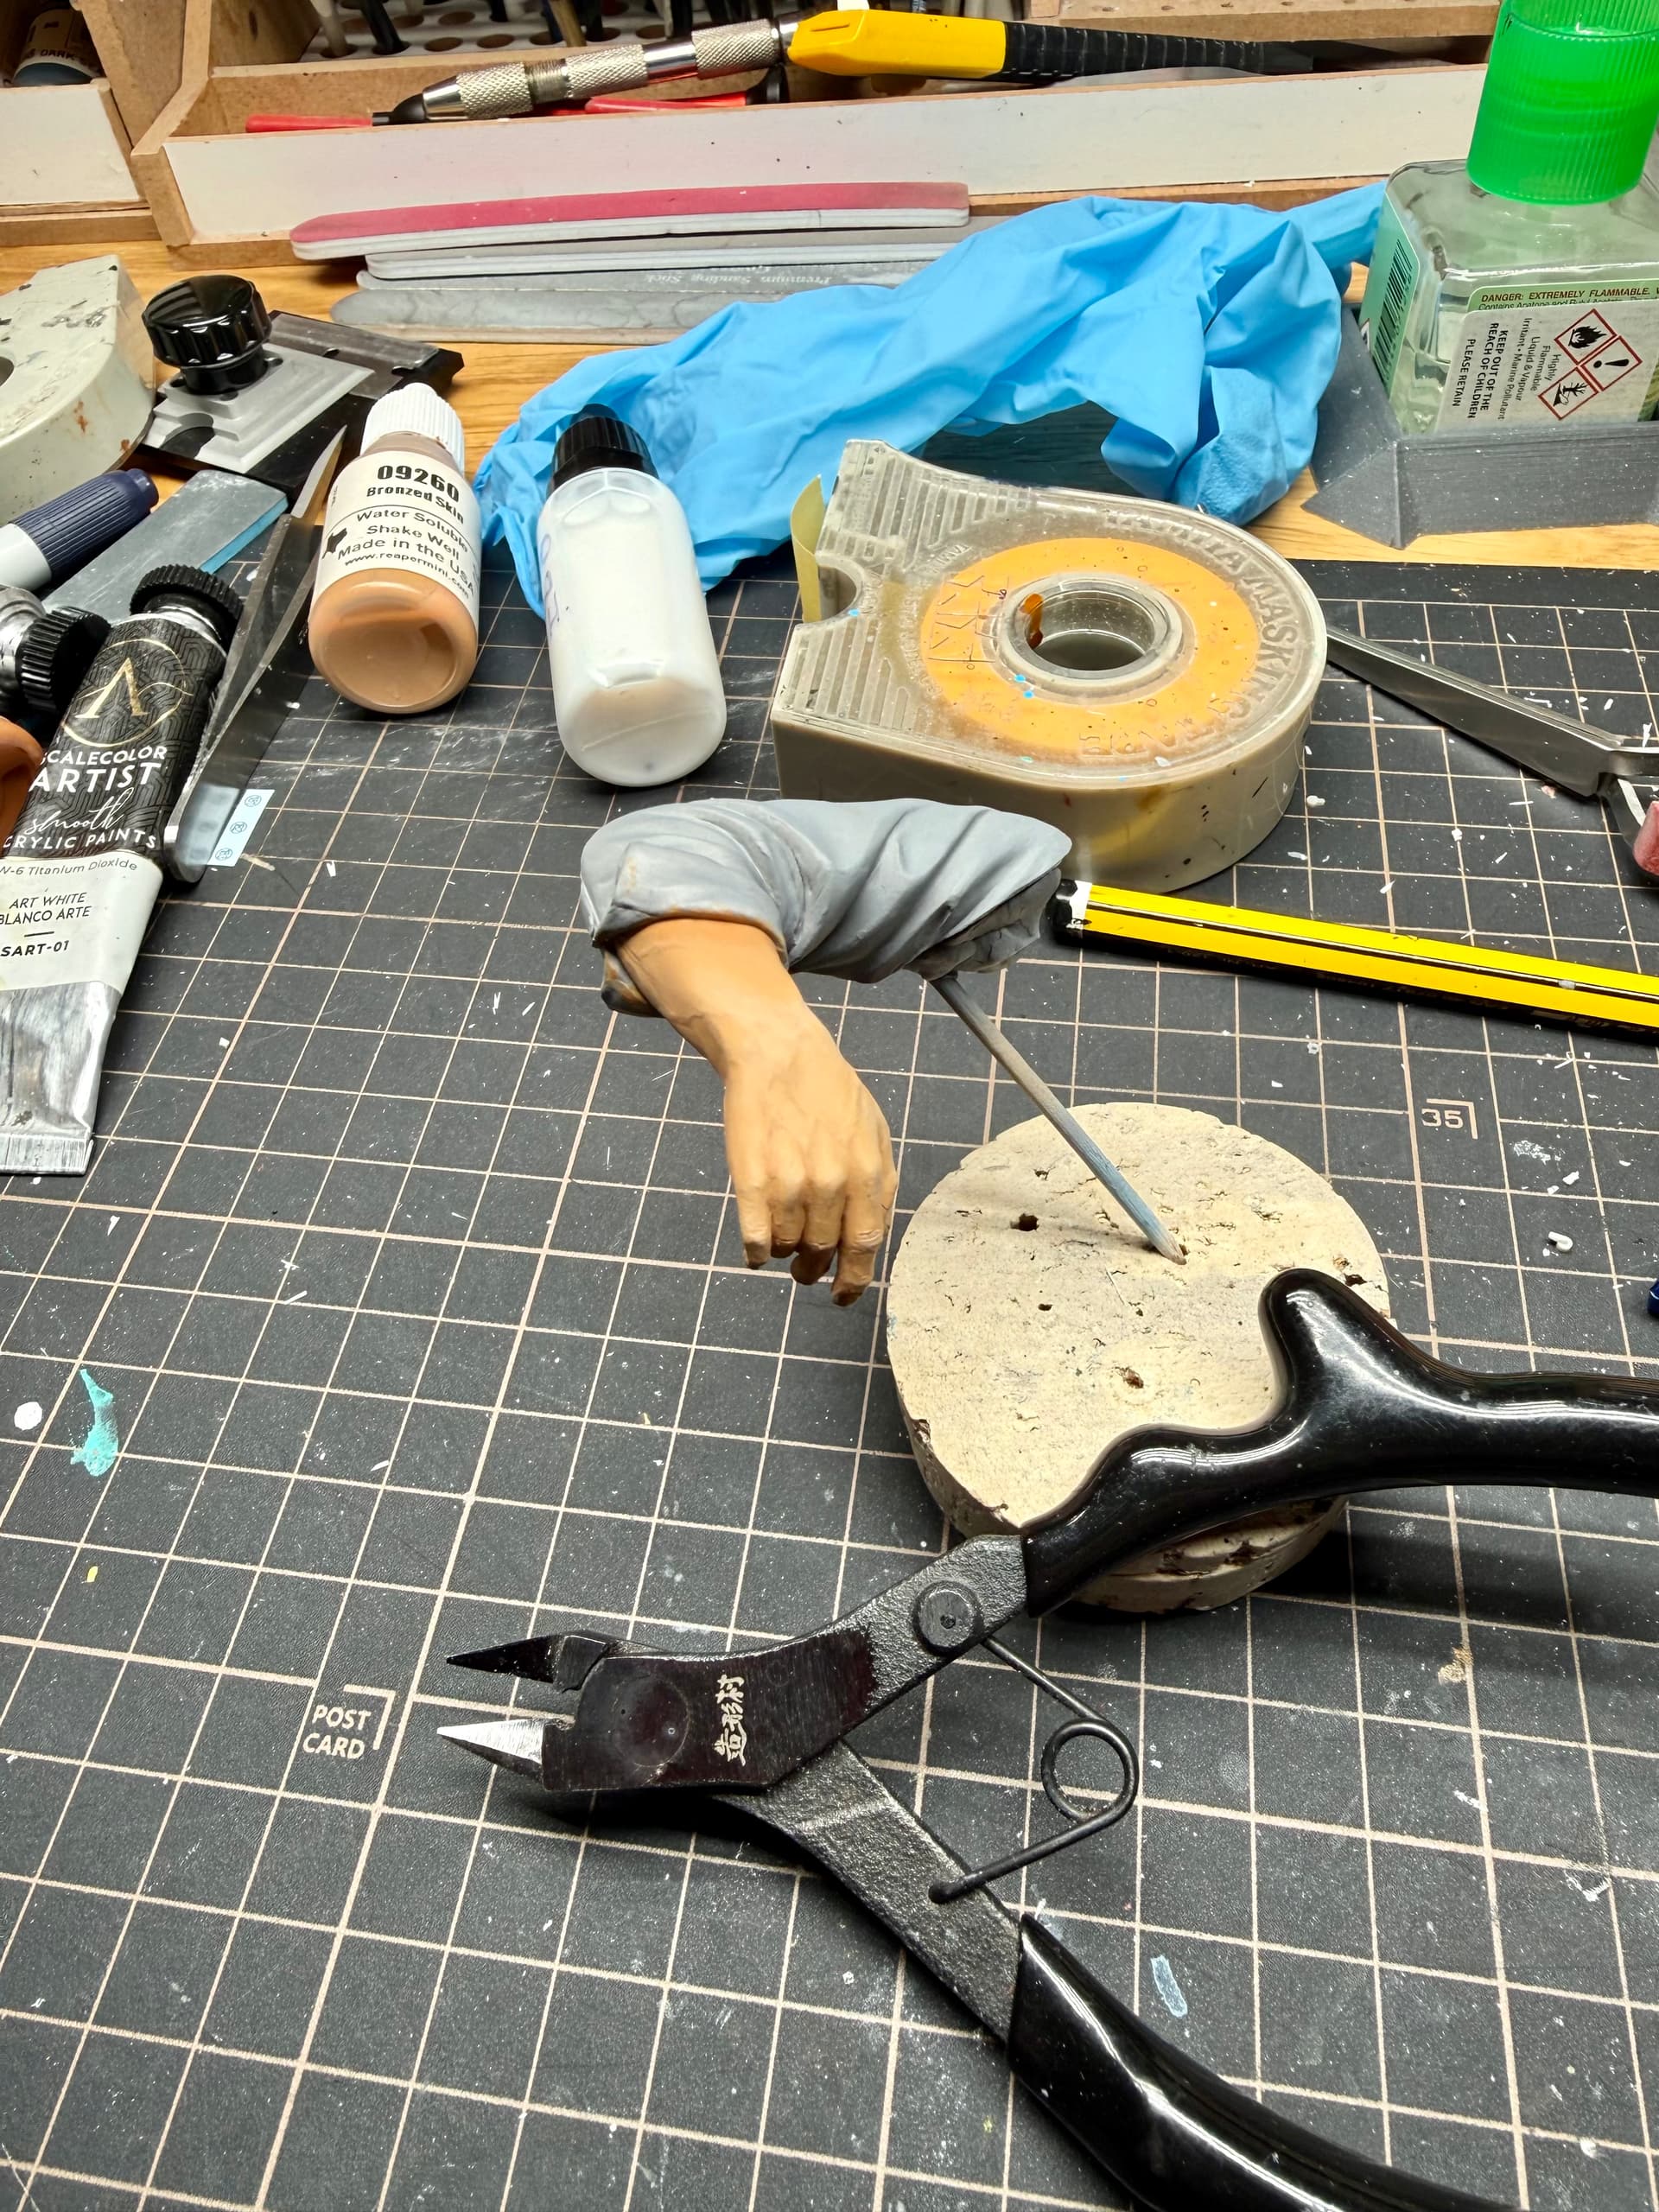
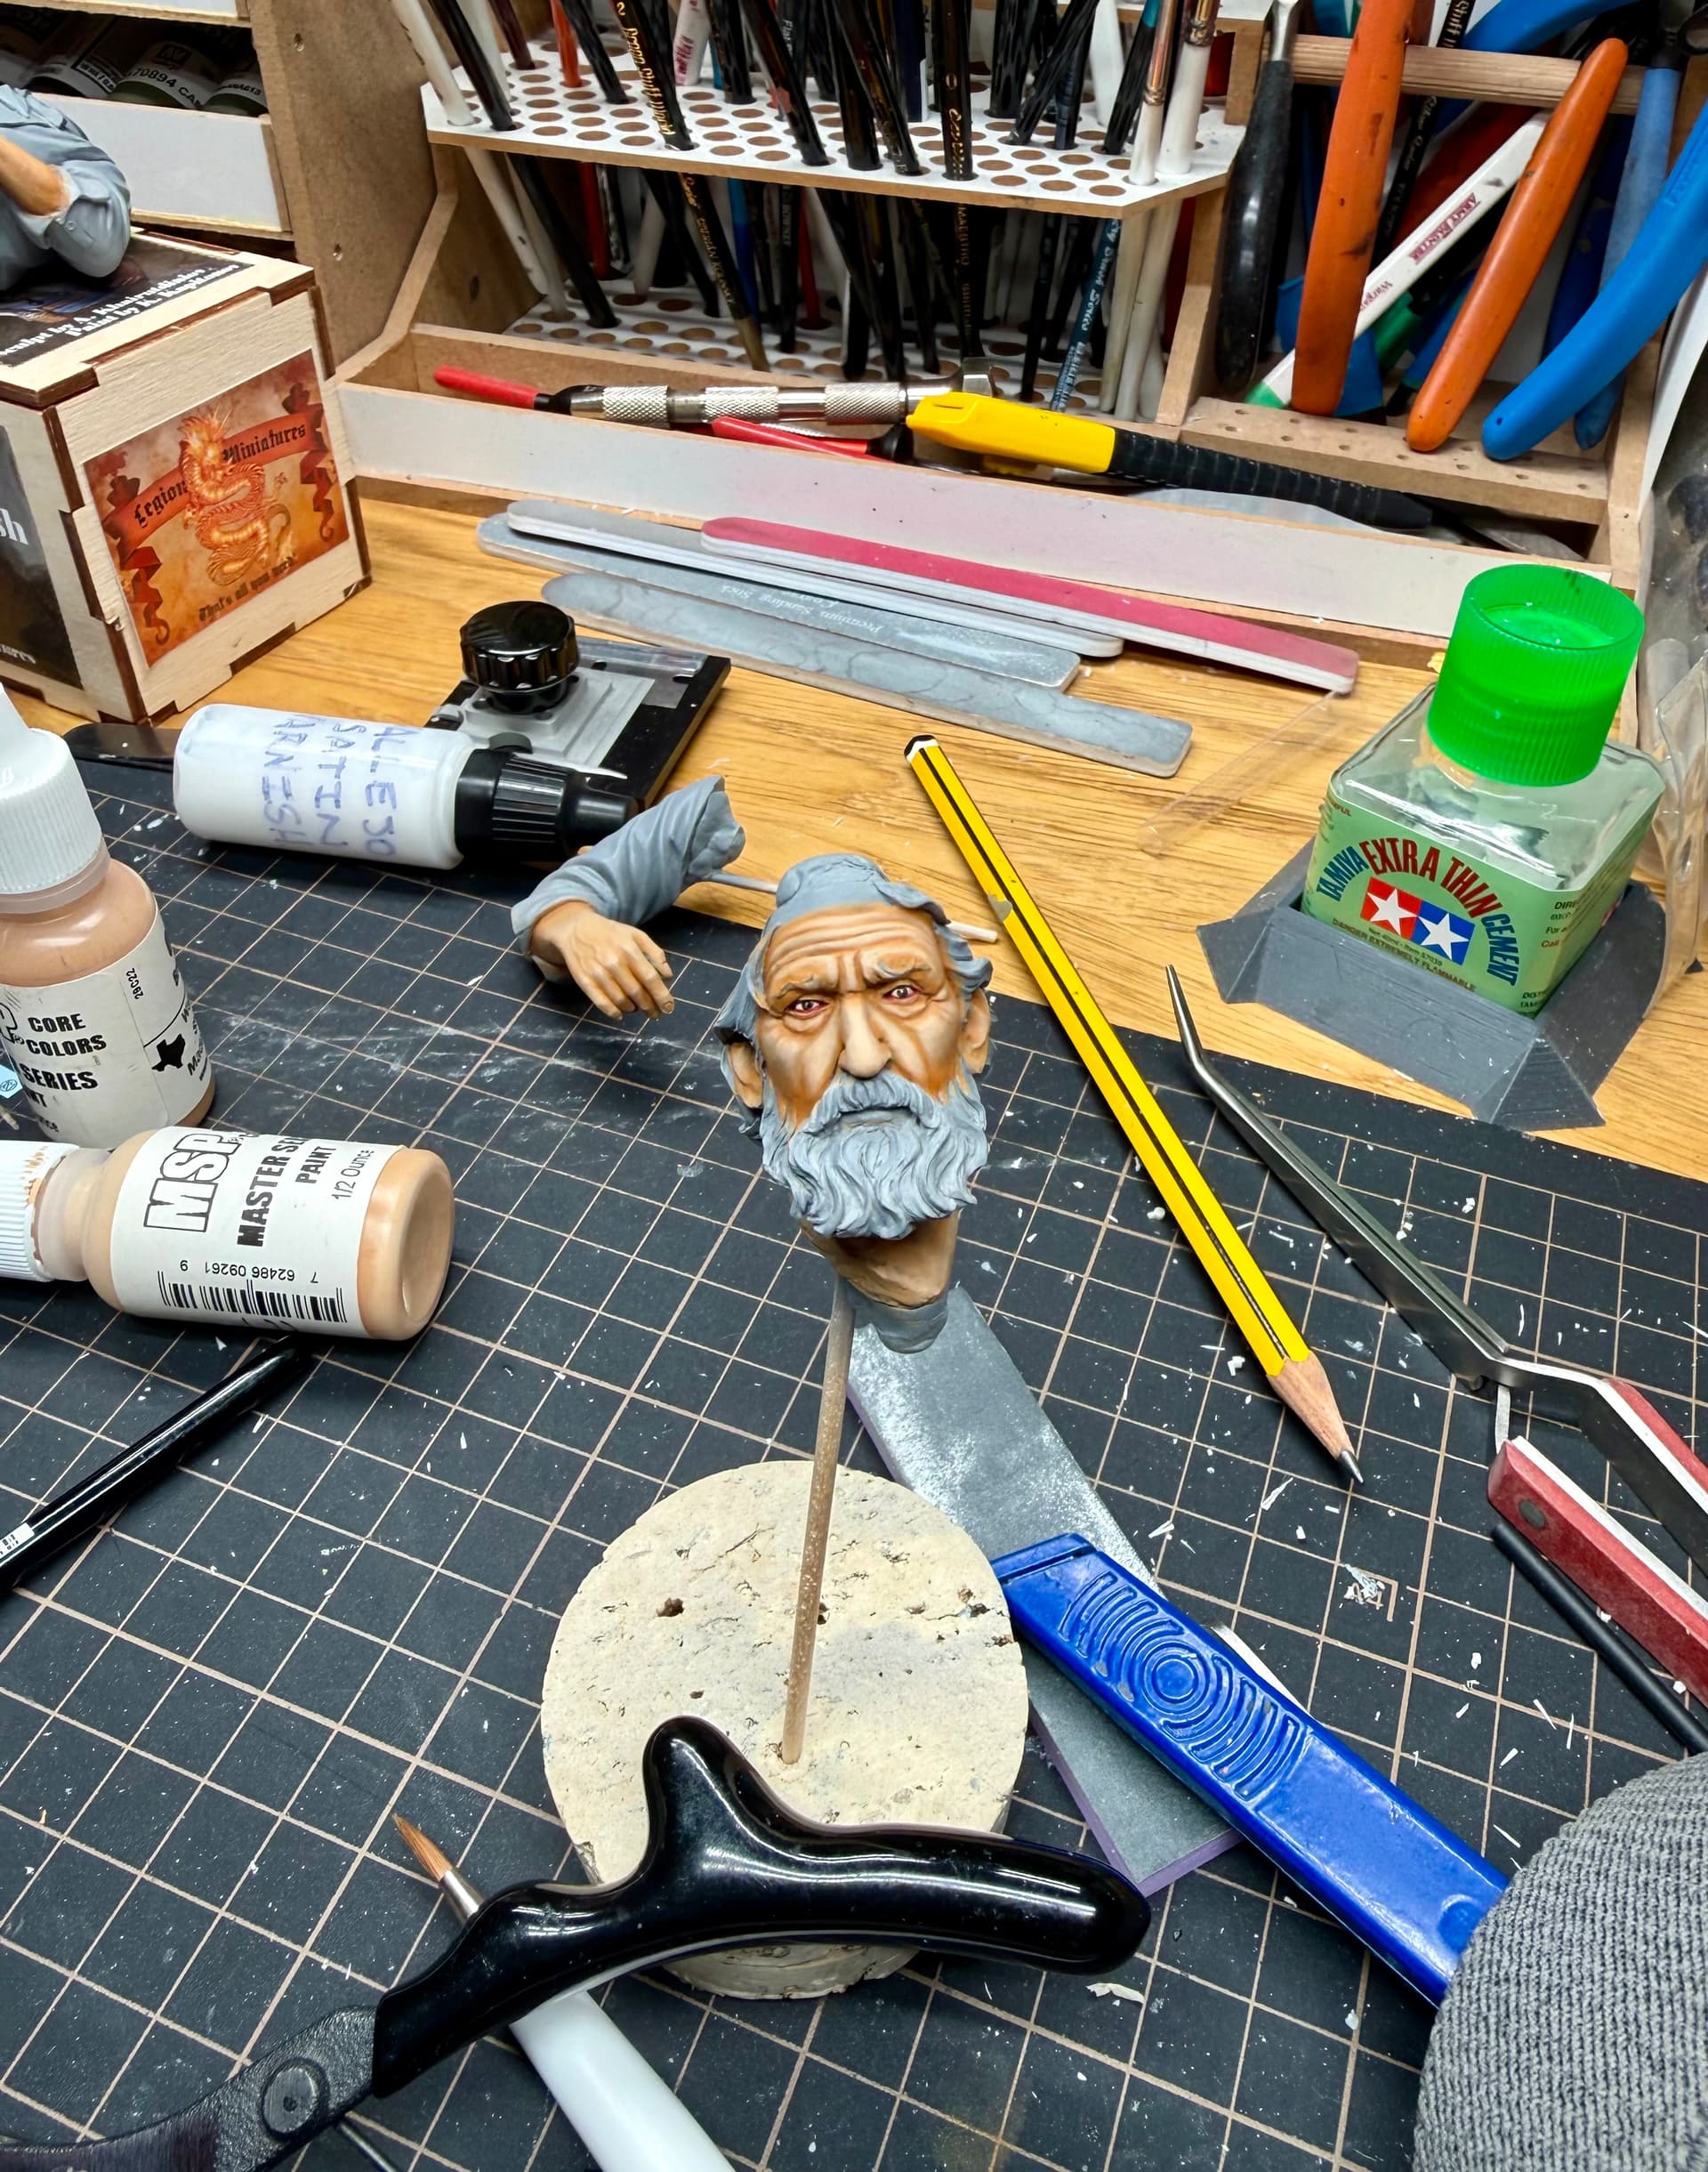
In addition to adding the skin blemishes I tried to impart weathered and damaged skin around the knuckles and fingers- Gold prospecting would have been a very hands-on job and would not have been gentle on the skin! I can’t say I’m entirely happy with the effect though.
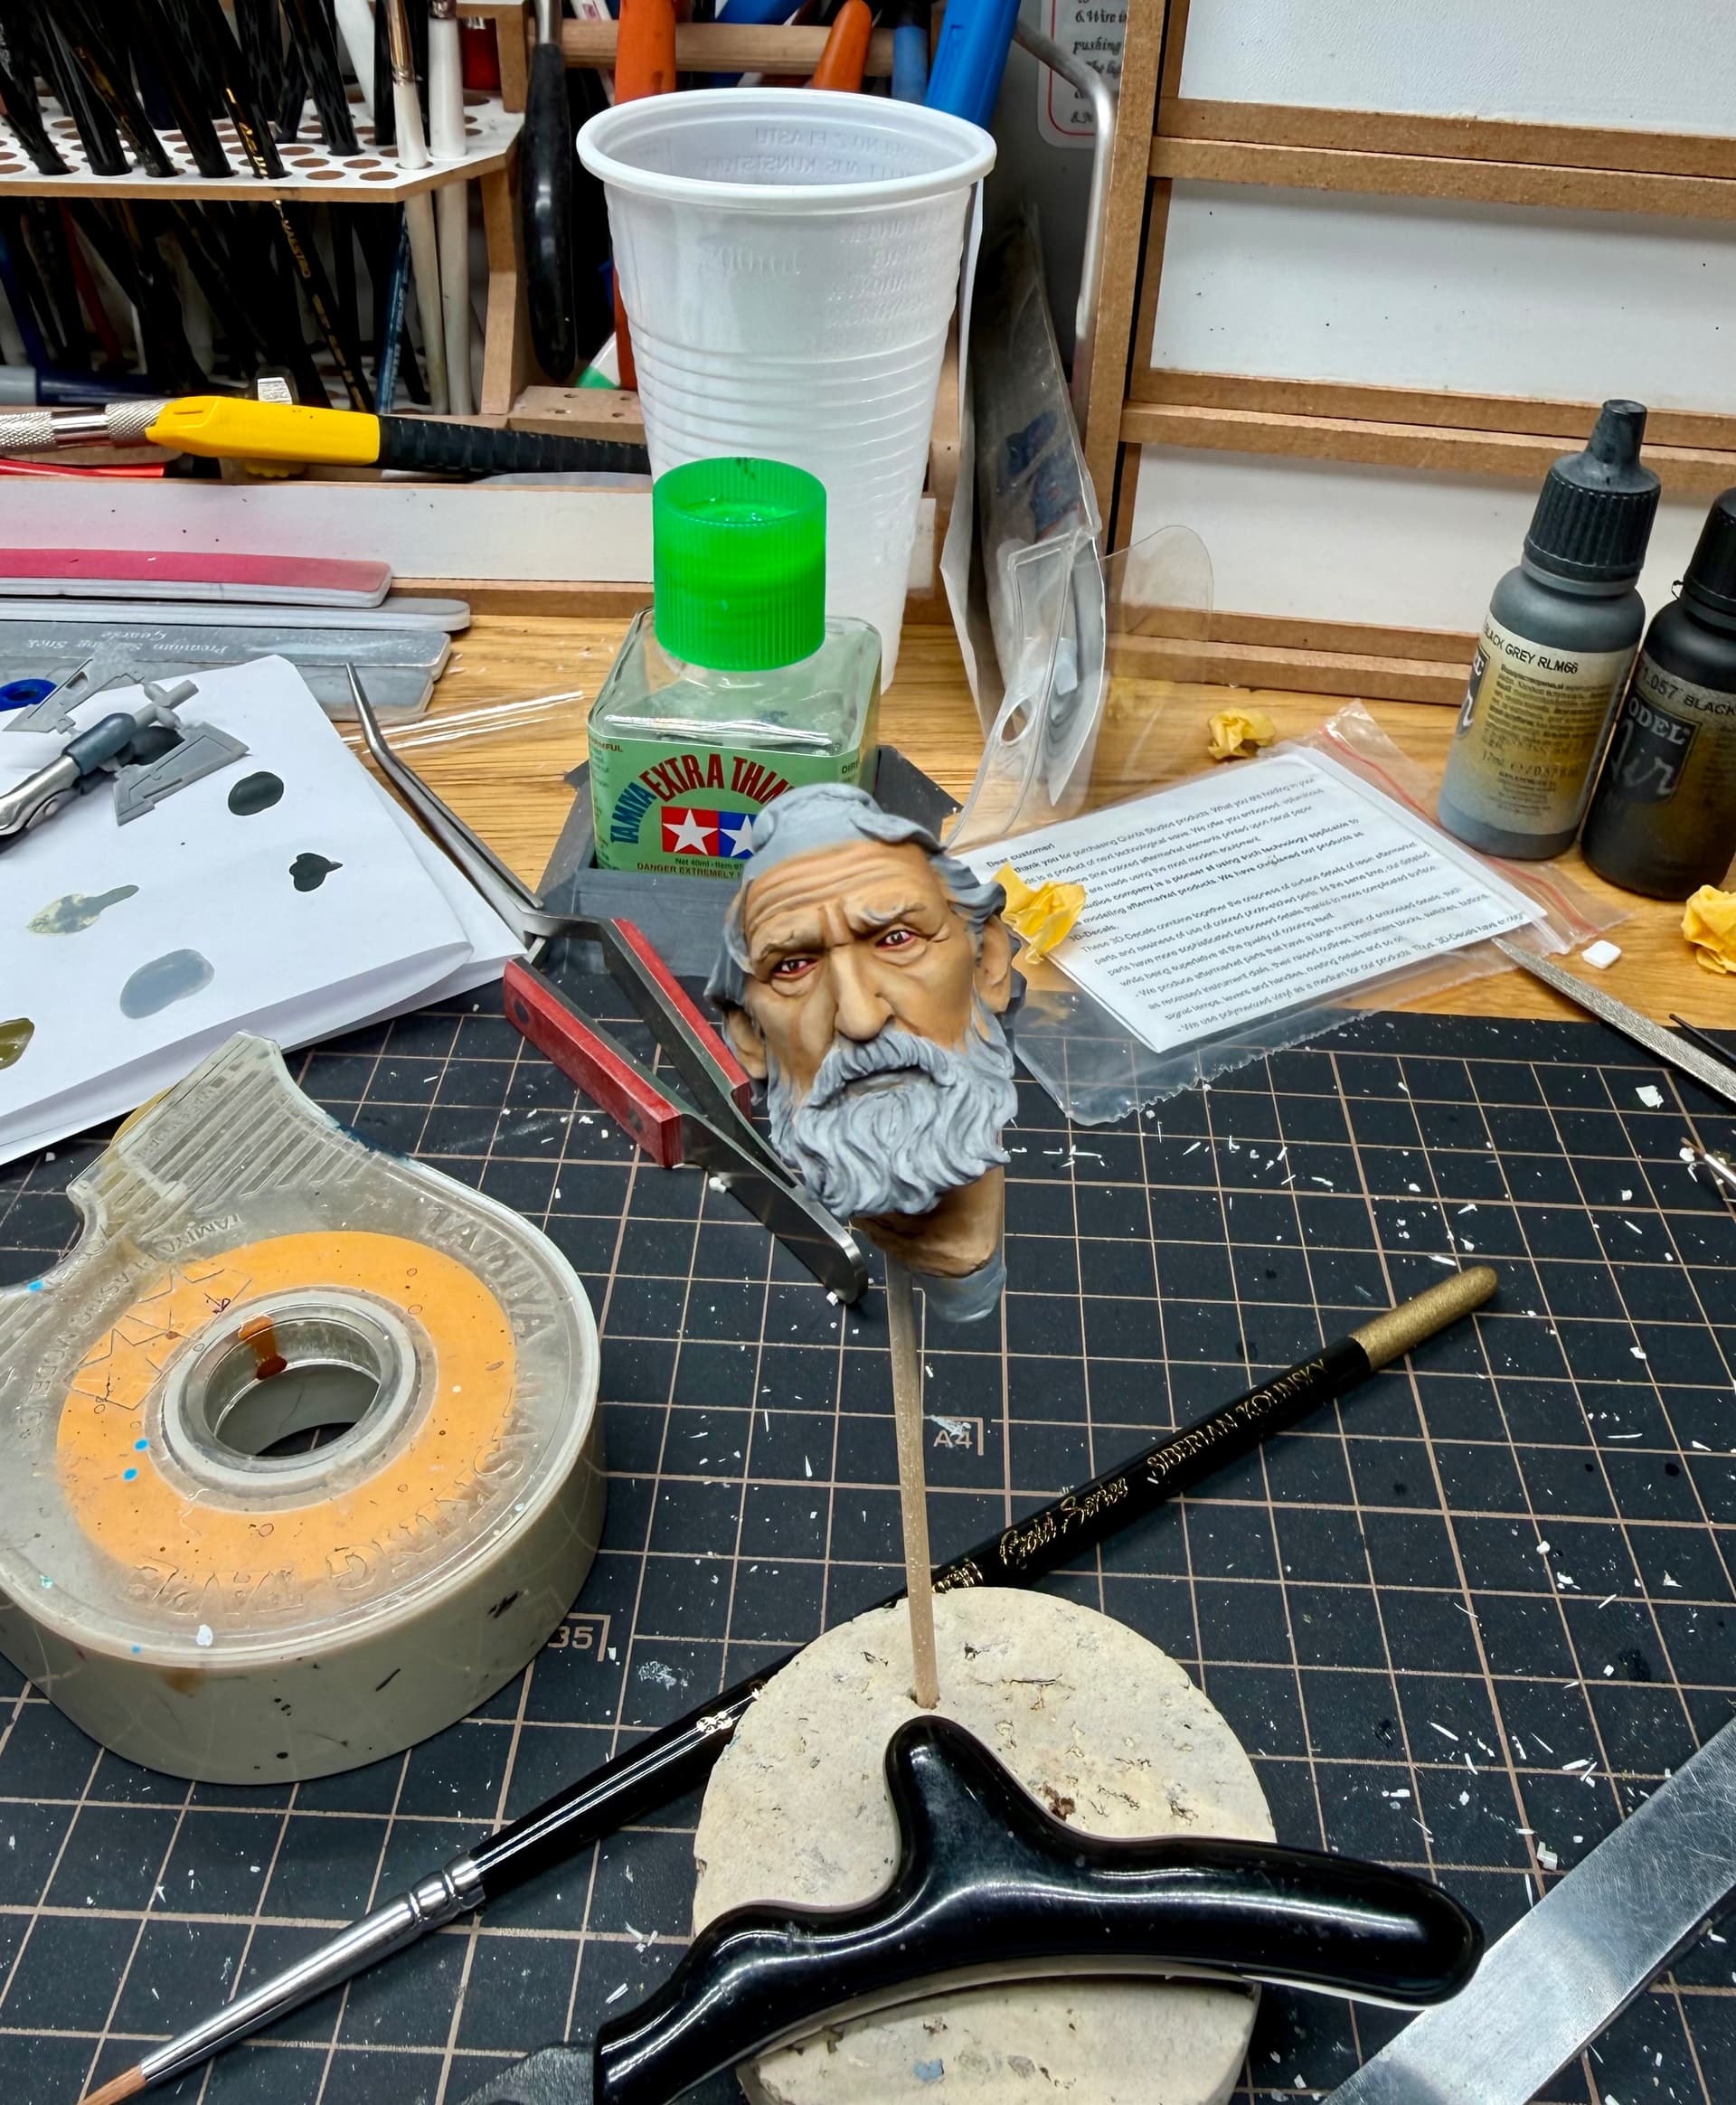
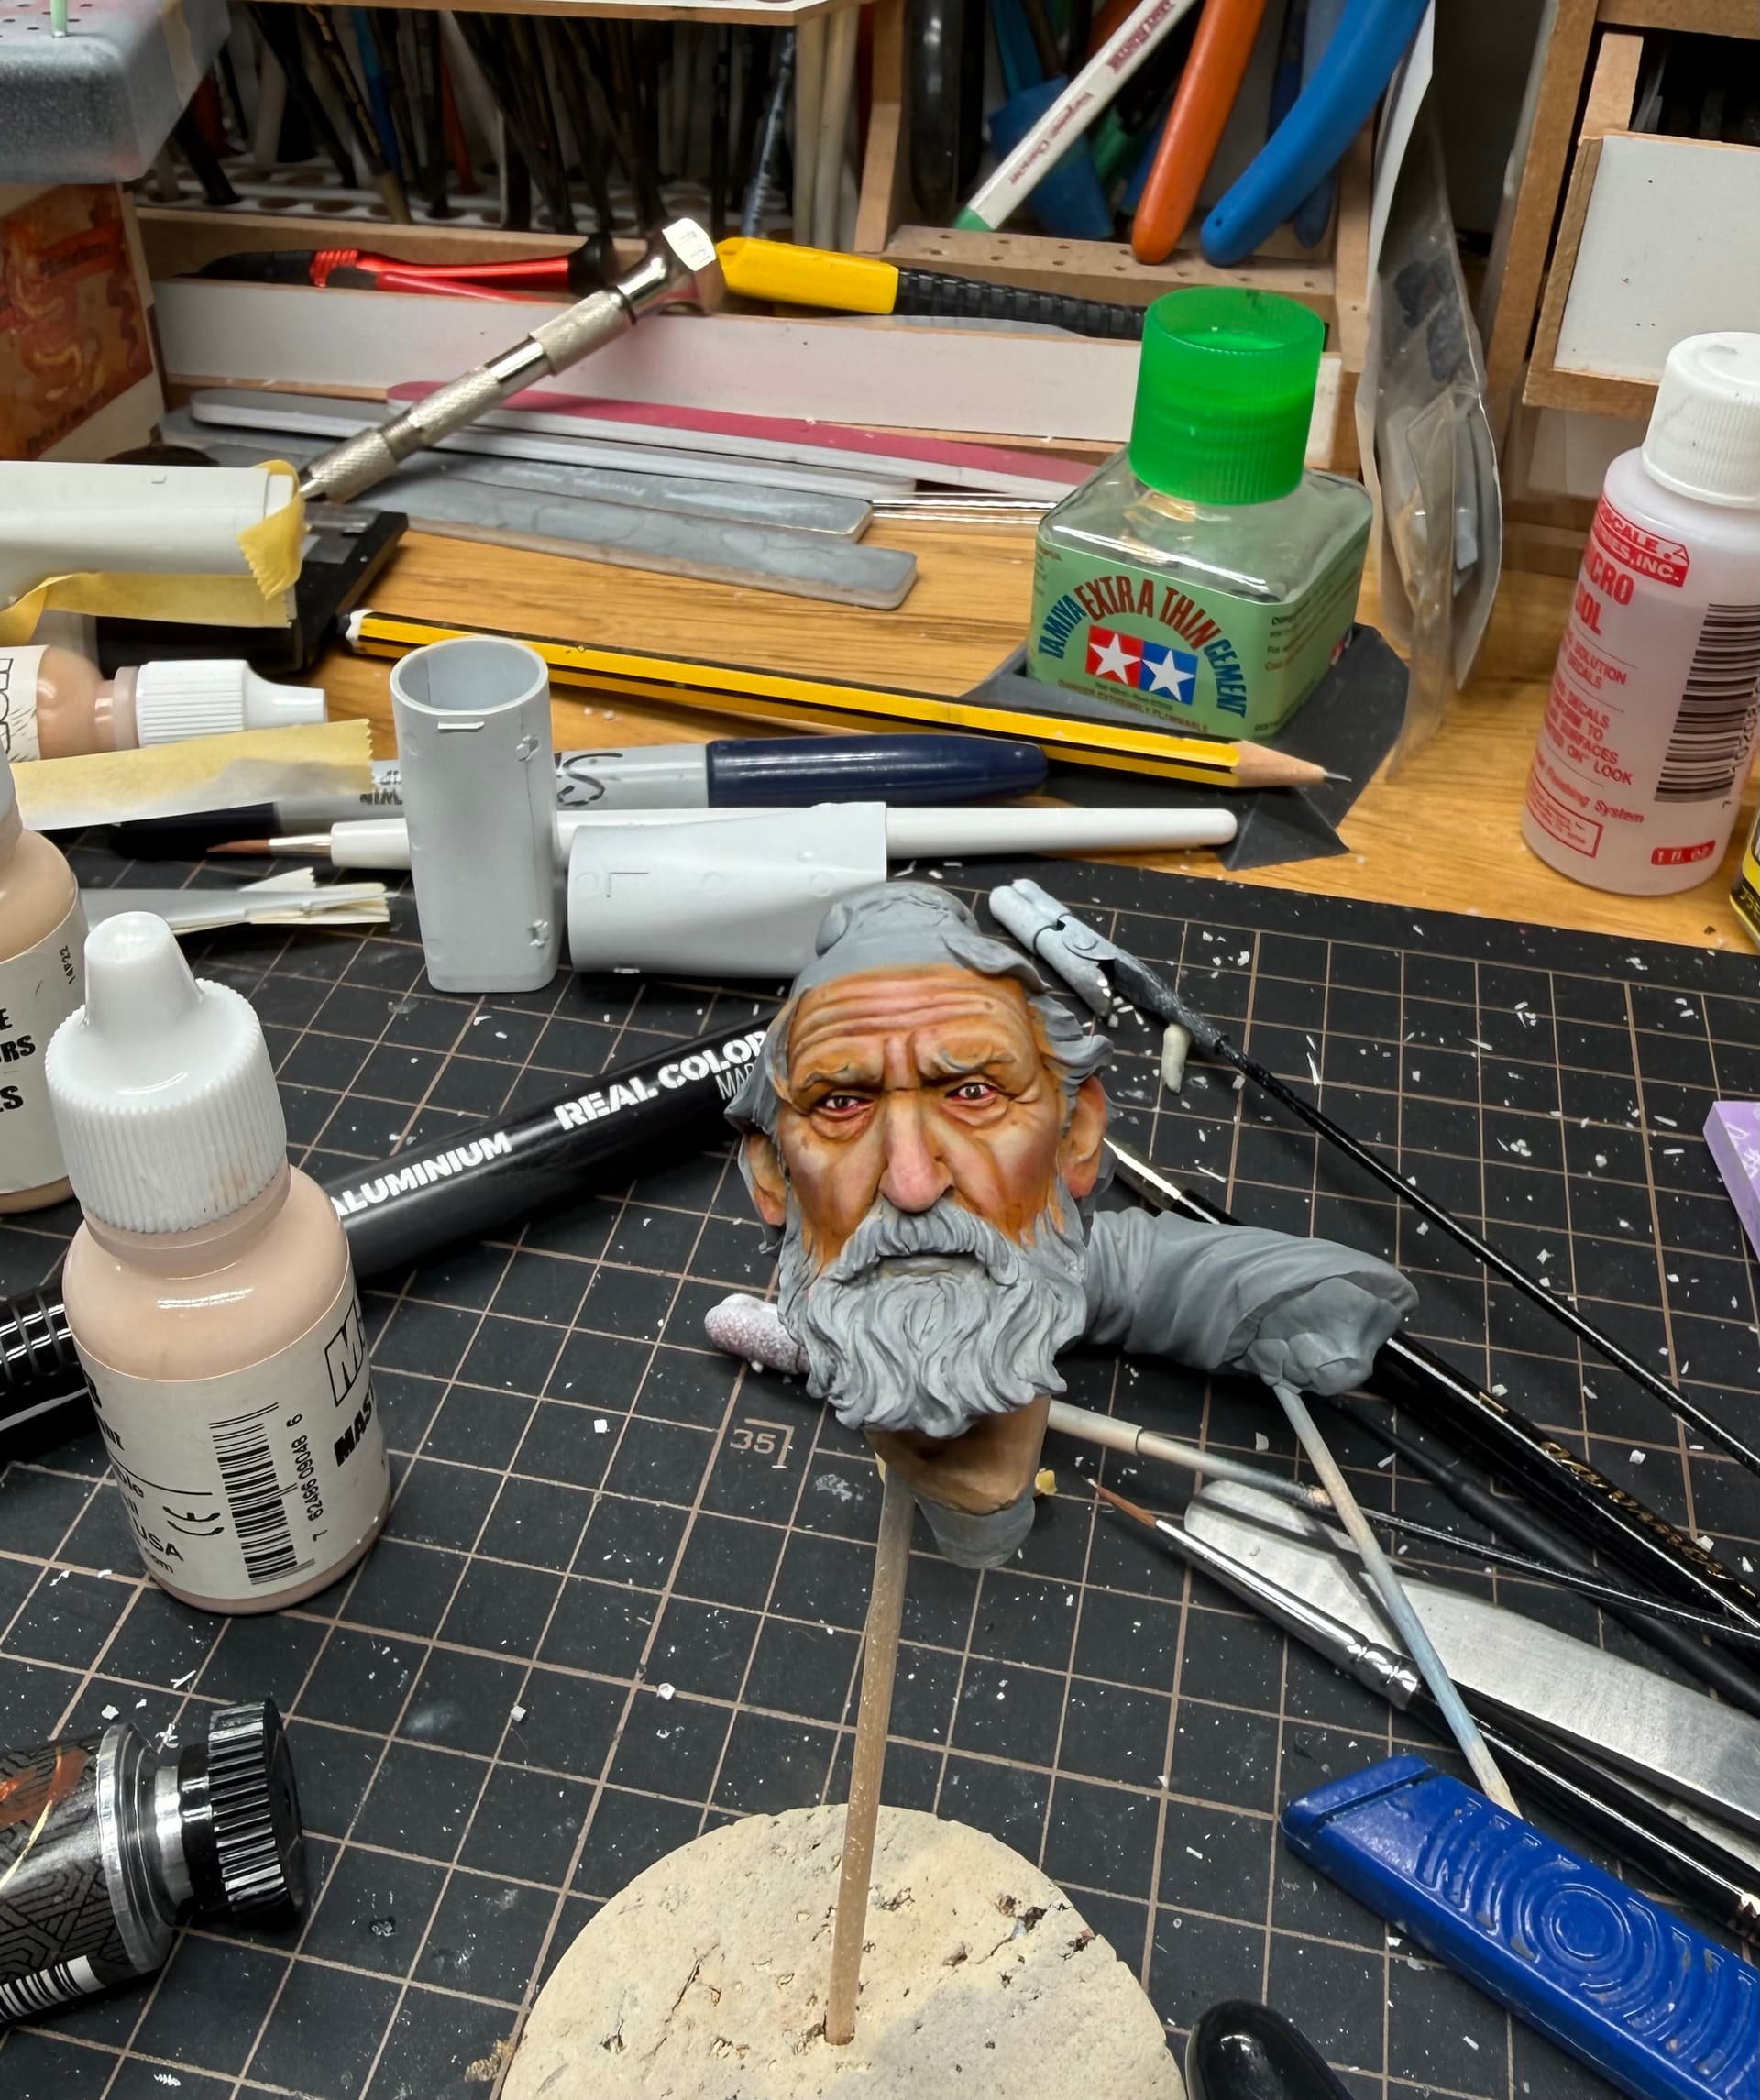
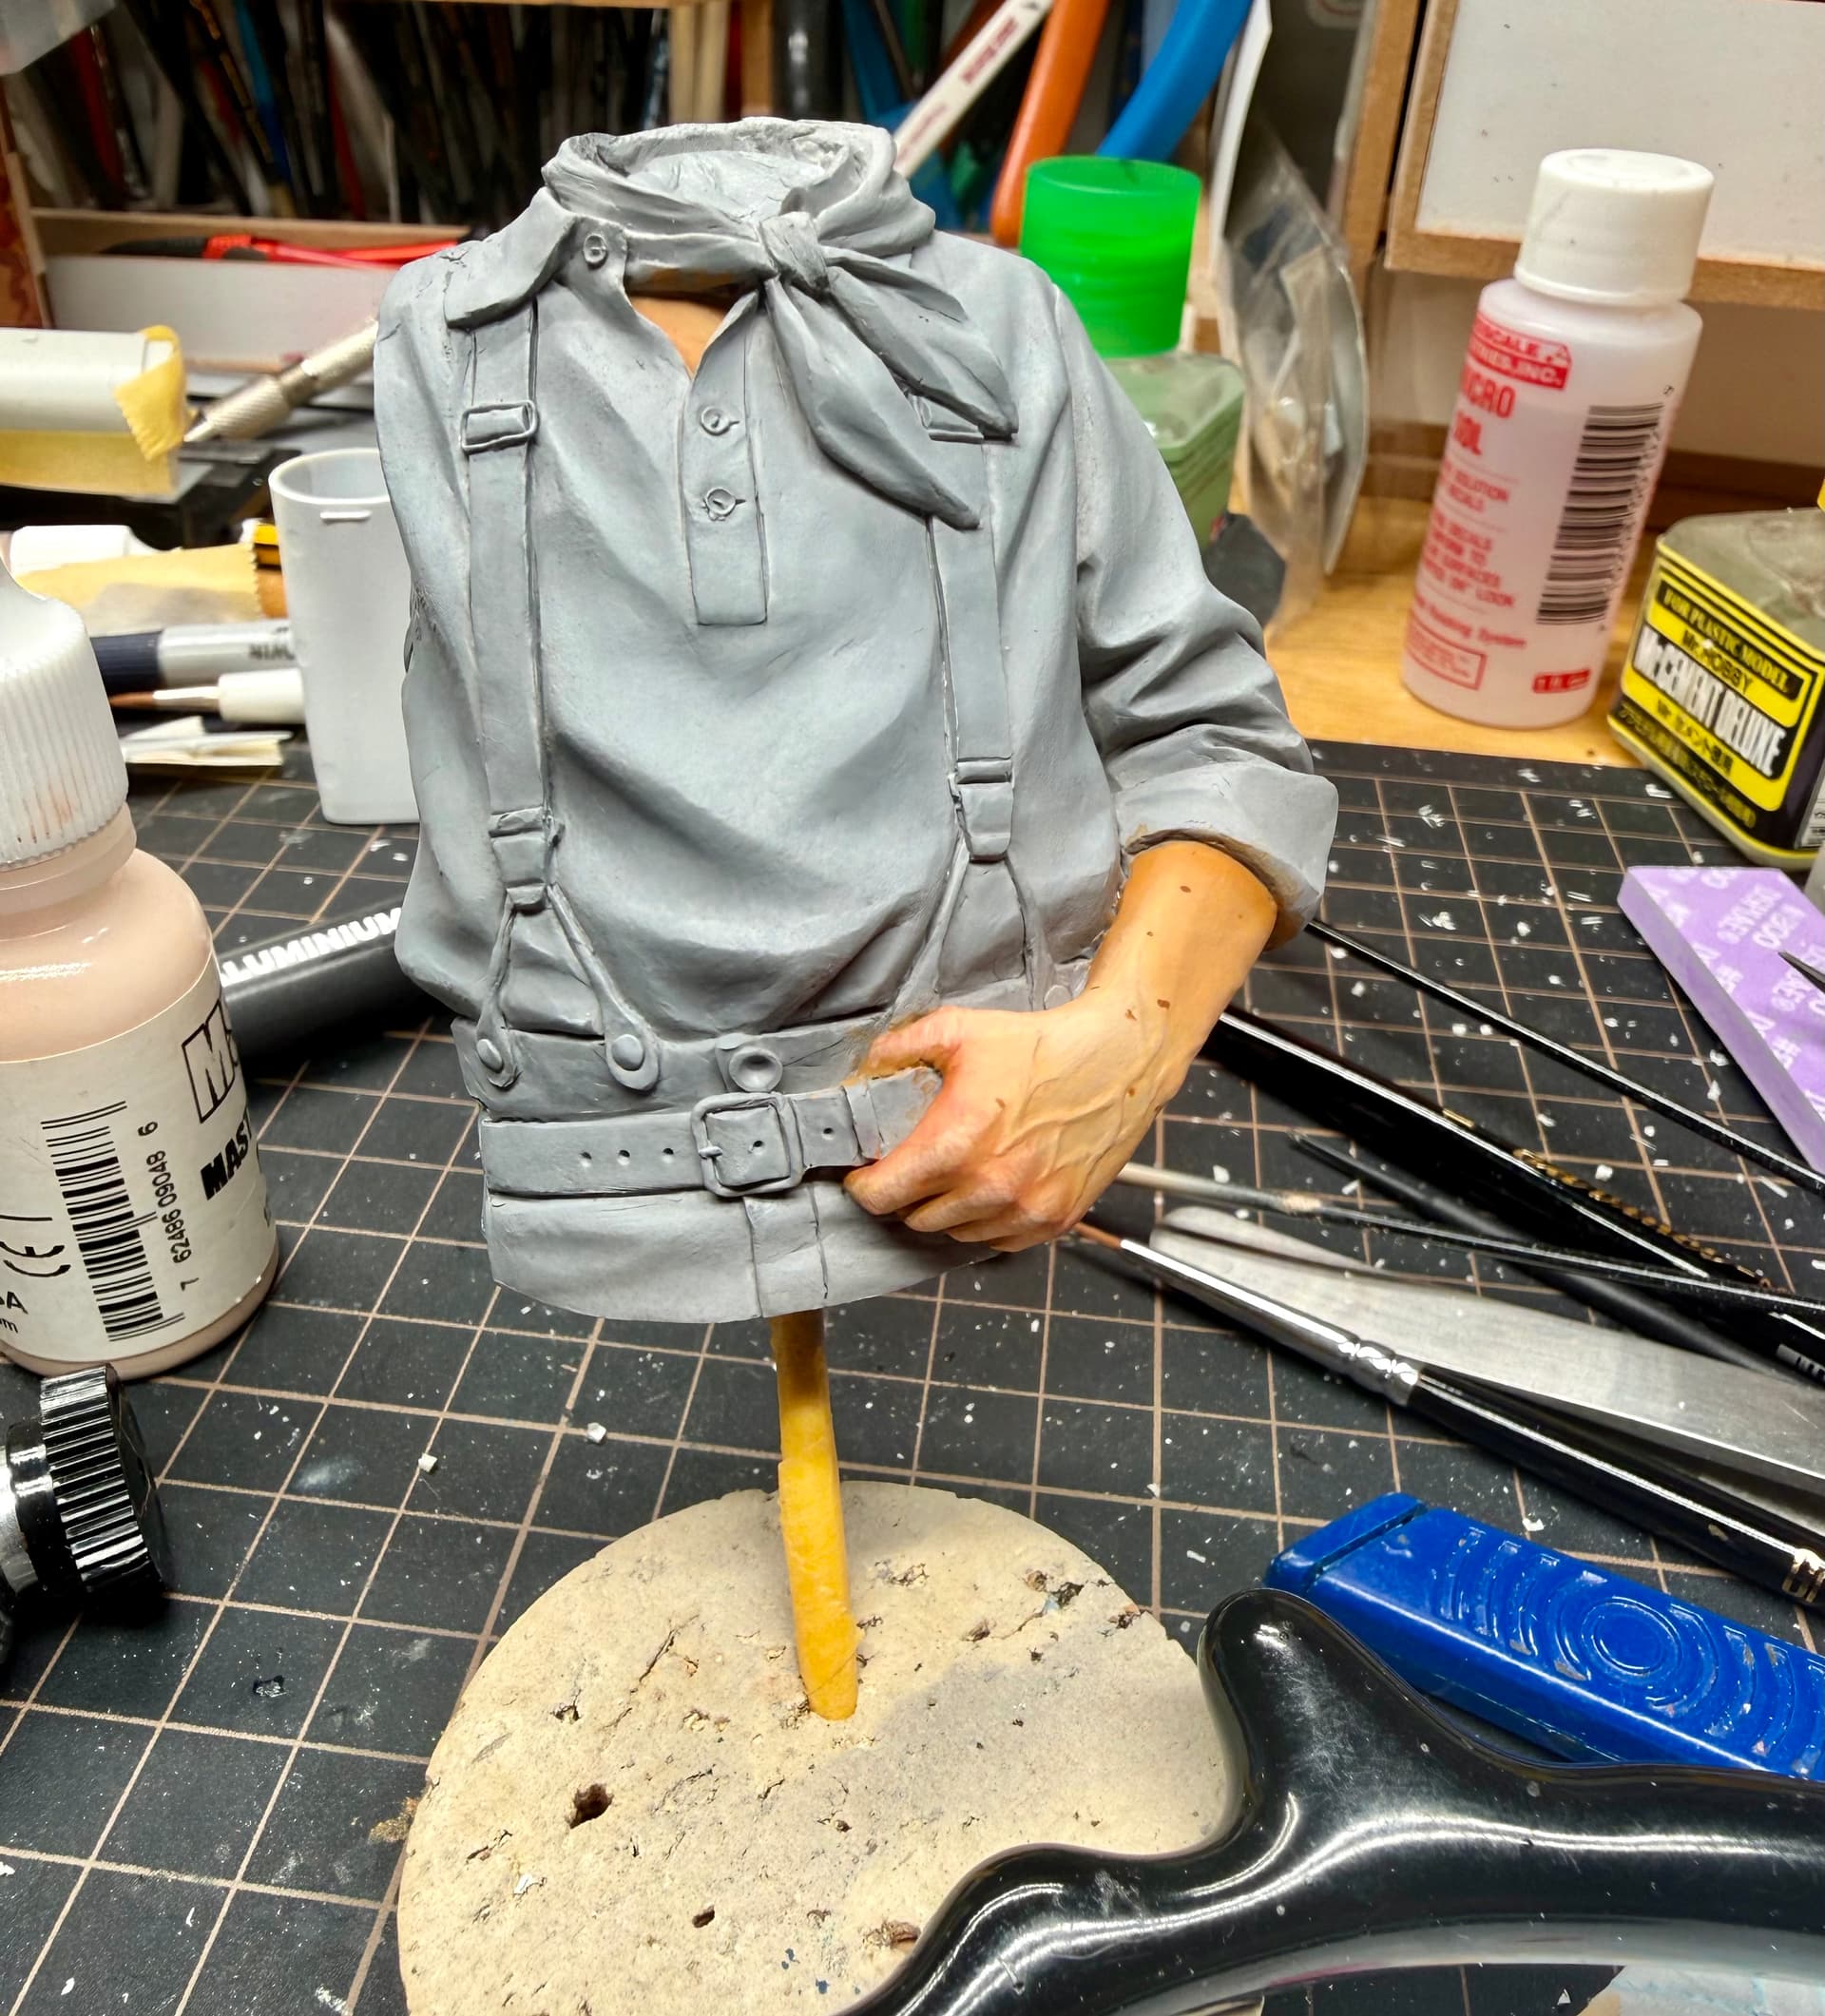
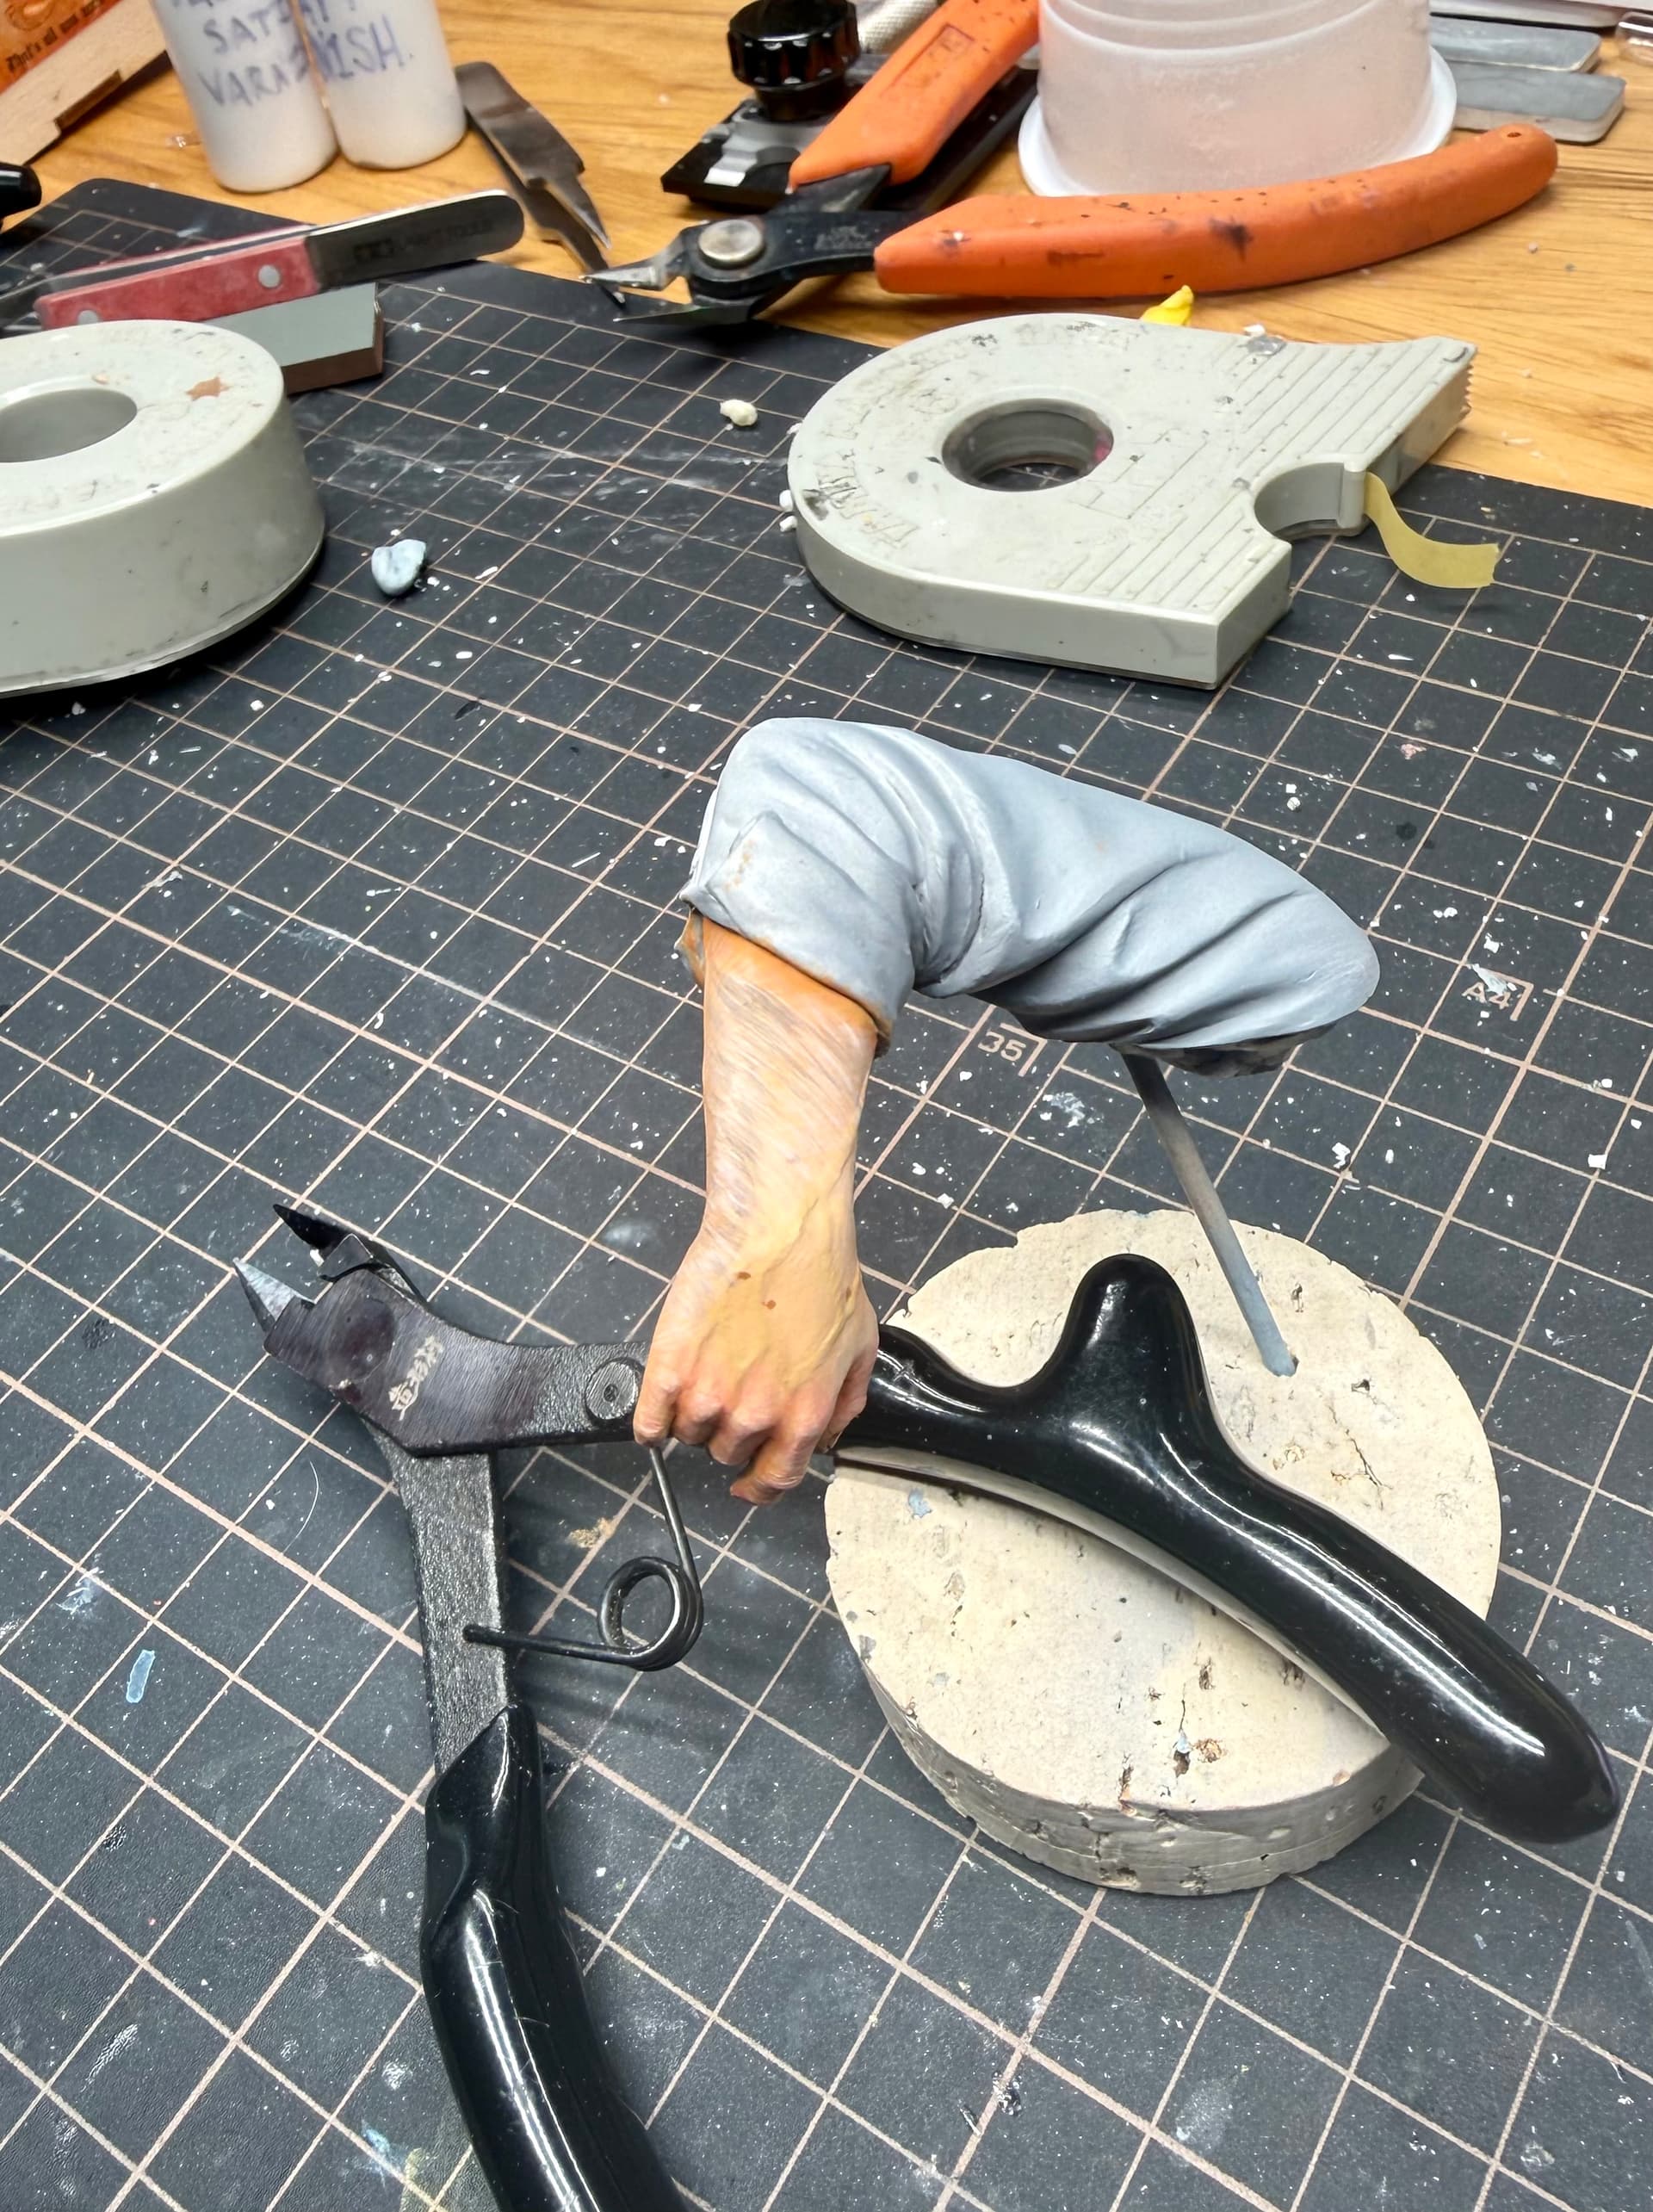
At this point the skin on the face is more or less finished- the lips and hair will be next. On the arms/hands I have to do the veins and nails before then tackling the arm hair.
Thank you very much! I’ve been steadily adding the Hobbyzone modules here and there- really nice products- I kind of wonder how I did without them now!
This is looking fantastic and thanks for walking us through your process. I was quite into figures some time ago and recently finished one. I feel I need to re-learn everything
Thank you for the kind words bud! There are really a lot of different ways to tackle a figure model- my process will not be right for all. Takes practice and a fair bit of experimenting to find what you might be comfortable with.
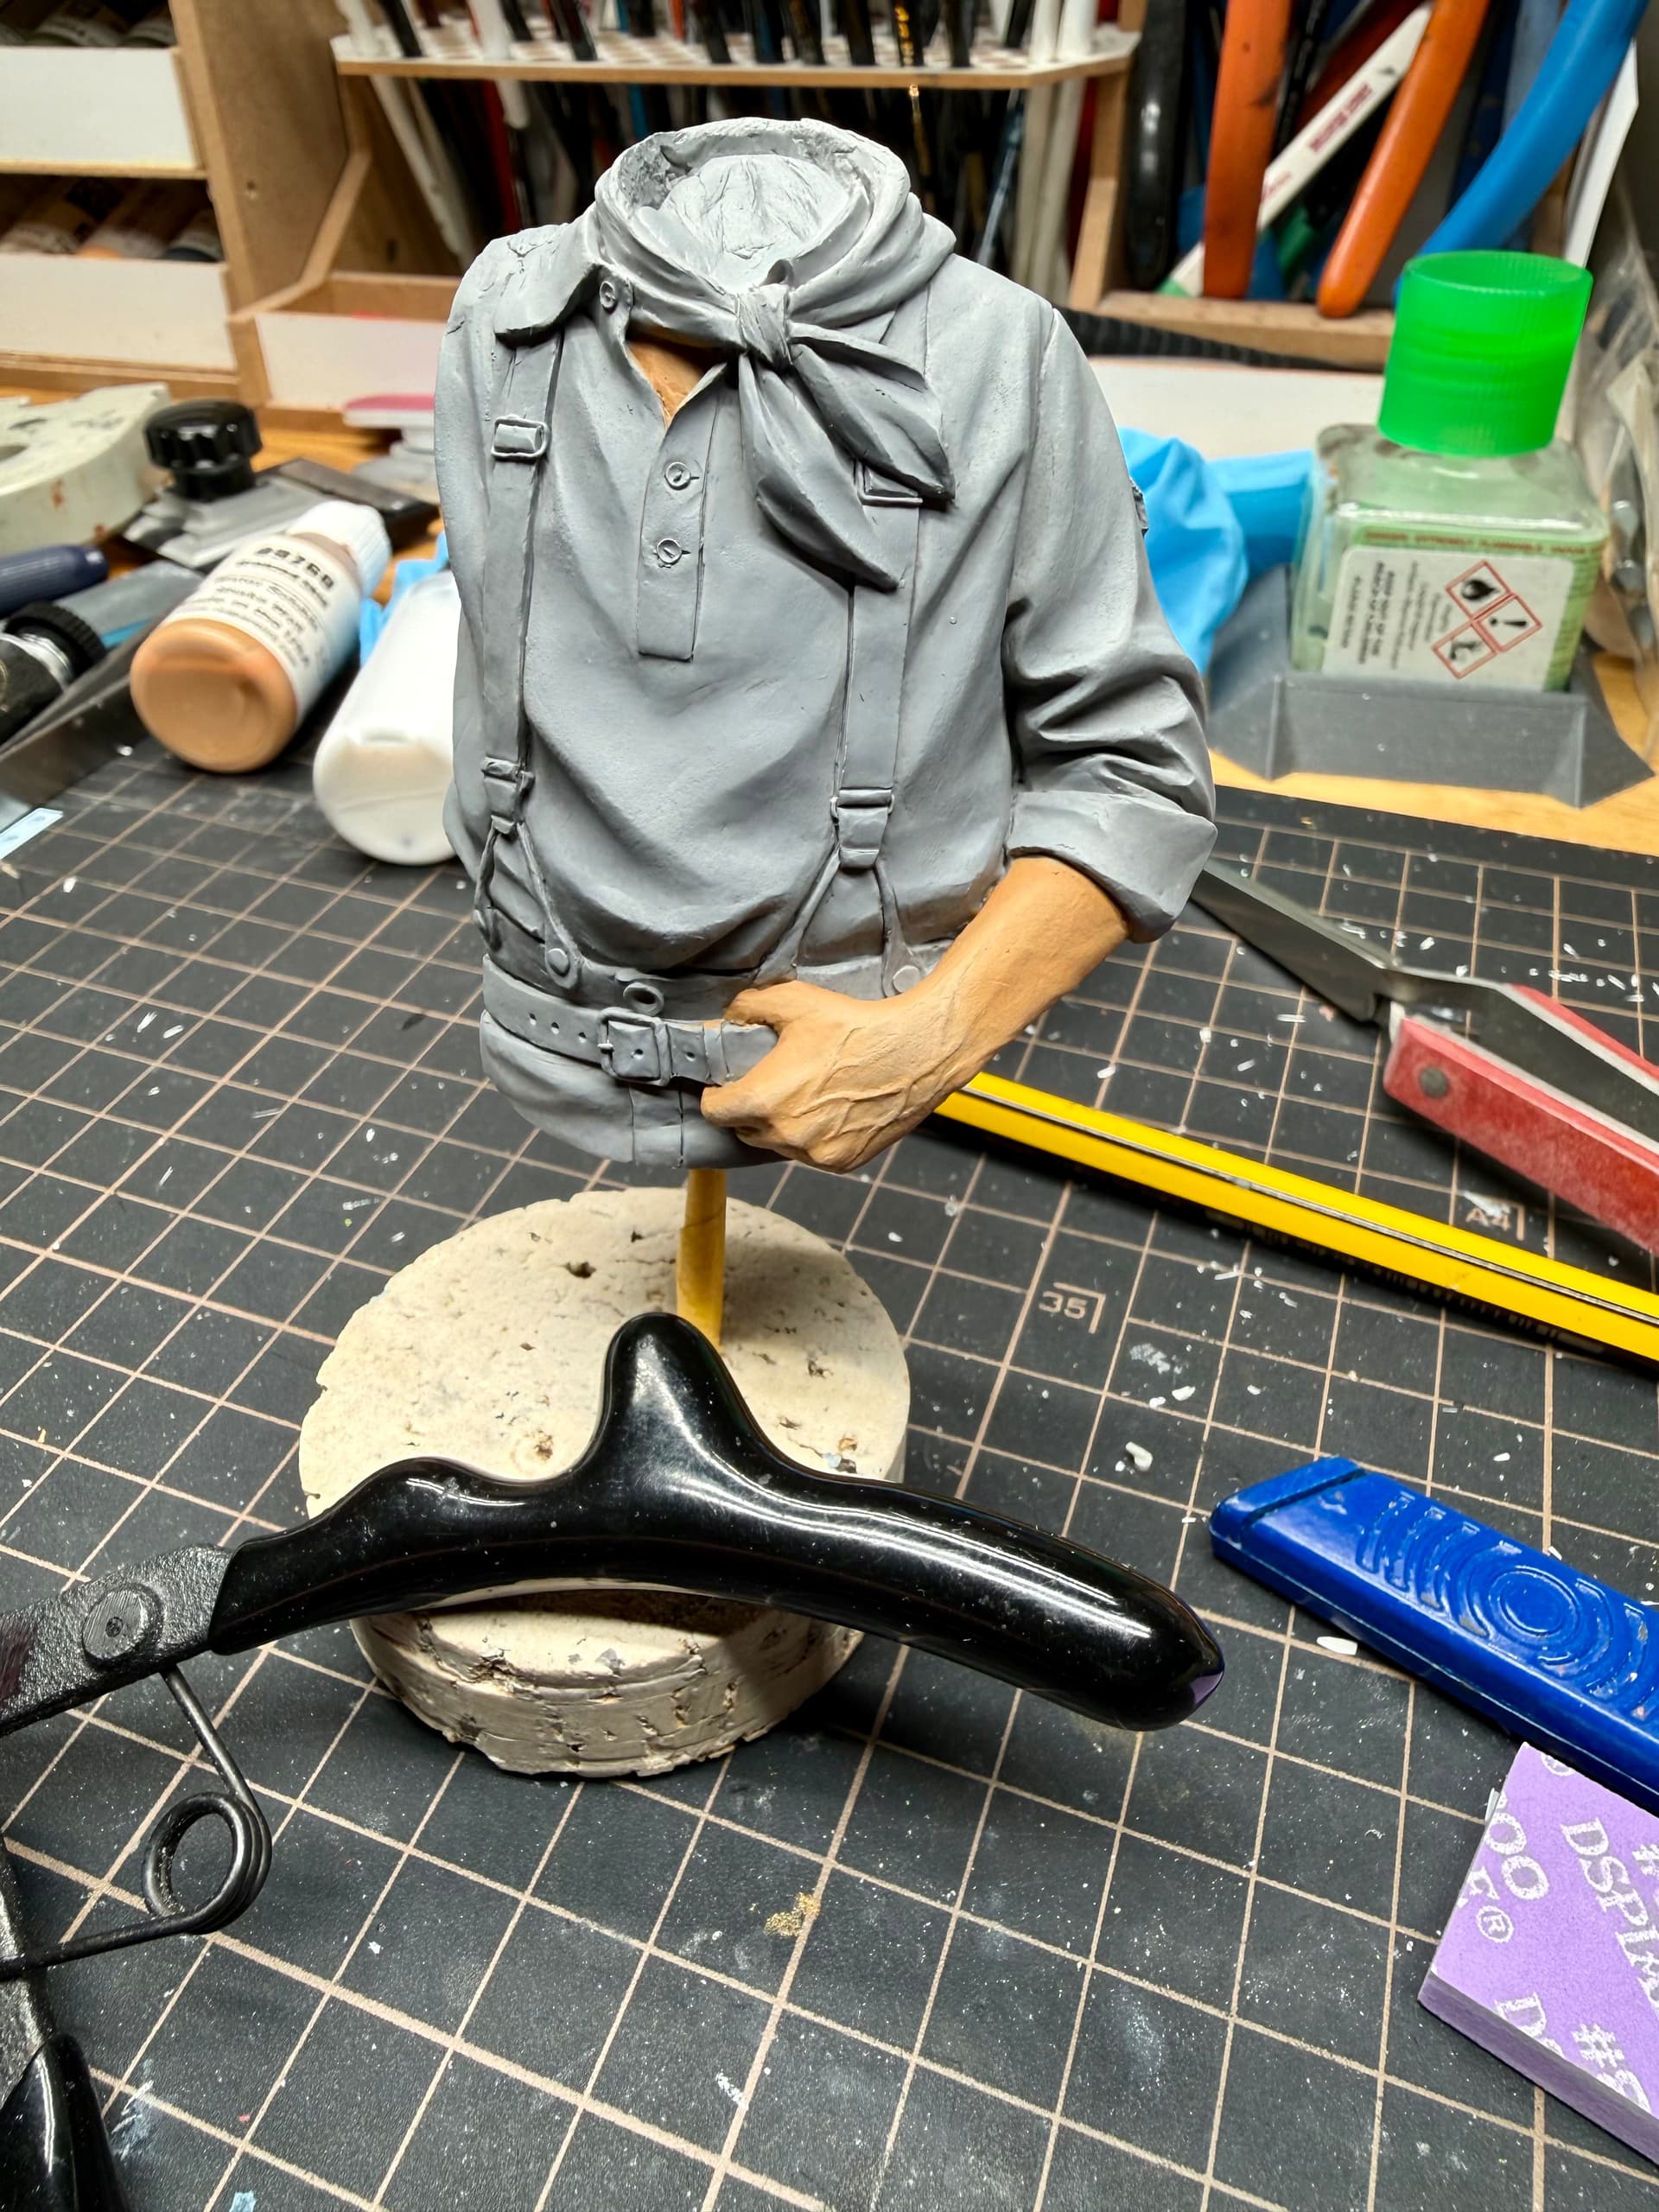
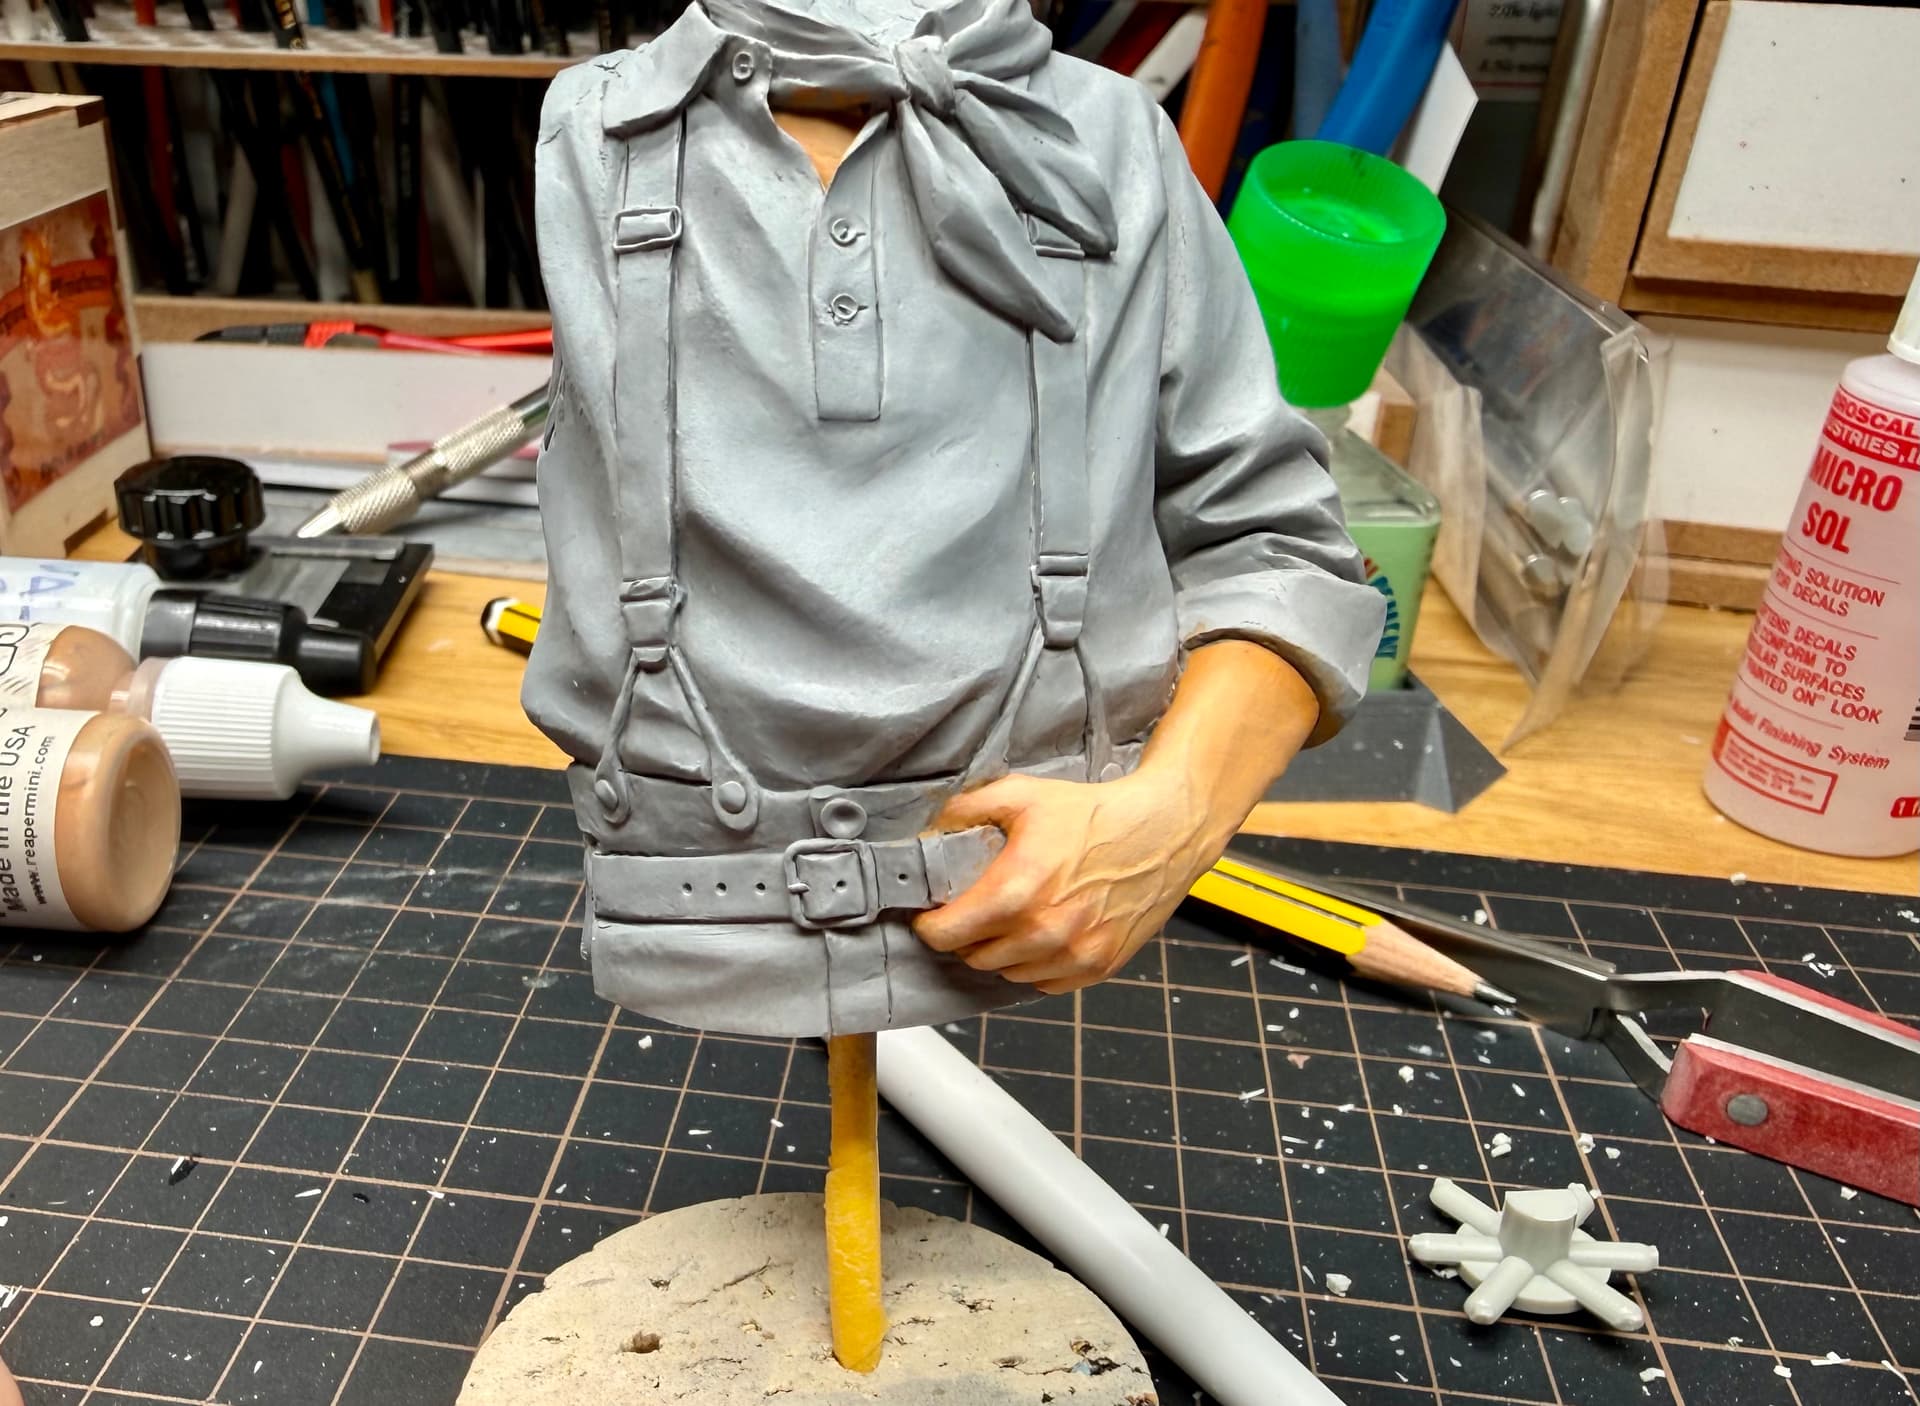
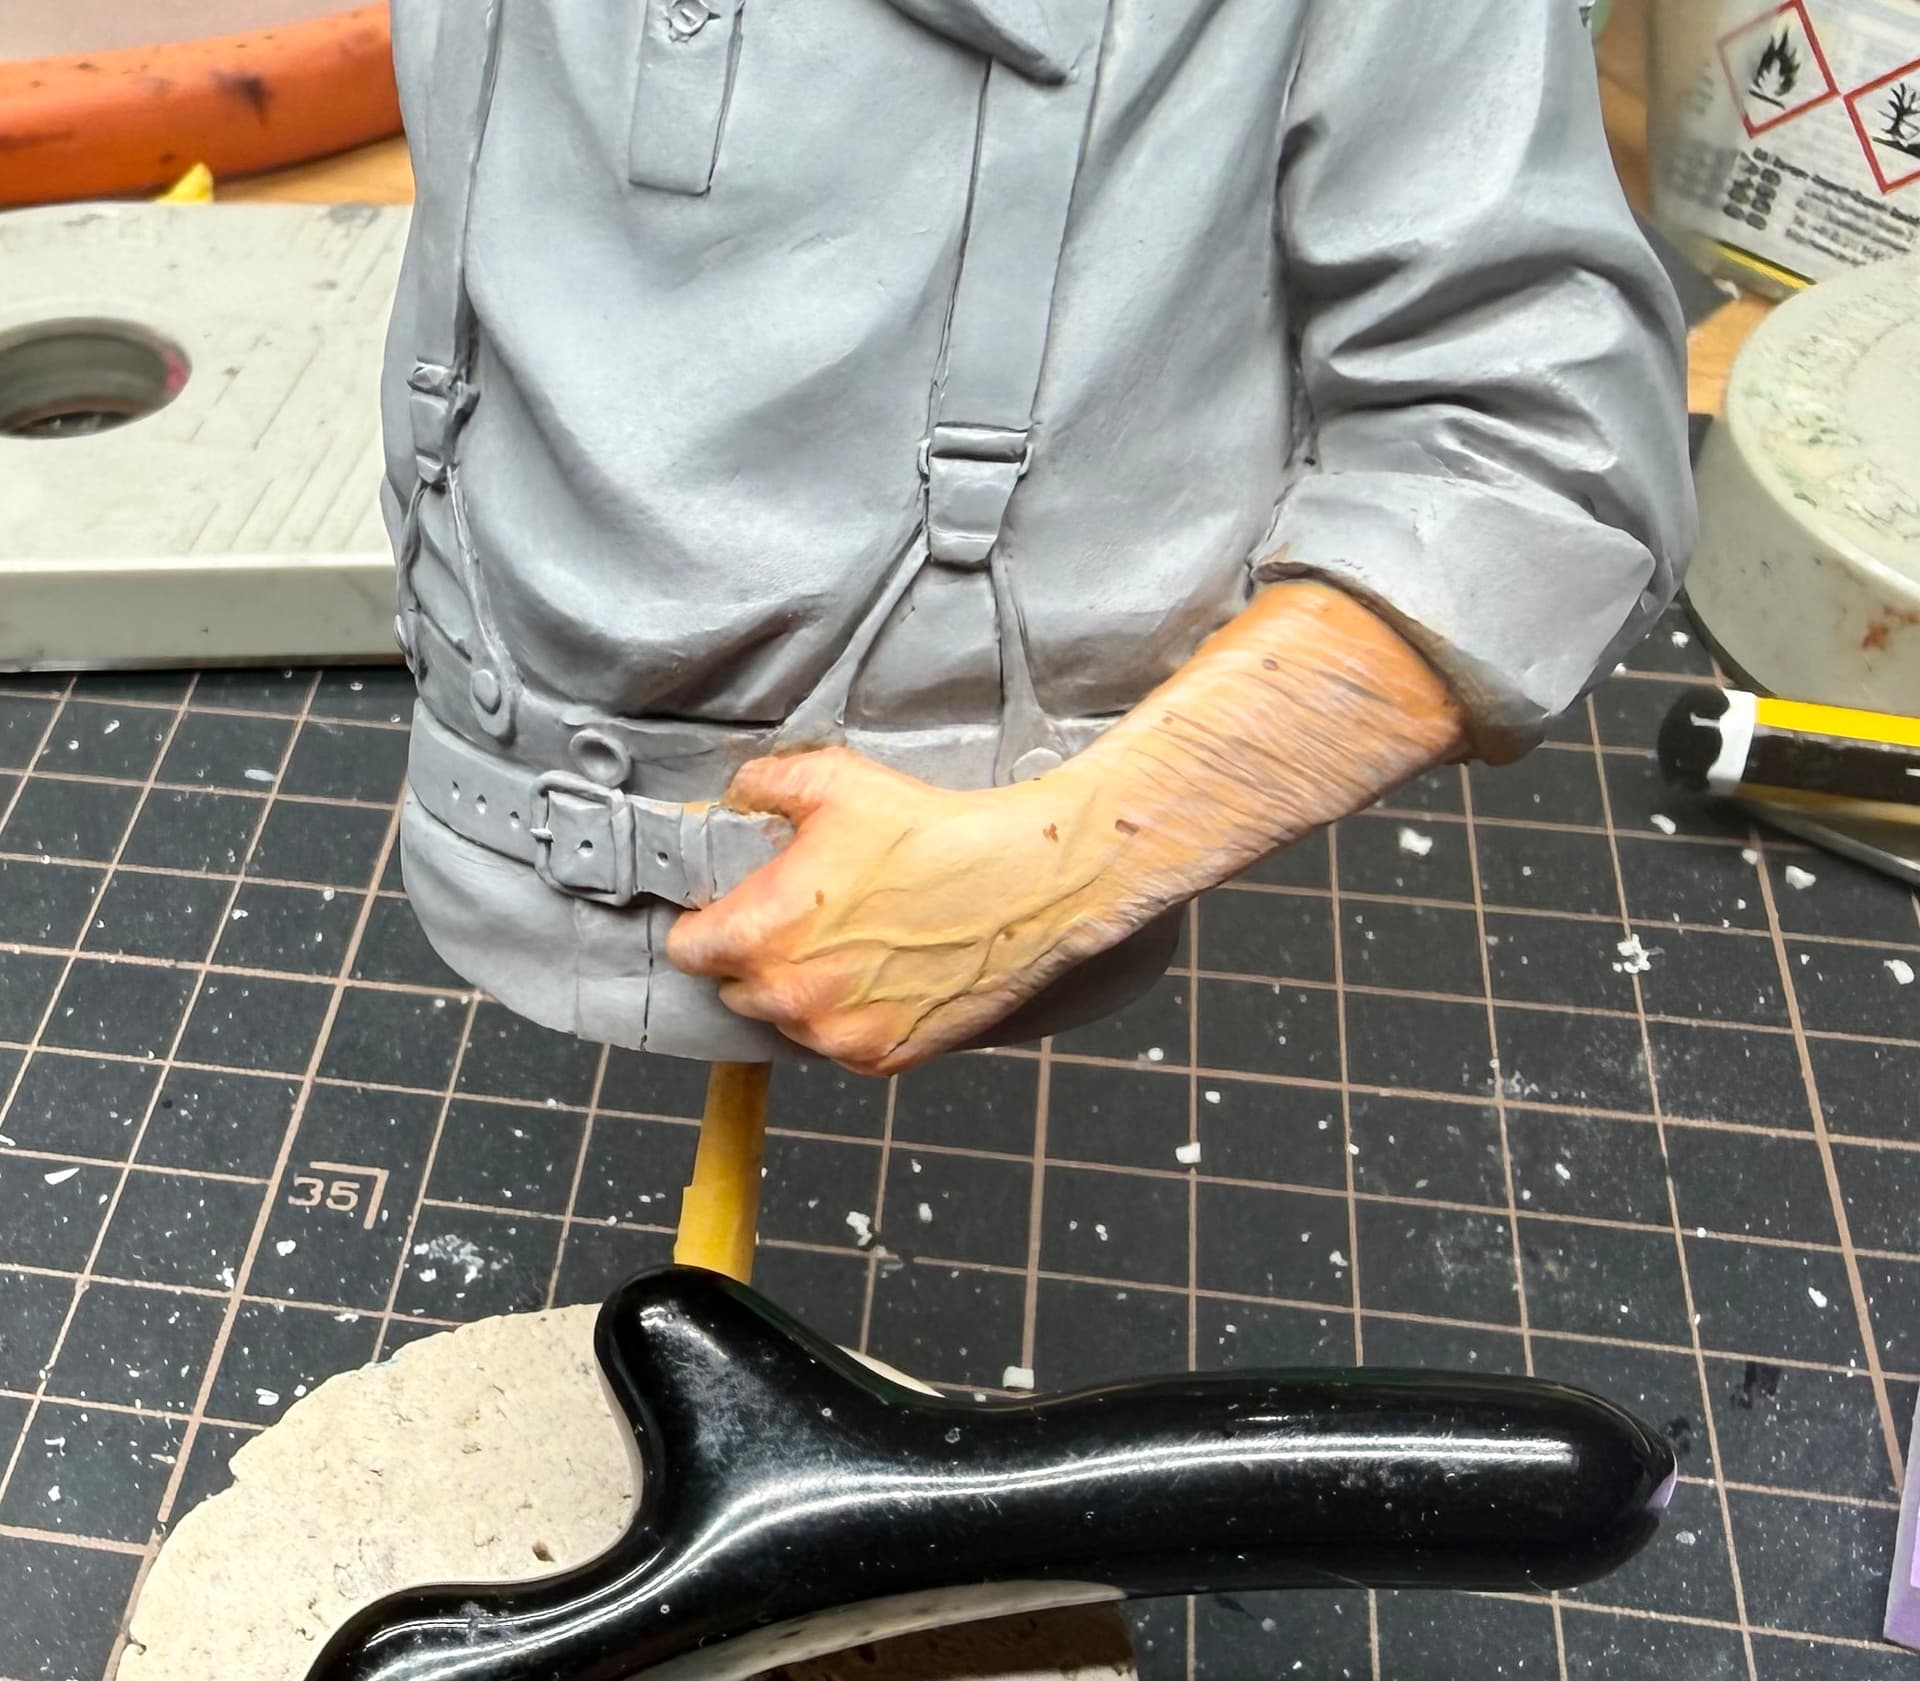
I’m not overly happy with the way the arm hair has turned out. It did not get off to a great start- messed up the direction of growth so it was different on one arm to the other! Thankfully the paint was quite light at that stage so easy enough to correct. Looking at the finished arms, I think my paint strokes are too long and too uniform- I am going to have to get a bust with bare arms to practice this technique on. But for this bust that is the flesh and hair all done.
I’ve started work on the hat and the leather parts of the trouser braces so I will get some pictures of that shortly.
Thank you so much my friend! The arm hair is something I have tried on a few occasions but I think I need a sort of ‘no pressure’ area to practice the technique in more depth- a bit like the way some modellers keep a ‘test’ mule’- like an old kit that you can try different weathering or airbrush techniques on.