Does anyone know if there are any plastic kits of the Gleaves class destroyers available? A friend of mine’s father was killed in the Battle of Cape Esperance on board the USS Duncan (DD-485) on October 12, 1942 and I was thinking about building a model of that ship for him.
Forgive my poor memory if I’ve asked this question before on this forum. Here’s some info on her:
Can you recommend the brand(s) and colors of paint that I should use when painting her? I obviously can’t tell from a black and white photograph what color she was painted as she headed out to her doom. To my old eyes it doesn’t look as if she had any camo painting - just straight gray or whatever color she would have been. Any help here?
The deck is “Deck Blue”, color 20-B. What you’ll get is a very dark blue gray ship, which is a bit of a shock to those of us who are used to light gray/ haze gray ships.
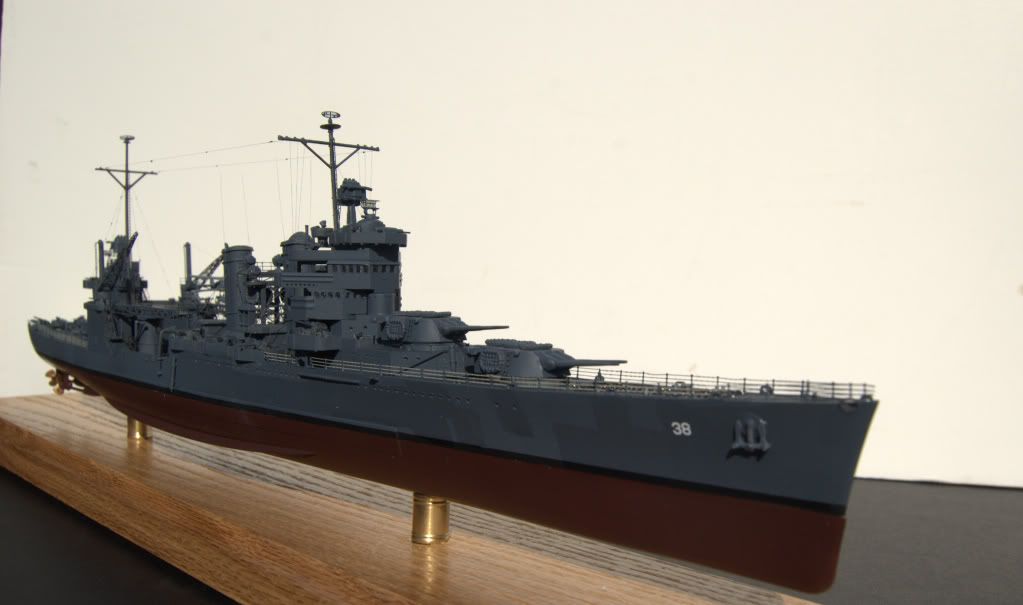
But that’s how they looked in 1942. Here’s my CA-38 USS San Francisco from the same battle.
I always assume that there was a store of paint in the locker for all things canvas- boat covers, dodgers, “blast” bags etc. It doesn’t hurt (helps) to assign those items a color of their own, as CapnMac noted.
It’s good to remember that things get replaced and repaired while underway. So, there can be shades of the same color, or ad hoc hues made up from stores.
Historical anecdote–my grandfather was aboard a ship that had a deck which spanned tow deckhouses. As the underside was not a deck, and it was “permanently in shadow” it had not been repainted in the change of Measure. So, it stayed in 5-L through different Measures.
This would be a subtle detail for the underside of a deck. From the list, Duncan had commissioned in Ms 12 (Mod), so any of a number of greys could be used for the undersides of deck overhangs.
Another detail that old salts will spot with a smile is to paint a small area in red lead and just leave it with moderately-neat edges
And I second that with said smile, CapnMac. Once, on *Ranger’*s portside island, there was a very large red lead peace sign painted by someone who shall be remain nameless, that was in full view of all on the flight deck for about two days before it was painted over in haze gray. Then it was a fresh haze gray peace sign over the older gray and could still be seen for months.
You are correct, I cannot support that a very dark grey, like gunship is historically, or scale-effect accurate. I should have said, that I like the look that results from using that sort of color.
There was a lot of variation to paint back in WWII, and deck paint tended to get beat to snot. The colors you mention are certainly more true for today’s paint. Depth chargers were painted tp match camouflage, but there was variety and some times operational tempo or conditions precluded repainting. There are some color photos of Buchanan in her Measure 12 Mod on this Navy Historical Center web page and this photo in particular shows a bit of what the deck looked like after a bit of time at sea.
Hi,you know I consider you one of my go to reasearchers.Here,s one for you.When aboard the U.S.S.OZBOURN -D D 846-She got painted lot ! After all we were flag,so we had to look sharp.I couldn,t help but notice our decks were what you could call DARK CADET BLUE(meaning the same shade as the MIDDIES blue blouses at the ACADEMY )
Which was actually a dark blue grey. I think we must pause and reflect here. Aircraft and ARMOR modelers are on the mark here.We must paint and allow for scale variance in color. This is NOT an easy task.I did the U.S.S.BUCKLEY in that so called blue that was called for.I know colors can affect the eye,s perception of shade and size.
The 1/350 model looks almost the same size as my 1/700 when viewed from a distance. Why? well it,s called color distortion.It,s a normal occurance.I do know that in ships that small(destroyers anyway) I will now stick to haze grey for them from now on. OH,I enjoyed the discussion on the previous post about the ARIZONA. TANKER-builder
No, I would not call it Dark Cadet Blue, I would call it Deck Blue, which was in use even after the war ended as the Navy tried to use up stocks. Here’s my deal: the Navy had STANDARDS. Yes, there was deviation from these; different batches of paint have variance and the paint changes with age, so you will see differences in paint color even today. But, they all start from something that is CLOSE to a standard color and formula.
Civilian paints have no such standards. Two companies may have a “Navy Blue” color, but they’re not formulated to the same STANDARD, they just have a dark blue that they call “Navy Blue.” I have no problem with someone using the “wrong” Navy Blue if it suits them - I firmly believe this is a hobby and you should paint you ship in a way that you enjoy. But, when someone comes asking for paint advice, I think they should at least have the opportunity to get both sides and choose for themselves.
“Here is the accurate start that you can then weather and fade as desired, if desired. Or just find something that looks good to you and have at it!”
I’ve just read Charles Landrum’s review of the Dragon Gleason class kit and I must say I’m intimidated. I will not be put off however as this is to be a gift to a friend.
I’ve never even seen PE much less used it and it’s been over fifty years since I built any warships (other than my recent build of the USS Constitution in my avatar). Would some of you please explain the correct order of build if I’m going to paint my model (as the USS Duncan DD-485) with Measure 12 as seen here: http://www.history.navy.mil/photos/hi-res/NH%2097000/NH%2097800.jpg (BTW, I realize that Measure 21 would be easier but the USS Duncan was sunk at the Battle of Cape Esperance on October 12, 1942 and it’s my understanding that she probably would not have used the over-all blue color scheme).
What order of construction to I plan? I’m going to brush paint since I don’t own an airbrush and I will be using LifeColor acrylics. I’ve also ordered the GMM PE set to augment or substitute parts from the kit’s PE set. When do I paint all the tiny little parts? Where do I paint them - on the sprues?
Why wasn’t she Measure 21? There’s a number of pictures I have seen taken in the week before she was sunk that look like a well worn 21 to me, but not a patterned camouflage. Anyways, to each modeler his or her own preference.
Brush paint is a great way to go, but do your prime coat with a rattle can. I use Tamiya white for this type of thing, but any other good lacquer like Krylon will be fine. Just go light so you don’t get runs. Just make sure the primer color is different than the color coat, otherwise it’s hard to judge coverage.
Prime the PE before you apply it, Pre paint it the color coat if it’s a different color than the structure it’s mounted to, otherwise paint it after gluing it on. That helps hide the glue.
I personally wouldn’t suggest priming PE before application. Every layer of paint or primer applied will flake away when you bend the parts. Plus the fact that primer would thicken the parts (that’s what it’s designed to do), just doesn’t suggest it’s a good idea. ALL photo etched parts are cleaned thoroughly at the manufacturer (per EPA requirement), so there’s no need to primer. I have been designing and using photo etched parts since their invention, and never had a problem with paint sticking. Every bend will cause paint flaking and require touch ups as you go, but that’s the nature of the beast. All the primer in the would will not change that.
Like primering, brush painting PE parts will thicken them considerably and fill in small details, so I recommend airbrushing the entire fret with the most prevalent color of the ship with a THIN coat. Then leave only the other colors to brush painting with THIN paint.
Painting PE after application is a royal pain. I personally never understood why people do that, but that’s me. It works for some folks, so power to them. Painting railing for example, that is close to a bulkhead is nearly impossible to paint the inside facing the bulkheads in spots.
Hiding super glue spots is super easy. After the model is completed (I mean DONE), I spray the entire model with a THIN coat of clear dull coat. This gives an even finish to every part of the model and hides any shiny spots.
That’s how “I” do it on my models. As you have read others do it differently. If you have more questions about PE, check out my web site. I sell a cool “how to” CD called working with Photo Etched Parts. You may find it helpful. As was so eloquently put, “to each modeler his or her own preference”.
Mike don’t be too intimidated by the kit. It has many fine parts, but you don’t have to use them all. Some of the PE parts are optional upgrades for the plastic parts. The doors, bridge wing supports, and 20 mm gun shields are supplied in plastic and will still look good. You can leave the gun sights and seats off of the 20 mm and 1.1" guns and they will still look better than anything else on the market. The other parts are pretty easy to locate and attach. I would suggest using wood glue on the PE as it is tacky and gives you time to get them located.
The Buchanan and Duncan were built to the same set of plans and the only thing you really need to do different for that ship is use the alternate searchlight platform that is also on that parts sprue. Duncan was painted in MS-21 when she sailed for the SW Pacific so the paint job should be relatively painless.
As far as fit goes, there are a few fit issues with the kit. The forward part of the mid superstructure needs to be sanded a bit to fit properly to the forward deck. Check the build threads on the forum at ModelWarships.com for some help. There are many and you can get a lot of tips there.