well i have been working on this one a long time put it down for over a year cause of having a baby. now i am trying to finish it up. working on the soldiers all day today so hopefully it will be done soon. i would just post the pics here but i have totally given up on that because i used photobucket no luck and now kitmaker i can preview just fine but pic never shows up but anyhow here is the link to my album at kitmaker if anyone wants to take a look. http://photos.kitmaker.net/showgallery.php?cat=17854 any criticism is welcome will help me out in the future . thanks guys happy modelling!
You need to type [ img]…[/img ] with your photo’s url where the dots are, and remove the spaces between the first bracket and the i, then the last bracket and the last g.
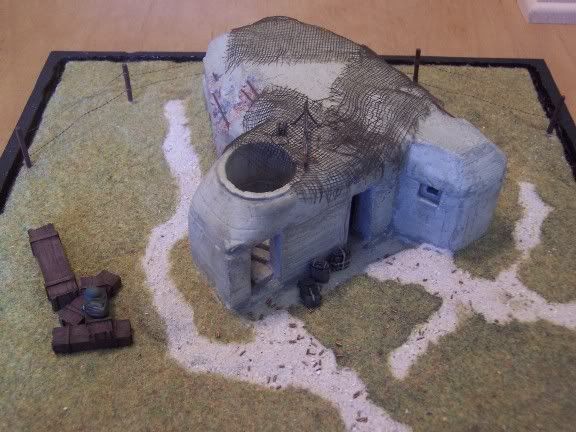
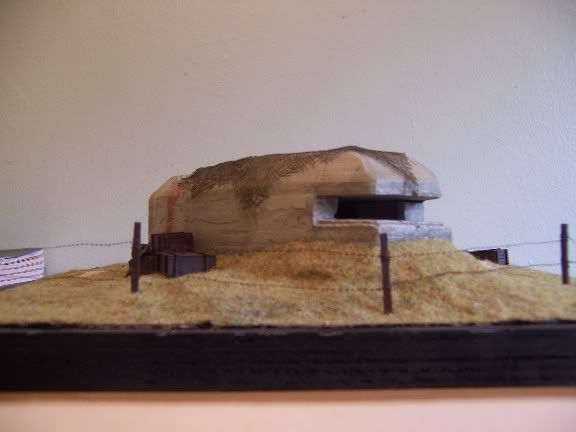
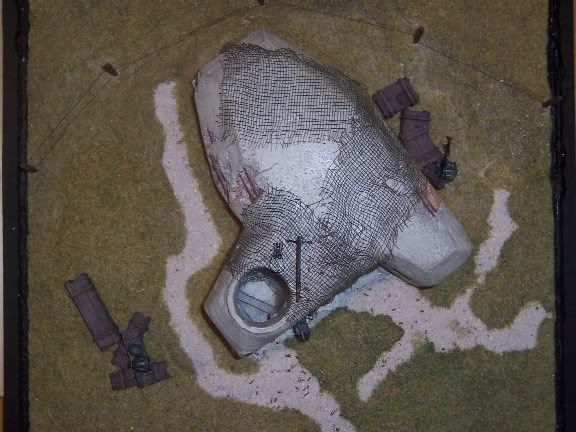
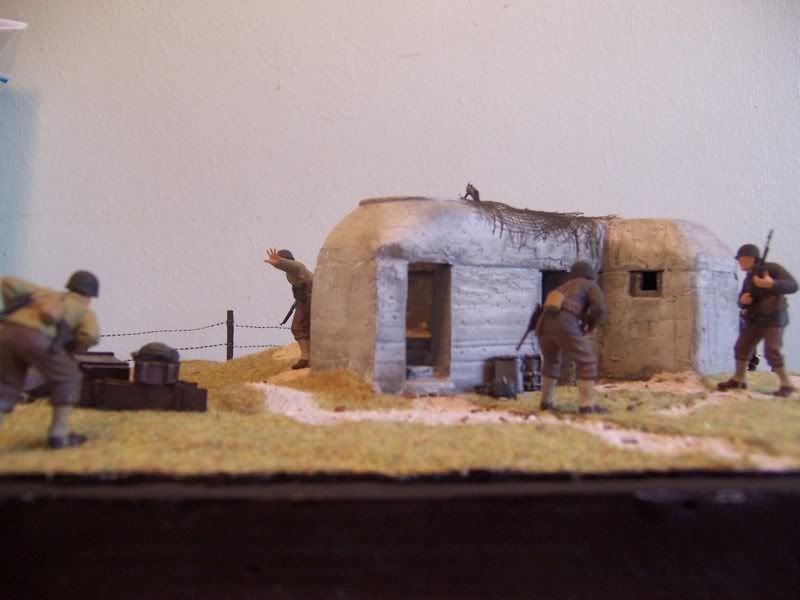
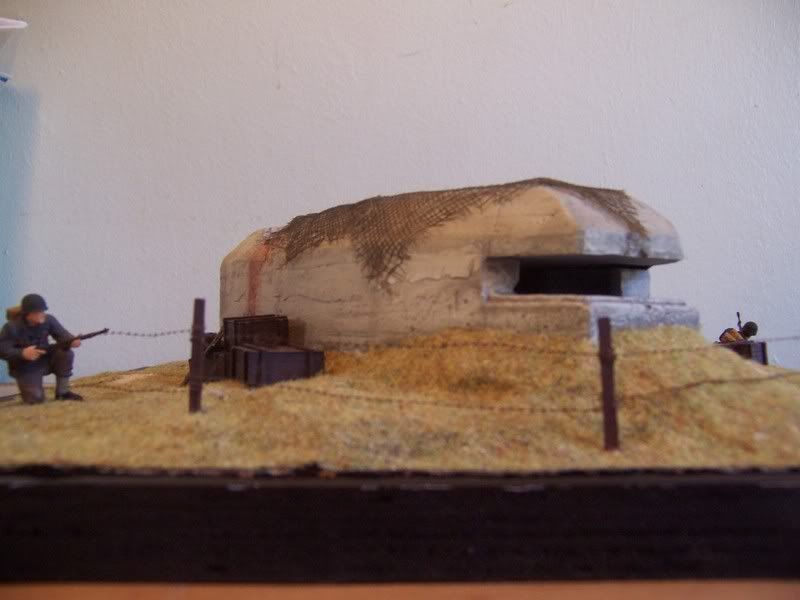
A couple of suggestions; Verlinden’s box art doesn’t really display this bunker correctly. These types of pillboxes were buried into a hillside, so that the front gun aperture would be exposed, but the rear of the bunker, and it’s entrance, would be protected by surrounding earth, with a trench leading to the entrance, as shown in this photo;
Although this isn’t the same type, you get the idea.
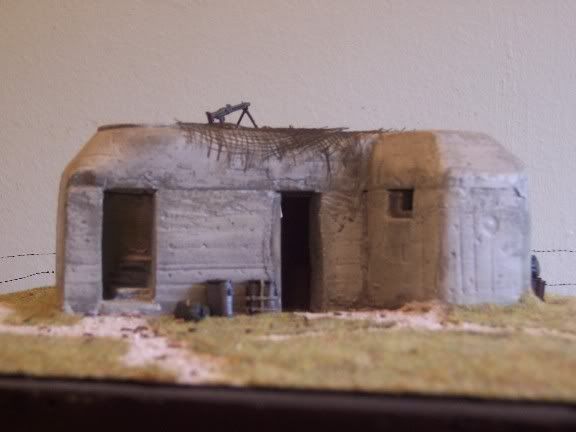
The main entrance also needs a thick steel door. The Tobruk pit does not need a door, but it’s entrance should be below ground level, connected to the main part of the bunker by a trench. I’ll see if I can find some more photos or a diagram to help illustrate this.
thanks kykeon . unfortunately for me i have tried that a million times to no avail i can preview the pic fine then when it goes to post somehow the script gets messed up. i guess it is my computer i have no idea. but thankyou again for the info . kenny
thanks again ky. i am almost done with it now so i wont be able to get it historically correct at least i know for next time research research research always makes a better model my problem is i get to happy and rush right into building
Verlinden himself didn’t do all his homework on this either, so don’t worry about it too much. While not identical to the model, this may very well be the bunker Verlinden styled his from;
Verlinden has been known to cut a few corners while producing their products. I think the same may apply here. Fittings like stove pipes, ventilation openings, the ladder on the side, doors, etc., are all missing from the kit. The shape of the bunker is somewhat simplified too.
Notice how the sand has eroded away from around the base of the bunker in the above photo. This would have been completely covered with sand 60 years ago. Many bunkers left at Normandy have completely washed into the sea or toppled over from erosion around their bases, here is just one of many in this condition;
I built this kit too. I also didn’t bury mine in the ground either. []
I didn’t know it should have been buried until long after I built it. I’m planning on scraping the diorama and rebuilding it in a different setting, this time setting it in the ground as it should be.
What else are you planning to add to your’s? Some figures perhaps? Looks good so far!
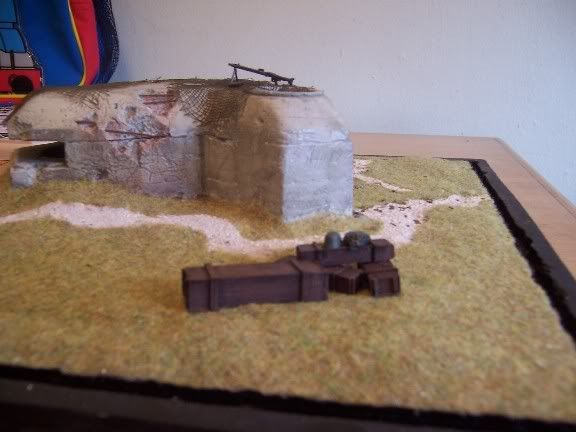
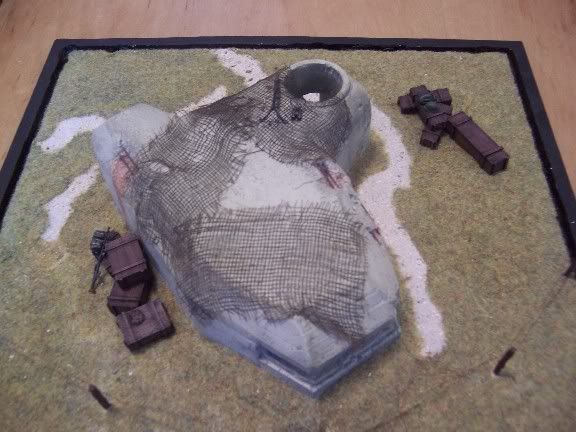
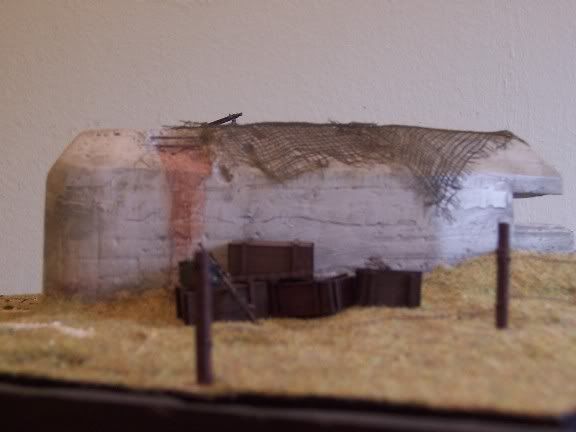
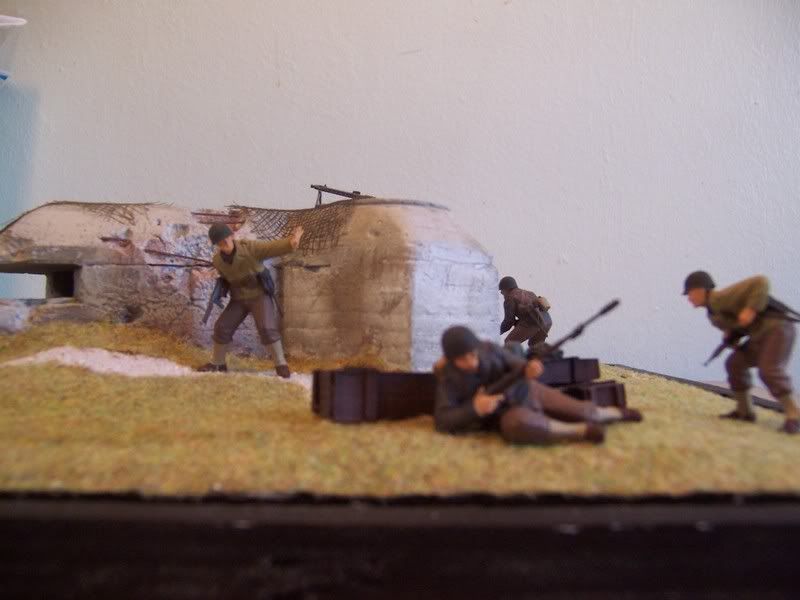
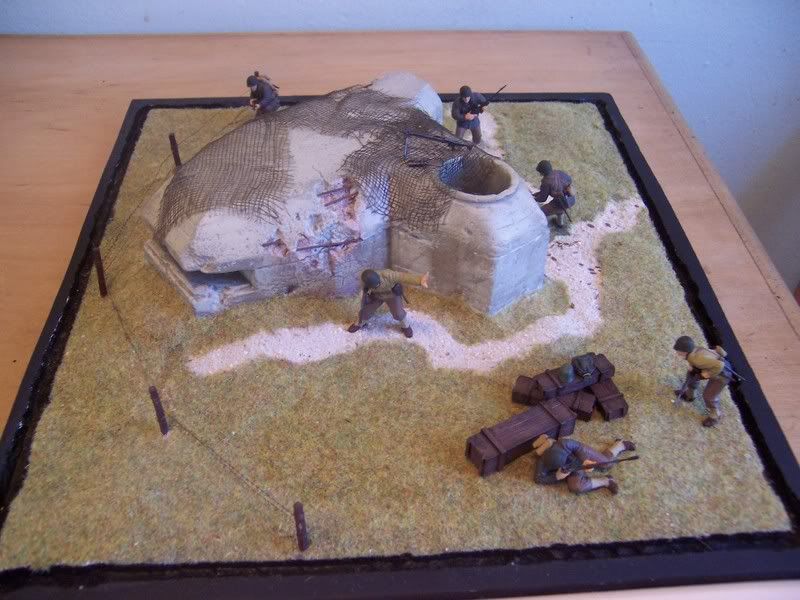
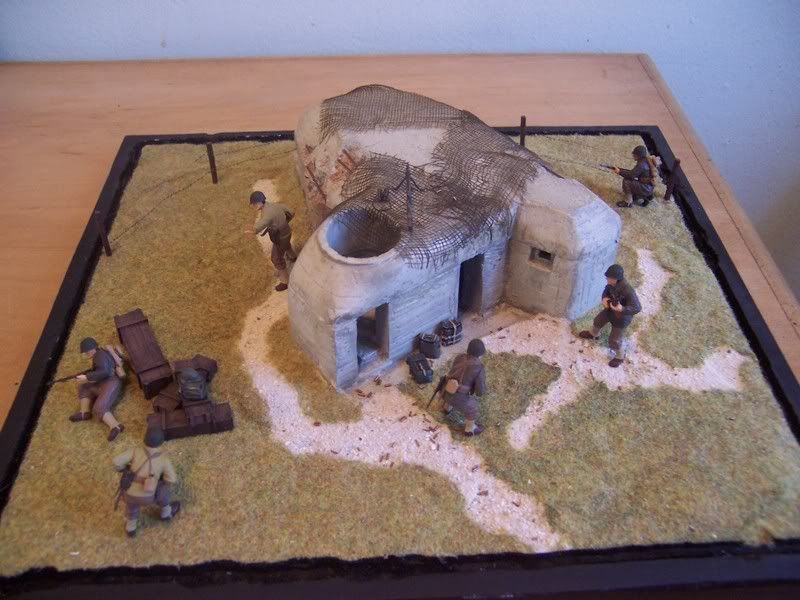
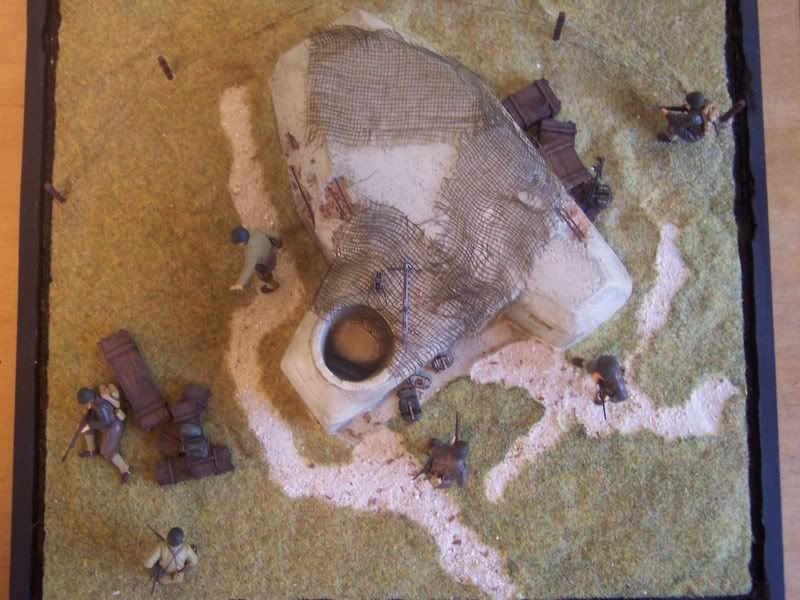
wow thanks for the photos ky. the last one how it is teetering would be an interesting dio to do . i definately think the first one is the one verlinden was trying to produce . and by the looks of it the kit is a lot out of scale i think the kit should be bigger. i wish i would have seen that pic awhile ago i would have done a beach head dio i am just finishing up the tamiya assault infantry set. pretty much they will be clearing an abandon bunker. eventhough i have been modeling a long time my skills still arent that great but i get enjoyment out of the builds and i am satisfied with what i do
The kit is also missing the angled roof portion over the main door, as seen in the photo. Other than that, it appears to be the same bunker. I have several books on German bunker design and construction, with quite a few photos and drawings if you need anything else in terms of photos or the like.
finally got pics to post thanks steve used firefox. now one more question how come i cant just copy and paste into the message box on firefox lol hey at least i am getting pics to post now
Hey Kenny, The bunker looks great! Have any luck with the patches yet? I’m not sure I understand the ?? regardig Firefox message box… In Photobucket, check in the small box under the photo you want to post, then go to bottom of page and click “generate IMG”. That will prompt the next page; click address in 2nd to last box, copy, then paste in message box in Firefox’s FSM forum. I hope this is the answer you’re looking for. Again, the bunker looks awesome. SteveM
thanks steve . i copy from photobucket but when i go to paste in the finescale box it wont . i really dont mind typing everything in as long as my pics post i was up till 1 30 am working on the soldiers a little more to go then i try the decals so hopefully everything goes well. thanks again for the help and the decals steve hope to post some more pics today and finally finish up the dio so i can start on the two group builds i am in . kenny
Still unsure of what a group build is. Does everyone make their own model of a specific subject at thesame time, or do they all work on one model, passing it over to the next guy after a certain timeframe of work? I know I sound ignorant. Well, I guess I AM ignorant. SteveM
lol steve you arent ignorant a very good question. it all depends on the GB i am in one where we are all building F16’s at the same time in a certain period of time . The other GB i started was the military veterans GB. we are all building what vehichle ship plane helicopter you used or serviced in the military. so basically everyone buys a model of the same type or whatever the group build calls for and we set a timetable for it to be done and share our progress and ideas on the subject we are building. i hope that answers your question steve. so hope i am done with the bunker tonight and i can start on the two builds
well i just finished up the dio. so i will take some new pics and post them tomorrow. hey steve sorry to say the 101 patches two went to the wind so they will have to wait for the next dio i need more practice with them. by the way steve do you know if they make modern patches in the subdued colors for my group build i am building my hummer from the 101st
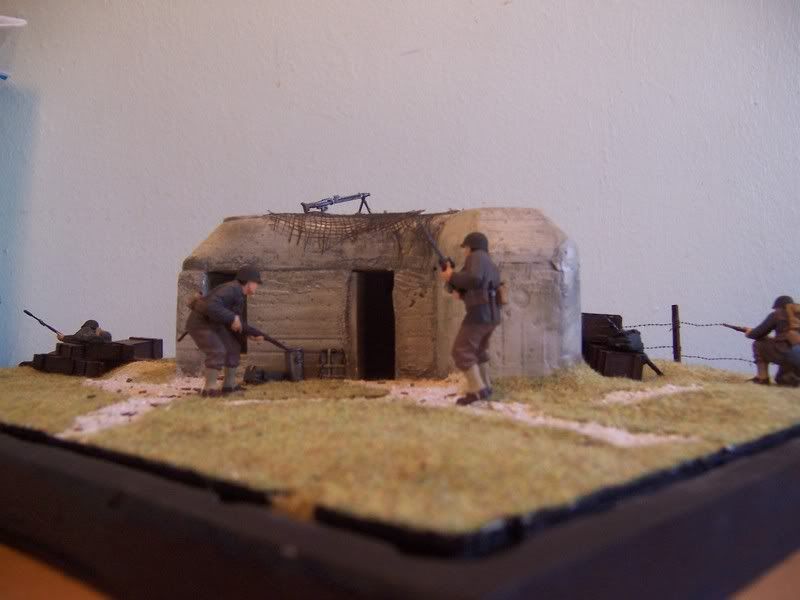
Hey Kenny Dio looks fantastic! They got that monster surrounded, time to clean it out.I like the grass a lot. Paint job looks well done, exciting piece. As far as Archer, check out: http://www.archertransfers.com/ I’m gonna get some things from them this weel, I think. Looking to buy some British chevrons for my next project tentatively titled “Asswhip in Arnhem”. SteveM
thanks steve. just have to add that final detail of the 101 patches gonna order a few things from archer soon too. thanks zokissima i appreciate the compliment not the greatest model builder but i love doing it
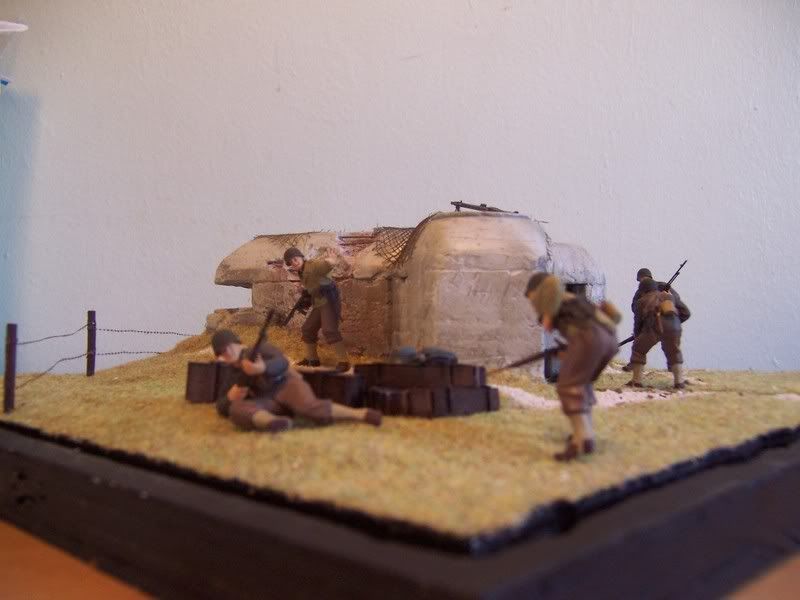
Nice groundwork and painting on the bunker. The path is convincing for a setting near a beach where the soil would be sandier. Nice camo net, too. Little hard to see any detail on the figures, though so I can’t comment on that.
If the bunker was abandoned, I’d have guessed the departing occuants would have taken their weapons with them, though. Never know when your going to meet some unfriendlies.
I like all the figures except the guy on the ground behind the boxes. His pose and position don’t fit with the other guys. I know that’s what Tamiya provided, but he doesn’t ring true in that position. If he had to fire, he’d have to roll over and reposition the rifle. If he’s covering the rear, he’s exposing himself and none of the other guys are indicating a threat from behind him.
Are those gerry cans by the door? If they are, it looks like they were molded to be placed on a vehicle with straps. They’d work better if they came from an aftermarket set without he strapping. If that’s not the case, disregard this paragraph.