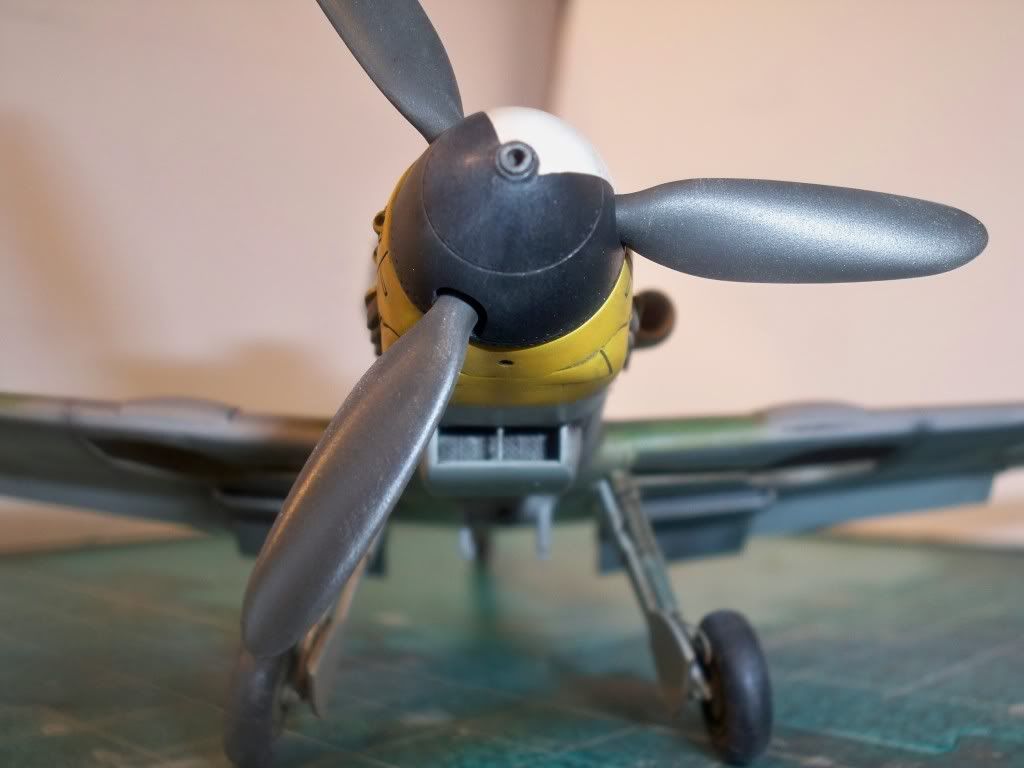
Forgot to mention how good that decaled spinner looks over the almost finished cowl.
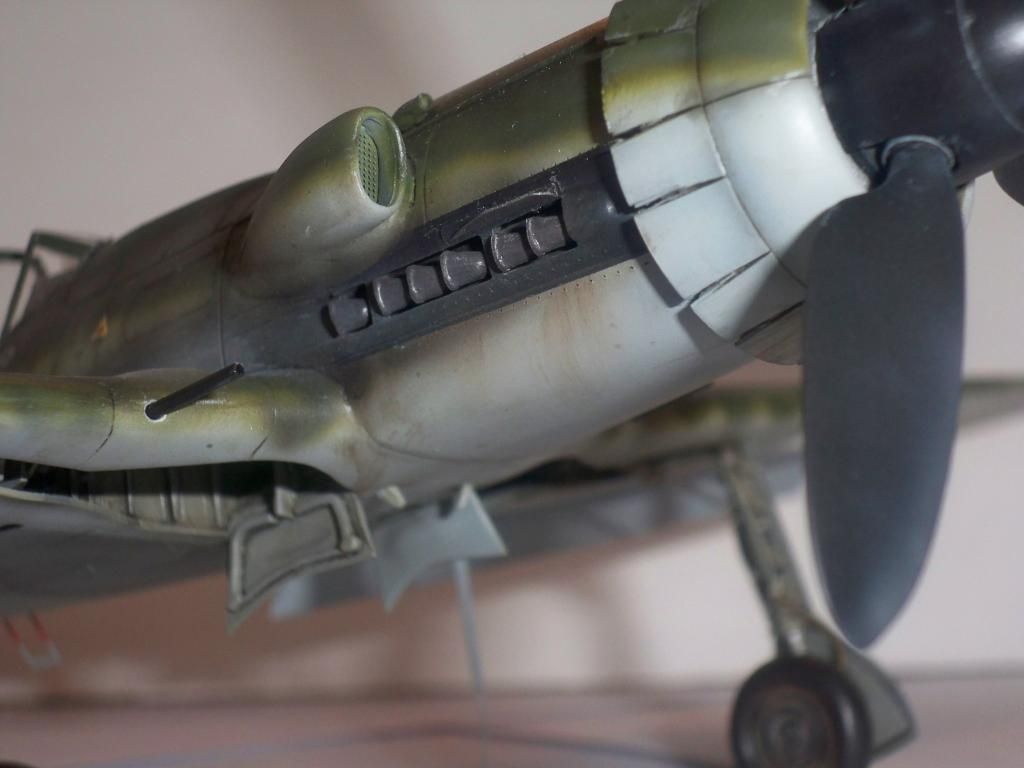
Wow, I hadn’t yet realized how big the spinner is (relative to the cowl ring). I am really glad I didn’t have a fit when I broke several of the spider-like fuel lines or whatever they are and just cut them all off. Now realize they would have been not only hard to see, but impossible to see!
Nice spiral Greg. The Gloss looks nice too. Keep practicing on the Gloss. Don’t forget to keep the airbrush farther away from the surface, say 3,4 inches or so, maybe more. Try different psi too to see if it makes a difference.
You have to remember that youre building an F-8 and I’m building a D model. The A/F series has ALOT smaller spinner than the D model did. More detail will show behind your prop. The cooling fan behind the prop obscures some of the detail but the spinner doesn’t “block” ALL the view on the A/F’s as it does on the D’s. Nice job on the spinner. Now a wash and a coat of flat and youre done with that puppy!!!
Nathan, thanks. I will keep experimenting. I had a thought yesterday. I’ve been trying to spray gloss coat with a lot of air : little paintflow (IOW, the trigger pulled not very far back). Dawned on me that might lead to the ‘paint’ drying in the air, hence the eggshell satin finish I keep getting. I visited the Alclad site and found a how-to that states Alclad actually recommends a single action brush for their products. No idea if this includes the presumably acrylic-based Aqua Kleer Gloss. Any thoughts on the matter?
I think it’s just a matter of experimenting more and finding out what works.
Joe, I didn’t realise that re the relative spinner size of 190 variants. So much to learn!
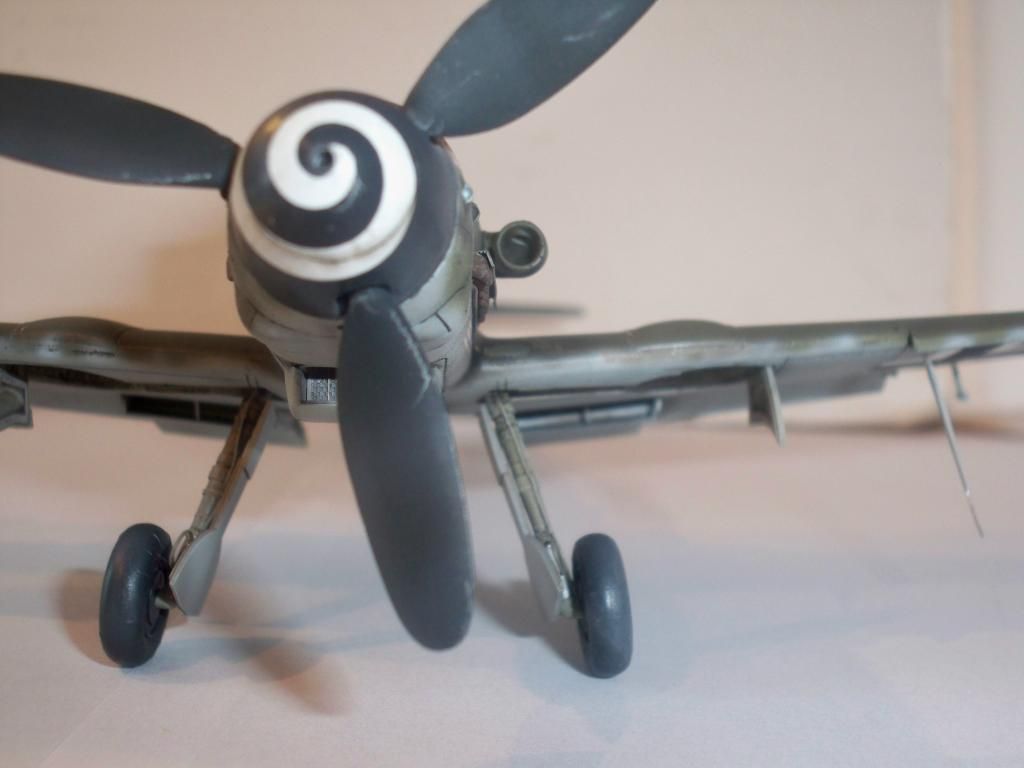
What would you recommend for a wash on the spinner? I hadn’t given a wash a thought.
If you used an oil based clear coat then go with a water based paint/ thinner mix for the wash with a drop of dishwashing detergent mixed in with it to break the surface tension so it won’t have a tendency to bead up. The detergent mixed in allows the wash to “flow” like an oil based wash. It’ll really bring that seam in the middle of the spinner out!
Ah, so it’s about making the seam stand out. My second “D’oh” in as many days. Thanks, Joe! I know that is a always a reason to wash, I just wasn’t thinking of that seam in that way for whatever reason. I will give it a go!
I have a question that I’m sure some of our FW-190 experten can answer. Revell released a pre-painted “Pro Finish” kit of an Fw-190 in 1/48. Does anyone know which variant this model represents? Thanks for any help!
Greg. I would suggest the opposite. Lots of paint flow, pull the trigger back a lot. Keep psi around 18-25?? Giver her lots of paint, just before it starts to run all over heck. This means keeping the airbrush further away from the suface so you don’t get splatters and runs. You want a wide pattern with lots of overlap on each pass. Now remember Aqua gloss is pre-thinned(the paint industry rule is adding more thinner can affect the gloss) so you can’t control the end sheen. I don’t think its the shiniest gloss out there but it works fine.
And for washes on a black surface, aka a spinner, I go with a grayish/brown wash so its visible agains the black.
Greg: Your spinner looks awesome as well! Great job there, mate! The Clear Kote is really nice. It’s not fool-proof either, but It sprays like a dream and if you do what Nathan mentioned already, you should get a nice gloss finish. I had no problems with using an oil-wash over the gloss coat so far, but I only did so on a single tank model so far… We’ll see how things turn out when using it on a plane with a lot more oil washes…
Nathan, John, Joe: It’s the C-0. It has no fit issues at all regarding the wings (they are a perfect fit), nor the wing roots, but the fuselage halves are a bit tricky to get in line with eachother and that damn nose section is a real pain (the only really bad thing about that kit so far). I had to cut the whole nose off and replace it with another one supplied in the kit. I think I just screwed the cutting work up, so I can’t really blame the kit though… The kit is great, but It has some annoying little fit issues that coul’ve been avoided by just molding the kit with the right nose in the first place…
Ok, yeah. The C-0 Dragon kit has you cut off the kit nose and add the supplied resin one. Dragon was too lazy to mold a whole new fuselage and wings for the C, and just gave you the original H plastic with resin replacements to make a C. That’s why if I ever make a Ta152C, it will be the Hobbyboss kit.
Nope, no resin involved. They just added different sprues for the wings and the nose section. You still have to cut off the nose and replace it though…
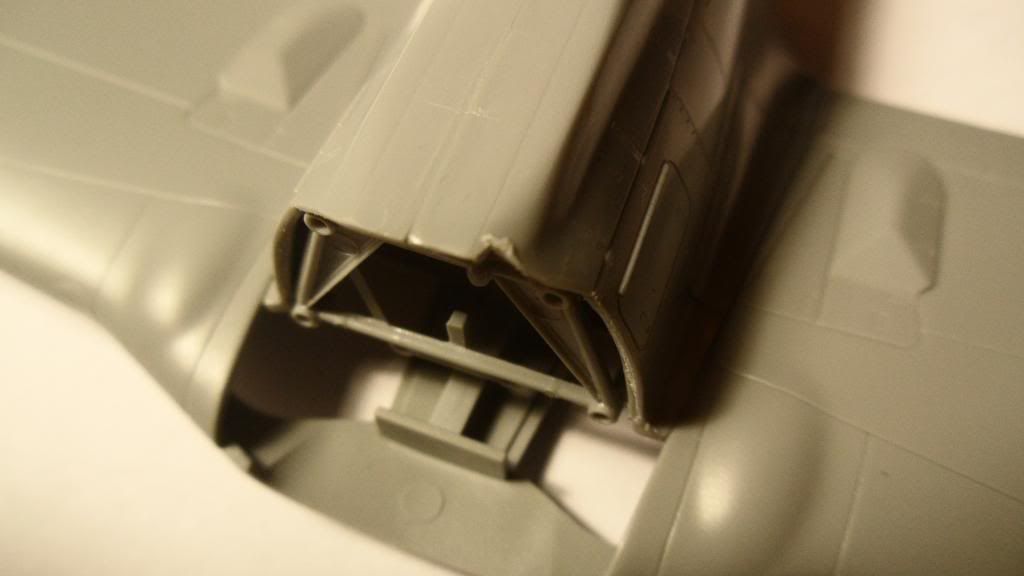
The wings are glued together, as is the fuselage (the cockpit can be glued in place from the below, so I could glue the halves together before painting the 'pit.). The fuse is only dryfitted to the wings and as soon as you apply a wee bit of pressure, it is perfectly flush with the wings!
This is where I screwed things up:
I cut the nose off using the thread method someone here suggested (I think it was Doug) and I had no problems on the first fuse half (right), but I somehow managed to cut out a nice chunk of plastic on the 2nd half…
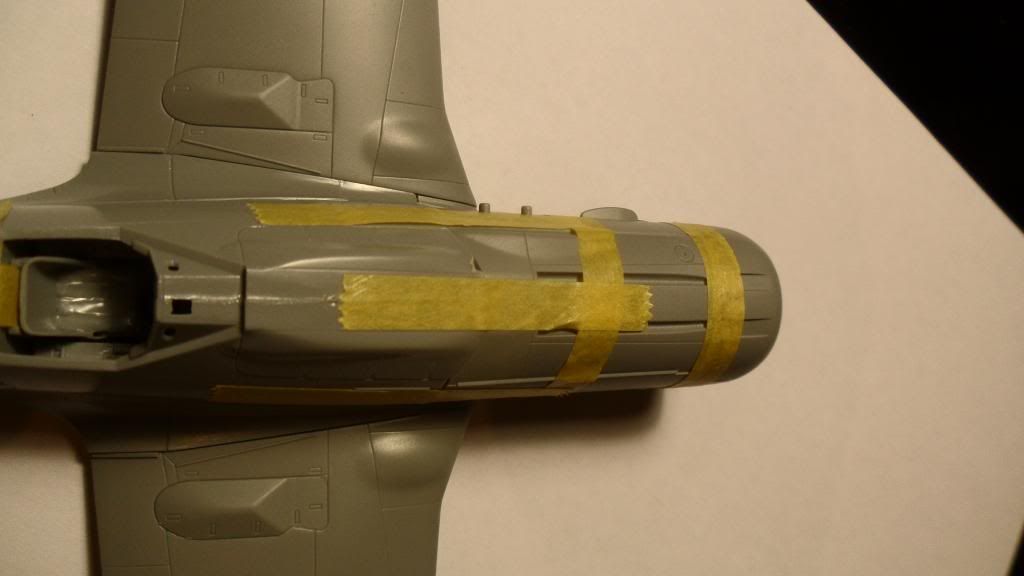
Dryfitting of the nose:
It looks like a nice fit on this pic, but I just held the nose in place with some tape. It is slightly pointing up when it is attached like this. There is a noticeable gap on the top of the fuselage when the nose is level with the fuse…
You can’t see it in this pic, but there is a slight step on the tail section of the fuselage and the rudder halves are not really lining up. Some sanding should do the job though…