Anyone out there with any good pointers on how to paint or apply it ? I have a jet that is going to require it, and in 1/72nd, no less…sigh.
Thanks in advance!
greg
Anyone out there with any good pointers on how to paint or apply it ? I have a jet that is going to require it, and in 1/72nd, no less…sigh.
Thanks in advance!
greg
You might want to buy some clear decal film and spray it the colours that you need.
After that, you can draw the camo patterns onto the decal and cut it out of the sheet and apply it in the right spot to the model.
I seem to recall a couple of years ago, a model of that Czech air force MiG-21 that was done up in low vis grey splinter camo in FSM’s reader gallery. The same technique had been used for the camo on it and it looked very good.
Another suggestion would be to enlarge a drawing (if one is available) and cut-out the patterns. Much like you would if you were going to use them for soft/ hard-masking, etc. Once cut out, trace the patterns onto 3M blue painters tape. Or spray a light mist of low-tack spray adhesive to the back of the paper pattern. Now, just lay out the patterns on the fuselage and airbrush the scheme. FSM authors: Darren Roberts and Senior Editor Paul Boyer did this for a 1/48th & 1/72nd scale F-18A “Fighting Omars” NSAWC Hornet years ago. The result was very good if I recall correctly. An idea for ya, good luck!
PS: References:
“Camouflage this adversary Hornet”
By: Darren Roberts
FSM, March 2001 issue, pages #28 through #31.
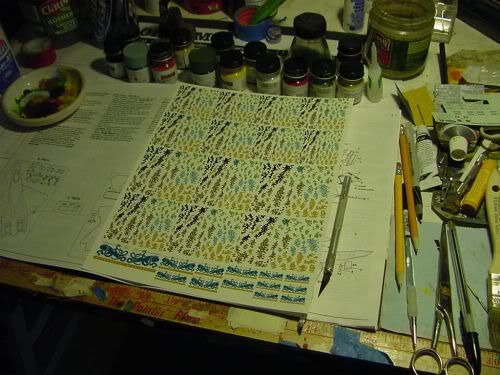
Talking with a graphic artist, (thanks Tom!) I decided to print out the colour seperations on a clear decal sheet…these will be applied to the multi-toned masked body in layers. Well, hopefully it’ll work…we shall see!
did manage to get the two tone base paint down today:
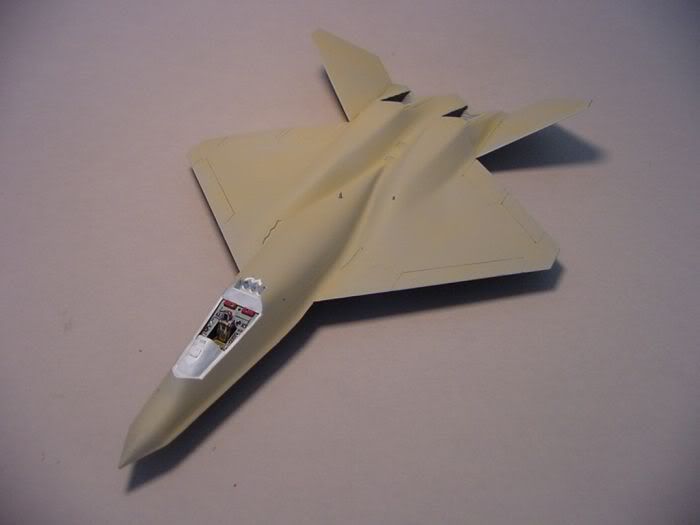
four hours of cutting and applying…this is going to be a loooooong job!
And I thought the Viggen pattern was going to be difficult!
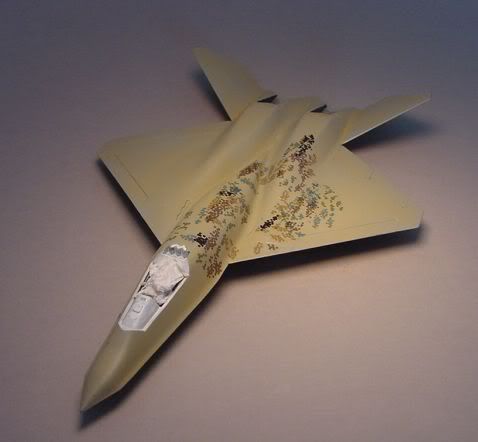
it is getting much easier…working the bugs out, so to speak!

more layers of dots…they combine to make up the pattern:

That looks great.
You are far more patient than I am… I’da done said “That’s it! No paint for you! One year!” [:)]
now, onto the bottom! This wraparound stuff is intense :

Lots of decals later…pretty happy with how it turned out !

made a simple mirrored base (no way I was going to let all that time on the bottom go to waste!) and an Italeri figure sets the scale:

and yes, there are markings!

For those of you interested in the build up:
That’s really incredible looking. Nice write-up too.
The camo works. Looking at the pics from certain angles, it’s really hard to pick out shapes and outlines. It just blends in. Proof of concept!
Um…um…um…Wow! [:O] Amazing work.
Thank you both very much! It was one of those “two in the morning” ideas that actually played out rather well.
greg