Which reminds me what a ditz I am. I’d been hinting at a countertop air fryer for a long time, but my domestic partner has used her veto power. I bought a large dehydrator, similar to yours but it is a dedicated box.
I had since realized I should have gotten a combo unit as you did.
Do you ever worry about putting food in the same space where solvent vapors have been floating around? I’ve been perusing about this for a couple of weeks now. No big deal, it’s just how my mind works…curious.
No but you should keep what you have, Greg. Cabinet style is nice.
What bothers me is two part paints, actually scares me they offer them for home hobby use. I all but ate regular enamels in 1/1 but when all the warning bulletins came around on two part catalyzed paints I took them to heart.
Don’t panic about it and use common sense, use an organic particulate mask good for solvents, latex or whatever gloves, safety glasses or goggles and your booth. You’ll be fine. But the isocyanates in the activators can enter through skin and eyes even in the curing process until the paint kicks. Unwary don’t realize this and might spray the stuff regularly with just a dust mask and improper venting and those folks are my concern…One shouldn’t try to beat or cheat the system in this case. I think your reading will support my claims.
I almost regret the purchase. Not sure I need anything that durable, and even though my vent/exhaust system is extremely good, I don’t think I need to be using such nasty stuff in the same house as my wife, for medical reasons.
I’ve only ever used the Vallejo primer. And while it can improve adherence I can’t say that it’s anything great. My first test will be against the plain primer.
My journey was similar. Vallejo is what I picked up when I started thinking about resuming the hobby in '19.
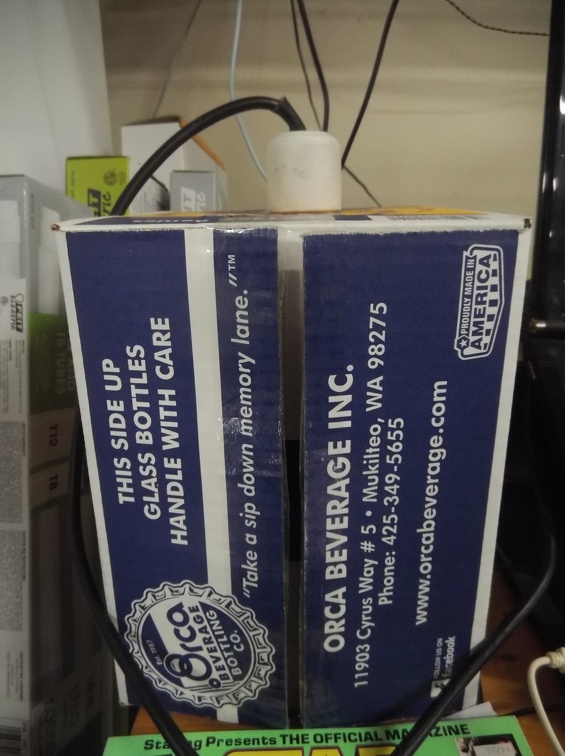
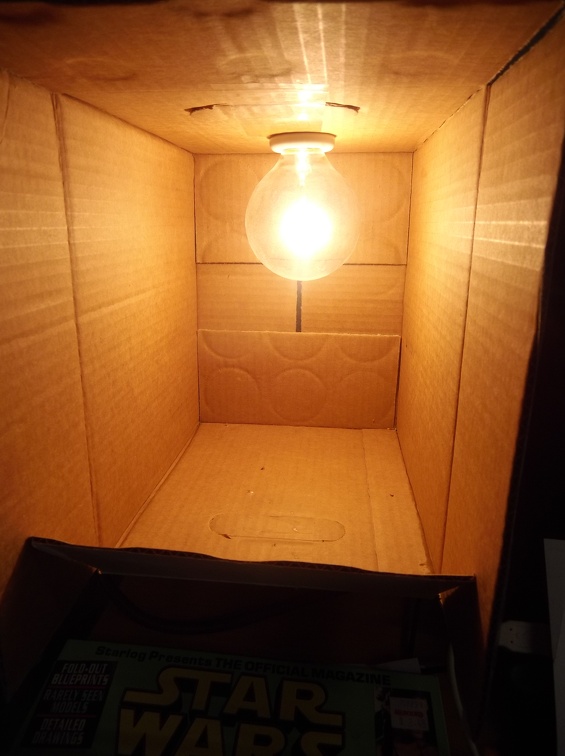
I just finished cobbling together a ghetto dryer out of a spare cardboard box and parts from an old heat lamp.
It’s a 60w bulb in there now. Let it run for about 4 hours while keeping it under observation. The socket is ceramic so very little heat transfer from that. Cardboard is showing no signs of discoloration and it held at 110F about 3" from bottom. Air flow is going to be ok given it will draw cooler from the bottom and vent the hottest at top where the bulb is.
Drying booth looks good. [Y] Let us know how it works out as your tests progress.
Do you have the lightbulb on a dimmer so you can control the temp? (That is Don’s (Missileman’s) idea, not mine)
I’d be very interesting in hearing your results testing Vallejo Surface Primer against other primers. As I said, aside from the fantastic leveling and detail preservation, I was never able to get it to adhere very well nor sand it. I’ve always wondered if maybe I got a bad bottle all of those years ago.
OP: I would think 110f would be fine for most things including enamels. If it maintains that temp and has air movement you should do well with it. You will know as you get to using it more.
Don or anyone interested: On another note, Amazon lists incandescent bulbs from 15-500 watts or more.
You can also find ceramic heat emitters with a pretty wide range of wattages that screw into an ordinary light socket. Used those for my reptiles when they were babies.
It holds 110F very consistently. If I were to add a shelf to it and get to 8" from bottom the temp rises to120F consistently.
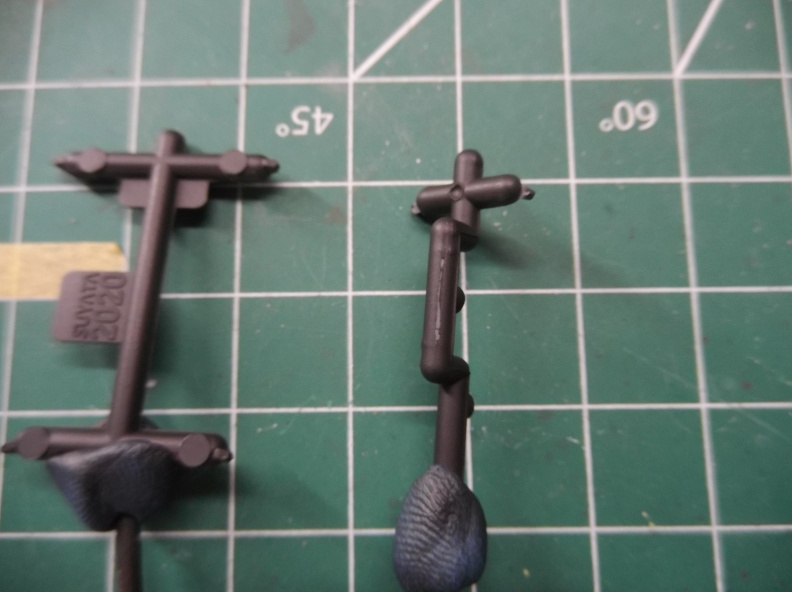
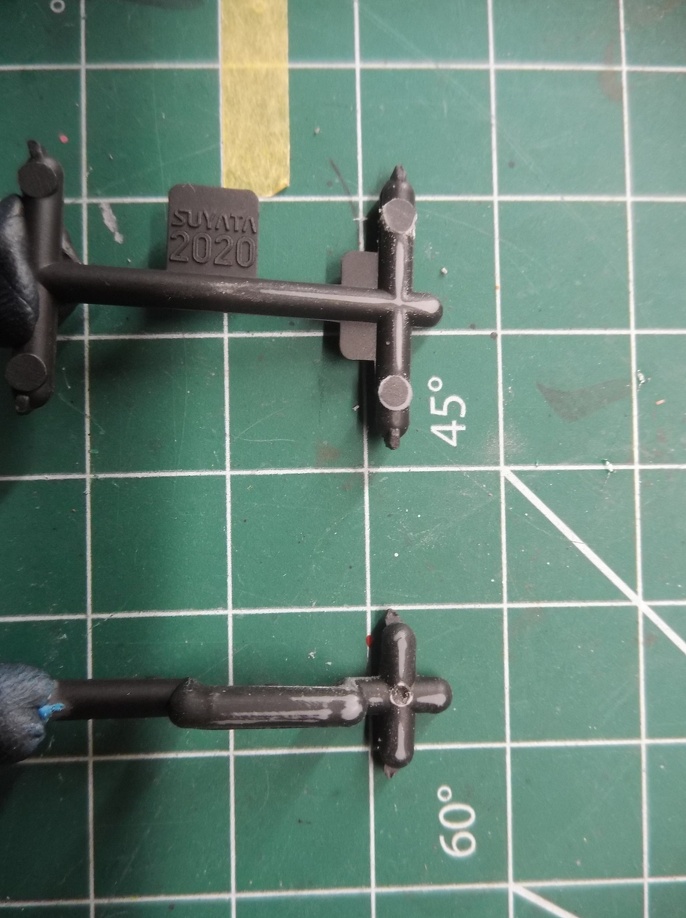
I took a sprue and painted it with primer and cut it in half. One half went in the Bulb powered dryer and the other half sat out. I let them cure for a solid 12 hours.
The sprue in the dryer came out with a very smooth dull finish. The one that dried outside had a tacky feel to it and a slight sheen.
Running the edge of my thumbnail along the long stem. It scuffed the dried part but lost no paint. Same test on the air dried part took chunks out.
Applied the sander to the heat dried part and the primer came off with some effort in a beautiful powder. That was a first for me!
The other sanded off as well but left chunky black bits in the sander.
New favorite painting tool is my cobbled together heat box!
Thank you Greg for starting this thread (even though I didn’t use a food dehydrator)!
There’s no dimmer on it. It’s full power on. I left a couple of small gaps by the handle punch outs at the top. Ostensibly to promote airflow and allow some of the heat to escape. Luck was on my side as I hit 110F right off the bat.
I’ve had the exact same problems with Vallejo primer as you. It wasn’t the bottle either. I’ve used primer from three different colors and bought across different years and whenever I tried to sand it the primer peeled rather than sanded. The results with the drier were the first time I had been able to successfully sand a part and even get the edges to feather!
I’ve started curing all my Space Sub’s parts in it since completing this test. Fingers crossed the results are consistent.
That’s exactly the point we are stressing I think,that by using the heated drying boxes of whatever iteration that results are not just faster and stronger curing of paint, but more consistently so. Congrats on your rig working well for you ! It’s exciting whenever we step out in faith and things turn out so well.
You’re surely welcome. I’m as thrilled as you are with my new machine. I don’t put off paint jobs anymore, dreading the drying time. (that makes no sense, I know…but it’s how my ditzy mind sometimes works). I’m glad you were incented to make a drying box…gives me somebody to share my enthusiasm with. [:)]
I’m amazed at your report about the Vallejo Surface primer. I’ve never read of anybody being successful in sanding the stuff. That sure adds credence to OMG’s comment directly above (about dehydrator/drying box effecting more than just drying time)
I haven’t personally used Vallejo primer but every review points to it being non sanding. And they all air dried the primer and at that I don’t believe any gave it 24 hours air dry time as Vallejo themselves say should be the standard for the primer. So indeed that’s a surprise to me too that it was sanded smooth as reported here after heat drying.I’ll probably still use Mr Primer Surfacer and Stynylrez primer though. I’m familiar with their capabilities and have no reason to look beyond them other than the curiosity factor…
Seeing the examples others in thes forum taking those leaps has made it easier for me to do so. Each one has been rewarding in it’s own way. Even the ones that didn’t quite turn out