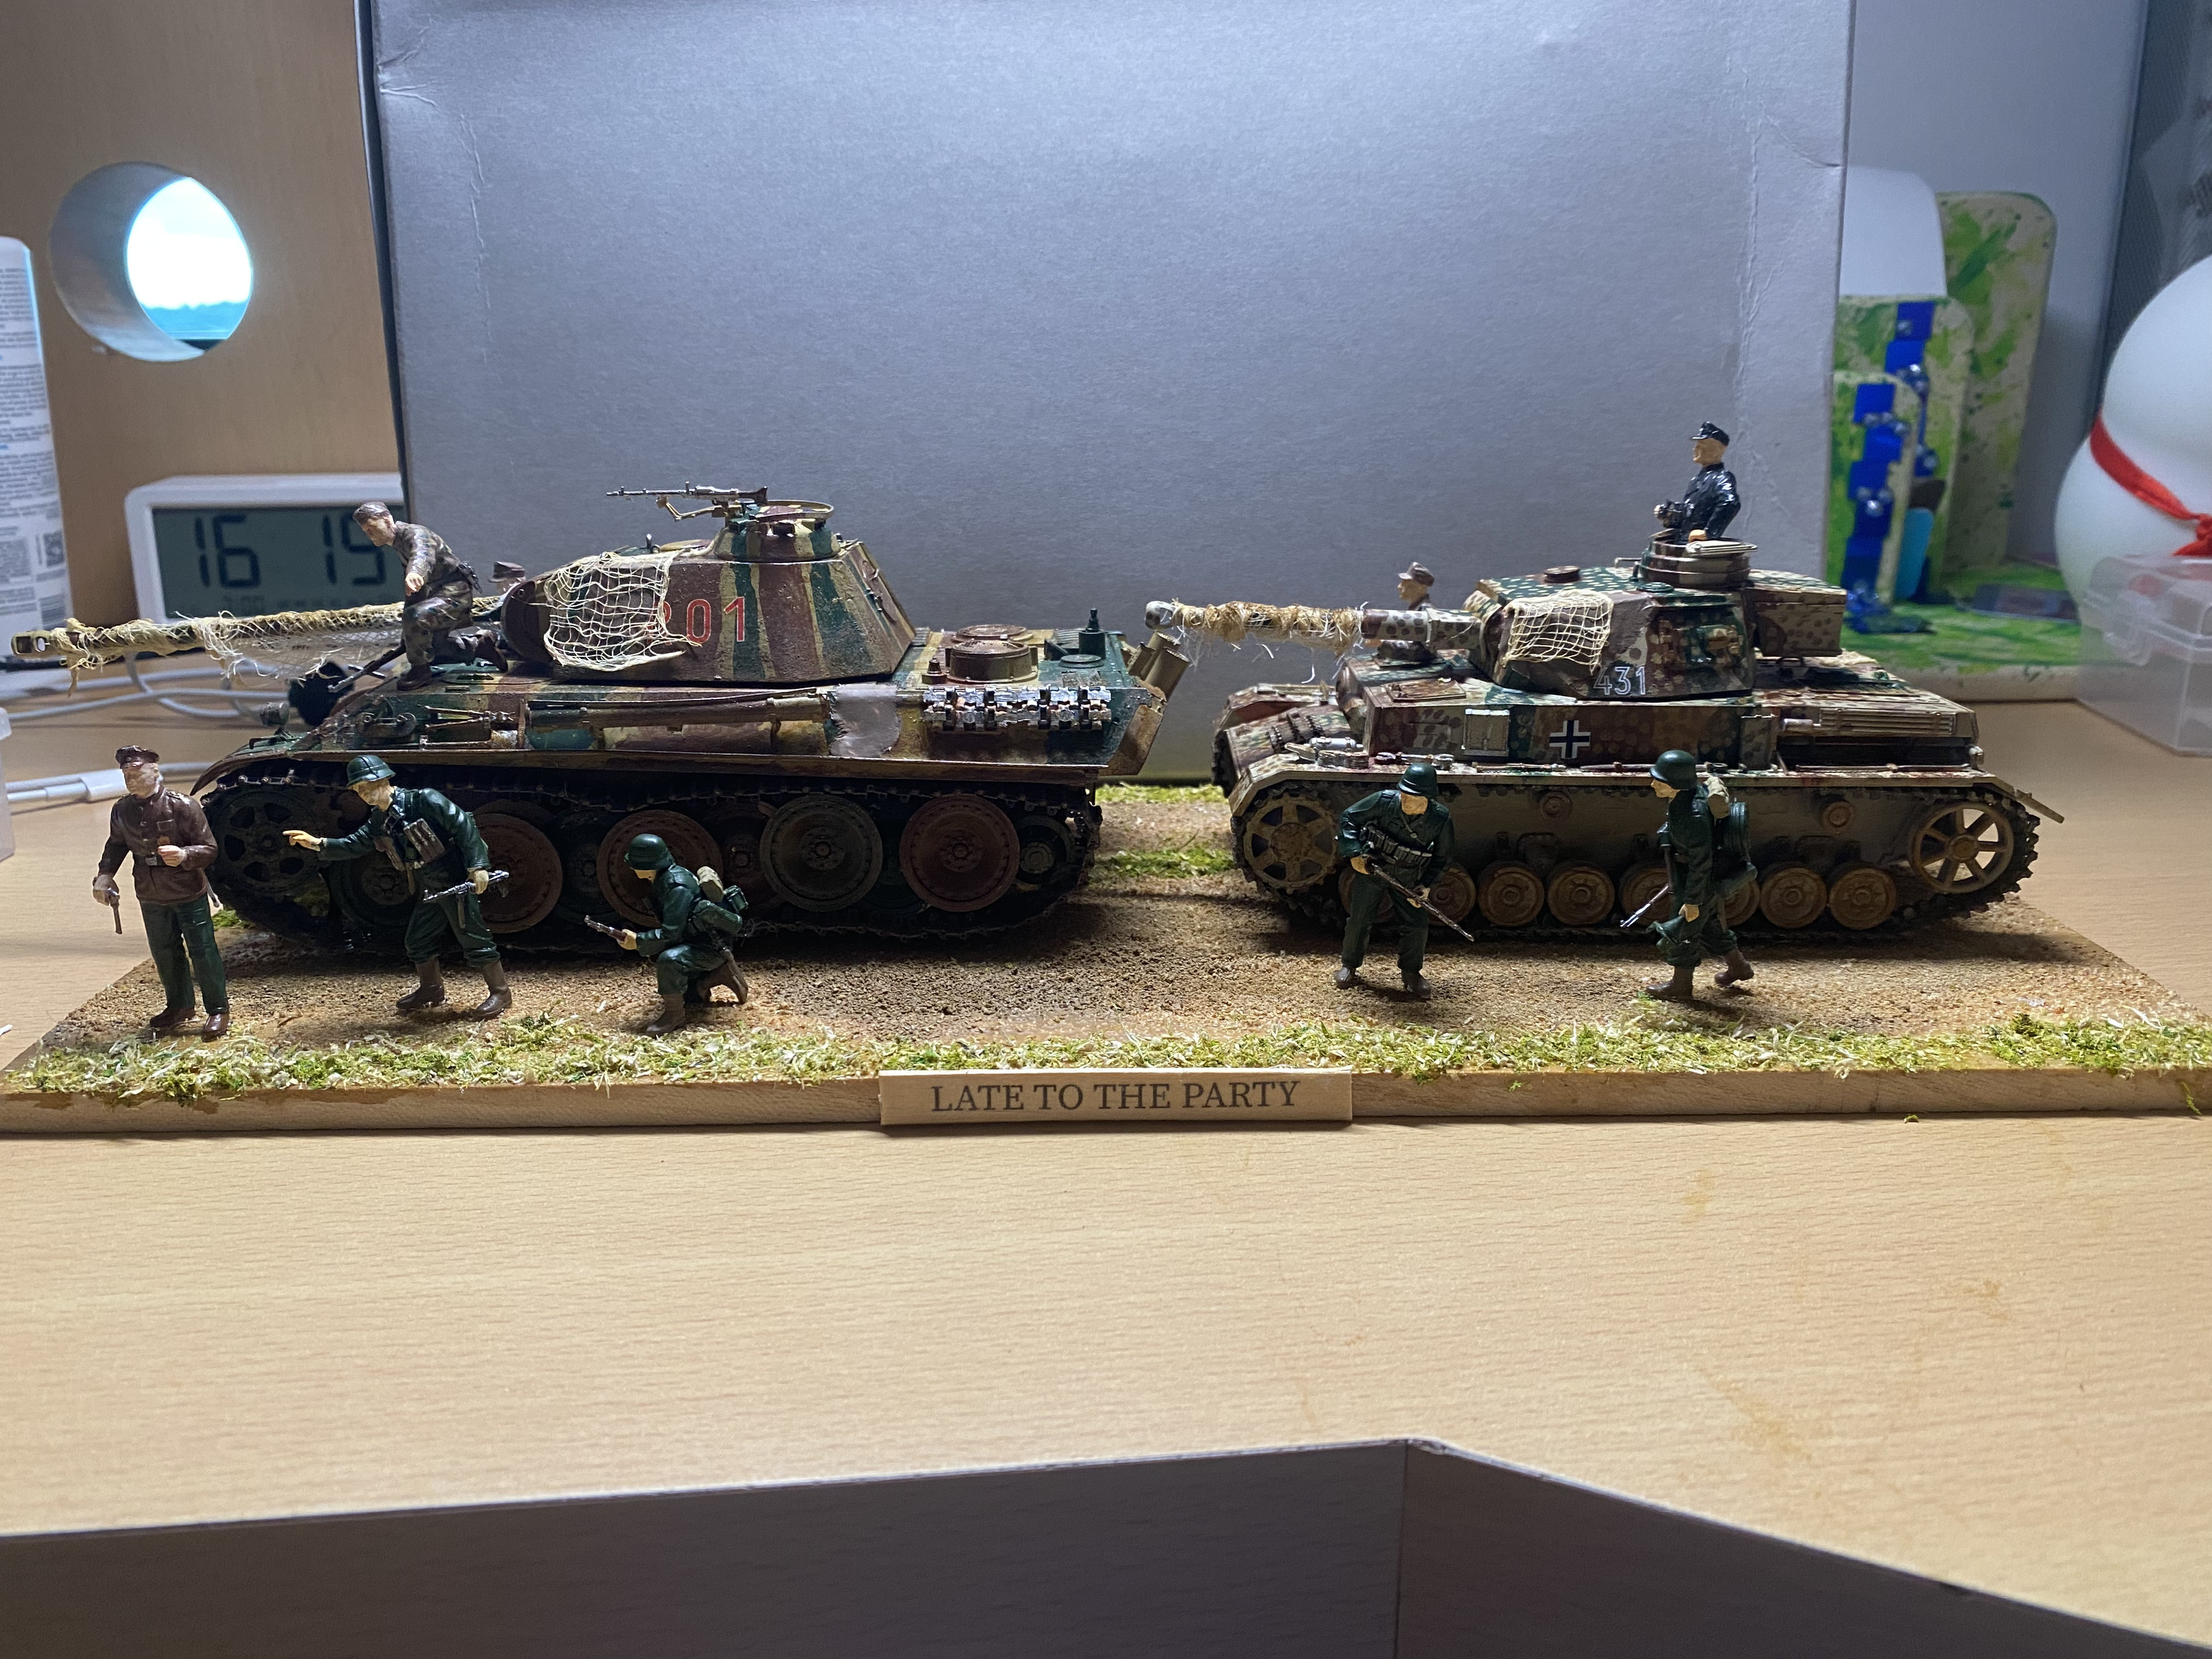
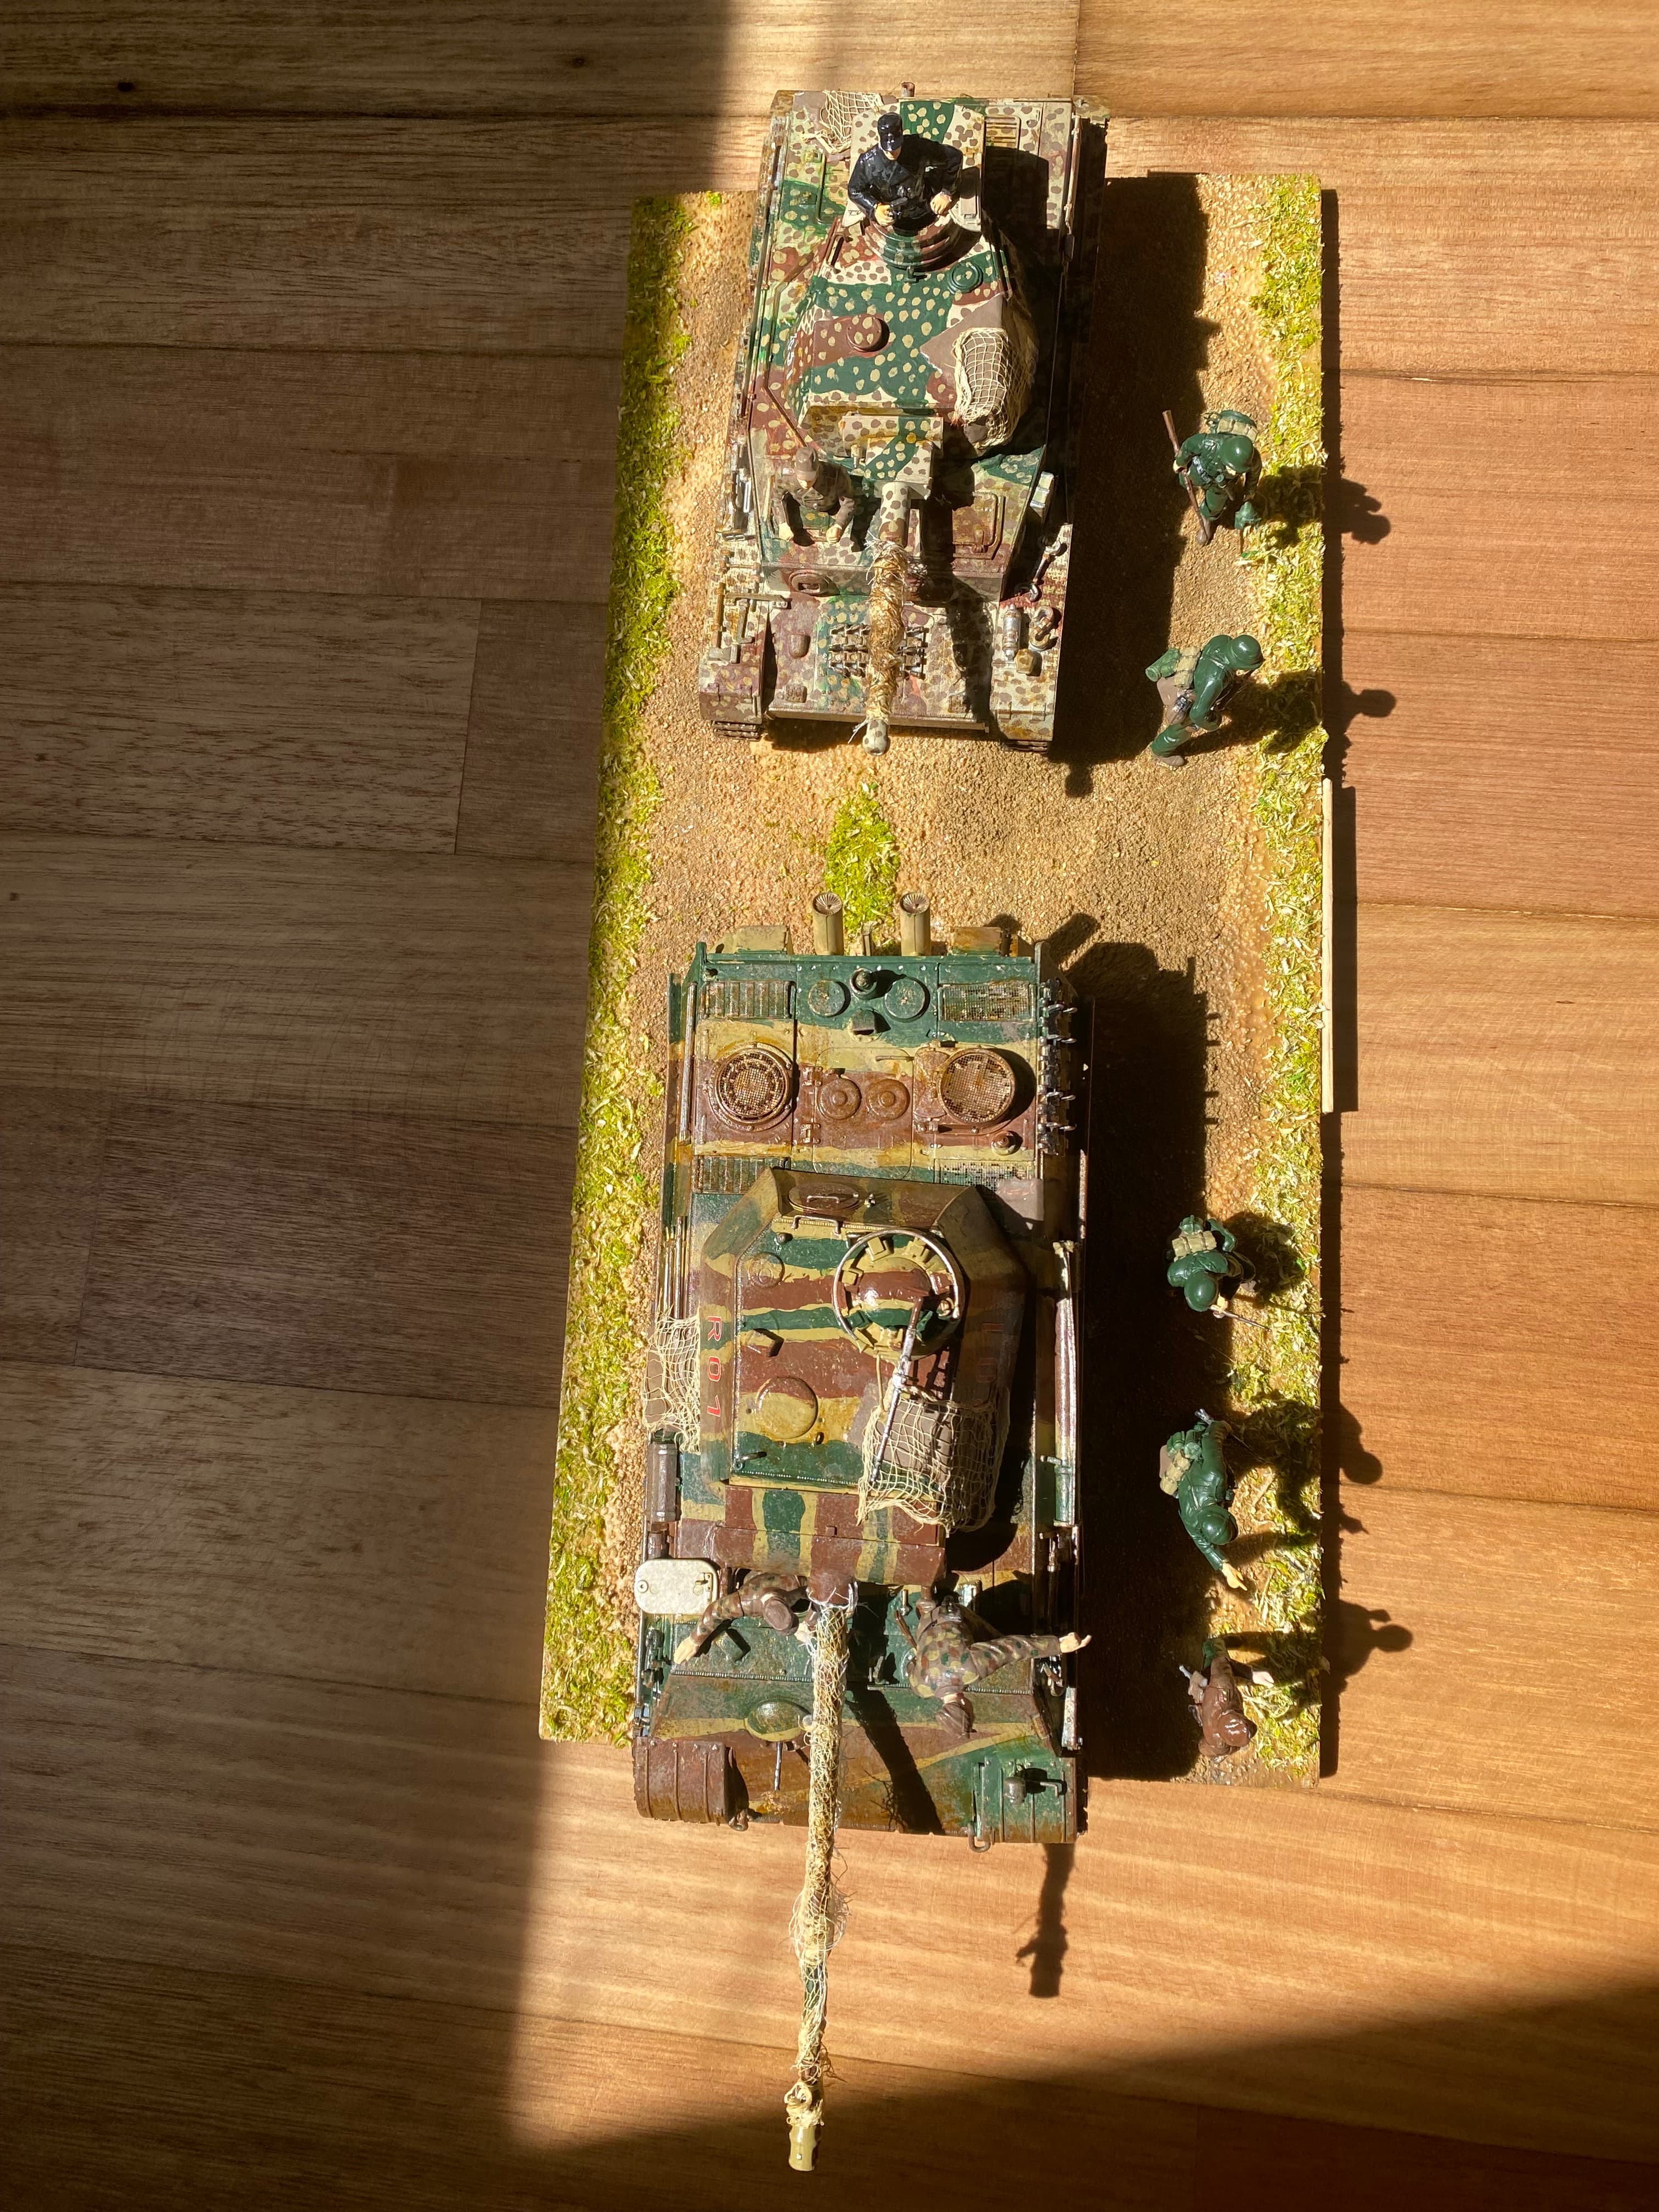
My first model and diorama ever, RFM Panther and Dragon Panzer IV. Brush painted
7 Likes
Do you have more photos of this model?
Hello!
In Poland we’re good at criticism!
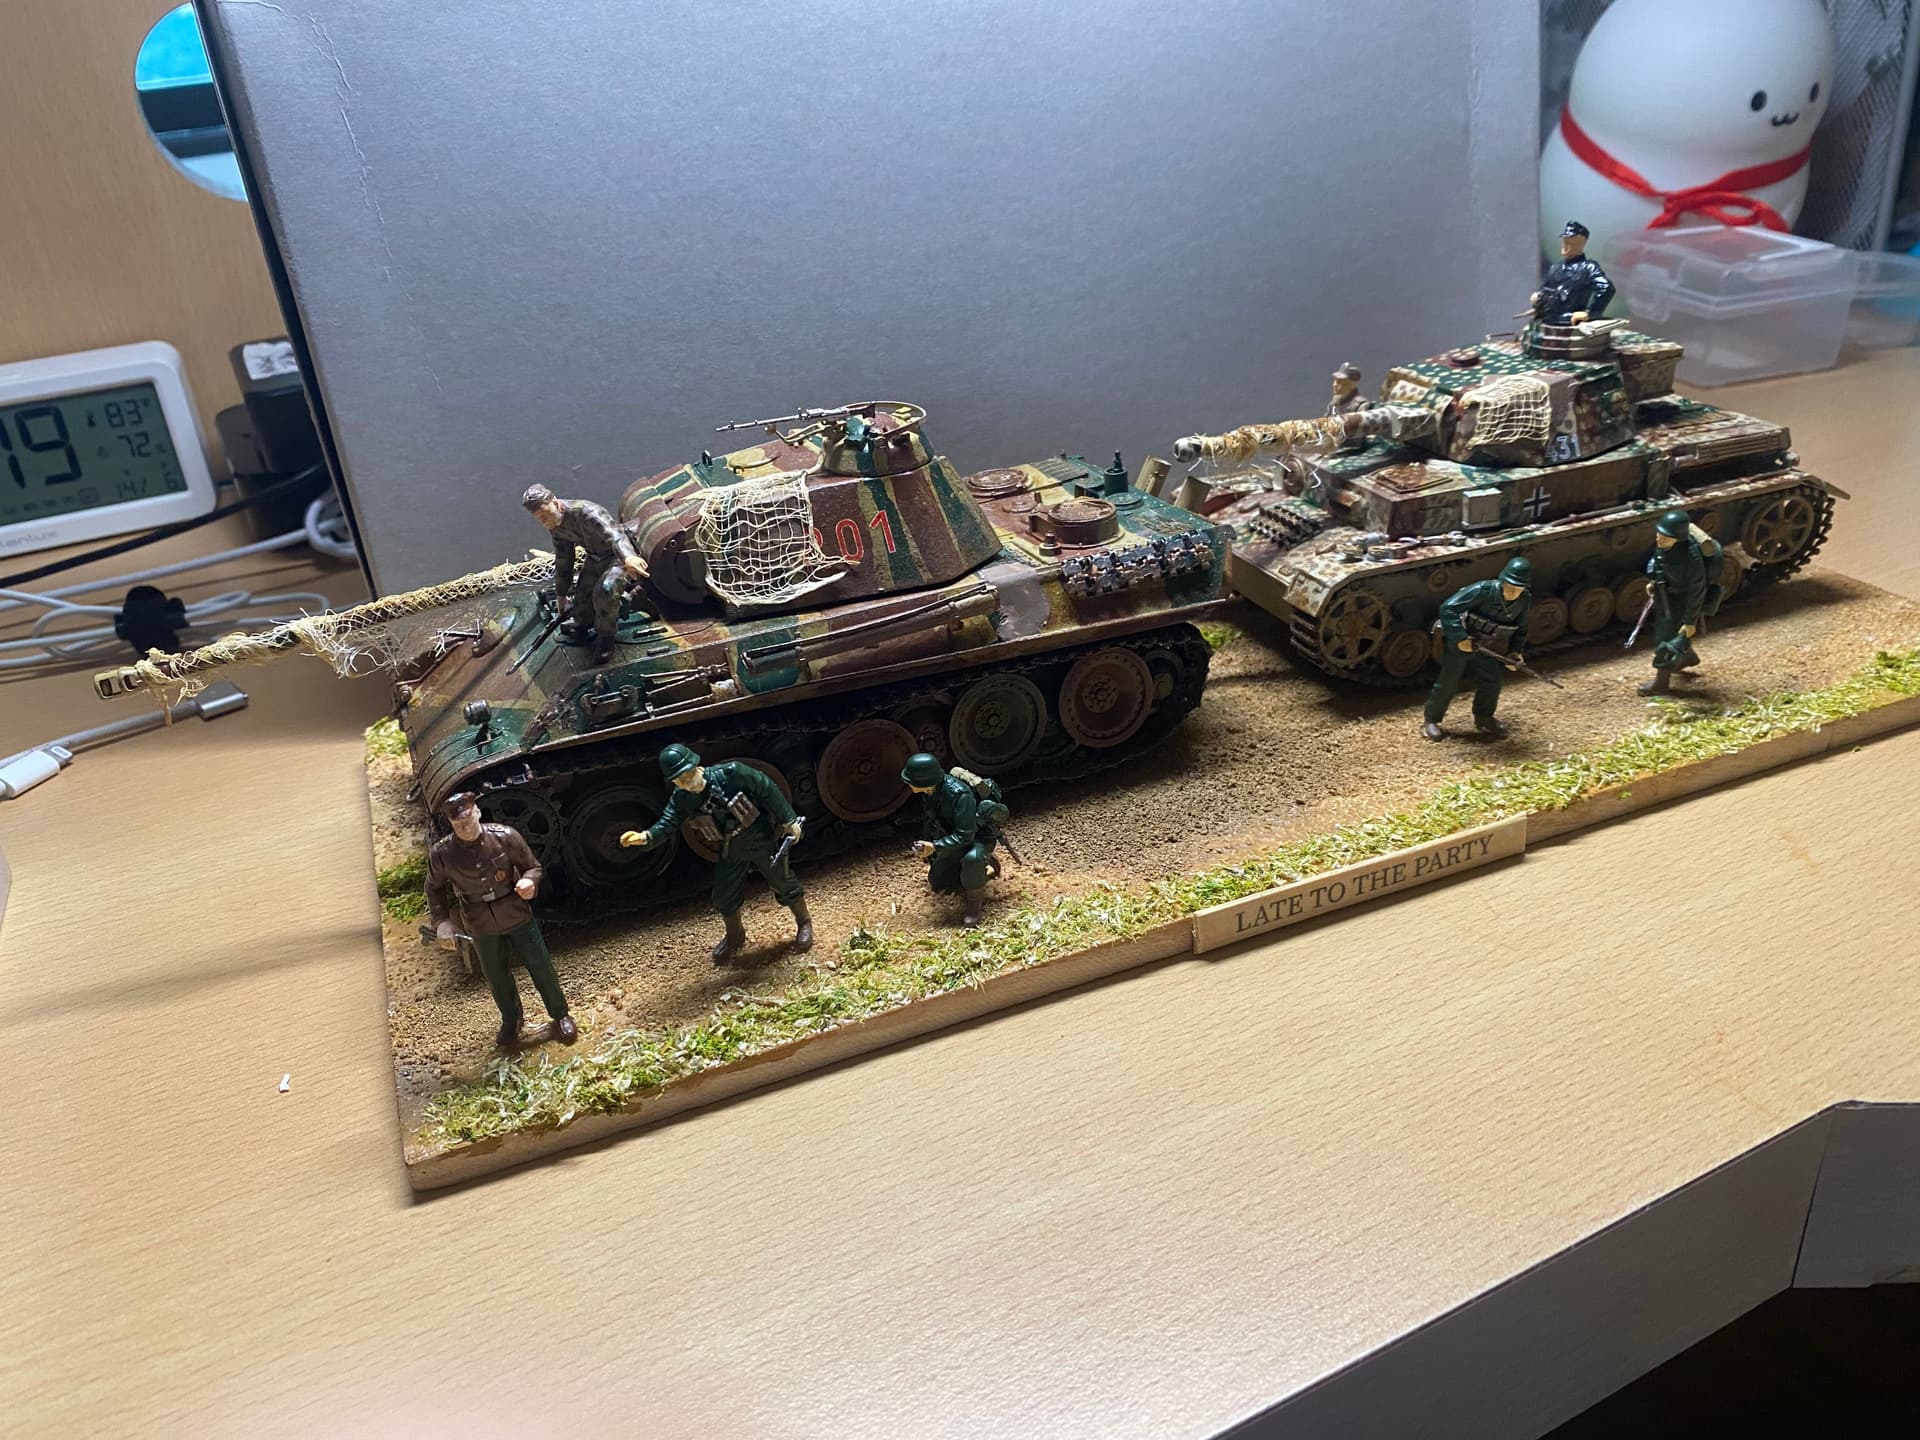
First - still not enough photos to say something definitive about painting and detailling. So please post some more, preferably close up and with natural lighting.
The placement of the tanks looks off to me - I think they are too close to one another. From what I know trying to park tanks like that, when the driver isn’t a real master, would end up with the tanks coliding… And if they halt in a tactical situation (or do you mean a real party, like a birthday party, or a christmas party?) wouldn;t they want to stop in a “herringbone” or something like this? You know, to cover both sides of the road, while keeping the road open.
And the figures… They look suspiciously glossy and their poses somehow are out of place - I mean for example the one kneeling - why doesn’t he use the tank for a cover? But then why - the first guy from the left seems very relaxed and is standing like nothing is happening. Now I know it’s not easy to make the figs tell some story.
Now I only wrote this because you wanted criticism - it sure is a very good effort for a first diorama, and a very good job for a first (and I guess second?) model.
If you would like to make another dio, I’d suggest you work from a photo - you take a real life photo and try to show what’s in that photo. This can make the job challenging (like when you need to find a certain object/vehicle in scale, or re-pose the figures), but it also makes your life as modeller so much easier, because it frees you from inventing stuff and if somebody says “no, it’s all wrong!” then you just say “I got a reference to prove it!” - bada bim, bada boo!
Thanks for sharing and good luck with your next builds
Paweł
2 Likes
Thanks for the criticism, sorry for the lighting I’ll repaint the figures with non gloss paint(I was trying to keep things cheap so I used glossy gundam paint) and I’ll reposition the models. I’m also working on a separate diorama which I did use a historical picture so yeah
All the best
Ethan
I’ve only done a couple of dioramas, so take my criticisms with that grain of salt. Improve your light source. Natural lighting would be best, but even a couple of LED lights to give some more clarity to your tanks would be good. I can’t see the treads, for instance. Ensure the diorama is the only thing in the photo. While my eyes go right to the tanks and figures, I’m distracted by the objects in the background. It’s a good thought to model your diorama after an actual photograph. One thing I’ve seen armor builders do is to actually print a large background photograph that could be the street these tanks are traversing, with some homes or other buildings in that background, to give more depth to their diorama.
But, I will say your work on the street and the tanks is quite good.
Panthertonk, congratulations on the initiative and work.
As you asked for criticism, here we go:
- If you are not an excellent draftsman, like me, always use scene photos as a model or starting point. I am working on a project with paratroopers from the 101st Airborne in Normandy, where the inspiration came from an oil painting.
The distribution of elements in the scene is extremely important; there are good books that give us a good understanding.
-
Avoid glossy paint on military models, stick to matte.
-
Take closer photos capturing details, and include objects and items in the scene that cause this as well, such as an animal, clothes, vegetation, etc.
Now a compliment:
-
Making dioramas is not easy and the undertaking is significant. Congratulations on diving straight into them; the vast majority of us take a while, starting with the basics, then vignettes, and finally dioramas. It’s not a rule, it’s a more natural path where we gradually evolve the techniques.
-
Modeling is evolution, we don’t start running, do we? See the evolution from the initial Panther models by Tamiya to the current quality of RFM and Dragon.
A big hug and success on your journey, we will closely follow the progress.
Not too bad for a first time. I’d be pretty proud of your work. The only advice I’d give would be maybe a little variety in terrain that would draw attention to the whole diorama. Maybe an uncrossable ravine, fallen tree, tank mine removal. Most country roads aren’t flat nor mowed. Tall grass also hides many mistakes!
@Panthertonk
Congratulations on completing your first diorama and sharing! The first one is never easy and takes lots of time figuring it out!
I like the details and realism of the tanks. Great job!
And I like the overall display.
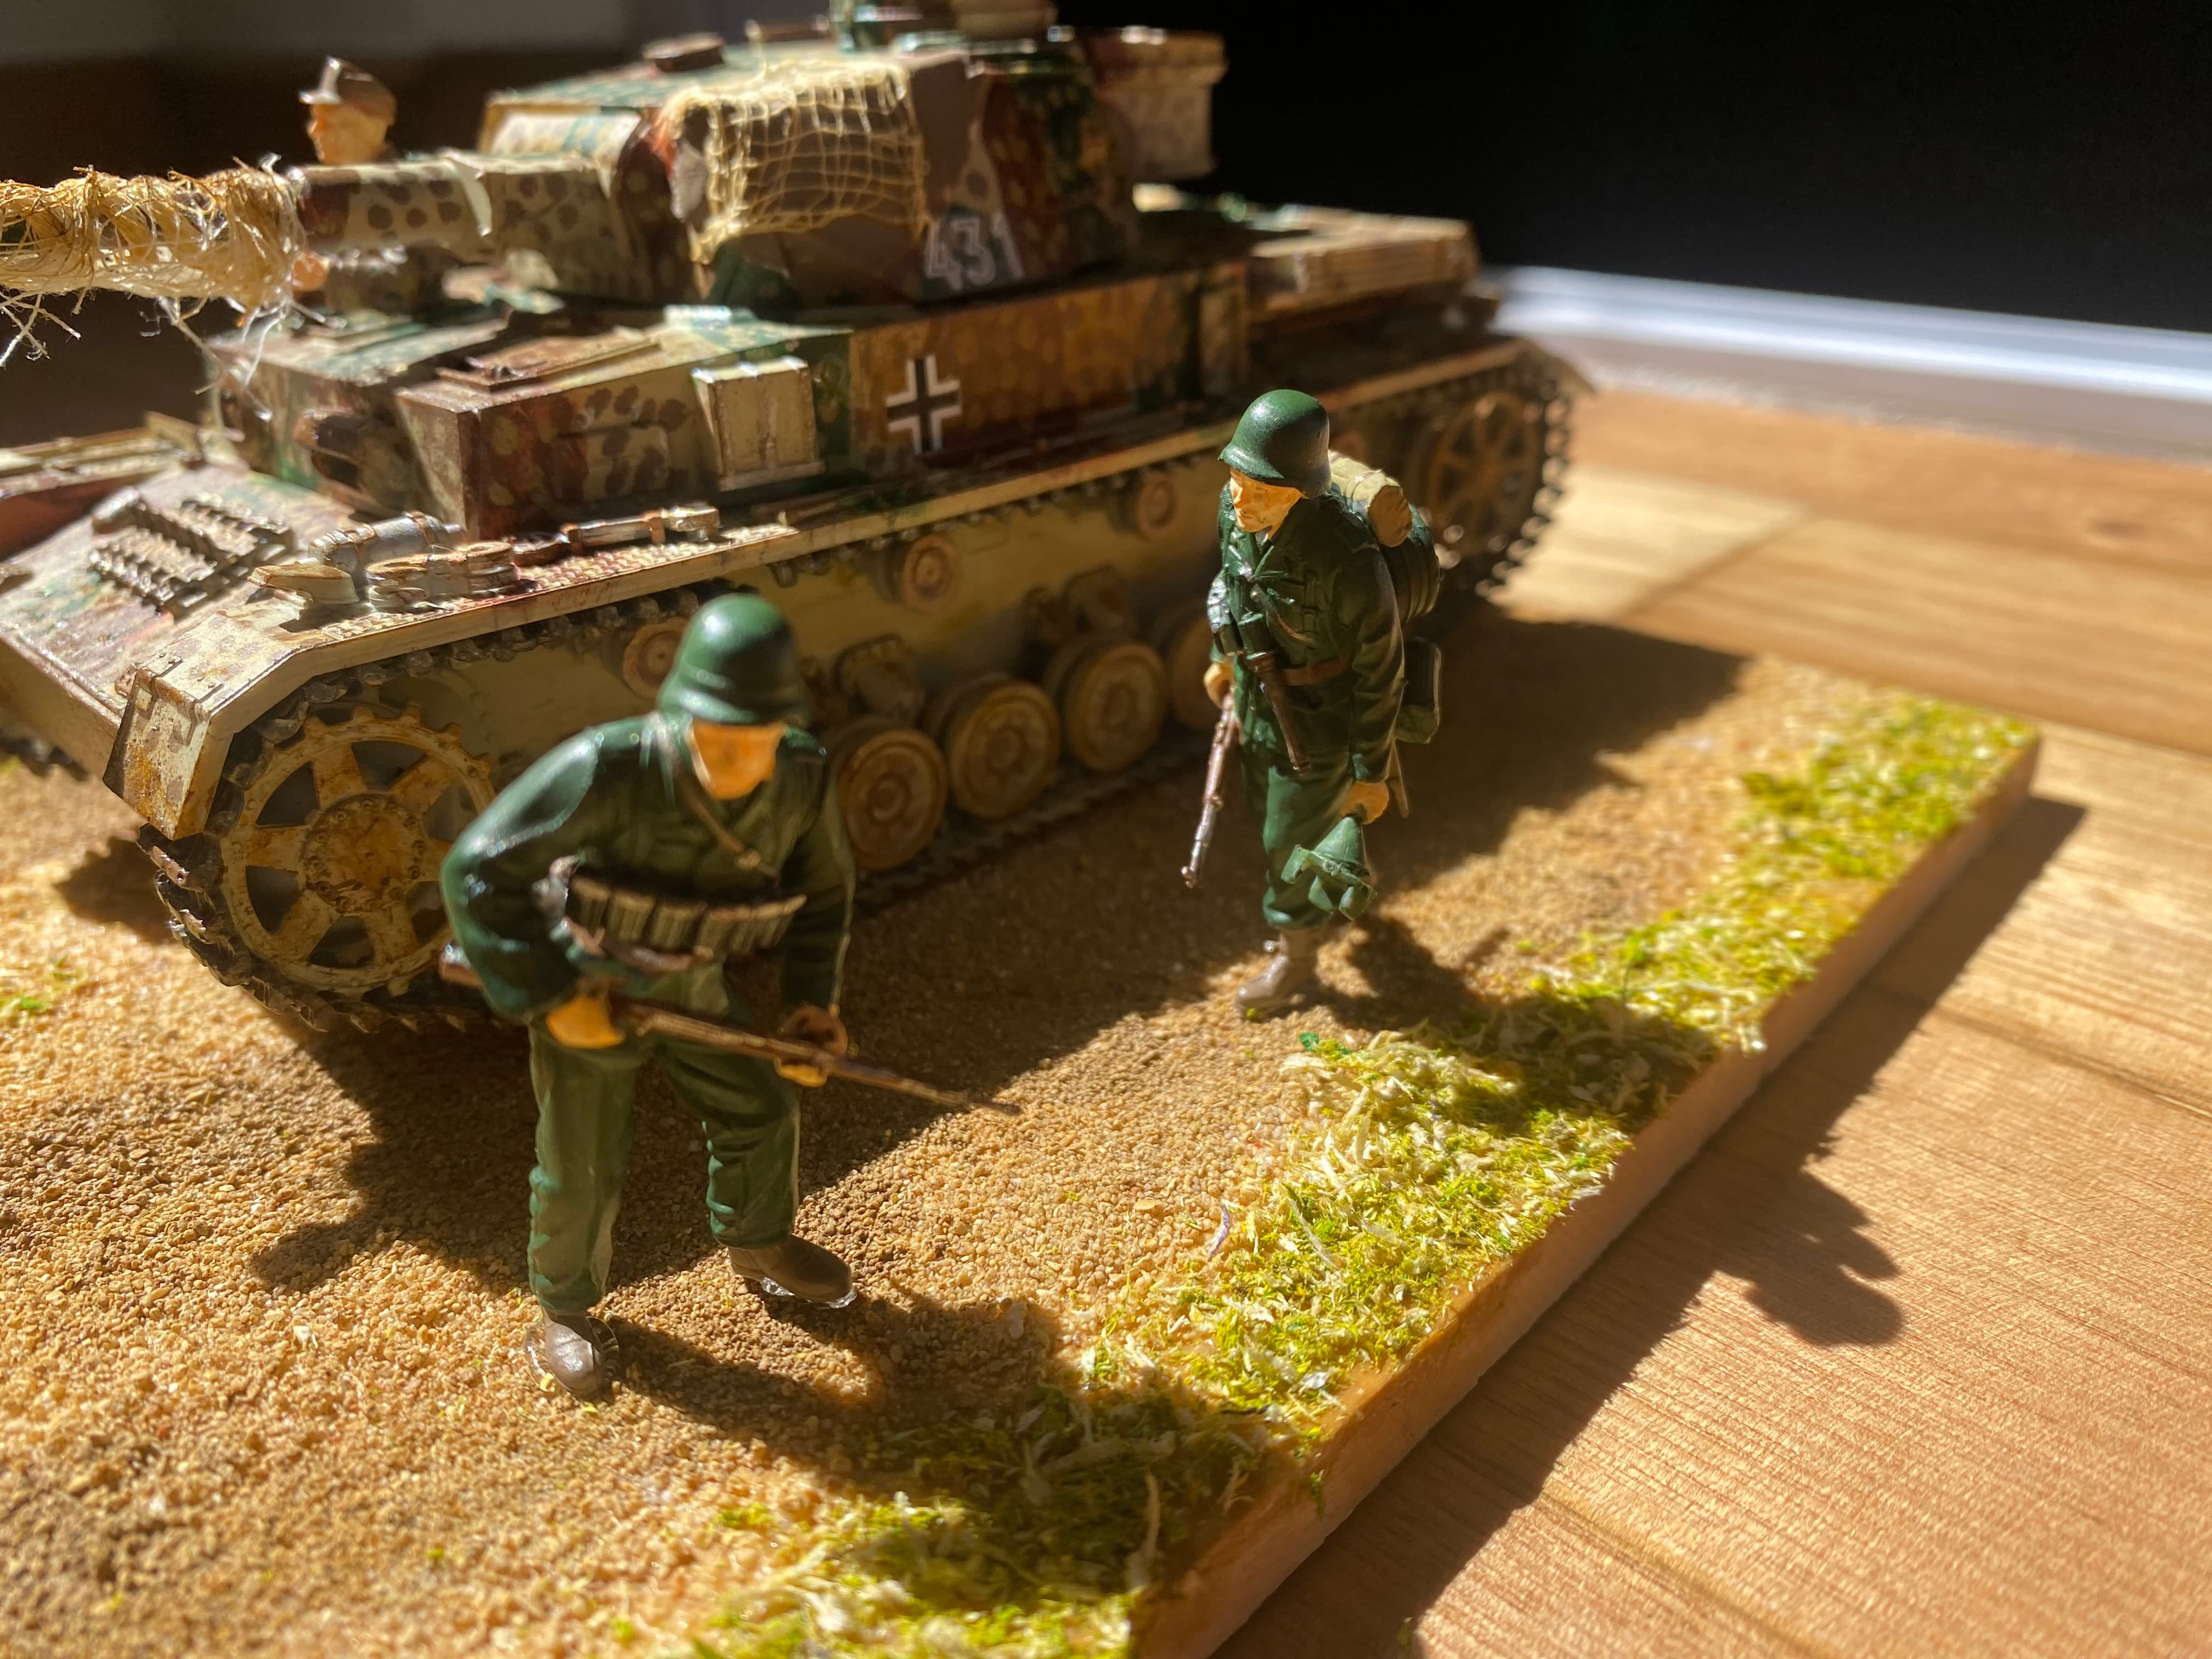
BUT the one thing that takes away and distracts are the fake looking soldiers.
Two options: remove the soldiers OR better yet, learn how to paint realistic faces and uniforms. I blew up the photo so I could see clearly before commenting. But it wasn’t that clear so forgive me if there is more detail on your soldiers than I can see.
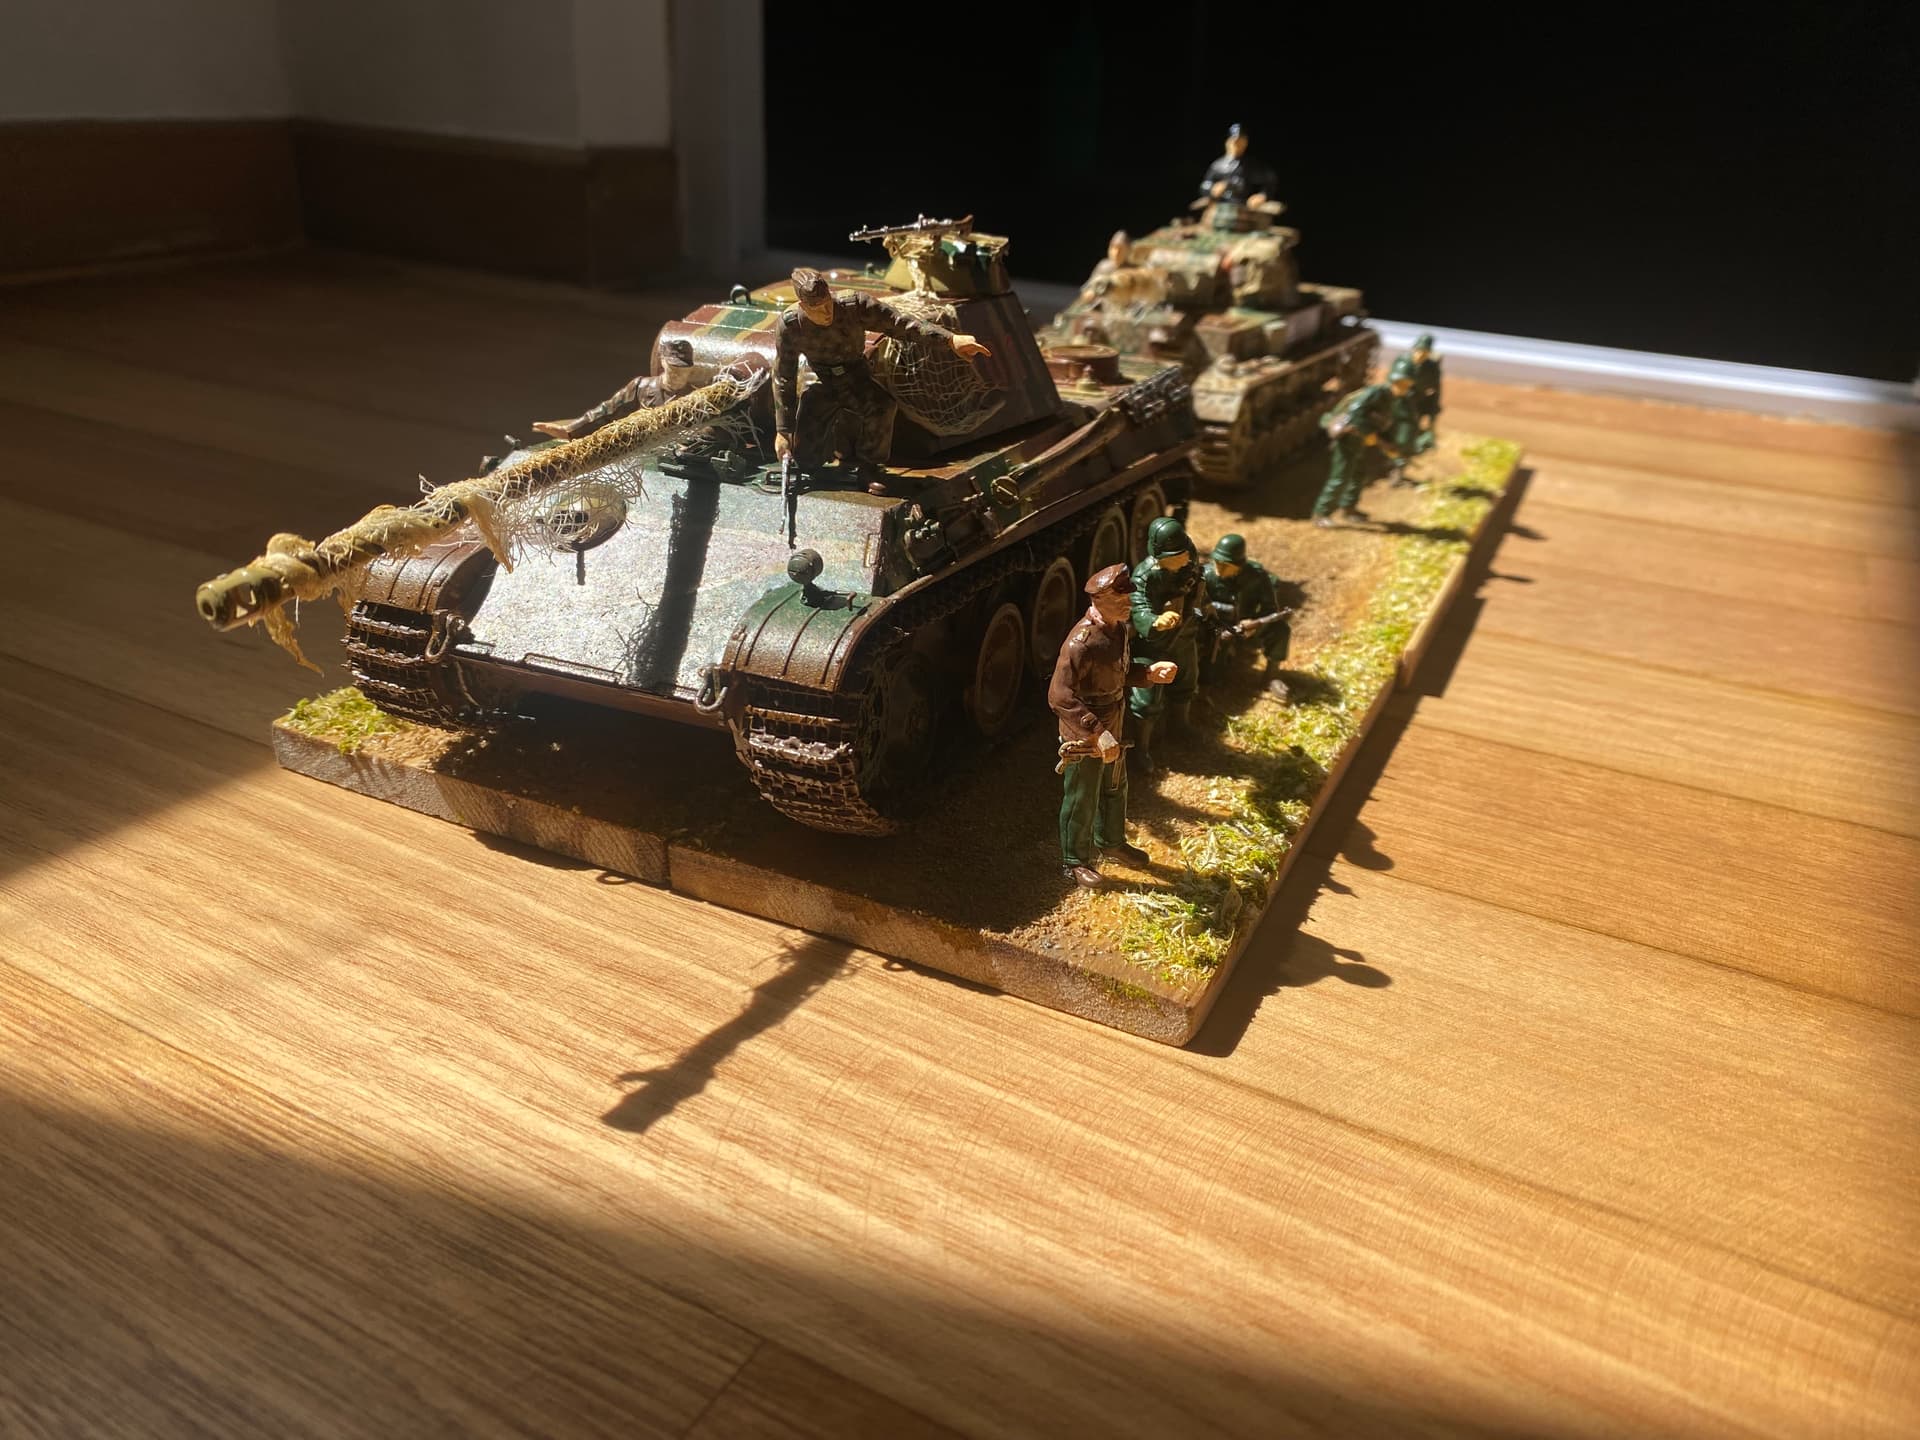


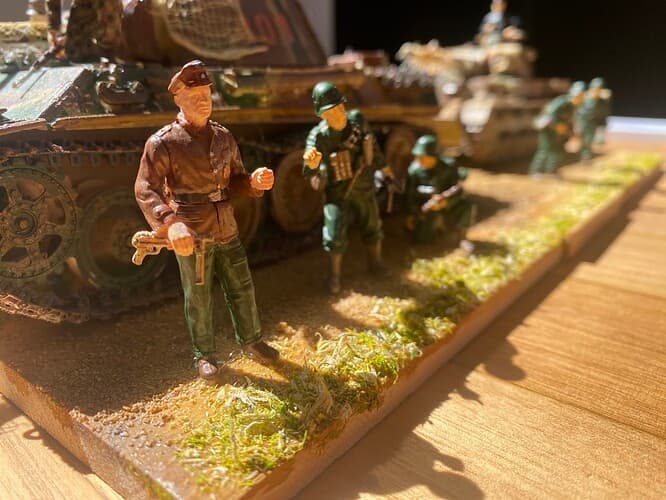
The sunlight really makes it pop to life. LOVE THE TANKS!!
For the soldiers, paint them to be a little more “dull”/“faded”….meaning create more realism with shadows in the folds and creases on their uniform and equipment and skin tones.
Hello!
With better lighting it’s a different talk now!
I like the ambush camo on the Panzer IV a lot. It’s a little sloppy, but that’s what you could get from a field application, right?
As for the uniform colours - to blend everything together you might try to mix in a little bit of a certain colour to all of the colours for the uniforms - in this case I feel like dunkelgelb might do the trick. So instead of gren you take green with a drop of dunkelgelb in it, istead of brown - brown with a drop of dunkelgelb in it and so on. Makes the figs look a little faded - just the way it’s supposed to be. Shading can be difficult - here I would like to recomment Games Workshop “contrast” paints - this way the figs almost “shade themselves”. Faces and hands would look better with a little thin brown wash.
I hope this helps you - good luck with your builds and have a nice day
Paweł
1 Like
Use a matte varnish coat on the figures. That’ll de gloss em!
1 Like
I think some little details around it would make all the difference! What I’m thinking of is like some of those ww2 scenes where a panzer tank is rolling through crumbled Berlin where there are crumbled buildings or structures. I think details like that really show the setting really well.
But over all I think your dio looks good ![]()
It is a good start, but to me lacks the story. Ask yourself, will the observer understand what I am trying to convey? Is this group expecting action or pulling into a muster area? Difficult to say from what the figures are doing. It is hard to find figures in the poses that you need and you may not be comfortable cutting them up to pose how you like or need.
Working with what you have, switch tank positions since the commander is out of the hatch he would have the best view. Traverse the turret slightly, then turn him to face the danger. Have the soldier on the panther that is pointing moved next to the commander also pointing to the danger(he is not doing any good by the panther driver). Have the troops on the ground go from getting ready for action at the front to not yet knowing what is going on towards the back. Play around a little until you have the story you want to tell.
1 Like
@NucMedTech
All excellent points of view. I put lots of thought into how to position everything. Sometimes I get stuck and leave the diorama alone for many days then go back to figure stuff out again, moving pieces around to get a “ believable/realistic” scene. Then leave that alone for a while and come back many days later to see if I still like that scene before doing anything down permanently.
Thanks, criticism can be difficult for me. I try not to sound like I am just destroying one’s work.
I like your road and I have the same difficulty that you have here in showing variation in ground level. I have switched over to using insulation board (you can find at your local home improvement store for a few dollars.), which allows you to carve ditches and such. You can find them in 2x2 pieces which can give 2 or 3 Dio bases, but that would be for a future project. There are a lot of excellent videos on YouTube showing how to use this
1 Like
It’s always fun when after you look at a picture then look again and see some detail in a totaly different light.
First look: this view shows your figures very well.
Second look: Is that a “fist bump” happening? ![]()
I’ll go be good now ![]()
1 Like
I’ll critique a few historical aspects of your work here. The Panzer IV is a F2 model, a late 1942 type. The Panther is an early G variant, a second half 1944 type. The time frame alone dictates the two types would not likely serve together, let alone would the Mk.IV have been repainted into an ambush scheme. Second, when Panzer IVs and Panthers did serve in the same Panzer Regiment, they were in separate battalions for logistical purposes.
It looks like you used a few Dragon figure sets, which are a great starting point. But again you’re mixing figures from different branches, SS and Heer (Army). While they will occasionally interact together, they usually operated separately.
Lastly, I would suggest putting the half driver figure sitting inside the open hatch with his shoulders up against the inside, rather than out on top of the bow gunners hatch with his hands not doing anything appropriate.
I think for a first effort you’ve done well. There are so many things that go into making them,as you have learned from the replies you’ve gotten. It’s an on going(never ending) learning process and figures are hard to do, painting, posing etc. Taking photos is a real challenge. Fine Scale Modeller has videos that can help. Keep on modeling, take the tips as just tips and use what you can. Keep it fun and do the best you can at the time. My first diorama went so badly,I didn’t finish it and have never tried another. I think the ground is very well done.