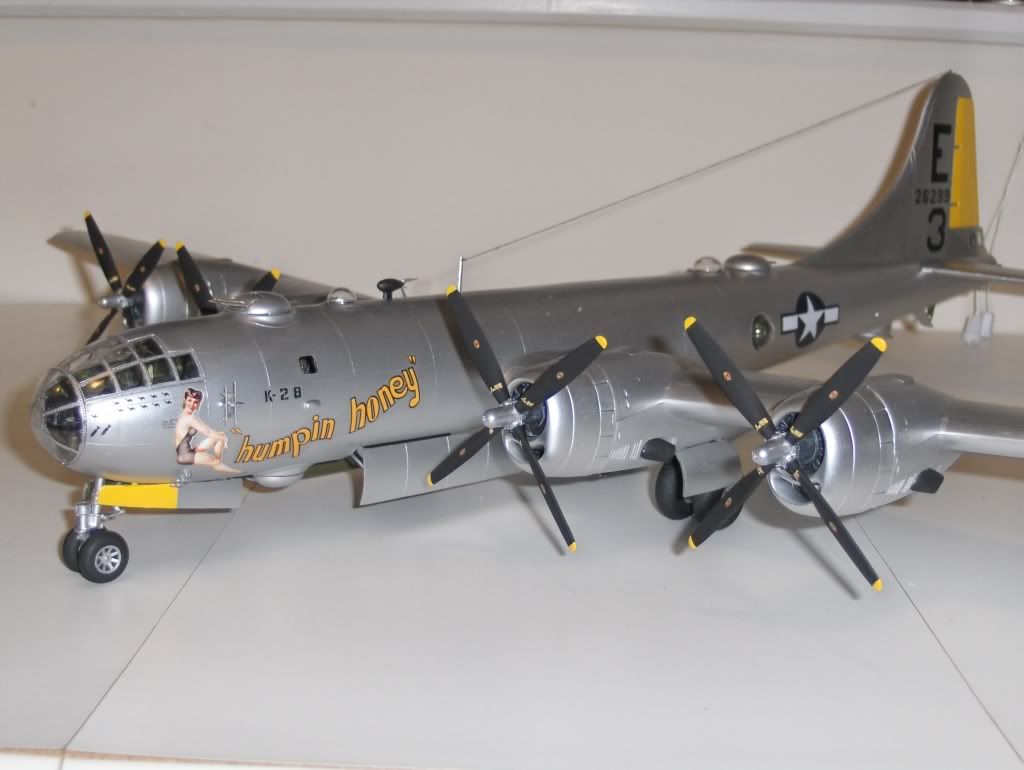
Well guys, here she is. My newly finnished B-29, the “Humpin Honey”. It is a beast of a model that took me over 3 weeks to complete. I had built this kit when I was a kid, needless to say, it turned out better this time. This is the fourth serious plane I’ve ever built, so I know its not perfect, but what model build is. Let me know what you guys think.
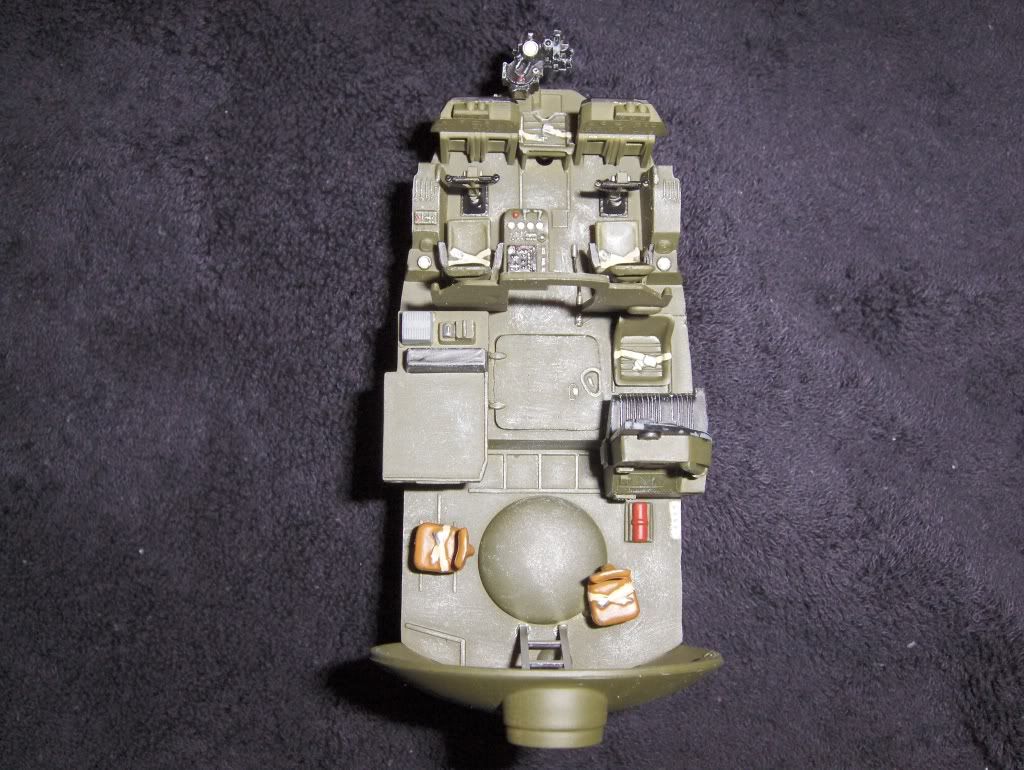
I started her by painting the interior with Testors dark flat green with dry-brushing to add a warn effect. Some of you may have seen these pictures during the build.

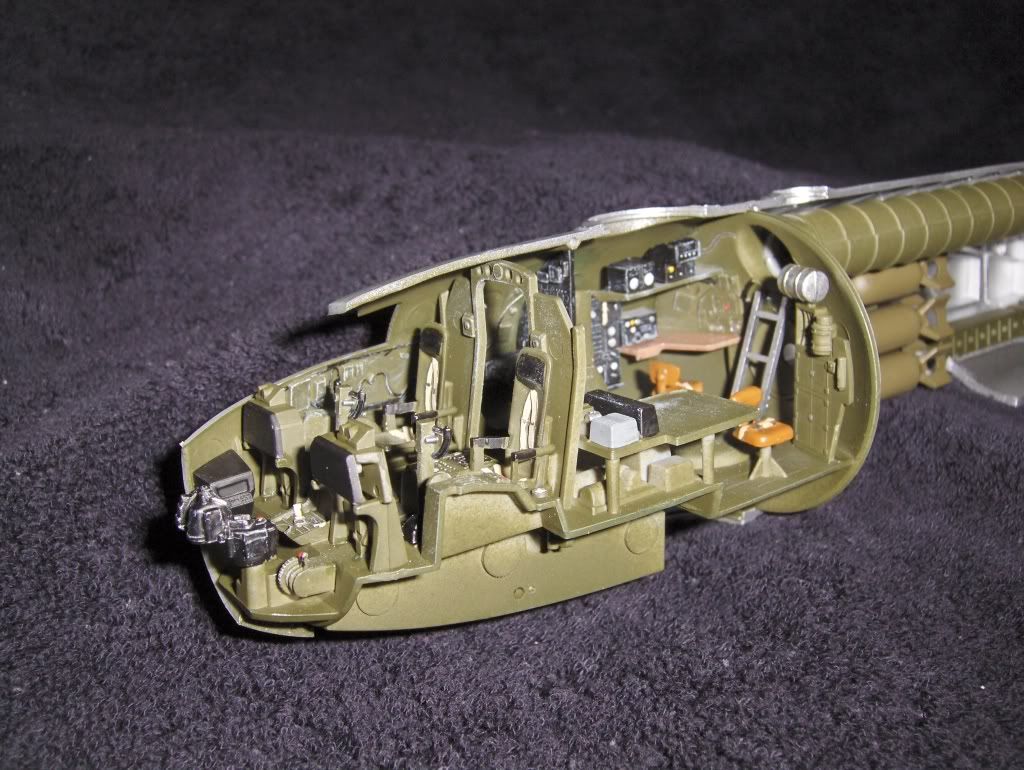
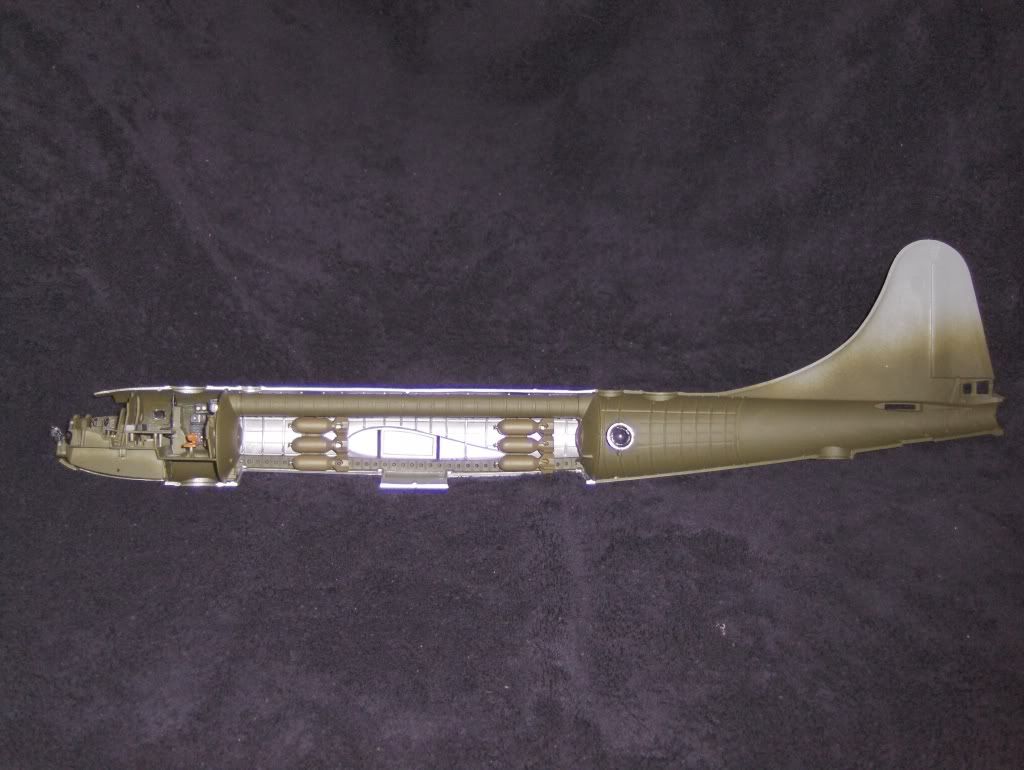
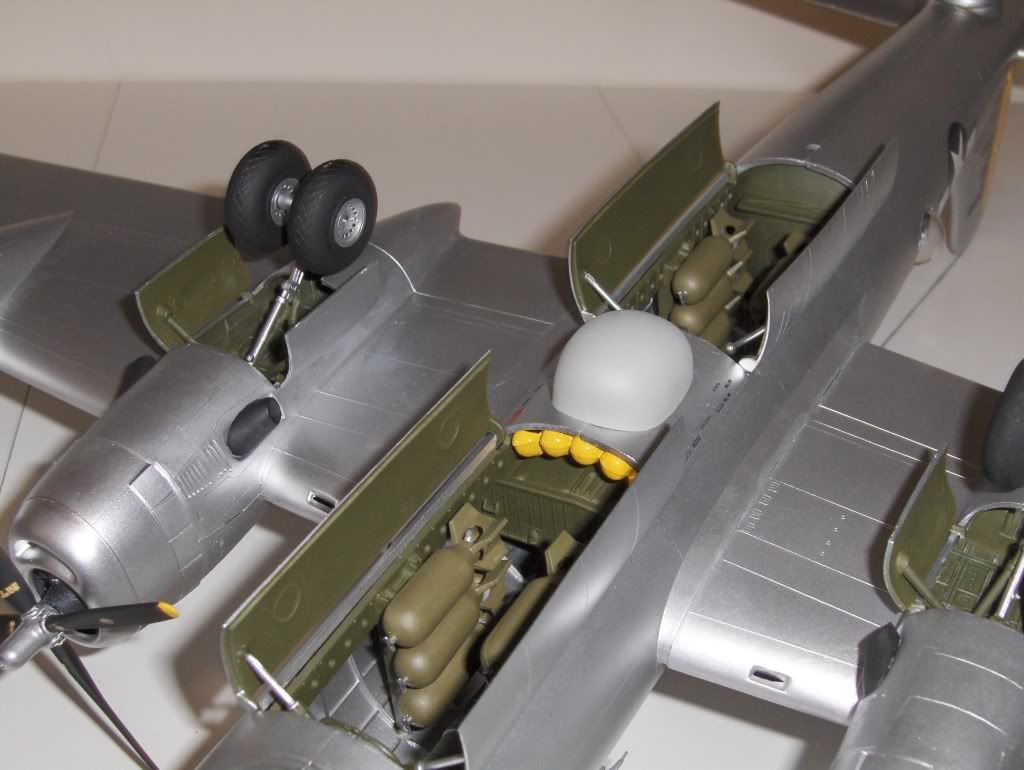
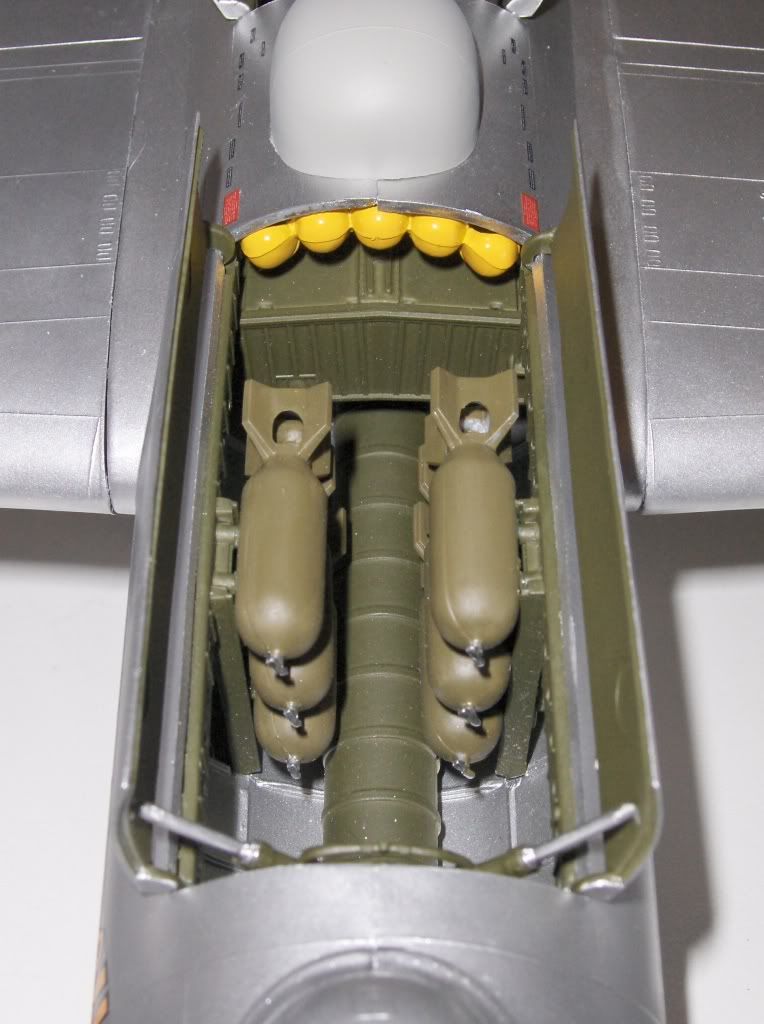
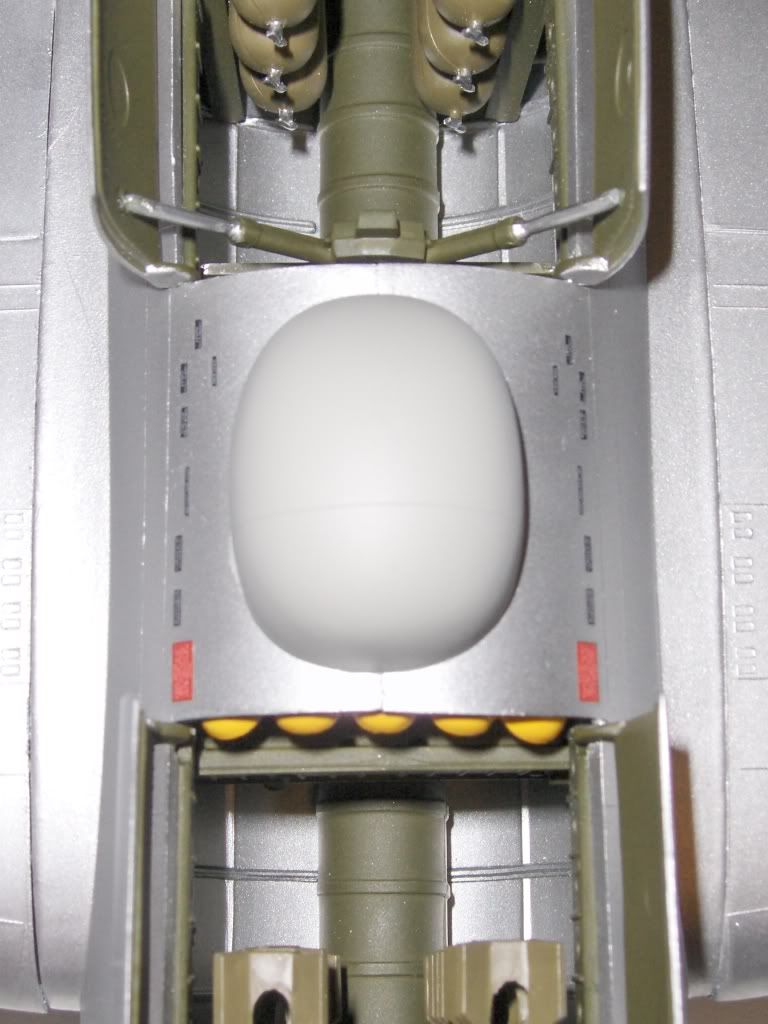
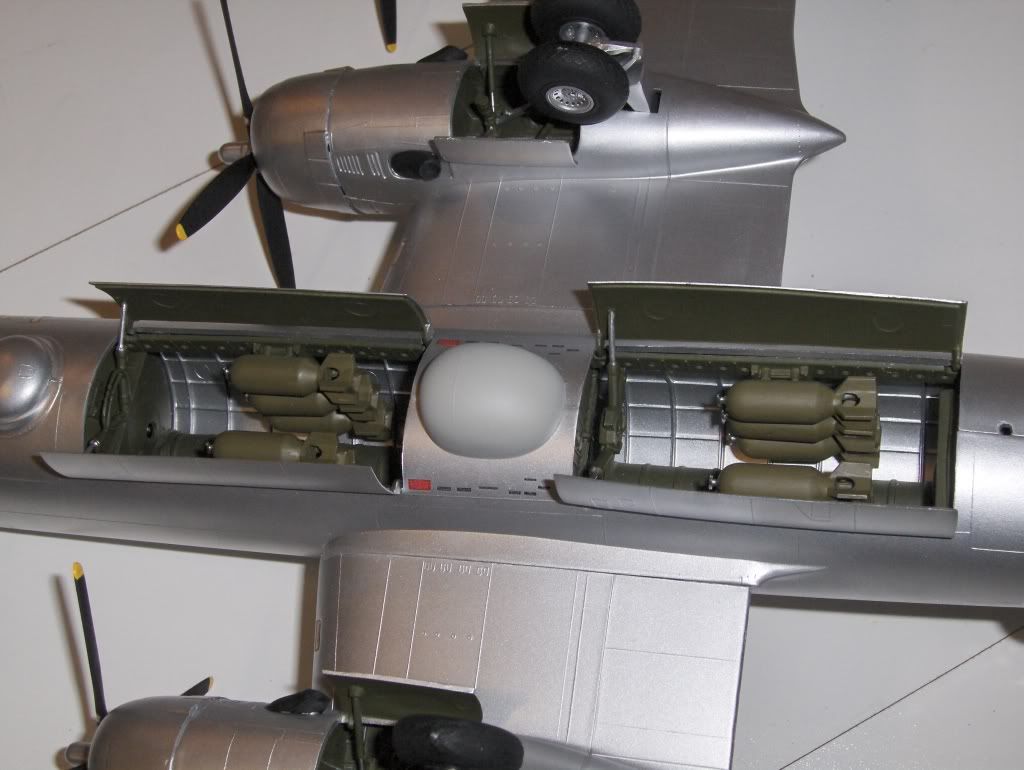
I painted the bombs Testors Olive drab. I brushed them by hand with a fine soft brush. They turned out nice. The bomb bay was painted aluminium as per the directions. I like the contrast it provides.
After the two fuselage halves were done, I stitched her together and laid on a nice coat of Tamiya putty. Not my favorite part of modelling, it’s such a pain in the butt. I am inexperienced when it comes to planes, so getting the joints to look right was a challenge. I chose not to fill the gaps in the engines because I knew it wouldn’t turn out right and I felt it would look better if I left them…just played it safe.
I did however fill in the gapps in the wing halves between the engines and in the fuselage, which was a no-brainer, it had to be done to achieve a decent finnish.
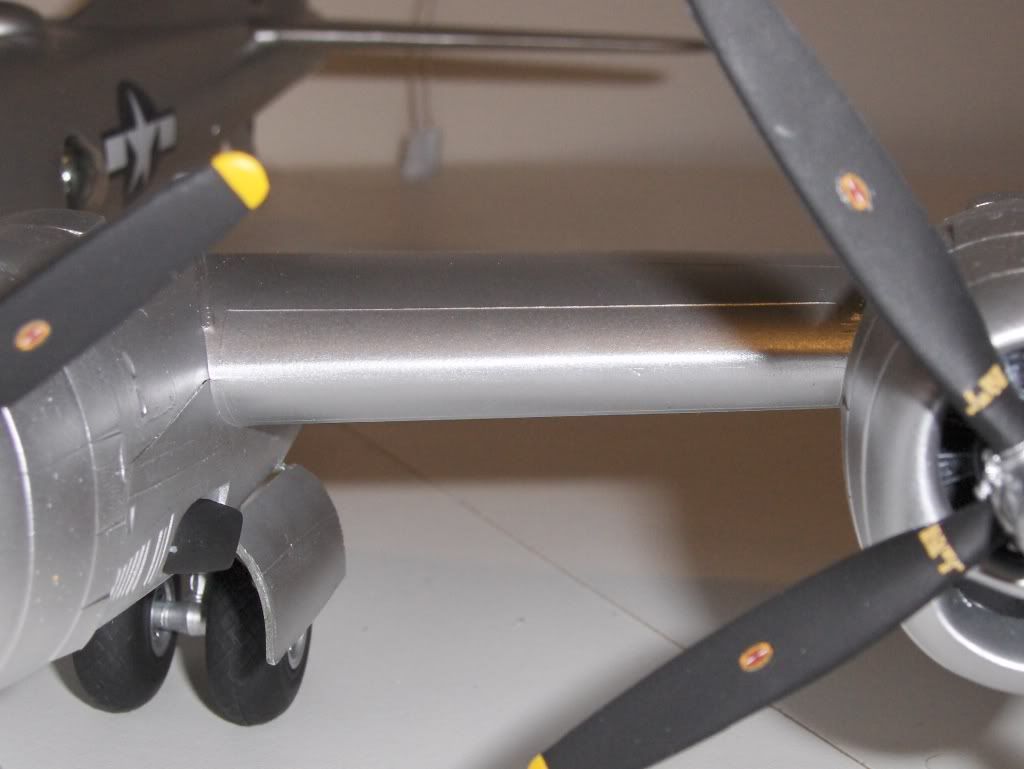
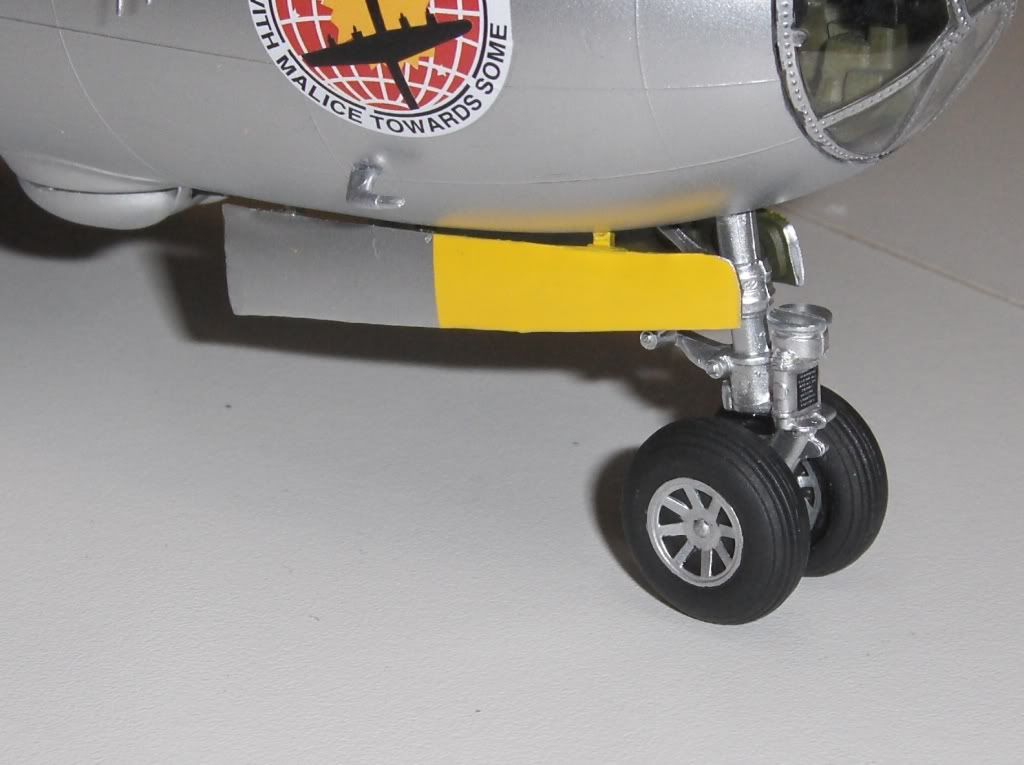
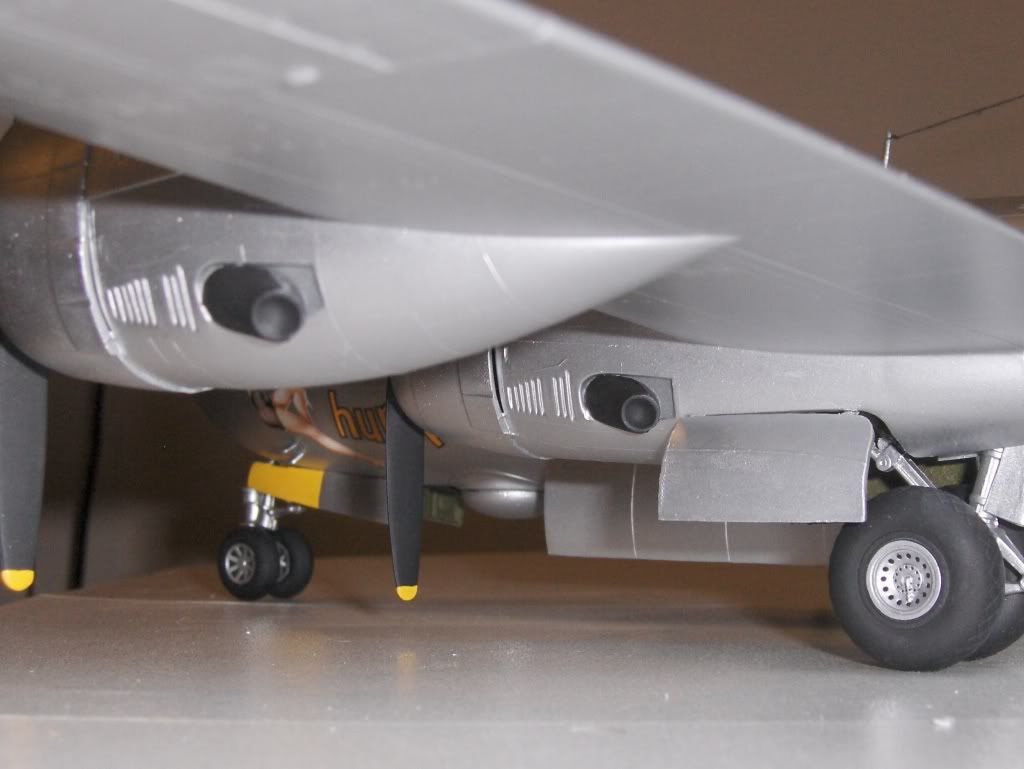
The landing gear bays were painted Testors dark flat green and also dry-brushed. I had never used this technique before and I love it, it looks so cool if done right.


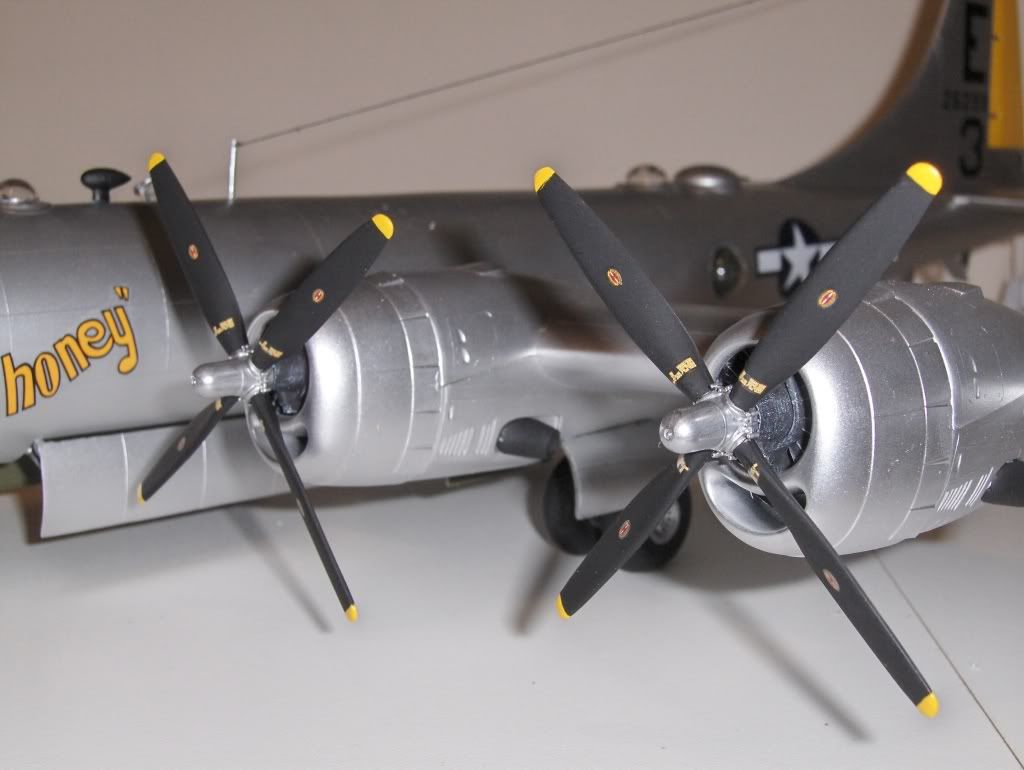
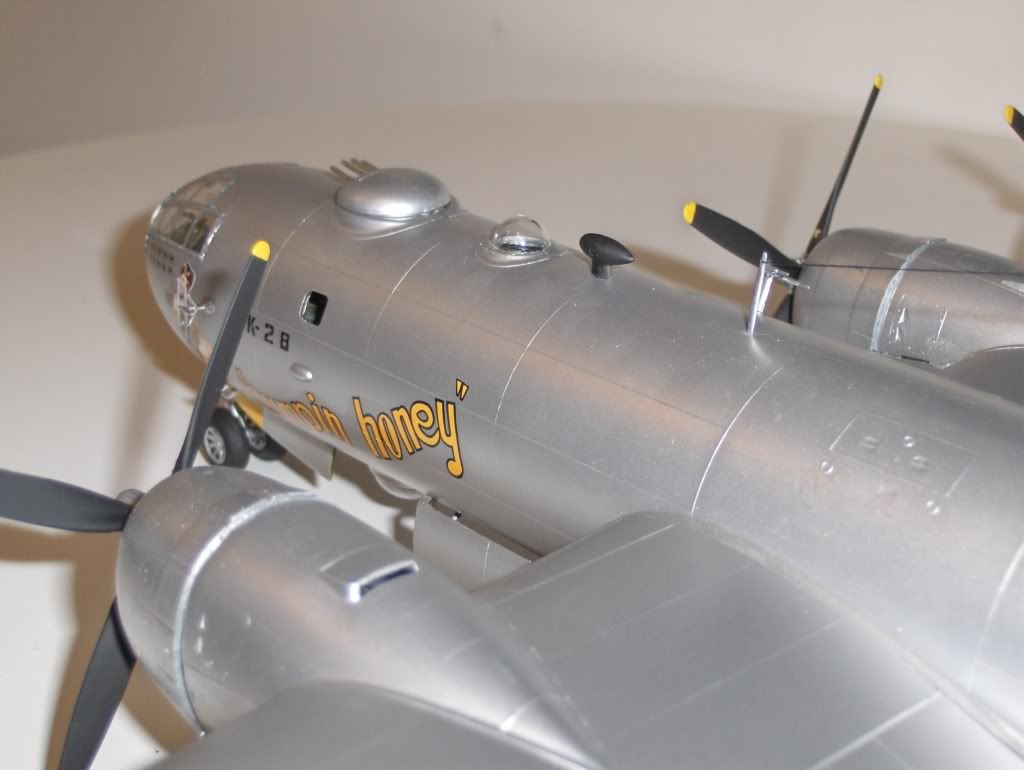
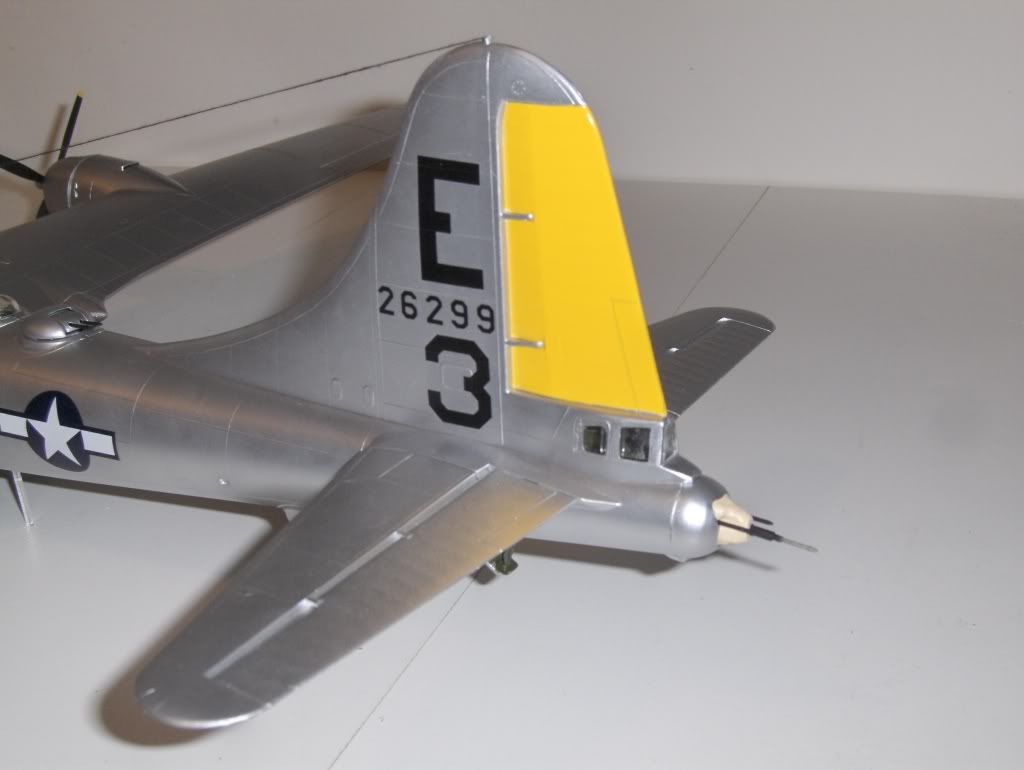
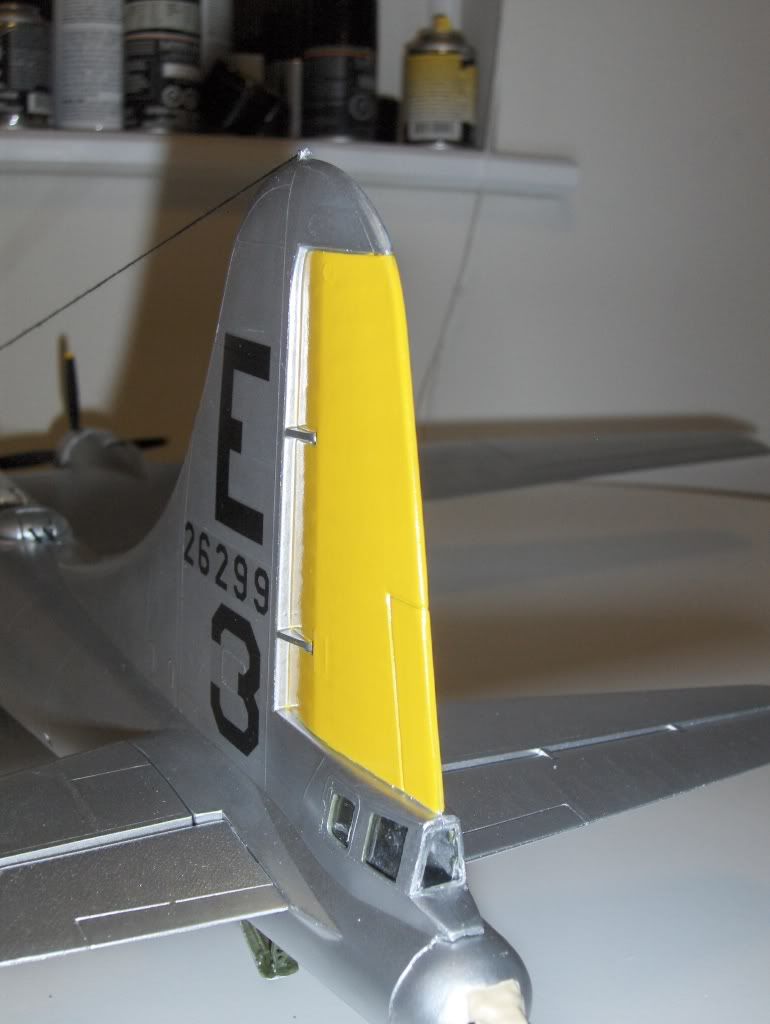
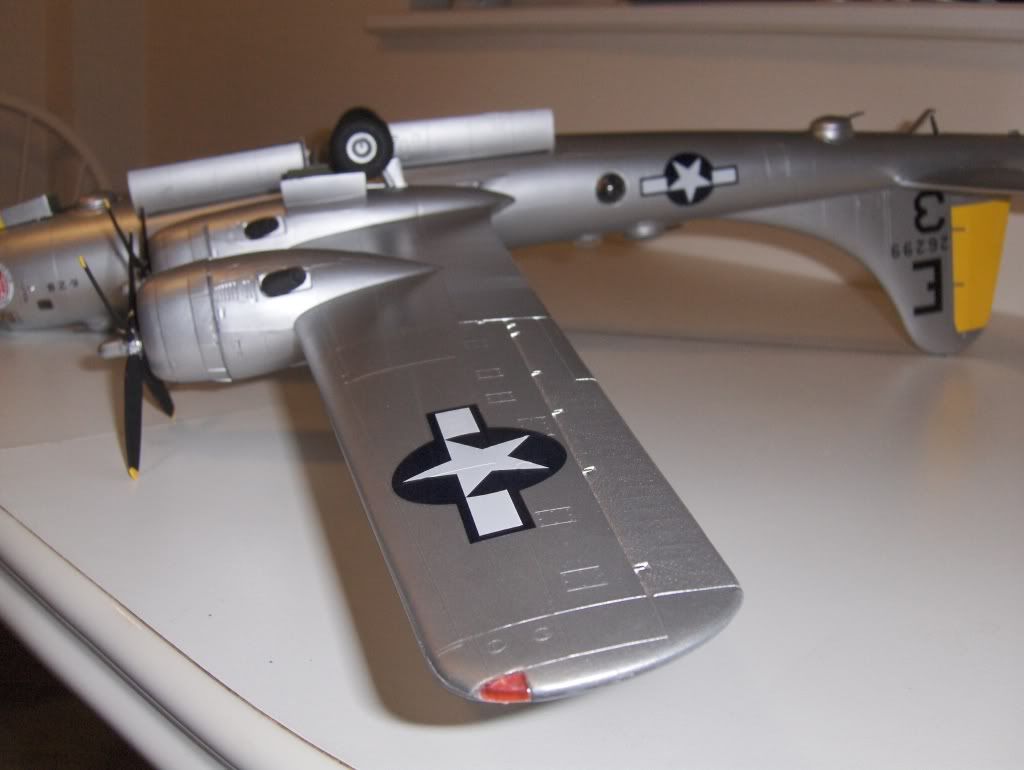
Even though this bird did not have an antenna tied from the tail to the fuselage, I felt it would add a nice touch to the finnished product…I was right, I love the way it turned out.
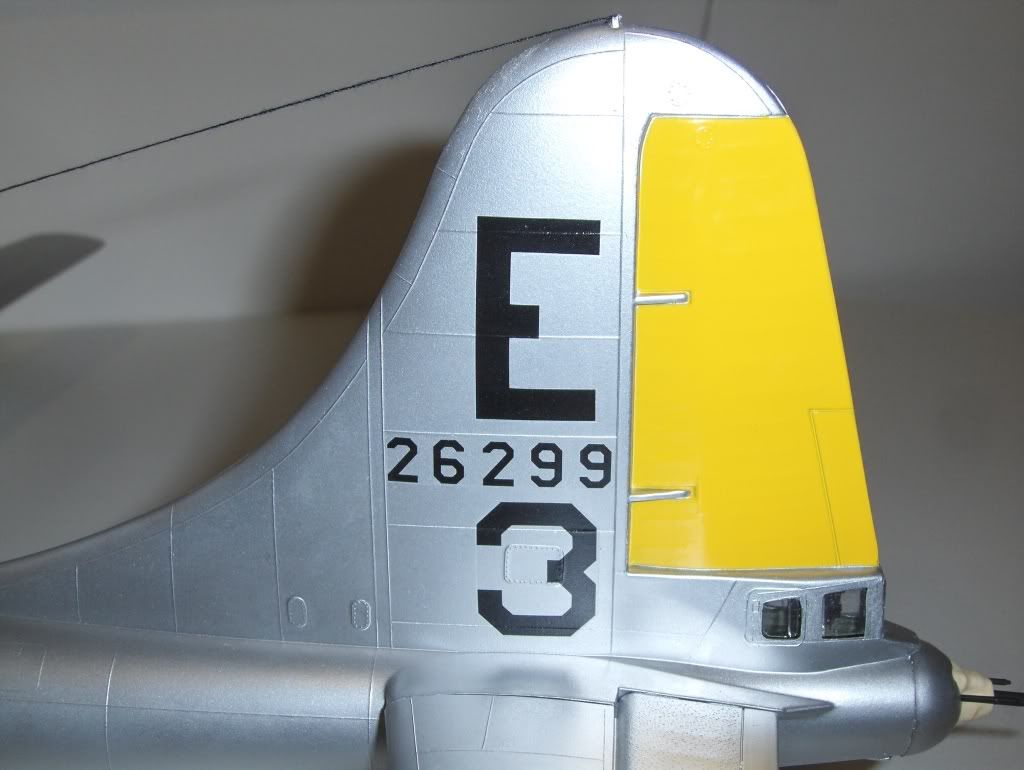

I drilled a microscopic hole in the antenna glued to the fuselage, than another in the tip the tail, there is a small ‘nub’ that drilled out just fine. I used the small drill bit set i used while drilling out distributor caps and cylender heads when I used to detail my engines on cars. I than used black thread to depict the antenna…I love how it turned out. I know its not accureate to this specific plane, but its a personal touch.
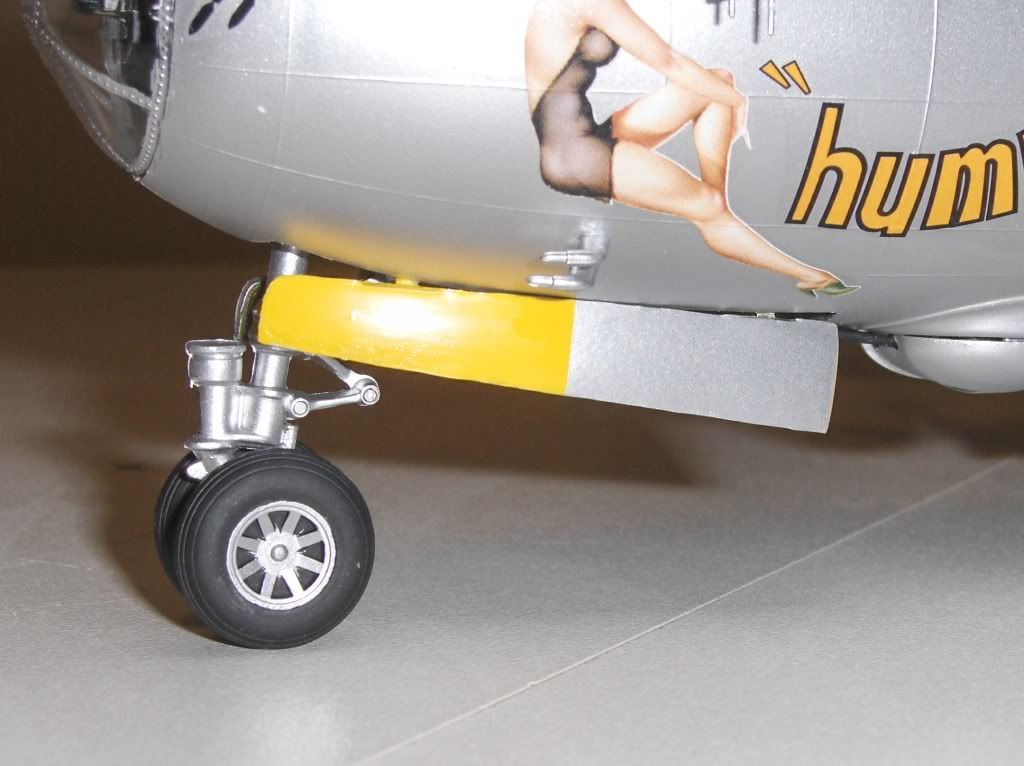
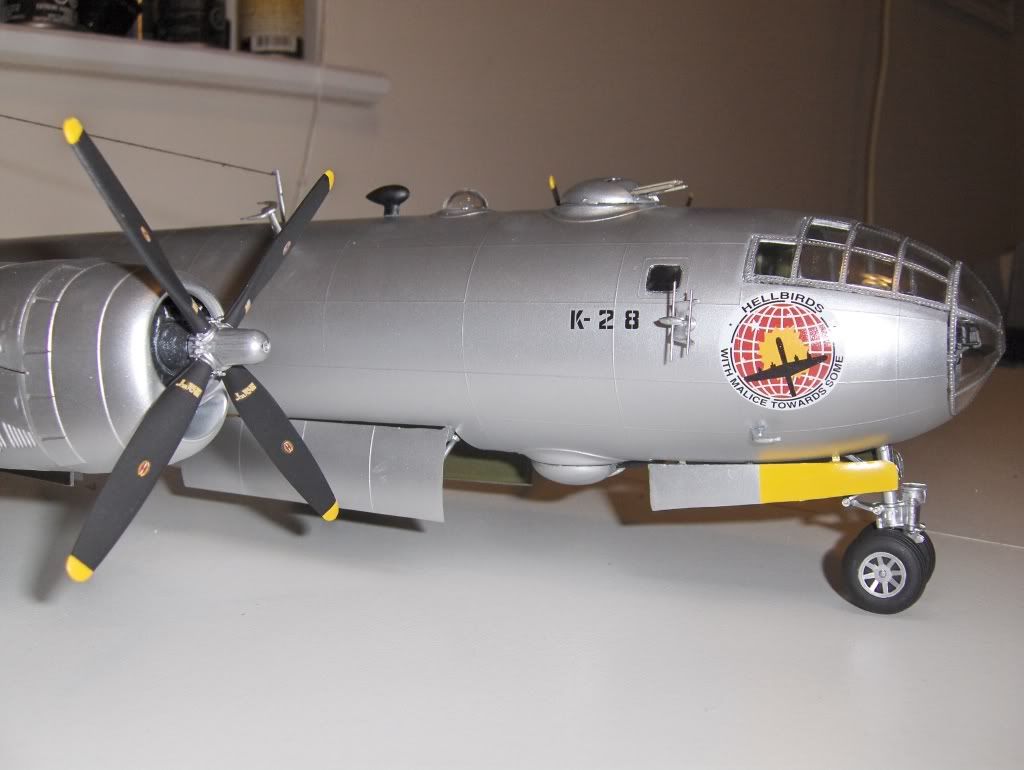
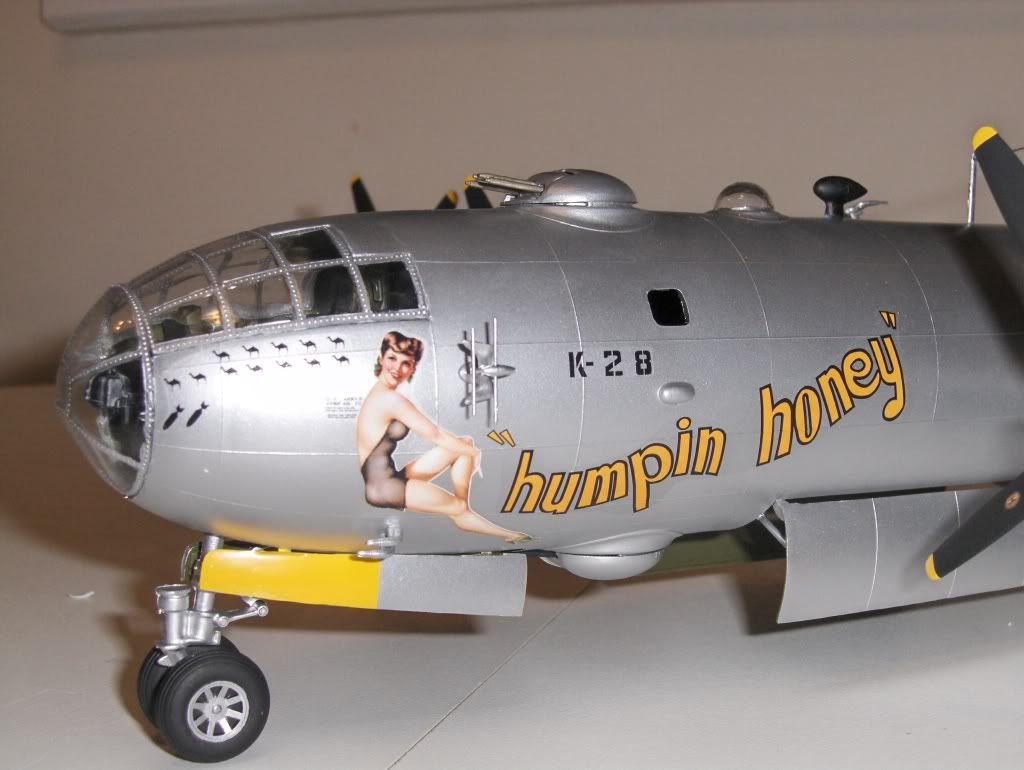
The front landing gear doors were half painted yellow, which classifies this plane as a heavy bomber. The front wheels were supposed to have a cover on each wheel with a black and yellow turbine style decal. I couldn’t make the covers look right…What I really needed was a set of leather punches, to make the covers perfectly round…I couldn’t do it by hand. I kept messing it up, so I gave up and painted the wheels instead.
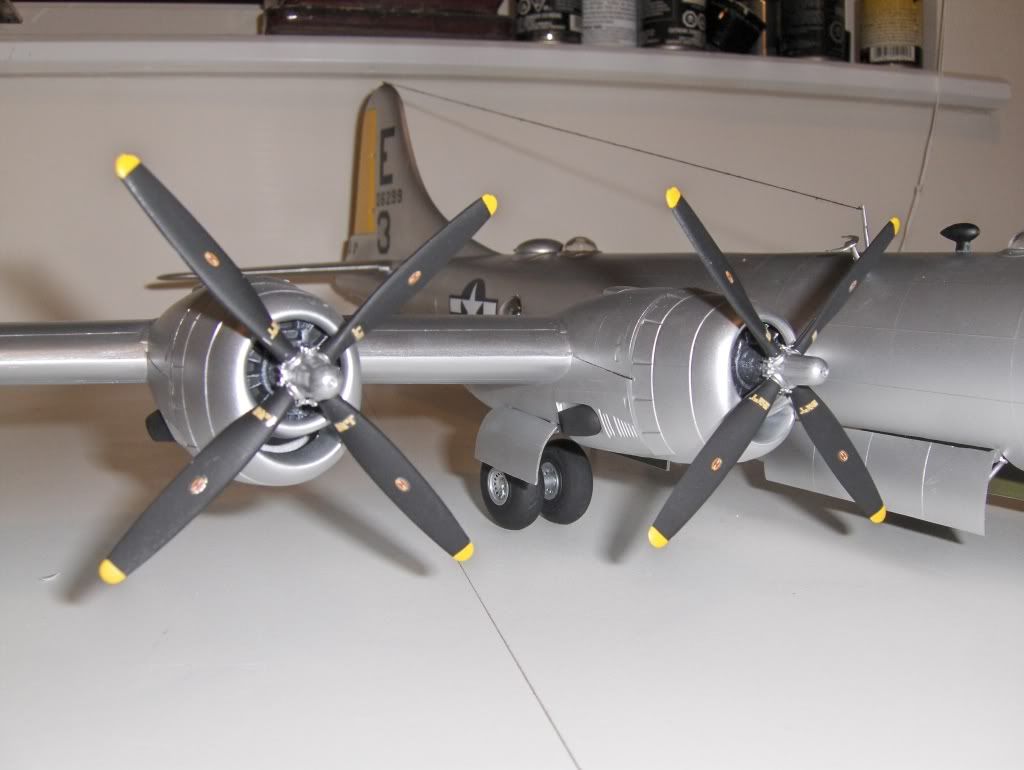
The whole plane was painted with Tremclad Aluminium. It was a mistake that I wish i could take back. The hobby store I use didn’t have any Tamiya paint. I was too impatient to order it and it is expensive. Instead of paying 20 bucks for two cans of the good stuff, I cheaped out and got a 3 dollar can of Tremclad…oh well, lesson learned.
The paint isn’t bad, it just lacks that nice glossy sheen that would have came if I used the Tamiya paint…that stuff is money.

Here’s wher my inexperience shows, I painted the wings and fuselage separately. If I could have done it over, I would have done it all in one piece…like Feldmarschall’s B-29. I thought it would make things easier in the long run, which it did, but it would have looked better if I filled the gaps and painted the whole thing in one shot…lesson learned.
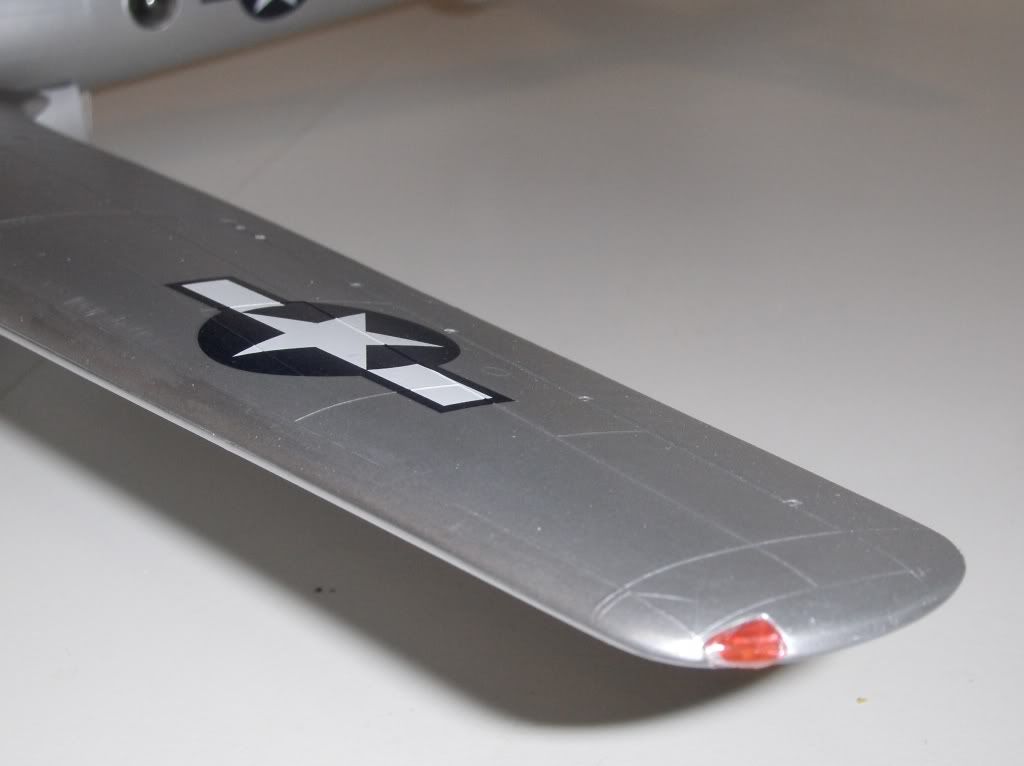
After the fuselage was dry, I taped off the tail rudder and sprayed it with Testors yellow. Once it was dry, I went in with a brush and hand painted the separation lines in the corners, and the control surfaces to mach the fuselage…it gives it a clean look I think.
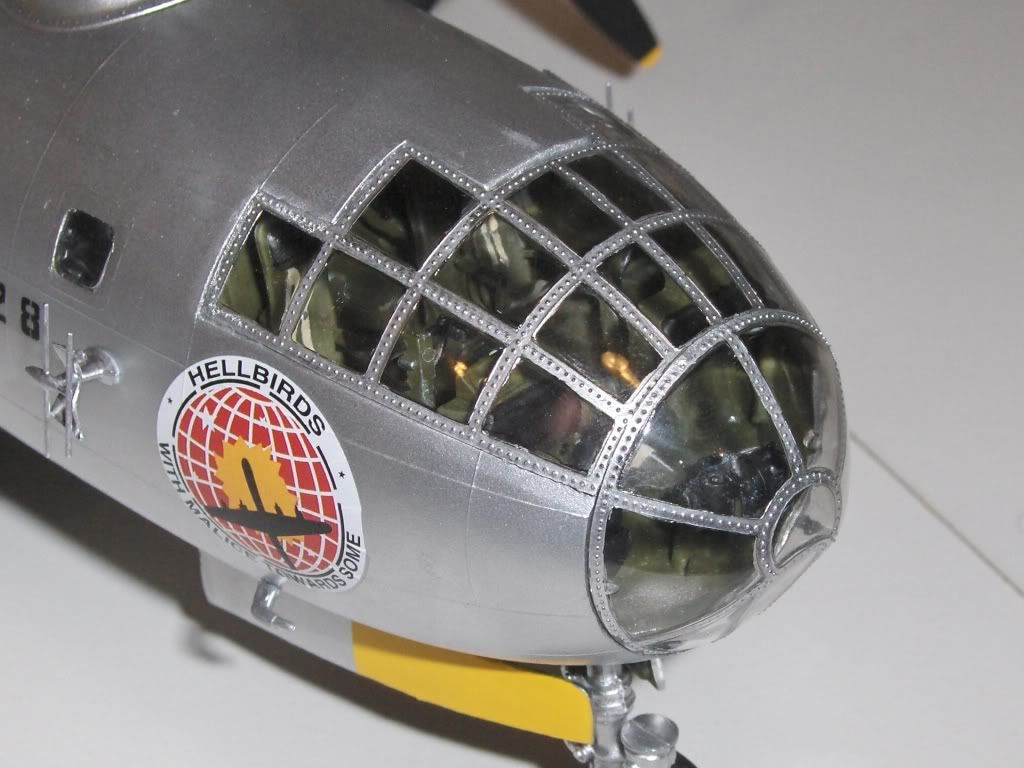
The windshield pieces (which were a terrible fit) were hand painted using a fine brush and some testors. After seeing these pics closer, it looks like I got a wee bit of touch up left to do!
Here’s a few pics of the underbelly of the beast.
Those little decals were a pain, but worth the effort.
I did a little research on this plane. The “Humpin Honey” was delivered to the 452nd BG on January 11th 1944 to Walker Army Arifield in Kansas. It departed the U.S on April 10th for assignment with the twentieth Air Force arriving in India six days latter. It took part in a raid on the Manchuria Airoplane Manufacturing Company and an adjacent arsenal at Mukden. 80 B-29’s hit the primary target and ten others hit a near by marshalling yard. Superfortress gunners claimed 10 downed Japanese fighter aircraft, 10 probably destroyed and 30 damaged. Seven B-29’s were lost, including the “Humpin Honey”.
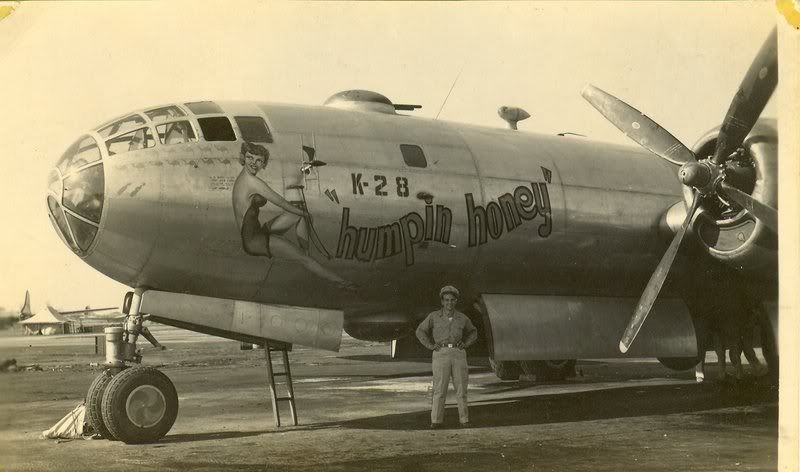
Sgt. Walt Huss, the “Humpin Honey’s” right gunner claims the plane was downed over Mukden after being rammed by a “Tojo” fighter. Left gunner Sgt. Ken Beckwith and himself were the only survivors. Both survivors were captured and spent the rest of the war in a Japanese P.O.W camp in Mukden.
In taking on this build, I wanted to pay my respects not only to this beautiful aircraft, but to the men that flew her into battle and gave the ultimate sacrifice.
I hope you all enjoyed the build and the story of this truly great aircraft. Thanks guys! If any of you are atempting this beast and need any help or tips, please do not hesitate to ask.
Thanks to everyone who helped me along the way, you know who you are.