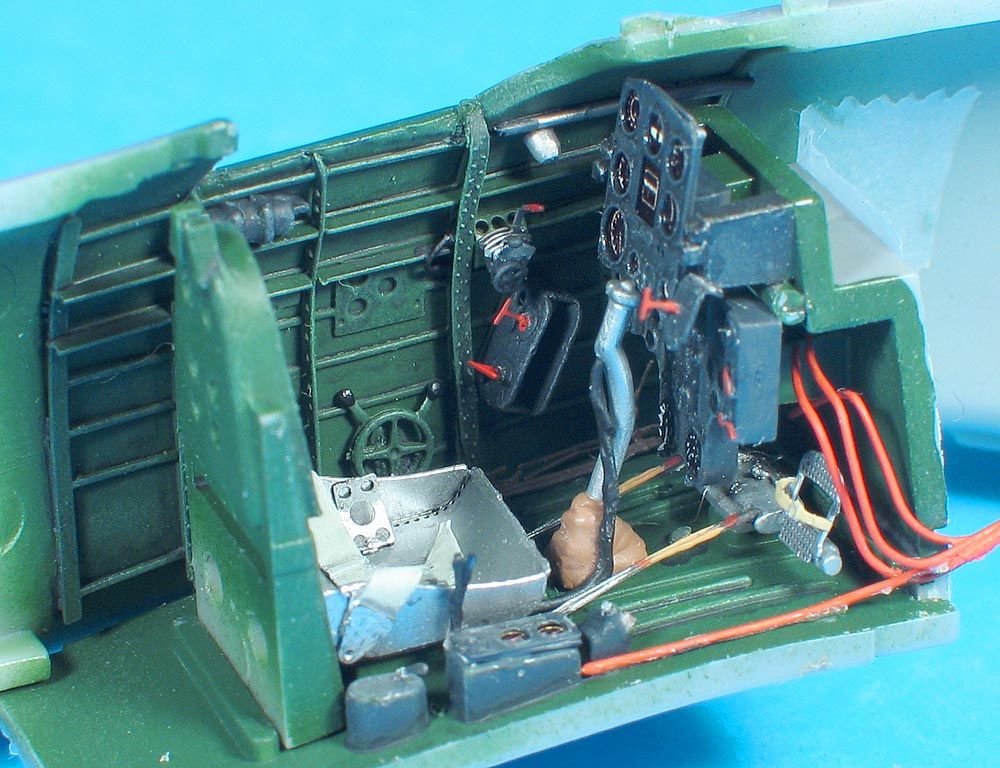
Here are the latest pics of Hasegawa’s Oscar, built using Eduard’s PE detail set.
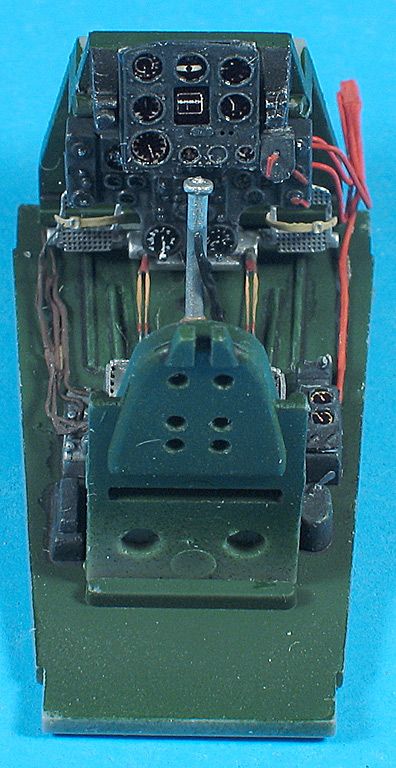
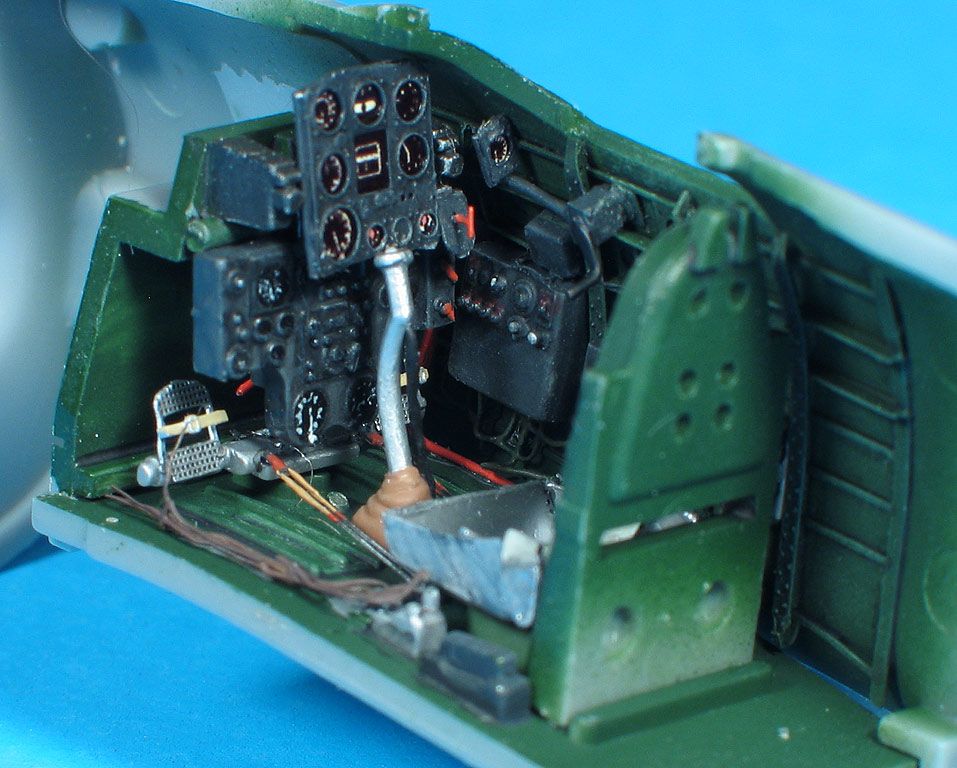
I finished the cockpit today. Plenty of PE and added wiring and hoses. Eduard only includes an instrument panel for the top, so I had to use the kit’s lower panel. The refief is pretty sharp, and I don’t think there’s too much difference between the two. It worried me a little that the plastic one would detract from the rest of the 'pit.
The cockpit opening is pretty small, so some of this will be difficult to see once I close the fuselage. I’ll know it’s there, plus I’ve got the pics !
Awesome detail pix, I hope these are on your website so when I start mine, I can reference your build. I can’t remember if you said, but what colours are you going to do this one in?
excellet cockpit detailing! I’m especially interested in how you made the rudder control cables. I’ve tried it once or twice but always gave up ‘cause it didnt’ turn out right. Your’s look fantastic.
Thanks Domi, thevinman, jboutin, waikong, and wayne !
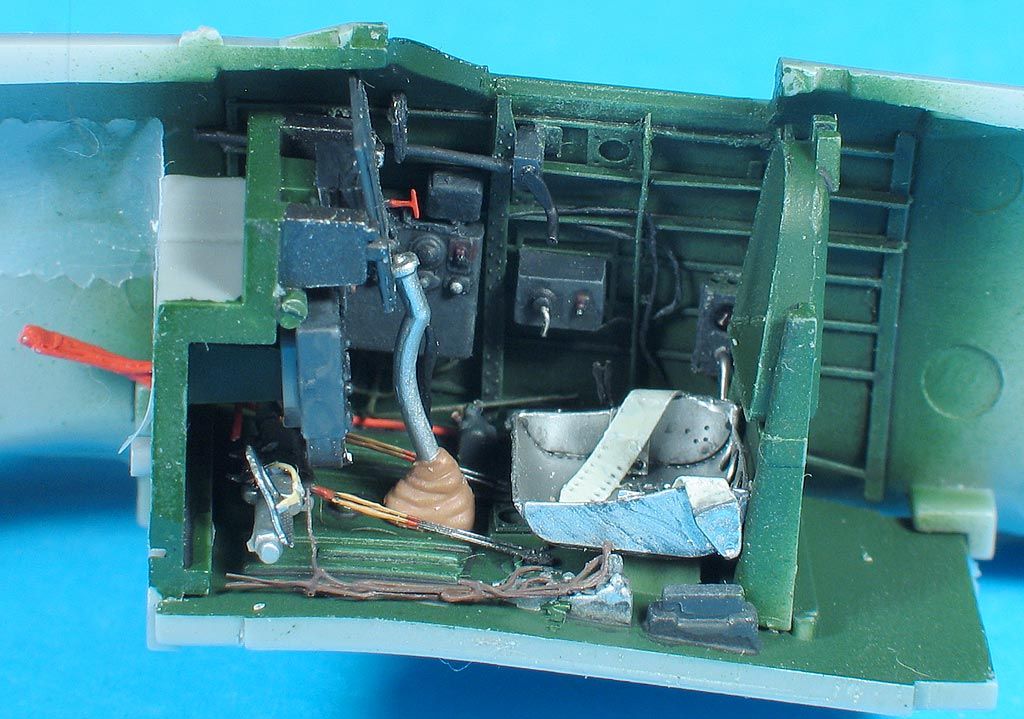
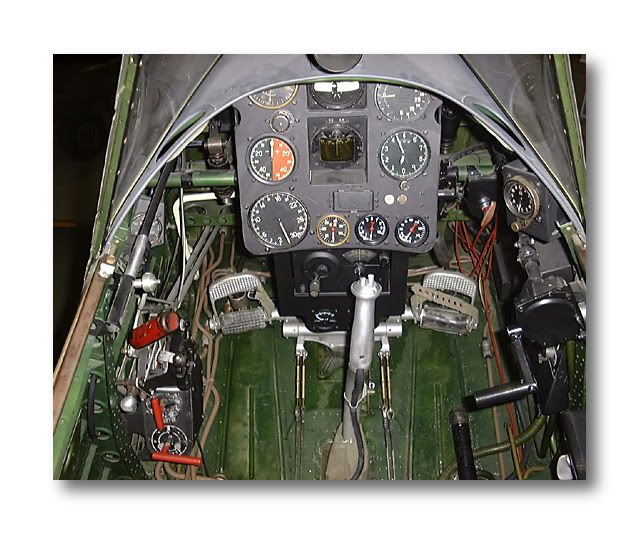
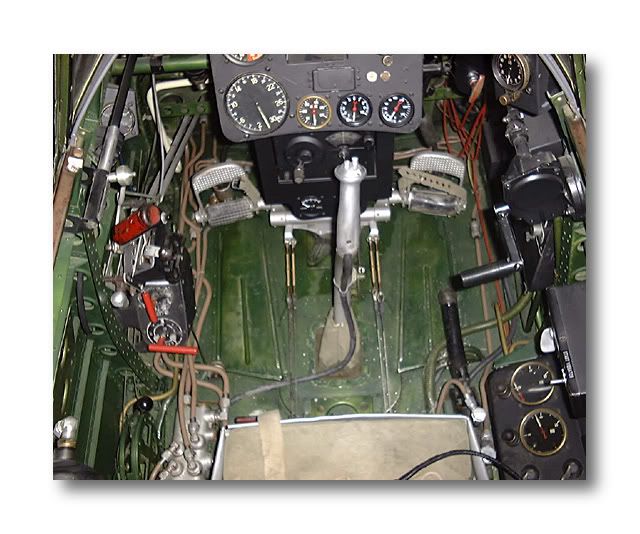
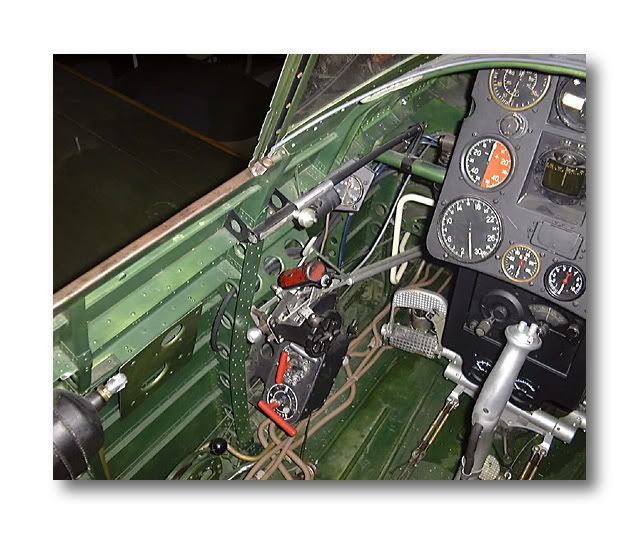
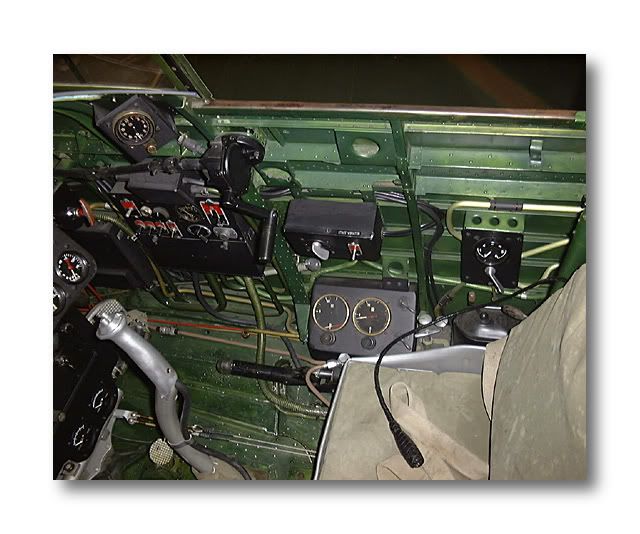
jboutin - here are pics of an original (unrestored) Ki 43 cockpit that I used for reference. While moving the cockpit around for pics, I lost a cable & handle from the floorboard near the pilot’s right knee, and the cables from the throttle. All easily reglued.
This is the scheme I’ll probably use:
waikong - the control cables from the rudder pedals are PE, from the Eduard set.
wayne - I used Gunze H6 (just a generic “green” name on the bottle). It looks a close match to the reference pics.
Pix, I’m not sure if you outdid yourself or simply did what you always do, either way, brilliant! [tup][tup] The funny thing is that when comparing the photos of the real Oscar’s cockpit vs the model, it’s not really apparent that the model is fifty times smaller that the original!
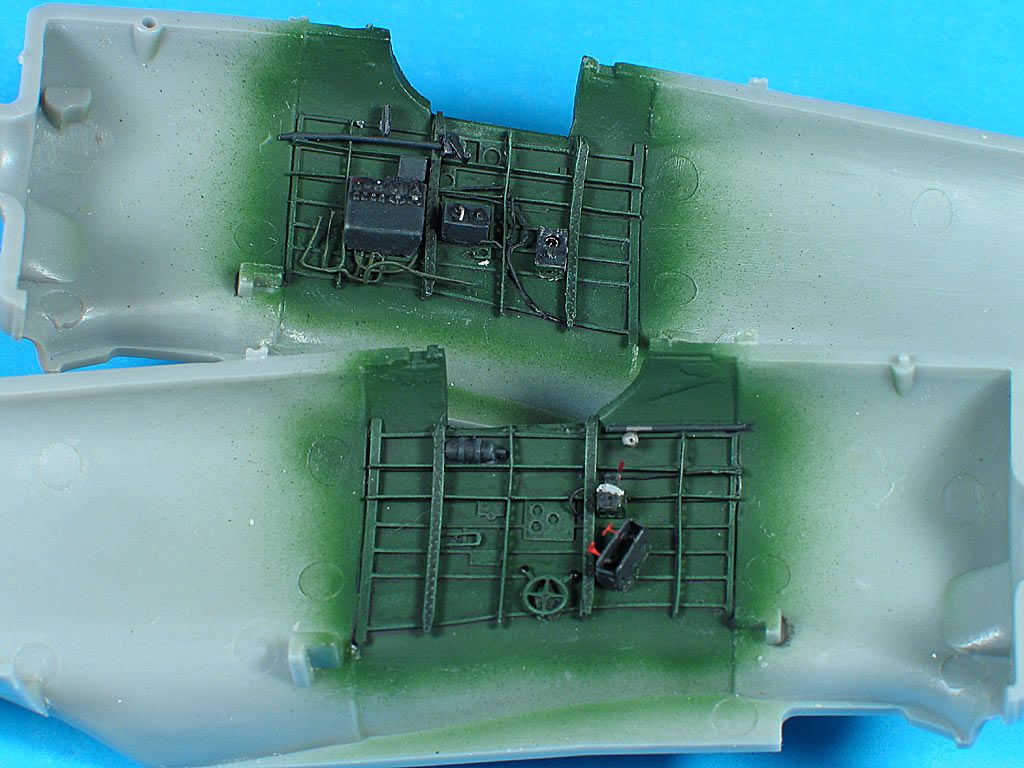
Andy - this cockpit has something I’ve never seen in an Eduard PE set - the sidewall framework is PE:
I like the added realism it gives. Whether I “outdid” myself is something I can’t tell. You can see pics of some of my other cockpits here: http://www.pix.prettyneatinc.com/buildarticles.htm
Cockpits are one of my favorite parts of building aircraft.
My hat is off to you, you have done it again! I cannot tell the difference between the resin and styrene panels, would never have known had you not mentioned it, Another Pix masterpiece!
Great work! It is obvious that you build for the love of it, especially as you stated it may be difficult to see your handiwork once it’s closed up. Have you considered doing “cutaway” versions of any of your work? I’m sure that would turn a few heads!
That is just sweet!.. I will be taking on the 1/32 scale version of this bird, and you have given me a great deal of insperation to start… That cockpit looks great…
Pix,
Great work on this cockpit. I love the Eduards PE cockpit sets and especially like the set you used with the fuselage side framework, it really adds realism. Some may think using the PE sets is cheating versus scratch-building the extra detail. I say, it’s pretty hard assembling those tiny pieces and then attaching them to the kit parts, and it’s even harder keeping them attached while you’re doing all the other stuff to the kit. I like to use the PE sets but still end up adding a lot of scratch-built details also.


![http://img.photobucket.com/albums/v280/Pixilater/oscar/oscar010.jpg[url]](http://img.photobucket.com/albums/v280/Pixilater/oscar/oscar010.jpg%5Burl%5D)