Finished: 1/35 Meng Renault FT-17 WIP from an Aircraft guy

Hey all,

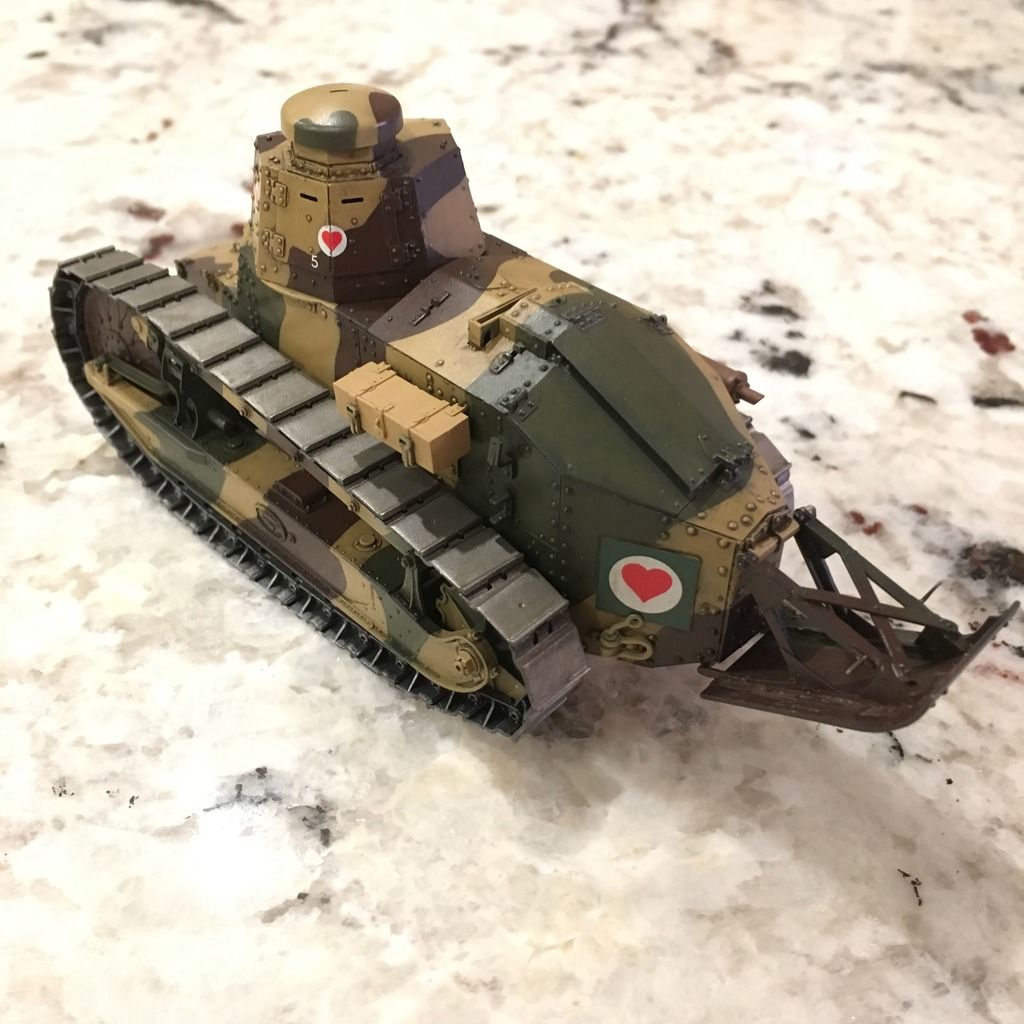
I typically build planes these days, but about 20 years ago was really into armor. Last year, on a lark, I bought the Meng FT-17 with riveted turret because who can resist it?

Anyway, the “Out of your comfort zone” group build came a callin’, and I decided to set down the winged thingies for some tracks. Hopefully I can do it justice!

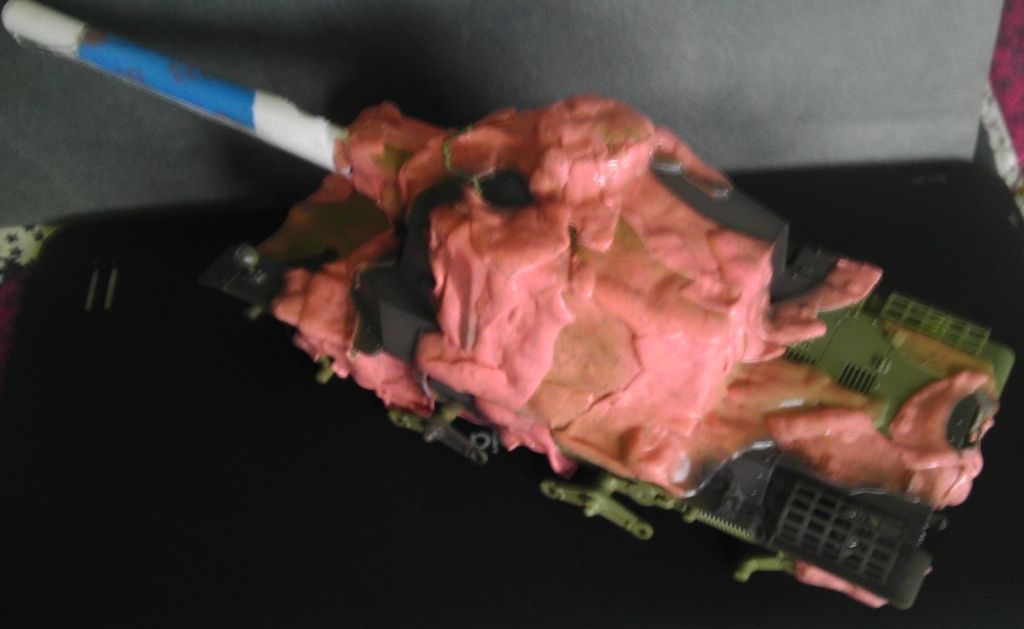
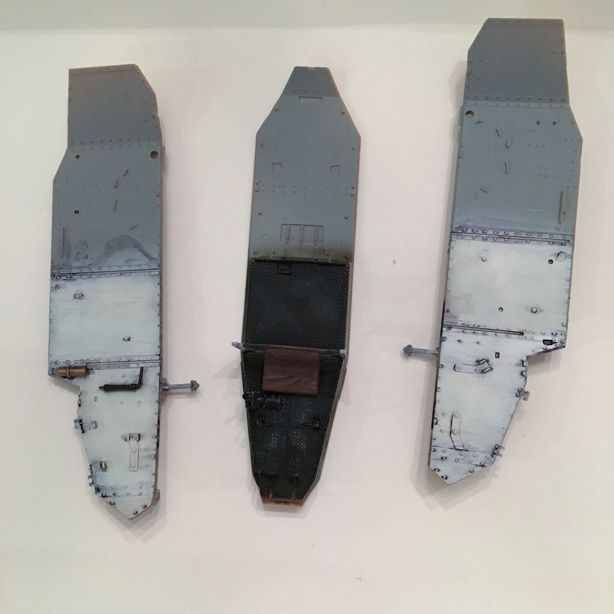
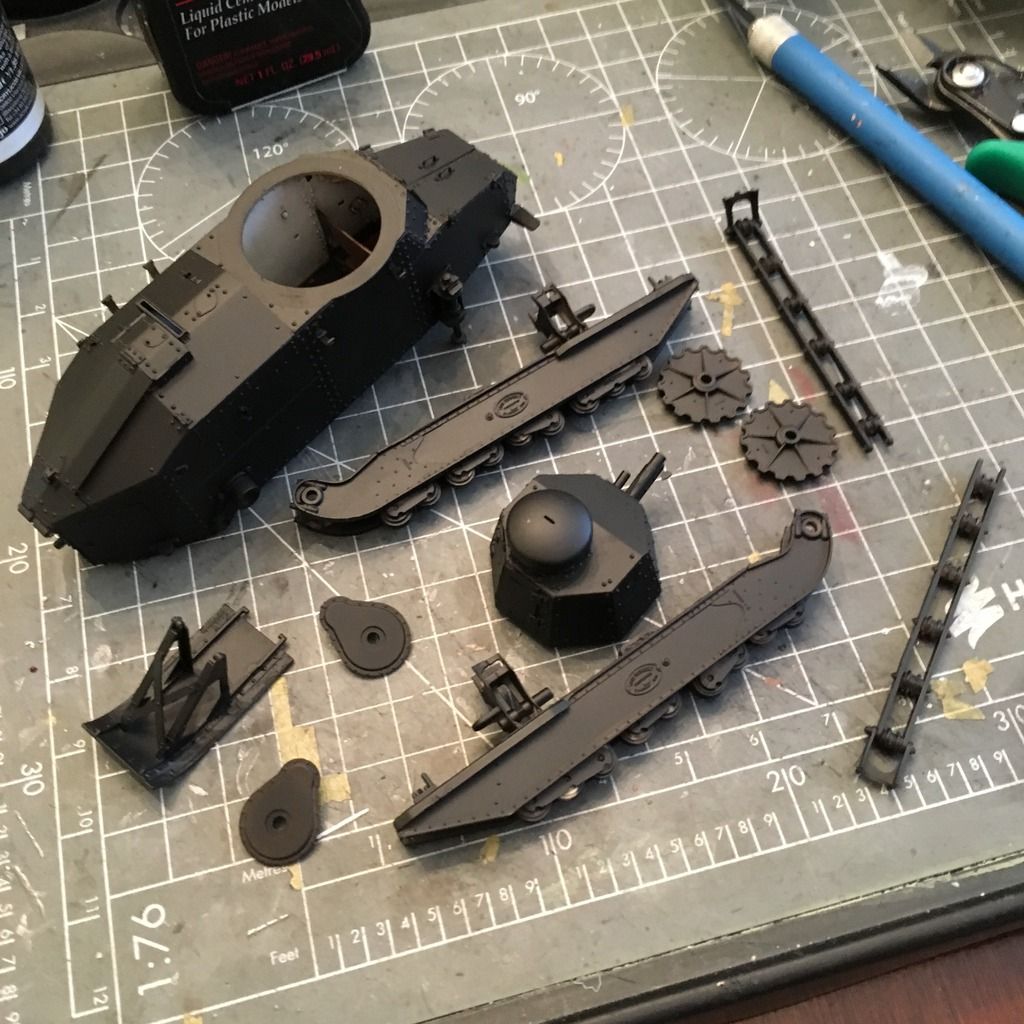
This kit doesn’t have a full interior, and I planned to build it closed up, but I wanted to play with some weathering techniques, so I went ahead and painting the innards. Here is where they are when I was mostly finished with them.

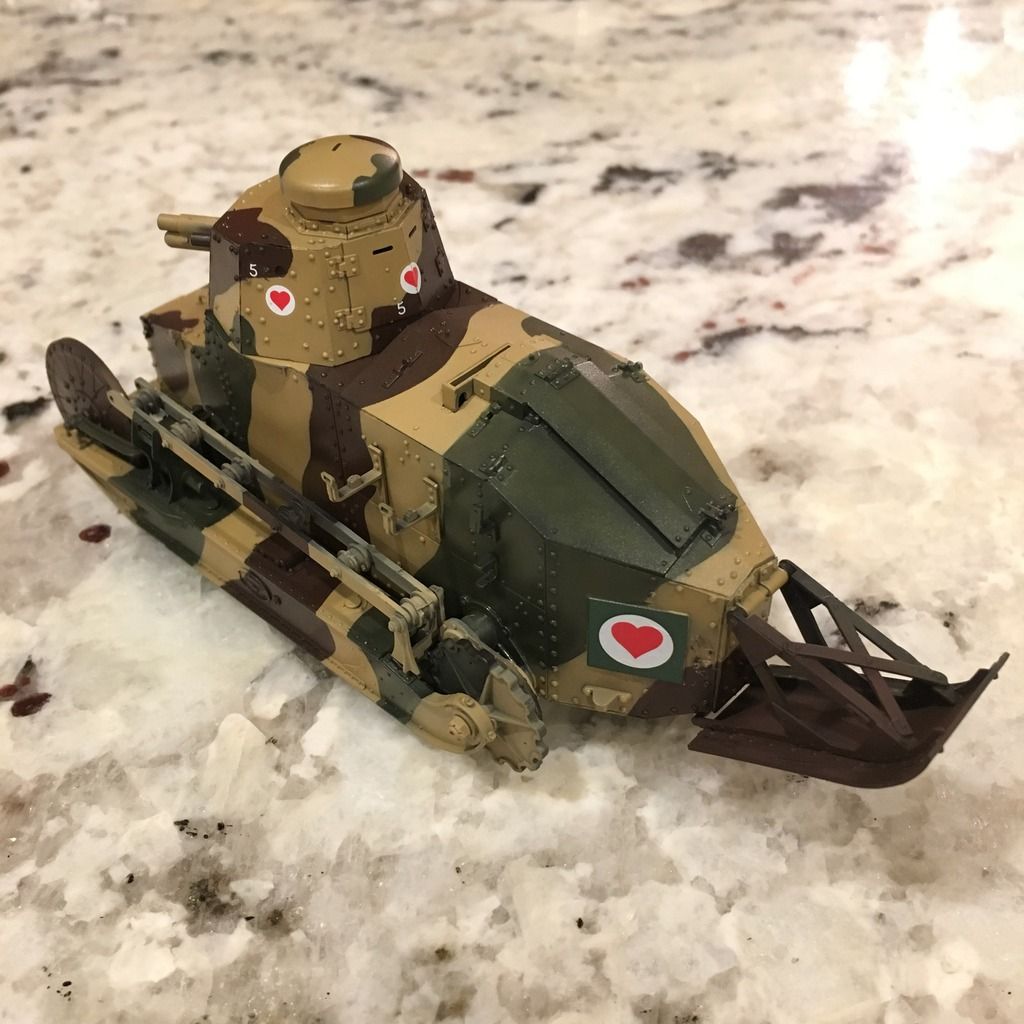
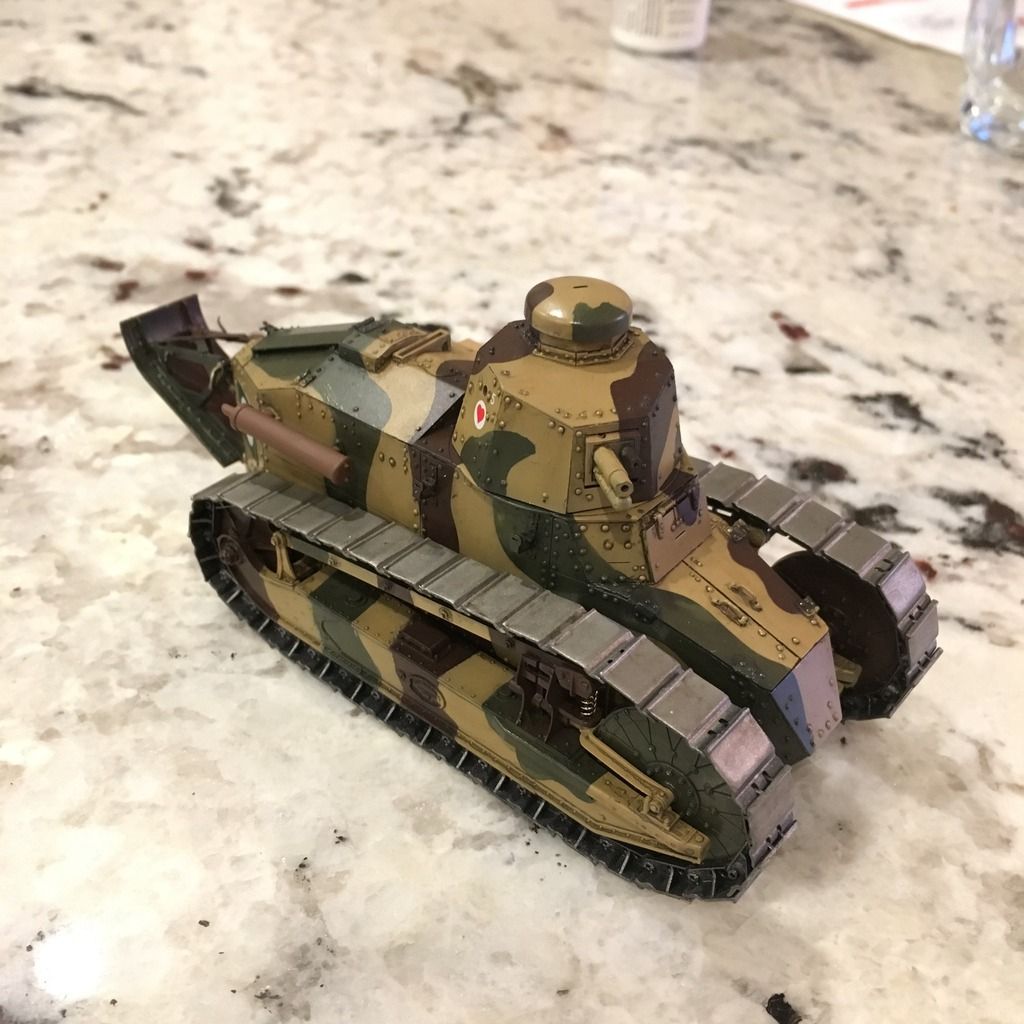
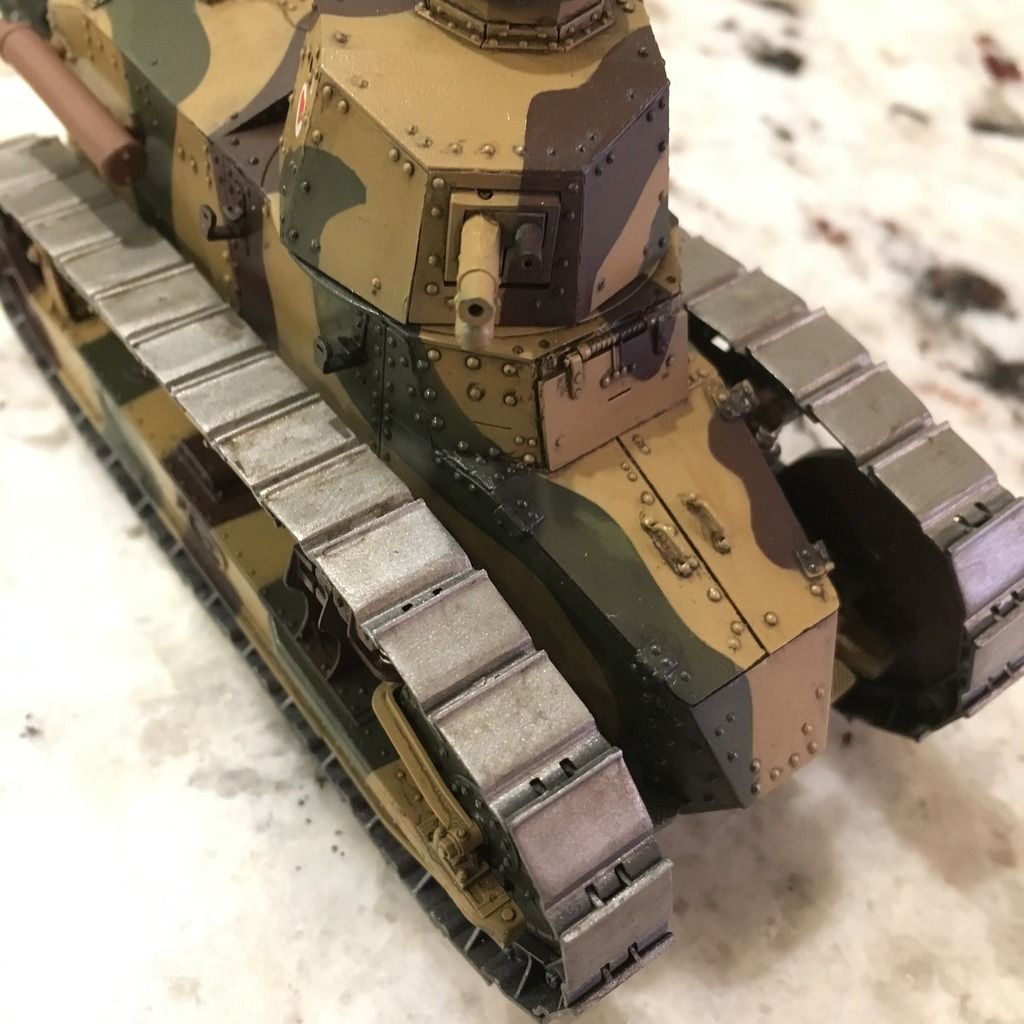
That was where I got to early last night, and then I went about assembling the tank. It seems to have a much higher parts count than the old Tamiya kits I was building in the '90s, but it went together pretty quickly and, wonder of wonders (for an aircraft guy) there was no seamwork to deal with.

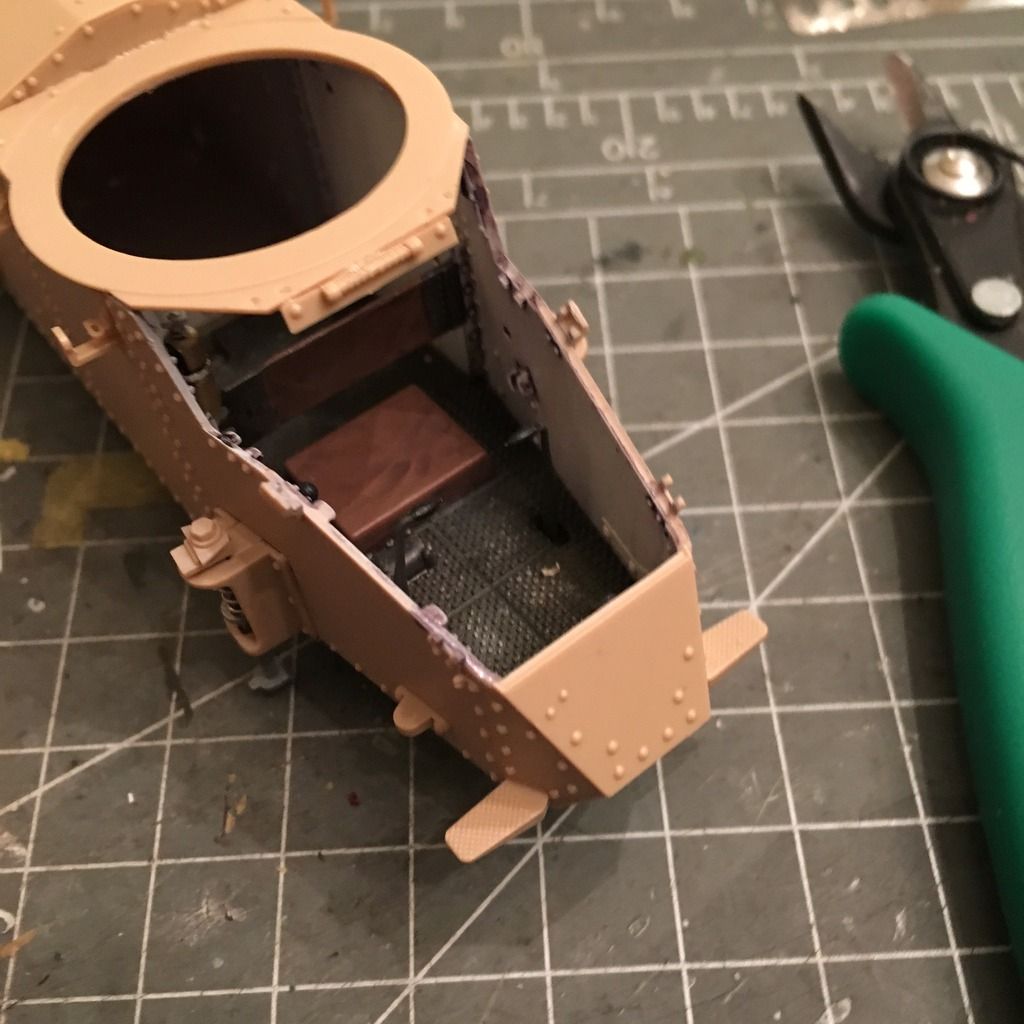
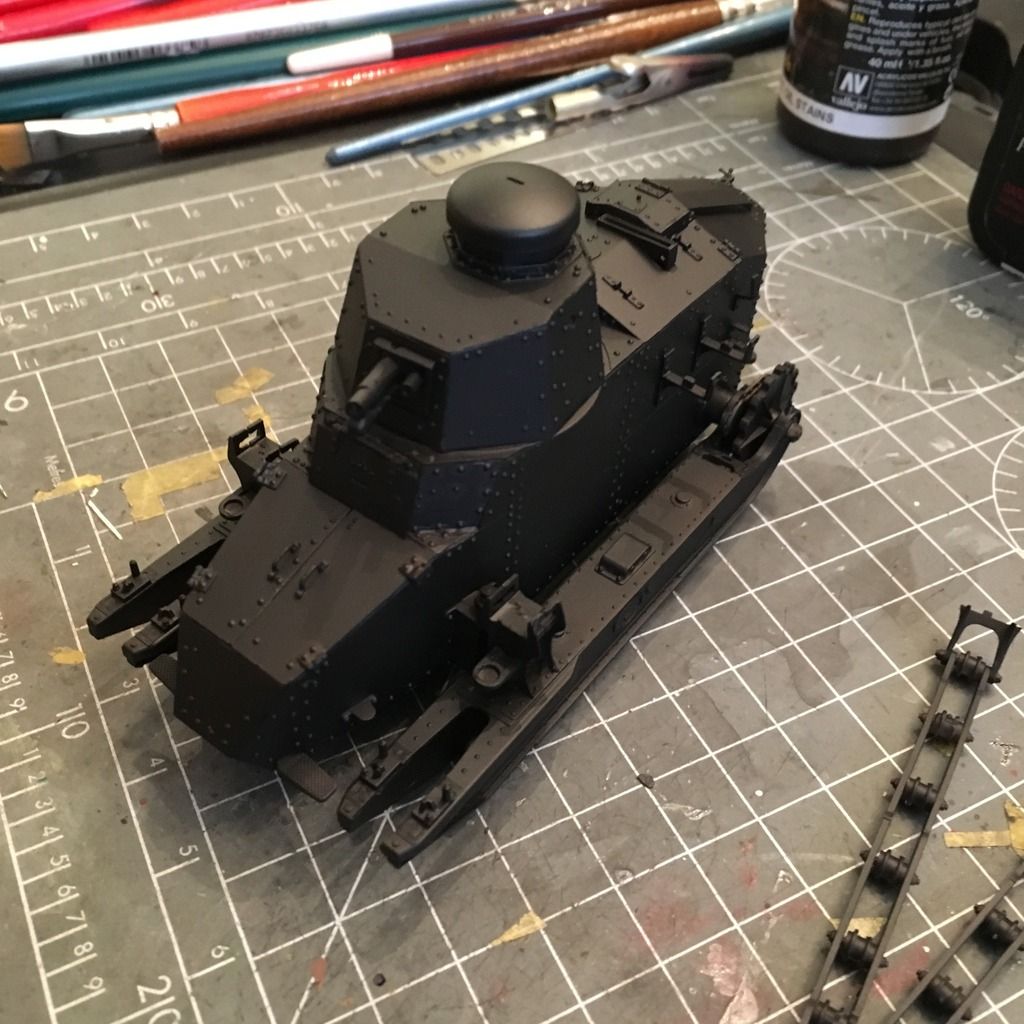
I closed up the fighting compartment last night, and wenthome for lunch today to throw primer on it.

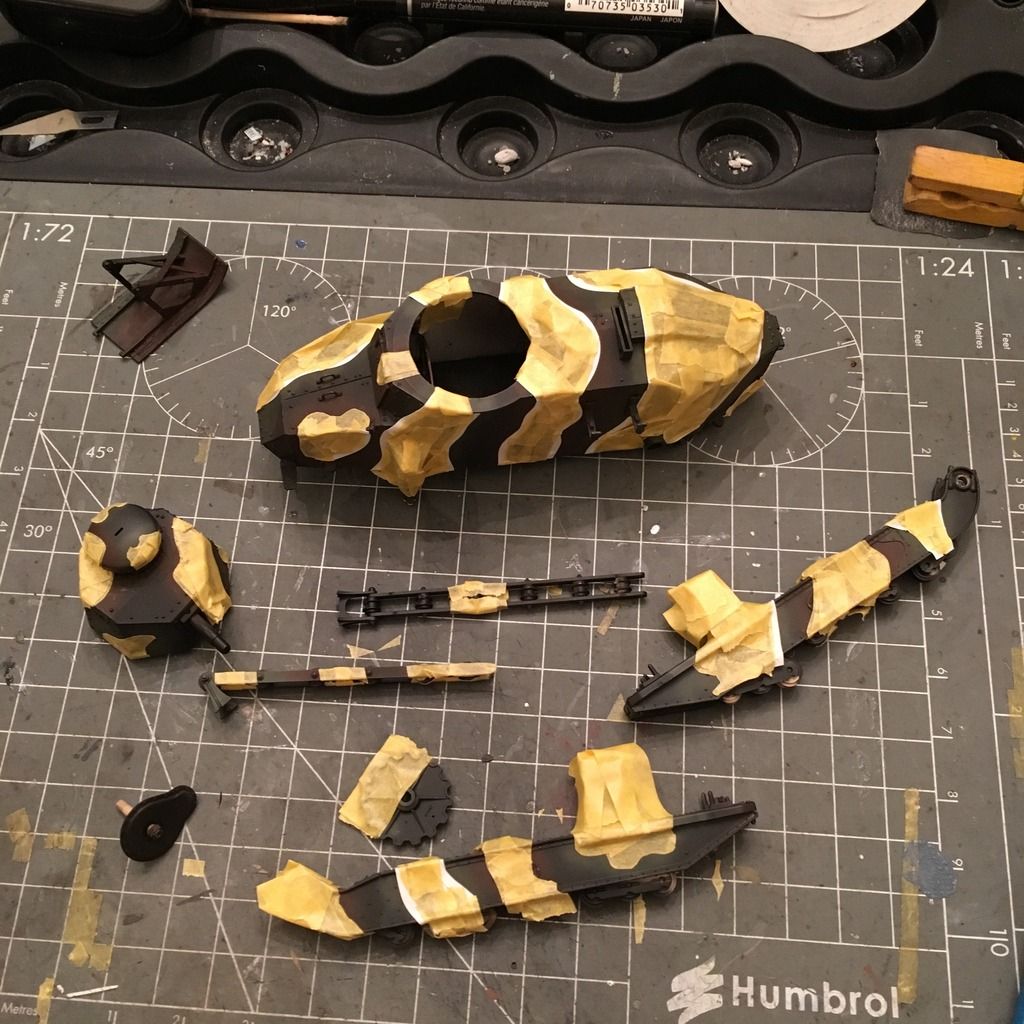
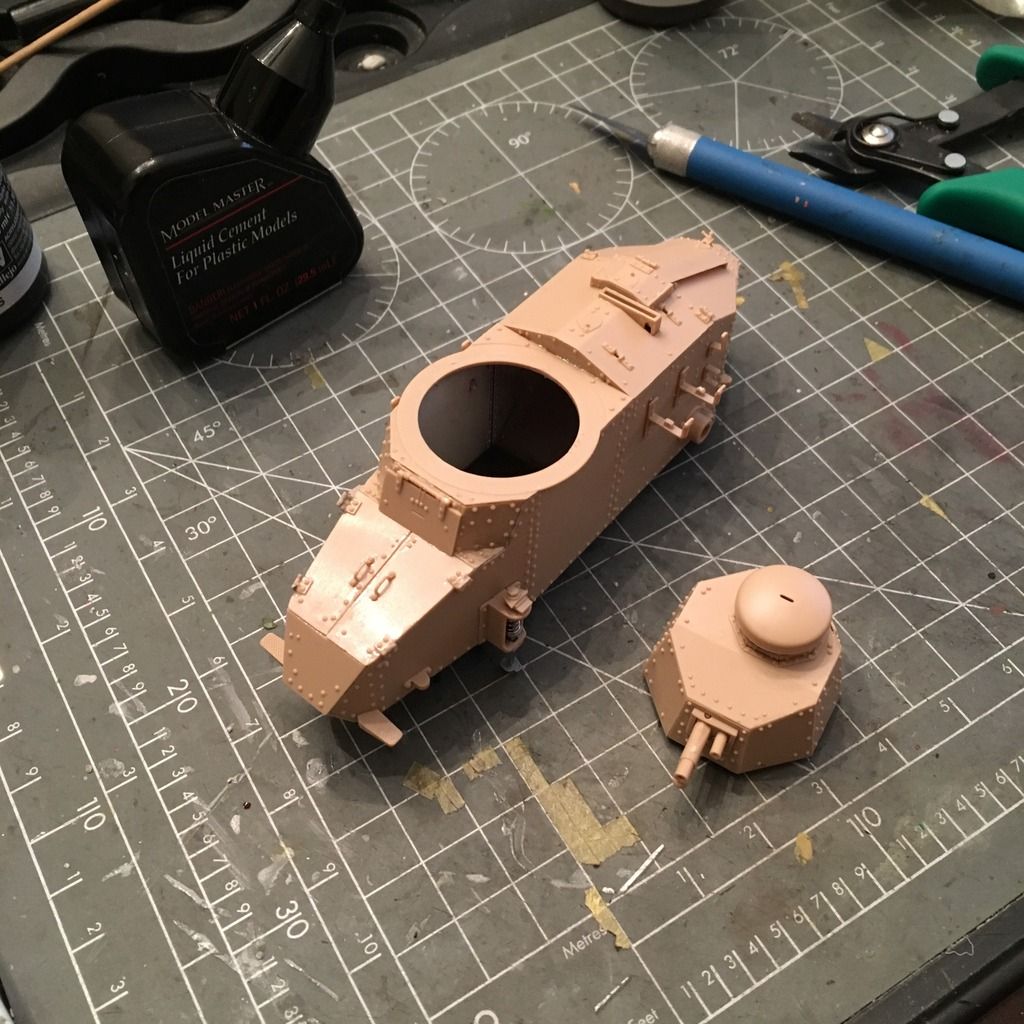
This is where I am now. I’ve taken it as far as I want to before painting, with the exception of the upper suspension arms, which I will glue in at the main point, but leave unattached at the forward eng so I can rotate them out of the way for paint. This is just sitting together - turret and all of the suspension will be coming off for paint, as it looks in the photo above.

Thanks for looking! I don’t see myself moving over from aircraft too often, but this is really fun…

-BD-

Brandon,

Looking great so far!

But, be very careful, next thing you know, you buy another tank, and another, and then you have crossed over to the dark side! [:D]

Actually, not a bad place to be!

I’m Looking forward to more progress!

Back in the saddle again, once you build a tank no matter how long you stray they always call you back…always. Cool WIPs, should be a sweet ride when your done.

For someone who doesn’t do much armour you’re doing a great job on her. [Y]

Thanks, guys. This has been a lot of fun. I don’t see myself branching out into armor too much, though I do have one of those Skoda Turtles and a Mk.V Male tank in the stash. There’s a Dragon Stug somewhere around, but no idea if it has all the parts.

-BD-

I thought I’d have to wait till tonight for paint, but I managed to spray the brown and green on Friday night, and I spent most of late Saturday night masking it.

I used Tamiya Tape for Curves on this, and I wouldn’t again. I have used it on aircraft and been happy, but I think the more irregular surface of armor needs something that has a little more bite to it. The vinyl tape kept moving around.

Thin strips (like 0.5mm) of standard Tamiya Kabuki tape were much more useful.

Sunday morning, I sprayed the tan color and pulled up the masks. Lots of work to do still, and some touching up is in order, but overall I’m happy with it.

For colors, I used Tamiya paints: RAF Dark Green, Flat Brown and a 1:1 mix of Buff and Desert Yellow.

Hopefully I’ll gewt some time tonight to touch up the areas where themasks lifted, and I’m hoping I can do that with a brush.

Weathering will probably mostly be done with oils, though I may toss a Flory Dark Dirt wash in some of the panel lines.

-BD-

Everyone should build an armor kit. There is too much fun to be had to turn down the opportunity to build armor.

I’d love to build a piece of armor soon, but my modeling budget isn’t anywhere near what I’d like it to be right now and I keep finding great deals on planes I’ve been wanting to build. Then my dad sent me a 1/48 B-24 and I signed up for two group builds that will involve building planes. So, doesn’t look like 2017 is going to be the year I branch out into armor. [*-)]

Great looking build so far btw.

It looks spectacular, and I do enjoy seeing early armor. You’re making quick progress on the kit. I especially like your interior weathering. The compartment walls look appropriately and convincingly beat up and dirty.

-Chris

Hey BD, the camo came out great!!!

Frankly though I 'll agree that masking over irregular subjects like armour is a pain with tape. A lot of people use Silly Putty or poster tack. I’ve had good experiences with SP and it’s become my go to item for masking tanks:

Yeah, your camo came out fine! I know you were just dipping your toe in the water, but that kit with the full interior is a very fun build! The engine compartment is mostly accurate, and a few additional wires and some weathering make the engine look almost runable.

I’m in the middle of one right now. Just about to get to the exterior paint now. Still not 100% what scheme I’m going to use.

Gene Beaird,
Pearland, Texas

Thanks for the kind words, everyone! It’s been fun, to say the least.

No new progress at the moment, as I’m making the house ready for the girlfriend to move into, so I’ve been busy.

Gamera - I thought about using that but didn’t have any handy when I wanted to paint. I’ll probably go that route when I do the Skoda Turtle.

-BD-

Nice work so far, from another aircraft guy that found armor!

-Alan

BD: What you’ve got looks great!!! I’m just trying to save you a little extra work the next time around! [;)]

And believe me, it’s MUCH appreciated [:D]

-BD-

Very small update on the Meng FT-17. I got the decals (all six of them) on. After building a Mirage last year that felt like it had 70 or 80 decals/stencils, this is a nice change of pace, especially when looking at a Phantom that has 100+.

I’ve since touched up paint on the uppermost part of the suspension so it matches the camouflage pattern on the body. I also got some more parts glued together, but this is still largely press-fit subassemblies.

As of now, it all has a gloss clear on it, and I can start on the weathering. I still need to paint the tools, wooden box on the side and exhaust pipe. But it feels like a tank now.

-BD-

Looking good. Glad to see you have resisted temptation and not put wings on it.

When you start ordering Pz Grey by the gallon, its time to panic [:D]

She’s coming along great BD, and the weathering is the fun part.

Thanks, Gamera and Bish!

Bish - putting wings on it is a GREAT idea! I’m thinking maybe the main wing from a Fokker D.VIII on the turret and some stabilizers on the rear part that I always think of as a wheelie bar for a tank.

-BD-

Ok, so…what now, armor experts?

I think I’m at a snag. I keep staring at it and wondering which way to go next. Most of this is still just press-fit in subassemblies, and the tracks are removable at this point. I painted them Mr. Paint Steel, then dropped some Flory Dark Dirt panel line wash on them, using a brush to rough it up and remove most of it. But they’re still clean, and while pigments sound fun, I don’t know if that’s going to be enough. But judging by this pic of the same tank I am building, maybe it is?

There appears to be some mud on the big suspension bars, but the rest appears rather clean. Maybe some mud in the forward part of the track cleats.

This thing served in Verdun, according to Meng, and having visited Verdun, that’s one of the things that drew me to this scheme. I remember Verdun being muddy, even in 2008 when the grass and trees had grown back.

So I guess what I’m asking is this: What’s the best way to replicate some stuck-on mud in the tracks as shown in the pic? I have some of the Vallejo Mud product, but have yet to use it, or even open it. I have considered mixing paint with Tamiya putty and stippling it in, and even just dropping pigments onto a wet surface and building them up, but I don’t know if that would work.

As for the rest of the vehicle, I still need to add a metal screen on top (one of the PE parts), finish the exhaust and finish painting the wooden storage box and tools, then cement them on.

I also feel like there should be more tonal variation in the paint, and I might hit it with another round of oil filters now that it has a mostly flat coat on it. I oil dot filtered it when it was glossy, and I liked the effect, but it’s a bit muted now.

Thanks in advance for any input and advice. This has been a lot of fun, and I will definintely be looking forward to the Mk.V I have in the stash.

-BD-