I scored this kit a few weeks ago. Been wanting to do this car for a wile. I love these JoHan Maverick/Comet kits. They are a little simple in the chassis area, but all in all. they really build into a very nice model. I am not doing much to revising the chassis. I went with the kit Chassis with all of the suspension molded in. But I had to redo the front inner fenders. Because I am wanting to do a little bit a detail on the engine. I needed to make the engine bay a little more accurate. So I used the inner fenders/ shock towers out of a Monogram 70 Boss Mustang I had laying around. They worked out perfect. BUT I will have to show pics, later. I digress
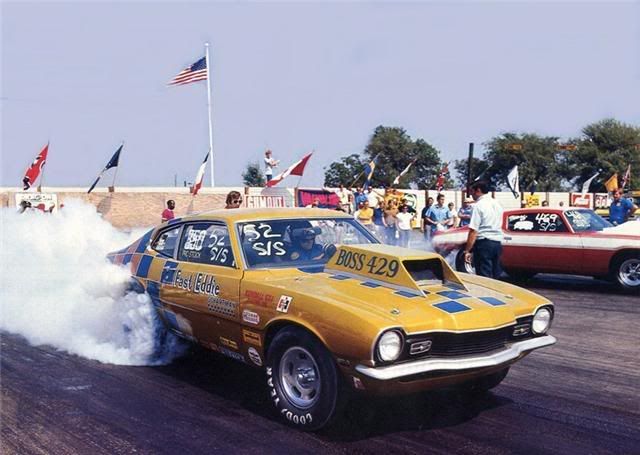
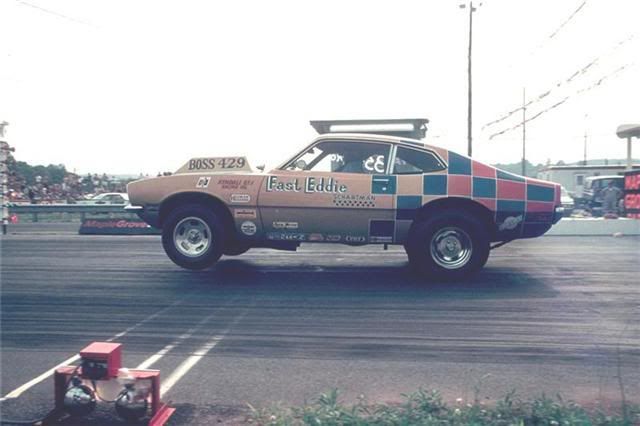
Back to this post. I am painting the body. First here are pics of the real car.
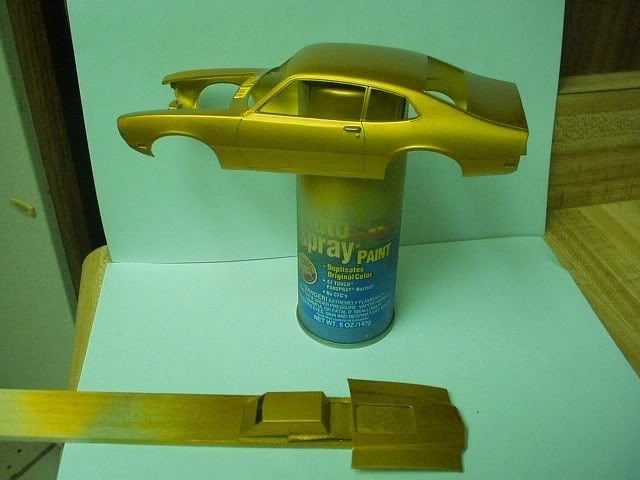
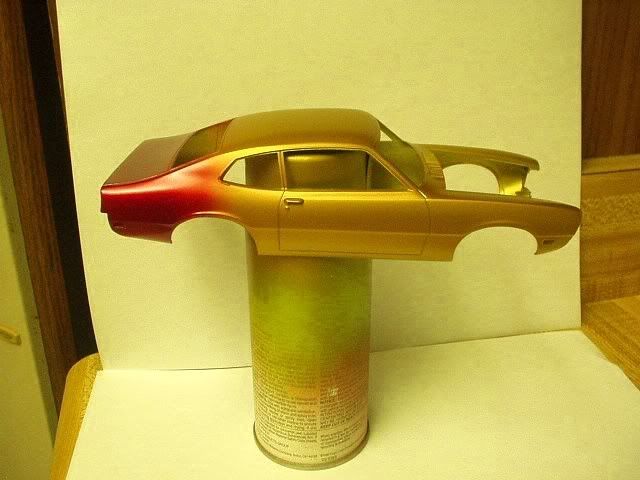
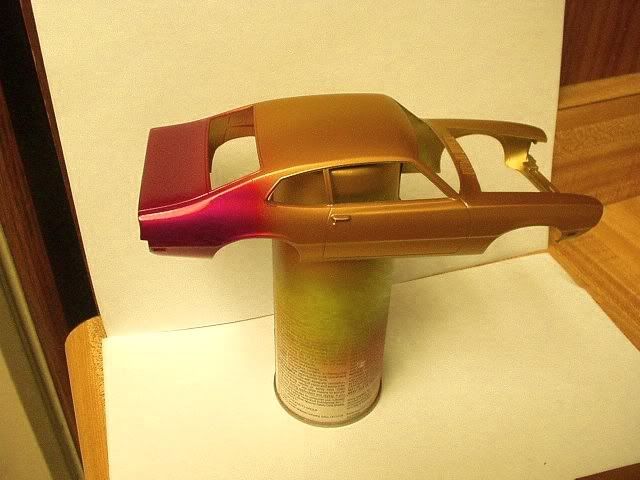
Now here is my model. I went with House of Color Pagan Gold as the main color and House of Color KBC11 Candy Red for the fade. The gold was shot through an automotive touch up gun and the red was with my 20 year old Badger model 200 air brush. I based it with Tamaya Silver Leaf from the can. My primer is Plasti-Koat Lacquer Primer. You have to use that if you are going to paint with automotive paints No problems with using the tamaya spry because it is a synthetic lacquer. I am going to put a coat of lacquer clear from a can on this to have a barer between the color and the Slixx decals. I will post that later. Then I will be clearing the whole thing with an automotive clear shot through an automotive full sized gun.
The Silver Base
The Pagan Gold
The Red Fade
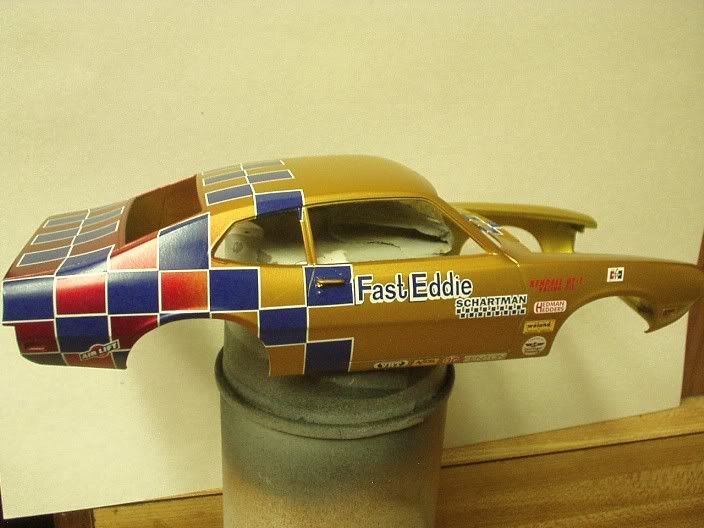
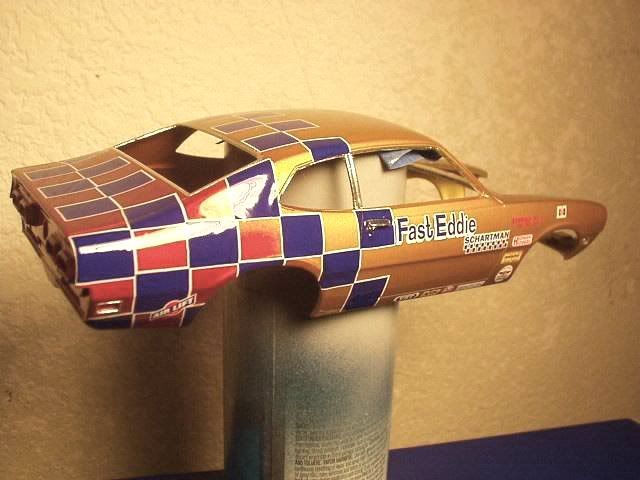
Here is the decaled body. I did this a few weeks ago. Next I will be bare metal foiling it and then the clear. This is just the decals laid down on the base cat. These decale were HE ##!! But with a little Micro Sol. I got them on. It took some time. Does not look so great yet. Wait till I get the clear on. Then it will POP!!! ;D
Matt
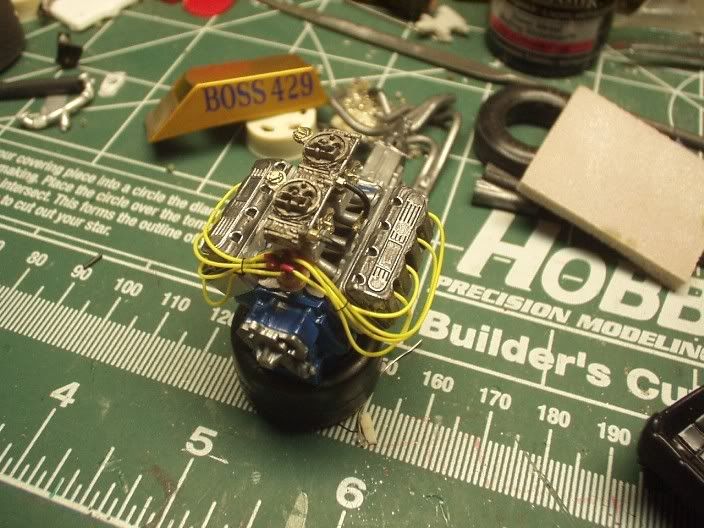
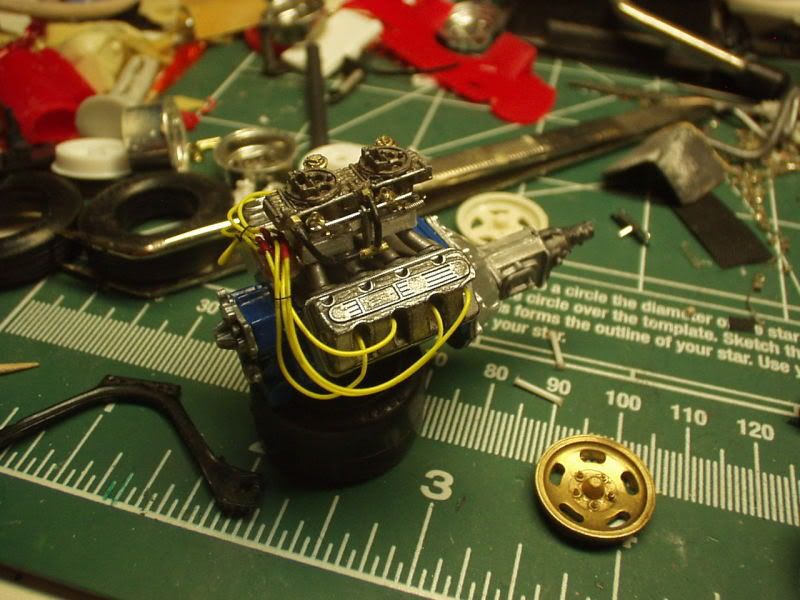
Everything but the carbs are out of the box and of course the detail. Everything but the engine block and the dist. cap, were painted with Testors Metalizers out of the bottles with a brush. Not an air brush, but by hand. That paint brushes real nice without any streaks. The valve covers were left kit chrome and brushed over with Testors “Detailer” and then cleared with dull coat.
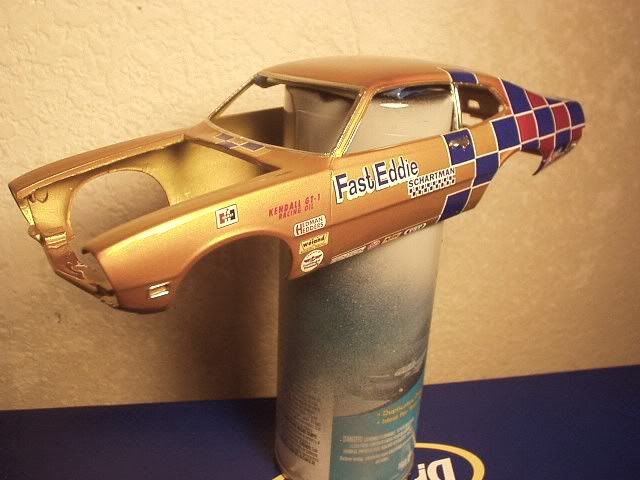
When I cleared the body. Had one mishap. A piece of one of the blue squares on the roof blew off during clearing, and I did not notice it till after 3 coats. Bummer. Not sure, yet what I am going to do about that. The clear came out ok. Not 100% happy. A few dirt nibs. I will get them out during polishing. All in all I am pretty happy so far.
My camera is not that great. But here are a few pics I just took.
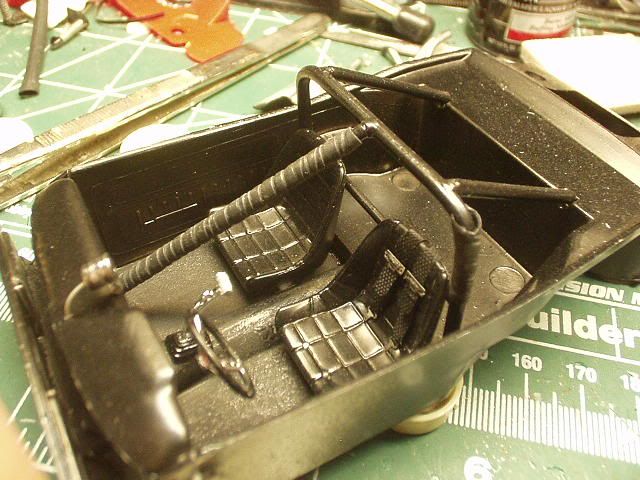
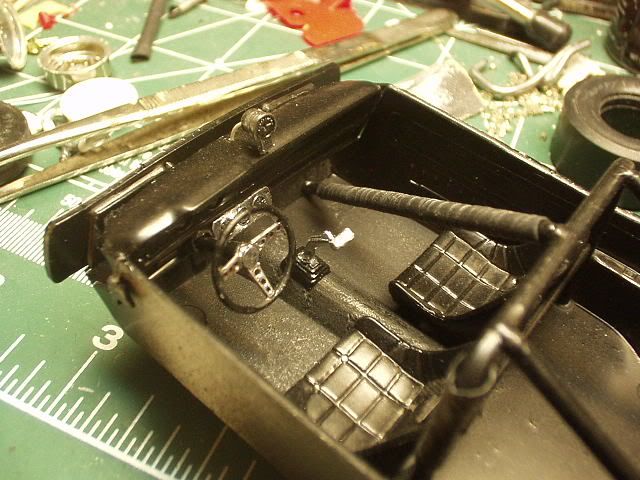
Here is the interior. It is simple and I did not do much outside of the kit but add the steering wheel, roll bar wrap and the driver’s shoulder belts. The rest is all kit.
In this pic of the engine. You can see the carb linkage and spring. I use Detail master Carb linkage and guitar string for the rod and the spring.
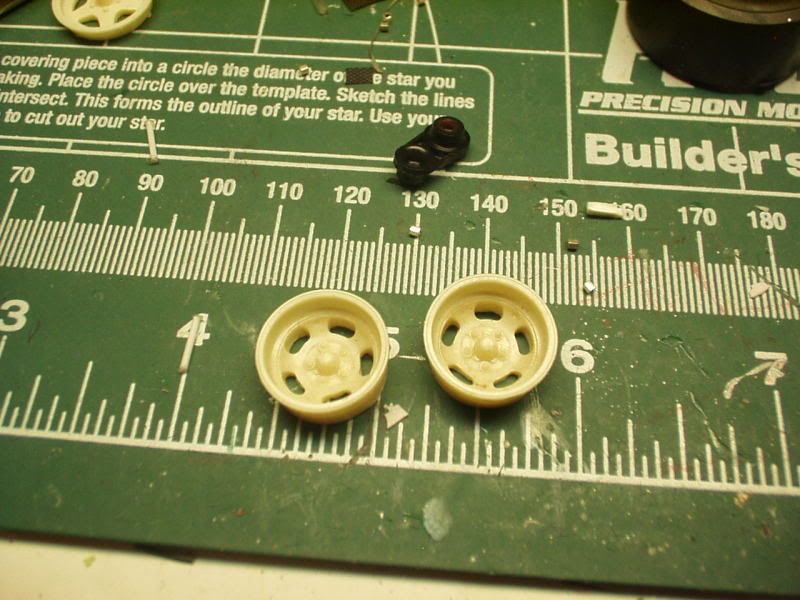
The kit has a beautiful set of Anson 5 slot wheels, but JoHan forgot to put the wheel lugs on. So I did it myself and made molds of them. Here are the resin copies of the rears. There is one of my front resin copies in gold in the engine shot, above. I did it for the front, too. I am going to Alclad them. I have never used the stuff, so now is a good time as any.
No9-Very nice work. I really like the 60’s-70’s drag cars-a lot of history there. It’s still hard for me to believe that the Pro Stock’s of today are running faster than the Top Fuel Dragsters of the late 60’s! I still remember watching Big Daddy Don Garlits break the 7 second barrier at the Nationals in the late 60’s on ABC’s Wide World of Sports…
Where did you get those carbs.They look fantastic.
Fast Eddie was a great racer, along with Landy, Grumpy, Sox and Martin.and others to numerous to mention.I loved watching all of them run,and beleive me there were some characters back then.
Thanks guys. I have taken a break from this model for a few months. I had those issues with the decals and a few things in the clear. Nothing real big, but it kind of took the wind out of my sails. I am going to be getting back on it. I have to sand down the area I have to repair the decal and do another clear session. Then it is final assembly. I have also been redoing my model room, so I have not been doing much building lately. So I am ready to get back on it. So more pics very soon. Thanks for your comments.
As for those carbs, I made one years ago and made a mold to cast it in resin when I needed them. I do have my own resin casting business , but I do not sell small stuff like that. Just not enough money in the small stuff for the amount of time and work you have to put into it. I produce conversion kits, Bodies and bigger parts like bumpers and grills. Not sure if it is cool to put links on this message board like the way it is a NO-NO on the Scale Auto board. It a sin over there punishable by death. I will never get that one. But if any of you are interested in my product. PM or e-mail me. Or let me know if it ok to just post it.
I am not one of those fly by night casters. I have been doing it for 15 years and not as just a hobby. I learned how to as a job in the industrial market and had a casting business for years, before. This one is all new.
Anyways, back to this model. I love the old pro stockers. I have a few others in the works that I will post later. I have always wanted to build this model for years. It has been a fun model to build. I think that, for it’s age, this JoHan kit is really nice. Yea the chassis is a little simplified, but it is what it is, and with a little bit of paint detail work. One can make it look quite good. I wanted to go with the out of the box chassis on this one. As I get older. I have not been so butt headed about kit bashing old kits like this to make the chassis more correct. Life is too short. So I build more kits these days they way they are and I am fine with it. I just want to finish models these days. I get to much into correcting things. I never finish them. LOL!